 Sylwester
This instruction comprises with the following steps:
- Assembly using bread board
- Setting-up IFTTT and HUE service
- Configuring IoT module
- Connecting IoT module to the internet
Everything can be done under 10 minutes without a single line of code or cloud knowledge.
Assembly
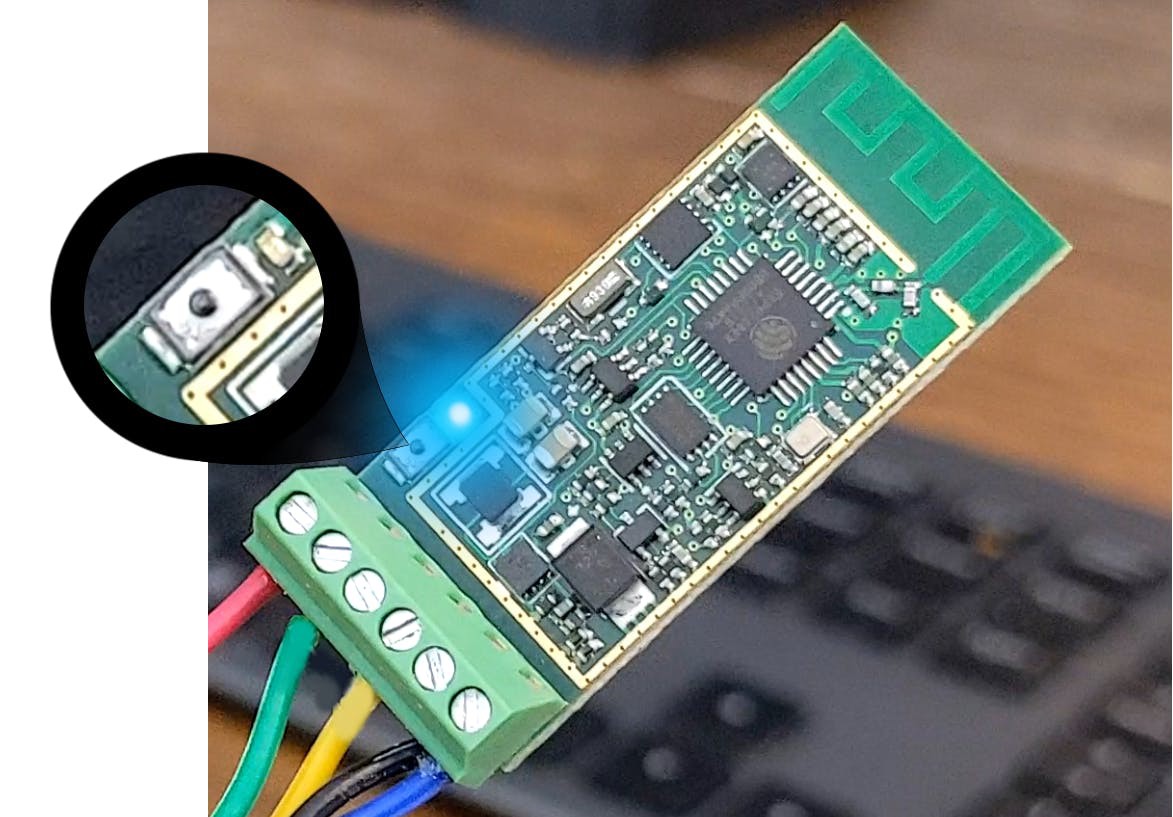
Solder Pin Header PCB breakaway connector to Cricket module. The header makes it easier to connect Cricket module to breadboard.
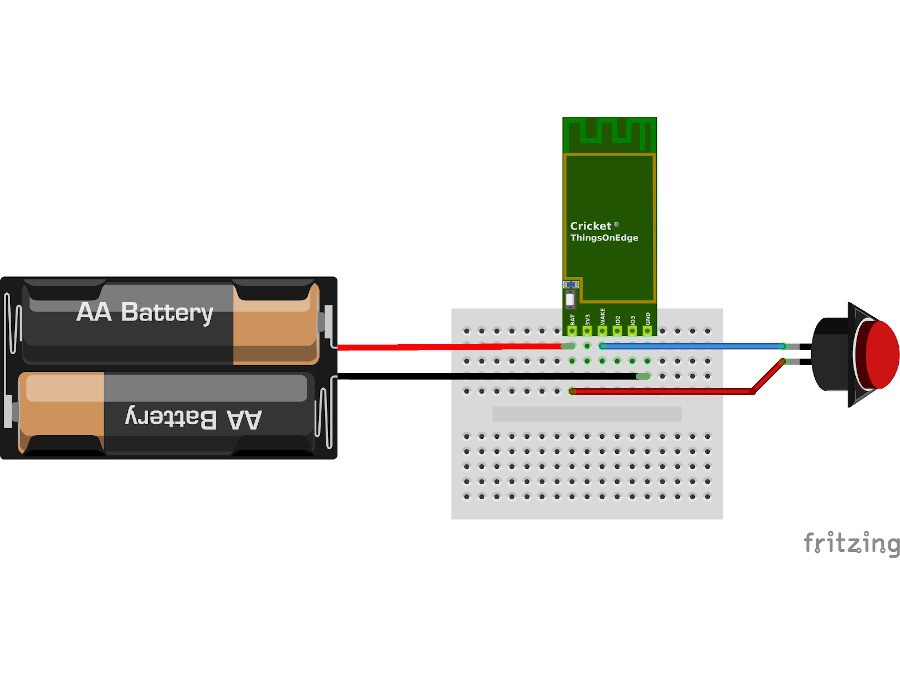
- Connect 1st pin from the button to battery VCC (+)
- Connect 2nd pin from the button to WAKE_UP port on Cricket module
- Connect battery VCC (+) to BATT port on Cricket module
- Connect battery GND (-) to GND port on Cricket module
You successfully assembled device. Now we need to configure both IFTTT and Cricket online. Please follow the next sections to do that.
IFTTT setup
Steps to follow:
- Go to: https://ifttt.com/
- Login or register
- Click Create from User / Account menu (top right corner)
- Click + to create new source event
- Select Webhooks service
- Click Continue
- Click Receive a web request (on the left hand side)
- Create event name e.g. button_event
- The source event should be set-up now, click + after Then event
- Search HUE service
- Select HUE service event
- if you do not have yet HUE you need to add by -> Connect
- Select device (light) to which this event will be attached
- Click Finish
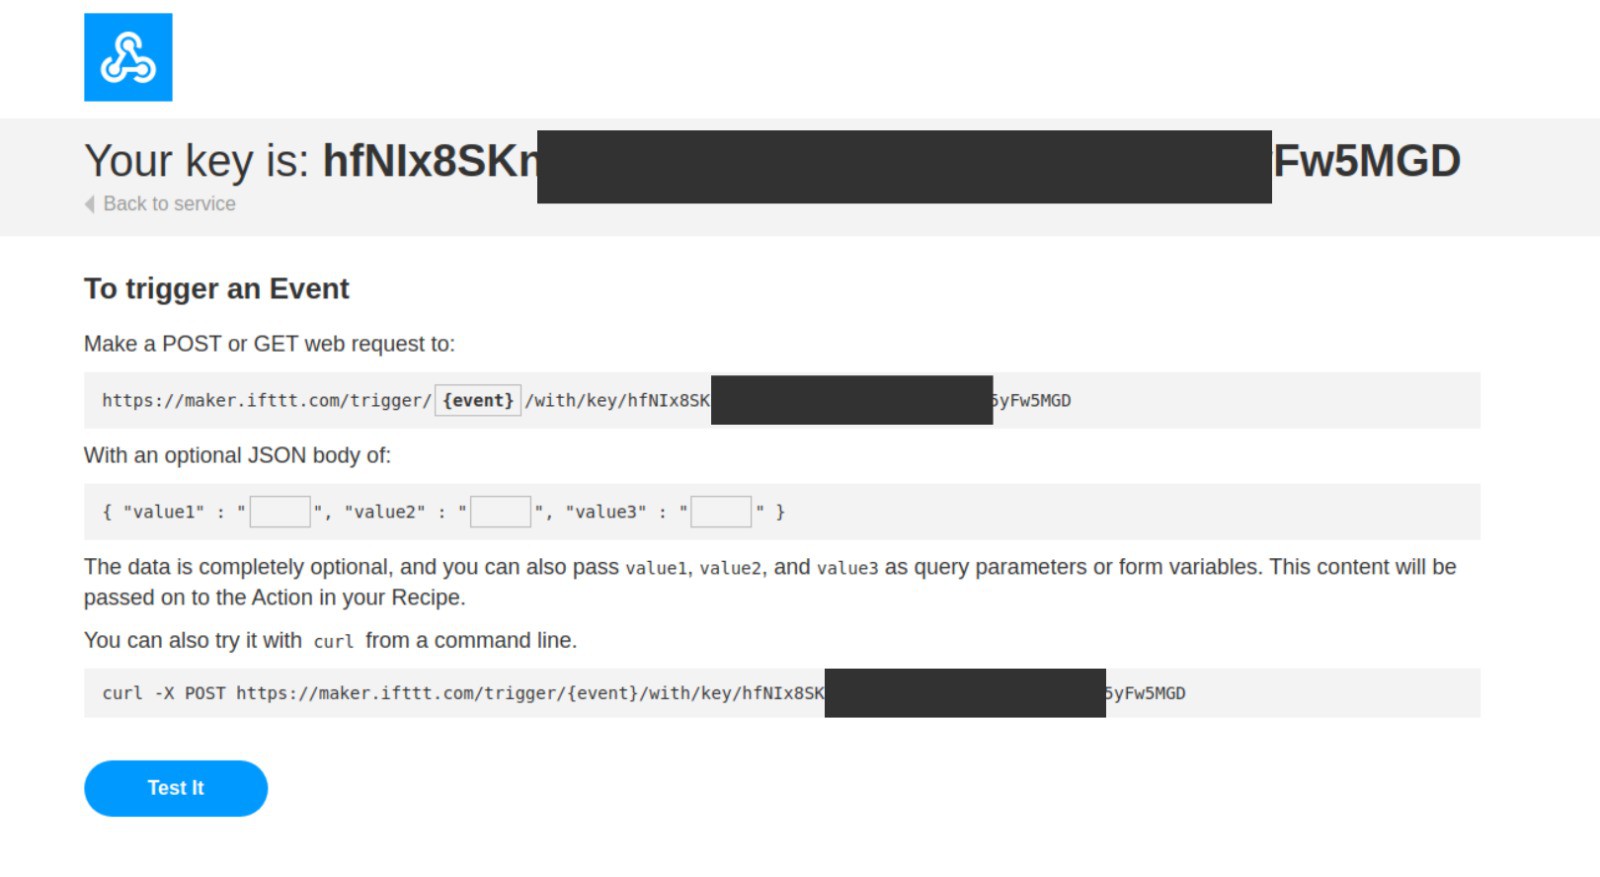
Nearly done, we need to get a HTTP address to which we can post event from IoT module.
Search for Webhooks service and click in document ion in the right up corner.

Next copy web links under "Make a POST or GET web request to:" you will need it latter.
Configure Wi-Fi Cricket module
Cricket is entirely configured OTA (Over The Air) through Things On Edge - Developer Portal (https://dev.thingsonedge.com). The configuration will be retrieved by Cricket via the internet when it is connected to your Wi-Fi (which is described in the next section). Now let's configure it first.
For the button we need to configure Cricket to send POST HTTP request when is woken up by high signal on IO1: WAKE_UP pin. This signal is provided when the button is pressed.
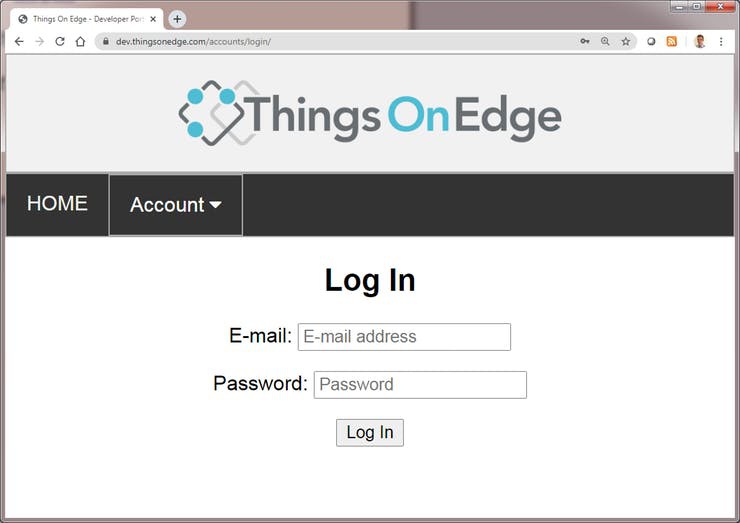
Now open TOE Developer Portal from any browser either from PC or mobile. You must register/login to Developer Portal to activate and configure the device in your account. Otherwise the device won't work.
After successful login / registration you need to click "Add new" device to activate your device in the system. You need to use the unique serial number printed on a label stick on the back of Cricket.
WARNING: You must keep the serial number for yourself only. Do not share it with anyone else.
Now you can configure your device.
Set the following configuration:
- RTC: OFF
- IO2: OFF
- IO3: Off
- Battery monitor: OFF
- Force updates on - IO1 Wake Up: On
- Force updates on - RTC Wake Up: OFF
- Post Events: see below
Paste the link you copied from Webhooks in io1_wakeup and leave data empty
replace https to http and replace event to button_event
The link should look like below:
<a target="_blank" rel="noopener noreferrer" href="http://maker.ifttt.com/trigger/button_event/with/key/hfNIx8SKn_xxxxxxxxxxxxxxxxxxxxxx_YW3xx5yFw5MGD">http://maker.ifttt.com/trigger/button_event/with/key/hfNIx8SKn_xxxxxxxxxxxxxxxxxxxxxx_YW3xx5yFw5MGD</a>
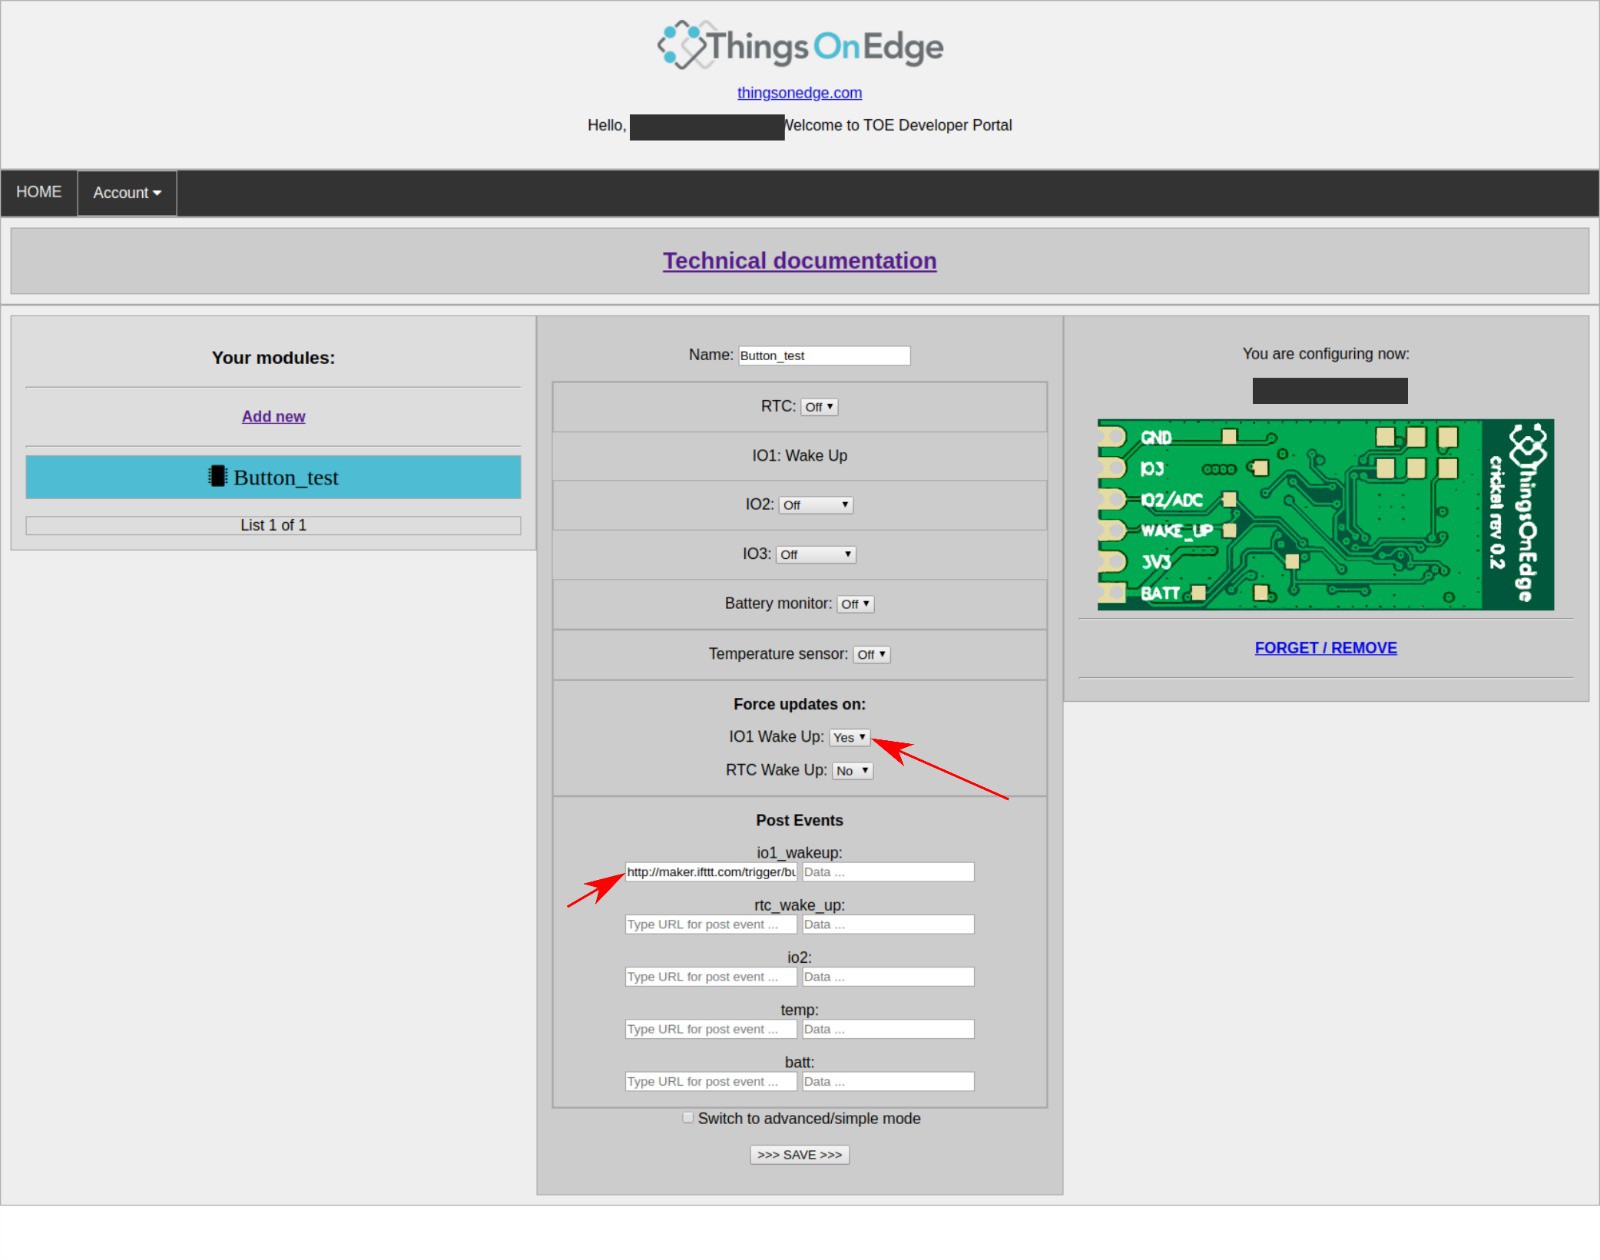
Once you set the configuration hit Save button.
We are almost there! Now you just need to connect your device to the internet over your Wi-Fi network. Please follow the next section how to do it.
Connecting IoT module to the internet
In a few steps you will connect your device to the internet over your Wi-Fi network. All you need to do is to activate Cricket's private Wi-Fi hotspot and then open a private web page to pass your Wi-Fi network credentials. Please follow the steps below:
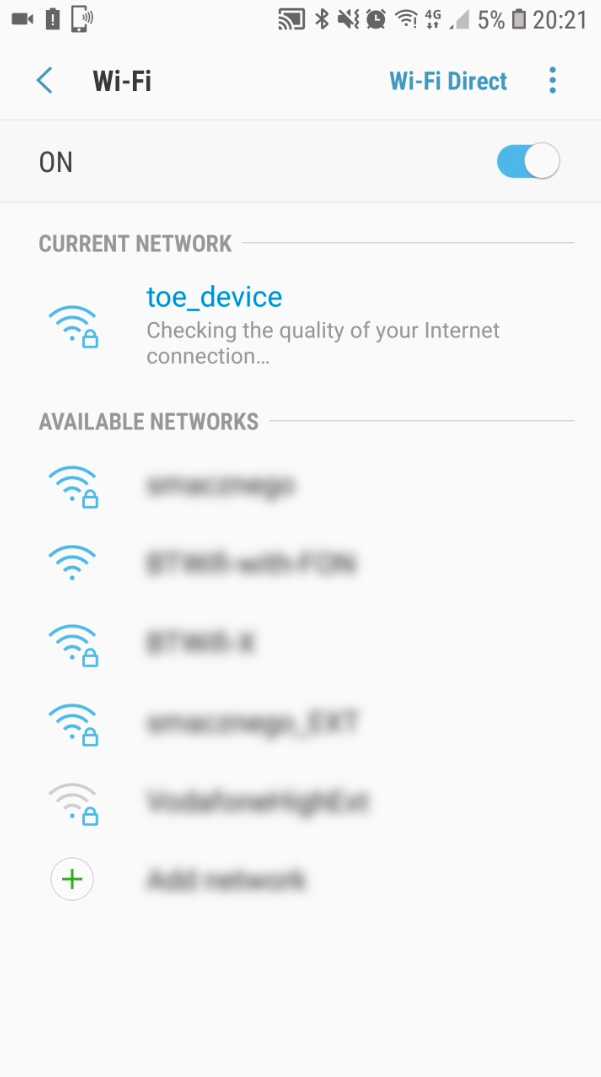
- Press and hold a button on the module for 5 seconds until the LED is constantly lit.
- Once the LED is constantly lit Cricket opened a private Wi-Fi hot spot. Connect from either a laptop or smartphone to the hot spot with the following credentials:
SSID: toe_device
No password is required
- Once connected, open a private web page: http://192.168.4.1/index.html
NOTICE: make sure LED is still ON! If is OFF repeat the steps from the beginning

- Now you can pass your Wi-Fi network credentials and click CONNECT. If you passed correct SSID and Password then after few seconds the device should report it is online and the LED will be OFF.
Congratulations! Now your device is live and connected to the internet!
Now you can switch on/off HUE light with your buttondevice !!!
You can find more information:
- About Cricket module from ThingsOnEdge page
- More technical information can be found here GitHUB (https://github.com/thingsonedge/cricket).
Video with instruction :