 Dylan Radcliffe
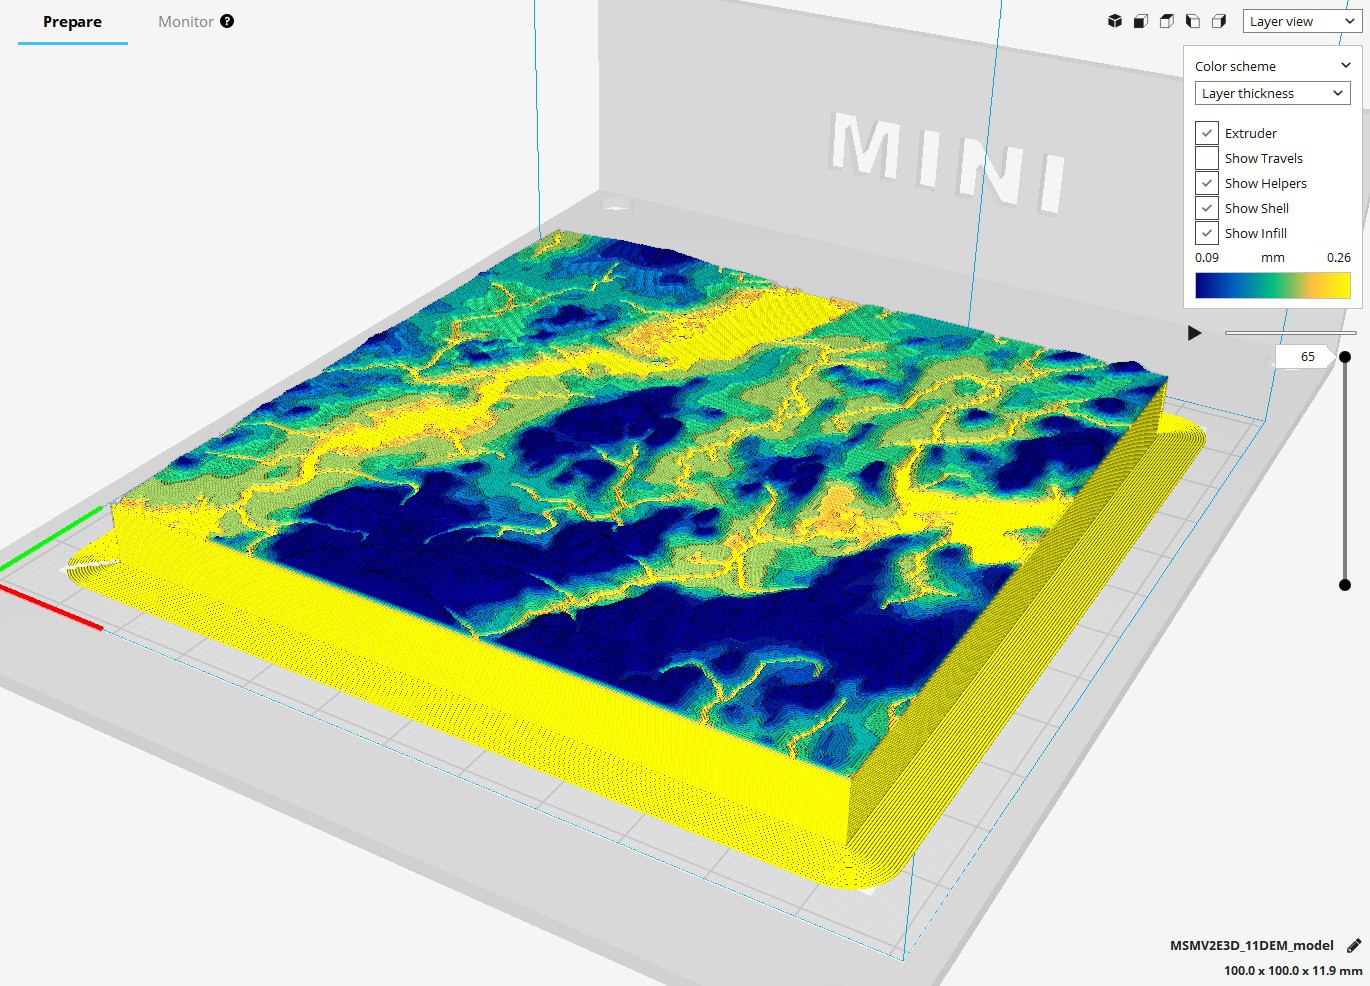
Recently I started printing 3d topographies as an educational tool. They are relatively flat for the majority of the print, but when it comes to the surface, having thicker layer heights left much to be desired. Due to the large volume being printed, setting a smaller layer heights sent printing times through the roof. I needed a better solution. Enter adaptive layer heights.
Setting the layer height to 0.0875mm creates a detailed surface, but dramatically increases print time.
Variable or adaptive layer heights can increase detail being printed on sloped surfaces relative to the XYZ axis on your printer, while layers parallel to any axis can be printed thicker since it is not as imperative for surface detail. The unique problem with the monoprice select mini is that the stepper motor used to drive the Z axis has an unusual property that sets the minimum resolution to a nice even 0.04375mm. In order to ensure top quality prints while reducing print time, we must first understand each of the settings.
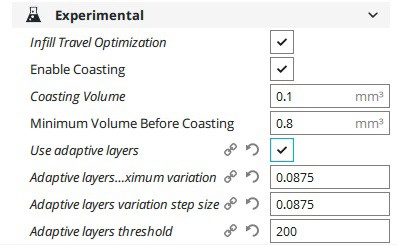
To use adaptive layer heights, you must enable it under Cura’s experimental options.
Adaptive Layers Maximum Variation
The maximum variation is the maximum distance that layer height will deviate from the layer height set under print quality. In this example, I will set the layer height under print quality to 0.175mm which is 4 x 0.04375.
Because there is a minimum step size of 0.04375, any deviation from the set layer height must be a multiple of this number. Effectively we are setting the upper and lower bound of what our layer heights can be. Because we want the most finely detailed parts of our print to print at a resolution of 0.0875 (2 x 0.04375) we will set the maximum variation to the difference between the print quality layer height and our detailed layer height, the difference then being 0.0875 (0.175 – 0.0875 = 0.0875) This setting also sets the maximum layer height we will print with, which is 0.2625 (0.175 + 0.0875 = 0.2625)
Adaptive Layers Variation Step Size
Setting the variation step size will set the gradient of step sizes that the printer will graduate between when changing layer heights. Since the minimum step size of the Monoprice Select Mini is 0.04375 we must set the step size to a multiple of this value.
For this print, I would like to move as quickly as possible from our maximum layer height of 0.2625 to our minimum layer height of 0.0875. In order to accomplish this I will set the step size to be 0.0875 which will move the printer from a layer height of 0.2625 to 0.0875 in two layers. (0.2625 → 0.175 → 0.0875). If you would like a finer graduation in layer heights, it is possible to set the value to a minimum of 0.04375.
That’s it! You did it!
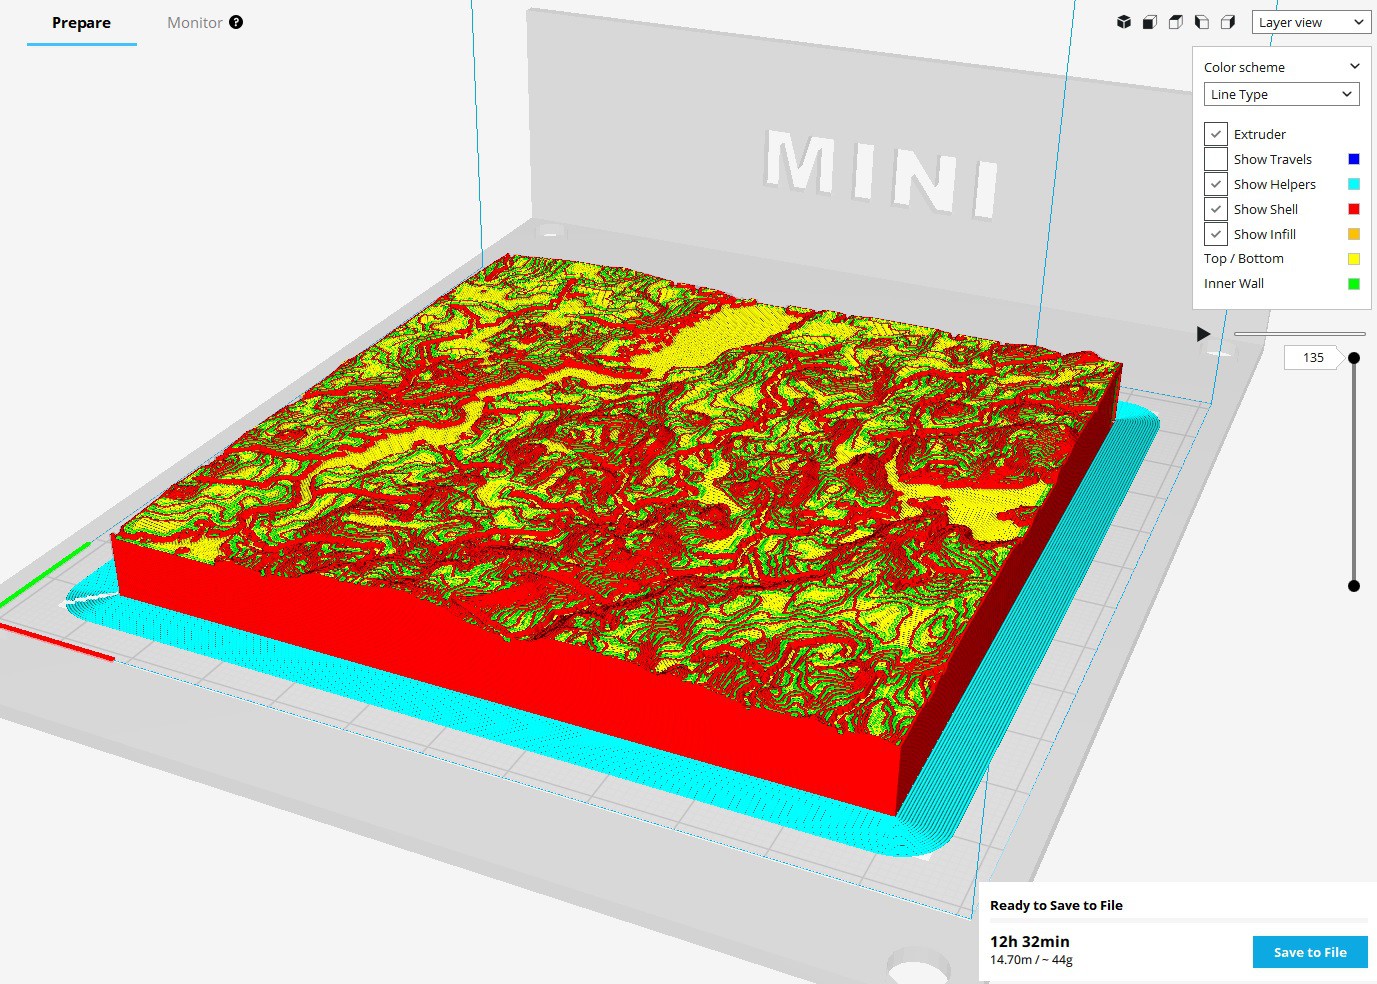
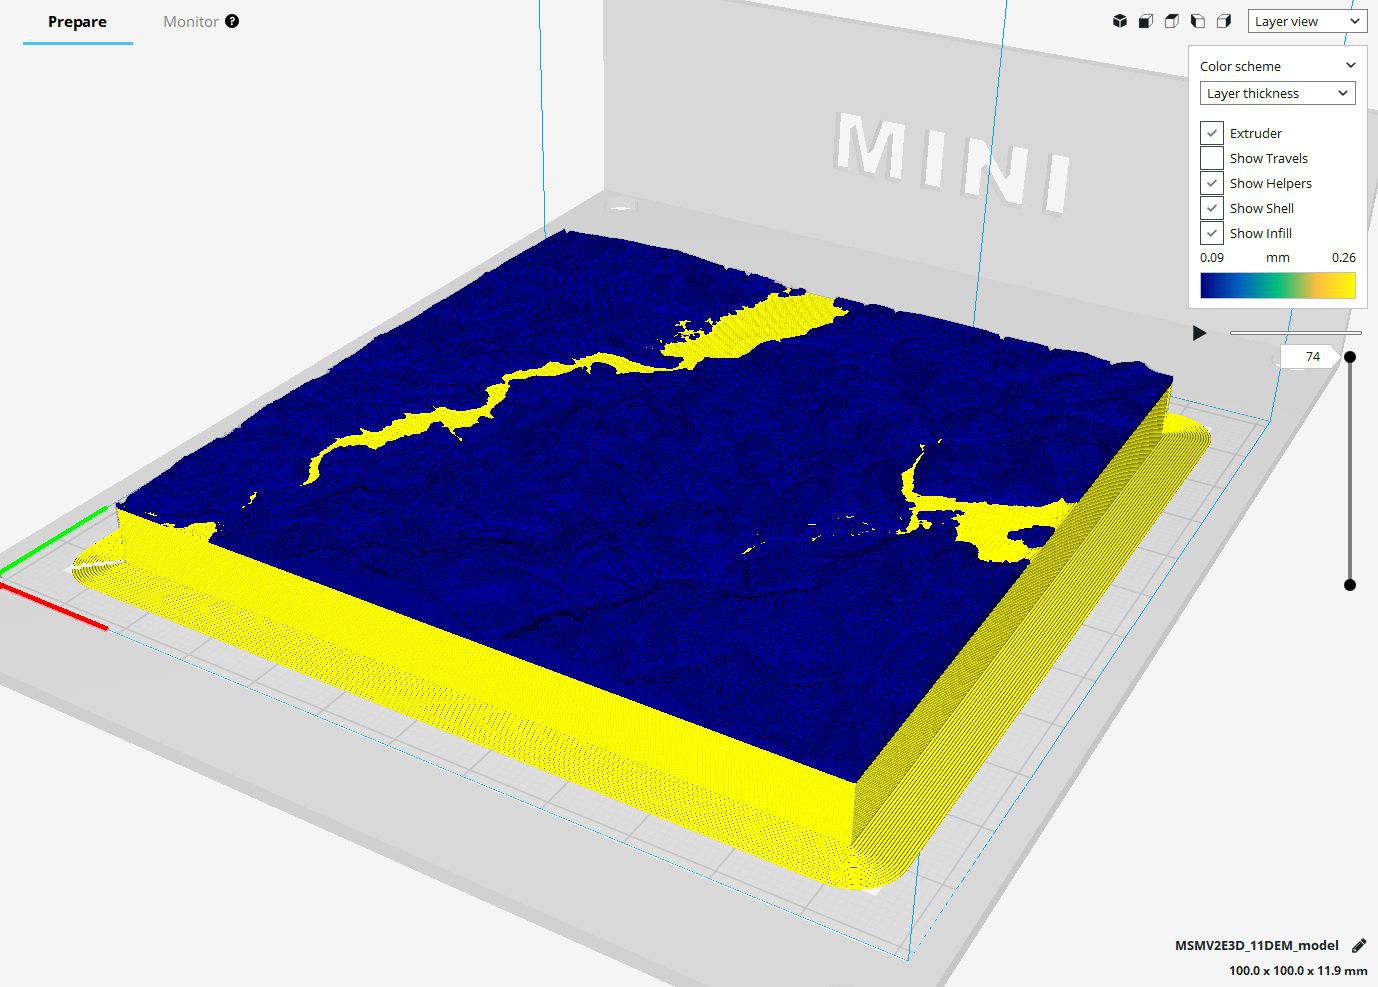
Using the adaptive layers setting, you can now minimize print time while maximizing detail! In the above print of some topographic maps, we reduced printing time from 12 hours to 7 hours. Happy printing!
Discussions
Become a Hackaday.io Member
Create an account to leave a comment. Already have an account? Log In.