 Dylan Radcliffe
Out of the box one of my biggest issues with the MPSM was the heated bed. After mild use, it quickly warped, was unable to warm up, and had uneven heat distribution. One of the quick fixes that many people do, including myself is to install a glass sheet on top of the heated bed. This works, but I found myself desiring a cleaner solution. I also still found that I needed to occasionally adjust the bed leveling, something that shouldn’t really be necessary on a printer bed this small.
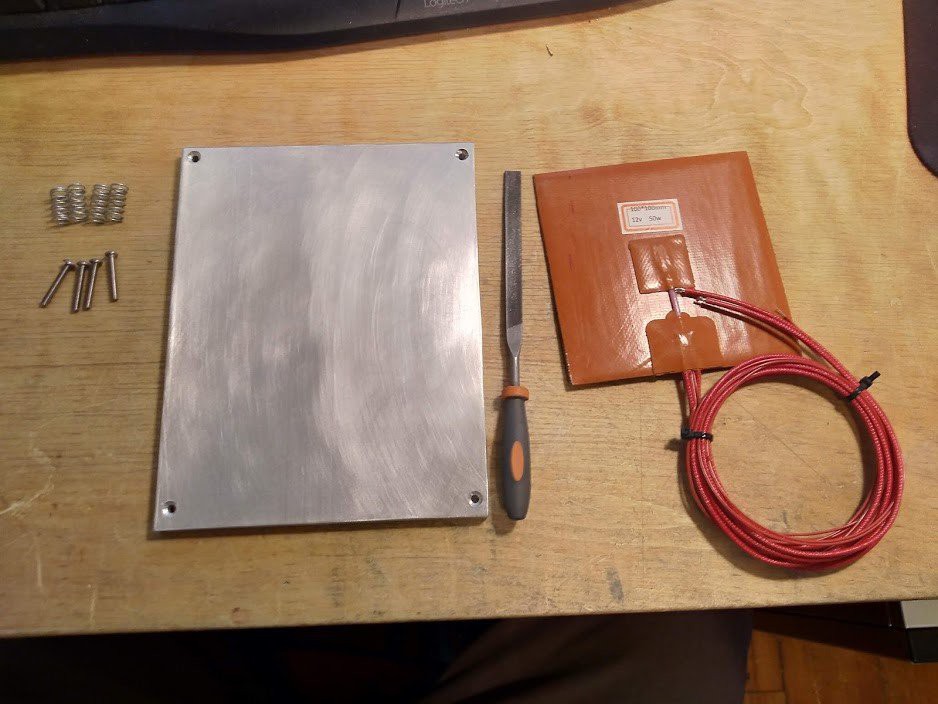
Back in February I ordered all of the parts to build a brand new heated bed for my printer that solved all of the above issues. For this project I needed an SSR, 1/4” aluminum plate, and a 110mm2 12v heating pad. Zipties and wire are useful too. While I waited for parts to mail from China, I started by cutting the aluminum sheet I got from a local metal supplier. I debated using MIC6 tool steel, but I decided it wasn’t needed for such a small bed. I cut it to size using a tablesaw (yes it works if a little rough) and filed down the edges. I finished with a bit of sandpaper and cooking oil to bring out a bit of shine.
Next up I cut the holes using my CNC machine. Using a drill press would work fine for this portion as well. The corner to corner measurements I had came out to about 118mm x 152mm and mount perfectly on the machine as is. You could easily expand the bed using this method, but I’m ok with a smaller printer.
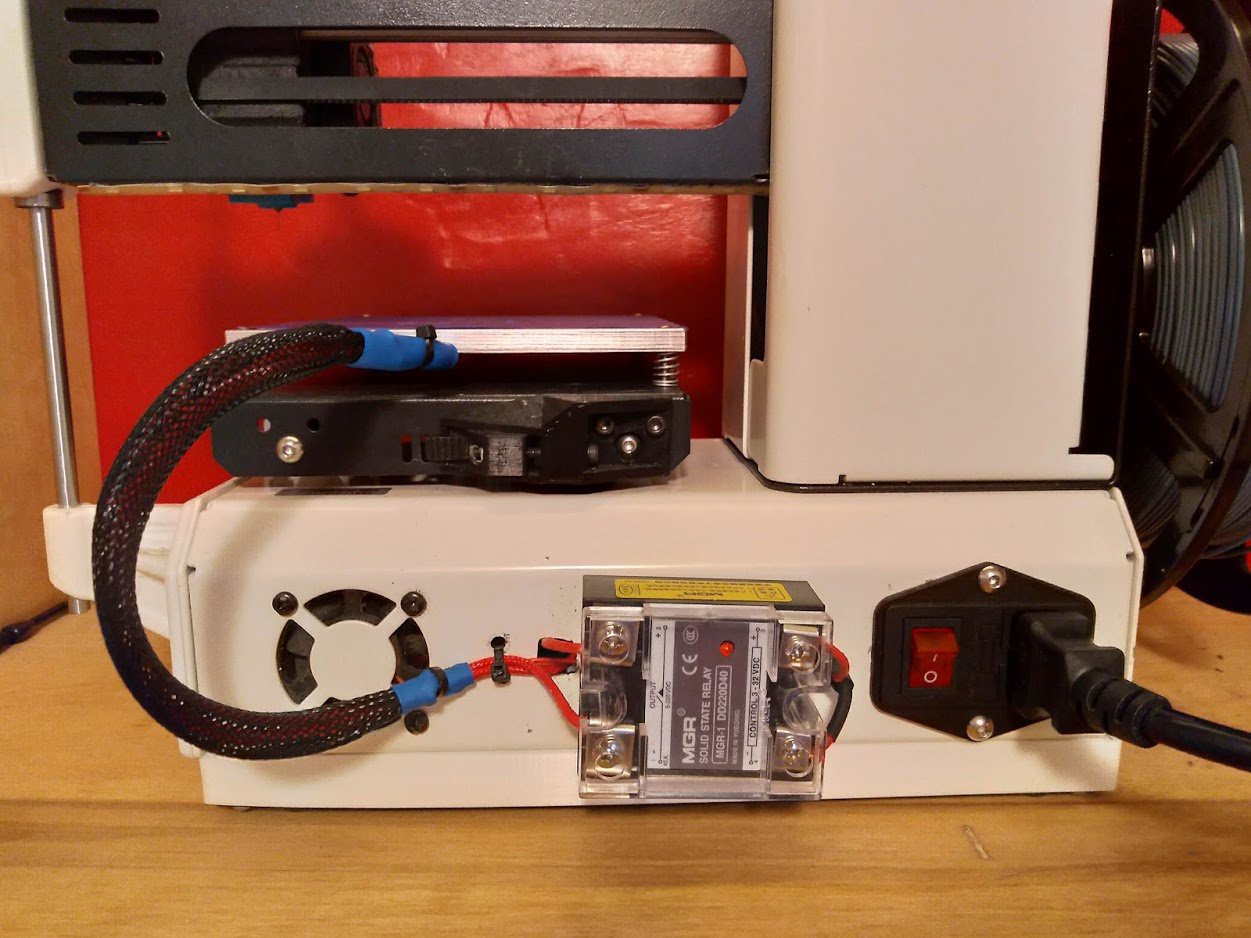
When the parts finally arrived, I started by drilling holes in the back of the frame. I would have liked to have installed the SSR internally, but I already have an internal meanwell 12v power supply so there isn’t any room left! I drilled holes for the control wires coming from the printers main board and additional wires to attach zipties to for strain relief. I mounted the SSR on the back of the frame with some M3x8 bolts and wired the the heated bed as seen below. You can see them all in the included picture.

After putting everything back together, I am quite pleased with the results! The aluminum plate does a great job distributing the heat, and there is no evidence of bed warping after a couple dozen hours of use, I haven’t had to adjust the leveling once! Additionally, the heated bed has an easy time hitting 60°C and can with a bit of patience get as high as 80°C. I suspect If I installed some insulation along the bottom of the bed, there would be no issues whatsoever.
Discussions
Become a Hackaday.io Member
Create an account to leave a comment. Already have an account? Log In.
I bought a 15V power supply to feed mine with as I upgrade it, but haven't installed the MOSFET and PSU yet.
My printer's biggest issue was the bed surface, which I ended up putting a polypropylene glass bed overlay to replace.
Are you sure? yes | no