 Mark Rehorst
I use an old cell phone with a cracked screen to monitor my 3D printer, especially during very long prints, sometimes 30-40 hours. The cell phone uses Open Camera's intervalometer to snap high resolution pictures every 30 seconds or so. Google Photos uploads the images as soon as they are snapped, so I can monitor print progress using my phone or any computer that I happen to be around. There's no advertising, no subscription fees, and no limitations on the camera's performance. It' best to use Open Camera's exposure and focus lock features to keep video quality high (something I discovered only very recently).
After I have an image sequence, I batch edit in IrfanView (free) and then create a time lapse movie using imageJ (free). Here's an example of an intervalometer based time lapse:
I used a very high resolution setting in Open Camera when the image sequence was made, so I was able to crop a specific area using irfanview to make an interesting close-up time lapse from the same image sequence:
In both of those videos you see the extruder bouncing around as well as the bed bouncing up and down because some of the pictures are made during lift-on-retract. I also failed to turn on focus lock, so the focus tends to hunt a bit. It all looks very busy! The close up video looks like something from an old sci-fi movie...
Layer synchronized time lapse video is made from an image sequence in which images are captured only when the print layer changes. That completely changes the character of the video. Here's an example, this time with exposure lock and focus lock set:
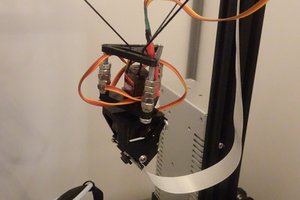
The technique I used is very simple, inexpensive, and doesn't require any wiring or controller configuration changes. It uses a bluetooth remote shutter button ($5-20 via amazon.com) that's compatible with my phone and its OS version (check before you buy one), to trigger the camera every time the print layer changes.

I simply mounted the bluetooth button in a printed bracket on my printer's frame and a "pusher" on one end of the X axis. When the print layer changes, I use custom gcode in the slicer to send the extruder carriage to the back of the printer, which pushes the bluetooth button and snaps a picture. It's very low-tech, but it works. Here it is in action:

Notice I saved the printer profile under the name "UMMD TL". The special printer profile includes changes to the retract and unretract settings to eliminate the blobbing at the back of the print that you can see in the video above. When I'm not making a layer synced time lapse movie, I just use the regular "UMMD" profile, and I leave the bluetooth button out of the bracket inside the printer.
More here: https://drmrehorst.blogspot.com/2020/04/fancy-no-hack-layer-synchronized-time.html


 Pointlessly Useful
 setCREATE
 Absolutelyautomation
 brashtim
Great hack, I will definitely try it !