kutluhan_aktar
Description
I am fond of experimenting with the Raspberry Pi camera options (such as image effects and duration) while recording demonstration videos for my electronics projects, and especially when birdwatching in my balcony :) When I take a video with my Raspberry Pi for the mentioned reasons, I usually upload the video to my YouTube channel, as a private video, due to the storage limit on Pi. However, the process of recording and uploading through Raspberry Pi had miscellaneous and intricate steps to follow all over again: adjusting video settings manually, opening my YouTube channel, defining video parameters, etc.
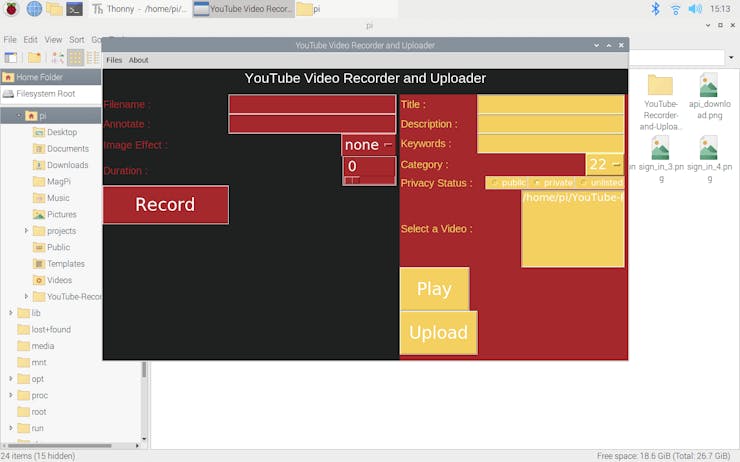
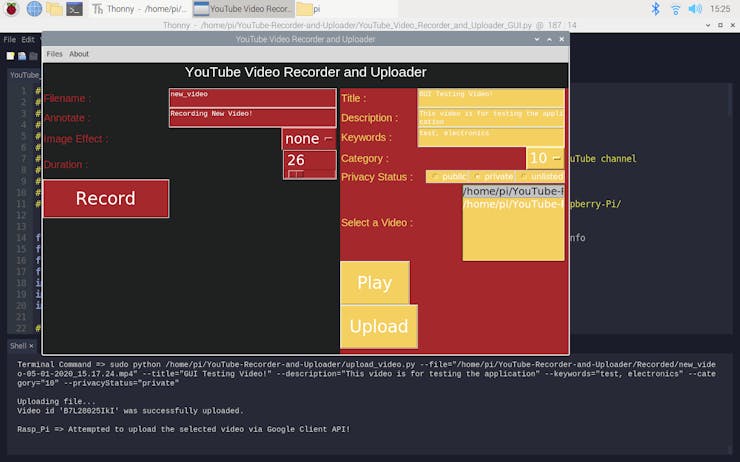
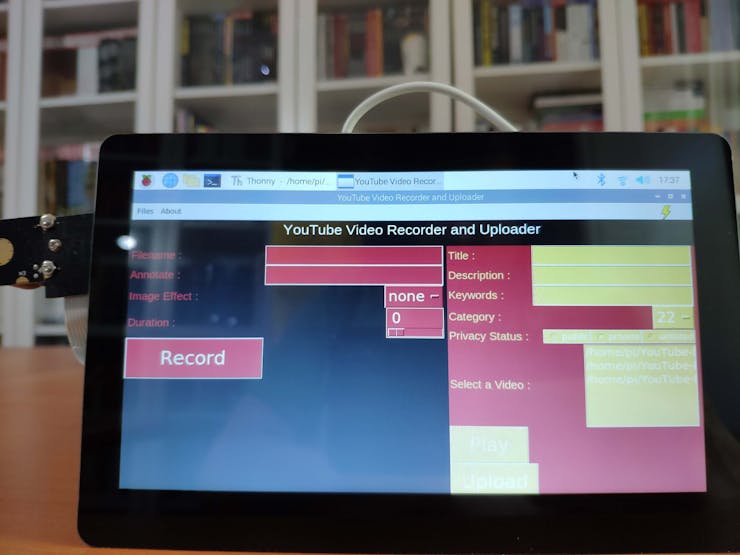
Thus, I contemplated a GUI by which I could adjust the video recording settings and define the parameters to upload videos to YouTube without signing to my YouTube channel on the browser every time. After some research, I decided to use the Google APIs Client Library for Python to communicate with my YouTube channel through the YouTube Data API. In the end, I developed a GUI (YouTube Video Recorder and Uploader) in Python, including two interfaces - Record menu and Upload menu.
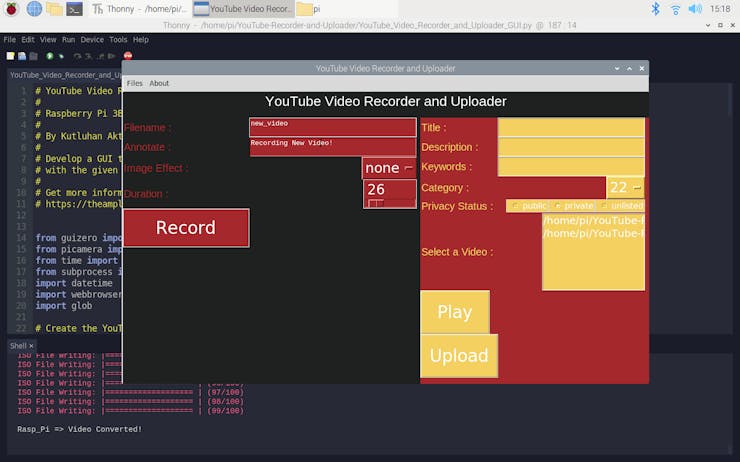
In the Record menu:
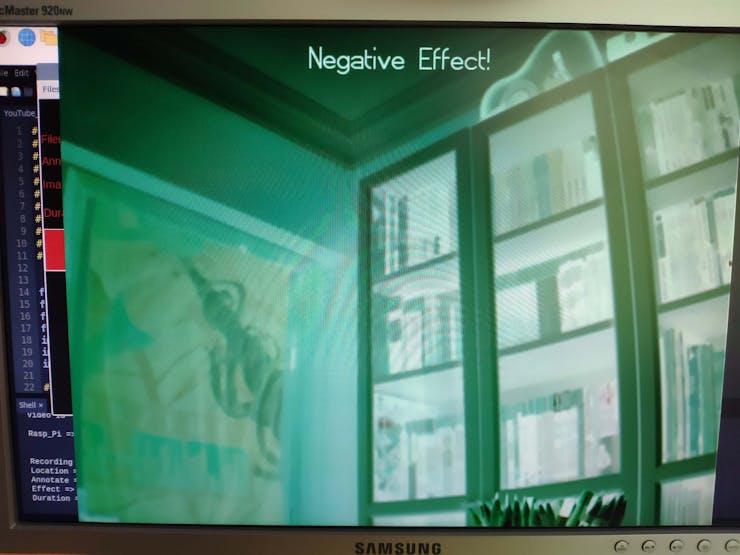
You can define filename (timestamp included automatically), annotation text (if required), the video duration, and select an image effect (predefined by the GUI, for instance, negative).
In the Upload menu:
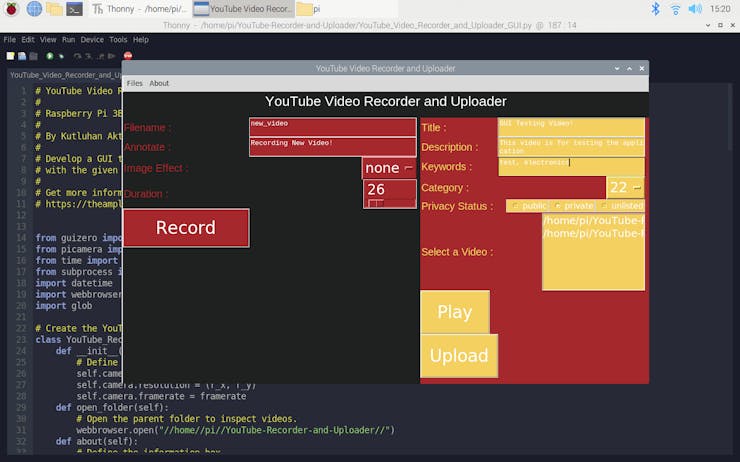
You can upload the selected video to YouTube via the YouTube Data API without any further steps by merely entering the required parameters by YouTube - Title, Description, Keywords, Category, and Privacy Status.
You can find detailed information about the features of the GUI (YouTube Video Recorder and Uploader) in the Features.
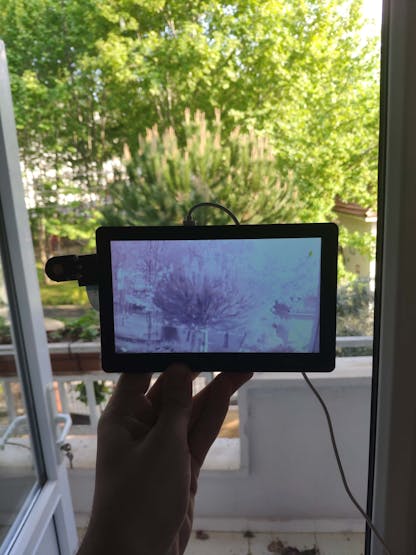
After completing coding, to add mobility and night vision to my project - helpful while birdwatching or recording outside at night :) - I used a 7'' HDMI Display with Capacitive Touchscreen and a 5MP Night Vision Camera, kindly sponsored by DFRobot.
Sponsored Products by DFRobot:
- 7'' HDMI Display with Capacitive Touchscreen | Inspect
- 5MP Night Vision Camera for Raspberry Pi | Inspect

Preview: What You Will Learn
- How to register your application with Google so that it can use the OAuth 2.0 protocol to authorize access to user data
- How to install the Google APIs Client Library for Python on Raspberry Pi
- How to set up the night vision camera to record videos with the given settings
- How to program a GUI with the guizero module
- How to create a class in Python
- How to convert the H264 format to the MP4 format using MP4Box in Python
- How to upload videos to your YouTube channel using the YouTube Data API
Step 1: Registering an application with Google to use the OAuth 2.0 protocol to authorize access
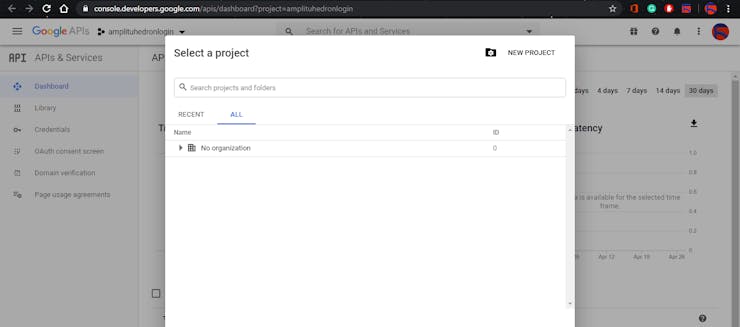
You need to create an application on the Google API Console to run the Google APIs Client Library for Python properly, and your application must have authorization credentials to be able to use the YouTube Data API.
If you are a novice to the Google API Console, do not worry it is a simple process, apply the following steps only :)
- Go to the Google API Console and click to the 'New Project' button.
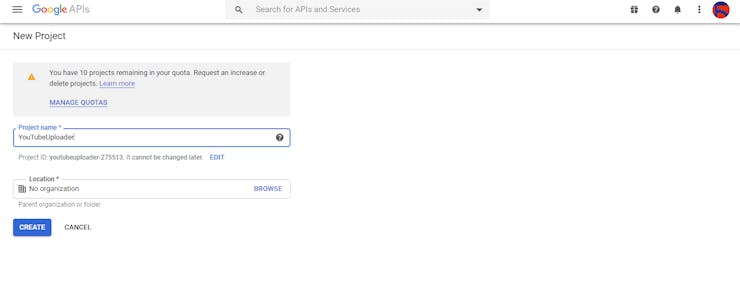
- Enter the project name - YouTubeUploader - and create the project.
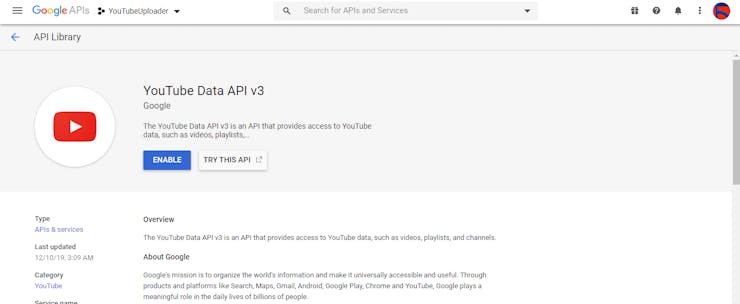
- Open the API Library.

- Enable the YouTube Data API v3.
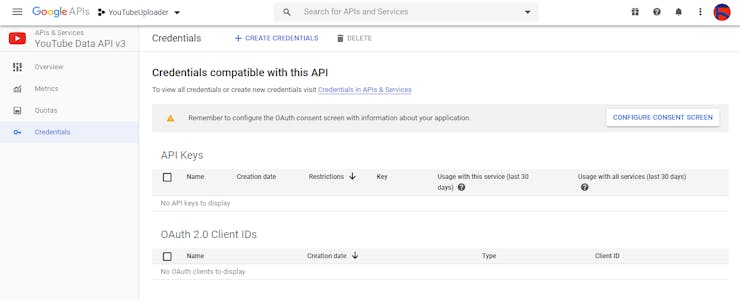
- Select 'Credentials' under the YouTube Data API v3 and click the 'CREATE CREDENTIALS' button.
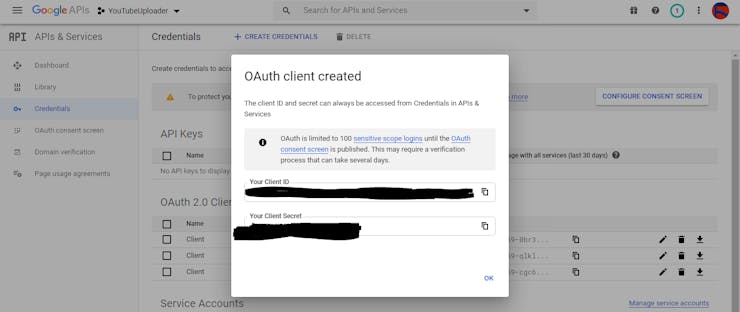
- Select the application type as 'Other' and enter the application name as 'Client'.

- Copy the Client ID and the Client Secret. You will need them later when authorizing your Raspberry Pi with the Google APIs Client Library for Python as a user.
Step 2: Installing the Google APIs Client Library for Python on Raspberry Pi
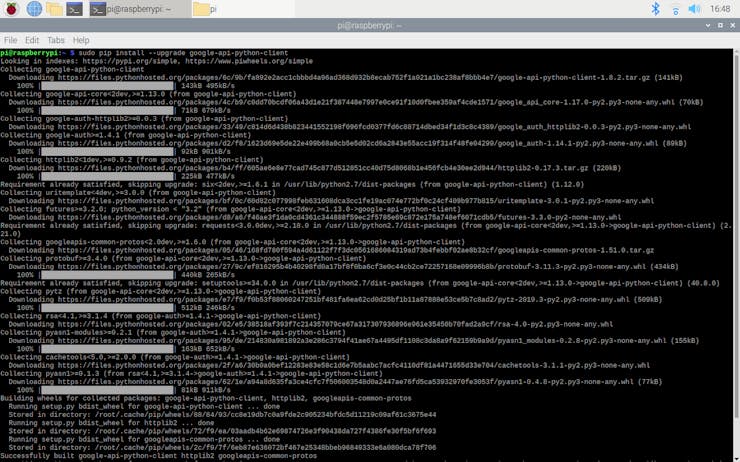
Open the terminal and enter the command below (it will take some time to install all packages):
$ sudo pip install --upgrade google-api-python-client
Step 3: Authorizing Raspberry Pi to upload videos via the YouTube Data API
First of all, create a new folder at this path:
/home/pi/YouTube-Recorder-and-Uploader/
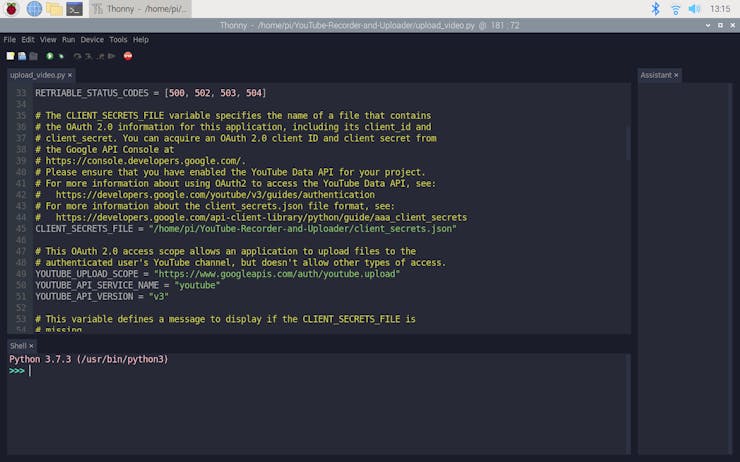
Then, download the upload_video.py file in the Code. It is the sample code provided by Google for the YouTube Data API.
Create the client_secrets.json (there is a sample in the Code) file that contains information from the Google API Console (Client ID and Client Secret).
{  "web": {    "client_id": "[[INSERT CLIENT ID HERE]]",    "client_secret": "[[INSERT CLIENT SECRET HERE]]",    "redirect_uris": [],    "auth_uri": "https://accounts.google.com/o/oauth2/auth",    "token_uri": "https://accounts.google.com/o/oauth2/token"  }
}
Inspect upload_video.py and client_secrets.json sample files I used from this guide by Google.
Do not forget to change the client secret path in the upload_video.py file.
Now, to verify your Raspberry Pi, open the terminal and enter the following command.
$ sudo python /home/pi/YouTube-Recorder-and-Uploader/ --file="[[INSERT FILE PATH]]" --title="Test" --description="Test" --keywords="test" --category="22" --privacyStatus="private"
Do not worry; it will throw an error message which says "Cannot access:...upload_video.py-auth2.json" due to the absence of the confirmation tokens generated when you sign in to an application.
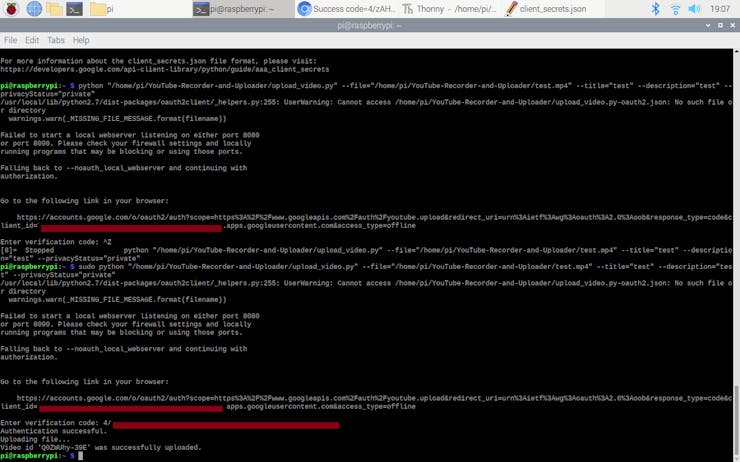
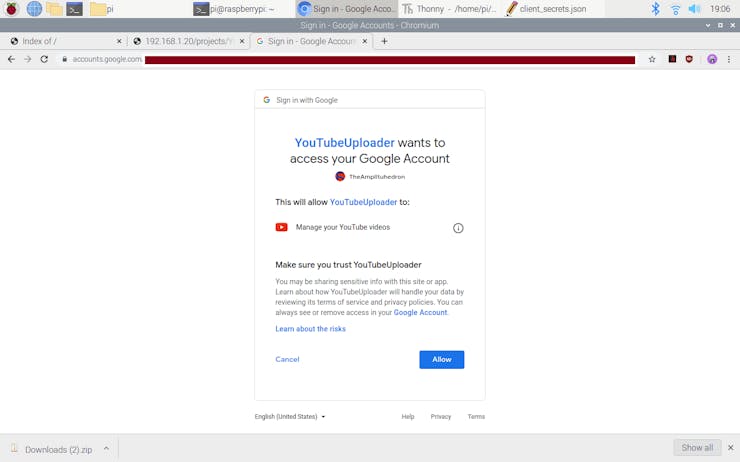
To create the requested file, click the link generated by the API.
And, sign in with your selected account to the application.

Copy the verification code.

Enter the verification code in the terminal and voila! Now, you can upload videos to your YouTube channel as many as you want without signing in again :)
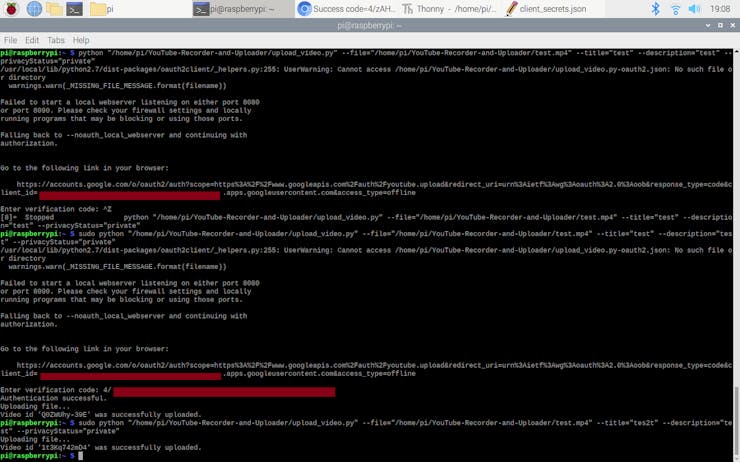
You can see the generated verification file named upload_video.py-auth2.json (/home/pi/YouTube-Recorder-and-Uploader/).
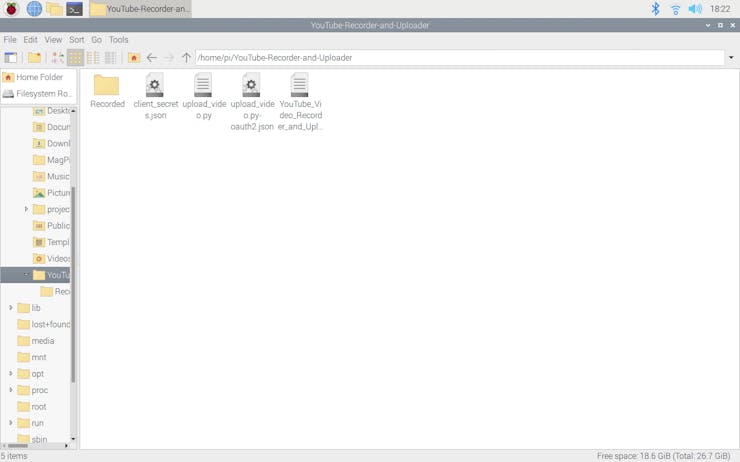
Note: Do not forget to create a folder named Recorded in the parent folder (/home/pi/YouTube-Recorder-and-Uploader/) to save videos afterward.
Step 4: Developing a GUI (YouTube Video Recorder and Uploader) and programming Raspberry Pi
There are different modules by which you can create a GUI in Python; I chose to use the guizero module due to its simplicity and efficiency.
To be able to use all the provided widgets and events by the guizero module, install the module on Raspberry Pi:
$ sudo pip3 install guizero
After running the mentioned command on the terminal, you can use the code I provided (YouTube_Video_Recorder_and_Uploader_GUI.py) without any further requirements.
But, if you want to add new features or inspect the widget features, you can get more detailed information about the guizero module from here.
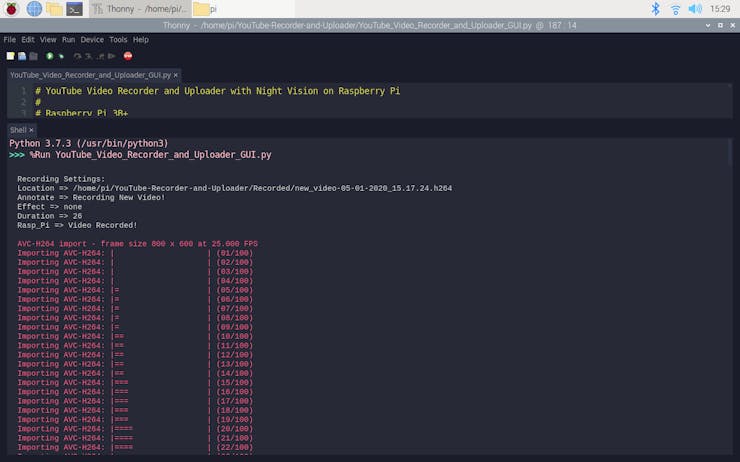
Unfortunately, Raspberry Pi captures video as a raw H264 video stream, and YouTube does not allow users to upload a video in the H264 format. So, we need to convert the video in the H264 format to the MP4 format by using MP4Box before uploading it to YouTube.
Install MP4Box with this command:
$ sudo apt install -y gpac
The code executes the following command automatically when the user records a new video using the GUI. So, while using the GUI (YouTube Video Recorder and Uploader), you do not need to take any further action to convert videos from the H264 format to the MP4 format to upload them to YouTube.
MP4Box -add [[INSERT PATH]].h264 [[INSERT PATH]].mp4
I will explain the code of the GUI step by step as follows, but if you want to inspect the features of the GUI (YouTube Video Recorder and Uploader), go to the Features.
Code Explanation:
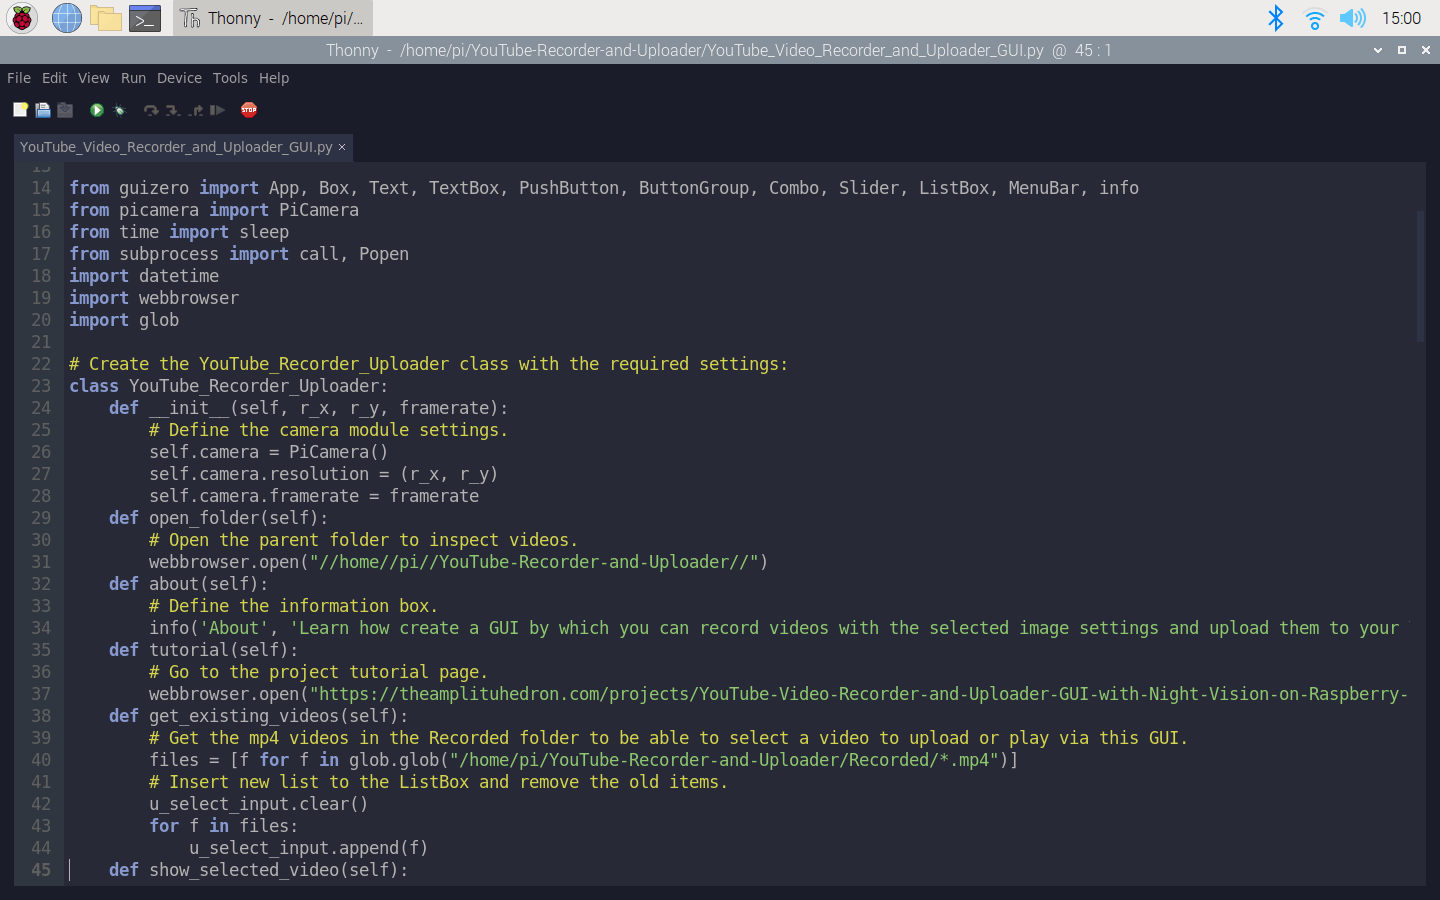
- Import the required modules and libraries.
- Create the YouTube_Recorder_Uploader class with the required setting parameters - resolution and framerate:
- Define the camera module settings.
- In the open_folder function, open the parent folder (/home/pi/YouTube-Recorder-and-Uploader/) to inspect videos.
- In the about function, define the information box for the menubar.
- In the tutorial function, define the tutorial page link.
- In the get_existing_videos function:
- Get the mp4 videos in the Recorded folder using the glob module to be able to select a video to upload or play via this GUI.
- Insert the new list to the ListBox widget and remove the old items.
- In the show_selected_video function, create a pop-up, including the selected video information.
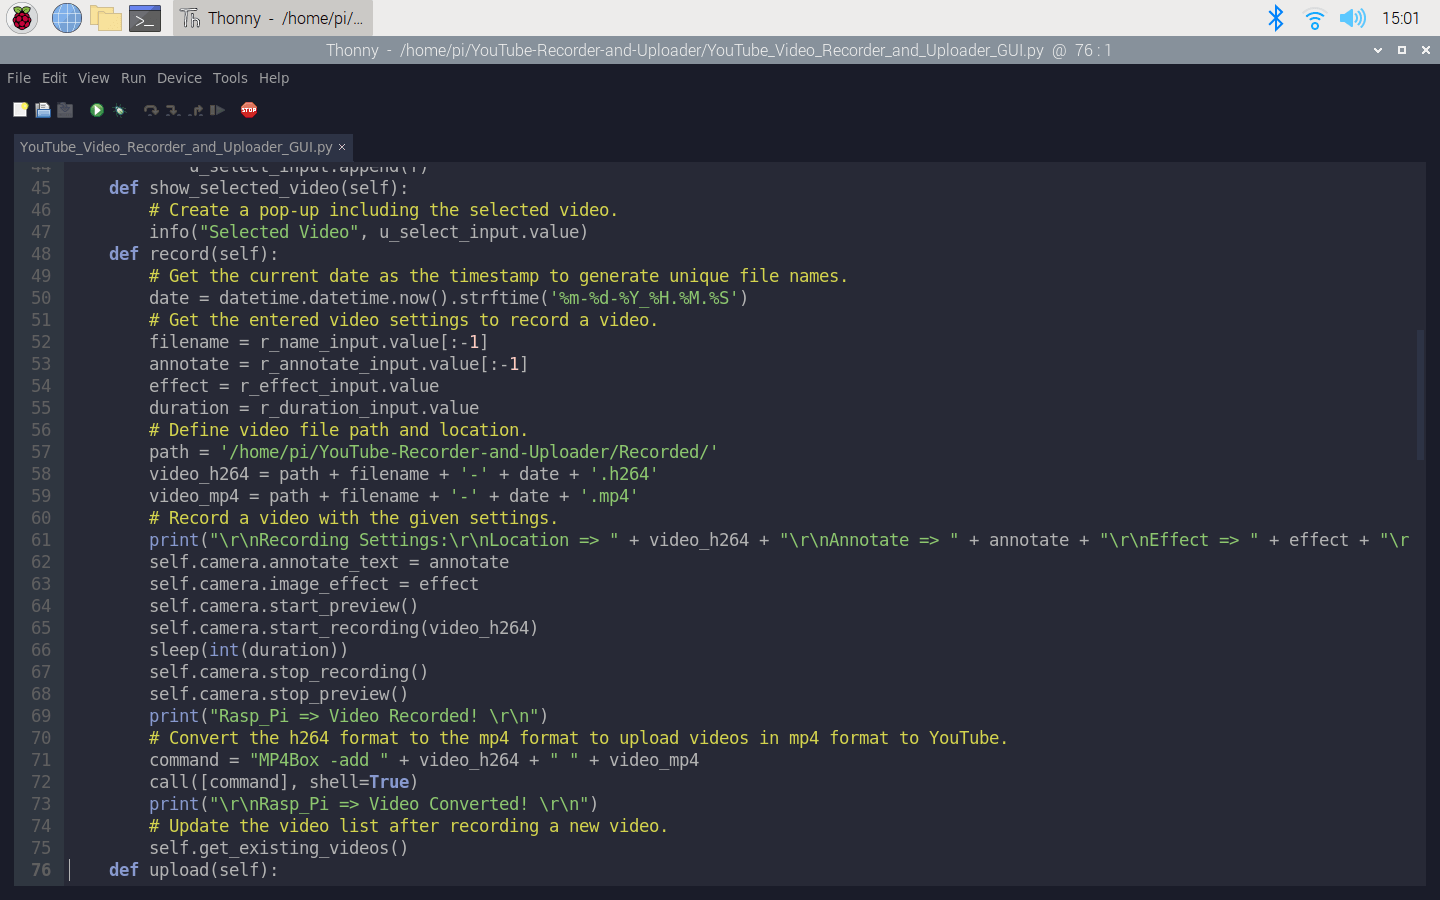
- In record function:
- Get the current date as the timestamp to generate unique file names.
- Get the entered video settings on the GUI to record a video.
- Define the video file path and location for both the H264 format and the MP4 format.
- Record a video with the given settings.
- Convert the H264 format to the MP4 format using the subprocess module (MP4Box) to upload videos to YouTube.
- Update the video list after recording a new video.
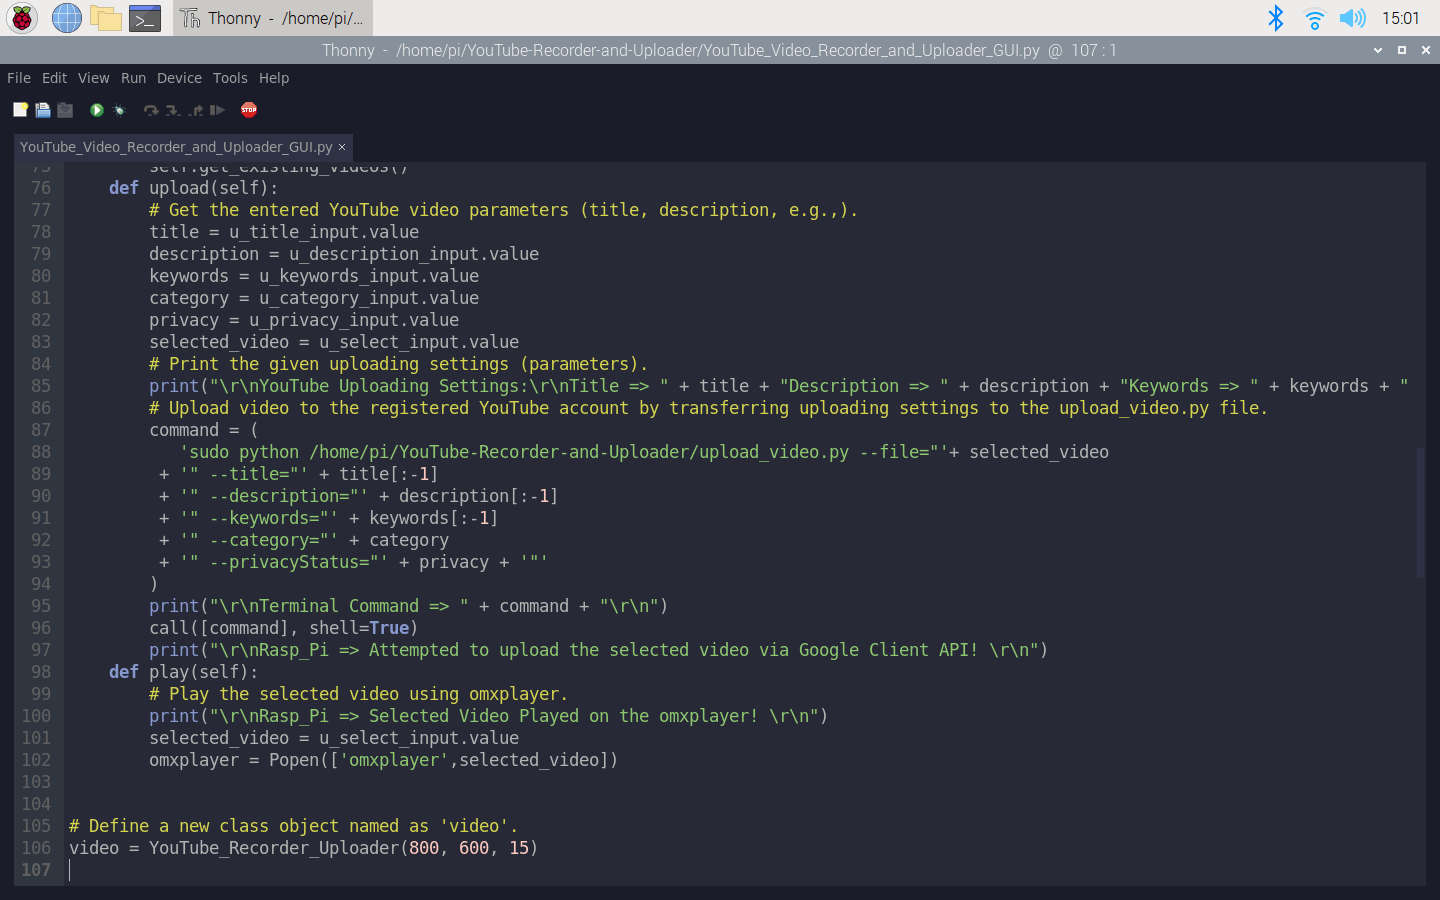
- In the upload function:
- Get the entered YouTube video parameters - title, description, keywords, category, and privacy status.
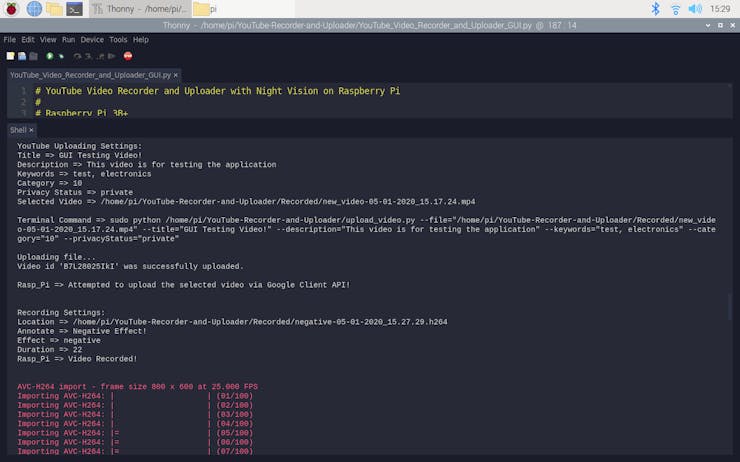
- Print the given uploading settings (parameters) in the shell.
- Upload video to the registered YouTube account by transferring the uploading settings to the upload_video.py file with the subprocess module; I explained this command in Step 3.
- In the play function, play the selected video using omxplayer.
- Define a new class object named 'video' and enter the resolution and framerate parameters.
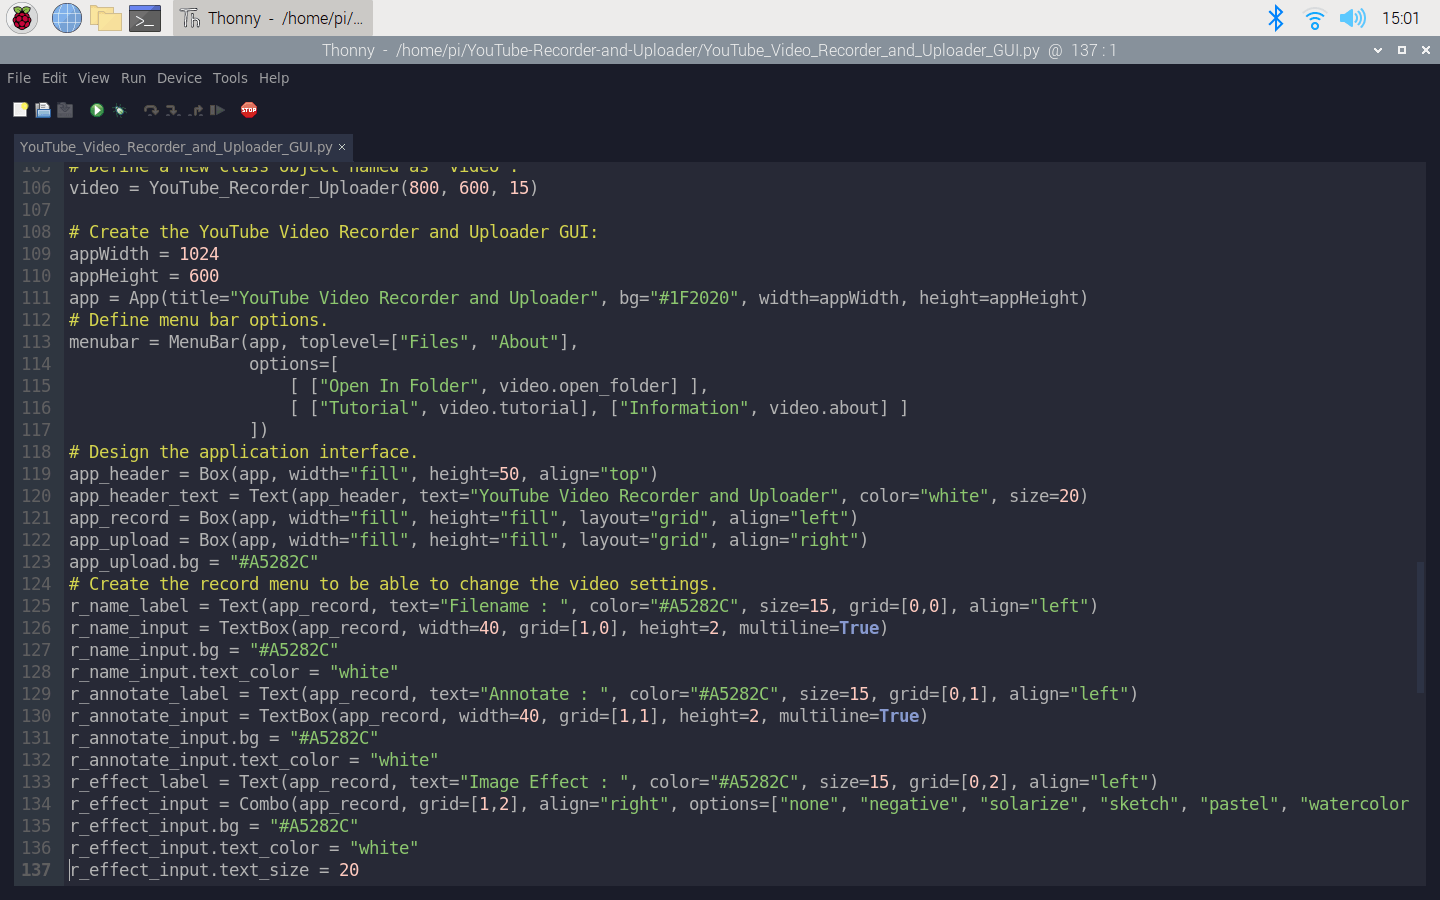
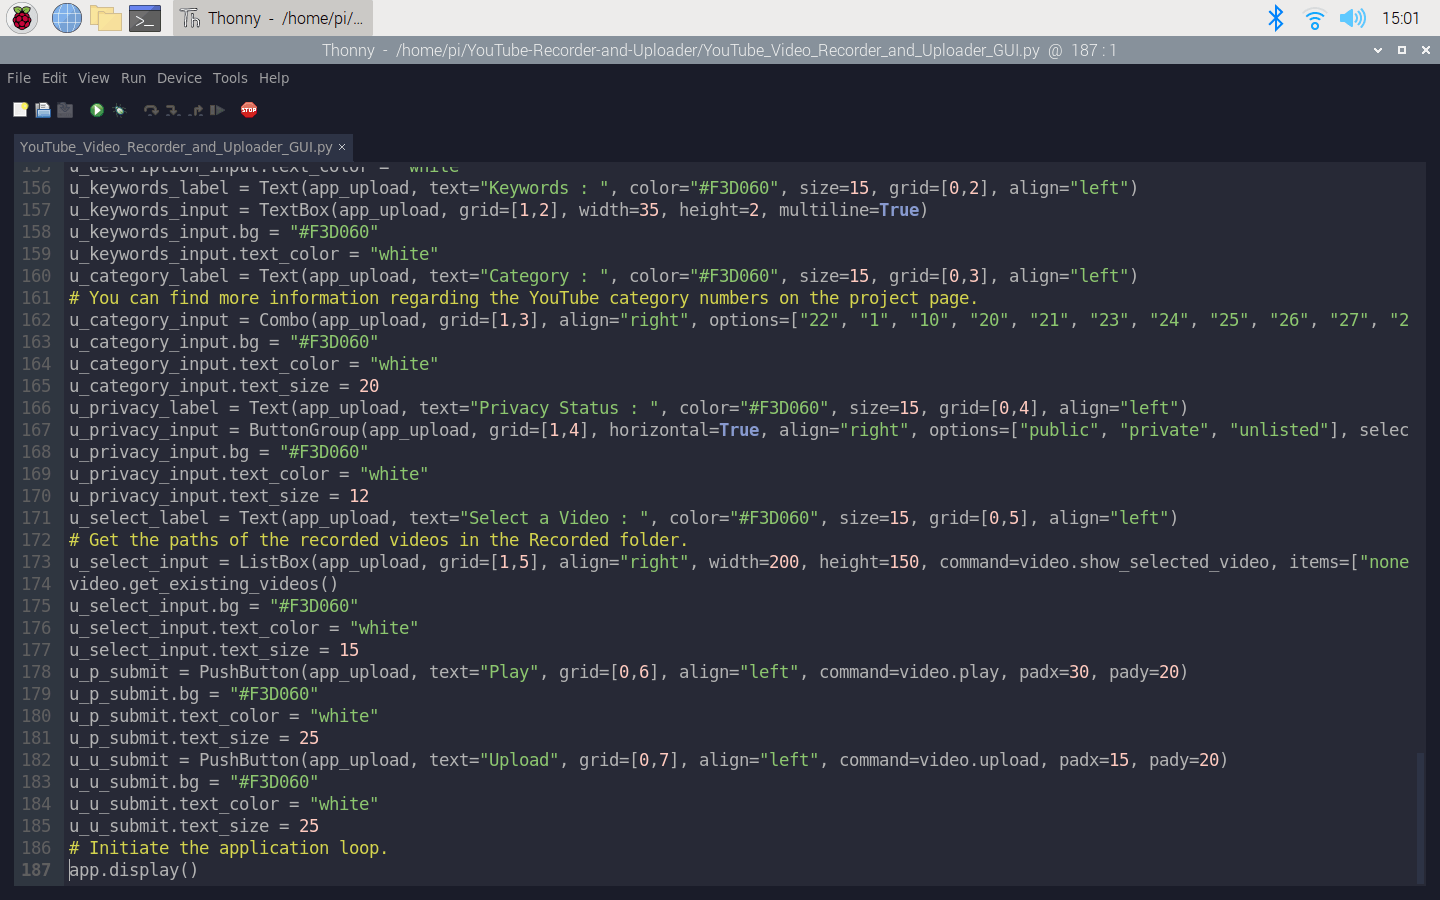
- Create the YouTube Video Recorder and Uploader GUI.
- Define menu bar options.
- Design the application interface - Header, Record, and Upload.
- Create the record menu to be able to adjust the video recording settings - Filename, Annotate, Image Effect, and Duration.
- Create the upload menu to be able to enter the required parameters by YouTube - Title, Description, Keywords, Category, and Privacy Status - and select a video in the Recorded folder.
- You can find detailed information regarding the category numbers in the Features.
- Get the paths of the recorded videos in the Recorded folder.
- Initiate the application loop.
Features
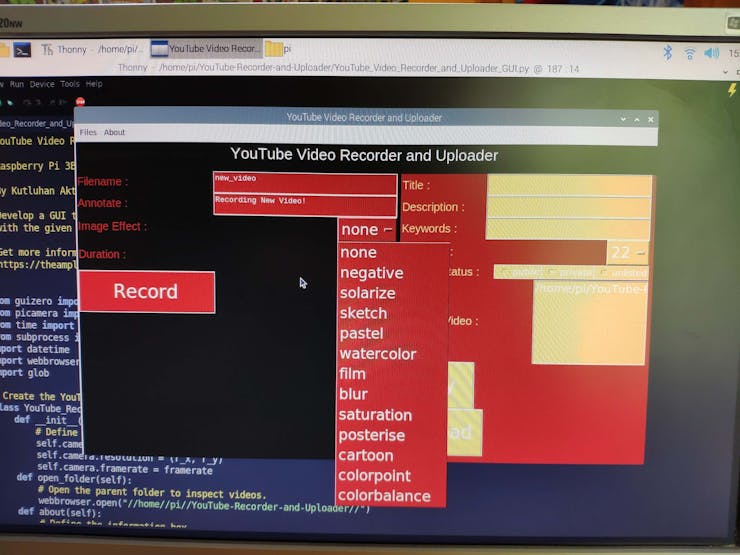
Record Menu:
1) You can define the filename and the annotation text (pinned on the video). For each video, the GUI (YouTube Video Recorder and Uploader) adds a timestamp at the end of the filename (example: test-05-06-2020_17.25.01.mp4). Also, you can define the video duration using the slider from 0 to 250 seconds.


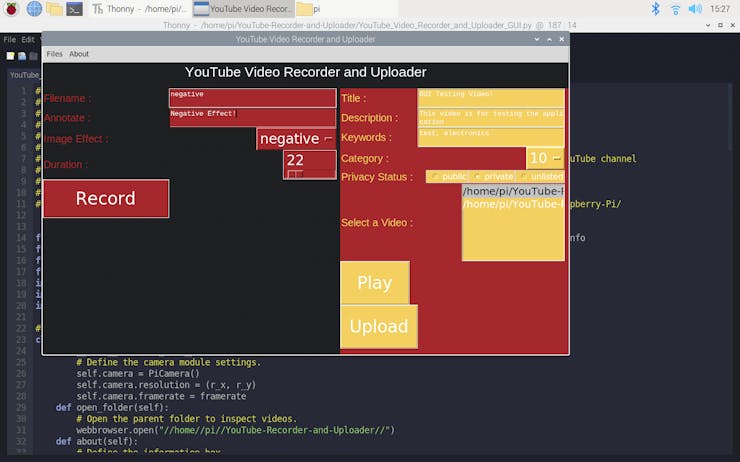
2) You can choose one of the predefined image effects (solarize, negative, pastel, etc., ) provided by the GUI before recording.
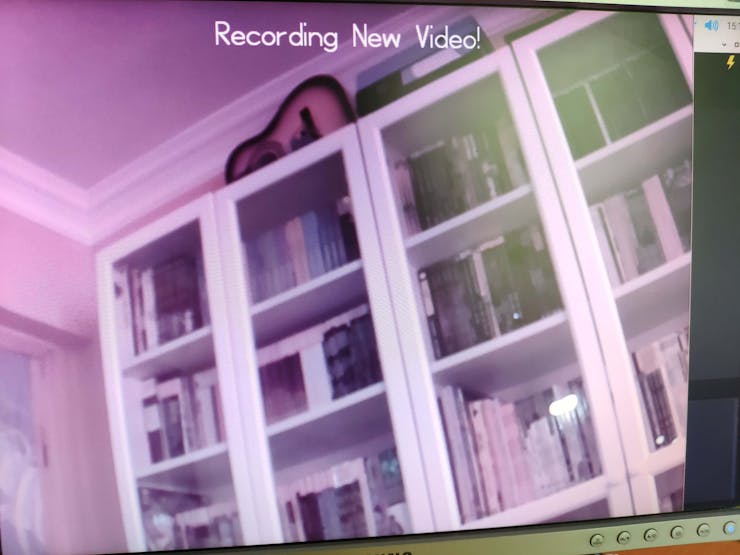
3) The GUI allows you to preview your video while recording.
4) After taking a video by clicking the Record button, the GUI updates the video list to insert the recently recorded video's path automatically.
5) The GUI saves videos in two file types - H264 (default) and MP4 (automatically generated by the GUI) - to the Recorded folder.

Upload Menu:
1) You can define the video parameters required by the YouTube Data API - Title, Description, Keywords, and Privacy Status - in the GUI (YouTube Video Recorder and Uploader).
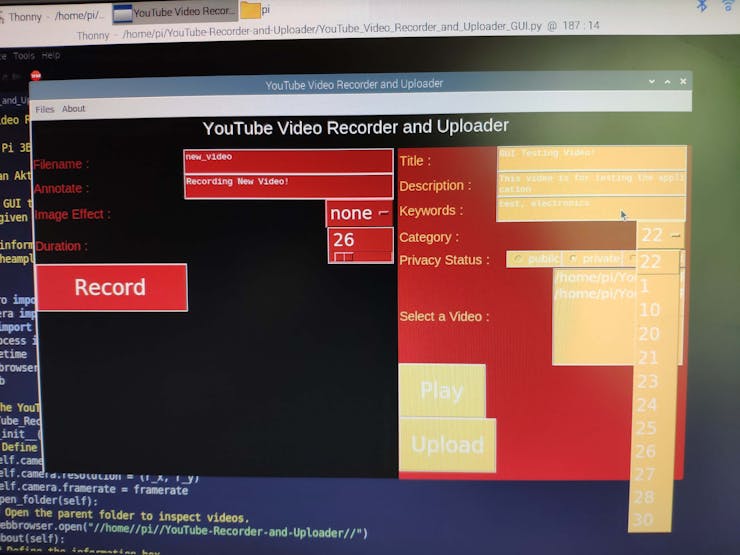
2) YouTube has a category list in numbers by which you can change the default category (22) before uploading videos with the GUI. I added these categories which you can choose between:
- 22 - People & Blogs
- 1 - Film & Animation
- 20 - Gaming
- 21 - Videoblogging
- 23 - Comedy
- 24 - Entertainment
- 25 - News & Politics
- 26 - Howto & Style
- 27 - Education
- 28 - Science & Technology
- 30 - Movies
You can inspect all categories from here.
3) You can select the video you want to upload to YouTube on the list box. The GUI notifies you with an information (info) message, including the path of the selected video, to avoid selections by mistake.

4) You can play the video with the omxplayer before uploading it to YouTube if you want to check the video quality again.

5) When you fill all the required parameters, you can upload the selected video with the given parameters to your YouTube channel by merely clicking the Upload button, without any further action :)
6) Go to your YouTube Studio to view the video you upload with the YouTube Video Recorder and Uploader GUI.


Shell:
1) The GUI prints notification messages after every command: you can see the recording and uploading settings or check whether the video is uploaded to YouTube correctly - if it is, you should see the video ID.

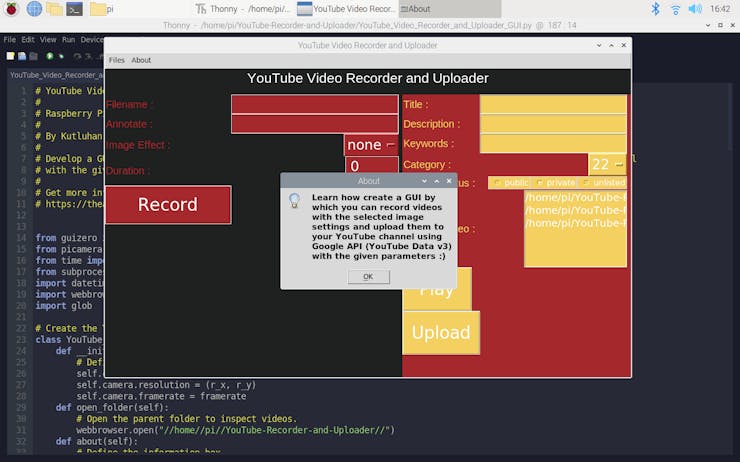
Menubar:
I added this menubar for fun :)
1) You can see the project explanation in a nutshell.
2) And, you can access the videos and other files by clicking the Files button.

Connections (Hardware)
If you are a novice in programming with Raspberry Pi, to go to the official Raspberry Pi setting up tutorial, click here.
To learn how to connect the Raspberry Pi Camera Module to your Raspberry Pi and take pictures, record videos, and apply image effects, go to the official getting started with the camera module tutorial.

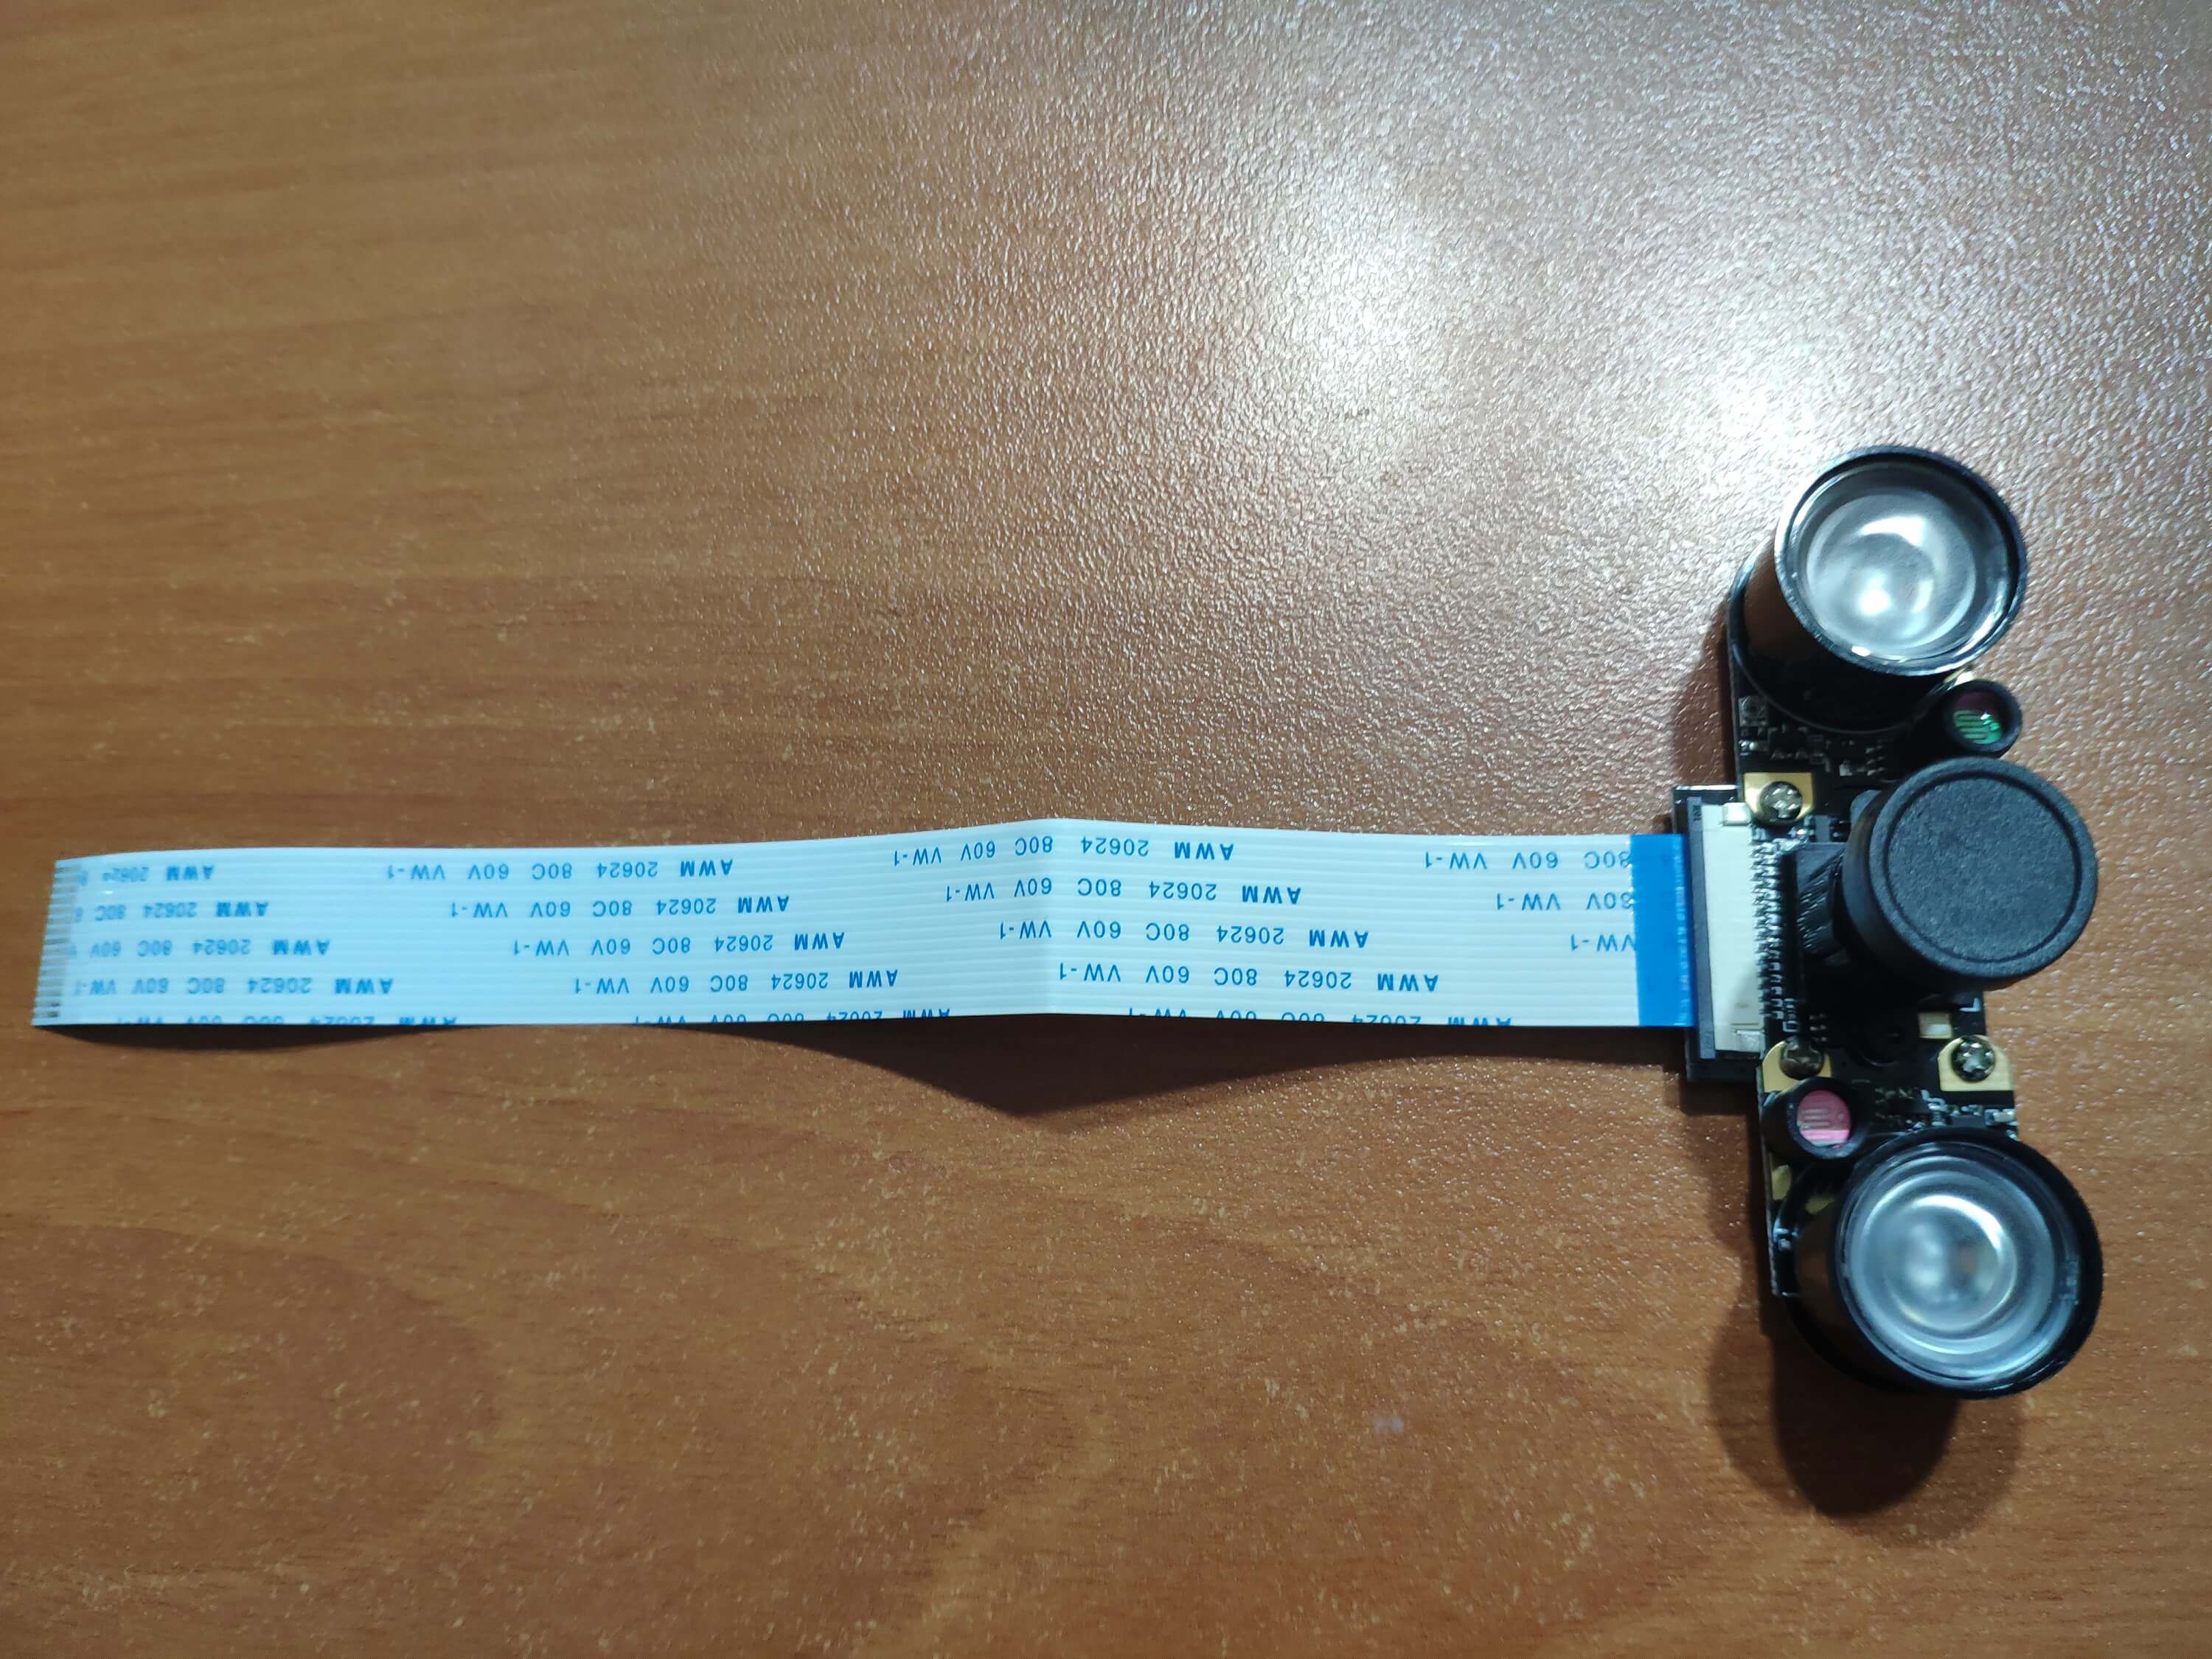
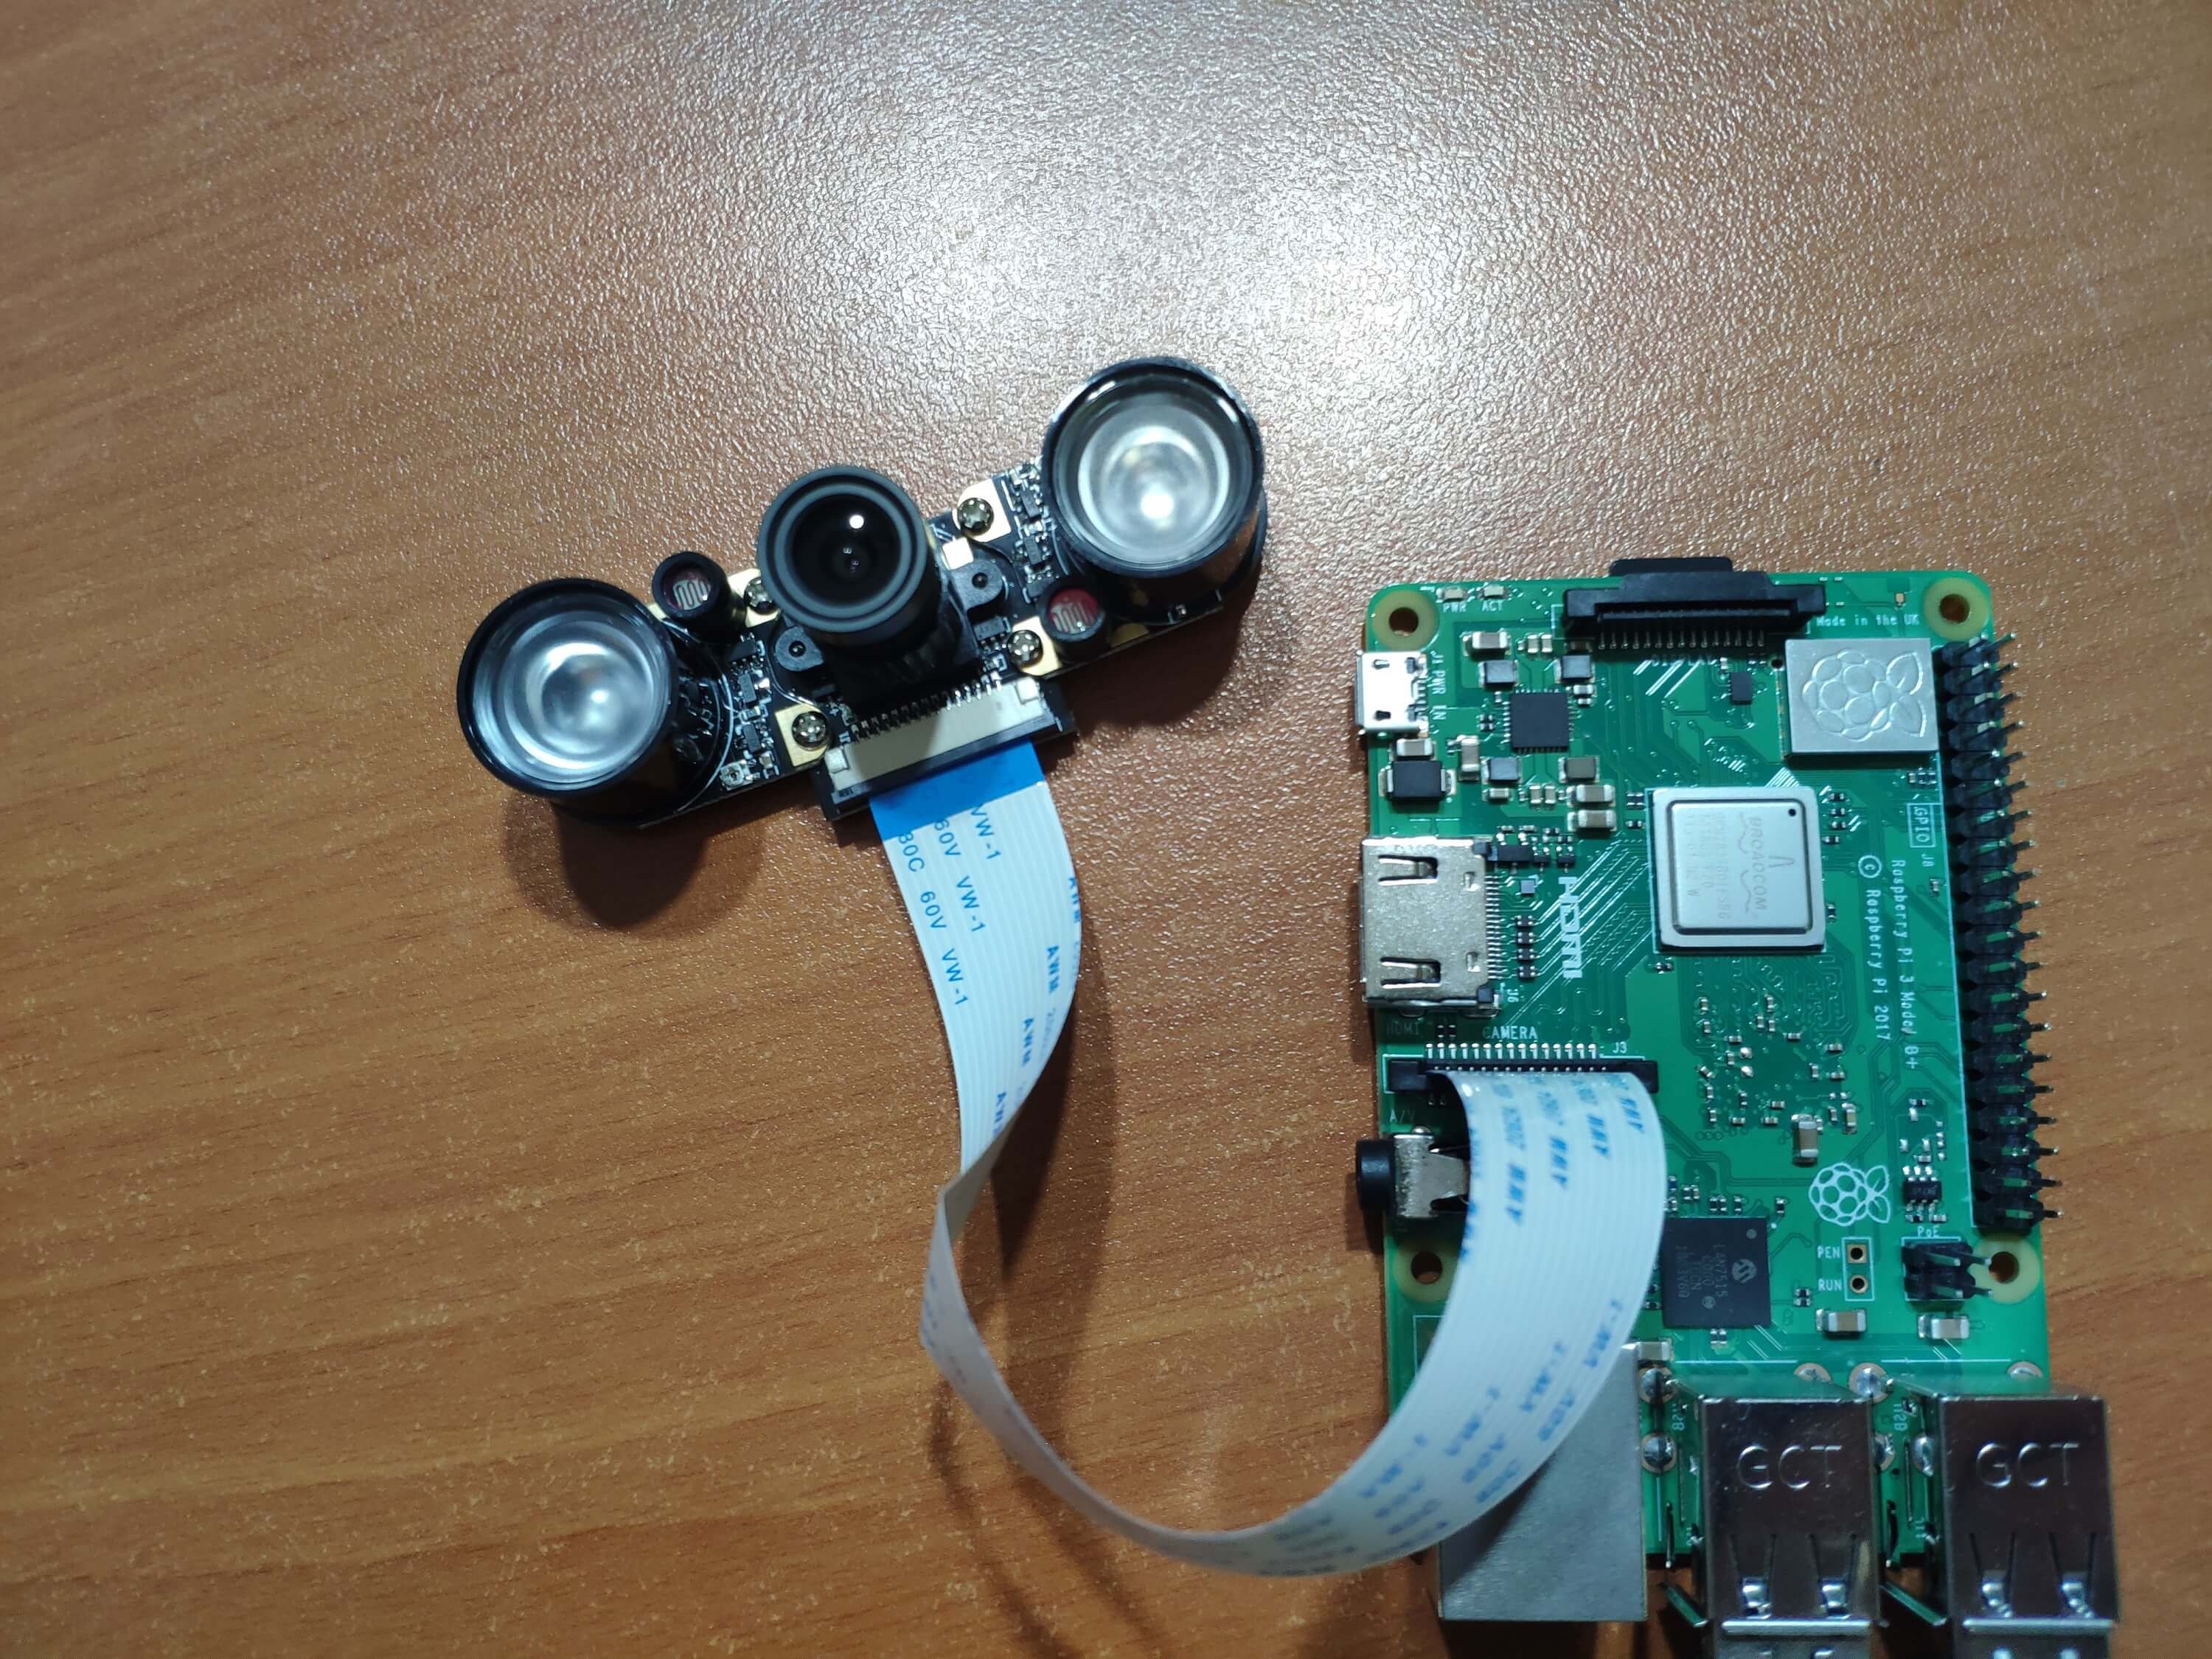
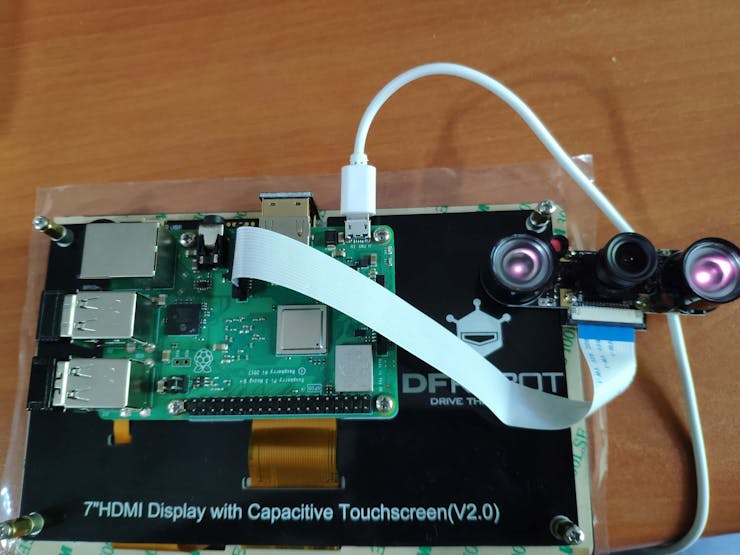
Assemble the DFRobot 5MP Night Vision Camera and connect it to your Pi.

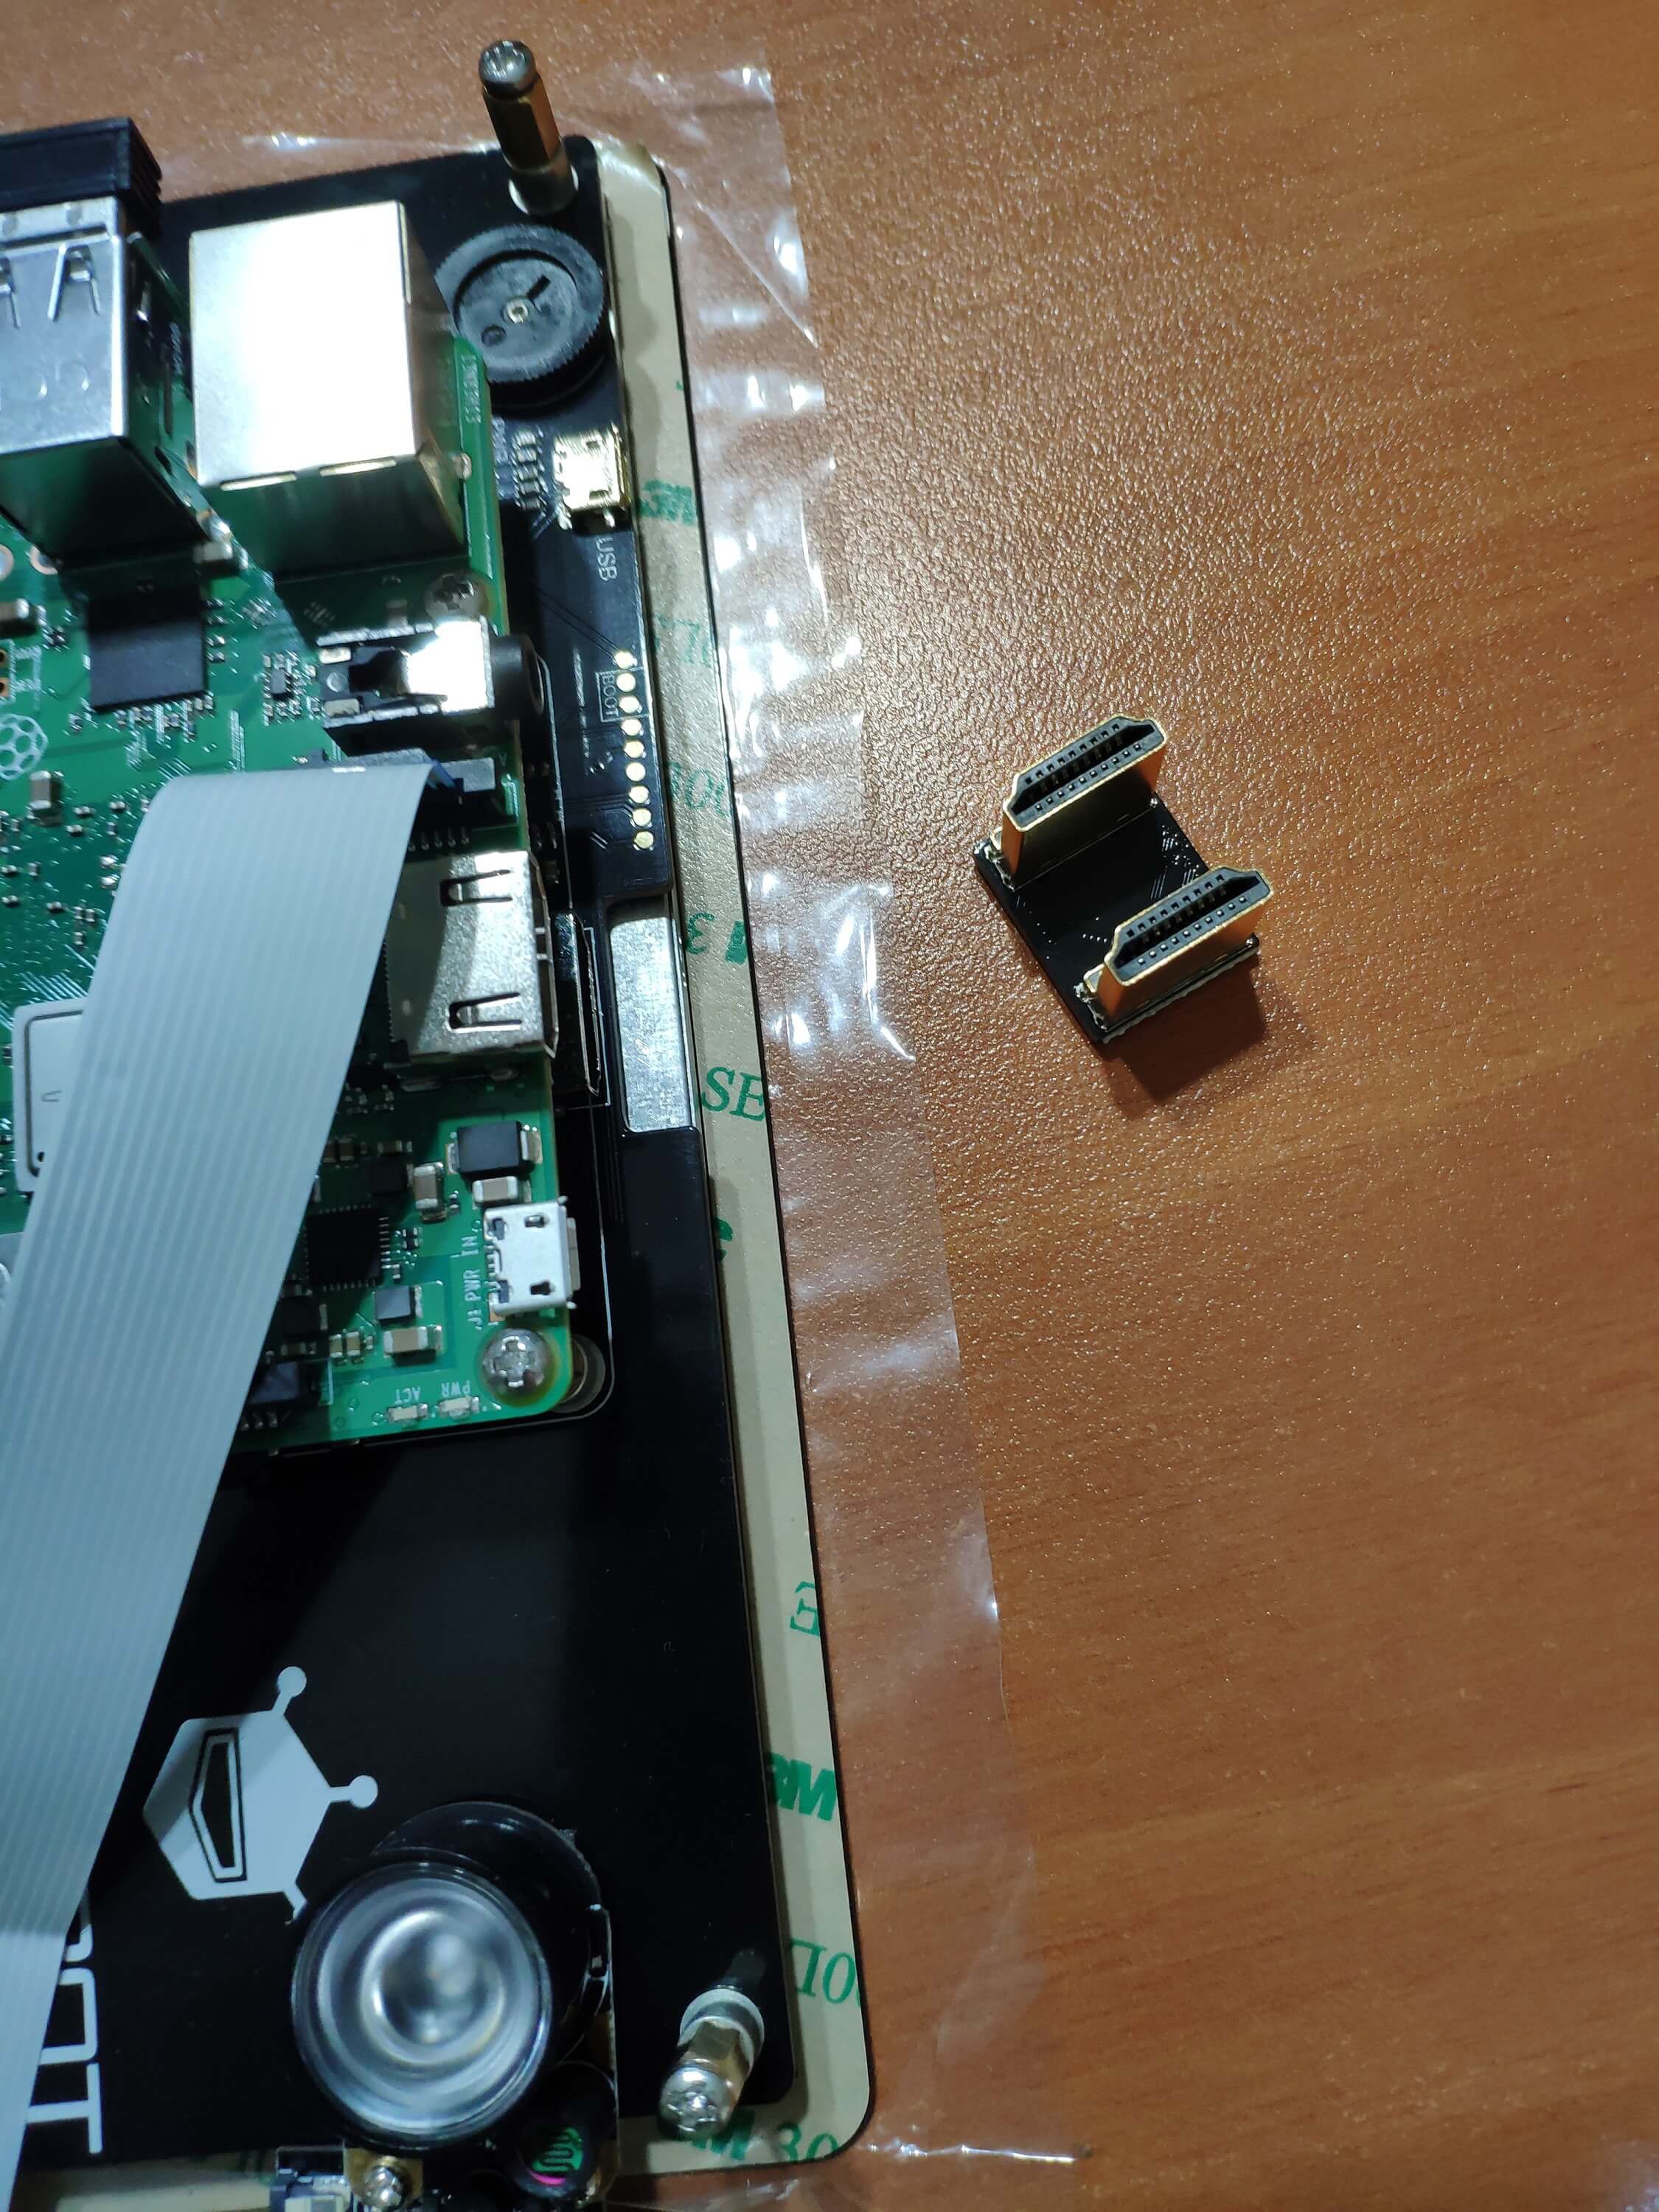
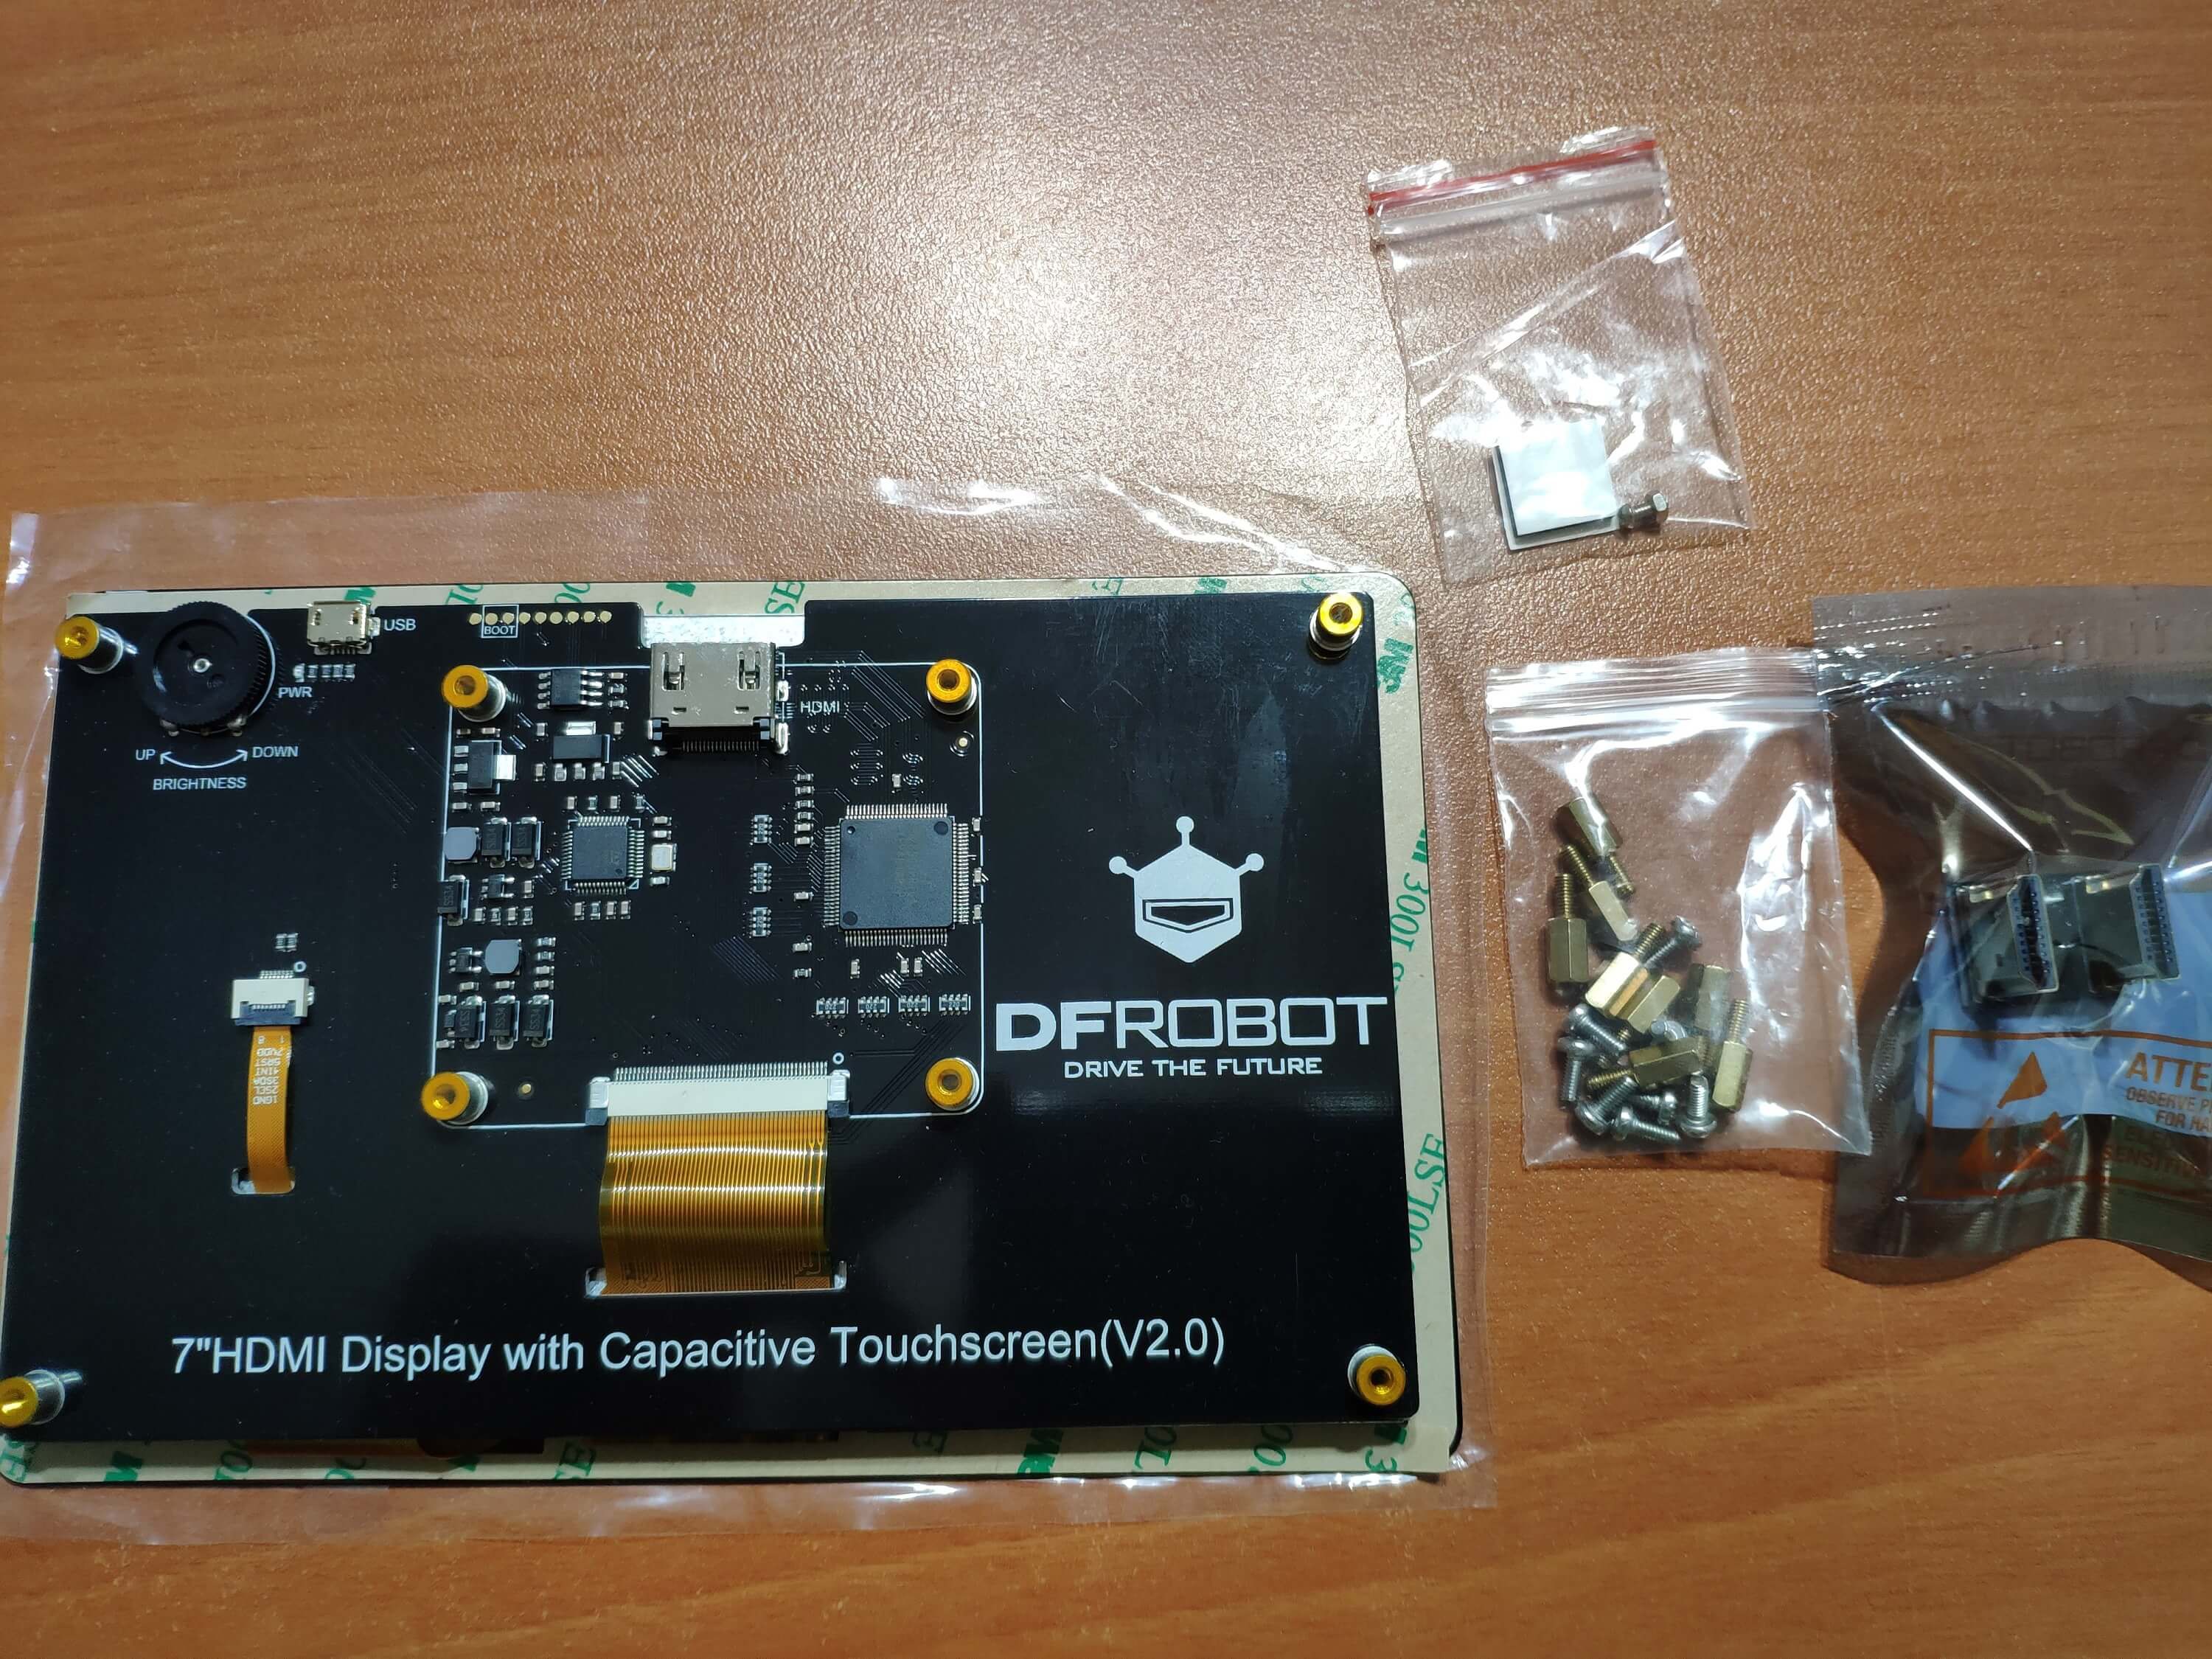
DFRobot 7'' HDMI Display with Capacitive Touchscreen is a very reliable and compatible screen for your projects with Raspberry Pi. Attach your Raspberry Pi to the screen using the standoffs and machine screws. And, connect the Pi to the screen using the well-thought Raspberry Pi HDMI Adapter. As a bonus, you do not need any driver.
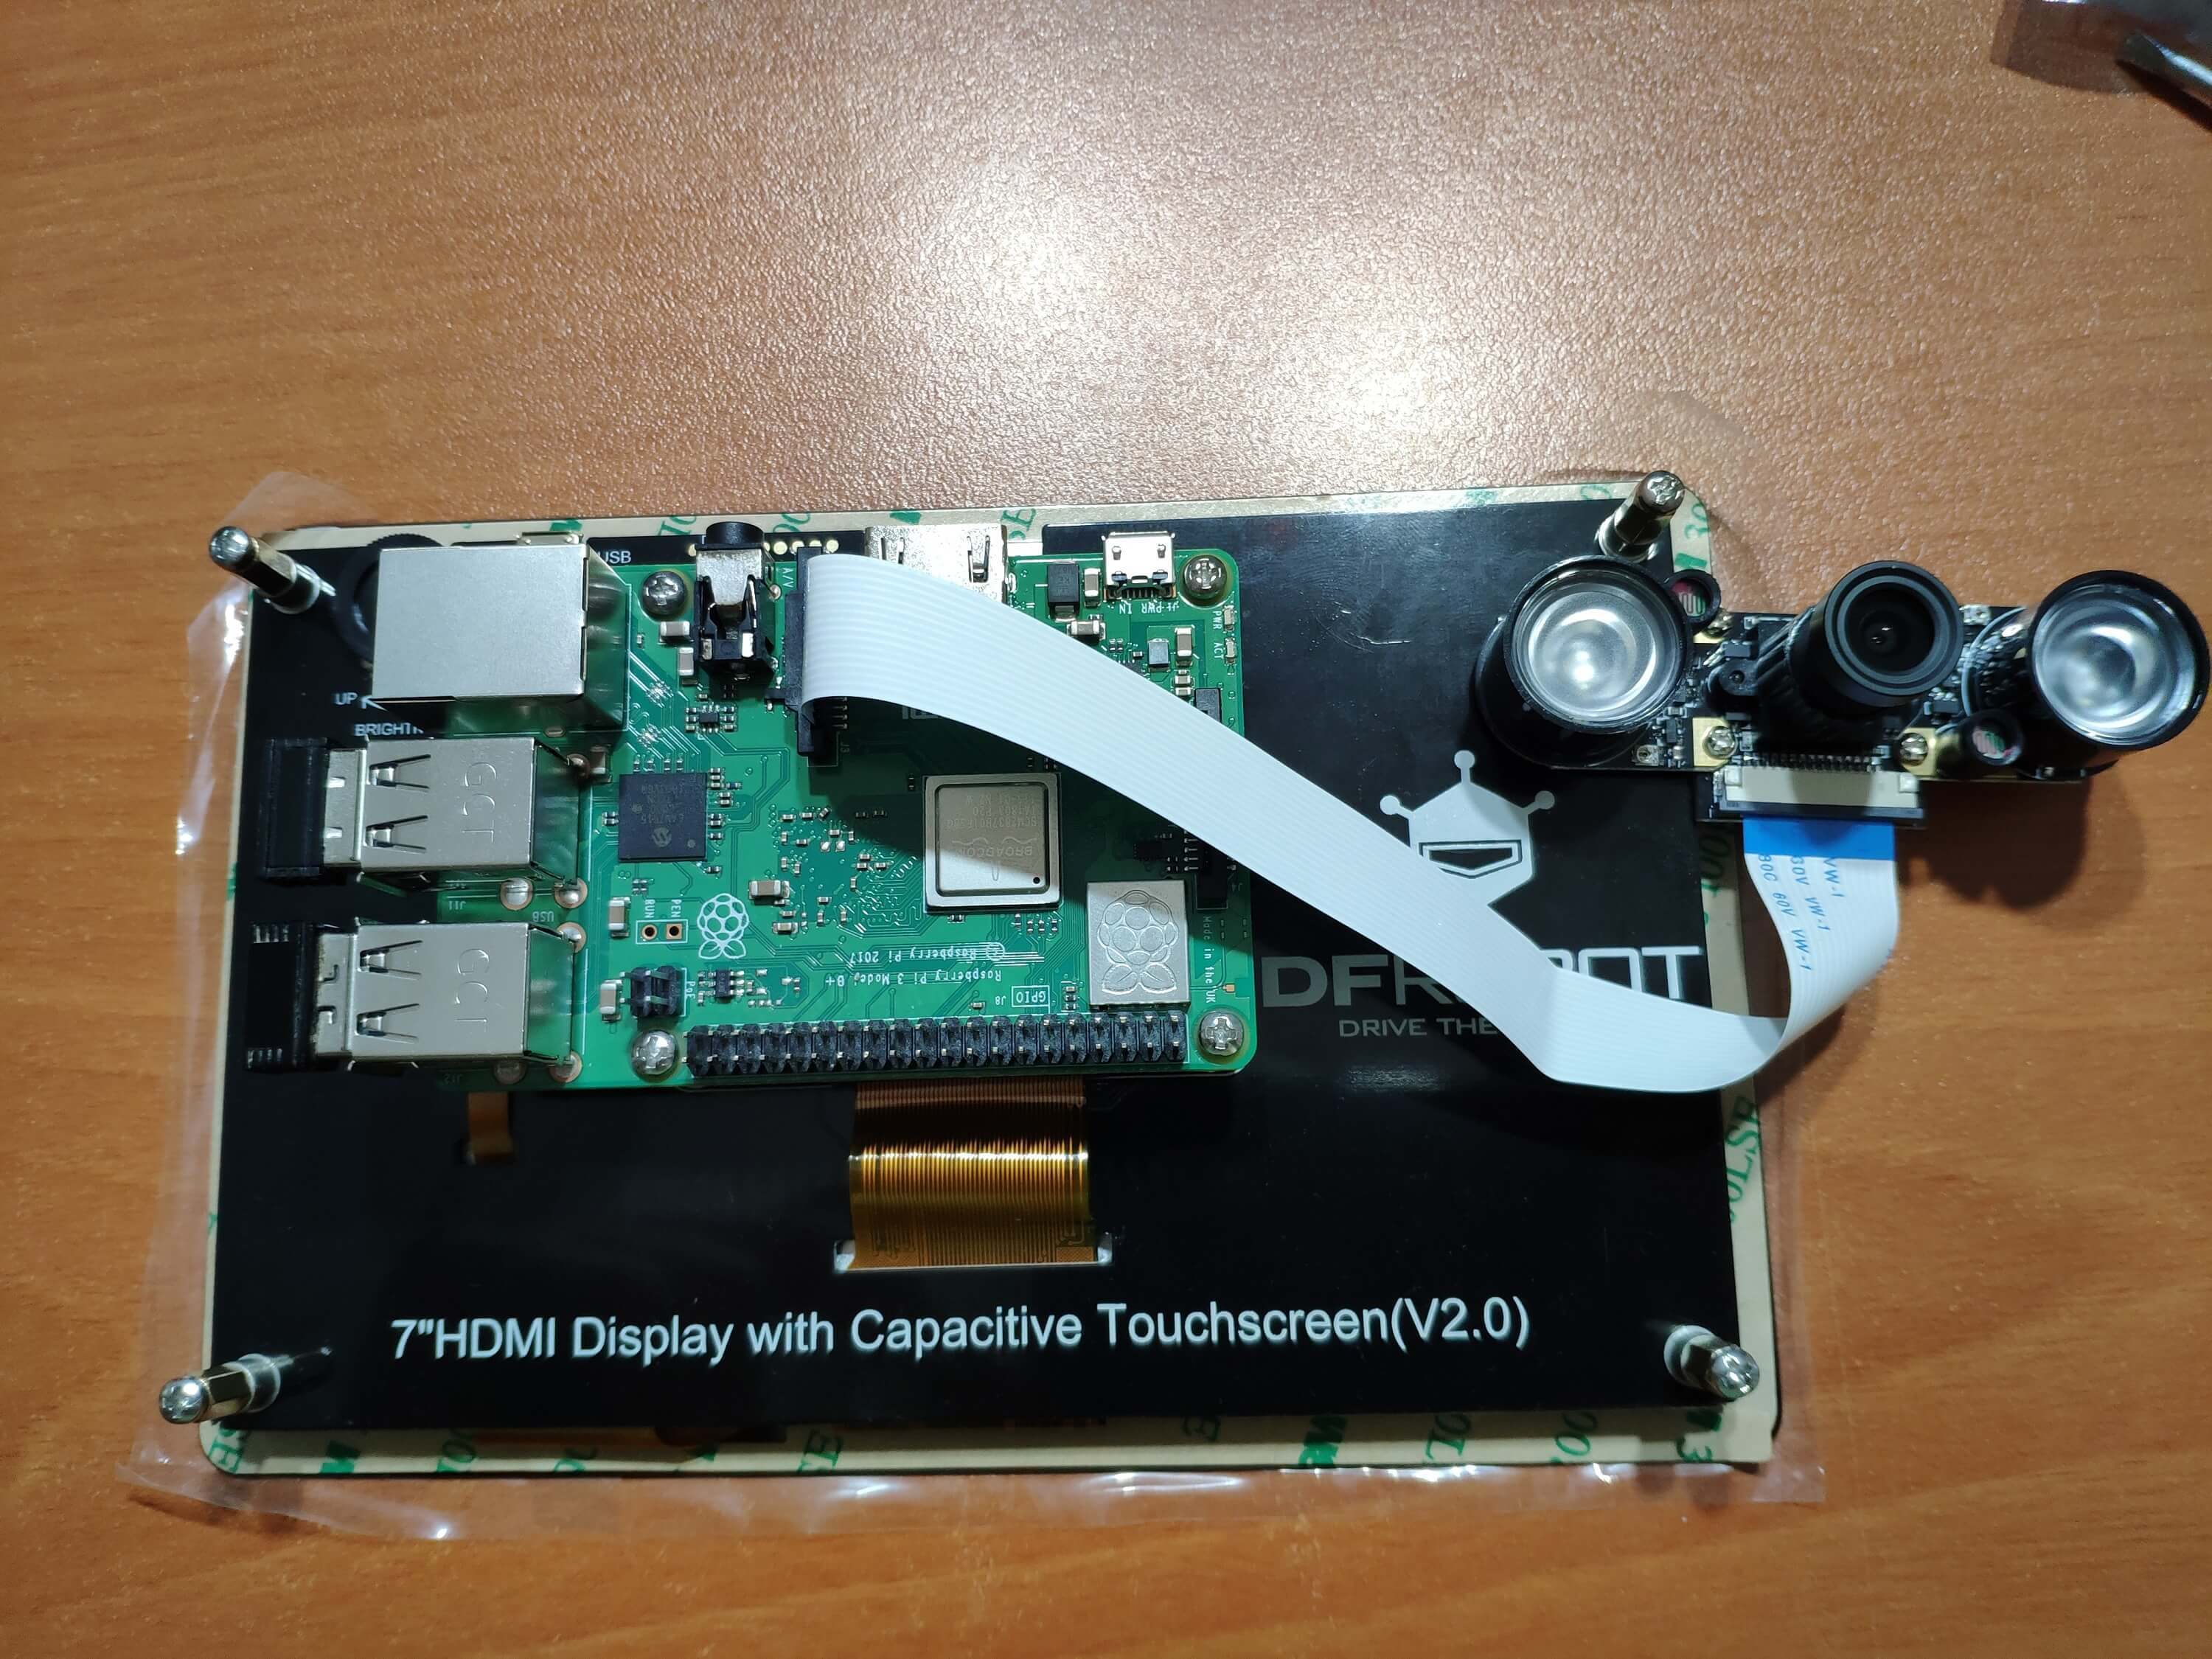
You can fasten the camera to the back of the screen using the little band coming with the camera module.
Now, you can use the GUI (YouTube Video Recorder and Uploader) with DFRobot 7'' HDMI Display with Capacitive Touchscreen and DFRobot 5MP Night Vision Camera :)


Conclusion and Testing Features
You can see the recording and uploading processes in the project demonstration video.
The video uploaded with the parameters shown in the Features:
Video recording with the negative image effect setting:

Video recording and uploading with the solarize image effect setting:
Video recording and uploading in the dark to test the night vision camera:

Outdoor testing while birdwatching :)