Click here to go directly to Digitspace's product page.
Constructing the camera
At first, putting together all the hardware components to construct the camera may seem intimidating to do, but from my experience, it is actually quite straight forward and can be done without any major difficulties. However, my number one tip is to make sure that the various components are put in the right place as some parts may visually appear the same but are slightly different in size or shape, like some of the acrylic parts and the screws. As a result, I recommend organising all the smaller components in groups first before starting as loosing parts can be a big issue for you as well.
Secondly, one of the small issues which I faced when building the camera was in regards to the wiring of the servo controlling the horizontal movement as you may need to force the connecting cable through small gaps to make everything work well. Nevertheless, it should not be a problem that will damage the cable or cause any open circuit, but I would advice you to try and use minimal force only when constructing any aspect of this product.
Lastly, make sure everything is tightened well at the end as that will ensure that the operation of the camera is smooth and works with no problems when put to the test. Refer to the video below on how to construct the camera from start to end (you can pause or slow it down to follow along at certain parts):
When mounting the plastic studs connecting the acrylic base piece to the Micro:bit expansion board, you may want to use a bit of force but make sure that it is positioned in the right direction first before pushing. Furthermore, be careful when positioning the camera in place as you would want it to be straightened out but without any damage to the antenna or the ribbon cable in the process.
Wiring the camera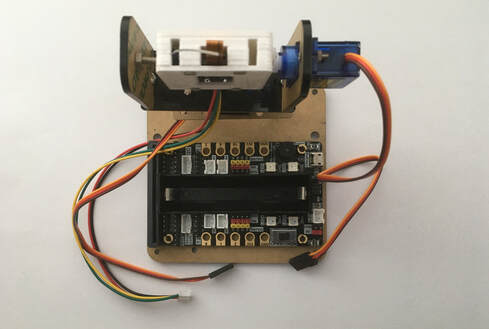 1. After the construction of the camera, we will need to connect a few wires from the camera and the two servo motors to the Microbit expansion board. First of all, make sure no power is connected to the Microbit, its expansion board or the camera itself.
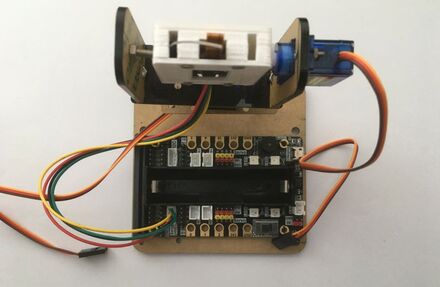
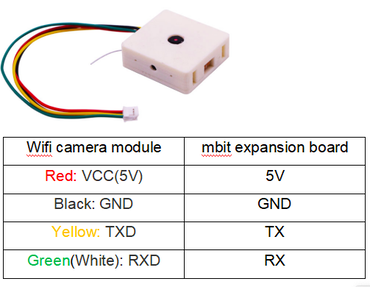 2. To start with, connect the camera's cable, the one with a male 4-pin JST connector on its end, to the female 4-pin JST connector located on the Microbit expansion board marked 'Serial Port'. There is only one direction which the JST cable can fit into the connector, so you don't need to worry about the polarity or the cable being placed in the wrong way. An image of the camera pinout is above for further reference.
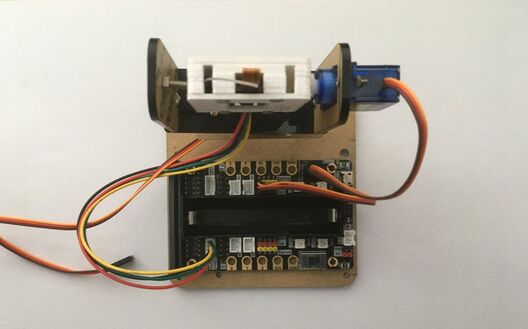 3. Next, for the servo motor controlling the vertical movement of the camera (up/down), connect its 3-pin wire to the row of male pins on the Microbit expansion board marked 'S1'. The three colours of the wire will match up to the three colours on the pins on the expansion board with the brown wire closest to the 18650 battery, so make sure that it is connected in the right way before powering anything up at the end.
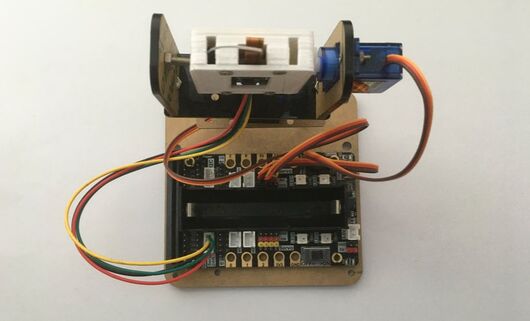 4. For the last wire, it connects from the servo motor controlling the horizontal movement of the camera (left/right) to the Microbit expansion board so connect its 3-pin wire to the row of male pins marked 'S2'. Once again, the three colours of the wire will match up to the three colours on the pins on the expansion board with the brown wire closest to the 18650 battery, so make sure that it is connected in the right way before powering anything up at the end.
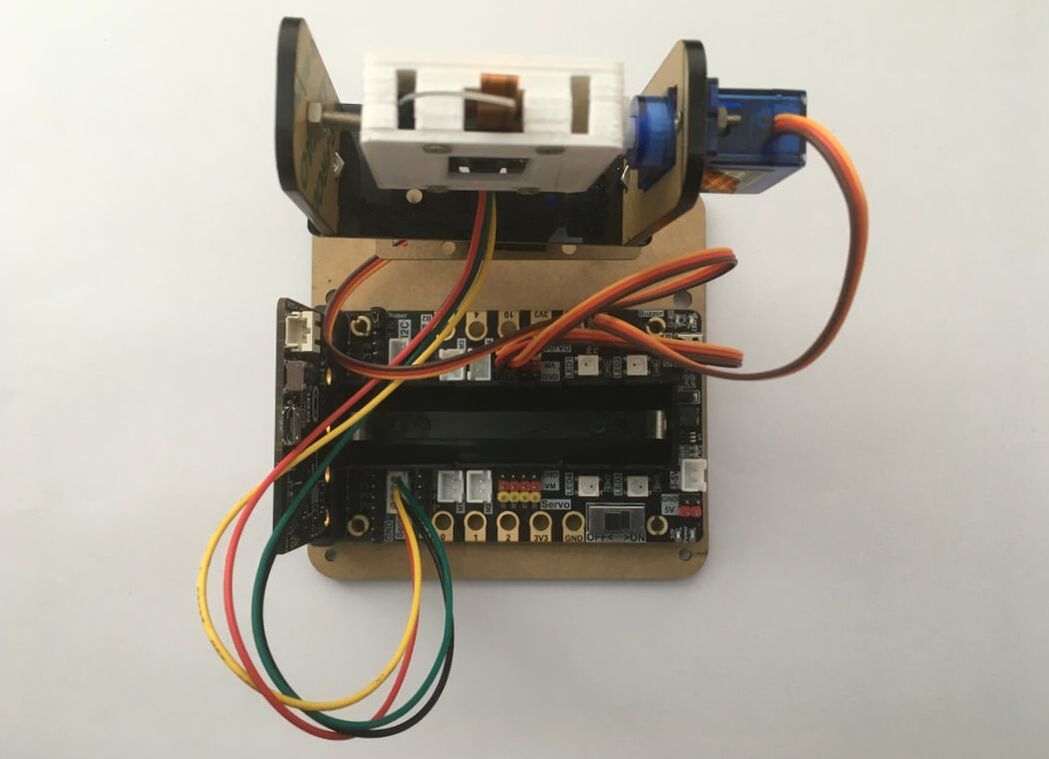
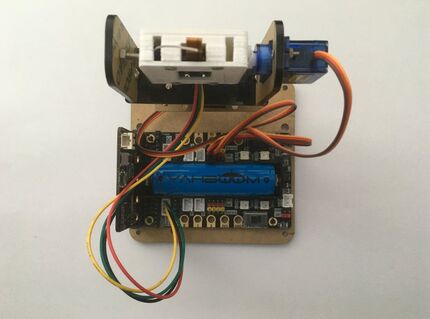 5. Now, to complete setting up the hardware part of the camera, you can insert the 18650 battery into the battery holder and the Microbit into the expansion board's port as seen with the final pictures above. Make sure that the polarity of the battery is correct as shown by the markings in the picture before turning on the power switch as well as the direction of the Microbit board in the port as shown above also.
Programming the camera
In regards to the coding aspect of the camera, we will be using the Microsoft MakeCode Blocks/JavaScript Code Editor which you can access online through any web browser or offline through the software being downloaded to your computer. If you choose to use the online version of Blocks, visit this link here and open a new project to get started. The same will apply to the offline version of MakeCode. Now, let's get started on how to import the program and the necessary library needed to code the camera, as provided by Yahboom: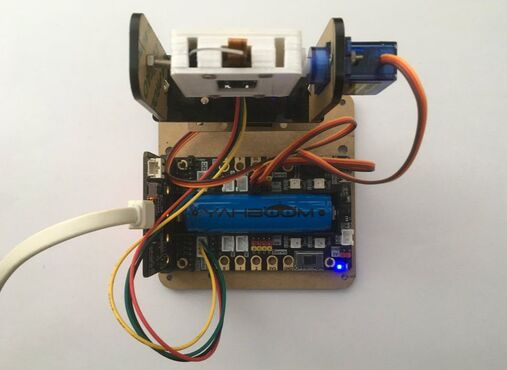 1. Firstly, you will need to plug a micro-USB cable from your Micro:bit to your computer in order to program and upload the code. Once you have connected the board to your computer, it will pop up as a USB flash drive which you will be uploading your programs to once you are done with everything.
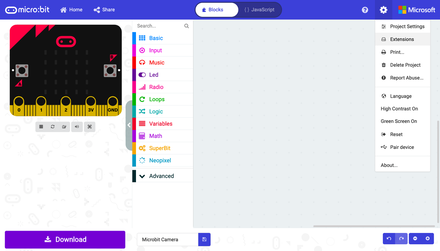
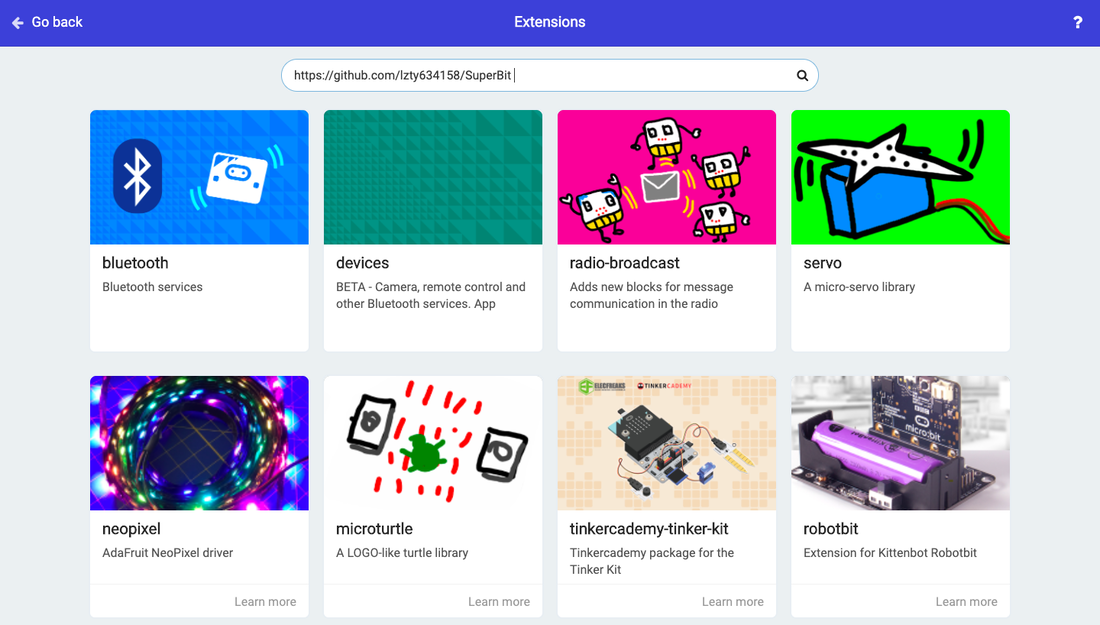 2. Now, in the Blocks editor, go to the Extensions page in the settings menu bar and insert the link below to the search bar for the custom Yahboom package to be implemented into the editor: https://github.com/lzty634158/SuperBit
Be sure to click on the package once it shows up and it will automatically be downloaded into your editor.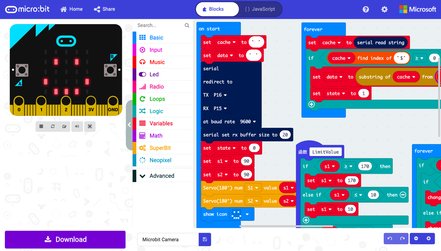
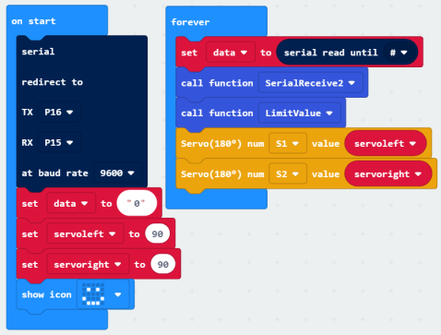
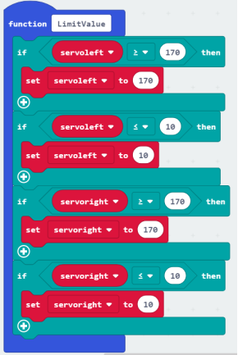
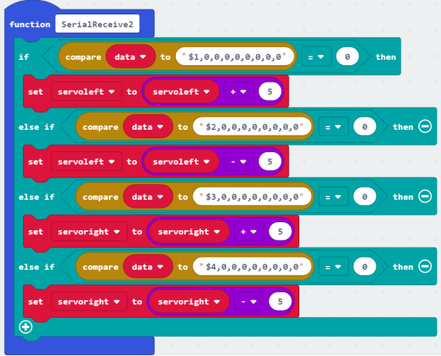 3. From here, in order to program the camera, you can either do two things: drag the blocks in the editor to make the code manually or simply just download the code directly into the editor to upload. If you are new to using the Microbit, I would highly recommend following the pictures above and simply making the code yourself as it isn't too difficult, but if you want to save some time, download the file attached to this project.
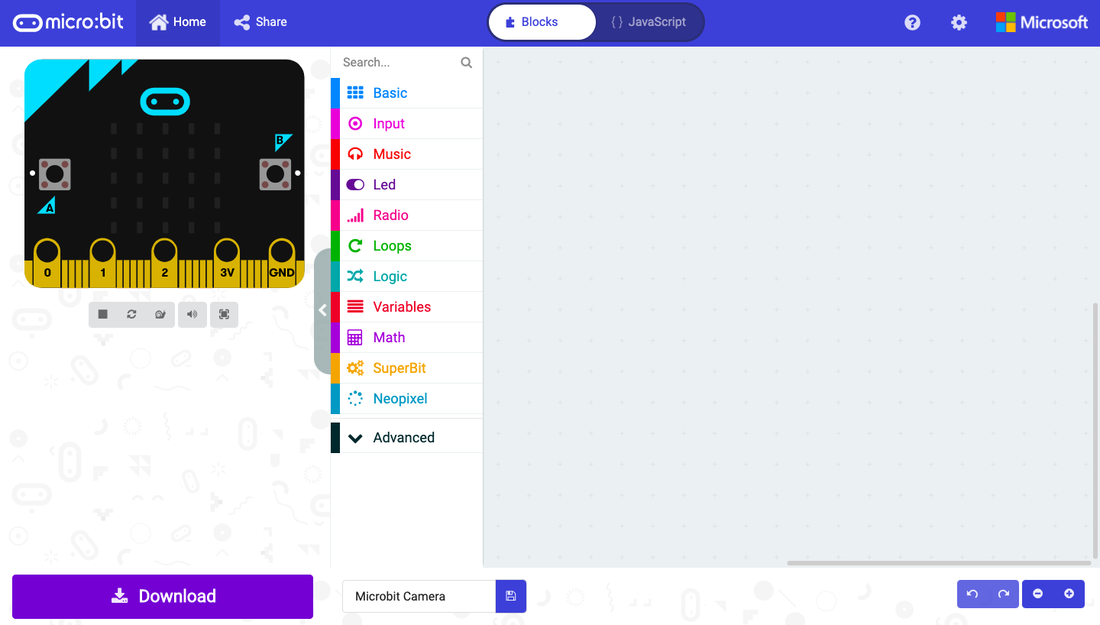
 4. In order to upload the code after you have downloaded the file, you will have to exit back to the homepage of the Blocks editor from your new project file and click the Import button to the right of the page as seen with the picture above.
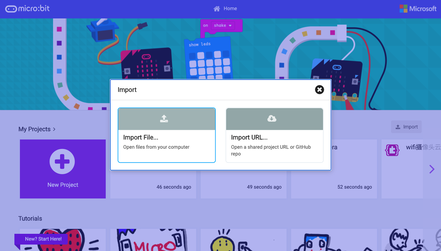
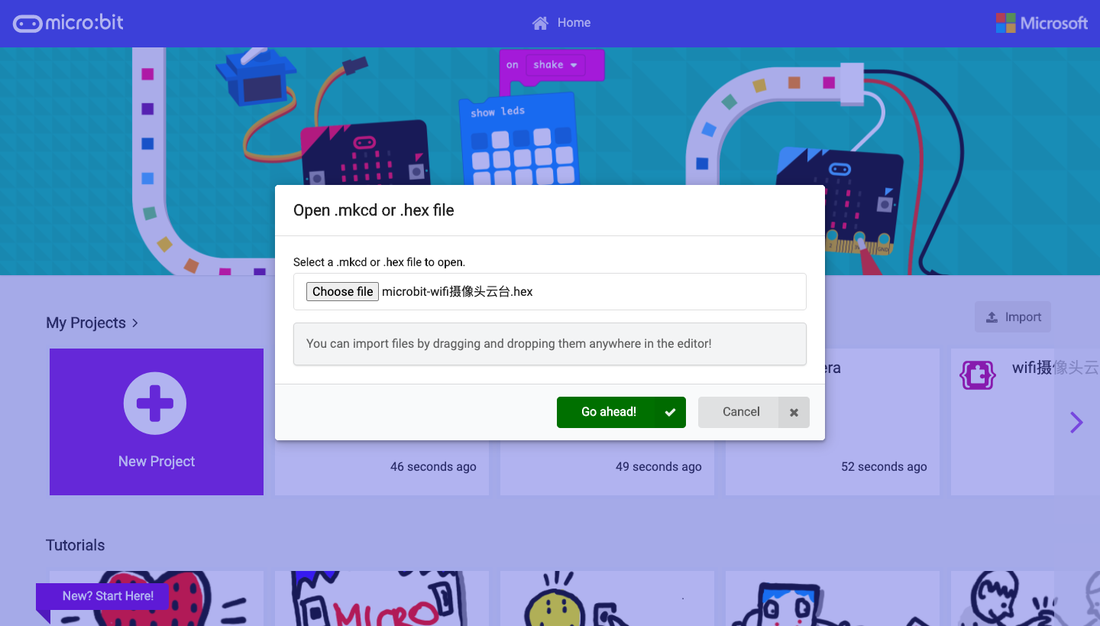 5. Now, click the 'Import File..' button, upload the downloaded hex file for the code which you have downloaded/made above and press 'Go ahead!' where it will automatically upload the hex file to the editor as a new project, which you can open up and view.
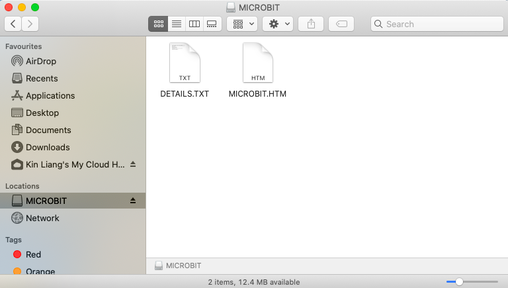
 6. If you chose to download the file from above, you can simply drag the downloaded file into the Microbit's folder directly since it is recognised as a USB flash drive by your computer now. Alternatively, if you chose to write the code manually, you will need to press the 'Download' button in the editor, where a file of the code will be generated for you to upload to the Microbit's folder directly. From there, it will take a few seconds for the upload to complete and once that's done, you can safely disconnect the Microbit from your computer.
Interfacing the camera with its companion app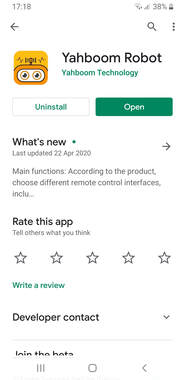
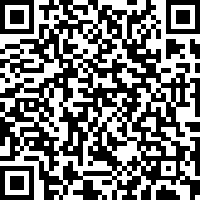 1. In order to wirelessly view the camera on your Android or iOS device, you will need to download its companion app, YahboomRobot, through either searching it on the App Store/Play Store or by using a QR code scanner and scanning the QR code above. Due to the size of the file, it may take some time to download but be patient and if there are any services which the app requests access to, like WiFi or location services, be sure to grant access to complete the download successfully.
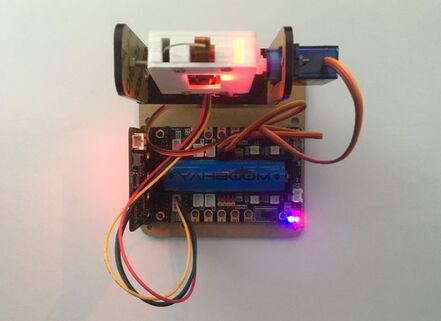
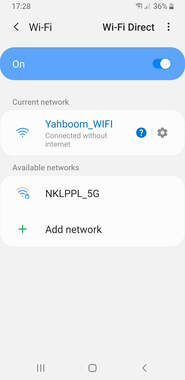 2. Once the app has downloaded, make sure that your camera is powered on, whether is through the battery or an external power source and connect to the WiFi signal named 'YahboomRobot' in your device's settings. There is no password so connect to it right away and this is what establishes the wireless connection between your camera and your device.
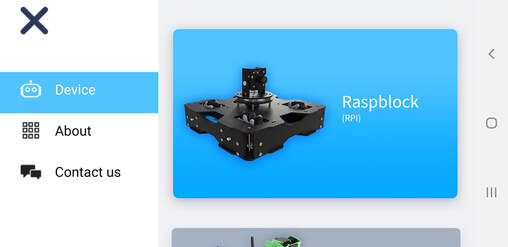 3. Then, open up the YahboomRobot app on your device and click on the menu tab on the top left of the homepage, which will take you to another page where you will select the device which you will be operating wirelessly.
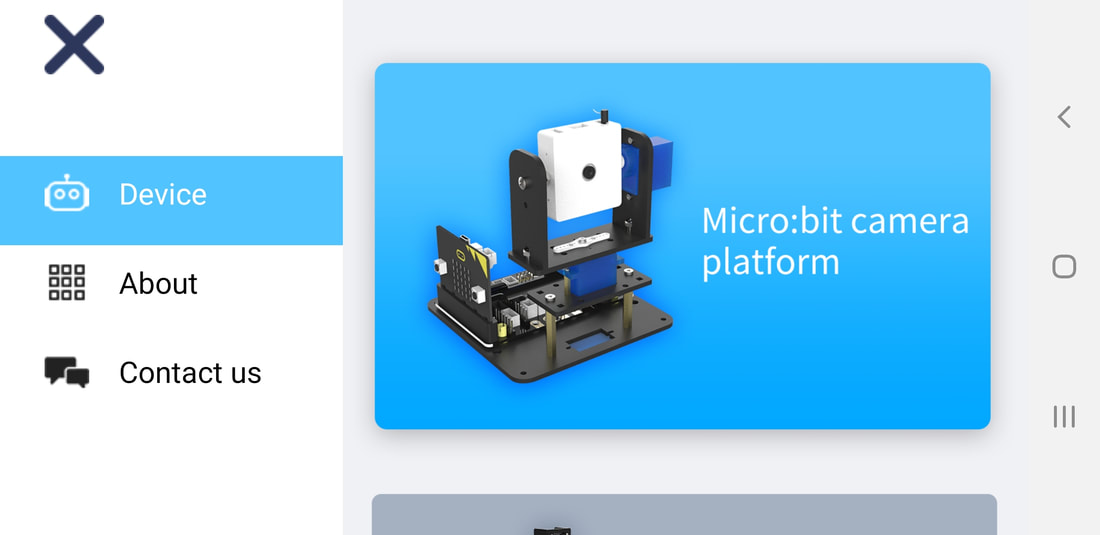
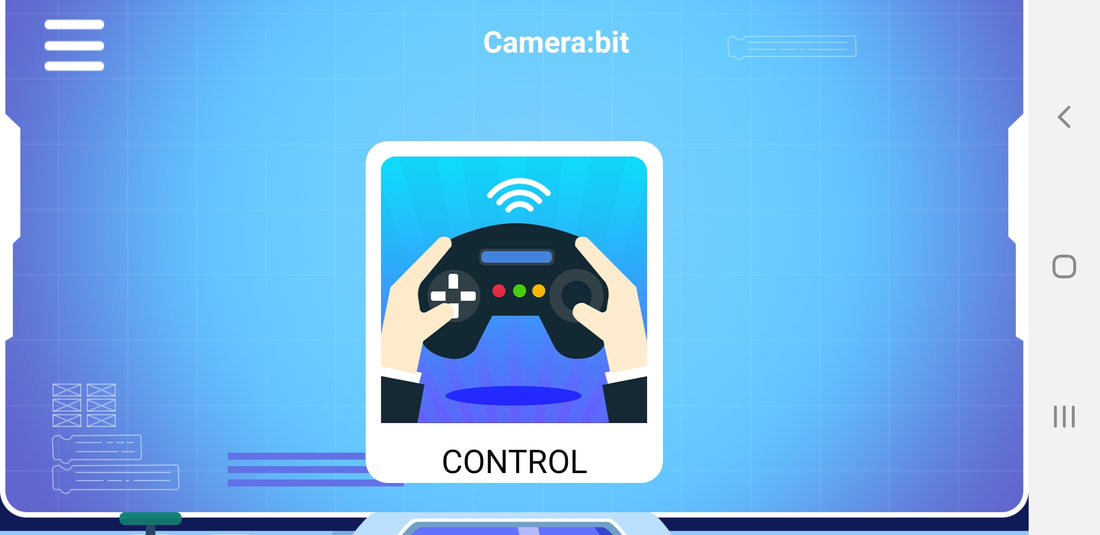 4. On the secondary page as shown above, click on 'Device' on the left-side of the page and scroll all the way down until you find 'Micro:bit camera platform'. Click on that and it will take you to its sub-page where you can simply press the only button on the screen stating 'CONTROL'.
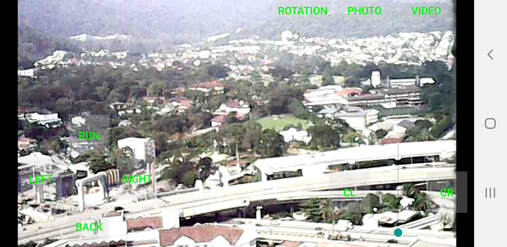 5. After that, you will be directed to the page as seen above where you can then have a live, real-time view of your camera. If we take a look at the left-side of this page, there are four buttons which control the up/down and left/right movement of the camera, where the camera is capable of moving in a range of 180° due to servo motors being used. On the bottom right of the page, there are two buttons which controls the camera to move to the extreme left or right directly through a press of those button and a slider at the bottom, which enables the camera to zoom in or out. If we look at the top right of the page, there are three labeled buttons allowing you to rotate the camera's view (which you may have to do upon startup) or take a photo or video (of what your camera is viewing). Now, the setup of your camera is done!
Conclusion
In conclusion, I personally enjoyed using and experimenting around with this product from Digitspace and even though it may seem complex at first, setting everything up is an absolute breeze after it is all completed. In my opinion, a product like this would be excellent for someone getting started with the Microbit, as it showcases some of its best features while providing a small introduction into basic electronics. Furthermore, with an affordable price, this product is hard to beat and especially with the camera built with a wireless connection capability to a device, it is fairly impressive as well. Moving on further, it is also possible to write your own custom code or make some changes to the code provided to suit your own needs but that is something which is quite advanced for makers who are just starting and I would recommend getting even more familiar with the Microbit first. All in all, I hope that from this project, you got a small look into what this product is capable of doing and you have now set it up successfully!
Amazing opportunities
Also, be sure to check out PCBWay, a leading manufacturer and distributor in PCB design and manufacturing. They have amazing prices and excellent quality in their services, so don't miss out on them! Plus, PCBWay has an amazing website, online Gerber viewer function and a gift shop so make sure to check out their links below:
PCBWay Free Online Gerber Viewer Function: https://www.pcbway.com/project/OnlineGerberViewer.html
PCBWay Gift Shop: https://www.pcbway.com/projects/gifts.html
Make sure you check out the review for this product by clicking here.
Enjoy! Contact us for any inquiries!