Do you have children or are you a classroom teacher? How many times have you thought about teaching in a fun, playful, and easy way for your student or child?
Perhaps, many parents and teachers use traditional teaching methods, because they do not want to innovate or do not want to leave the comfort zone.
Therefore, it is necessary to advance and see education with different eyes.
Education needs to be something fun and that allows the student to be engaged with the class.
But, after all, how to engage students and make the class fun and playful?
Imagine the following situation. Pay attention to that!
Imagine that you are a teacher and want to teach students the principal parts of the head. The parts are mouth, nose, ears, eyes, and hair.
Would it be possible to teach these parts with the Arduino?
Yes, it is possible to use Arduino to teach different concepts in the classroom. In this article, I will show you how to teach the main parts of the head with playful games using Arduino.
For this, we will use this 3D printed circuit board with the drawing of a child's face.

Figure 1 - Printed Circuit Board with the image of a child's face.
Note that on the printed circuit board structure there are a total of 7 LEDs. Each LED is on a part of the head.
We have LEDs on the mouth, nose, ears, eyes, and hair.
Thus, we can use these LEDs to signal each region of the head and develop playful activities. But, after all, what types of activities can we develop with this printed circuit board?
Playful Activities with Arduino
Well, as I already told you, the purpose of this plaque is for it to be applied in teaching. But, let's think! As a teacher, you can use it in your classes or at home with your children.
Here's the secret and I'll tell you now! Pay attention!
1 - Recognition activity of the main parts of the head
The first activity that I can indicate to you, is using 5 buttons. Each button will represent a part of the head. Thus, each time you press a button, which represents a part of the head, the respective LED will be activated.
That way, you can test your student/child, so that he tells you what is the name of the part that is triggered.
For example, imagine that you pressed the eye button.
At that moment, the LED of the eyes will be activated, the child will see and must answer that the triggered region is the eye. This way, you can test your student's knowledge.
If the child says another name, you can correct it and then press the button of the region he spoke to, to compare the right and wrong region.
2 - The Questioning Robot
There is another more interesting activity. You can use an MP3 module and, through audio, ask questions to your student.
The system consists of you choosing a region of the head and playing audio with her name.
For example, the system makes a random choice and speaks the name of a head region
The child will hear the name of the head region and must press the button that refers to that region.
The system will read the button, activate the LED of the mouth, and, soon after, the robot will check if it is right or not. In case she is right, he congratulates on the victory. Otherwise, he activates the LED of the mouth region, makes the correction, and moves on to another question.
See, is this system very interesting and fun for children's learning?
To help you, I will create an example application with you. You will learn how to develop the first example and then I will make available the code and files for the project boards.
Developing the Project
Let's develop the project for example 1 and create our Free NEXTPCB Printed Circuit Board. The goal is to allow the teacher to press a button, turn on the LED on one part of the head and the child responds which part is chosen by their teacher.
For this, we developed the circuit below. Each LED represents a part of the boy's head.

Figure 2 - Electronic Schematic in the Breadboard.
In this project, the teacher...
Read more »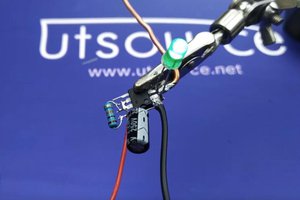
 Electroniclovers123
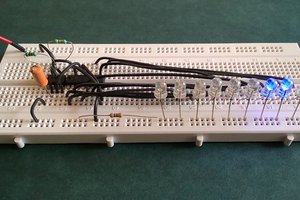
 kamalkedin123
 Alex
Alex
 Hulk
Hulk