Getting Started
You will need a micro SD memory card, which will hold your ID, settings, contacts and saved conversations. You have to prepare the SD card with a configuration file, which you typically only need to do just once.
Amongst the people you want to form a network with, you need to confer and assign unique ID's for each person, in the range of 1 to 254. There is no central server, no internet, so this is up to you to allocate.
On a computer, insert the SD card, and create a folder called 'ripple'. In that directory, create a plain text file called 'conf.txt' (Unix format, Not MS-DOS!) This file should end up looking like this:
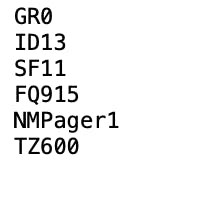
The lines can be in any order, but the first 2 characters are the property name (eg. 'ID' is your ID) followed by the value, terminated with a newline.
The properties are:
- GR - Group ID (can just leave as 0)
- ID - Your unique ID (1..254)
- FQ - LoRa frequency to use
- SF - LoRa spreading factor to use (10..12)
- NM - Your display name (others see this)
- TZ - Your timezone in minutes ahead of GMT. (optional)
NOTE: everyone in your group must use the same GR, SF, and FQ values!!
Once you have configured your SD card, just insert into the right-side slot, and power up the device.
The 4-way direction keys are used to navigate. Up/Down to select a contact, Right to select. (Left or ESC is used to go back to previous screen).
NOTE: Blackberry keyboard
For this keyboard module I have opted for key-combinations for the 4-way navigation:
Up: ALT + P (the '@' char)
Down: ALT + ENTER
Back: ALT + $
Select: ENTER
Exchanging keys with others
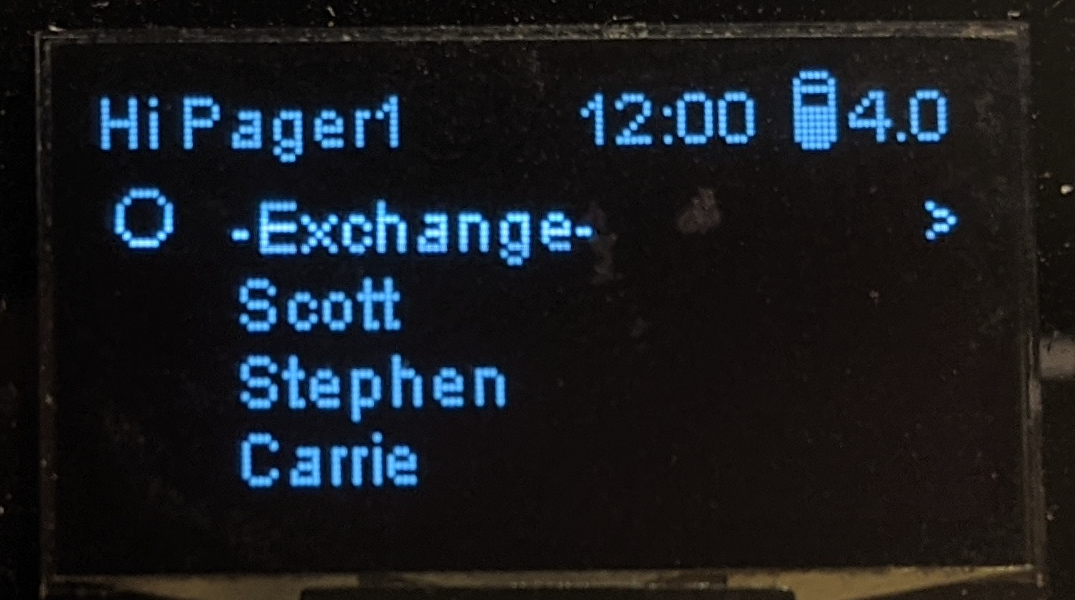
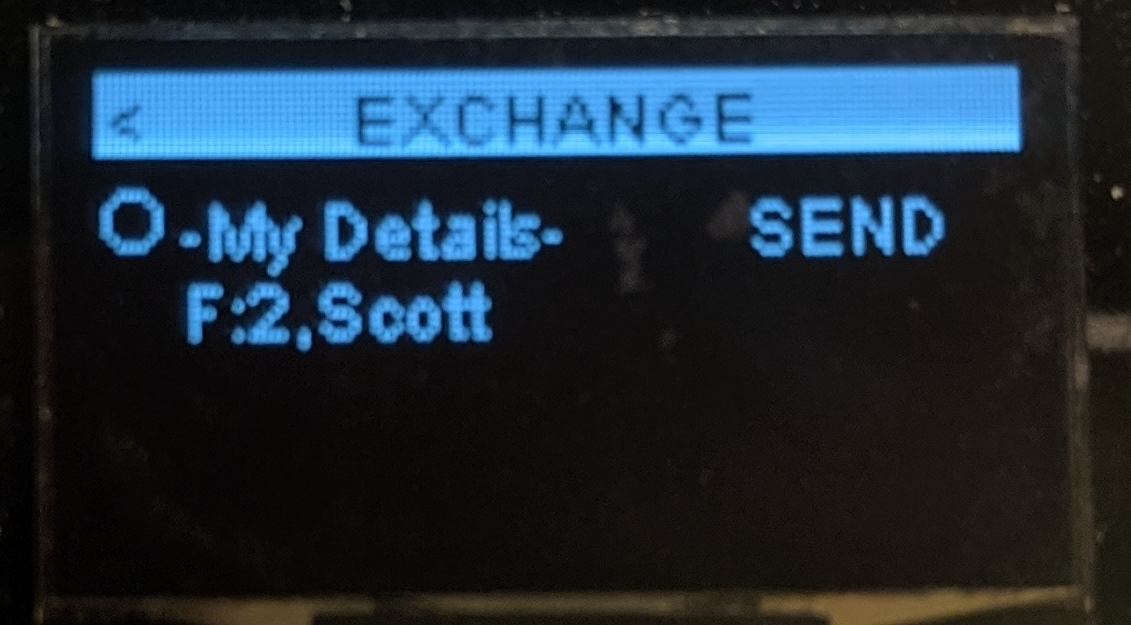
To add another user, ie. a contact, you need to enter the special '-Exchange-' room. For this chat room, you need to agree on a 4-digit passcode with the other(s), type that in, then press ENTER.
Here you select the top item '-My Details-' and press ENTER to broadcast your ID, name, and public encryption key to everyone else in the room. When others do this, you will see their ID, name appear in the list. Use Up/Down keys to select, then Right or ENTER key to ADD that user to your contacts (saved to your SD card).
You can do this at any time, to add or update users to your contacts list.
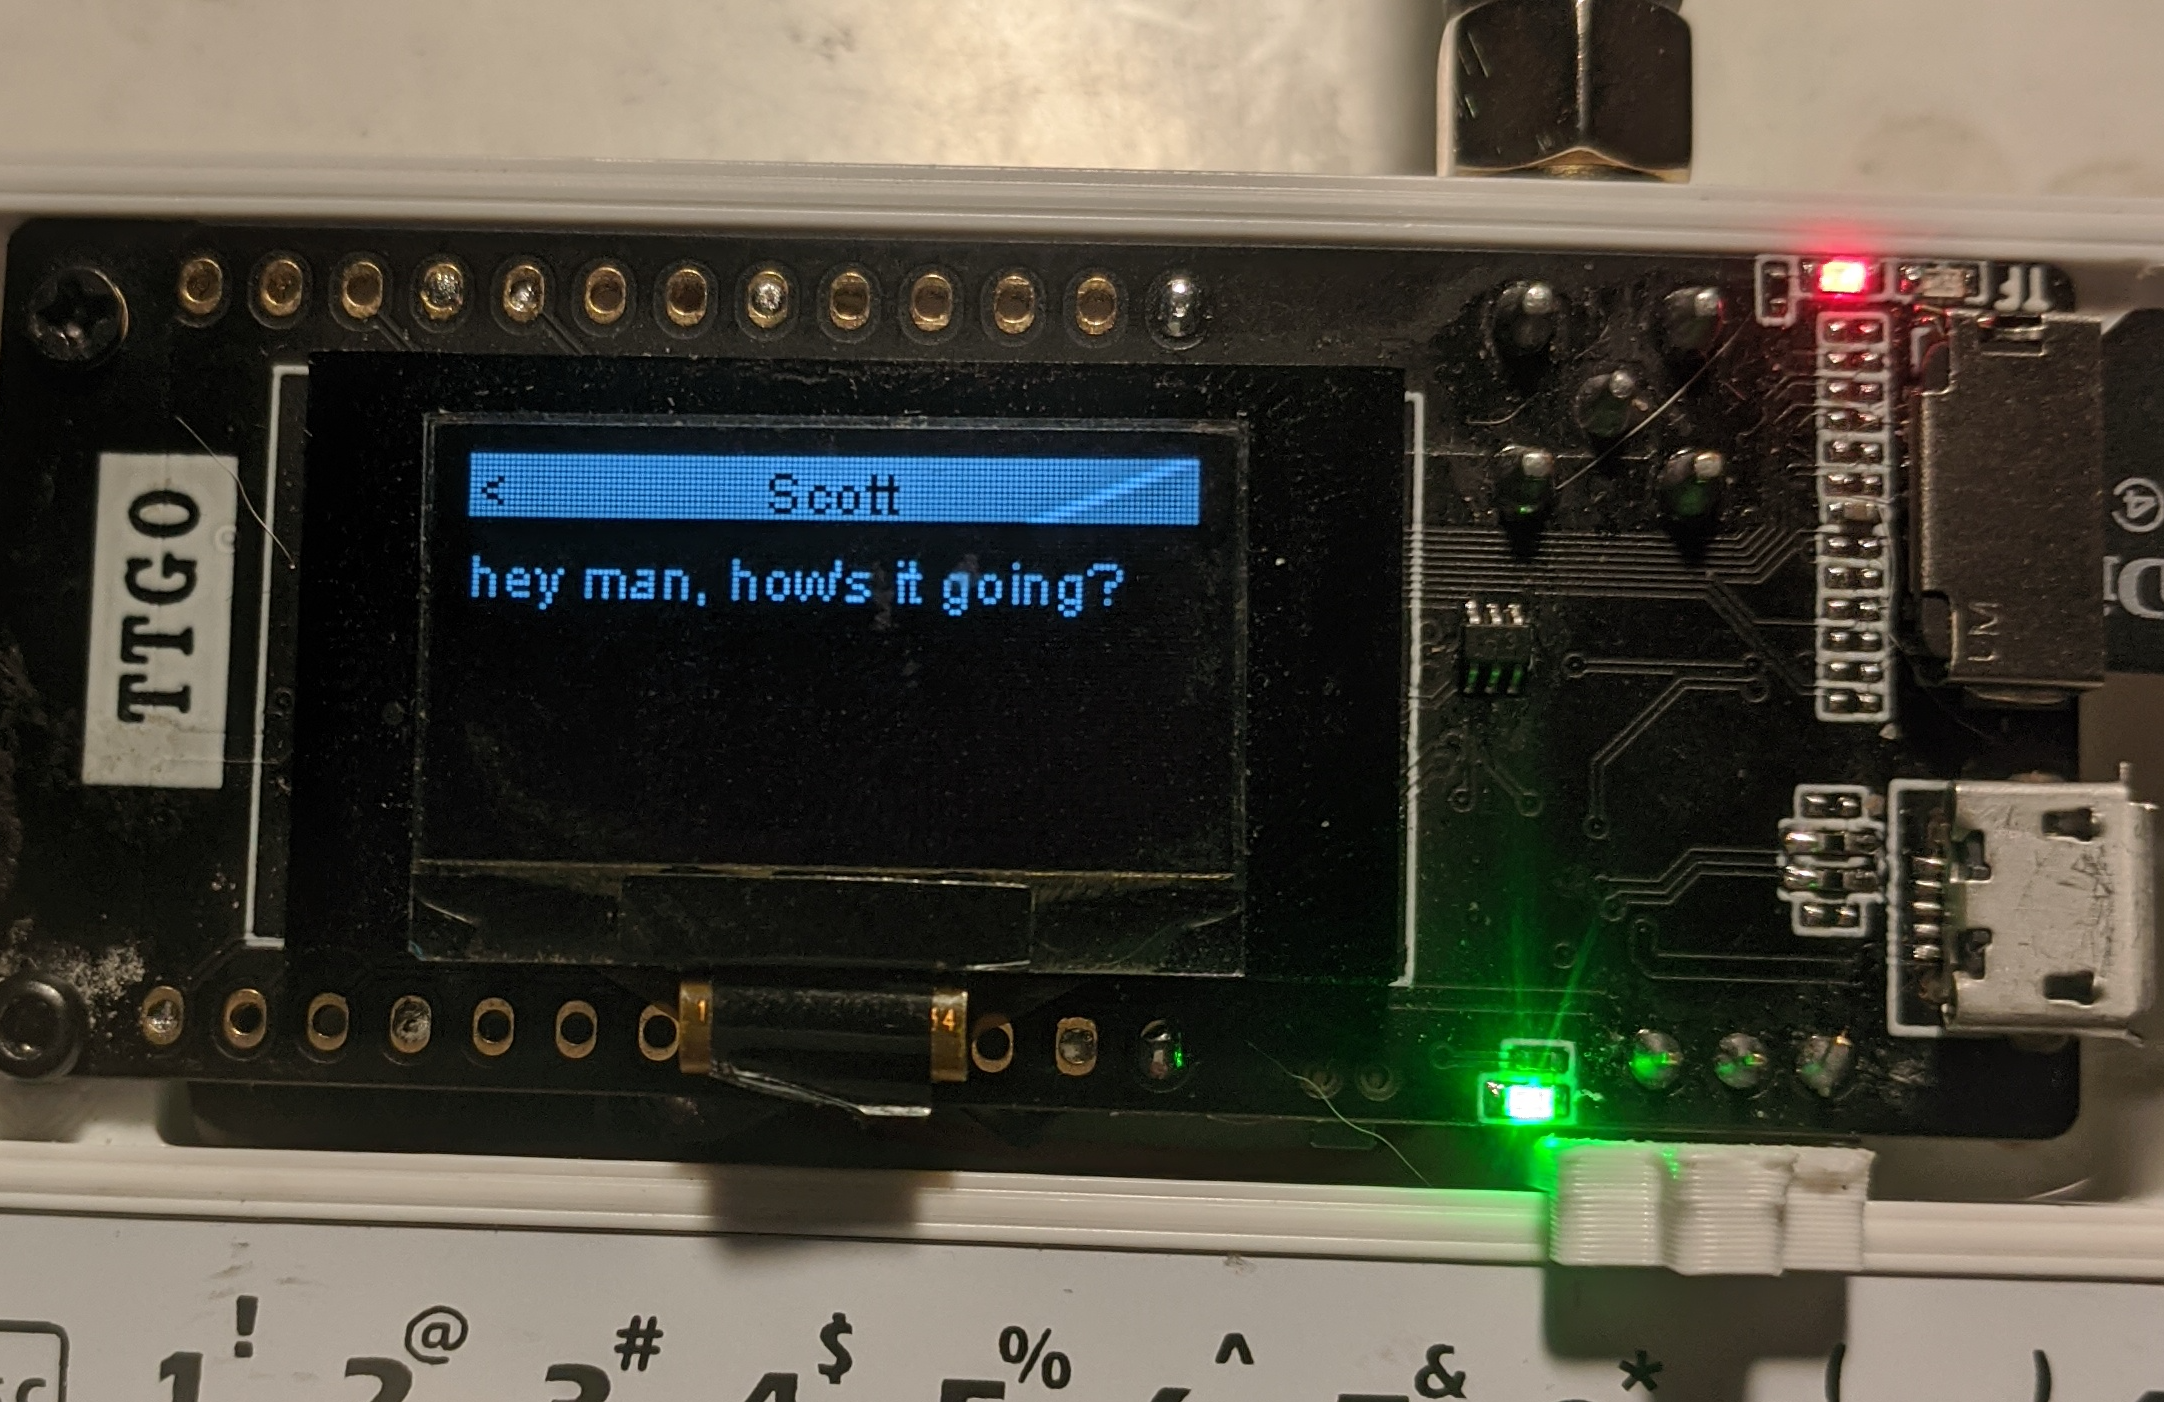
Conversations
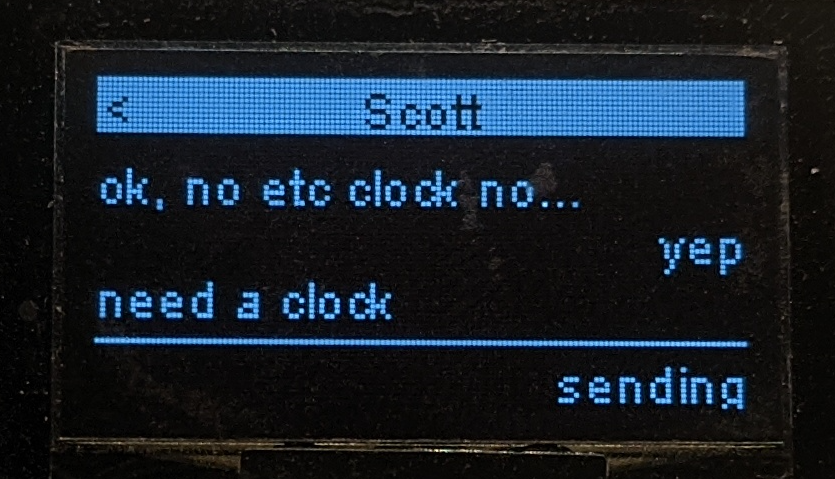
From the main screen, use Up/Down keys to select a contact, then Right to enter the conversation screen.
Just use the keyboard to type in messages you wish to send, then press ENTER key. The text will flash on/off while the send is in progress. If successful, the message scrolls up into the conversation, otherwise if it failed to be delivered it will stop flashing and stay below the horizontal line.
Alerts
The screen automatically turns off after 15 seconds if no keys are pressed. If a new message arrives, the screen turns on showing a full screen preview of the message and sender name, with the green LED flashing, and buzzer beeps.
From here, you can press Left key to go back to home screen, or Right key to enter the conversation screen.
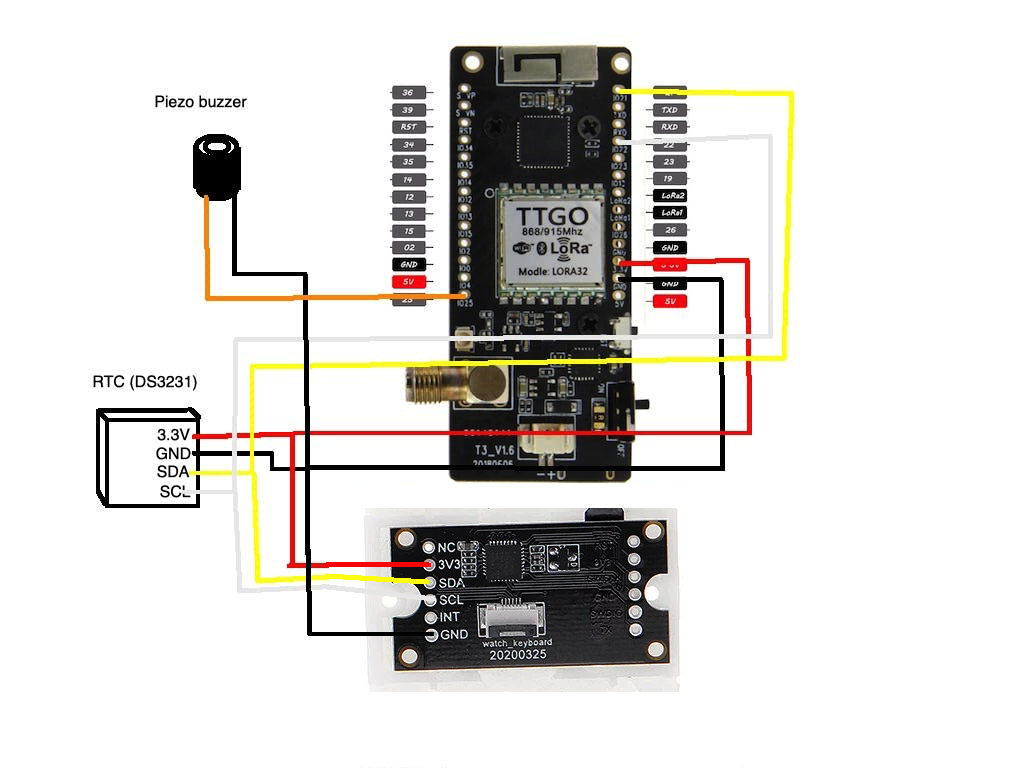
Wiring
Below is a wiring diagram for your reference. It is fairly simple, just involving two I2C slave modules (RTC clock, and keyboard), and a piezo buzzer.
Flashing the firmware
The firmware is at the Ripple github page: https://github.com/spleenware/ripple
You will want to flash the RippleQwerty-TTGOV2-BB.bin file.
NOTE: remove the micro SD card before attempting to flash firmware! For some reason this interferes with the USB serial.
There are instructions on the site on how to flash the firmware onto the TTGO ERSP32 board.
Setting the clock
To seed the RTC module, you need to create a special file on the SD card with your computer. In the 'ripple' folder, create a plain text file called 'clock.txt' (Unix format, Not MS-DOS). Edit the file and add the following date values on separate lines, in this order:
year
month (1..12)
day-of-month (1..31)
hour(0..23).
minutes (0..59)
seconds (0..59)
Save the file, eject the SD card, then slide it into the device. You will need to reboot the device for it to take effect. The RTC clock should now be set, and the home screen should be showing the correct time.
Printing the case
Please see the uploads section for the STL files. There are two main pieces, the upper and lower shell. There are also two small pieces for making a custom on/off switch slider.
You will need a number of M2 bolts to affix the TTGO board and the keyboard to the upper shell piece. Then, assemble the on/off switch through the slot, then clip the two shell pieces together.
Donate
If you find this project useful and feel like throwing some Bitcoin my way, I'd be really grateful:
My BTC address: 1CspaTKKXZynVUviXQPrppGm45nBaAygmS
Feedback
When SHTF happens, or the zombie apocalypse hits, or the asteroid, or whatever, and you need to chat with your family and friends, I hope this gadget comes in handy! :-)
Feel free to leave comments and ask me whatever questions you may have.