kutluhan_aktar
First of all, to make the doorbell talking with the guests after an interaction, I generated voices from texts for each occasion I wanted the doorbell to talk. You can get more information about how to create voice files over text files in the following sections.
To be able to get notified via WhatsApp after an interaction, I created an application on the Raspberry Pi, including Twilio's API for WhatsApp. And, I utilized an Arduino Nano 33 IoT to communicate with the application on the Raspberry Pi.
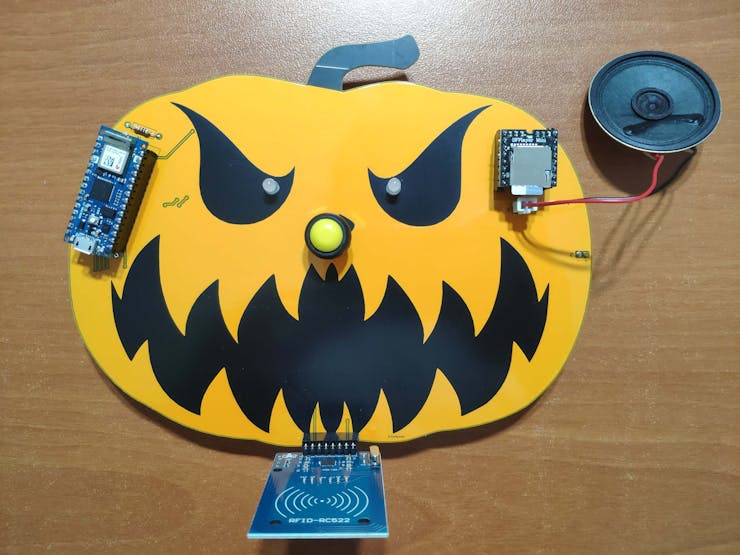
Then, to play the voices I generated with the Arduino Nano 33 IoT, I used a DFPlayer Mini MP3 Player with a speaker. And, to read and register UIDs from RFID tags or cards, I used an MFRC522 RFID Reader.
Finally, I included a DC184 Yellow Pushbutton as the doorbell button and RGB common cathode LEDs as the eyes of the jack-o'-lantern.
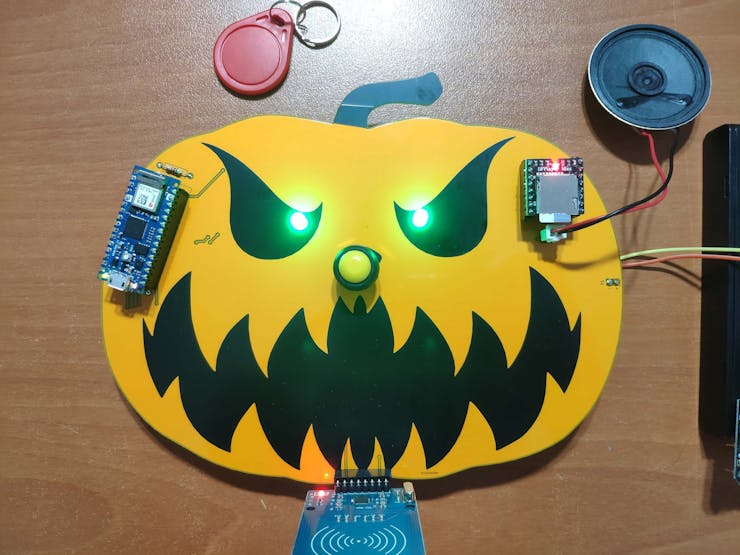
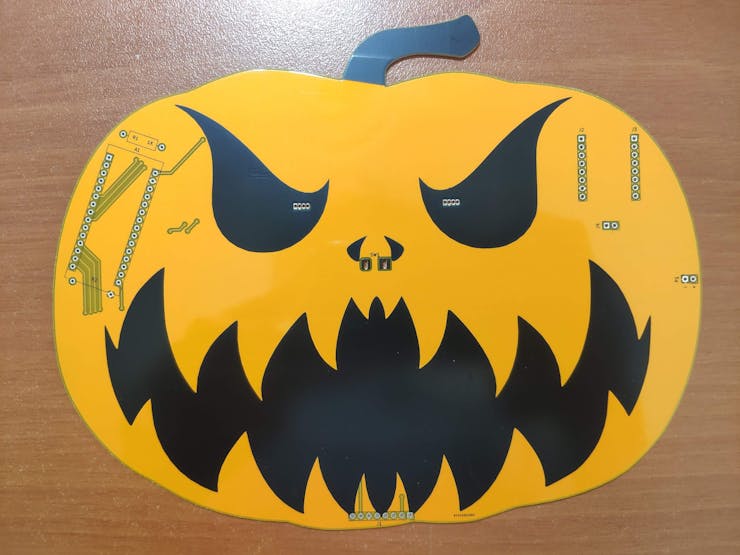
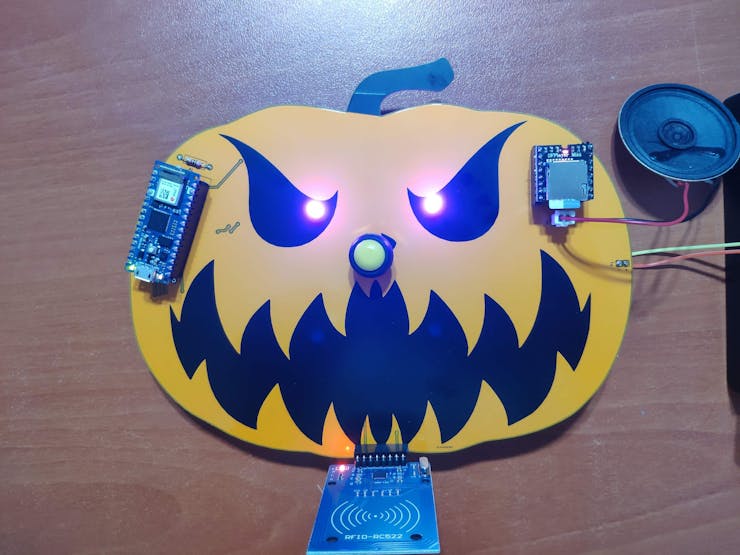
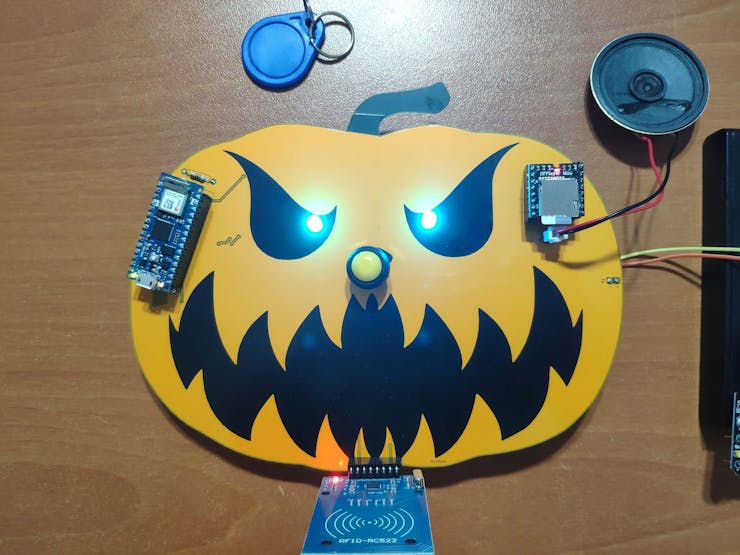
After completing my design on a breadboard and testing the code, I designed a PCB (WhatsApp RFID Talking Doorbell) with a unique jack-o'-lantern shape with an angry facial expression to create a suitable and wicked doorbell for Halloween :)
Huge thanks to PCBWay for sponsoring this project.
Step 1: Designing and Soldering the WhatsApp RFID Talking Doorbell PCB
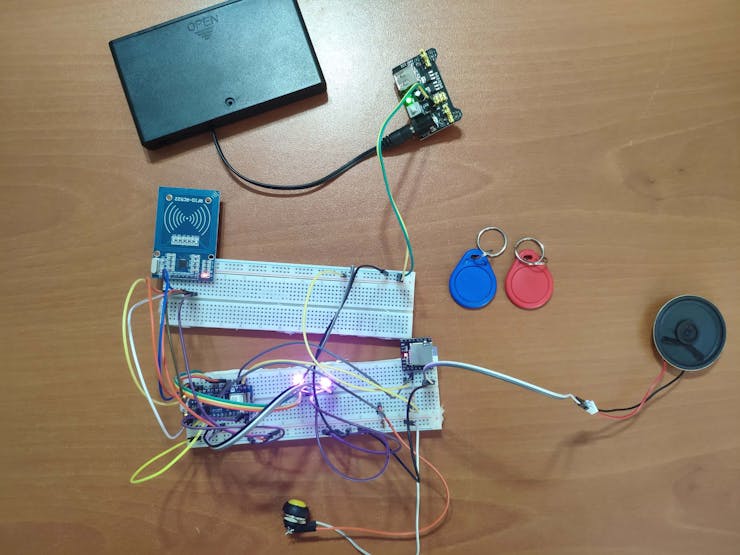
I tested all connections and modules with the Arduino Nano 33 IoT on the breadboard.
Then, I designed the WhatsApp RFID Talking Doorbell PCB by using KiCad. I attached the Gerber file of the PCB below, so if you want, you can order this PCB from PCBWay to create a stylish jack-o'-lantern to frighten your guests who were not informed about its cursed features :)
Click here to inspect and order this PCB directly on PCBWay.
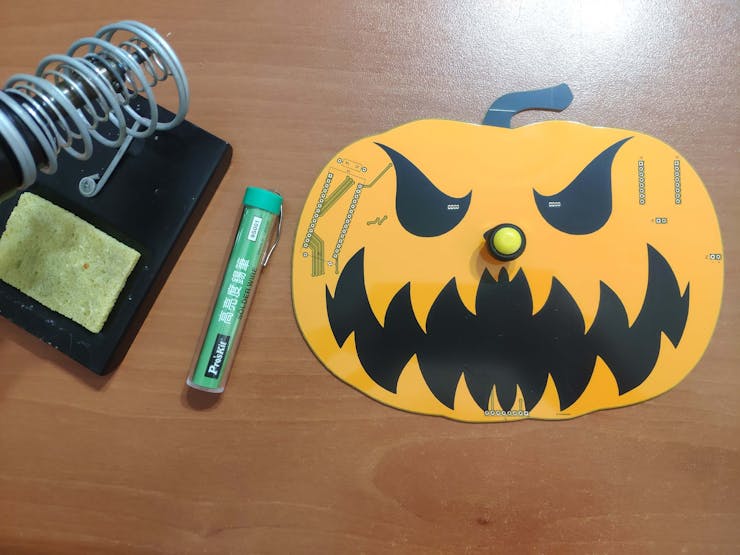
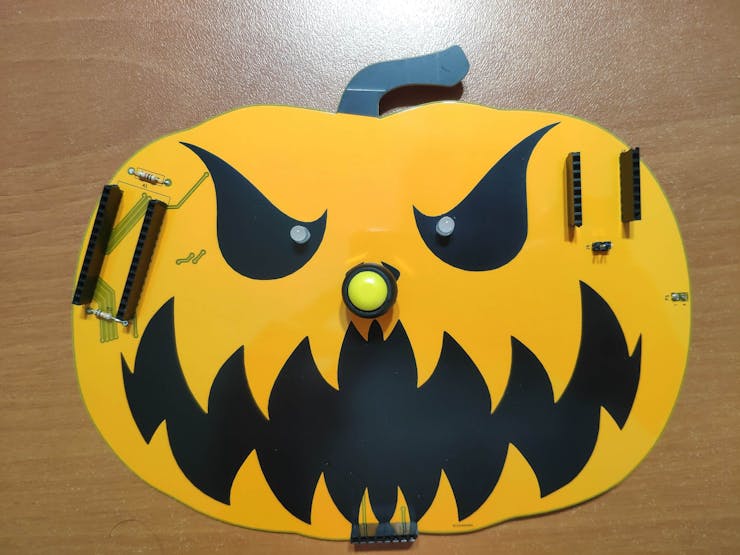
First of all, by using a soldering iron, I attached headers (male and female), 5mm RGB common cathode LEDs, 1K resistor, 10K resistor, and DC184 yellow pushbutton.
Component list on the PCB:
A1 (Headers for Arduino Nano 33 IoT)
D1, D2 (5mm RGB Common Cathode LED)
J1 (Headers for MFRC522 RFID Reader)
J2, J3 (Headers for DFPlayer Mini)
J4 (Headers for Speaker)
P1 (Headers for Power Supply)
R1 (1K Resistor)
R2 (10K Resistor)
SW1 (DC184 Yellow Pushbutton)

Step 2: Setting up a LAMP web server on Raspberry Pi
If you are a novice in programming with Raspberry Pi, you can inspect well-explained instructions and tutorials on the official Raspberry Pi website.
To go to the official Raspberry Pi setting up tutorial, click here.
- Open a terminal window by selecting Accessories > Terminal from the menu.
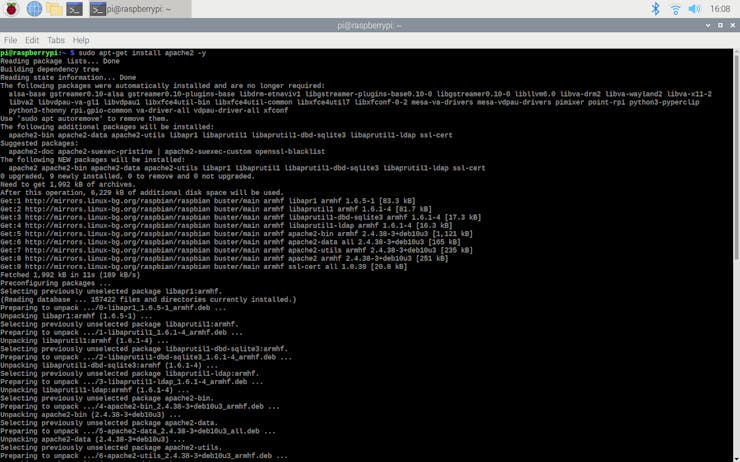
- Install the apache2 package by typing the following command into the terminal and pressing Enter:
sudo apt-get install apache2 -y
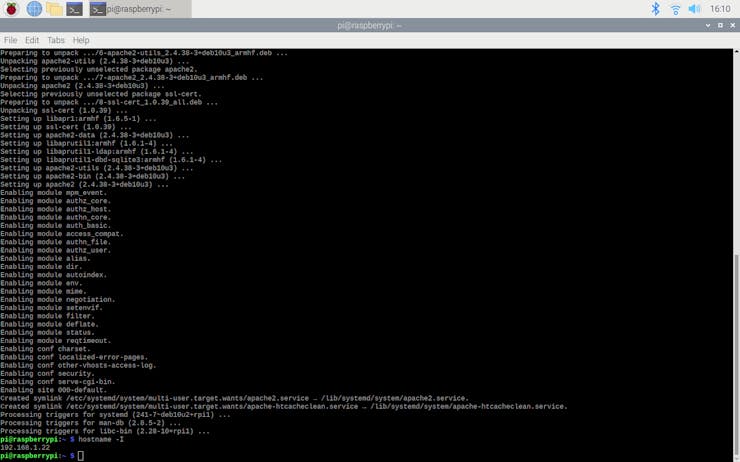
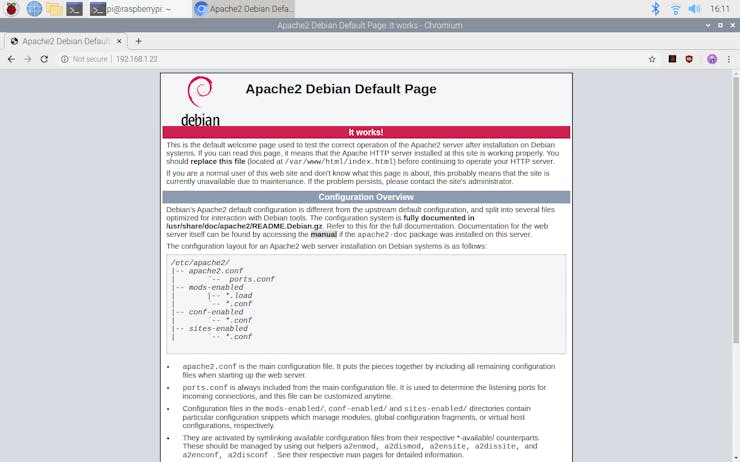
- To test the server, open Chromium by selecting Internet > Chromium Web Browser from the menu and enter http://localhost.
- If you want, you can use the IP address of your Raspberry Pi as well.
hostname -I
- Install the PHP package with the following command:
- Do not forget to update the Pi.
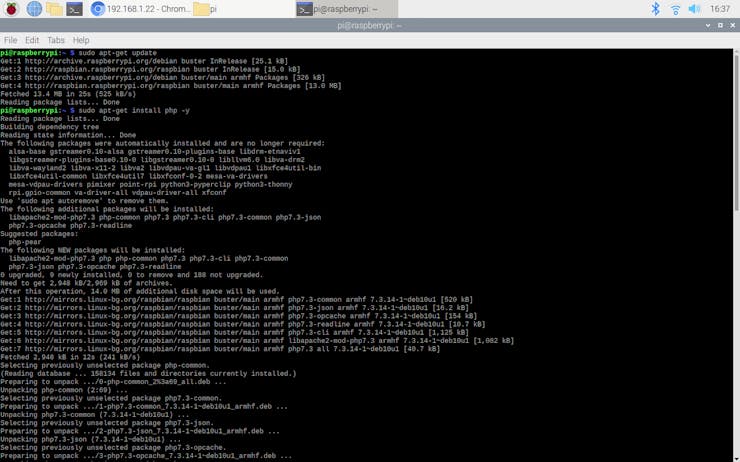
sudo apt-get update
sudo apt-get install php -y
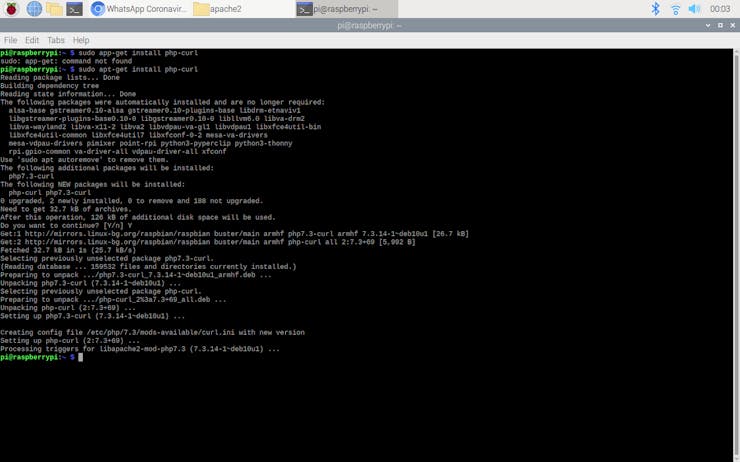
- To be able to utilize Twilio's API for WhatsApp in PHP, install the php-curl package:
sudo apt-get install php-curl
- Then, restart the apache server to be able to use the installed packages on the localhost:
sudo service apache2 restart
Step 3: Creating a Twilio application
To send WhatsApp messages through Twilio's API, the only thing you need to do is to sign up for a Twilio Trial Account.
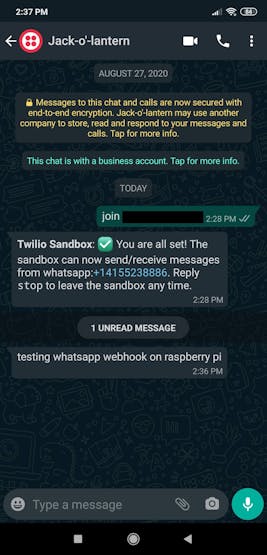
After signing up, with your SID and Auth Token, you can use Twilio's API for WhatsApp without any charge. As explained on Twilio, you need to join a shared phone number with your phone in order to verify your phone number and initiate the Twilio's API for WhatsApp.
For more information and learn how to create a new account, click the link below.
You can sign up for Twilio with my referral code here :)
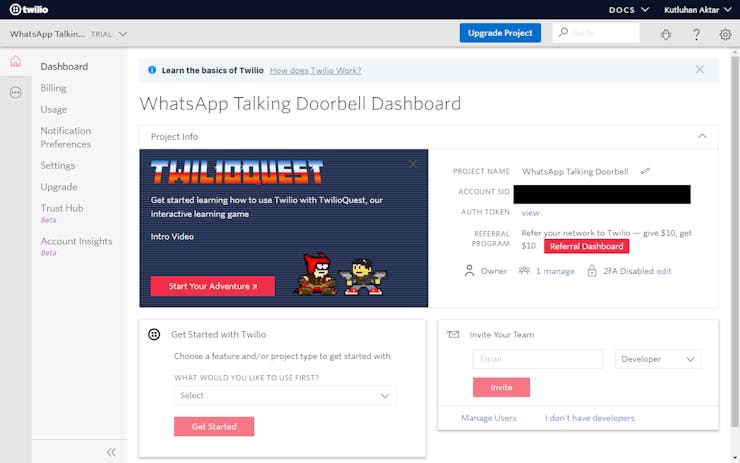
1) Create a new application - WhatsApp Talking Doorbell.

2) Open the Dashboard of the application.
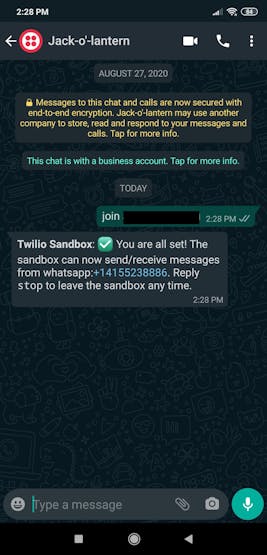
3) Go to the Twilio Sandbox for WhatsApp to get the verification code.
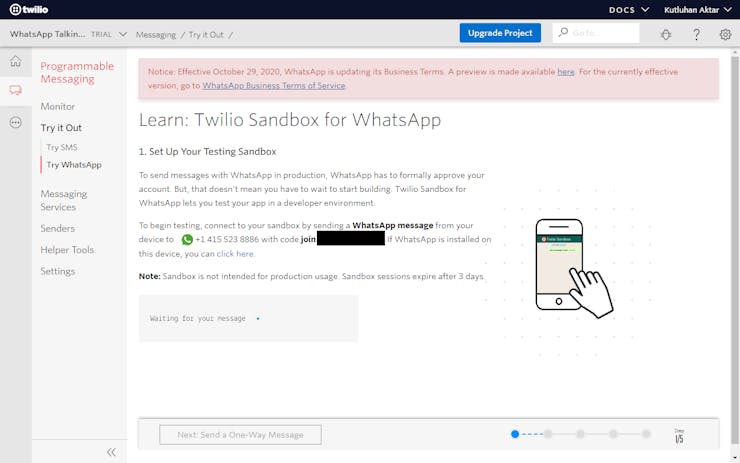
4) Connect your phone to your application with the verification code.
Step 4: Developing the WhatsApp Talking Doorbell application (webhook) running on Raspberry Pi in PHP
I developed the WhatsApp Talking Doorbell in PHP and explained the source code of the application in the Code Explanation section below for those who are interested.
However, if you are not fond of web development with PHP, you can download the application in Downloads - named WhatsApp_Talking_Doorbell.zip - and upload it to your Raspberry Pi without diving into PHP coding.
The Twilio PHP Helper Library is necessary to use this application. And, I have already included the mentioned API in the application folder (WhatsApp_Talking_Doorbell), so you do not need to download it particularly.
You can get more information about the API here.
Upload:
By the following steps, install the WhatsApp Talking Doorbell on the localhost:
- Download the application - WhatsApp_Talking_Doorbell.zip - including index.php and WhatsAppAPI (Twilio's API for WhatsApp).
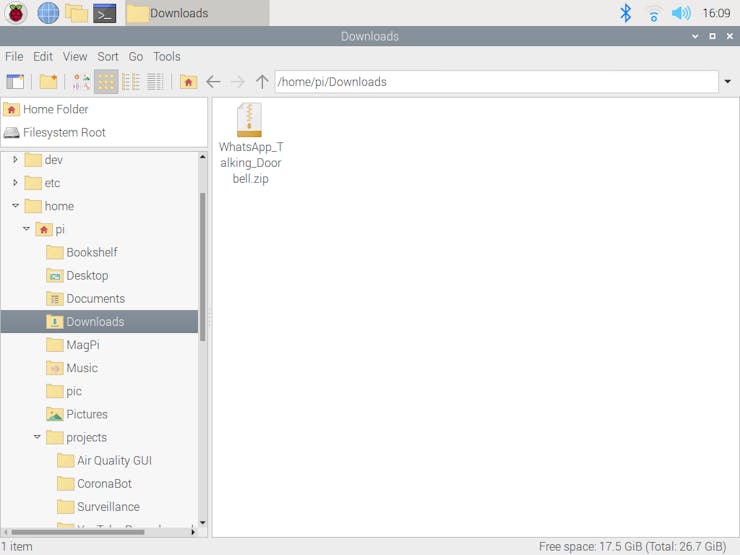
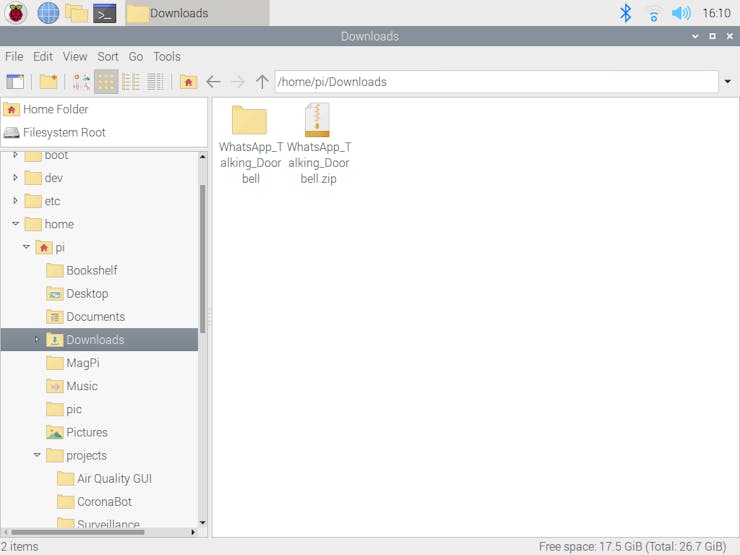
- Extract the WhatsApp_Talking_Doorbell.zip.
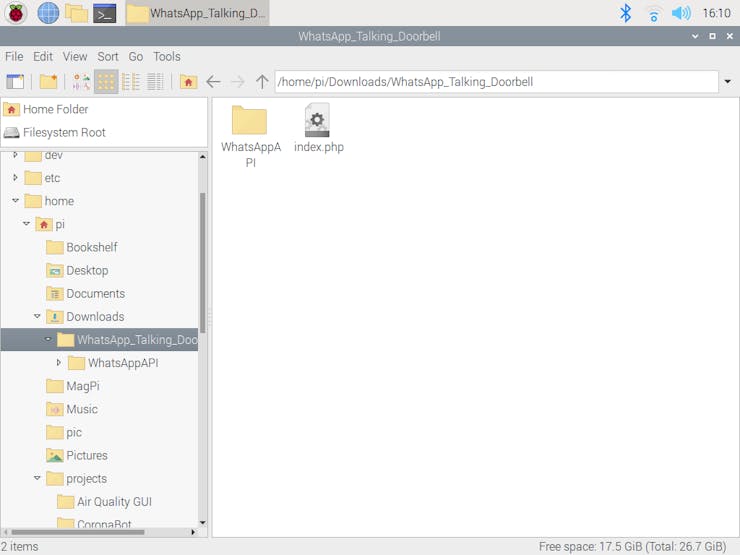
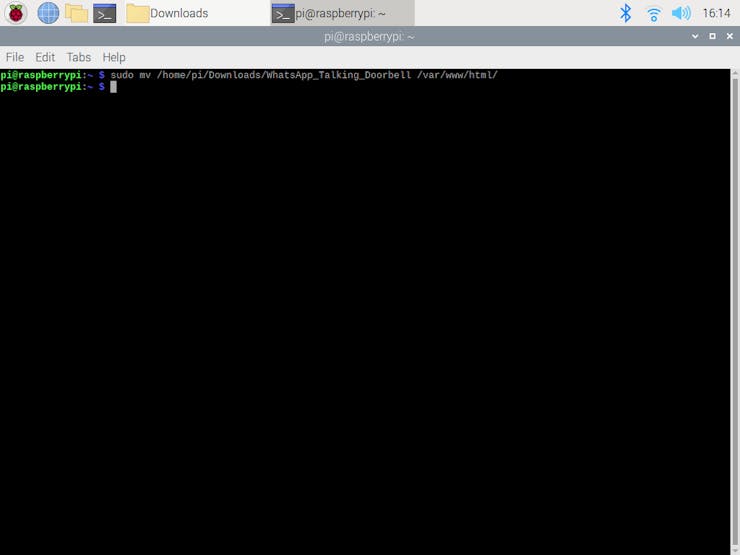
- Move the application folder (WhatsApp_Talking_Doorbell) from Downloads to the server (/var/www/html) by using the terminal since the apache server is a protected location.
sudo mv /home/pi/Downloads/WhatsApp_Talking_Doorbell /var/www/html/
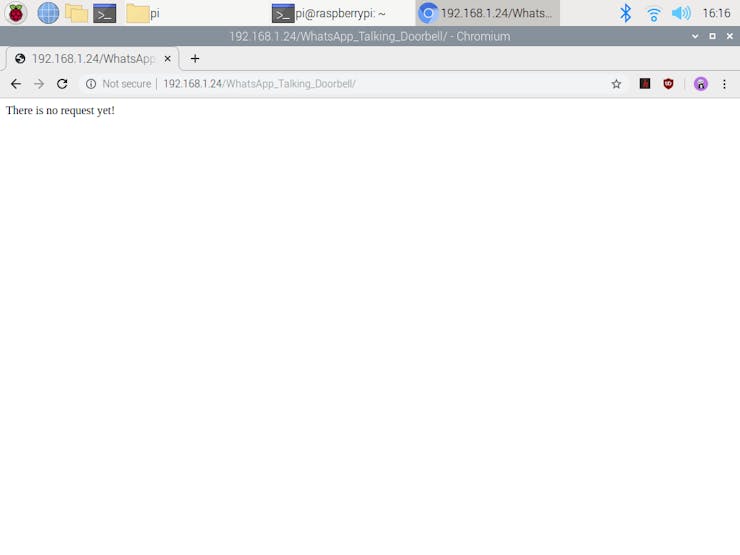
- Go to the WhatsApp Talking Doorbell:
http://localhost/WhatsApp_Talking_Doorbell/
Features:
1) If there is no request for the webhook, the application prints: There is no request yet!
2) Otherwise, if all required parameters are accurate, the application prints: Message Send...
sid: Twilio Application SID
a_token: Twilio Application Auth Token
body: WhatsApp Message Body
from: Shared Phone Number
to: Verified Phone Number
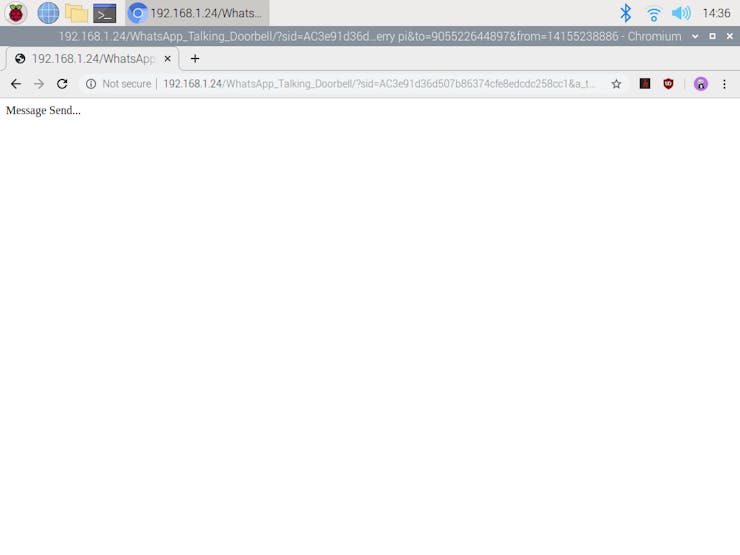
3) Subsequently, the application sends the message body to the user via WhatsApp.
Code Explanation:
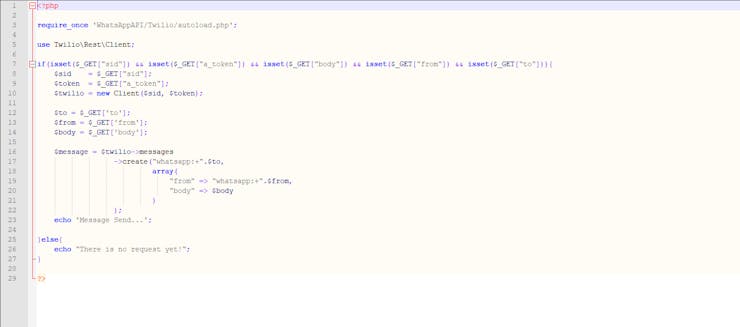
1) index.php
- Include the required library - Twilio Helper Library for PHP.
- If all the required variables are detected - sid, a_token, body, from, and to - create a new Client.
- Then, send a WhatsApp message from the server as the shared phone number to the verified phone number via Twilio's API for WhatsApp.
Syntax:
Step 5: Generating voices from texts
After completing the steps above, to give the ability to speak to the device, I generated different voice files from text files for each occasion, which I wanted the device to interact with the guests by talking. In this way, I could play them with the DFPlayer Mini MP3 Player when triggered for each selected event.
I wrote four different speeches for occasions and converted them to voice files via the web application below:
Of course, they are tricky and apt for Halloween :)
You can download the voice files I generated below - voices.zip.
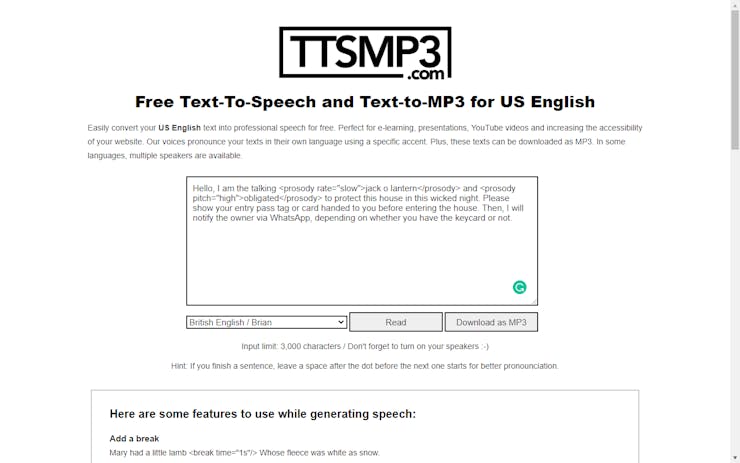
1) First attempt to ring the doorbell:
"Hello, I am the talking jack o lantern and obligated to protect this house in this wicked night. Please show your entry pass tag or card handed to you before entering the house. Then, I will notify the owner via WhatsApp, depending on whether you have the keycard or not."
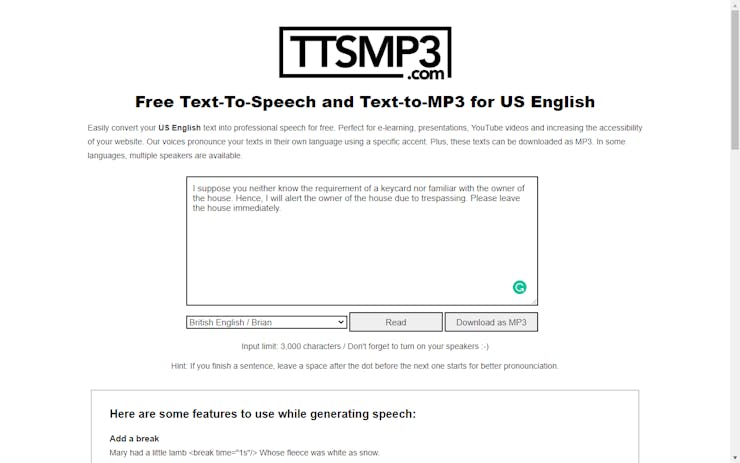
2) Second attempt to ring the doorbell:
"I suppose you neither know the requirement of a keycard nor familiar with the owner of the house. Hence, I will alert the owner of the house due to trespassing. Please leave the house immediately."
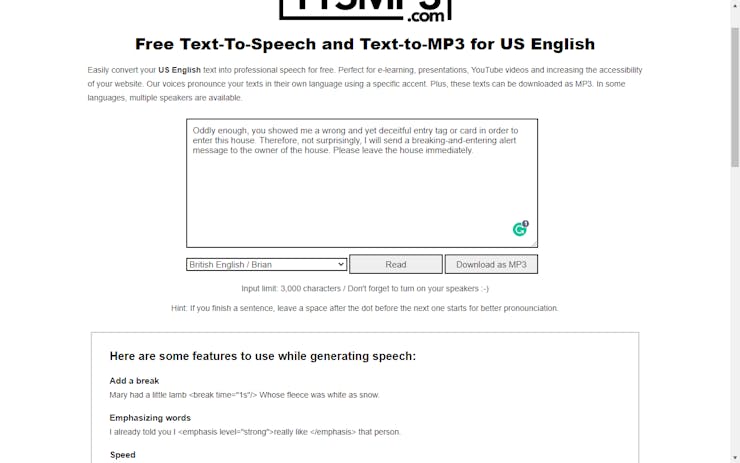
3) Wrong RFID UID:
"Oddly enough, you showed me a wrong and yet deceitful entry tag or card in order to enter this house. Therefore, not surprisingly, I will send a breaking and entering alert message to the owner of the house. Please leave the house immediately."
4) Correct RFID UID:
"Greetings, and thanks for visiting this haunted house on Halloween night by showing a registered entry card or tag relinquished to you by the owner of the house. I just notified the owner of the house about your arrival via WhatsApp. Please wait until your amiable welcome."

Step 6: Setting up Arduino Nano 33 IoT
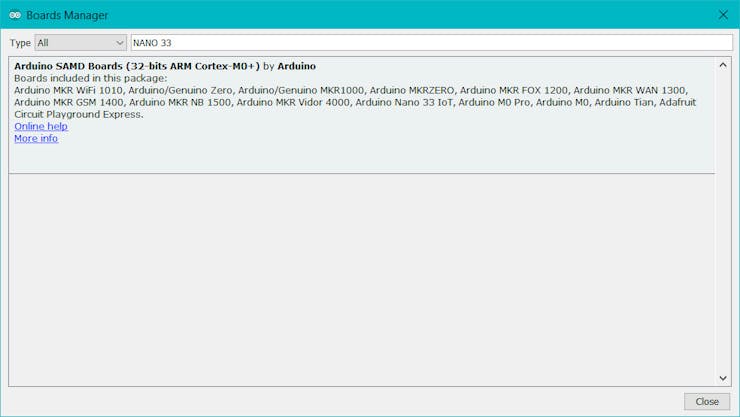
If you are a novice in programming with Arduino Nano 33 IoT: do not worry, it is simple to use with Arduino IDE. Just download the required drivers - Arduino SAMD Core - as well-explained here.
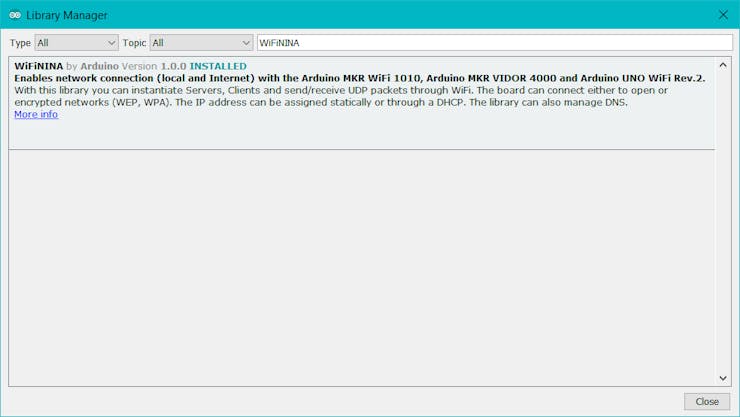
To be able to connect to the WiFi via Arduino Nano 33 IoT, download the WiFiNINA library from here.
I used the second serial port (Serial1) on the Arduino Nano 33 IoT to communicate with the DFPlayer Mini MP3 Player.
Serial Ports on the Arduino Nano 33 IoT:
"The USB connector of the board is directly connected to the USB host pins of the SAMD21. This routing enables you to use the Arduino NANO 33 IoT as a client USB peripheral (acting as a mouse or a keyboard connected to the computer) or as a USB host device so that devices like a mouse, keyboard, or an Android phone can be connected to the Arduino NANO 33 IoT. This port can also be used as a virtual serial port using the Serial object in the Arduino programming language. The RX0 and TX1 pins are a second serial port available as Serial1."
Then, Arduino Nano 33 IoT is ready to execute the project code :)
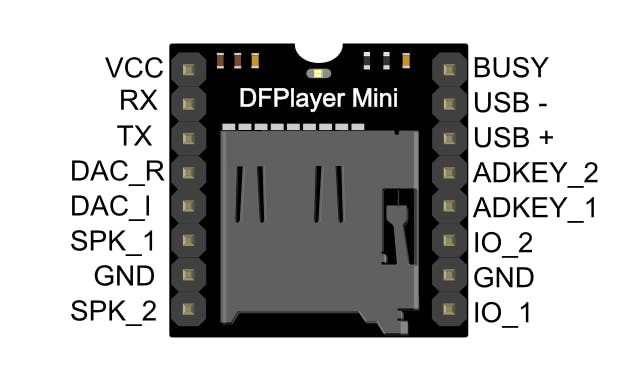
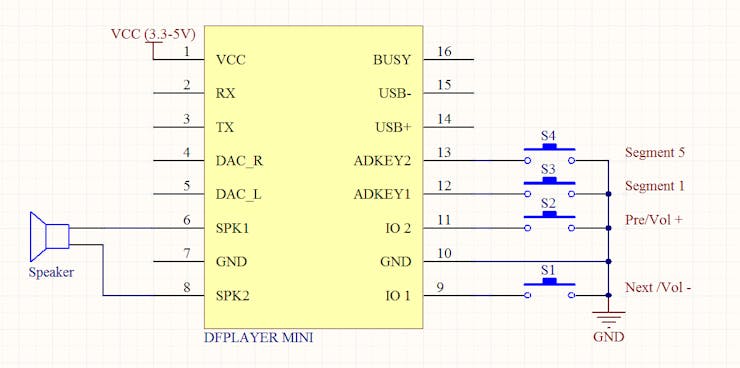
Step 7: Sending commands to the DFPlayer Mini MP3 Player
It is effortless to use a DFPlayer Mini MP3 Player with Arduino since it has a library, including all available UART commands and features. In that regard, you do not need to send UART commands manually to the DFPlayer Mini to play MP3 files.
As explained in its product wiki,"The DFPlayer Mini MP3 Player For Arduino is a small and low price MP3 module with a simplified output directly to the speaker. The module can be used as a stand-alone module with an attached battery, speaker, and push buttons or used in combination with Arduino".
To be able to use it with Arduino, the only thing you need to do is to download its library provided by DFRobot from here.
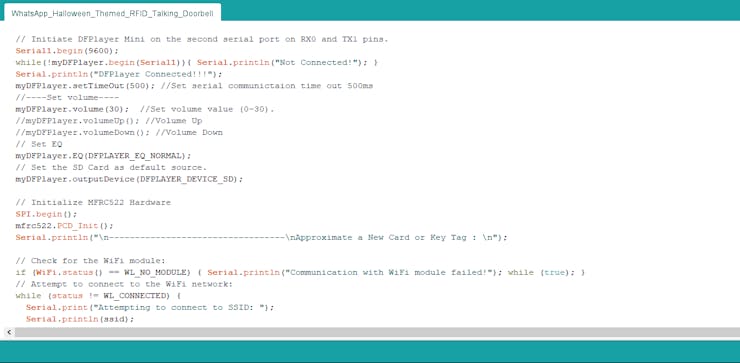
For Arduino Nano 33 IoT, you have to use the second serial port on RX0 and TX1 pins - Serial1 - instead of the SoftwareSerial library like in the sample code.
// Initiate DFPlayer Mini on the second serial port on RX0 and TX1 pins. Serial1.begin(9600); while(!myDFPlayer.begin(Serial1)){ Serial.println("Not Connected!"); } Serial.println("DFPlayer Connected!!!"); myDFPlayer.setTimeOut(500); //Set serial communictaion time out 500ms //----Set volume---- myDFPlayer.volume(30); //Set volume value (0~30). //myDFPlayer.volumeUp(); //Volume Up //myDFPlayer.volumeDown(); //Volume Down // Set EQ myDFPlayer.EQ(DFPLAYER_EQ_NORMAL); // Set the SD Card as default source. myDFPlayer.outputDevice(DFPLAYER_DEVICE_SD);
And, to be able to execute commands accurately, save your songs by adding consecutive numbers to song names as did I:
001bell_voice.mp3
002second_bell_voice.mp3
003wrong_rfid.mp3
004correct_rfid.mp3
Step 8: Programming Arduino Nano 33 IoT
Download the required libraries to be able to control the modules:
DFPlayer Mini MP3 Player | Library
MFRC522 RFID Reader | Library
- Include the required libraries.
- Define your WiFi network settings - SSID and PASSWORD.
- Enter the IPAddress of your Raspberry Pi.
- Define the pathway of the application in the Raspberry Pi.
- Initialize the Ethernet client library.
- Create the DFPlayer Mini object.
- Create the MFRC522 instance.
- Define the MFRC522 module key input.
- After executing the register_new_UIDs() function, paste the registered UID list to the invited_guests string array and define the total guest number.
- Define RGB LED pins.
- Define the doorbell pin - DC184 Yellow Pushbutton.
- Initiate DFPlayer Mini on the second serial port - Serial1 - on RX0 and TX1 pins.
- Initialize MFRC522 hardware.
- Check for the WiFi module and settings.
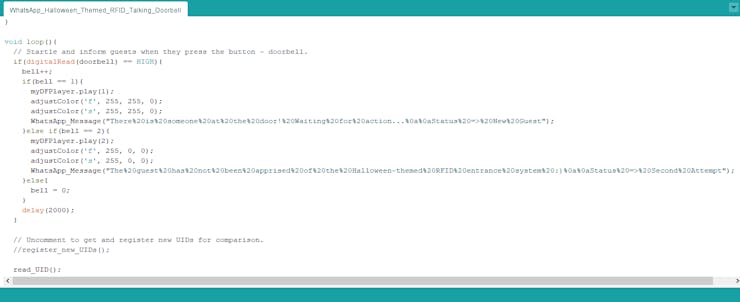
- Startle and inform guests when they press the button (doorbell) by playing voice files - myDFPlayer.play(1).
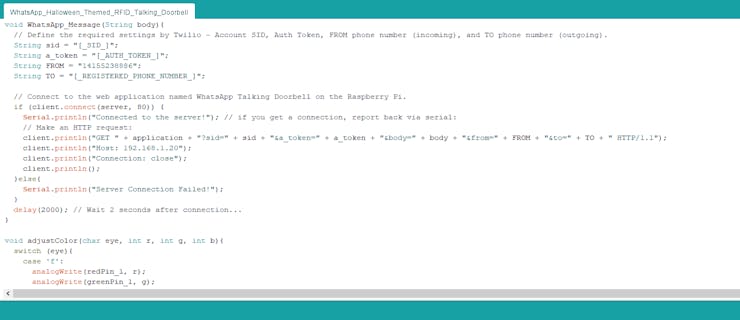
- In the WhatsApp_Message() function:
- Define the required settings by Twilio - Account SID, Auth Token, FROM phone number (incoming), and TO phone number (outgoing).
- Connect to the web application named WhatsApp Talking Doorbell on the Raspberry Pi.
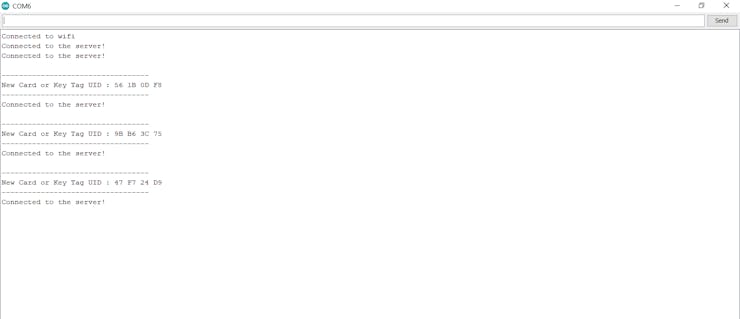
- In the register_new_UIDs() function (uncomment to execute), detect the new card or tag UID and print the UID list.
- To save the new UIDs to the invited_guests string array, copy the UID list after executing this function.
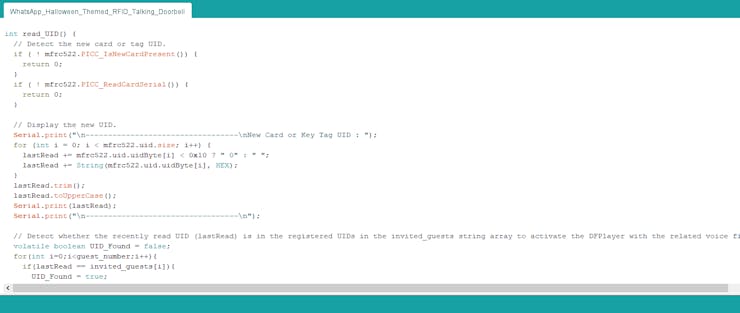
- In the read_UID() function:
- Get the recently read UID.
- Detect whether the recently read UID (lastRead) is in the registered UIDs in the invited_guests string array to activate the DFPlayer with the related voice file.

Connections and Adjustments
// Connections// Arduino Nano 33 IoT: // MFRC522// D9 ----------------------- RST// D10 ----------------------- SDA// D11 ----------------------- MOSI// D12 ----------------------- MISO// D13 ----------------------- SCK// DFPlayer Mini// ----------------------- VCC (5V External)// TX ----------------------- RX// RX ----------------------- TX// GND ----------------------- GND// RGB_Eye_1// D3 ----------------------- R// D5 ----------------------- G// D6 ----------------------- B// RGB_Eye_2// A2 ----------------------- R// A3 ----------------------- G// A5 ----------------------- B// Doorbell (Button)// D2 ----------------------- S
After finishing and uploading the code to the Arduino Nano 33 IoT, I attached all required components to the board via headers - MFRC522 RFID Reader, DFPlayer Mini MP3 Player, Speaker, and 5V External Battery.
DFPlayer Mini MP3 Player needs a sustainable 5V power supply to execute commands properly. Since the Arduino Nano 33 IoT is a 3.3V based development board, I added an external battery socket to the PCB to supply the DFPlayer Mini and the Nano 33 IoT both. I used an MB102 Breadboard Power Supply Module to generate sustainable 5V and connected it to the PCB via headers.
Modes and Features
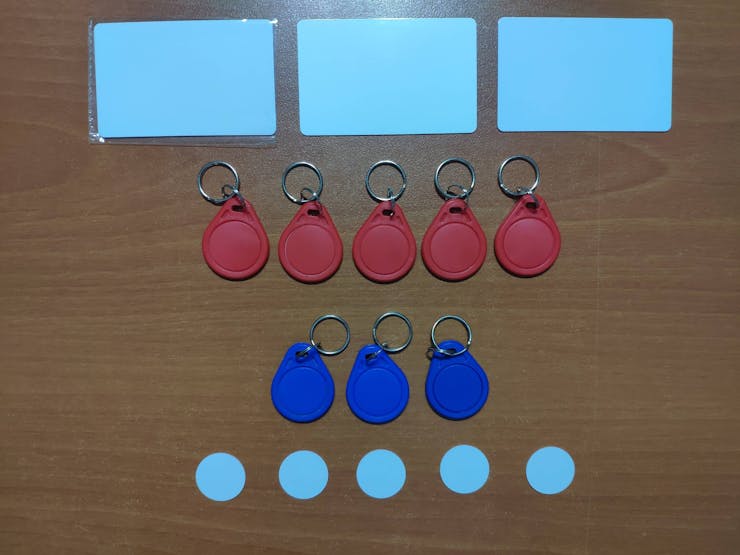
1) When the register_new_UIDs() function is executed, the device creates a list of UIDs to be registered for further comparison and displays the list via the serial port. In that regard, the user can register all RFID tags or cards to be utilized to distinguish invited and uninvited guests :)
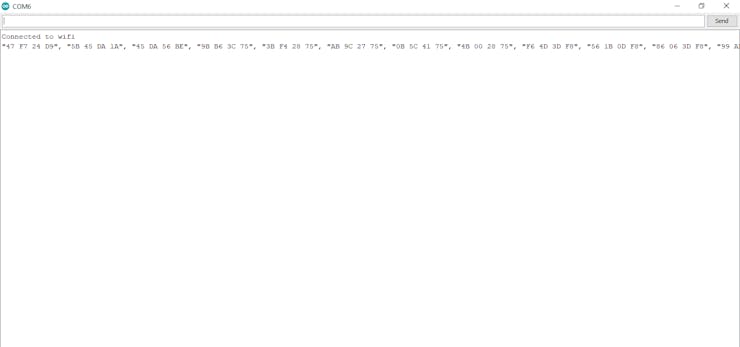
2) The device prints the status of the WiFi connection, the state of the server connection, the state of the DFPlayer Mini, and the recently read UID if connected via the serial port.
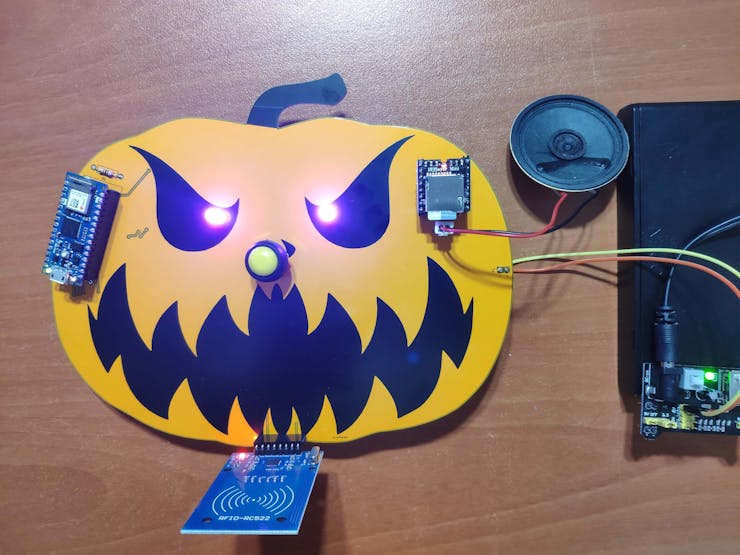
3) In the default mode, when the device starts working, it turns the RGB eyes to purple after executing the code precisely.
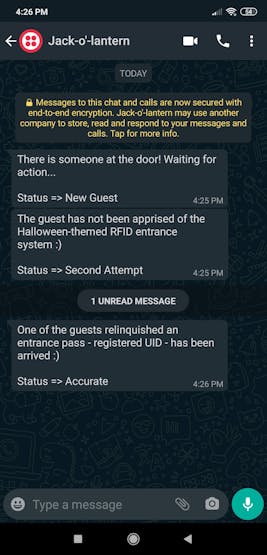
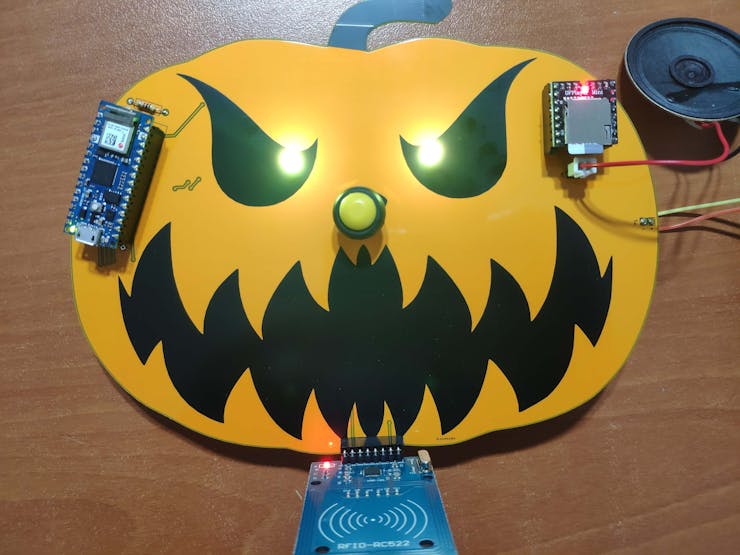
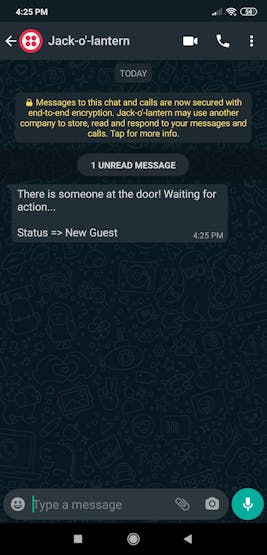
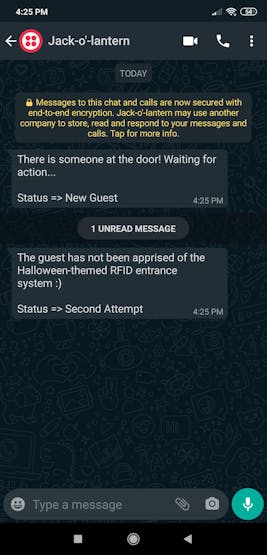
4) After the first attempt to ring the doorbell, the device plays the 001bell_voice.mp3 file, turns the RGB eyes to yellow, and sends a notification message to the user via WhatsApp:
"There is someone at the door! Waiting for action... Status => New Guest"
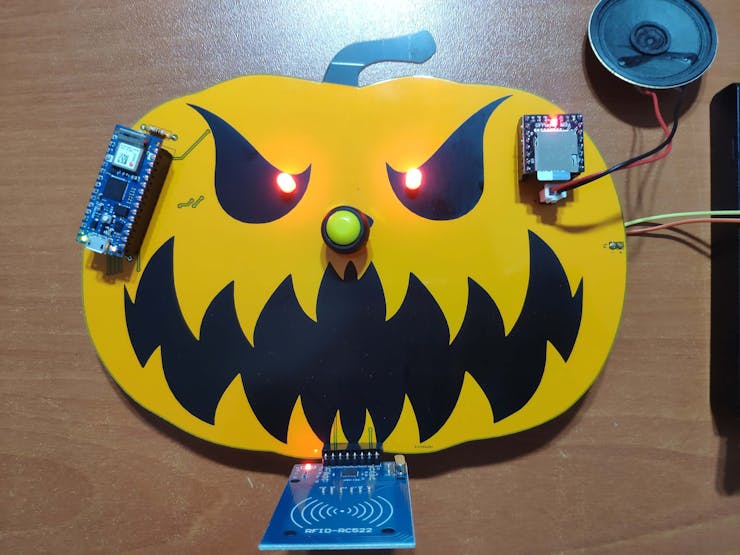
5) After the second attempt to ring the doorbell, the device plays the 002second_bell_voice.mp3 file, turns the RGB eyes to red - angrier :) - and sends a notification message to the user via WhatsApp:
"The guest has not been apprised of the Halloween-themed RFID entrance system :) Status => Second Attempt"

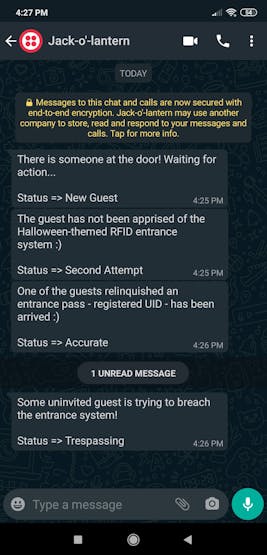
6) If the guest shows an unregistered and wrong RFID tag or card, the device plays the 003wrong_rfid.mp3 file, turns the RGB eyes to cyan, and sends an alert message to the user via WhatsApp:
"Some uninvited guest is trying to breach the entrance system! Status => Trespassing"

7) If the guest shows a registered and correct RFID tag or card handed to him/her, the device plays the 004correct_rfid.mp3 file, turns the RGB eyes to green, and sends a notification message to the user via WhatsApp:
"One of the guests relinquished an entrance pass - registered UID - has been arrived :) Status => Accurate"