 MughtyWinky
It seems, that i like to design my project from the outside to the inside. So i startet to think about possible designs. Using the pictures of the vu meter, some textures, an 3d model of an Marquardt 1812 switch and some Photoshop / Indesign-magic i was able to create a first visualisation of the front cover.
The measurements and the desing are / is based on the modushop chassis Pesante 02PN 2U that includes a front plate which measures 90 * 450 * 10 mm³.
The front plate will be milled by Schaeffer AG, as they provide a good service, a offline design software and are able to process material send in by the customer. To save some money (and to have some fun at the milling machine), only the front face wil be milled there. All holes and all milling on the back side will be done by myself.
Every glowing part will be illuminated by a 3mm blue led. Those leds are mounted from the back. The holes in the front will be filled with 2k epoxy. Let's find out, how to fill those holes without spilling too much epoxy on the surrounding :). To practise this, i ordered an example piece which will be shipped this week.
As an extra feature, the rotary encoder knob will be back illuminated. It will be possible to adress every single led with an PWM signal. So its possible to add different effects like "breathing" or some "position informations" e.g.: If you're on the top end of the menu, all left leds will light up. If you're on an option in the center, the top leds will light up, and so on.
As I'm not 100% percent shure about the placement of any element, I need to try out some more pssible combinations.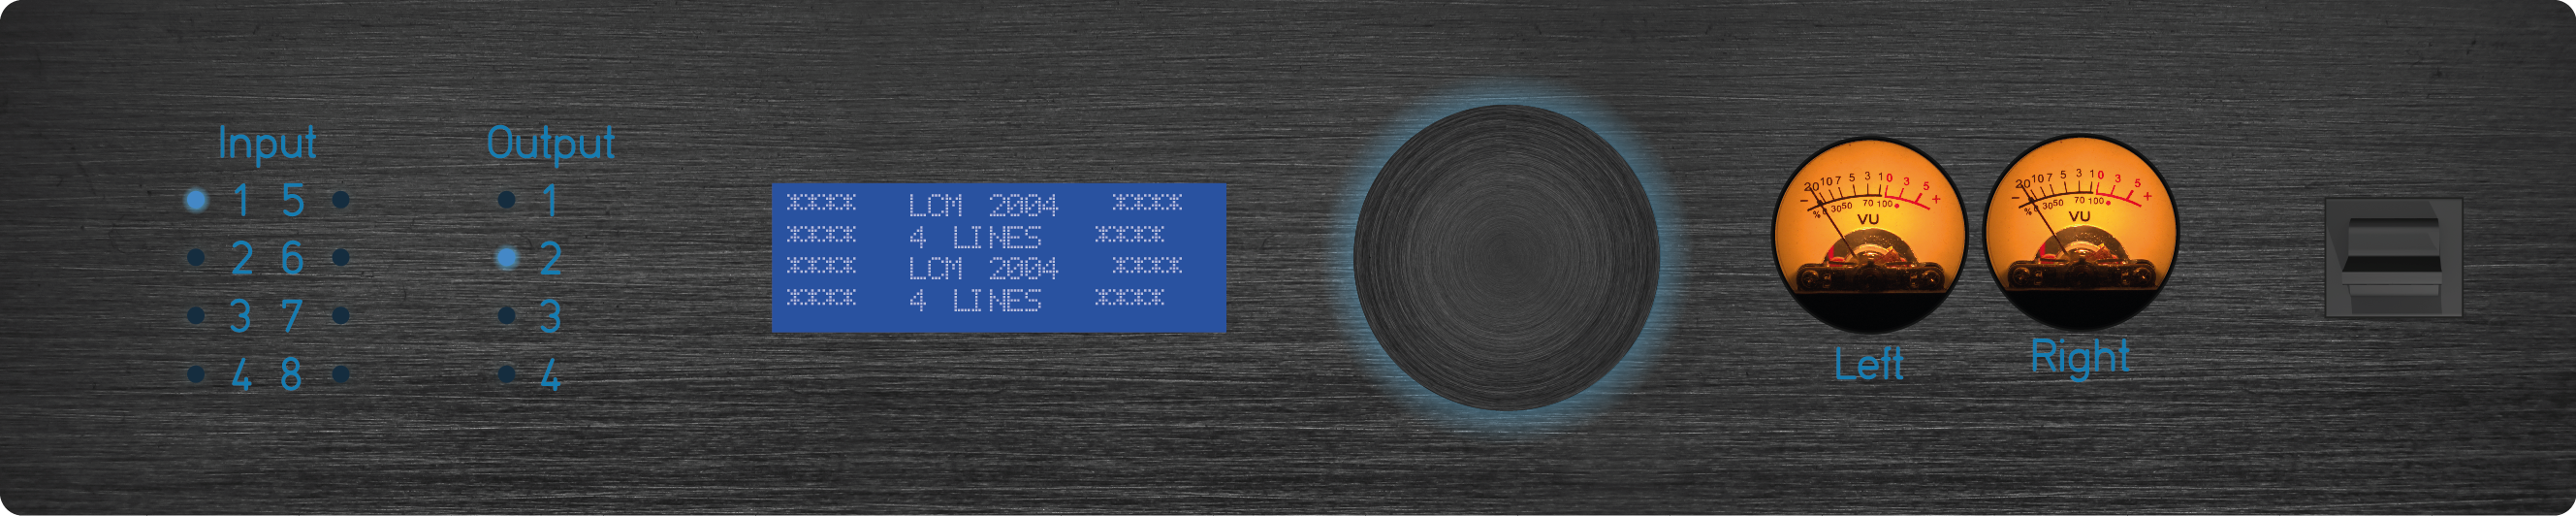
Discussions
Become a Hackaday.io Member
Create an account to leave a comment. Already have an account? Log In.