 rootfrogsMakes
As you know, the IR2IO Modul can be used with any infrared remote control you have at home.
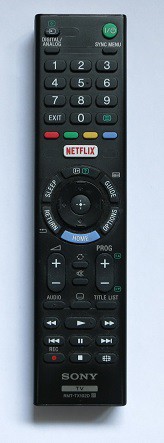
In my case I want to use my TV remote control for the project - but you can realize this project with any other remote control too.
Partlist
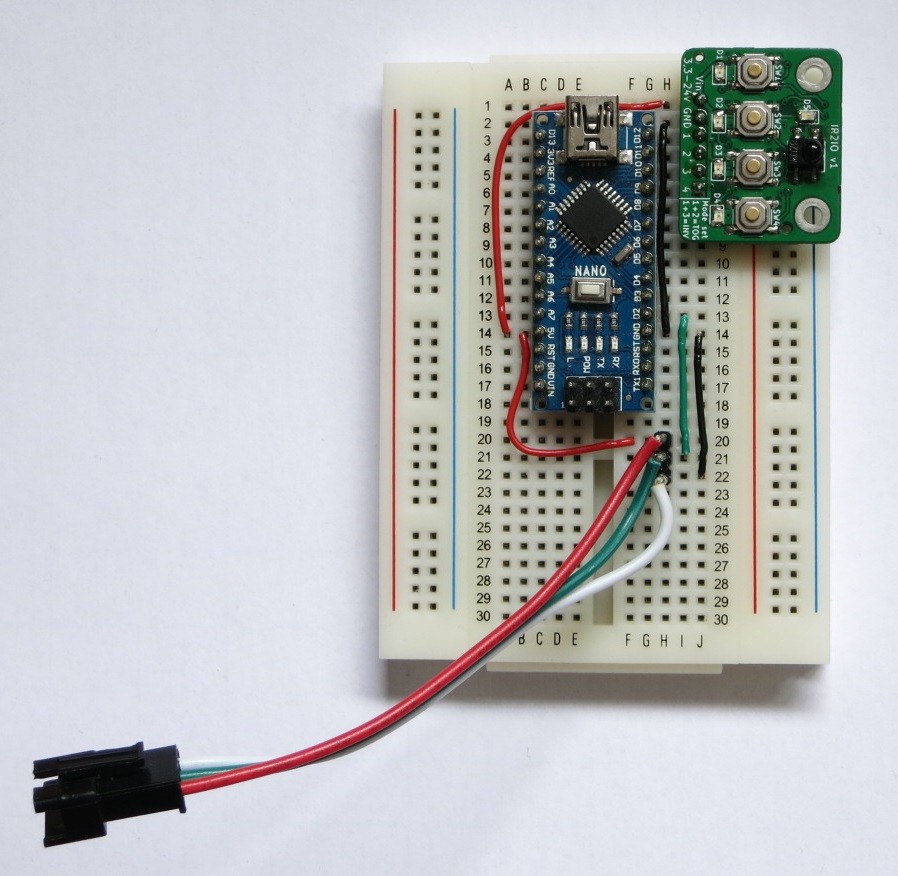
- Breadboard
- 5 cables
- Arduino Nano
- WS2812 LED strip
- IR remote control
- IR2IO Modul
- USB Power supply
Assembly
The assembly is very simple. You can put all the parts directly on the breadboard and just need 5 additional cables.
Connections
- WS2812 Data --> D2
- WS2812 Vin --> 5V
- WS2812 GND --> GND
- IR2IO Ch1 --> D12 (directly, without cable)
- IR2IO Ch2 --> D11 (directly, without cable)
- IR2IO Ch3 --> D10 (directly, without cable)
- IR2IO Ch4 --> D9 (directly, without cable)
- IR2IO Vin --> 5V
- IR2IO GND --> GND
Only 4 outputs? No, its 15!
The IR2IO has only 4 switching outputs. This sounds not so much. But think binary! They can be used as a 4 Bit Number. So we can have up to 15 states (16 if we count to off-state too). And this means: We can use up to 15 buttons of our remote control.
All we have to do is to teach the IR2IO module in a clever way.
To get a better overview, we have to create a table and assign a bit combination to each button of the remote control we want to use:
| ID | Function | Remote Control Button | CH1 | CH2 | CH3 | CH4 |
|---|---|---|---|---|---|---|
| 1 | Set color red | Red | 1 | 0 | 0 | 0 |
| 2 | Set color green | Green | 0 | 1 | 0 | 0 |
| 3 | Set color yellow | Yellow | 1 | 1 | 0 | 0 |
| 4 | Set color blue | Blue | 0 | 0 | 1 | 0 |
| 5 | Set color white | Netflix | 1 | 0 | 1 | 0 |
| 6 | more brightness | Volume + | 0 | 1 | 1 | 0 |
| 7 | less brightness | Volume - | 1 | 1 | 1 | 0 |
| 8 | On/Off | Power | 0 | 0 | 0 | 1 |
| 9 | no animation | Number 1 | 1 | 0 | 0 | 1 |
| 10 | fading animation | Number 2 | 0 | 1 | 0 | 1 |
| 11 | laola wave | Number 3 | 1 | 1 | 0 | 1 |
| 12 | strobo animation | Number 4 | 0 | 0 | 1 | 1 |
| 13 | fading rainbow | Number 5 | 1 | 0 | 1 | 1 |
| 14 | running rainbow | Number 6 | 0 | 1 | 1 | 1 |
| 15 | unused | - | 1 | 1 | 1 | 1 |
Teaching the 4 Channels
To teach the 4 channels of the IR2IO correctly, we just have to read the columns of the channels in the table above.
First Channel1:
Press & Hold the pushbutton 1 on IR2IO and press the following keys on the remote: Red, Yellow, Netflix, Volume -, Number 1, Number 3, Number 5. Then release the pushbutton - thats all.
Channel2:
Do the same procedure just with pushbutton 2 and keys: Green, Yellow, Volume +, Volume -, Number 2, Number 3, Number 6.
Continue with channel 3 and channel 4 in the same scheme.
The Arduino Software
The software for this project is open source. You can download it on our Github channel.
https://github.com/rootfrogsMakes/Remotely-controllable-LED-strip
Some Software Details
The software contains two classes:
IR2IO class
If you query the 4 pins in Arduino one after the other, the bit patterns may be misrecognized (if the output status changes during the query). Therefore the IR2IO class polls the 4 pins to the module cyclically. Only when the same bit pattern has been recognized twice in an interval of 1ms, the callback is called.
AnimatedStrip class
This is a helper class for an easy use of all the animations.
Main loop
In the Main loop you just have to call the run methods of IR2IO and AnimatedStrip class.
In the callback function, the corresponding change can now be made to the LED strip.
That's all - it's so simple.
void outputChanged(uint8_t activeOutputs)
{

  switch(activeOutputs)
  {
    case 0:
      //all outputs off (button on remote released)
      break;

    case 1:
      animatedStrip.setColor(Colors::RED);
      break;

    case 2:
      animatedStrip.setColor(Colors::GREEN);
      break;

    case 3:
      animatedStrip.setColor(Colors::YELLOW);
      break;

    case 4:
      animatedStrip.setColor(Colors::BLUE);
      break;

    case 5:
      animatedStrip.setColor(Colors::WHITE);
      break;

    case 6:
      animatedStrip.moreBrightness(5);
      break;

    case 7:
      animatedStrip.lessBrightness(5);
      break;

    case 8:
      if(animatedStrip.isOn())
      {
        animatedStrip.turnOff();
      }
      else
      {
        animatedStrip.turnOn();
      }
      break;

    case 9:
      animatedStrip.setAnimation(Animation_t::NONE);
      break;

    case 10:
      animatedStrip.setAnimation(Animation_t::FADING);
      break;

    case 11:
      animatedStrip.setAnimation(Animation_t::LAOLA_WAVE);
      break;

    case 12:
      animatedStrip.setAnimation(Animation_t::STROBO);
      break;

    case 13:
      animatedStrip.setAnimation(Animation_t::FADING_RAINBOW);
      break;

    case 14:
      animatedStrip.setAnimation(Animation_t::RUNNING_RAINBOW);
      break;

    case 15:
      //unused at the moment
      break;

    default:
      break;
  }
}