 techknight
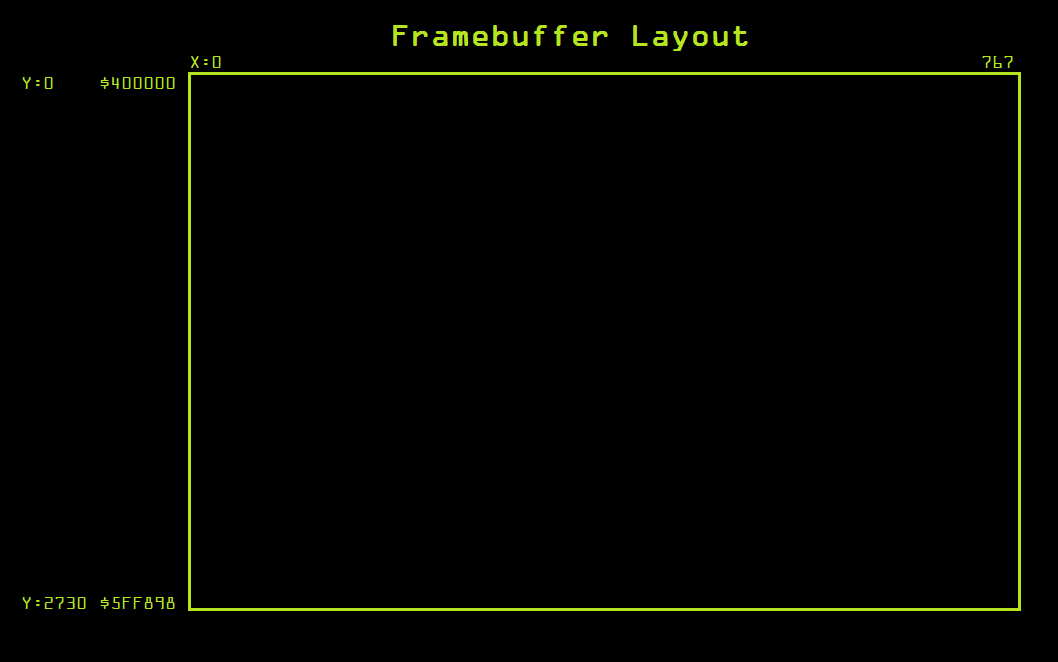
So now that we have basic framebuffer commands out of the way, Next thing we need to do is figure out the Memory-to-Pixel layout of the framebuffer.
I will spare you the experimentation process to get to where I have, plus its been a couple of years so I don't remember all the details anyways.
But the jest of it is this:
So now that we have this information, the next thing to do is figure out how the colors work.
So basically, each pixel is 1 byte. Since it is a 256-color system, this makes sense. However, 0 is reserved as the key color. So if there is a video signal coming into the unit, 0 gets replaced with 1 pixel of video information instead of a color.
All the other index values of 1 to 255 are physical colors. This color information is sent from the framebuffer control CPU to the RAMDAC.
There is a default palette as explained earlier, but you can also send a custom palette. We arnt quite there yet.
For now, lets see if we can get something into the framebuffer, regardless what it is. Before we can figure out exact details on some of the framebuffer control commands, we need have something on screen to use as a base of reference for experimentation.
So we have already played with colors, lines, etc... But we need to move on from that. We need to draw text and images.
But alas, all this stuff has to be recreated from scratch because none of it exists anymore. Except: the Font. For now, I was able to extract the font from the Weather STAR Jr. The font is almost 100% identical with the exception of the lower case W. it is not the same. So its from the same family, but not the same exact flavor. I am not a font/typeface expert so i dont know what all the little differences mean. but, hey. at least now we have something to start with.
There are public recreations of the WS4000 fonts, but they are far from accurate, and, they are true-type and the modern graphics suites have issues properly rendering fonts at low resolutions for bitmap use. so I abandoned that idea. Looks like garbage.
First of all we need to get the font in a format that the graphics card is going to work with. For testing, it was simple enough to just to convert the font into a simple bitmap with different values representing the different colors to be displayed on screen. Yes, this takes up a lot of memory. because now you are using 1 byte per pixel in the font table. But its good for testing.
So now I needed to write a simple program to shove data out of the UART to the Arduino for sending images/fonts.
Once I got a rough skeleton setup something like this:
	'Load 18x36 Font into Pixel Memory.
	Dim img As Image = fx.LoadImage(File.DirAssets, "font2.gif")
	Dim buffer() As Byte = GetPixels(img)
	Dim width As Int = img.Width
	Dim height As Int = img.Height
	For x = 0 To width - 1
		For y = 0 To height - 1
			Dim i As Int = y * width * 4 + x * 4
			Dim b As Int = Bit.And(0xFF, buffer(i))
			Dim g As Int = Bit.And(0xFF, buffer(i + 1))
			Dim r As Int = Bit.And(0xFF, buffer(i + 2))
			Dim a As Int = Bit.And(0xFF, buffer(i + 3))
			If A = 255 And R = 127 And g = 127 And b = 127 Then 'This is a Gray color (We key this out with whatever is in the background, So save as a 0)
				PixelArray(x, y) = 0
			else if A = 255 And R = 0 And b = 0 And G = 0 Then 'We have a black color. So we make this black, or 1.
				PixelArray(x, y) = 1
			Else if A = 255 And R = 255 And G = 255 And B = 255 Then 'We have a white color. So this is the typeface color. or, 2.
				PixelArray(x, y) = 2
			End If
		Next
	Next

	'Load 18x18 Font into Pixel Memory.
	Dim img As Image = fx.LoadImage(File.DirAssets, "font3.gif")
	Dim buffer() As Byte = GetPixels(img)
	Dim width As Int = img.Width
	Dim height As Int = img.Height
	For x = 0 To width - 1
		For y = 0 To height - 1
			Dim i As Int = y * width * 4 + x * 4
			Dim b As Int = Bit.And(0xFF, buffer(i))
			Dim g As Int = Bit.And(0xFF, buffer(i + 1))
			Dim r As Int = Bit.And(0xFF, buffer(i + 2))
			Dim a As Int = Bit.And(0xFF, buffer(i + 3))
			If A = 255 And R = 127 And g = 127 And b = 127 Then 'This is a Gray color (We key this out with whatever is in the background, So save as a 0)
				PixelArray2(x, y) = 0
			else if A = 255 And R = 0 And b = 0 And G = 0 Then 'We have a black color. So we make this black, or 1.
				PixelArray2(x, y) = 1
			Else if A = 255 And R = 255 And G = 255 And B = 255 Then 'We have a white color. So this is the typeface color. or, 2.
				PixelArray2(x, y) = 2
			End If
		Next
	Next

	'Turn 18x36 Pixel Map into a Character Array.
	Dim Characterbyte() As Byte
	Dim newI, b, A, c, newx, newy As Int
	For newI = 0 To 95 Step 1
		A = 0
		B = (newI / 16) + 1
		C = newI Mod 16
		Characterbyte = GetCharacter(c, b) 'Get character pixel data for ASCII Code I
		For newy = 0 To 35 Step 1
			For newx = 0 To 17 Step 1
				'Log("I" & newI & "X" & newx & "Y" & newy)
				ASCIIArray(newI, newx, newy) = Characterbyte(a)
				A = A + 1
			Next
		Next
	Next

	'Turn 18x18 Pixel Map into a Character Array.
	Dim Characterbyte() As Byte
	Dim newI, b, A, c, newx, newy As Int
	For newI = 0 To 95 Step 1
		A = 0
		B = (newI / 16) + 1
		C = newI Mod 16
		Characterbyte = GetCharacter2(c, b) 'Get character pixel data for ASCII Code I
		For newy = 0 To 17 Step 1
			For newx = 0 To 17 Step 1
				'Log("I" & newI & "X" & newx & "Y" & newy)
				ASCIIArray2(newI, newx, newy) = Characterbyte(a)
				A = A + 1
			Next
		Next
	Next
The above code basically loads up my Font Table which is a single image. Into memory. I laid out the font as a single indexed color GIF, and this program brings it into a bitmap font table. This is a Java/B4J program for ease of use. its very VB6-like.
At this point, I can write a simple piece of code to write a random character glyph into the framebuffer and see what happens.
The subroutine I wrote which draws a character into the framebuffer, like so:
Sub DrawCharacter(Text As String, Start As Int, Line As Int, StartAddress As Int, Background As Int)
	'Write a character to the screen:
	Dim Fontval As Int
	Dim CMD(6) As Byte
	Dim AddressBytes() As Byte
	'Beginning of framebuffer memory
	'Dim Address As Int = 0x402716
	Dim Address As Int = StartAddress
	Dim Columnaddress, Lineaddress, I, A, B As Int
	Dim Textbuff As String

	'Arduino Packet format for Byte-Wide Memory Writes:
	'02 = Write Byte
	'XX, XX, XX, XX = Address (Little Endian)
	'Data Byte = Little Endian.

	'Arduino Packet format for Word-Wide Memory Writes:
	'03 = Write Word
	'XX, XX, XX, XX = Address (Little Endian)
	'XX, XX = Dataword (little Endian)


	'Calculate a new address based on the Specified start character position, and line.
	A = (Line * 36) * 768 'Calculate new character line position
	B = Start * 18 'Calculate new character position
	Address = Address + A + B 'Create the new address

	Dim Characterbytes() As Byte = Text.GetBytes("UTF8") 'Get our character array.
	For I = 0 To Characterbytes.Length-1 'Loop through each byte in the character line.
		If Characterbytes(I) >= 32 Then
			Fontval = Characterbytes(i) - 32'Re-align ASCII table to exclude non-printable characters (Doesnt exist in this font)
		Else
			Fontval = 0
		End If

		Textbuff = ""
		Lineaddress = Address
		For Y = 0 To 35
			Columnaddress = Lineaddress
			For X = 0 To 18
				'CMD(6) = ASCIIArray(Fontval, x, y) 'Load in left pixel
				'x = x + 1
				CMD(5) = ASCIIArray(Fontval, x, y) 'Load in right pixel
				AddressBytes = Convert.HexToBytes(Bit.ToHexString(Columnaddress)) 'Get the byte values
				CMD(0) = 2
				CMD(1) = AddressBytes(2)
				CMD(2) = AddressBytes(1)
				CMD(3) = AddressBytes(0)
				CMD(4) = 0
				If CMD(5) = 1 Then CMD(5) = 127
				If CMD(5) = 2 Then CMD(5) = 12
				If CMD(5) = 0 Then CMD(5) = Background
				'If CMD(6) = 1 Then CMD(6) = 15
				'If CMD(6) = 2 Then CMD(6) = 1
				'If CMD(6) = 0 Then CMD(6) = Background
				astream.Write(CMD)
				Columnaddress = Columnaddress + 1 'Advance to the next pixel
			Next
			Lineaddress = Lineaddress + 768 'Move to the next line
			Log(Textbuff)
			Textbuff = ""
		Next
		Address = Address + 18 'Advance to next character position
	Next
End Sub
Great. This should do the trick. (All the debugging has been done, I dont have my old old code from this time period)
So in theory, if I draw a P into framebuffer, we can do it like this:
DrawCharacter("P", 0, 0, 0x400195, 9)Run the above subroutine, and boom:
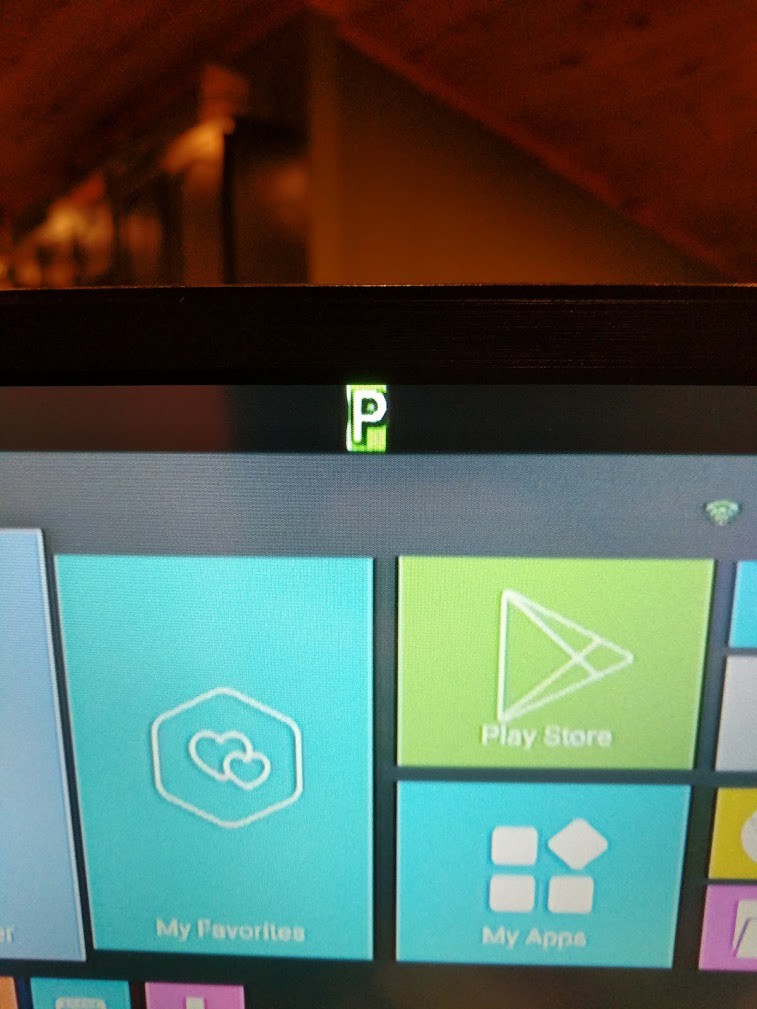
Its not perfect, you can see the characters aren't properly aligned, this is due to some weird bug in my Arduino 68K emulation code. its doing some weirdness with that.
Now lets see if we can draw out a full string:
DrawCharacter("This is a test of the Characters.       ", 0, 0, 0x400000, 9)
DrawCharacter("This would be the next line.            ", 0, 1, 0x400000, 9)
DrawCharacter("then of course, the line under that.... ", 0, 2, 0x400000, 9)
DrawCharacter("      This is being displayed on:       ", 0, 3, 0x400000, 9)
DrawCharacter("        The Weather STAR 4000!          ", 0, 4, 0x400000, 9)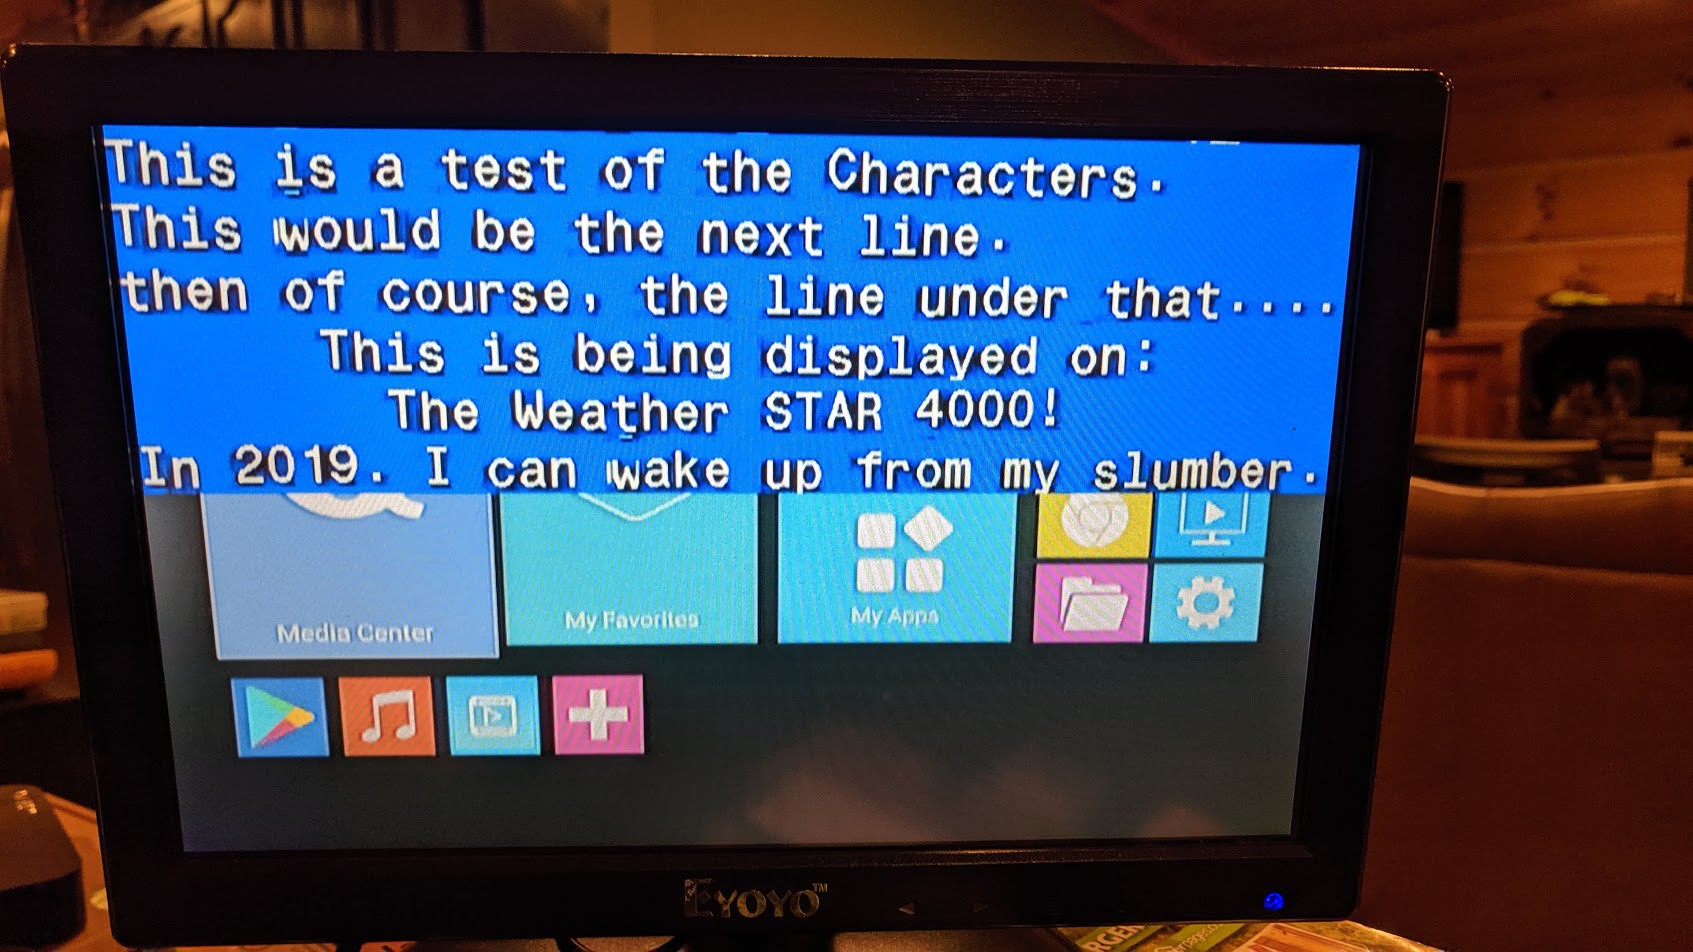
Boom! we now have the the primitives of the framebuffer figured out!
Lets move onto the next thing....
Discussions
Become a Hackaday.io Member
Create an account to leave a comment. Already have an account? Log In.