 kutluhan_aktar
- Bitcoin
- Ethereum
- Binance Coin
- Ripple (XRP)
- Tether
First of all, to elicit information on cryptocurrency coins concurrently, I decided to use the CoinGecko API V3 because it does not require account credentials or an authentification key. Though it is free, the CoinGecko API provides data in JSON for cryptocurrency coins profusely. After managing to get cryptocurrency data, I developed a web application in PHP, named Cryptocurrency Tracker, running on Raspberry Pi to obtain data from the API, process it, and print a JSON data packet containing these parameters for each requested coin:
- name
- current price
- total volume
- price change in 24 hours
- percentage change in USD in 24 hours
Then, I used a Raspberry Pi Pico to get cryptocurrency data of the requested coins elicited by the PHP web application and display each coin's information with an ST7789 IPS screen. Since the Raspberry Pi Pico is not eligible for WiFi connectivity, I added an ESP8266 ESP-01 to my device to assist the Raspberry Pi Pico in obtaining information from the web application.
Finally, I added a COM-09032 analog joystick and a button to control the interface of the device.
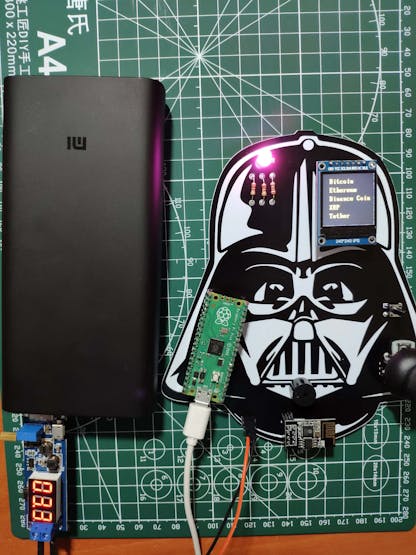
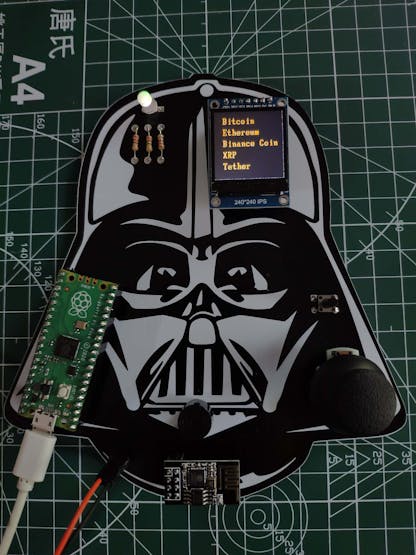
After completing wiring on a breadboard and testing the code, I designed my Darth Vader-shaped PCB to complete my project. It became a stylish and intriguing addition to my workplace as an effective apparatus to track real-time cryptocurrency data :)
In addition to presenting information, the device can be adjusted to notify the user under these two circumstances:
- price depletion
- price surge
Huge thanks to PCBWay for sponsoring this project.
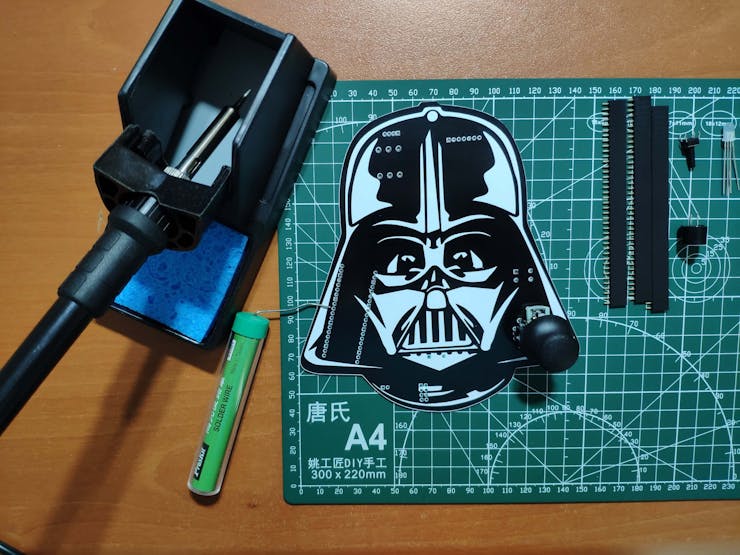
Step 1: Designing and soldering the Darth Vader Cryptocurrency Tracker PCB
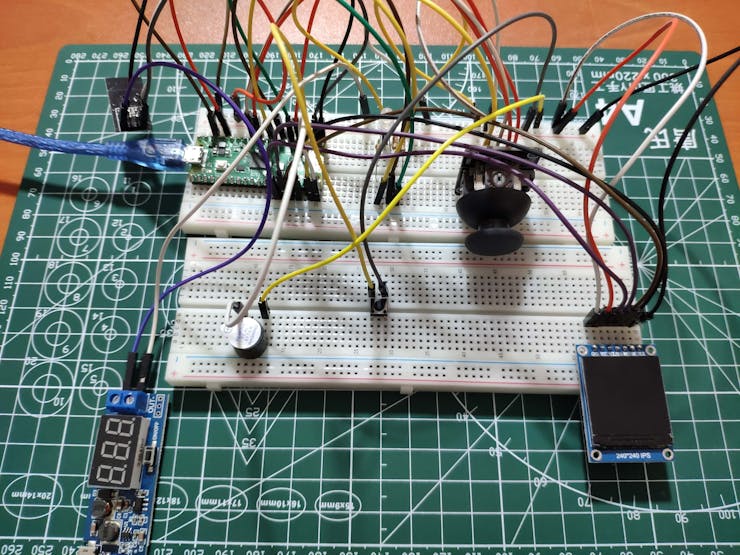
Before prototyping my PCB design, I tested all connections and wiring with the Raspberry Pi Pico on the breadboard.
Then, I designed the Darth Vader Cryptocurrency Tracker PCB by using KiCad. I attached the Gerber file of the PCB below, so if you want, you can order this PCB from PCBWay to create a stylish and felicitous apparatus to monitor real-time cryptocurrency data and get notified when there is a change in coin prices - surge or depletion - inspired by Anakin Skywalker :)
Click here to inspect and order this PCB directly on PCBWay.


First of all, by utilizing a soldering iron, I attached headers (female), COM-09032 analog joystick, buzzer, 5mm common anode RGB LED, 6x6 pushbutton, and 220Ω resistors.
Component list on the PCB:
Pico1 (Headers for Raspberry Pi Pico)
ESP1 (Headers for ESP8266 ESP-01)
S1 (Headers for ST7789 IPS Screen)
U1 (COM-09032 Analog Joystick)
BZ1 (Buzzer)
D1 (5mm Common Anode RGB LED)
K1 (6x6 Pushbutton)
R1, R2, R3 (220Ω Resistor)
J1 (External Battery)


Step 2: Setting up a LAMP web server on Raspberry Pi
If you are a novice in programming with Raspberry Pi, you can inspect well-explained instructions and tutorials on the official Raspberry Pi website.
To go to the official Raspberry Pi setting up tutorial, click here.
⭐ Open a terminal window by selecting Accessories > Terminal from the menu.
⭐ Install the apache2 package by typing the following command into the terminal and pressing Enter:
sudo apt-get install apache2 -y
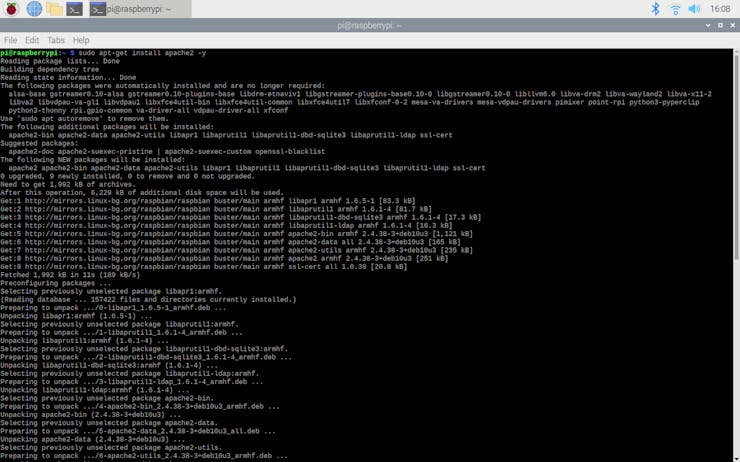
⭐ To test the server, open Chromium by selecting Internet > Chromium Web Browser from the menu and enter http://localhost.
⭐ If you want, you can use the IP address of your Raspberry Pi as well.
hostname -I
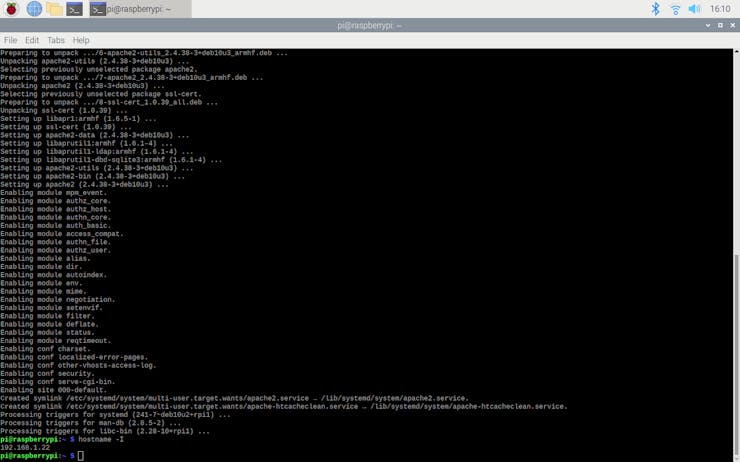

⭐ Install the php package with the following command:
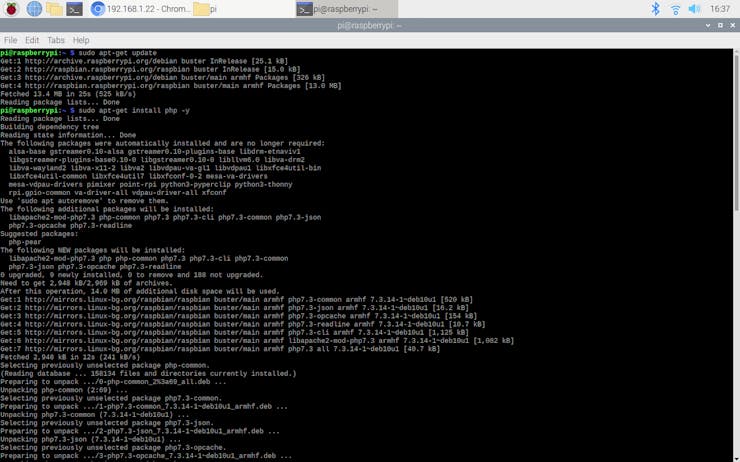
⭐ Do not forget to update the Pi.
sudo apt-get update
sudo apt-get install php -y
⭐To be able to obtain information from the CoinGecko API V3, install the php-curl package:
sudo apt-get install php-curl
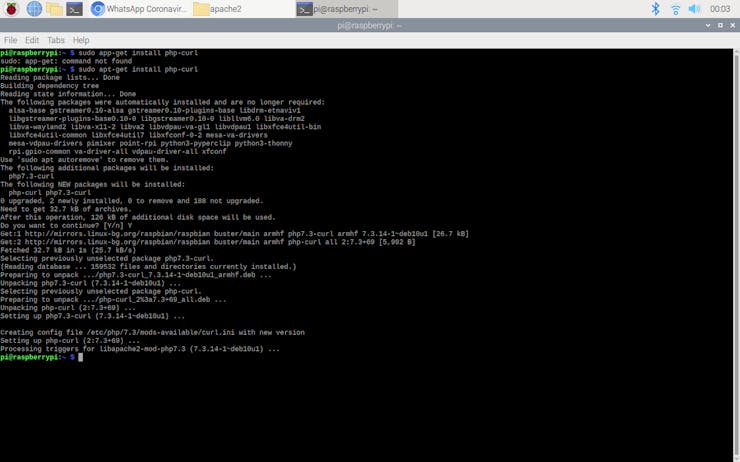
⭐ Then, restart the apache server to be able to use the installed packages on the localhost:
sudo service apache2 restart
Step 3: Developing the Cryptocurrency Tracker web application in PHP to obtain data from the CoinGecko API
I decided to use the CoinGecko API V3 in this project due to the fact that it does not require account credentials or an authentification key to send real-time cryptocurrency data. Although making requests to the CoinGecko API without account credentials returns limited information on coins, the incoming data is yet more than enough to display and interpret any given coin's status clearly.
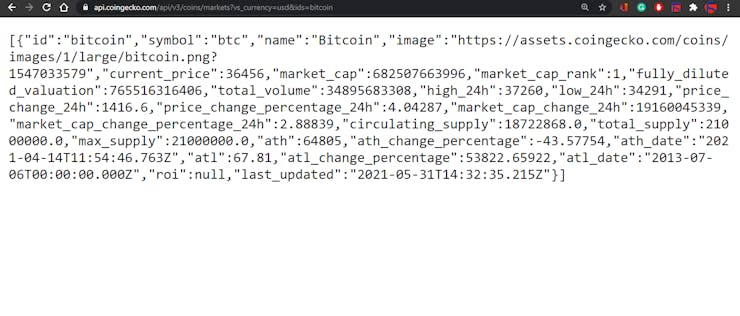
⭐ The CoinGecko API uses coin names (IDs) to collate real-time cryptocurrency data and returns the collected data in JSON:
https://api.coingecko.com/api/v3/coins/markets?vs_currency=usd
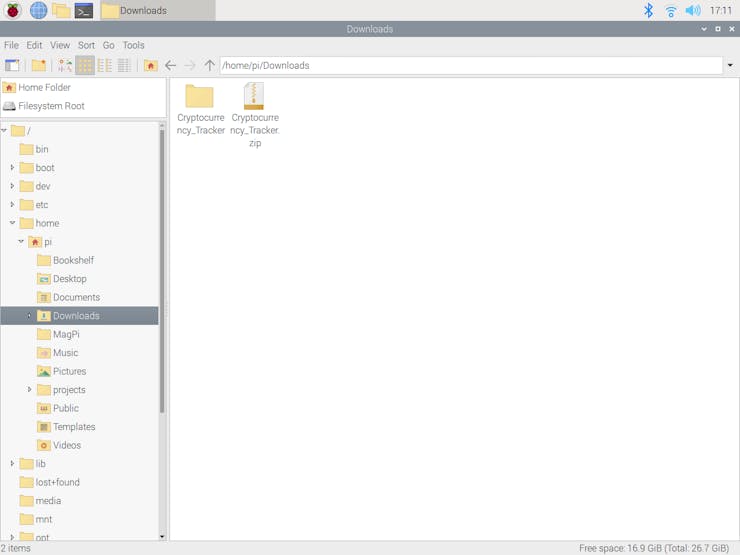
The web application consists of one file - index.php. You can download the web application below to install it on your Raspberry Pi - Cryptocurrency_Tracker.zip.
💻 index.php
⭐ Define the cryptocurrency_tracker class and its functions.
⭐ In the display_currency function, make an HTTP Get request to the CoinGecko API V3 to obtain real-time data of any given coin, such as Bitcoin.
⭐ Get the incoming data by using json_decode and file_get_contents functions.
⭐ Create the query array with the required parameters:
- name
- price
- total_volume
- price_change_24h
- percent_change_usd_24
⭐ Insert the recently created query array into the currencies object with the given coin's name.
private function display_currency($cryptocurrency){ # Make an HTTP Get request to the CoinGecko API V3 to collate data on the requested coin. $data = json_decode(file_get_contents("https://api.coingecko.com/api/v3/coins/markets?vs_currency=usd&ids=".$cryptocurrency, TRUE)); # Create the query array with the requested data: $query = array( "name" => $data[0]->name, "price" => $data[0]->current_price, "total_volume" => $data[0]->total_volume, "price_change_24h" => $data[0]->price_change_24h, "percent_change_usd_24" => $data[0]->price_change_percentage_24h ); // Assign objects for each given coin: $this->currencies[$cryptocurrency] = $query; }
⭐ In the print_cryptocurrencies function, print the currencies object in JSON (json_encode) after inserting data for each coin in the given coin name (ID) list:
- bitcoin
- ethereum
- binancecoin
- ripple
- tether
public function print_cryptocurrencies($cryptocurrencies){ foreach($cryptocurrencies as $coin){ $this->display_currency($coin); } echo(json_encode($this->currencies)); }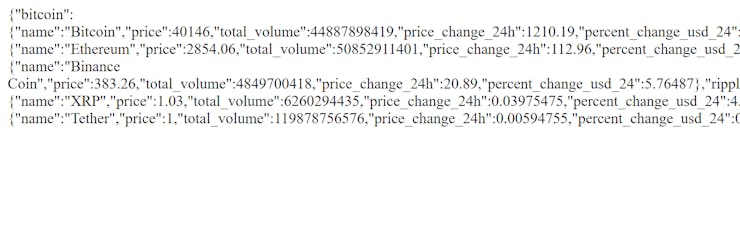
⭐ Define the coin class object and the coin name (ID) list.
$coin = new cryptocurrency_tracker();# Get data on this list of cryptocurrencies: Bitcoin, Ethereum, Binance Coin, XRP, Tether$coin->print_cryptocurrencies(array("bitcoin", "ethereum", "binancecoin", "ripple", "tether"));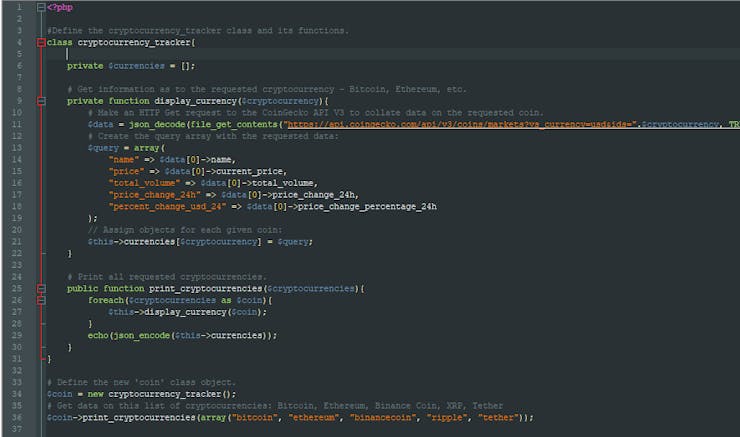
Step 3.1: Setting up the web application on Raspberry Pi
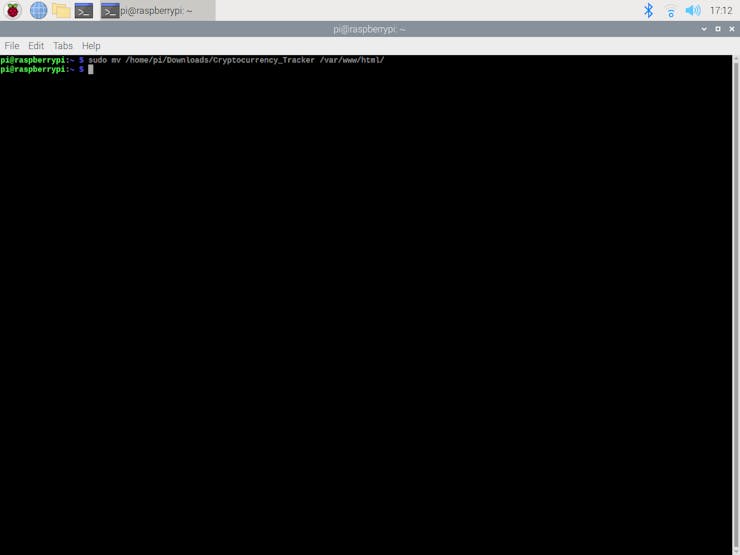
⭐ First of all, extract the Cryptocurrency_Tracker.zip folder and move the application folder (Cryptocurrency_Tracker) to the apache server (/var/www/html) by using the terminal since the apache server is a protected location.
sudo mv /home/pi/Downloads/Cryptocurrency_Tracker /var/www/html/
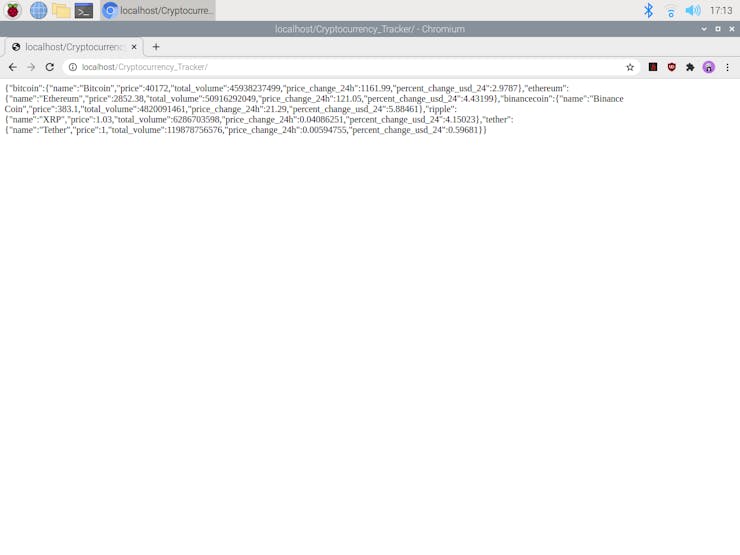
⭐ Go to the web application:
http://localhost/Cryptocurrency_Tracker/
Step 4: Programming the ESP-01 to print the response from the web application by serial communication
Instead of setting up and configuring the ESP8266 ESP-01 via serial with AT commands when connected to the Raspberry Pi Pico, I decided to program the ESP-01 with an ESP-01 USB UART adapter (programmer). In that way, the ESP-01 connects WiFi, obtains information from the web application, and prints the incoming data in JSON by serial communication automatically.
Depending on the UART adapter model you have, you may need to solder jumper wires to activate the programming mode on the ESP-01.
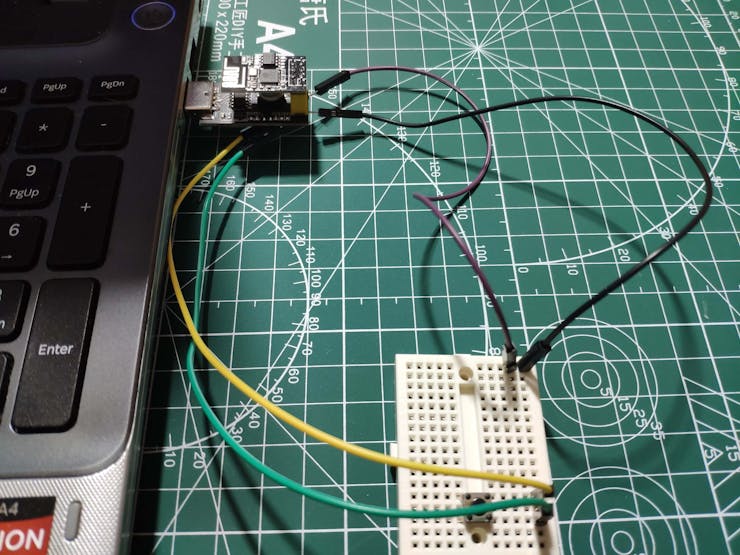
After connecting the ESP-01 to my computer successfully via the adapter, I used the Arduino IDE to program it.
To obtain information from my web application explained in previous steps, I modified the BasicHTTPClient example in the ESP8266HTTPClient.
If you do not know how to set up ESP8266 and its examples on the Arduino IDE, follow these instructions.
⭐ Wait for the WiFi connection.
⭐ Create the WiFi and HTTP clients.
⭐ Attempt to connect to the PHP web application.
⭐ If the connection is successful, get the server response header.
⭐ Print the response from the web application every fifteen seconds.
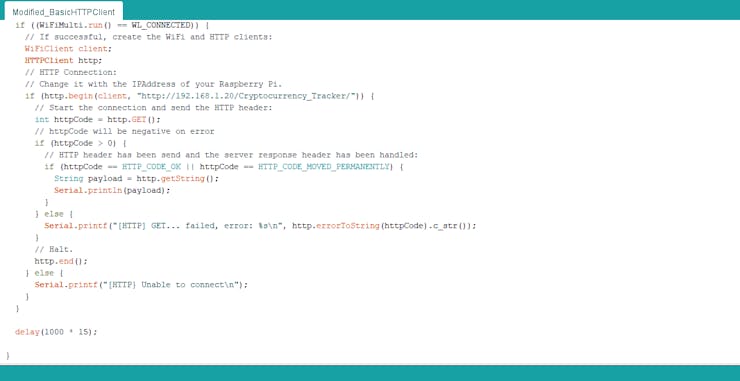
if ((WiFiMulti.run() == WL_CONNECTED)) { // If successful, create the WiFi and HTTP clients: WiFiClient client; HTTPClient http; // HTTP Connection: // Change it with the IPAddress of your Raspberry Pi. if (http.begin(client, "http://192.168.1.20/Cryptocurrency_Tracker/")) { // Start the connection and send the HTTP header: int httpCode = http.GET(); // httpCode will be negative on error if (httpCode > 0) { // HTTP header has been send and the server response header has been handled: if (httpCode == HTTP_CODE_OK || httpCode == HTTP_CODE_MOVED_PERMANENTLY) { String payload = http.getString(); Serial.println(payload); } } else { Serial.printf("[HTTP] GET... failed, error: %s\n", http.errorToString(httpCode).c_str()); } // Halt. http.end(); } else { Serial.printf("[HTTP} Unable to connect\n"); } } delay(1000 * 15);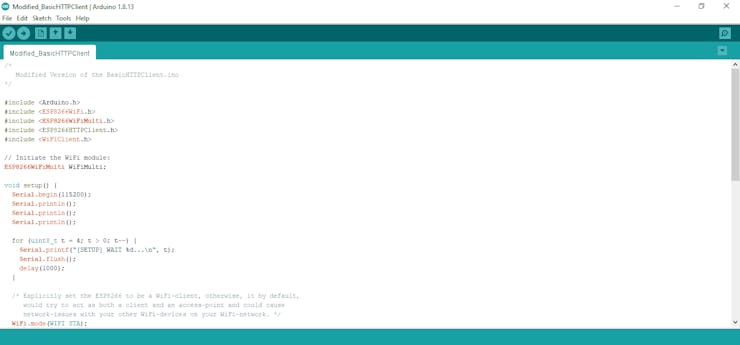
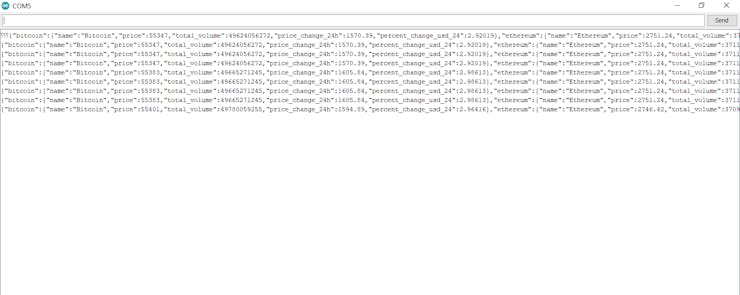
After uploading the modified BasicHTTPClient, the ESP-01 connects to the web application and prints the response (real-time JSON data) by serial communication every fifteen seconds.
Step 5: Setting up the Raspberry Pi Pico
In this step, I will show you how to set up the Raspberry Pi Pico and install MicroPython.
⭐ First of all, download the latest Thonny IDE from thonny.org, compatible with Windows, macOS, and Linux. If you want to use a Raspberry Pi to program the Pico, Thonny is already installed on Raspberry Pi OS.
If you have never used MicroPython on your Raspberry Pi Pico, you will need to add the MicroPython firmware.
⭐ Find the BOOTSEL button on your Raspberry Pi Pico.

⭐ Press the BOOTSEL button and hold it while you connect the other end of the micro USB cable to your computer.
⭐ This puts the Raspberry Pi Pico into USB mass storage device mode.
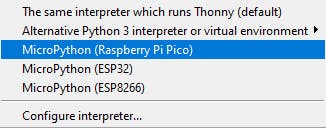
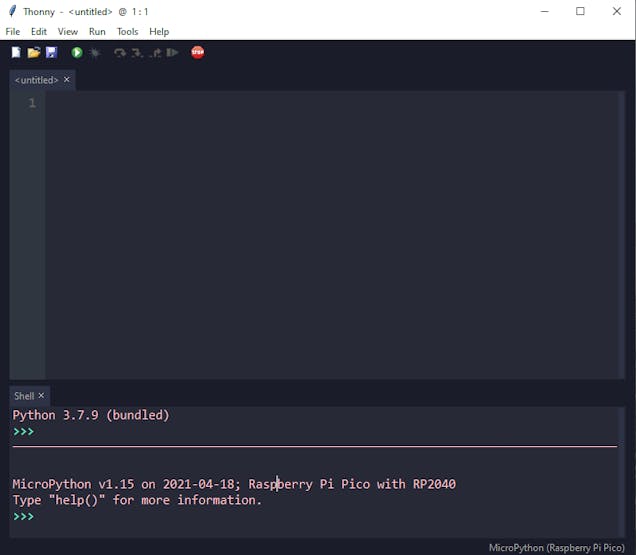
⭐ Then, in the bottom right-hand corner of the Thonny window, click on the Python version and choose ‘MicroPython (Raspberry Pi Pico)’:
⭐ When the dialog box pops up, click the Install button to copy the latest version of the MicroPython firmware to the Raspberry Pi Pico.
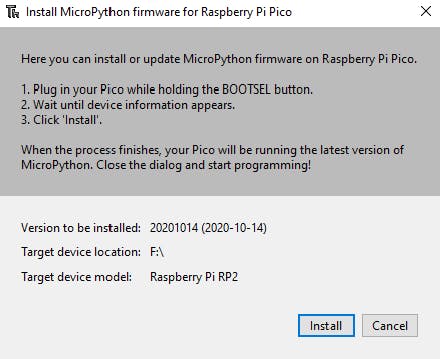
⭐ Wait for the installation to complete and click Close.
Now, when you plug the Raspberry Pi Pico into your computer without pressing the BOOTSEL button, Thonny should recognize the board and firmware automatically.
Step 6: Programming the Raspberry Pi Pico
In this project, the Raspberry Pi Pico requires four code files to monitor real-time cryptocurrency data, including libraries and fonts:
- bitcoin_tracker.py
- st7789py.py (library)
- vga1_16x16.py (font)
- vga1_bold_16x32.py (font)
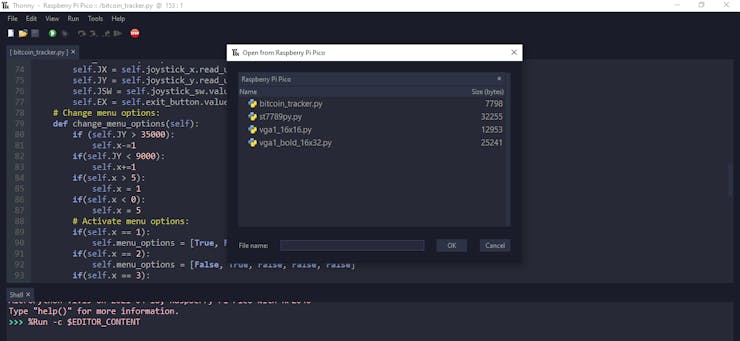
When saving files to the Raspberry Pi Pico, click the Save button and choose the Raspberry Pi Pico option on Thonny.

After saving all files, you should see the folder like this:
If you want to run the code automatically when plugged, save the bitcoin_tracker.py file as the main.py file.
In this step, I will discuss the bitcoin_tracker.py file. You can find more information on the library and fonts in the following step.
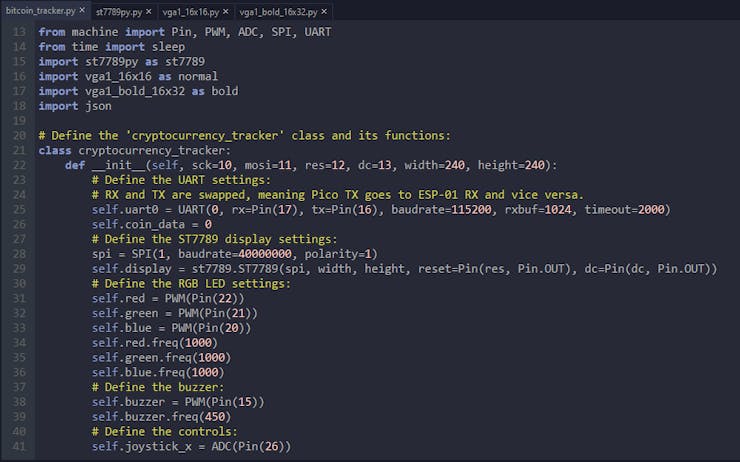
⭐ Include the required modules and libraries:
from machine import Pin, PWM, ADC, SPI, UARTfrom time import sleepimport st7789py as st7789import vga1_16x16 as normalimport vga1_bold_16x32 as boldimport json
⭐ Define the cryptocurrency_tracker class and its functions.
⭐ In the __init__ function, define the UART settings for the ESP-01, the SPI settings for the ST7789 display, the RGB LED and buzzer settings, and the menu options.
class cryptocurrency_tracker: def __init__(self, sck=10, mosi=11, res=12, dc=13, width=240, height=240): # Define the UART settings: # RX and TX are swapped, meaning Pico TX goes to ESP-01 RX and vice versa. self.uart0 = UART(0, rx=Pin(17), tx=Pin(16), baudrate=115200, rxbuf=1024, timeout=2000) self.coin_data = 0 # Define the ST7789 display settings: spi = SPI(1, baudrate=40000000, polarity=1) self.display = st7789.ST7789(spi, width, height, reset=Pin(res, Pin.OUT), dc=Pin(dc, Pin.OUT)) # Define the RGB LED settings: self.red = PWM(Pin(22)) self.green = PWM(Pin(21)) self.blue = PWM(Pin(20)) self.red.freq(1000) self.green.freq(1000) self.blue.freq(1000) # Define the buzzer: self.buzzer = PWM(Pin(15)) self.buzzer.freq(450) # Define the controls: self.joystick_x = ADC(Pin(26)) self.joystick_y = ADC(Pin(27)) self.joystick_sw = Pin(19, Pin.IN, Pin.PULL_UP) self.exit_button = Pin(14, Pin.IN, Pin.PULL_DOWN) # Define menu options and list: self.menu_list = ["Bitcoin", "Ethereum", "Binance Coin", "XRP", "Tether"] self.menu_options = [False, False, False, False, False] self.activated = False self.x = 0 ...
⭐ In the fetch_information_from_esp function, obtain, check, and decode the incoming JSON data (json.loads) printed by the ESP8266 ESP-01 via serial communication.
... def fetch_information_from_esp(self): incoming = bytes() while self.uart0.any() > 0: incoming += self.uart0.readline() # Check the incoming data before decoding: if (len(incoming) and incoming.decode("utf-8")): incoming = incoming.decode("utf-8") if (incoming.find("[HTTP]") < 0 and incoming.endswith("}}\r\n")): self.coin_data = json.loads(incoming) ...
⭐ In the interface function, display the interface with coins (menu options):
- Bitcoin
- Ethereum
- Binance Coin
- XRP
- Tether
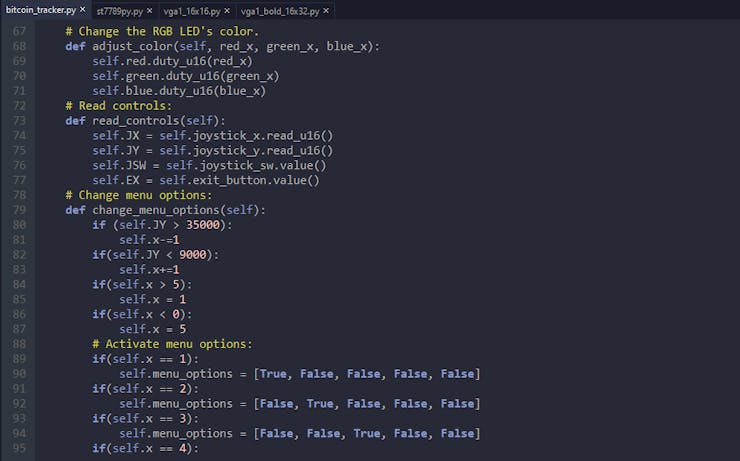
⭐ In the adjust_color function, change the color of the RGB LED.
... def adjust_color(self, red_x, green_x, blue_x): self.red.duty_u16(red_x) self.green.duty_u16(green_x) self.blue.duty_u16(blue_x)...
⭐ In the read_controls function, read the analog joystick and the exit button values.
... def read_controls(self): self.JX = self.joystick_x.read_u16() self.JY = self.joystick_y.read_u16() self.JSW = self.joystick_sw.value() self.EX = self.exit_button.value()...
⭐ In the change_menu_options function, select a coin (menu option) to activate according to the Y-axis of the analog joystick.
... def change_menu_options(self): if (self.JY > 35000): self.x-=1 if(self.JY < 9000): self.x+=1 if(self.x > 5): self.x = 1 if(self.x < 0): self.x = 5 # Activate menu options: if(self.x == 1): self.menu_options = [True, False, False, False, False] if(self.x == 2): self.menu_options = [False, True, False, False, False] if(self.x == 3): self.menu_options = [False, False, True, False, False] if(self.x == 4): self.menu_options = [False, False, False, True, False] if(self.x == 5): self.menu_options = [False, False, False, False, True] ...
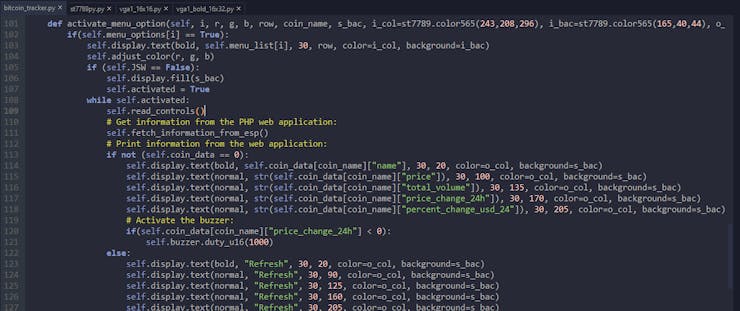
⭐ In the activate_menu_option function, after being selected, if a coin (menu option) is activated by pressing the joystick button (SW):
⭐ Display real-time data (parameters) of the activated coin (menu option) from the PHP web application, transferred by the ESP-01 via serial communication:
- name
- price
- total_volume
- price_change_24h
- percent_change_usd_24
⭐ Depending on the price_change_24h value, detect if there is a price depletion or surge to notify the user via the buzzer.
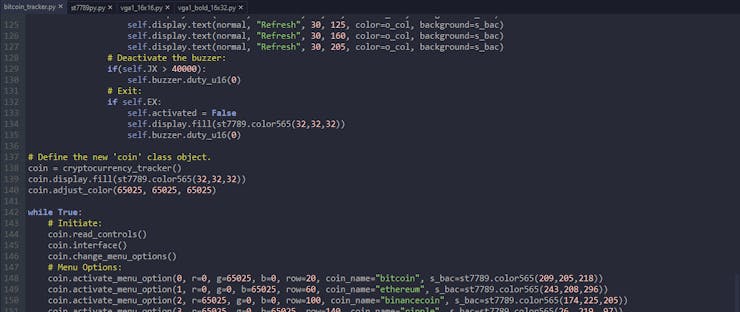
⭐ Turn off the buzzer if the X-axis of the analog joystick is higher than 40000.
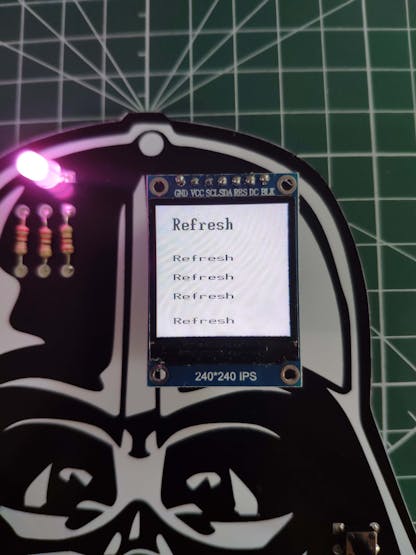
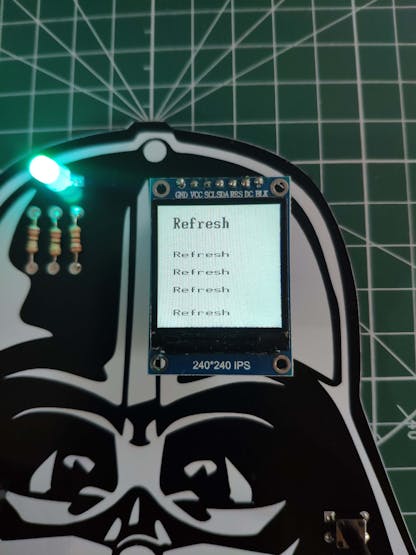
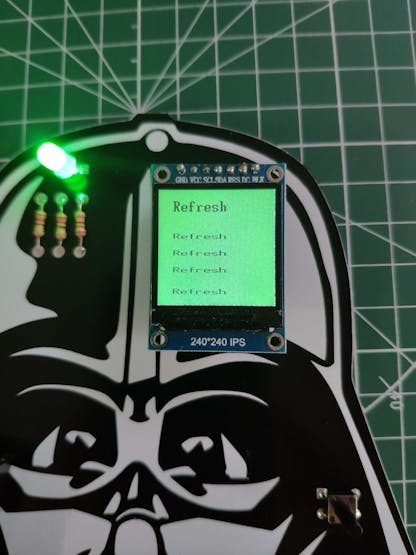
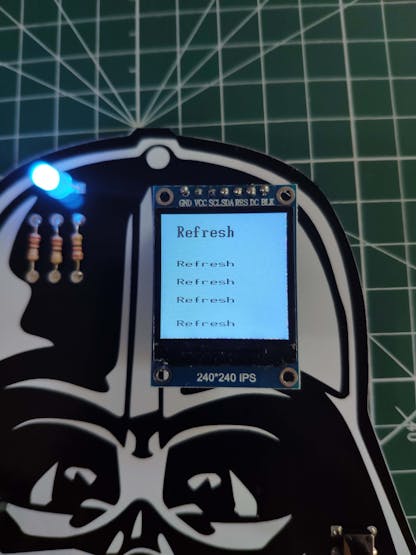
⭐ If there is no incoming JSON data, print Refresh for all parameters.
⭐ If the Exit button is pressed, return to the interface.
... def activate_menu_option(self, i, r, g, b, row, coin_name, s_bac, i_col=st7789.color565(243,208,296), i_bac=st7789.color565(165,40,44), o_col=st7789.color565(31,32,32)): if(self.menu_options[i] == True): self.display.text(bold, self.menu_list[i], 30, row, color=i_col, background=i_bac) self.adjust_color(r, g, b) if (self.JSW == False): self.display.fill(s_bac) self.activated = True while self.activated: self.read_controls() # Get information from the PHP web application: self.fetch_information_from_esp() # Print information from the web application: if not (self.coin_data == 0): self.display.text(bold, self.coin_data[coin_name]["name"], 30, 20, color=o_col, background=s_bac) self.display.text(normal, str(self.coin_data[coin_name]["price"]), 30, 100, color=o_col, background=s_bac) self.display.text(normal, str(self.coin_data[coin_name]["total_volume"]), 30, 135, color=o_col, background=s_bac) self.display.text(normal, str(self.coin_data[coin_name]["price_change_24h"]), 30, 170, color=o_col, background=s_bac) self.display.text(normal, str(self.coin_data[coin_name]["percent_change_usd_24"]), 30, 205, color=o_col, background=s_bac) # Activate the buzzer: if(self.coin_data[coin_name]["price_change_24h"] < 0): self.buzzer.duty_u16(1000) else: self.display.text(bold, "Refresh", 30, 20, color=o_col, background=s_bac) self.display.text(normal, "Refresh", 30, 90, color=o_col, background=s_bac) self.display.text(normal, "Refresh", 30, 125, color=o_col, background=s_bac) self.display.text(normal, "Refresh", 30, 160, color=o_col, background=s_bac) self.display.text(normal, "Refresh", 30, 205, color=o_col, background=s_bac) # Deactivate the buzzer: if(self.JX > 40000): self.buzzer.duty_u16(0) # Exit: if self.EX: self.activated = False self.display.fill(st7789.color565(32,32,32)) self.buzzer.duty_u16(0)
⭐ Define the coin class object and set up all menu options.
coin = cryptocurrency_tracker()coin.display.fill(st7789.color565(32,32,32))coin.adjust_color(65025, 65025, 65025)while True: # Initiate: coin.read_controls() coin.interface() coin.change_menu_options() # Menu Options: coin.activate_menu_option(0, r=0, g=65025, b=0, row=20, coin_name="bitcoin", s_bac=st7789.color565(209,205,218)) coin.activate_menu_option(1, r=0, g=0, b=65025, row=60, coin_name="ethereum", s_bac=st7789.color565(243,208,296)) coin.activate_menu_option(2, r=65025, g=0, b=0, row=100, coin_name="binancecoin", s_bac=st7789.color565(174,225,205)) coin.activate_menu_option(3, r=65025, g=0, b=65025, row=140, coin_name="ripple", s_bac=st7789.color565(26, 219, 97)) coin.activate_menu_option(4, r=65025, g=65025, b=0, row=180, coin_name="tether", s_bac=st7789.color565(94,176,229))

Step 6.1: Displaying texts with the ST7789 IPS screen
To print texts with the ST7789 IPS Screen, I used this driver for MicroPython.
⭐ First of all, I added this library to the Raspberry Pi Pico as the st7789py.py file.
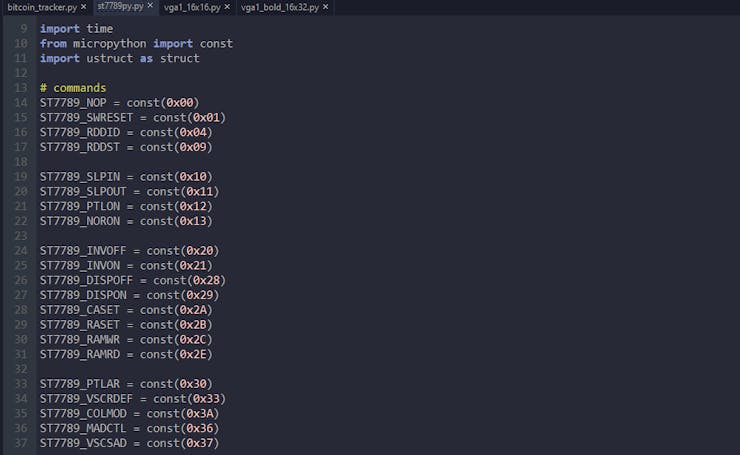
⭐ Then, I saved two different fonts(vga1_16x16 and vga1_bold_16x32) to the Raspberry Pi Pico to display headers and parameters separately.
Connections and Adjustments
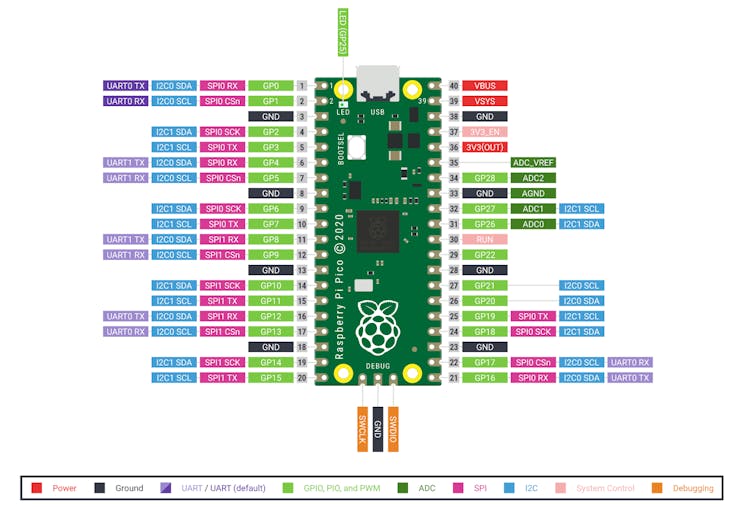
# Connections:
# Raspberry Pi Pico
#                                ST7789 SPI 240*240 Display
# GP10 --------------------------- SCL
# GP11 --------------------------- SDA
# GP12 --------------------------- RES
# GP13 --------------------------- DC
#                                ESP8266 ESP-01
# GP17 (RX) ---------------------- TX
# GP16 (TX) ---------------------- RX
#                                COM-09032 Analog Joystick
# GP27 --------------------------- VRX
# GP26 --------------------------- VRY
# GP19 --------------------------- SW
#                                5mm RGB Common Anode
# GP22 --------------------------- R
# GP21 --------------------------- G
# GP20 --------------------------- B
#                                Buzzer
# GP15 --------------------------- +
#                                Exit Button
# GP14 --------------------------- S
As shown above, I designed my PCB connections according to the pinout of the Raspberry Pi Pico. If you do not know the Raspberry Pi Pico pinout diagram and specifications:
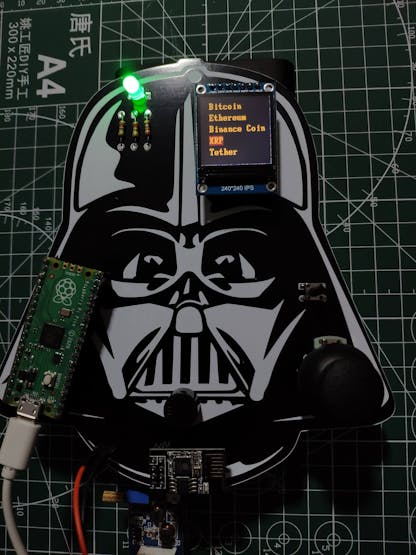
After completing and uploading the code, I attached all required components to the board via headers - Raspberry Pi Pico, ESP8266 ESP-01, and ST7789 IPS screen.
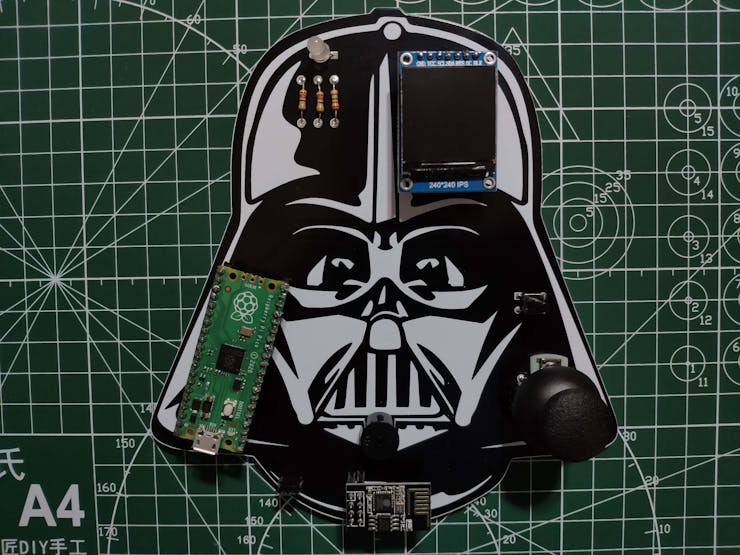
Unfortunately, even though Raspberry Pi Pico works at 3.3V, the current provided by Pico is not enough for ESP-01 to run while collecting information from a web application precisely. Thus, I added a connector (J1) to my PCB design to supply the ESP-01 with an external battery (3.3V).
Modes and Features
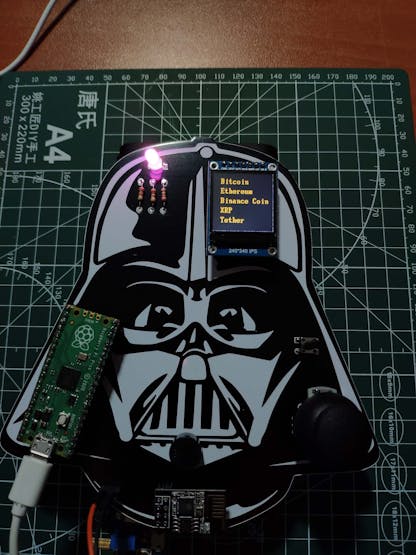
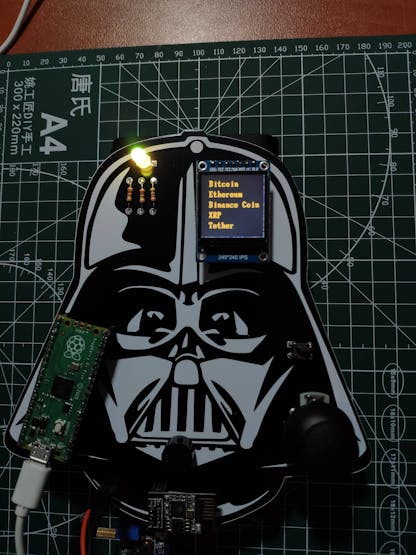
💰📊 The device shows five different coins (menu options) on the interface to display real-time cryptocurrency data of:
- Bitcoin
- Ethereum
- Binance Coin
- XRP
- Tether
💰📊 The device allows the user to select between coins to display information via the analog joystick:
- Y-axis (> 35000) ➡ Go Up
- Y-axis (< 9000) ➡ Go Down
- SW ➡ Activate
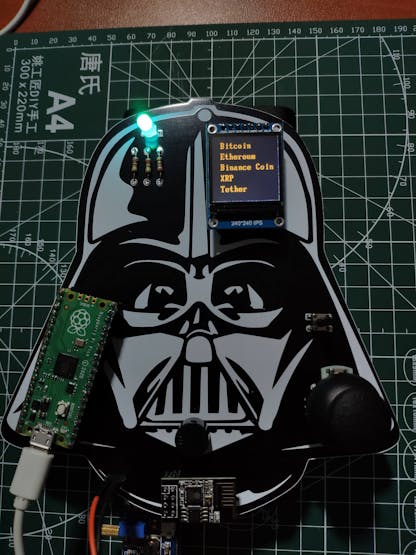
💰📊 While selecting a coin on the interface with the Y-axis of the analog joystick, the device turns the RGB LED to a different color for each coin as its color code:
- Bitcoin ➡ Purple
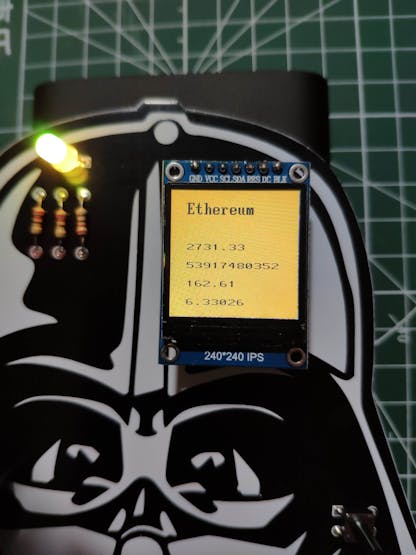
- Ethereum ➡ Yellow
- Binance Coin ➡ Cyan
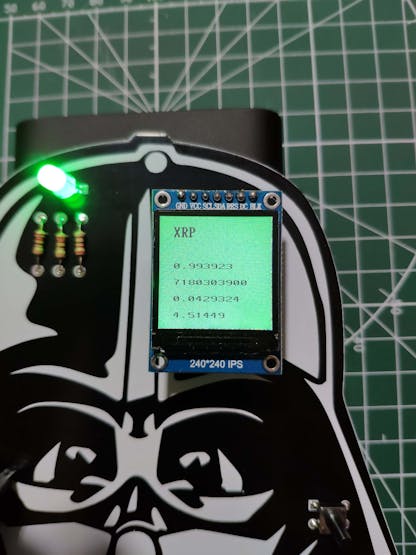
- XRP ➡ Green
- Tether ➡ Blue
💰📊 The device also shows the same color code as the background when displaying data for each coin.
💰📊 After activating any coins by pressing the joystick button (SW) to display real-time data, the device lets the user return to the interface by pressing the Exit button.
📌 Coins (Menu Options)
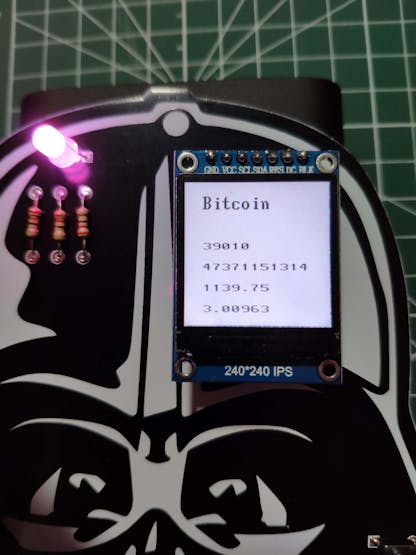
💰📊 If the Bitcoin option is selected and activated, the device displays its real-time data (parameters) from the PHP web application, transferred by the ESP8266 ESP-01 via serial communication:
- name
- current price
- total volume
- price change in 24 hours
- percentage change in USD in 24 hours
💰📊 Depending on the price change value in 24 hours, the device can detect if there is a price surge or depletion to notify the user via the buzzer. By default, the device is set for detecting the price depletion in 24 hours:
price_change_24h < 0
💰📊 The device turns off the buzzer if the X-axis of the analog joystick is higher than 40000.
💰📊 If the ESP-01 is not sending accurate data, the device prints Refresh for each parameter until obtaining the correct information.
💰📊 If the Ethereum option is selected and activated, the device displays its real-time data (parameters) from the PHP web application, transferred by the ESP8266 ESP-01 via serial communication:
- name
- current price
- total volume
- price change in 24 hours
- percentage change in USD in 24 hours
💰📊 Depending on the price change value in 24 hours, the device can detect if there is a price surge or depletion to notify the user via the buzzer. By default, the device is set for detecting the price depletion in 24 hours:
price_change_24h < 0
💰📊 The device turns off the buzzer if the X-axis of the analog joystick is higher than 40000.

💰📊 If the ESP-01 is not sending accurate data, the device prints Refresh for each parameter until obtaining the correct information.

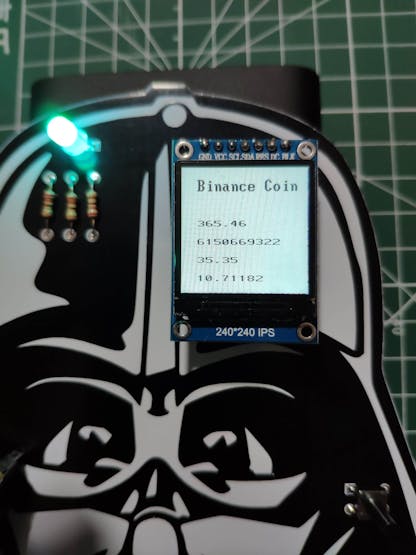
💰📊 If the Binance Coin option is selected and activated, the device displays its real-time data (parameters) from the PHP web application, transferred by the ESP8266 ESP-01 via serial communication:
- name
- current price
- total volume
- price change in 24 hours
- percentage change in USD in 24 hours
💰📊 Depending on the price change value in 24 hours, the device can detect if there is a price surge or depletion to notify the user via the buzzer. By default, the device is set for detecting the price depletion in 24 hours:
price_change_24h < 0
💰📊 The device turns off the buzzer if the X-axis of the analog joystick is higher than 40000.
💰📊 If the ESP-01 is not sending accurate data, the device prints Refresh for each parameter until obtaining the correct information.
💰📊 If the XRP option is selected and activated, the device displays its real-time data (parameters) from the PHP web application, transferred by the ESP8266 ESP-01 via serial communication:
- name
- current price
- total volume
- price change in 24 hours
- percentage change in USD in 24 hours
💰📊 Depending on the price change value in 24 hours, the device can detect if there is a price surge or depletion to notify the user via the buzzer. By default, the device is set for detecting the price depletion in 24 hours:
price_change_24h < 0
💰📊 The device turns off the buzzer if the X-axis of the analog joystick is higher than 40000.
💰📊 If the ESP-01 is not sending accurate data, the device prints Refresh for each parameter until obtaining the correct information.
💰📊 If the Tether option is selected and activated, the device displays its real-time data (parameters) from the PHP web application, transferred by the ESP8266 ESP-01 via serial communication:
- name
- current price
- total volume
- price change in 24 hours
- percentage change in USD in 24 hours
💰📊 Depending on the price change value in 24 hours, the device can detect if there is a price surge or depletion to notify the user via the buzzer. By default, the device is set for detecting the price depletion in 24 hours:
price_change_24h < 0
💰📊 The device turns off the buzzer if the X-axis of the analog joystick is higher than 40000.


💰📊 If the ESP-01 is not sending accurate data, the device prints Refresh for each parameter until obtaining the correct information.
Videos and Conclusion
After completing all steps above, I placed the device on my desk by utilizing a plastic easel as a fitting and stylish decoration for my workplace. It works impeccably :)