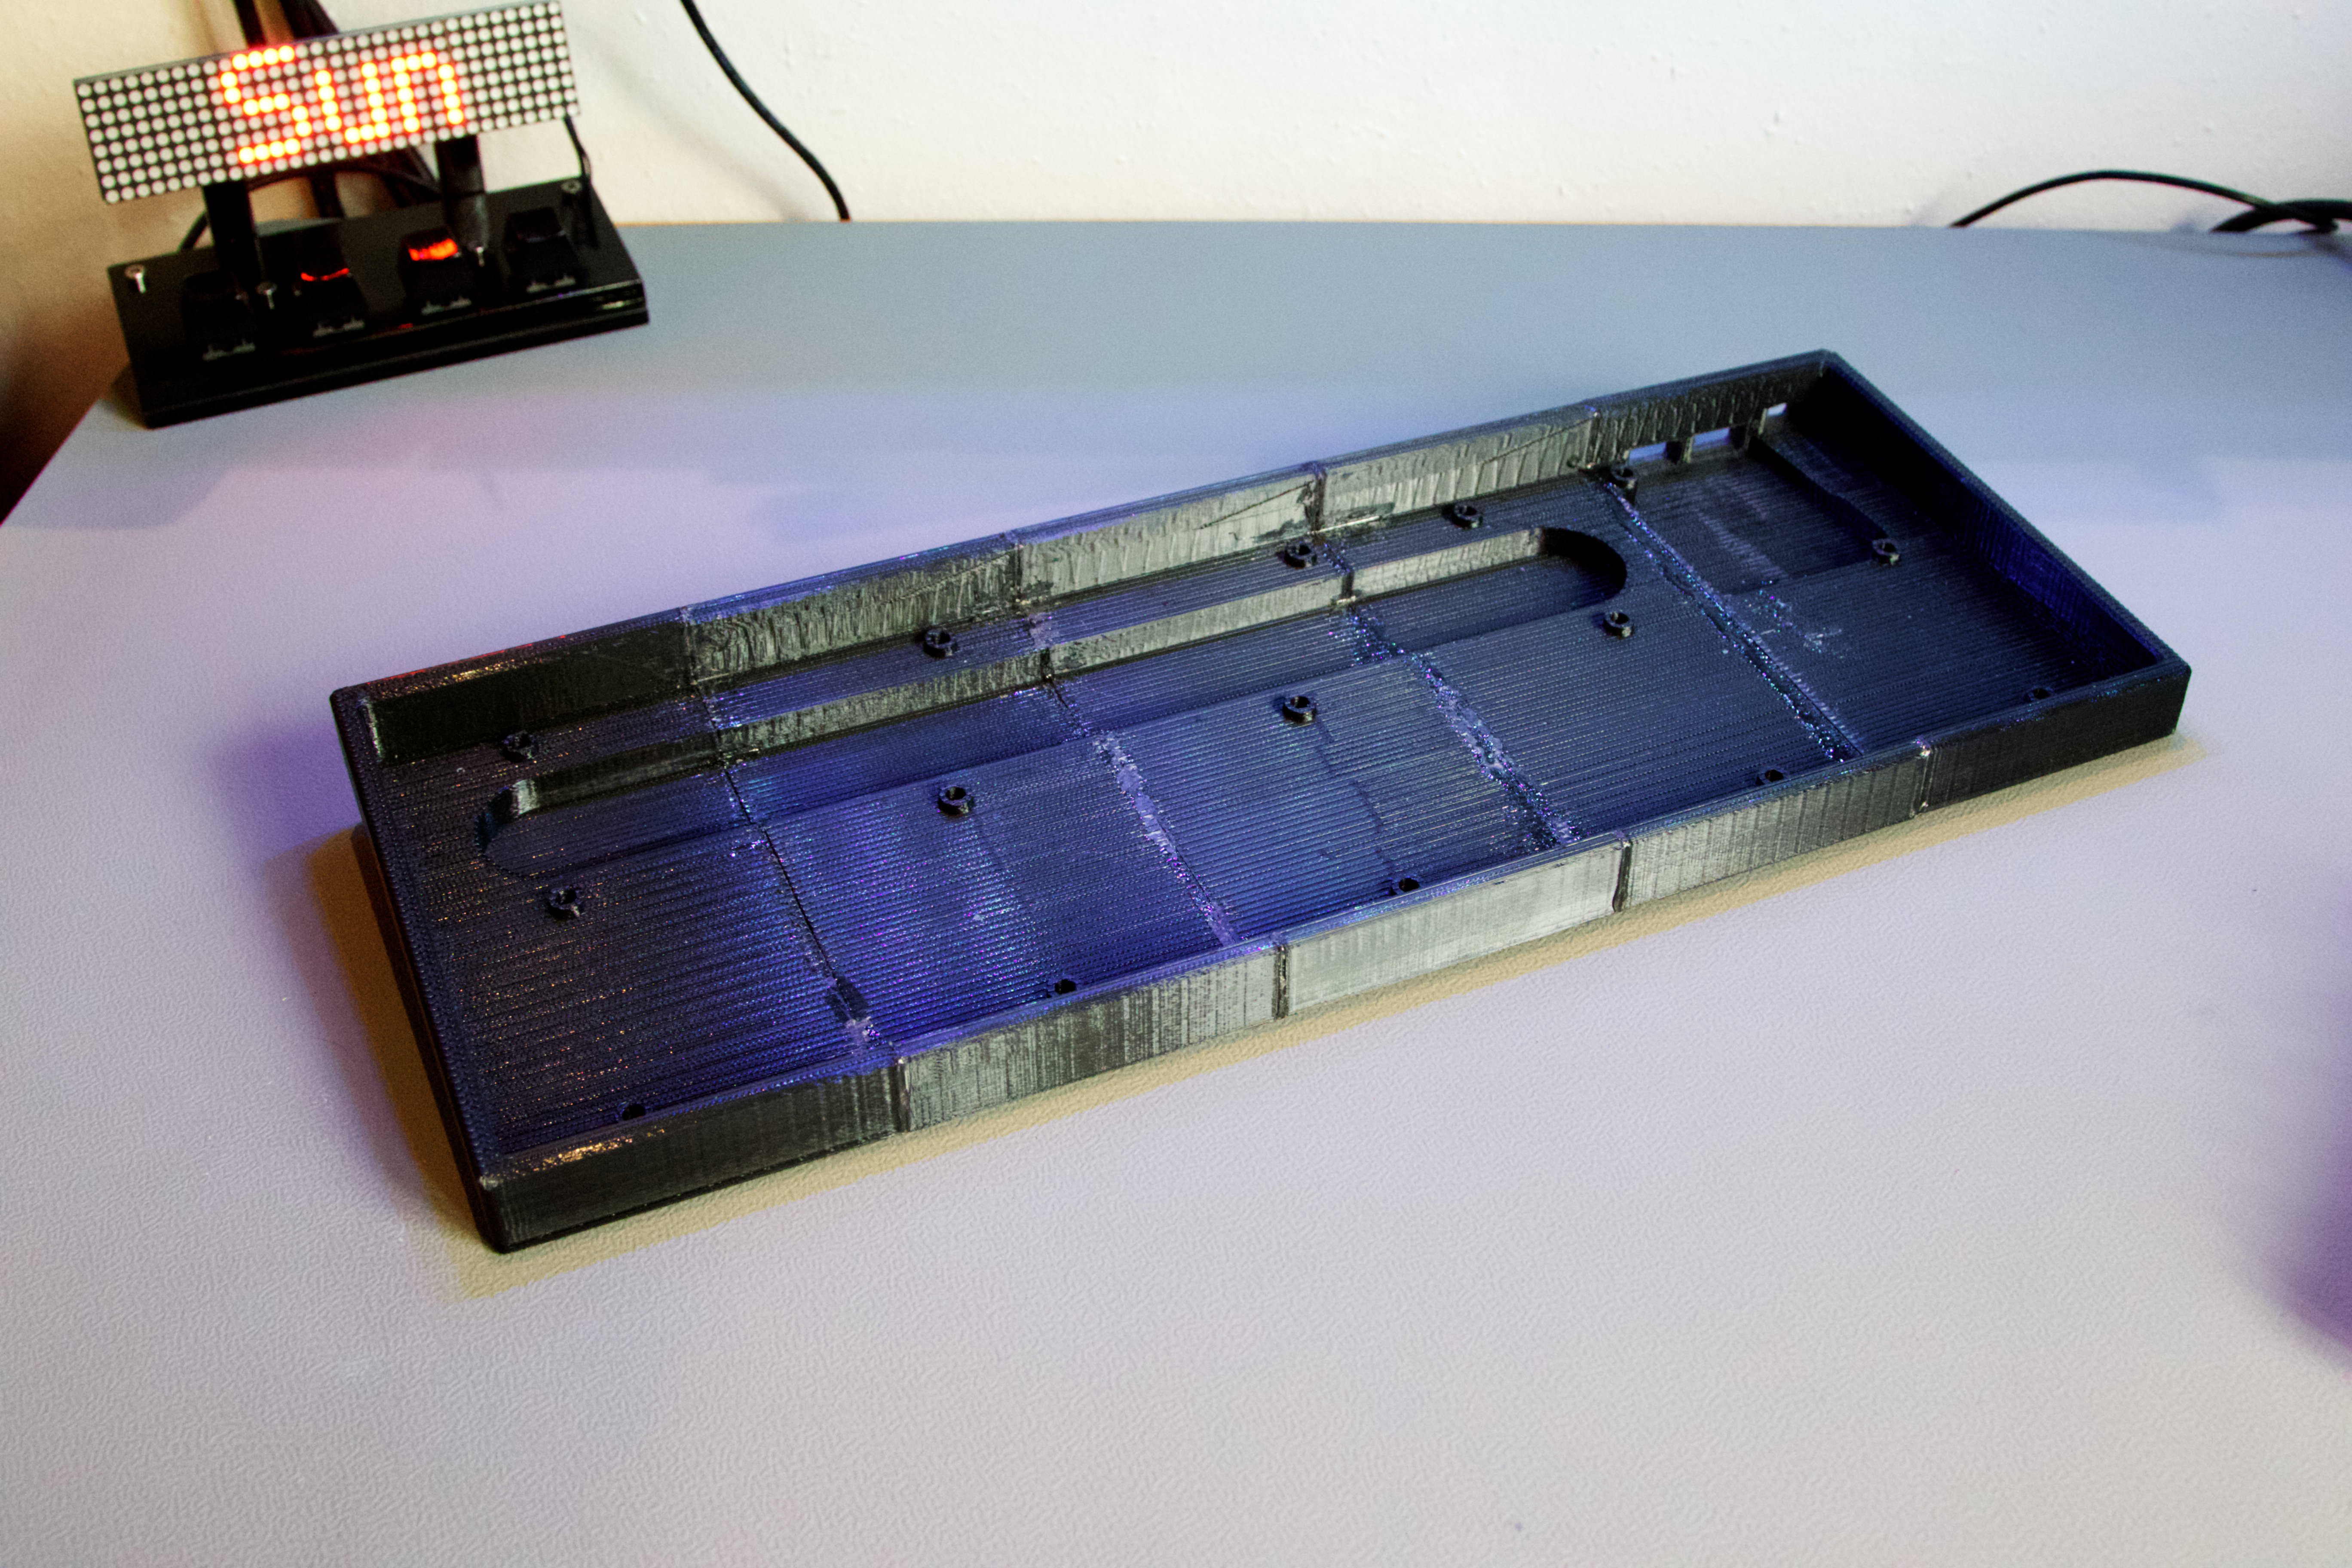
Here is a picture of the 3D printed case before finish.
I actually printed it in 5 separate parts that i than glued together with epoxy. Did this because of the limitations of the pint-bed size and because i didn't want such long time prints. (I have a Wanhao Dupilcator I3 Plus btw.)
After printing and glueing i than pushed in threaded inserts to connect the PCB to the case. Than i sanded the print smooth, filled bigger holes/print mistakes with filler, sanded again, sprayed it with primer and than put on the color (RAL9016) and a coat of clear varnish

 Jonas Kraus
Discussions
Become a Hackaday.io Member
Create an account to leave a comment. Already have an account? Log In.