 David
DavidSo, I guess people are wondering how this thing will work?
Well, this is how the cheap version will work. The much more complex version is far superior, and I will focus on that, once I get a working prototype of this simple version built.
Firstly, for the naysayers, convective PCR is still being researched in several science labs around the world, and the technique is proven, but almost always uses expensive Peltier effect devices.
To keep costs down, I plan on using boiling water, which at 1 ATM boils at 100C. The heat will spread though a heatsink, following a gradient from 100C to room temperature. By affixing a PCR reaction vessel to the point on the heatsink at 95C, we have our steady denaturation temperature. Induced convection in the vessel will cycle the reactants though the annealing and elongation temperature.
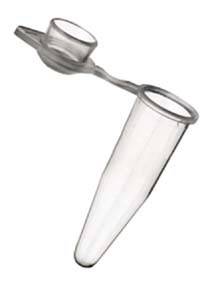
I have done some 2D modelling of a standard 0.2ml PCR tube, heated to 95C on one side, and heatsinked to room temperature on the other, with insulation around the other edges.
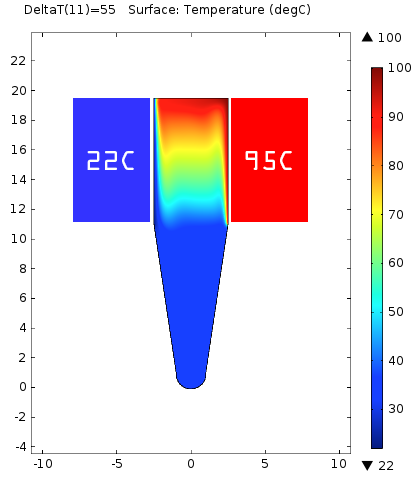
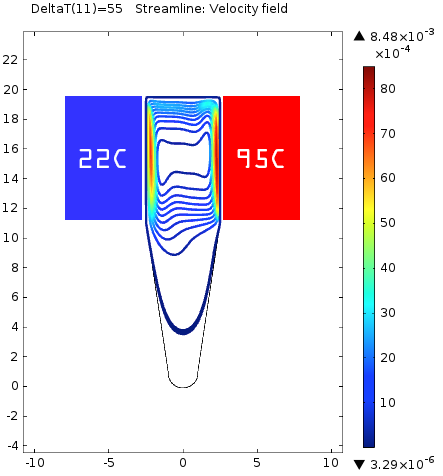
With side-heating and cooling, we end up with a large dead-zone in the velocity field in the bottom of the tube. This dead-zone also has a temperature below that needed for PCR, so this orientation is obviously not good.
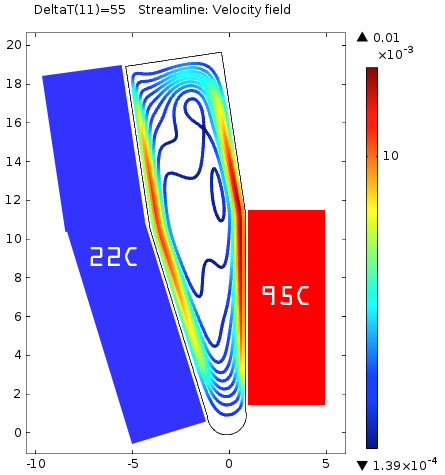
With the tube oriented so that the sloping wall is in contact with the heatsink, we get much better circular convection throughout the entire tube. From the heat map, we see that the fluid reaches all the temperatures necessary for the PCR reaction. The centre of the tube shows a large region at around 70C, great for the elongation phase.

It's important to note that we not every molecule is going to follow the correct temperature sequence. But with exponential growth, only a subset have to follow bounce around the tube in the correct sequence for the reaction to be successful.
So, with the initial modelling done, I will get a test system built, to see if the model work in practice. The next step is a prototype built. How will I keep the materials cost low? Well, firstly, I will use my thermal camera to find the position on the heatsink, so I don't need to build the temperature probe and serial connection just yet.
But the main costs for apparatus will be a few empty soda cans, some tap water and a tea light candle :)
Of course, the main issue with this technique is that the time and temperature cycles can't be easily controlled. However, there are ways around this problem, which I why I want to focus next on a more expensive, but much more useful design.
More to come soon.
Discussions
Become a Hackaday.io Member
Create an account to leave a comment. Already have an account? Log In.