 Steph
StephI'd like to find out how resilient to bending GlowStitch LEDs are after they've been sewn with a sewing machine. If you've used these in a project, especially on clothing, a certain level of flexing will occur through normal wear and tear. In this project update, I've turned my 3D printer into a 3 point bend testing machine to find out how many flex cycles they can take before breaking.
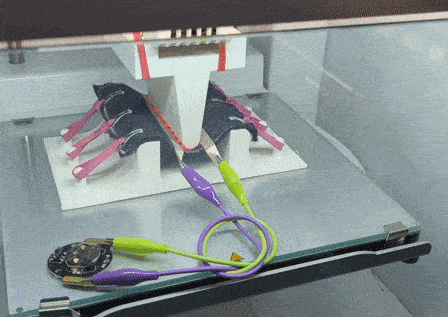
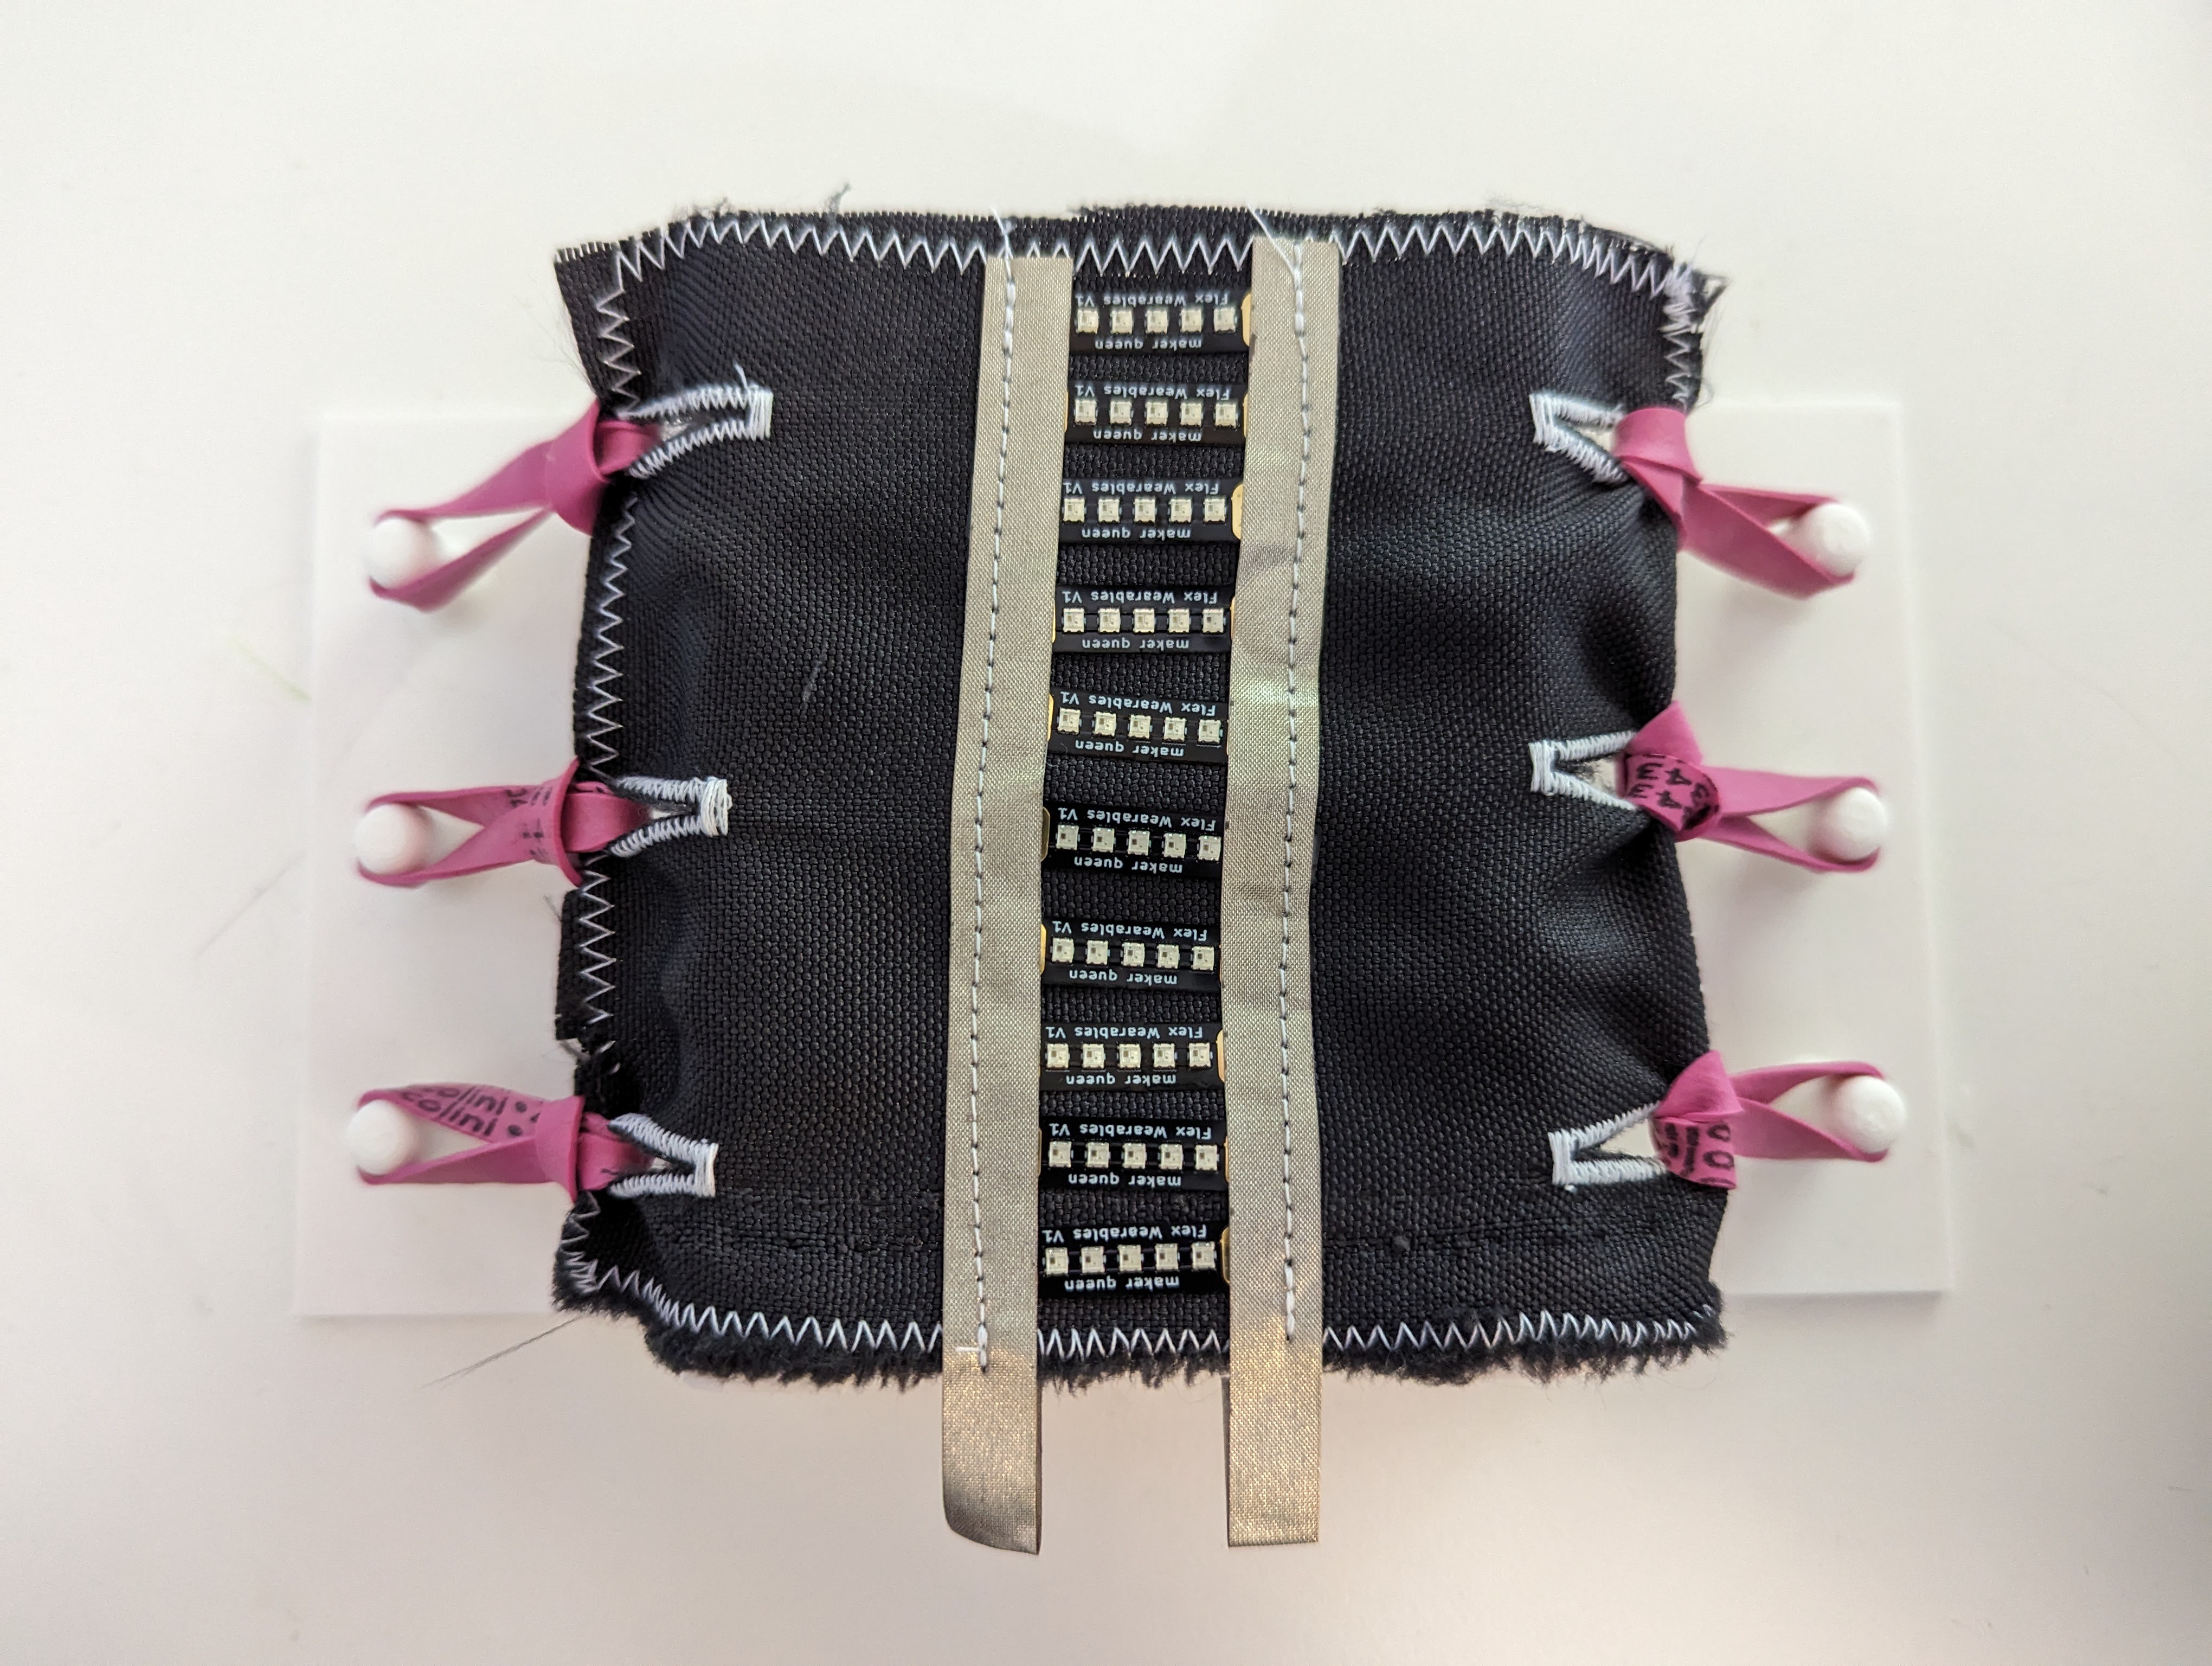
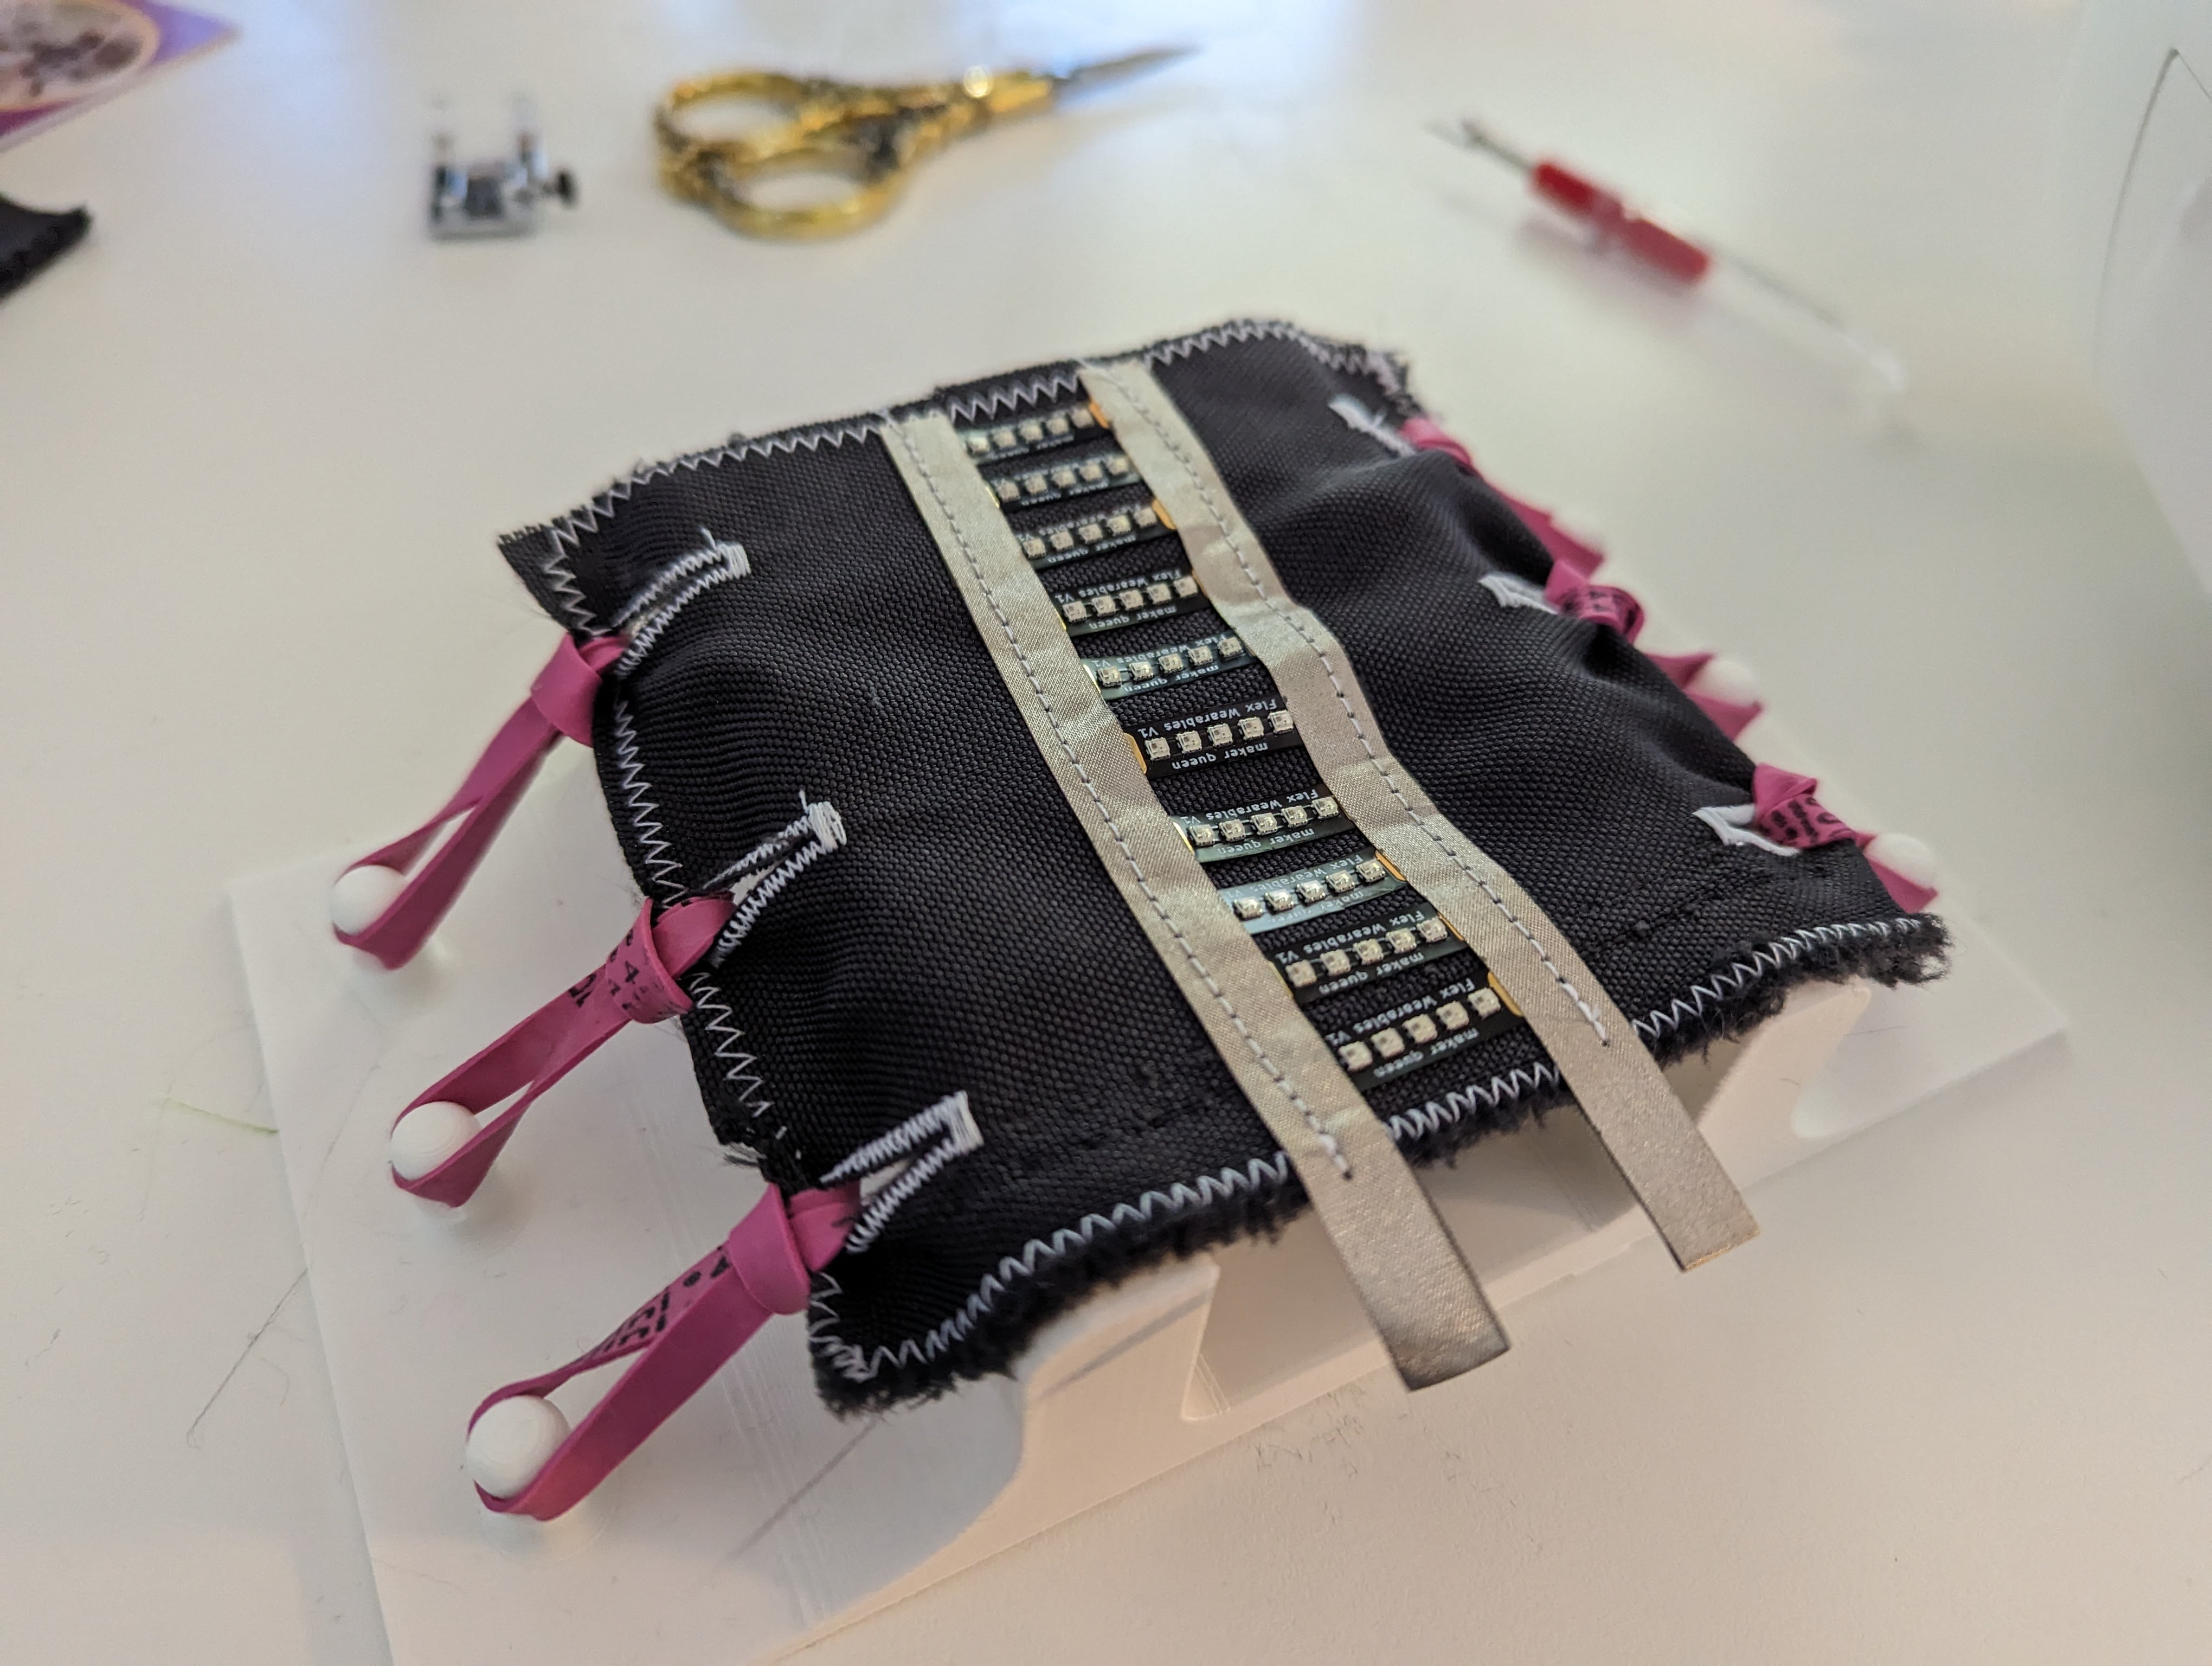
Normal flex PCBs are designed to withstand 500 million flex cycles. I won't be testing up to that many as it takes 4 hours to complete 10,000 flex cycles using my 3D printer, which would mean it would take 22 years to get up to 500 million, haha. Using a 3D printed jig, custom G-code and lots of rubber bands, I tested x10 GlowStitch strips at a time.
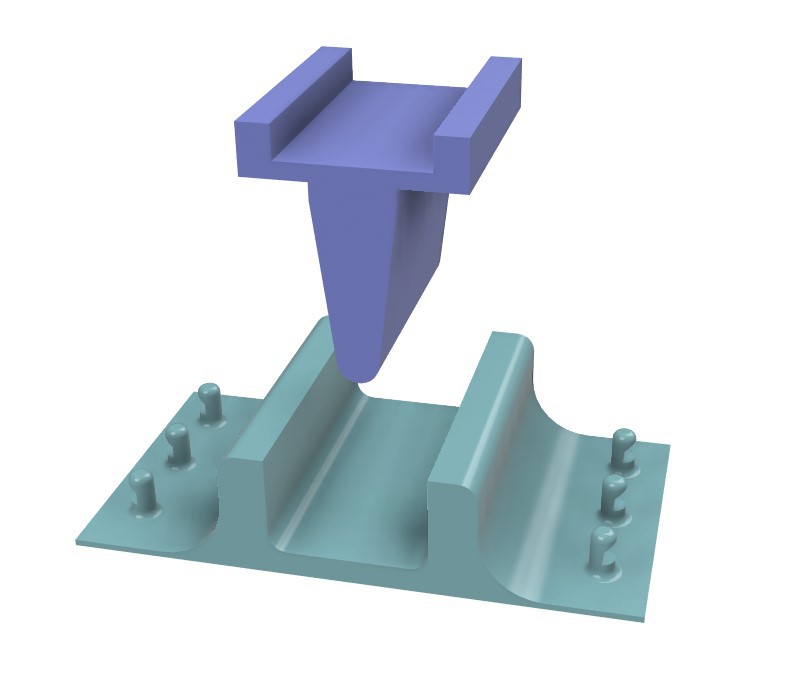
3D Printed Jig
I designed a jig in Fusion 360 to fit inside my Ultimaker S3 3D printer. It's not fastened to the bed and the head piece is just rubber banded in place. For the 3D print files, visit my Github.
A machine sewn test square is rubber banded onto the jig base. This is to ensure the fabric flexes back into place after each flex cycle. It tests x10 machine sewn Glowstitch strips at a time. I used machine sewn buttonholes to attach the rubber bands to the fabric.
Custom G-Code
I have an Ultimaker S3 which is a bit fiddly to set up for this experiment. You can't disable the autolevel function without changing the firmware. To make this custom gcode, I sliced a cube shape and saved the file as .gcode in Cura Slicer. From there, I edited the code in Notepad ++ to turn off the bed and nozzle temperatures. I deleted the actual print gcode, and replaced with the following:
G1 X50 Y100 E0 Z150
G1 X50 Y50 E0 Z150
G1 X100 Y50 E0 Z150
G1 X50 Y100 E0 Z150
G1 X100 Y100 E0 Z150
G4 P60000
First a custom sequence that moves the head around in a distinct pattern to let me know the machine has finished autolevel and is ready to run the Gcode. G4 P60000 is a 60 second delay, which is my window for installing the jig and test head before the flex cycles begin.
G1 X100 Y100 E0 Z100
G1 X100 Y100 E0 Z120
G1 X100 Y100 E0 Z100
G1 X100 Y100 E0 Z120
This is the actual flexy cycle Gcode. Up and down and up and down with no extrusion (E). Initially I ran 100 bend cycles ten times with a G4 pause after each 100 to test whether the lights still worked. I then upgraded to a 10,000 cycles tester code with breaks at every 1000 bends to test the lights. See the github for both Gcode files for reference.
After creating the gcode, I then ran it back through Cura to convert to a .ufp file for my printer.
The Results
Day 1 - 10,000 flex cycles completed: All strips functional
Day 2 - 20,000 flex cycles completed: x1 Strip experiencing flickering, located on end of testing rig
Day 3 - 30,000 flex cycles completed: x2 strips experiencing flickering
Day 4 - 40,000 flex cycles completed: x5 strips experiencing flickering
Discussions
Become a Hackaday.io Member
Create an account to leave a comment. Already have an account? Log In.