 Tom Nardi
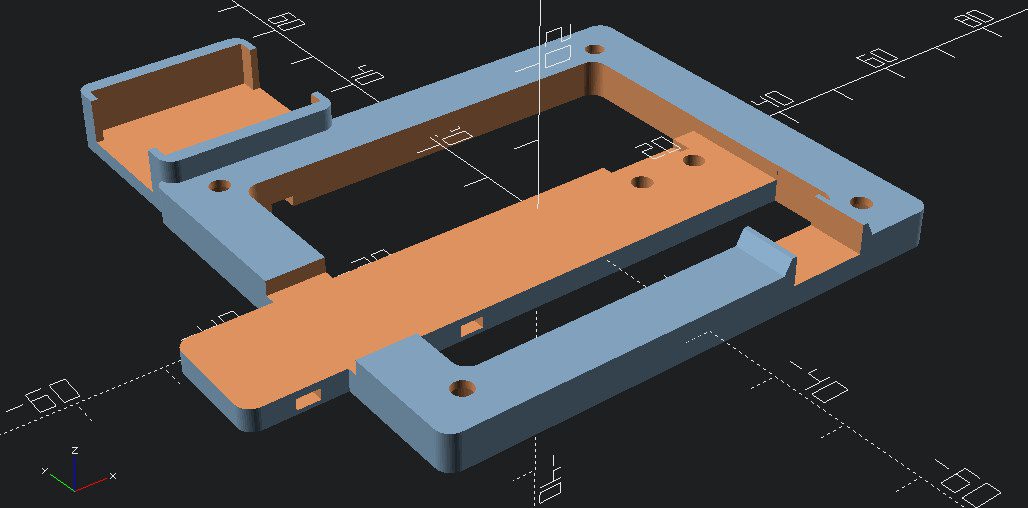
If you can believe it, out of all the parts that went into the reComputer 1000, the back of the LCD frame was the most time-consuming and difficult to design. It's probably also the farthest from what my initial goals were, and the most likely to get redone if I ever feel like building a reComputer 1001.
Part of the problem is that, originally, I wanted all the buttons on the LCD to be accessible from the outside. I spent a lot of time working on a button module that would blend in with the design aesthetics of the rest of the build, but could never come up with anything I was totally satisfied with. After spending weeks fiddling with the idea, I eventually just gave up.
Unfortunately, that means none of the LCD's controls are actually accessible unless you take off the rear panel. For the most part that's not a huge deal, as obviously I set things like the brightness to where I wanted them before buttoning it up. But it does mean you can't turn off the LCD without cutting power to the whole deck, nor can you turn up the physical volume of the speakers -- though at least you can still adjust the software volume.
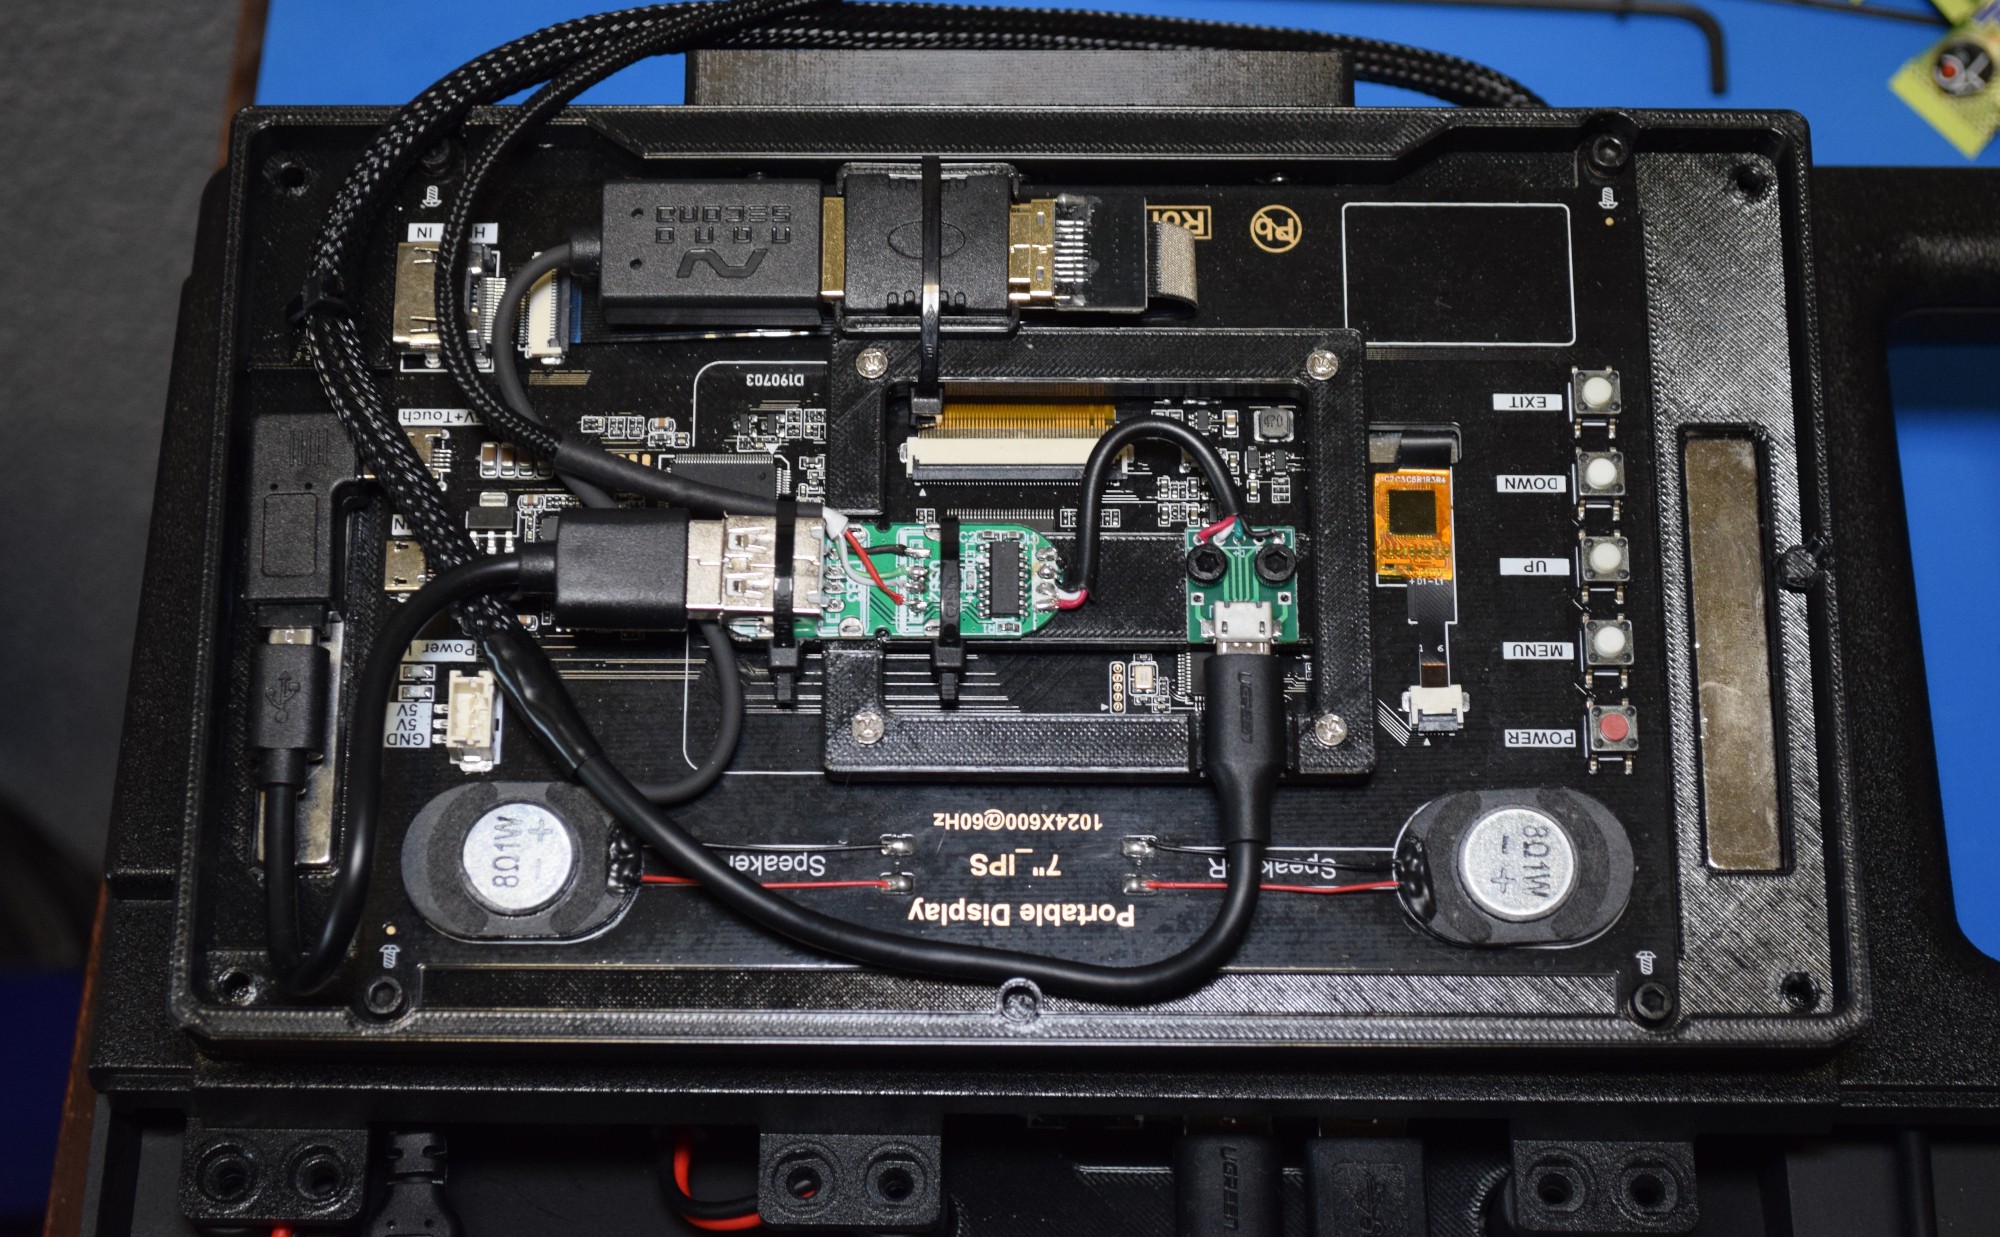
Then there was what I call the "lid interface", which is a bracket that holds the HDMI and USB terminations. Since I didn't want to hard-wire anything (in an effort to keep the deck modular and easy to work on) I had to come up with ways to work with the full size connectors. So the HDMI cable goes into a female-to-female coupling, and then to a ribbon cable, before actually connecting to the screen.
I also decided, very late into the process, that I wanted to make use of the USB inside the lid to add a notification LED. But that also meant adding a USB hub to the mix, so I had to find a tiny commercial one and strip it down as much as possible to get it to fit. Then of course there were the actual considerations for the notifier, but we'll save that for the next post.
In an effort to improve the audio, I added openings for the speakers which are disguised on the outside a bit with the same "vent" motif that I used on the front panel. So many computers in the 1980s had deep grooves cut into them, so I figured why should mine be any different?
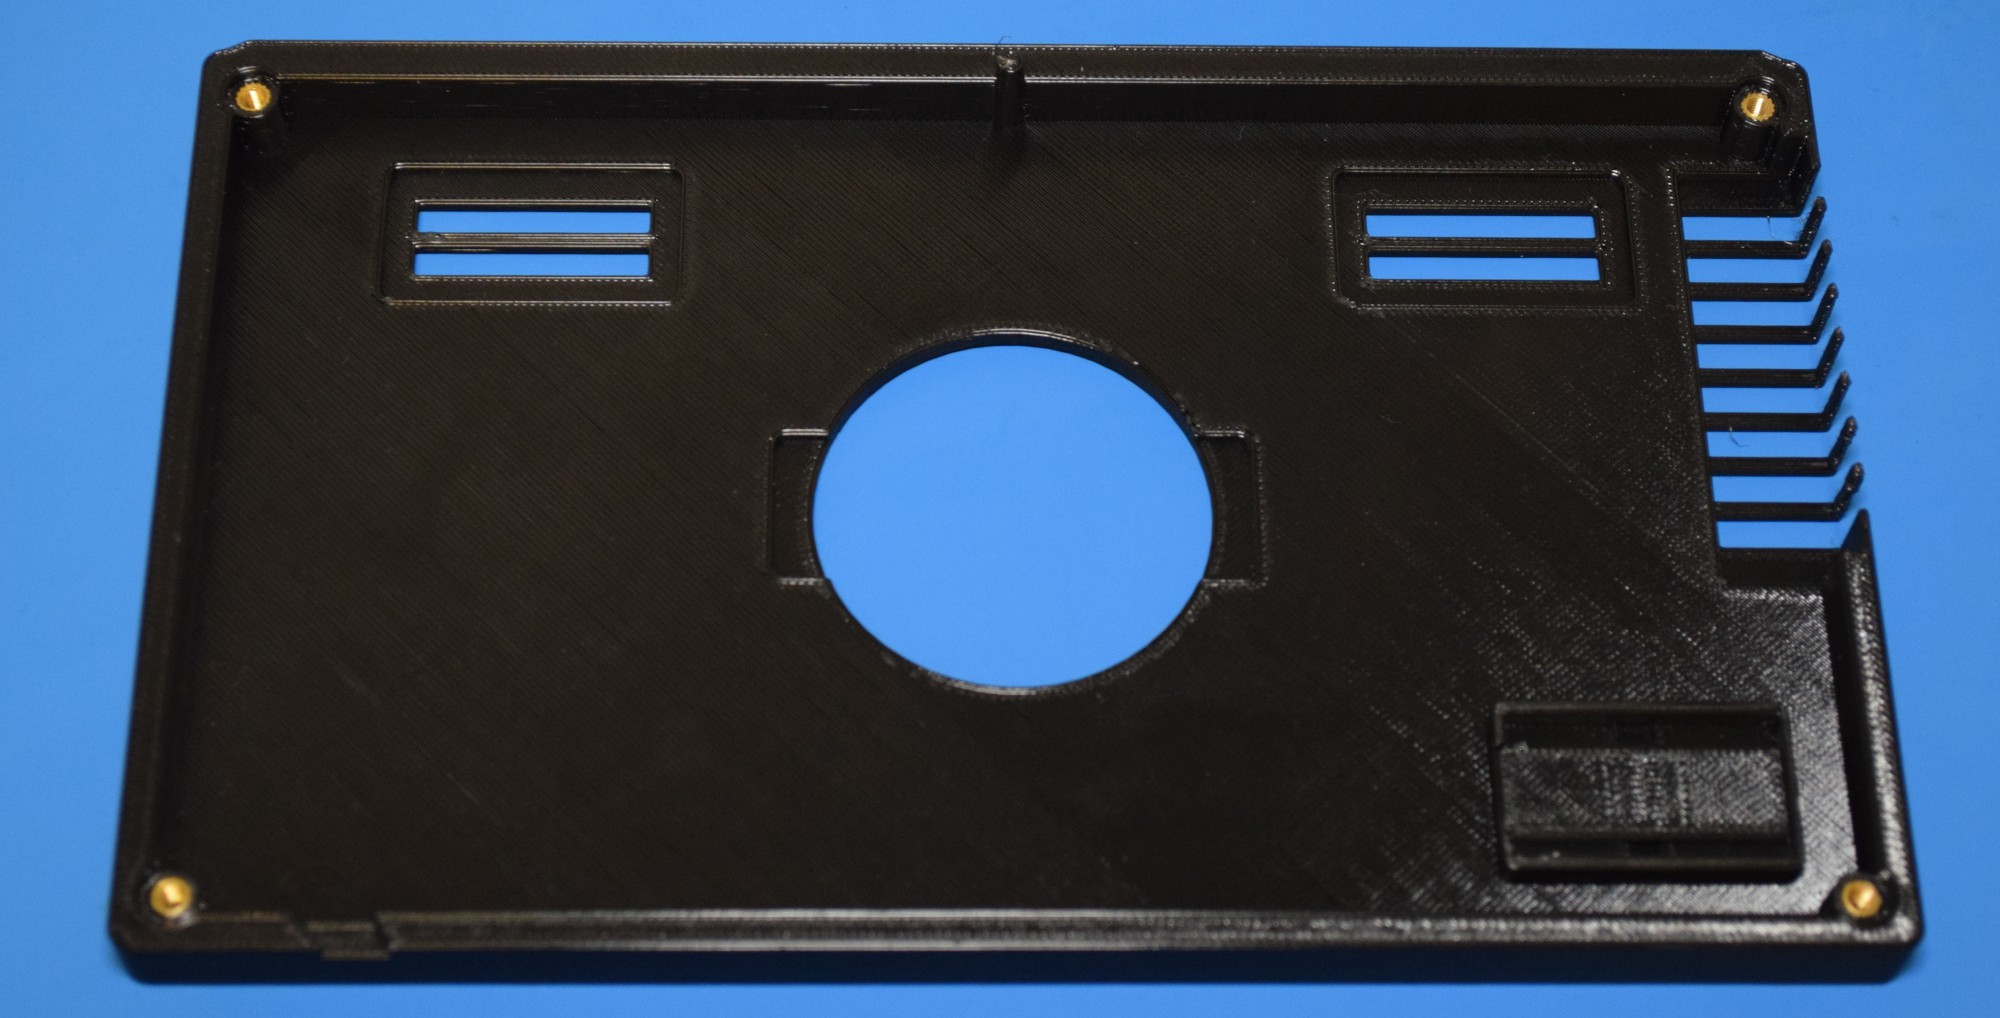
There's also the big circular opening in the middle which is where the emblem mounts. I had a lot of different ideas here, including putting in a little LCD or OLED display so the emblem could be changed in software. But in the end, I just did a two-color print of the Hackaday Jolly Wrencher.
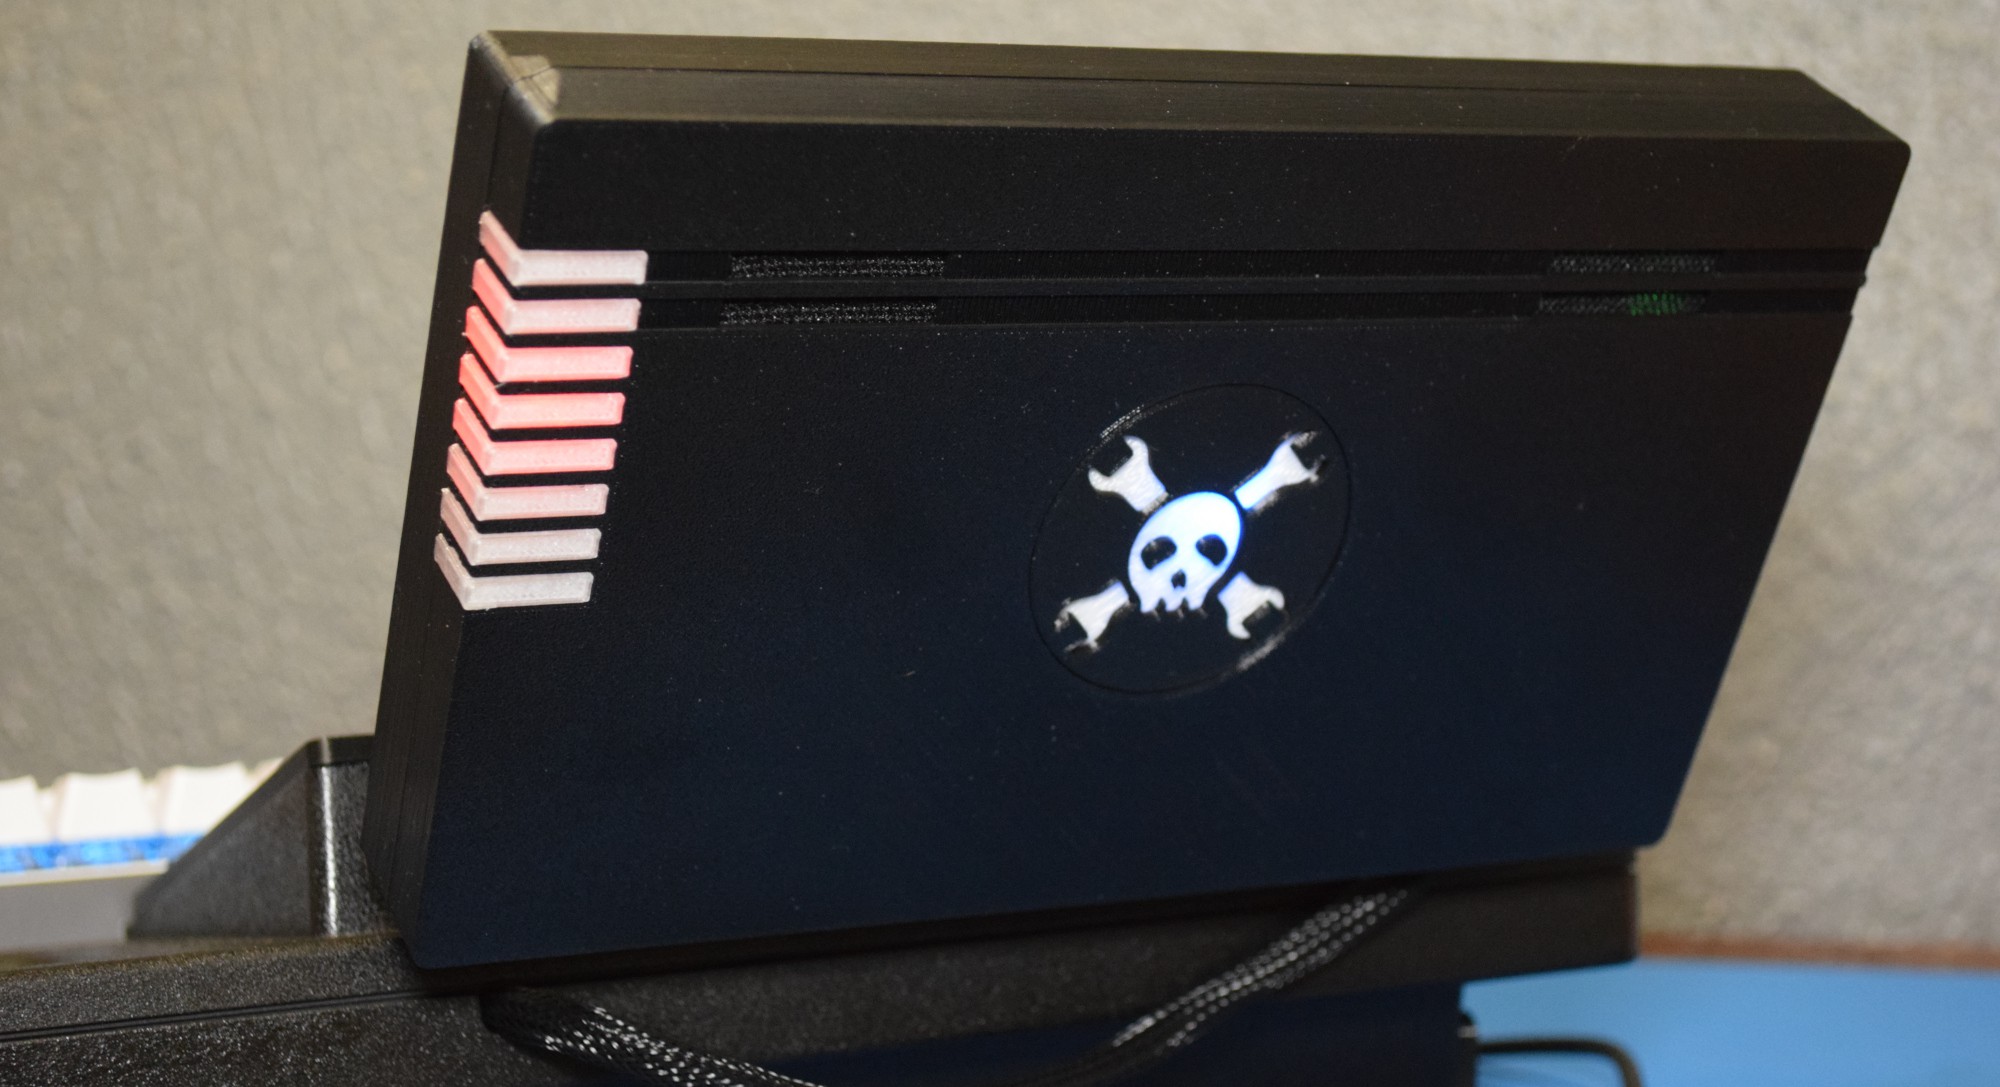
Interesting note -- the blue glow of the Wrencher is entirely unintentional. The USB hub had a tiny blue LED on it that I didn't bother to remove, and it so happens to align perfectly with the logo. I had considered removing the LCD or just putting black tape on the back of the logo...but it's kind of grown on me.
In fact, I've even considered going in and adding another RGB LED to the Arduino that runs the notifier, so that I could make the logo change color and flash.
Discussions
Become a Hackaday.io Member
Create an account to leave a comment. Already have an account? Log In.