 kutluhan_aktar
Even though there are various nutrition and management factors affecting egg production and quality, the feeding schedule proportional to cage density affects egg production considerably since hens can stop laying eggs intrinsically when they notice a sporadic feeding schedule or paltry feed. Hence, applying a regular and nutritional feeding regimen helps hens lay eggs abundantly.
Furthermore, as the hen’s age increases, the weight of the produced egg usually increases, and the weekly produced egg number decreases. Although each hen has an inveterate laying time, the weekly produced egg number denotes the overall health condition of the hens in the coop. Therefore, tracking unhatched eggs and logging the daily produced egg number assist farmers in determining a potential contagious poultry disease or malnutrition.
However, these processes can be compelling and arduous for small businesses in the poultry industry or people raising domesticated birds in their houses or backyards to produce eggs for profit. Since I am also raising quails as pets on my balcony, I am well aware of the struggles with tracking the poultry feeder status and the produced egg number daily. Hence, I decided to create this budget-friendly and accessible device to track the poultry feeder status and the produced egg number automatically with object detection.
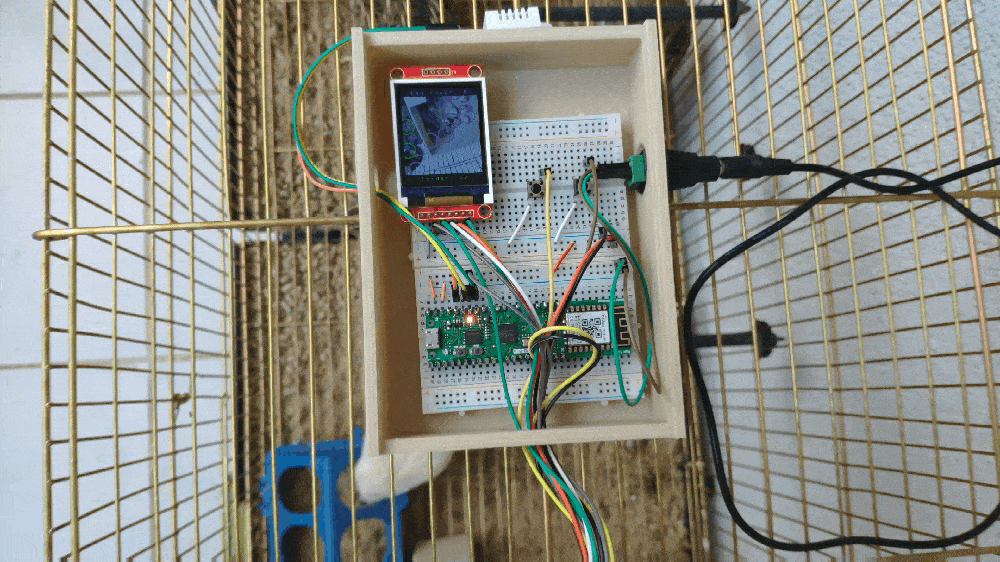
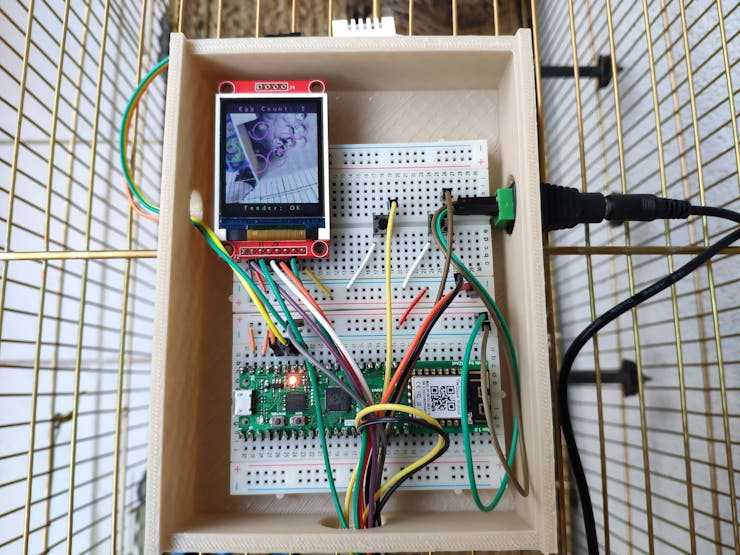
To recognize eggs in the coop (cage) and track the poultry feeder status accurately, I needed to collect data from the coop in order to train my object detection model with notable validity. Since OpenMV Cam H7 is a considerably small high-performance microcontroller board designed for machine vision applications in the real world, I decided to utilize OpenMV Cam H7 in this project. Also, I could easily capture images of my coop and store them on an SD card since OpenMV Cam H7 has a built-in MicroSD card module. Then, I employed a color TFT screen (ST7735) to display a real-time video stream and the prediction (detection) results.
After completing my data set by taking pictures of the produced eggs and the poultry feeder in my quail coop, I built my object detection model with Edge Impulse to recognize (count) the produced eggs and track the poultry feeder status: OK or EMPTY. I utilized Edge Impulse FOMO (Faster Objects, More Objects) algorithm to train my model, which is a novel machine learning algorithm that brings object detection to highly constrained devices. Since Edge Impulse is nearly compatible with all microcontrollers and development boards, I had not encountered any issues while uploading and running my model on OpenMV Cam H7. As labels, I appended two main classes to the file names while capturing and storing pictures:
- Egg
- Feeder
After training and testing my object detection (FOMO) model, I deployed and uploaded the model on OpenMV Cam H7 as an OpenMV firmware. Therefore, the device is capable of counting the produced eggs and tracking the poultry feeder status by running the model independently without any additional procedures.
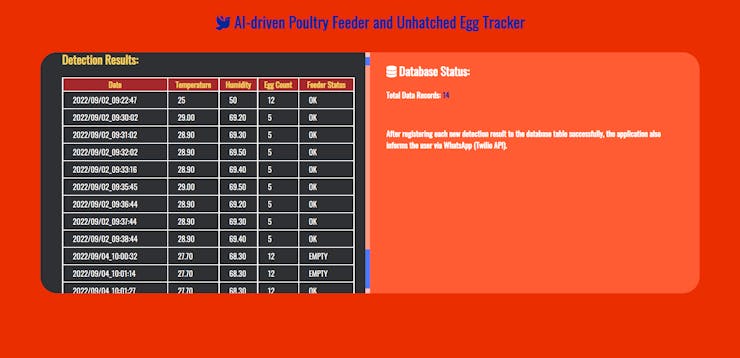
Since I decided to log the detection results on a MySQL database and inform the user of the detection results over WhatsApp, I set an Apache HTTP Server on LattePanda 3 Delta 864 and developed a PHP web application from scratch. To be able to send WhatsApp messages to a verified phone number, I utilized Twilio's API for WhatsApp.
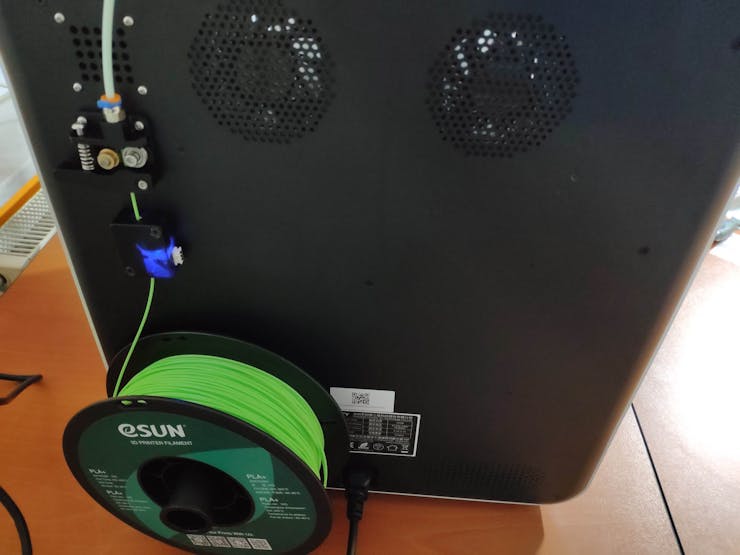
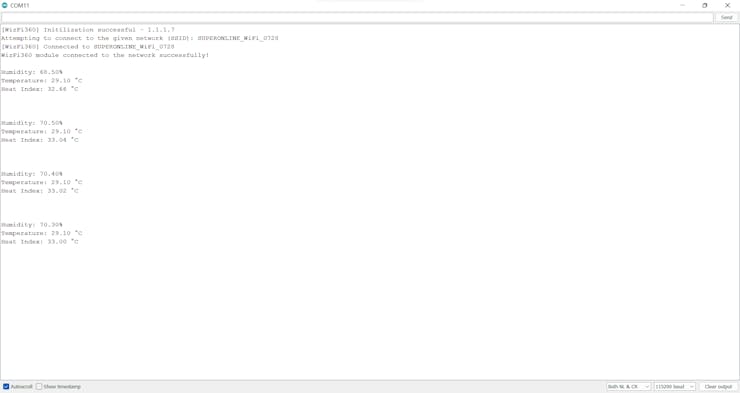
Since OpenMV Cam H7 does not provide Wi-Fi or BLE connectivity, I employed WizFi360-EVB-Pico to communicate with OpenMV Cam H7 and transfer the detection results to the web application. WizFi360-EVB-Pico is a budget-friendly development board based on Raspberry Pi RP2040 and enables Wi-Fi connectivity with the integrated WizFi360 Wi-Fi module. Also, I connected a DHT22 temperature and humidity sensor to WizFi360-EVB-Pico to log and get informed of the current weather condition of my coop (cage) in addition to the detection results.
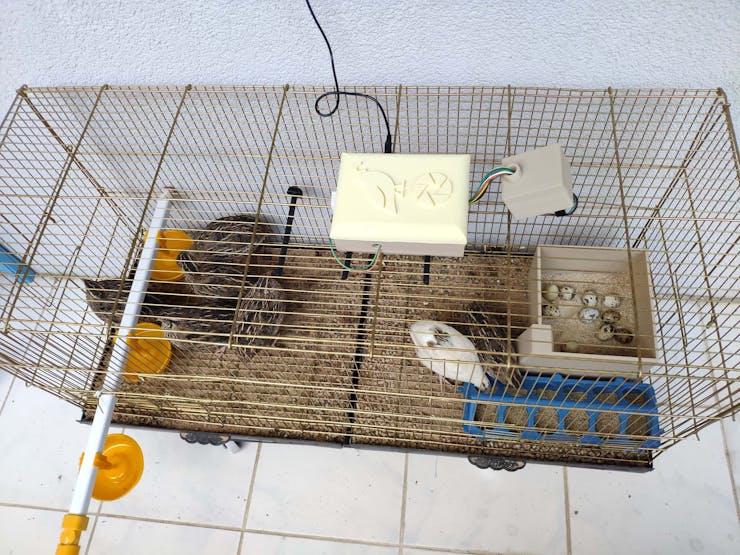
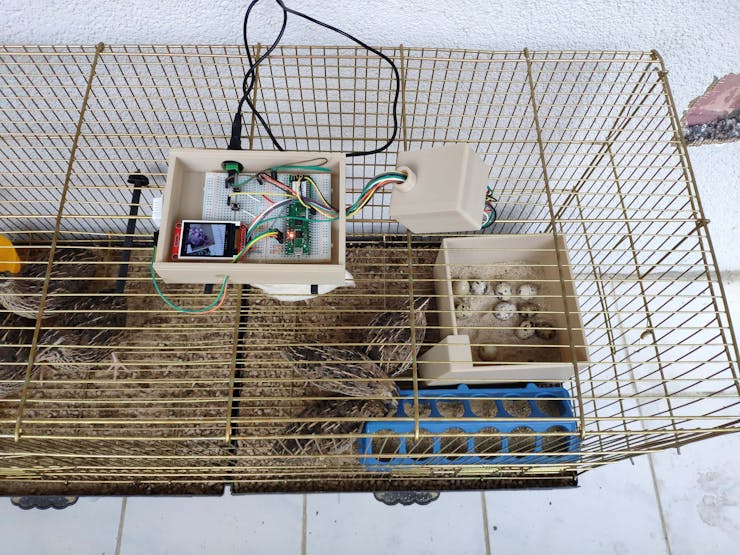
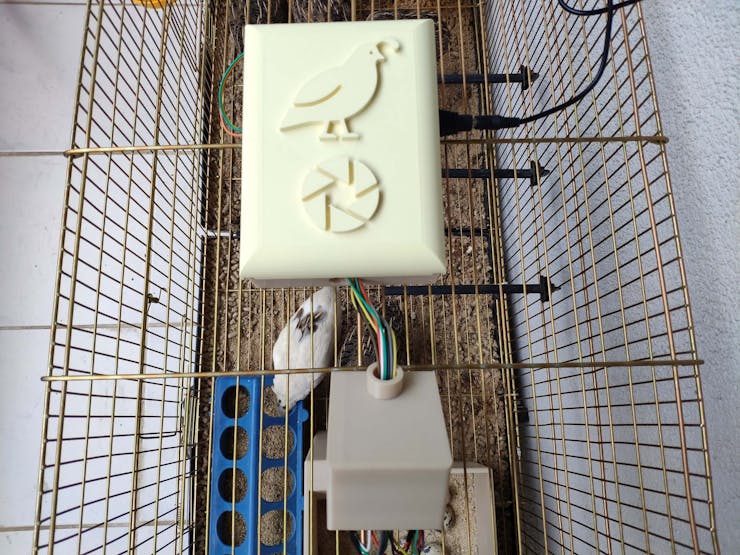
Lastly, to make the device as robust, sturdy, and compact as possible while experimenting with it in my quail coop (cage), I designed a quail-themed and coop-compatible case with a sliding front cover and a moveable camera handle (3D printable).
So, this is my project in a nutshell 😃
In the following steps, you can find more detailed information on coding, capturing coop images, storing pictures on an SD card, building an object detection (FOMO) model with Edge Impulse, running the model on OpenMV Cam H7, and sending the detection results over WhatsApp via WizFi360-EVB-Pico.
If you are planning to build a project with WizFi360-EVB-Pico, you can join the WizFi360 Design Contest to win an Apple iPad Pro🏆
🎁🎨 Huge thanks to DFRobot for sponsoring these products:
⭐ LattePanda 3 Delta 864 | Inspect
⭐ DFRobot 8.9" 1920x1200 IPS Touch Display | Inspect
🎁🎨 Huge thanks to WIZnet for providing me with a WizFi360-EVB-Pico.
🎁🎨 Also, huge thanks to Creality for sending me a Creality CR-200B 3D Printer.


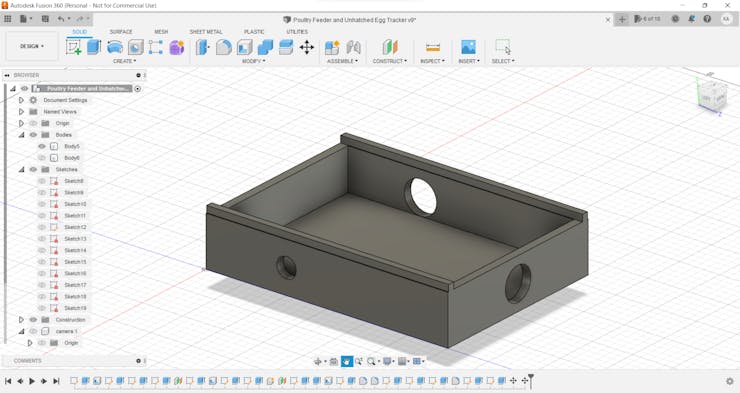
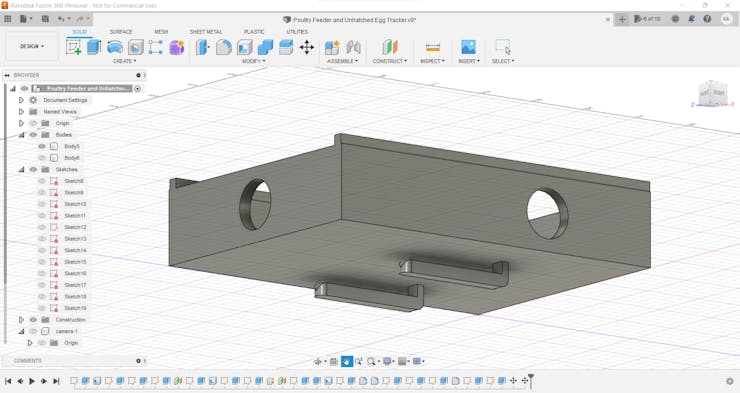
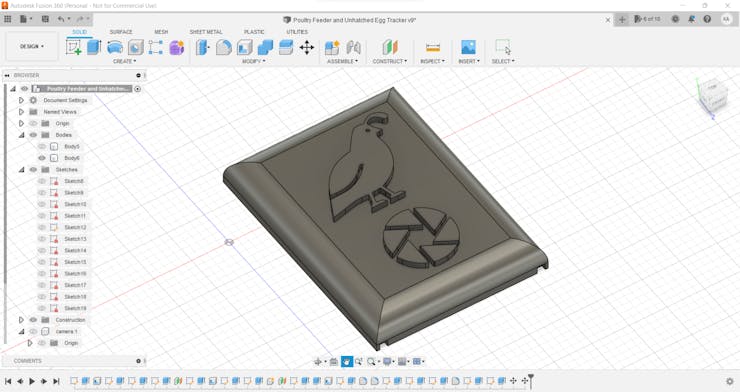
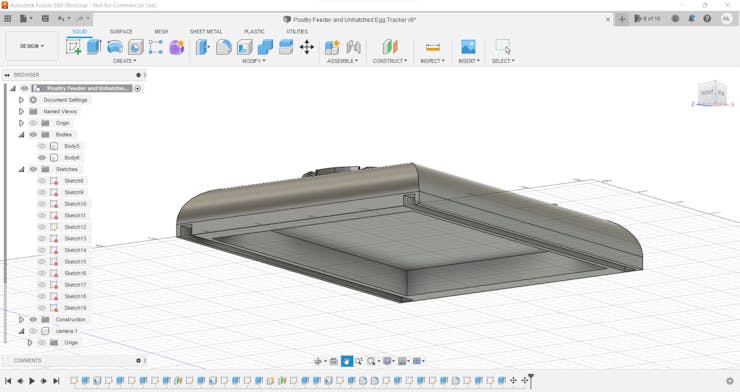
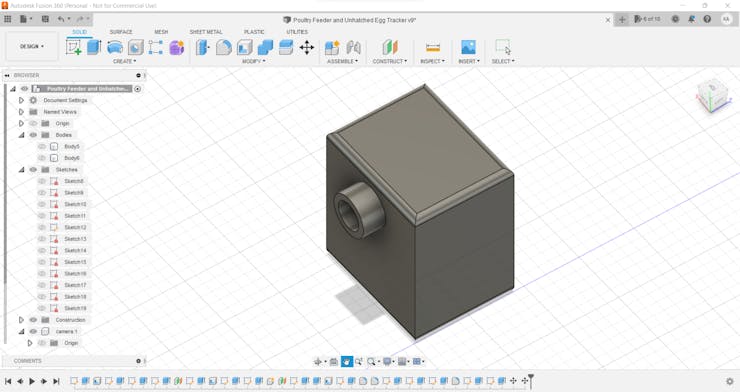
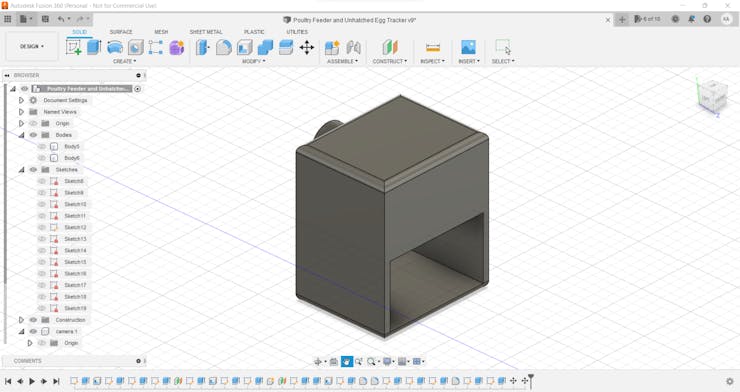
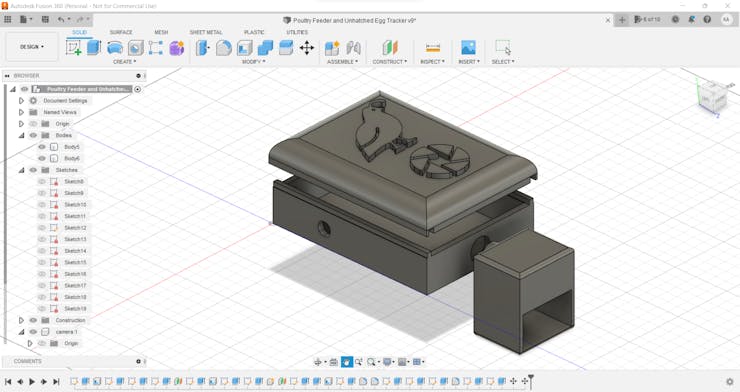
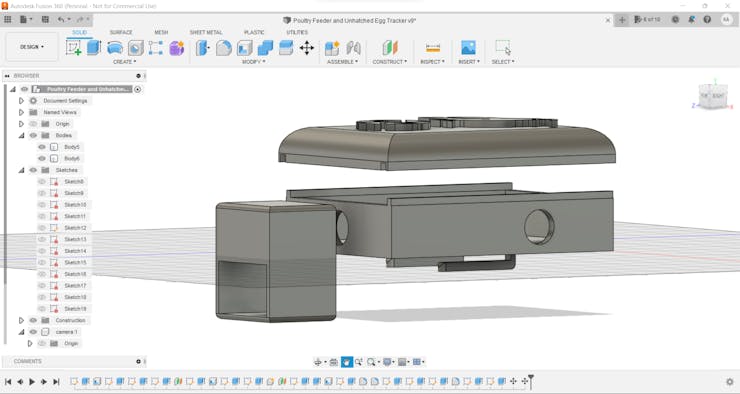
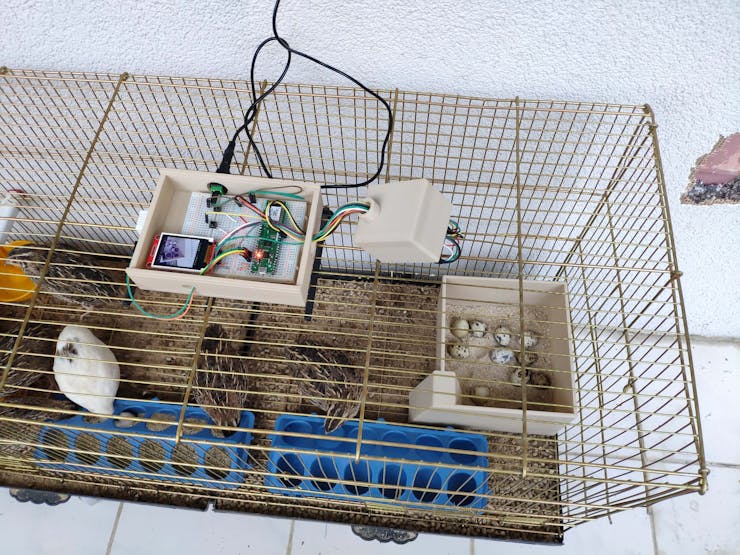
Step 1: Designing and printing a quail-themed and coop-compatible case
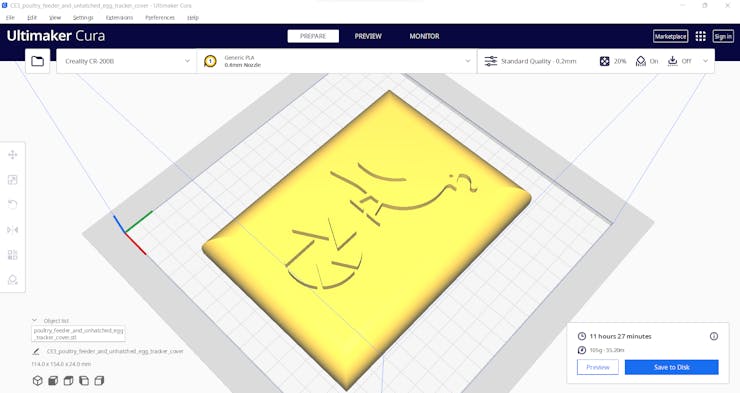
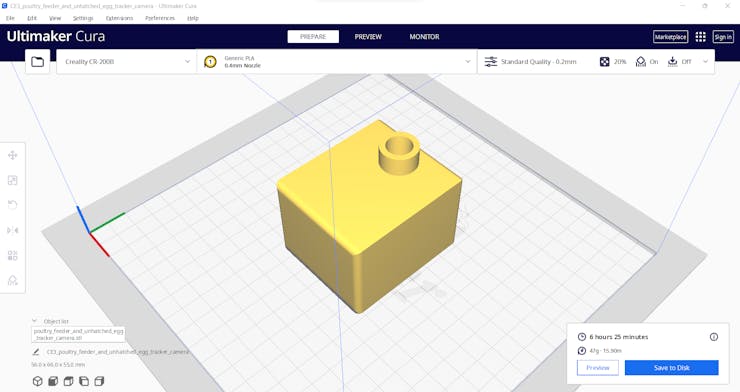
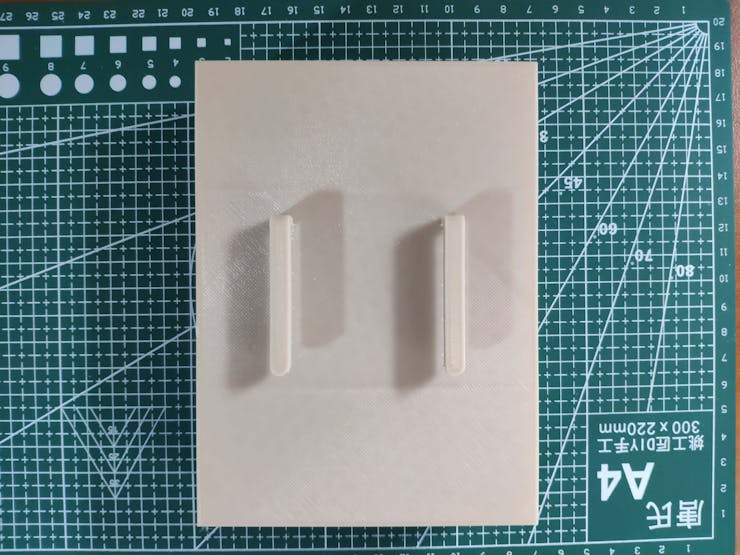
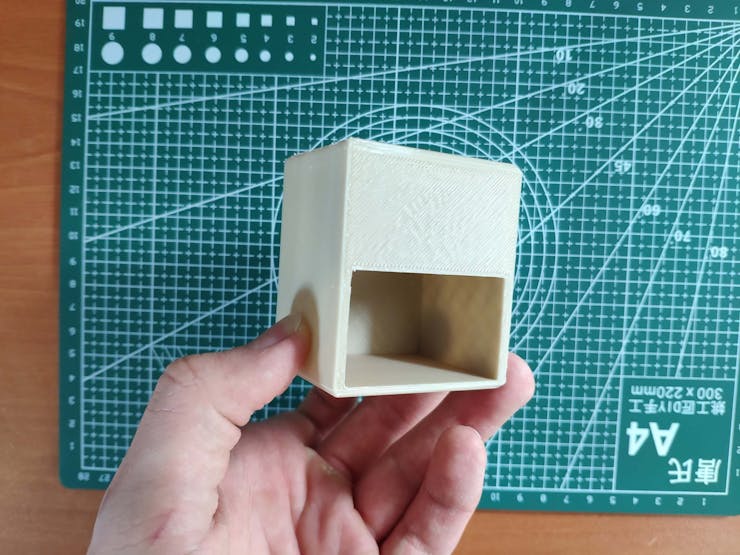
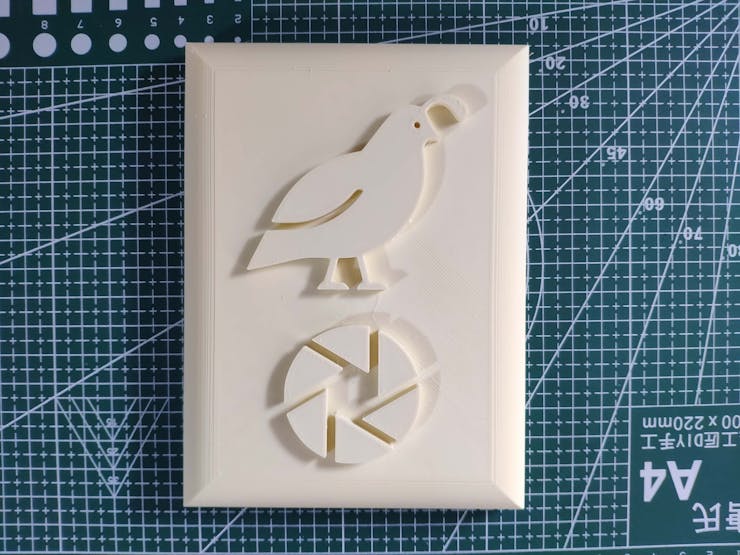
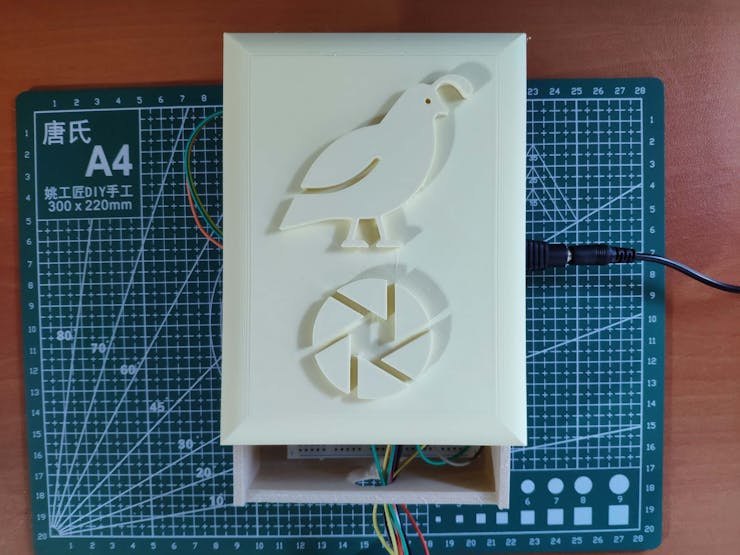
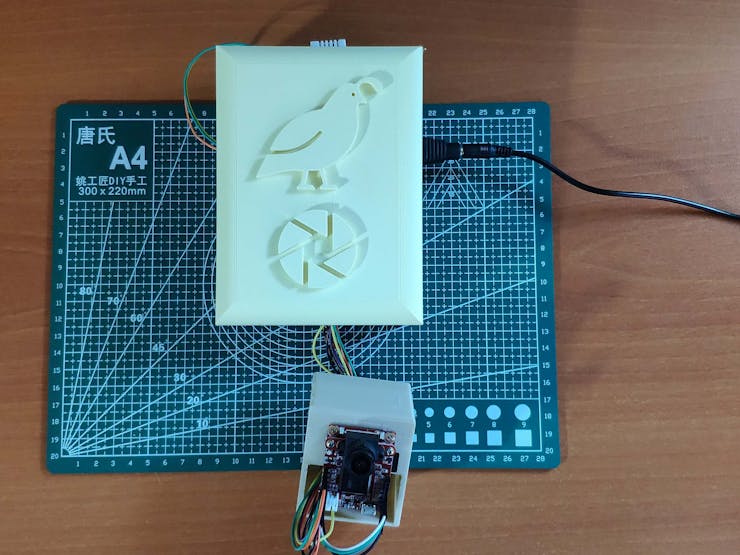
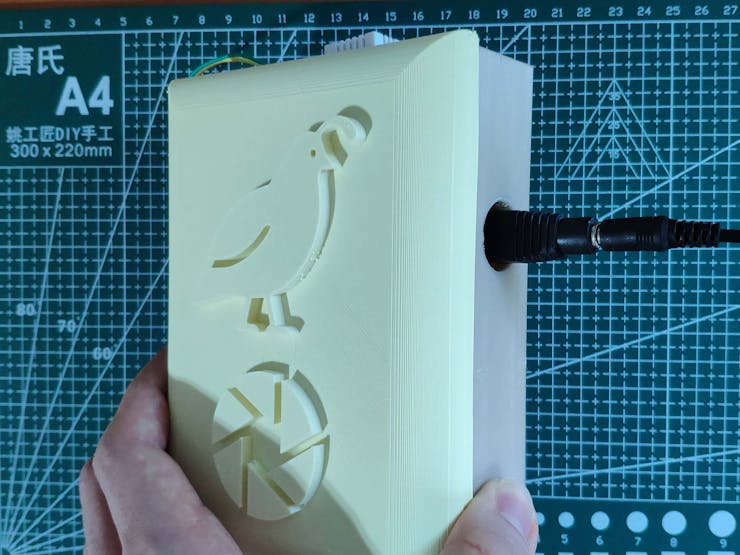
Since I focused on building a user-friendly and accessible device compatible with a wire quail coop (cage) in this project, I decided to design a robust and compact case allowing the user to attach the device to the wire cage via hooks and capture coop images effortlessly. To avoid overexposure to dust and prevent loose wire connections, I added a sliding front cover to the case. Then, I designed a separate moveable camera handle to capture coop images at different angles with OpenMV Cam H7. Also, I decided to adorn the sliding front cover with a quail logo and the OpenMV icon so as to highlight the poultry theme gloriously.
I designed the main case, its sliding front cover, and the moveable camera handle in Autodesk Fusion 360. You can download their STL files below.
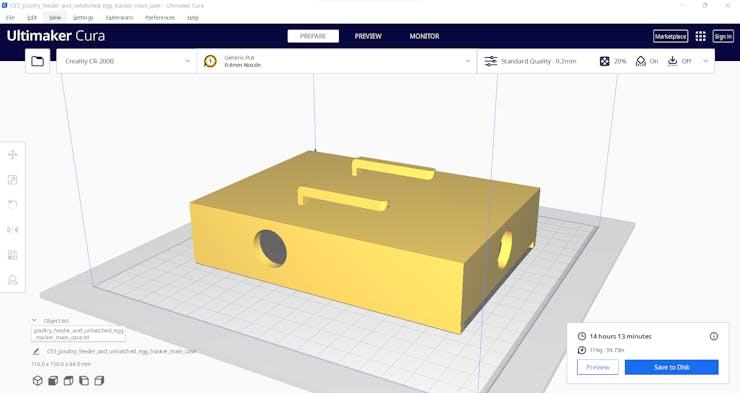
Then, I sliced all 3D models (STL files) in Ultimaker Cura.
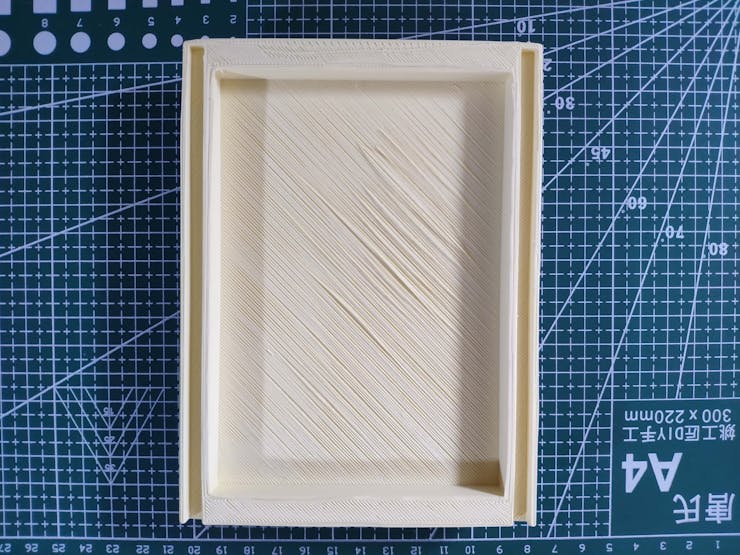
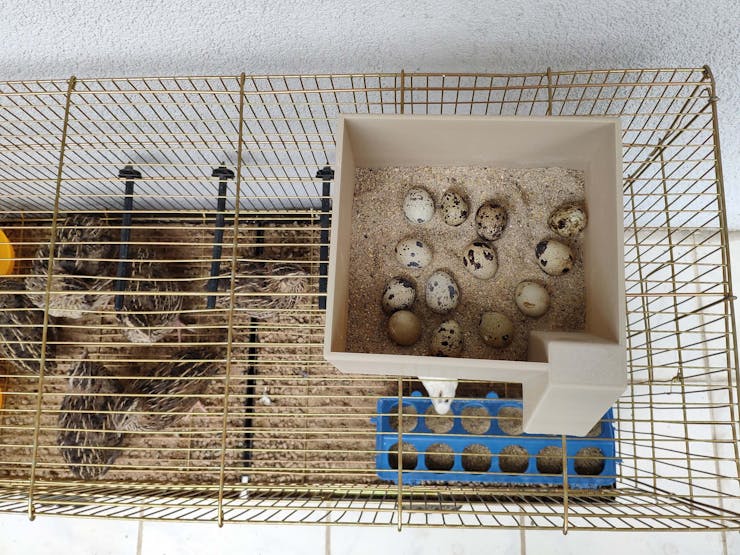
In addition to the mentioned parts, I also designed a complementing sand bath for my quail cage. Since quails usually choose to lay eggs in the sand, I utilized this sand bath to contain the produced eggs while capturing coop images to train my object detection model. You can also download its STL file below.

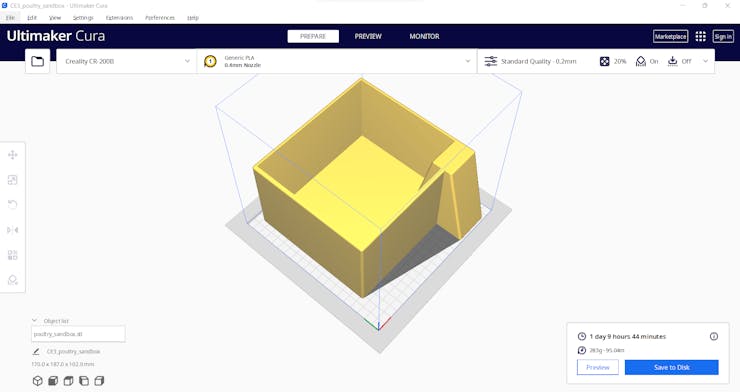
Note: The pictures above are for demonstrating the sliced models: I needed to split some models to make them compatible with the CR-200B build size (200 x 200 x 200 mm).
Since I wanted to create a solid structure conforming with quails' natural habitat and avoid shiny color themes which can trigger quails to attack the case, I utilized these PLA filaments:
- Bone White
- ePLA-Matte Almond Yellow
Finally, I printed all parts (models) with my Creality CR-200B 3D Printer. It is my first fully-enclosed FDM 3D printer, and I must say that I got excellent prints effortlessly with the CR-200B :)
If you are a maker planning to print your 3D models to create more complex projects, I highly recommend the CR-200B. Since the CR-200B is fully-enclosed, you can print high-resolution 3D models with PLA and ABS filaments. Also, it has a smart filament runout sensor and the resume printing option for power failures.
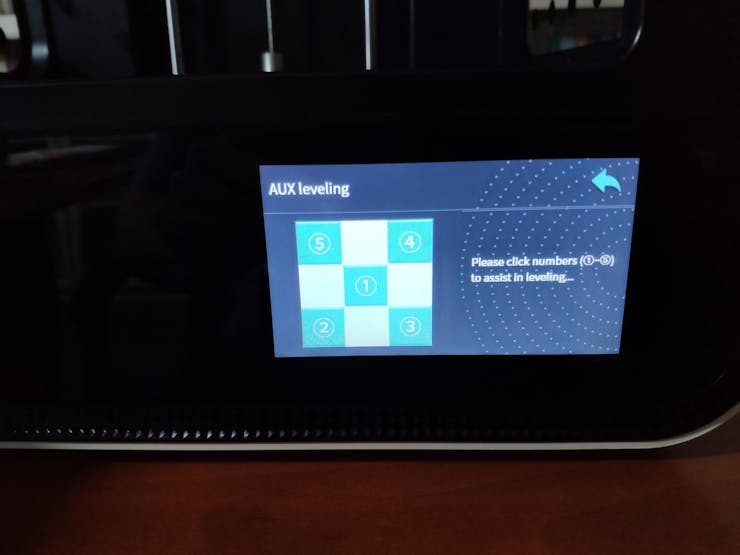
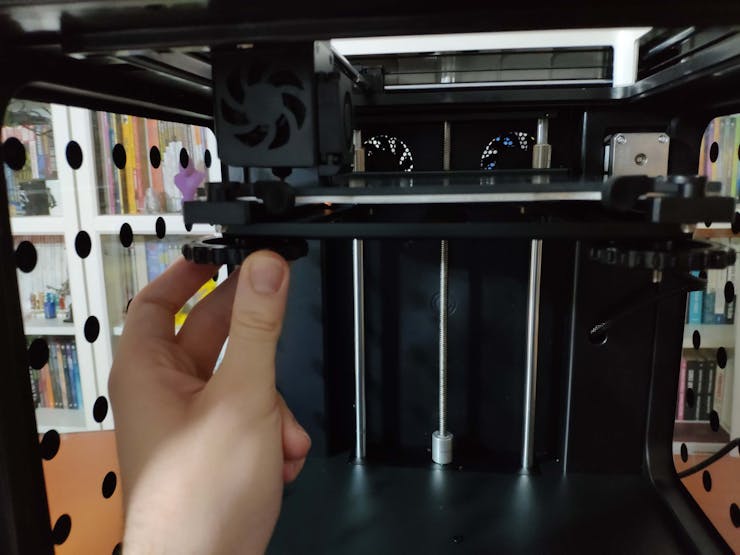
According to my experience, there are only two downsides of the CR-200B: relatively small build size (200 x 200 x 200 mm) and manual leveling. Conversely, thanks to the large leveling nuts and assisted leveling, I was able to level the bed and start printing my first model in less than 30 minutes.
#️⃣ Before the first use, remove unnecessary cable ties and apply grease to the rails.
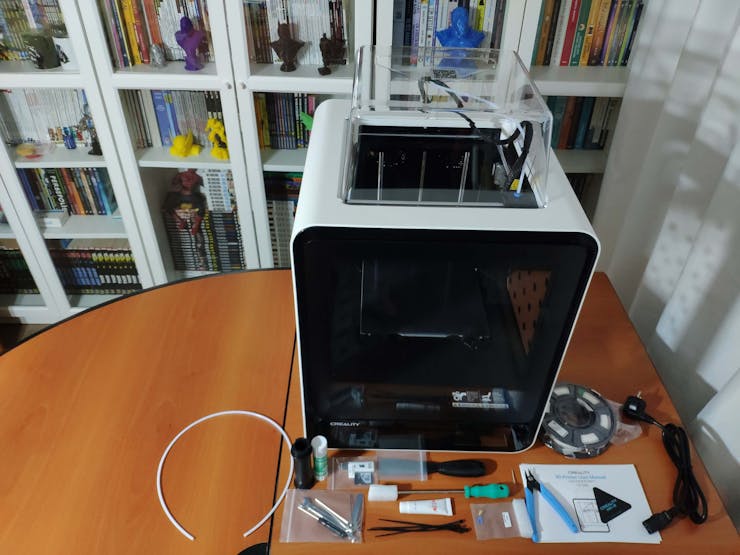
#️⃣ Test the nozzle and hot bed temperatures.
#️⃣ Go to Settings ➡ Leveling and adjust four predefined points by utilizing the leveling nuts.
#️⃣ Finally, attach the spool holder and feed the extruder with the filament.
#️⃣ Since the CR-200B is not officially supported by Cura, select the Ender-3 profile and change the build size to 200 x 200 x 200 mm. Also, to compensate for the nozzle placement, set the Nozzle offset X and Y values to -10 mm on the Extruder 1 tab.


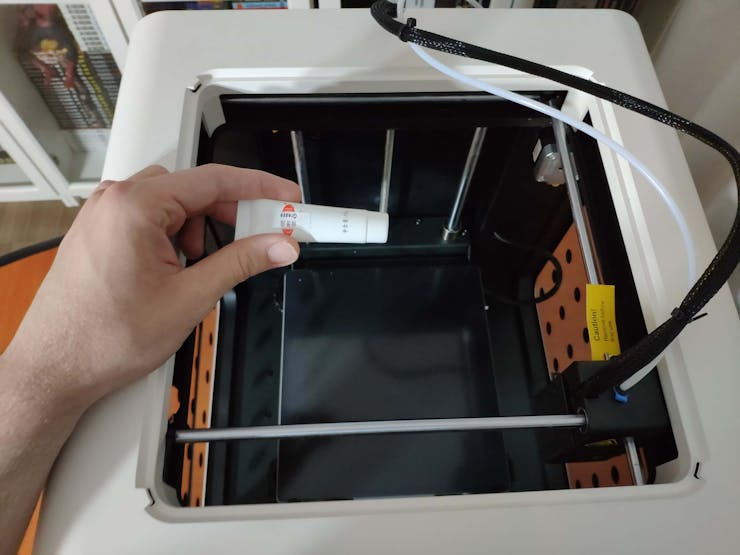
Step 1.1: Assembling the case and making connections & adjustments
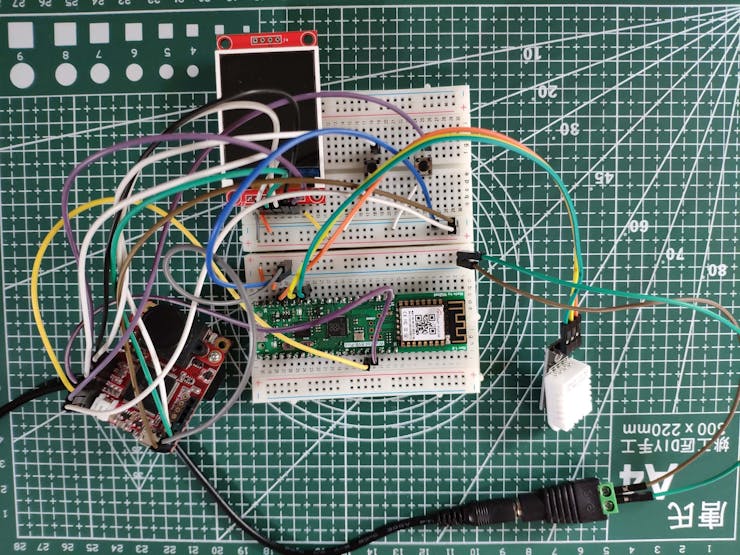
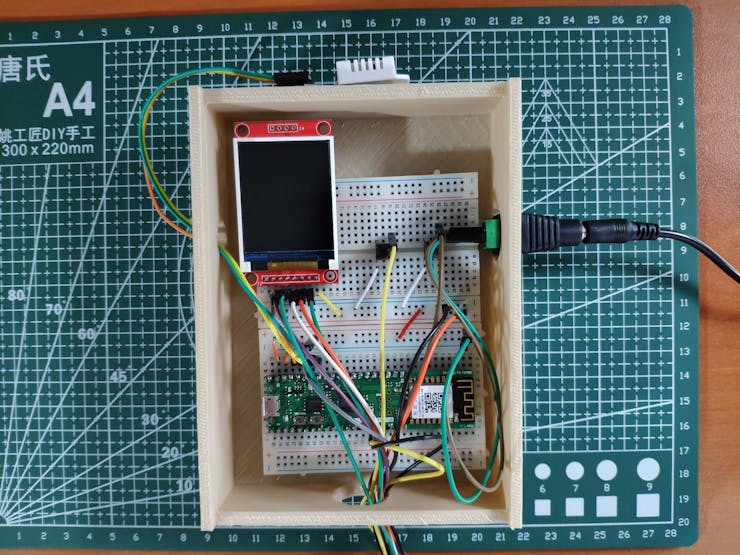
// Connections
// WizFi360-EVB-Pico :
//                                DHT22 Temperature and Humidity Sensor
// D28 --------------------------- DATA
// 3.3V -------------------------- VCC
// GND --------------------------- GND
//                                OpenMV Cam H7
// D13 --------------------------- P4
// D12 --------------------------- P5
//
//
//
// OpenMV Cam H7 :
//                                ST7735 1.8" Color TFT Display
// 3.3V -------------------------- LED
// P2  --------------------------- SCK
// P0  --------------------------- SDA
// P8  --------------------------- AO
// P7  --------------------------- RESET
// P3  --------------------------- CS
// GND --------------------------- GND
// 3.3V -------------------------- VCC
//                                Control Button (A)
// P6  --------------------------- +
//                                Control Button (B)
// P1  --------------------------- +
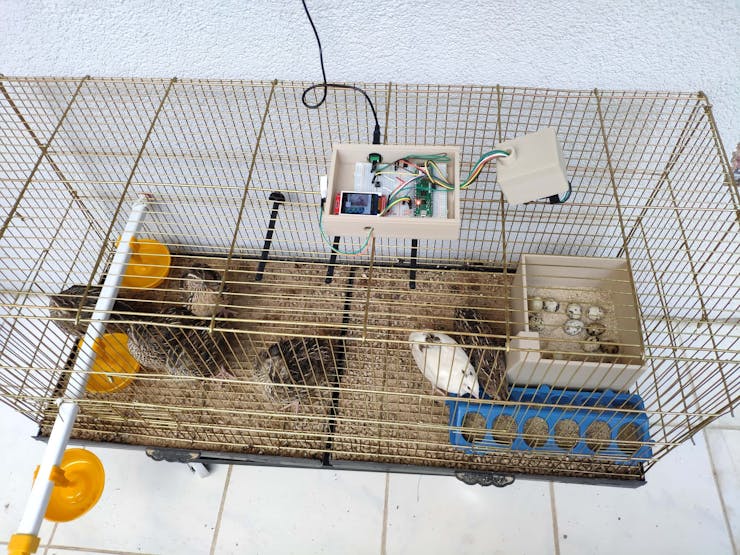
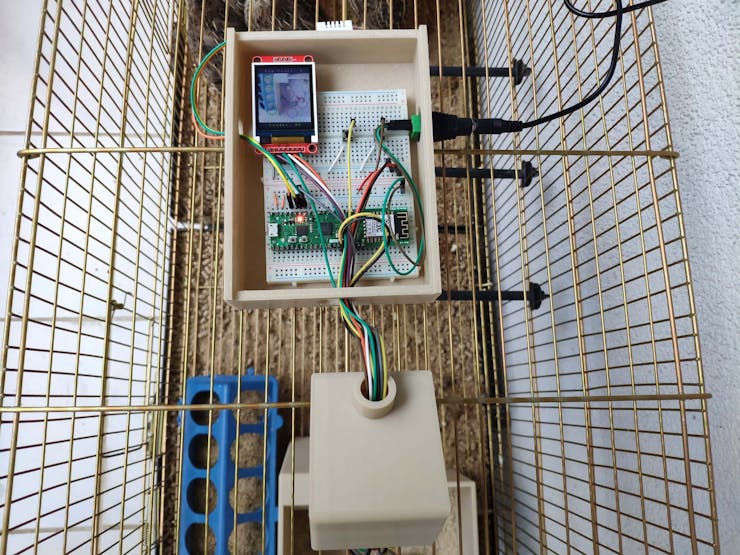
First of all, I connected a color TFT screen (ST7735) to OpenMV Cam H7 so as to display the real-time video stream, captured coop images, and the detection results (the produced egg number and the poultry feeder status) after running the object detection (FOMO) model. To append labels to the file names while capturing coop images and storing them on the SD card, I added two control buttons (6x6), as shown in the schematic below.
To be able to transfer the detection results to WizFi360-EVB-Pico via serial communication, I connected the hardware serial port of OpenMV Cam H7 (UART 3) to a software serial port of WizFi360-EVB-Pico. Also, I connected a DHT22 temperature and humidity sensor to WizFi360-EVB-Pico to collect the current weather information and send the detection results with the collected weather data to the web application via an HTTP GET request.
To power OpenMV Cam H7 and WizFi360-EVB-Pico via their voltage input pins (VIN and VSYS), I utilized a DC barrel jack adapter connected to my Xiaomi power bank.
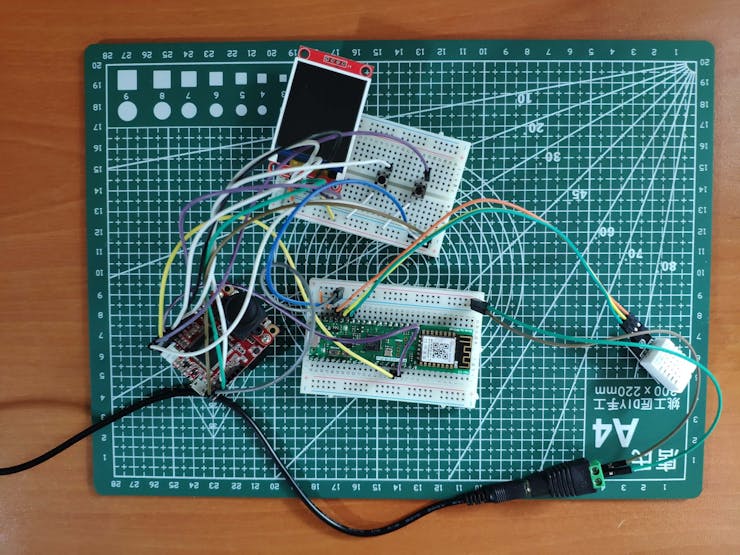
After completing breadboard connections and adjustments successfully, I made the breadboard connection points rigid by utilizing a hot glue gun.
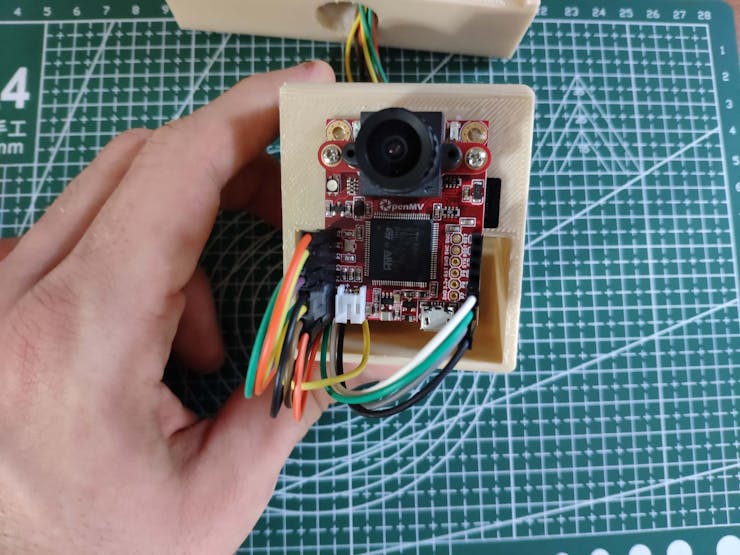
After printing all parts (models), I fastened all components except OpenMV Cam H7 to their corresponding slots on the main case via the hot glue gun.
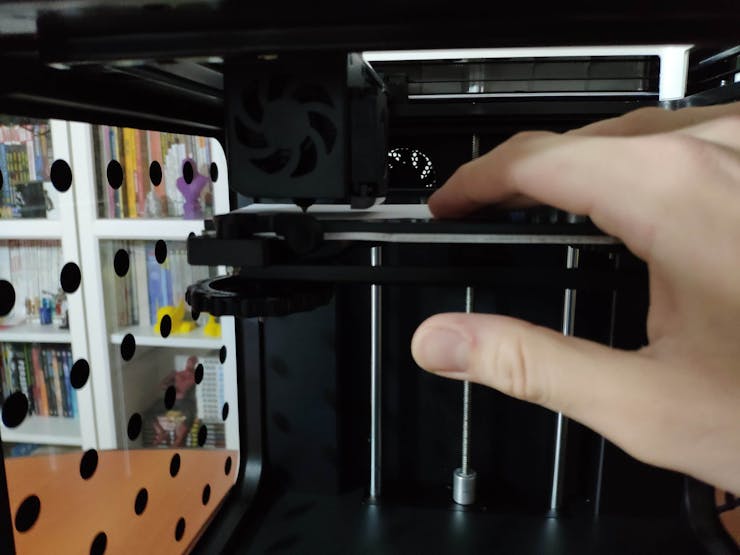
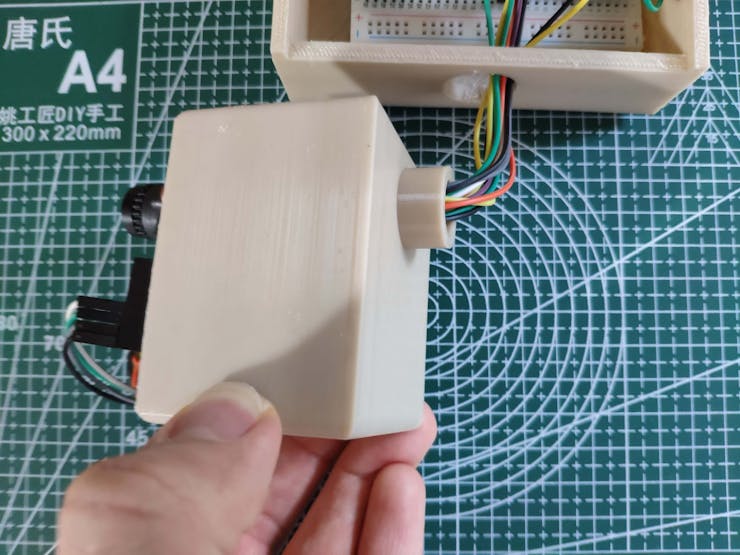
Then, I attached OpenMV Cam H7 to the separate moveable handle allowing capturing coop images at different angles.
Finally, I placed the sliding front cover via its dents.


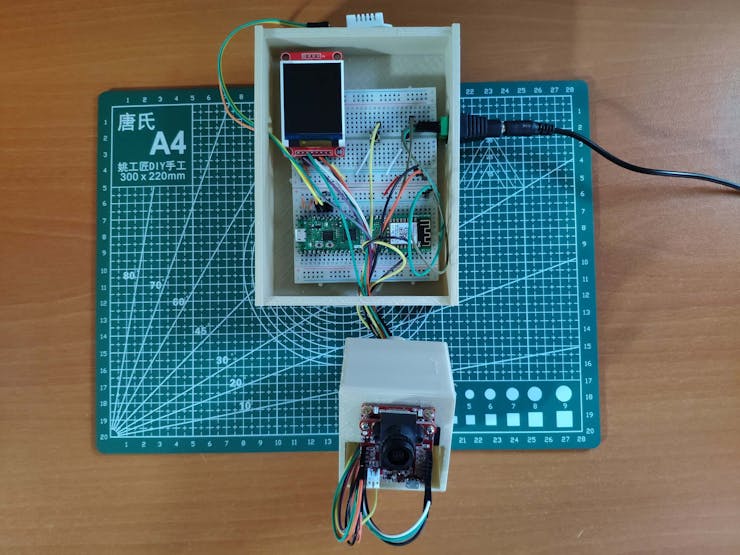
After completing assembling, I placed my 3D-printed sand bath in the coop (cage) and hung the main case onto the wire cage via its hooks.
Step 2: Creating a Twilio account to send messages over WhatsApp
Step 3: Developing a web application in PHP to log detection results
Step 4: Capturing and storing images of the coop w/ OpenMV Cam H7
Step 5: Building an object detection (FOMO) model with Edge Impulse
Step 6: Setting up the Edge Impulse FOMO model on OpenMV Cam H7
Step 7: Running the FOMO model on OpenMV Cam H7 to track unhatched eggs and the poultry feeder status
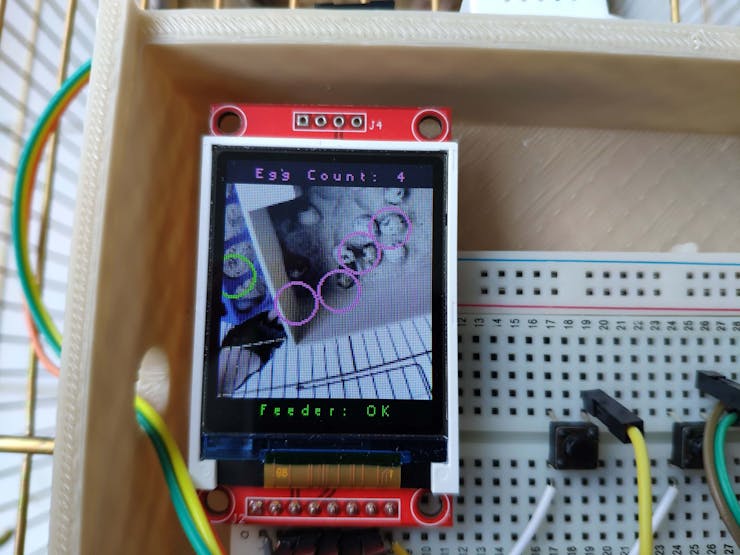
My Edge Impulse object detection (FOMO) model scans a captured image and predicts possibilities of trained labels to recognize an object on the given captured image. The prediction result (score) represents the model's "confidence" that the detected object corresponds to each of the two different labels (classes) [0 - 1], as shown in Step 5:
- Egg
- Feeder
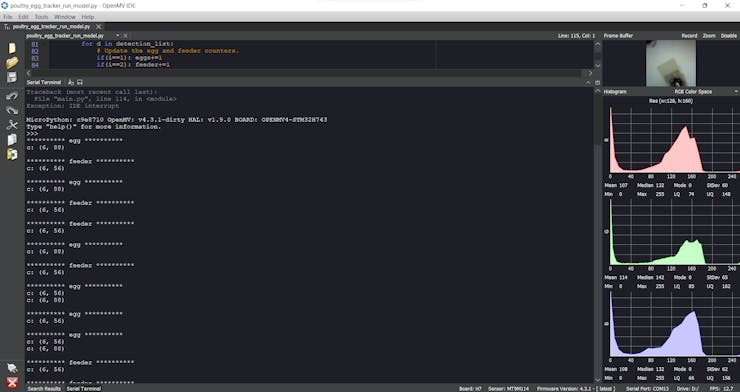
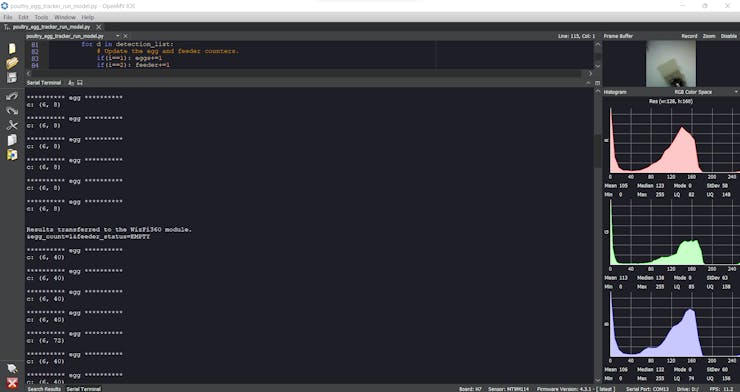
To run the poultry_egg_tracker_run_model.py file on OpenMV Cam H7 when powered up automatically, save it as main.py.
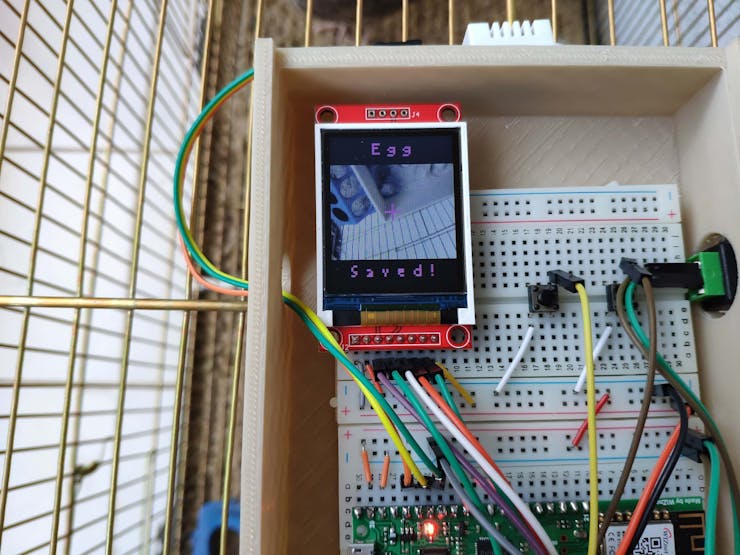
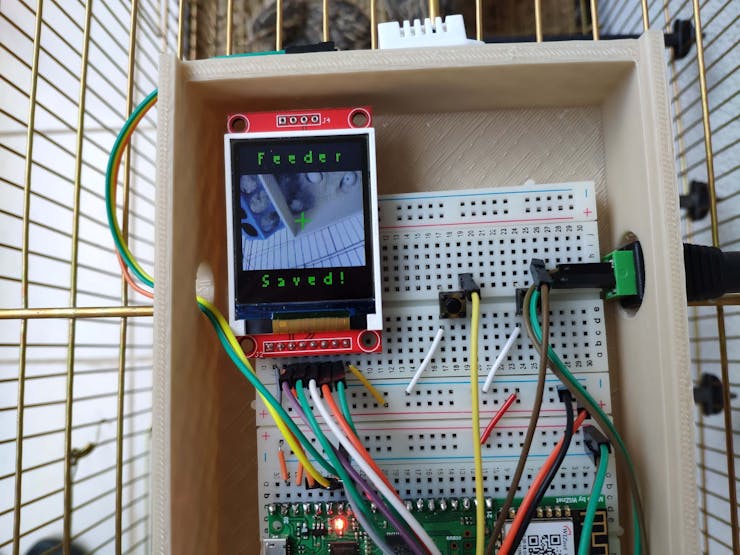
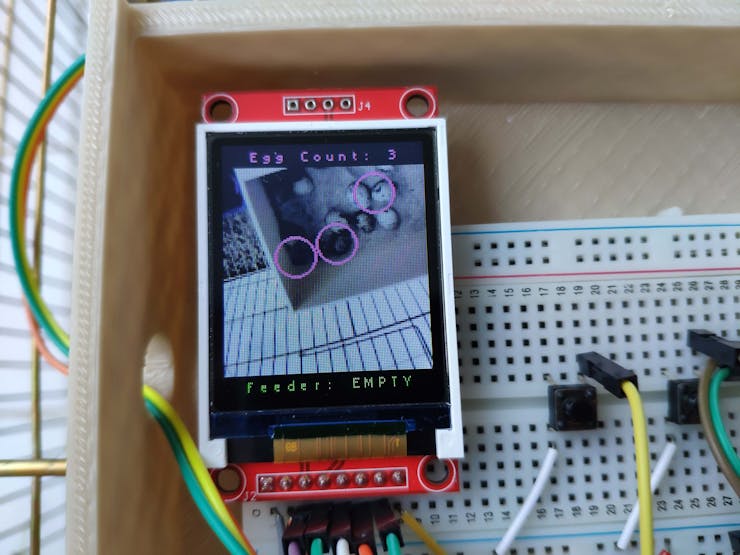
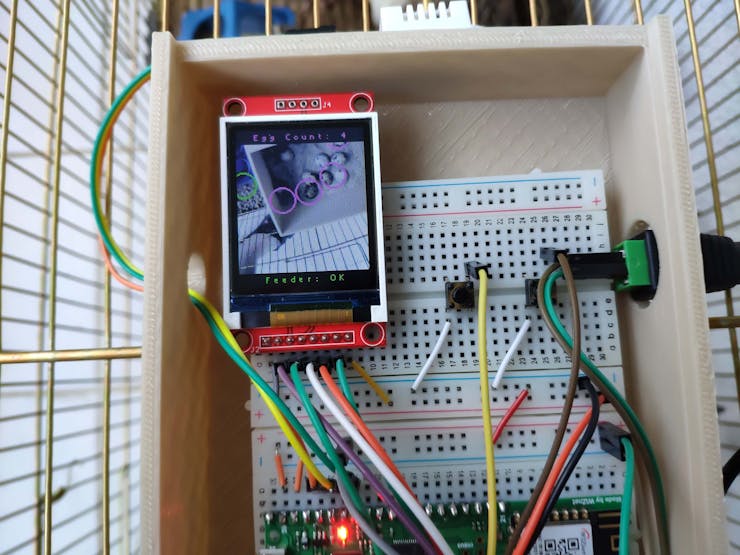
🐤🥚 The device displays a real-time video stream on the ST7735 1.8" color TFT screen.
🐤🥚 The device captures a picture and runs an inference with the Edge Impulse object detection (FOMO) model.
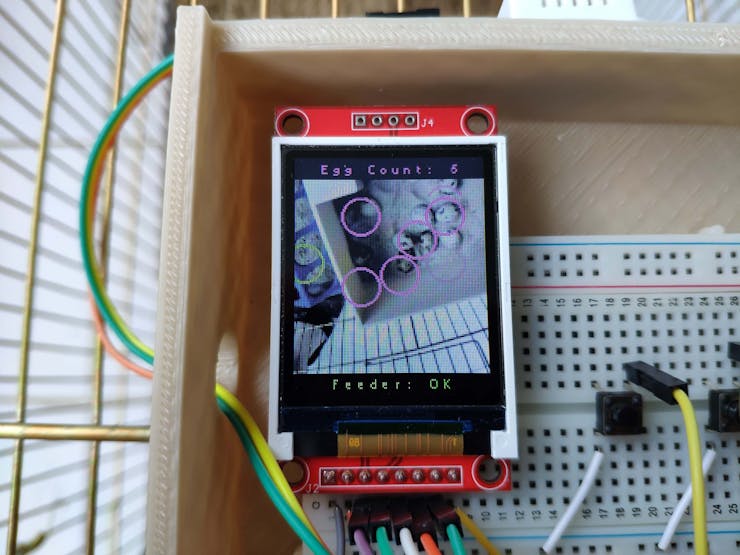
🐤🥚 Then, the device draws circles (centroids) on each recognized object with the detected label's assigned color.
- Egg ➡ Magenta
- Feeder ➡ Green
🐤🥚 For each detected egg label, the device increments the unhatched egg counter by 1.
🐤🥚 If there is no detected feeder label, the device declares the poultry feeder status as EMPTY: Which means that the poultry feeder needs to be refilled. Otherwise, it declares the poultry feeder status as OK.
🐤🥚 Then, the device displays the unhatched egg counter and the evaluated poultry feeder status on the ST7735 1.8" color TFT screen.


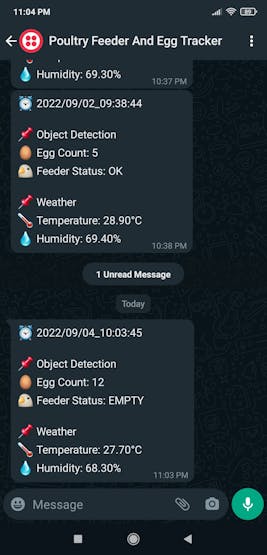
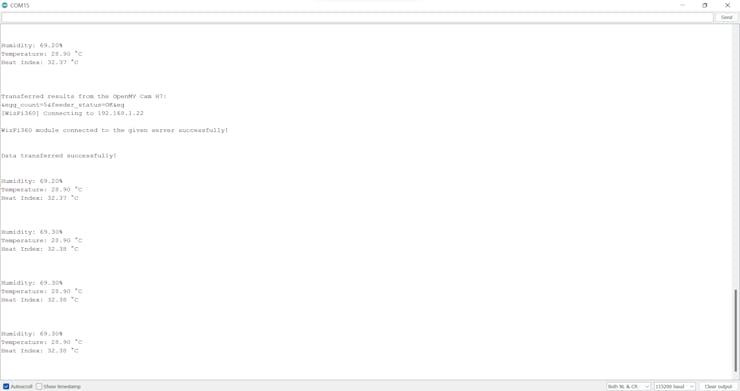
🐤🥚 Each half an hour, the device transmits the detection results to WizFi360-EVB-Pico via serial communication (UART) to inform the user of the detection results via WhatsApp. Then, the device blinks the built-in RGB LED as blue.
&egg_count=6&feeder_status=OK
&egg_count=8&feeder_status=EMPTY
🐤🥚 Also, the device prints notifications and the detection results on the OpenMV IDE serial monitor for debugging.
As far as my experiments go, the device recognizes objects with different labels (classes) precisely, evaluates the poultry feeder status faultlessly, and shows accurate centroids around the detected objects :)
Step 8: Setting up WizFi360-EVB-Pico to collect weather data and communicate w/ OpenMV Cam H7
Step 8.1: Logging the detection results and notifying the user over WhatsApp
After running the Poultry_Feeder_and_Unhatched_Egg_Tracker.ino file on WizFi360-EVB-Pico:
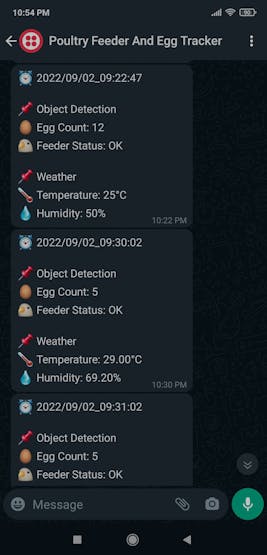
🐤🥚 The device transmits the detection results and the collected weather data to the PHP web application when WizFi360-EVB-Pico receives the detection results from OpenMV Cam H7 via serial communication every half an hour.
🐤🥚 As explained in Step 3, when the web application obtains the detection results and the collected weather data via an HTTP GET request, the application appends the current date & time and logs the received data to the given MySQL database table.
🐤🥚 Then, the application shows all registered data records as a list on the home page.

🐤🥚 Also, the web application sends the detection results and the weather data with the current date & time over WhatsApp via Twilio's API in order to inform the user of the latest unhatched egg number and the poultry feeder status in the coop.
🐤🥚 Finally, the device prints notifications and sensor measurements on the Arduino IDE serial monitor for debugging.
Videos and Conclusion
Further Discussions
By applying object detection models trained on captured coop images in tracking unhatched eggs and detecting the poultry feeder status automatically, we can achieve to:
🐤🥚 mitigate strenuous workload while logging the daily produced eggs and applying a regular feeding schedule,
🐤🥚 maintain the high poultry health status,
🐤🥚 maximize egg quality and quantity,
🐤🥚 determine a potential contagious poultry disease or malnutrition.
References
[1] Soltanmoradi MG, Seidavi A, Dadashbeiki M, Laudadio V, Centoducati G, Tufarelli V., Influence of Feeding Frequency and Timetable on Egg Parameters and Reproductive Performance in Broiler Breeder Hens, Avian Biology Research, vol. 7, no. 3, Aug. 2014, pp. 153–159, https://doi.org/10.3184/175815514X14025828753279