 Dimitar
Hey everyone,
Today we will run the keypad example for the EMB1082.

Here is wat will need
- EMB1082 - module
- Keypad - we need a key matrix. The one I have is 4x4. You can learn about key matrixes here
- Debugger - Segger J-link Edu / usb-miniJTAG / J-Link OB ARM
- BEE2-SDK-v1.2.0
- Button and a pull up resistor
- LED and a current limiting resistor
- Power supply - for this I am using 2 AAA batteries in series to get 3V 2450mAh
Optional
- UART to USB converter for reading debug info.
Hardware setup
We will use the button to put the module in pairing mode.
The LED will be used for caps lock feedback - optional.
Any pin can be used for GPIO functionality, so we hook up everything the most convenient way for us.
Software
To setup the project you can take a look at my previous build log or RTL8762D SDK User Guide.
We nee to open the following project BEE2-SDK-v1.2.0 -> board -> evb -> keyboard
First file we will take look at is board.h
/*******************************************************
*                 Keyboard Keyscan Config
*******************************************************/
/* keypad row and column */
#define KEYPAD_ROW_SIZE       4
#define KEYPAD_COLUMN_SIZE    4
#define ROW0                  P4_3
#define ROW1                  P4_1
#define ROW2                  P3_2
#define ROW3                  P0_0

#define COLUMN0               P2_4
#define COLUMN1               P4_0
#define COLUMN2               P4_2
#define COLUMN3               P0_5
We need to set is the size of the key matrix. Then depending on how you wire you set up, you have to tell the device on which pin you have connected each of the matrix columns and rows.
/*******************************************************
*                 Keyboard Button Config
*******************************************************/
#define PAIR_BUTTON           P0_1
Then we need to set the button that we use to put the device in pairing mode. When we hold this button for a few seconds EMB1082 will start advertising and we could pair it with the PC. Note that it is active level low.
/*******************************************************
*                 Keyboard LED Config
*******************************************************/
#define ADV_LED               P2_3
#define CAPS_LOCK_LED         P2_5
Here is the config for the LEDs. I have not connected any LEDs on my set up. If this is the case for you will have to modify keyboard_led.c and comment out the lines where Pad_Config is called.
Next lest go and open key_handler.c. Here we are interested in key_map array
const uint16_t key_map[KEYPAD_ROW_SIZE][KEYPAD_COLUMN_SIZE] =
{
    {KB_Return_ENTER,       KB_3,         KB_2,     KB_1},
    {KB_UpArrow,            KB_6,         KB_5,     KB_4},
    {KB_RightArrow,         KB_9,         KB_8,     KB_7},
    {KB_DownArrow,          KB_LeftArrow, KB_0,     KB_DELETE_Backspace}
};
If we press the button connected to the firs row and first column the device will send ENTER button press to the PC. You can find a list of available keys in key_handler.h You will need all the digits and ENTER.
More or less this is all you need to modify on the software side.
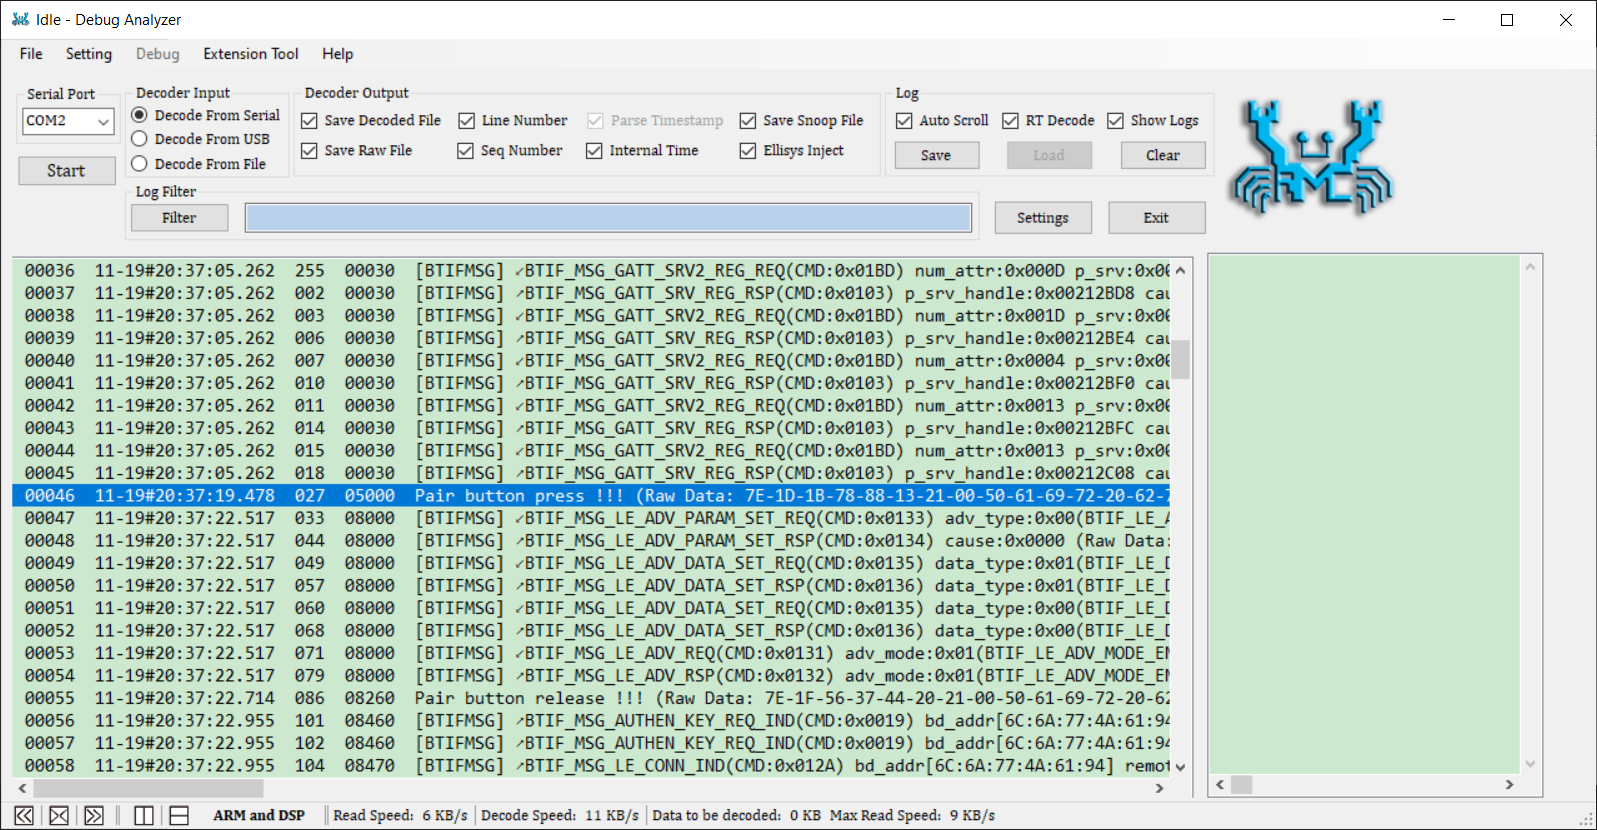
For debugging you can of course use the debugger, but if you are connected with Bluetooth it will break the connection. Fortunately you can use the debug serial port. It runs at 2000000 baud rate so you will have to use RealTek's serial monitor. You can set different debug level for different modules. This way you can remove a class of debug messages or stop a particular module to log.
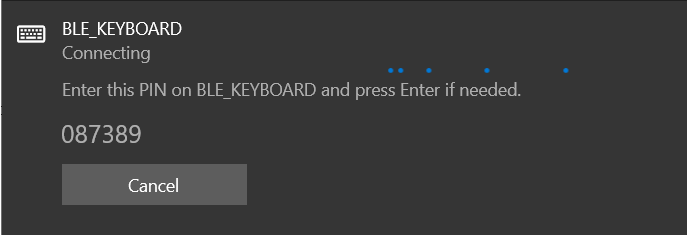
I am running Windows, so I open Bluetooth devices and click add new keyboard. Then I press and hold the pair button until I see BLE_KEYBOARD displayed. You will be asked a code you will need to type in the keypad. Do not forget to press enter when you are done typing the code.
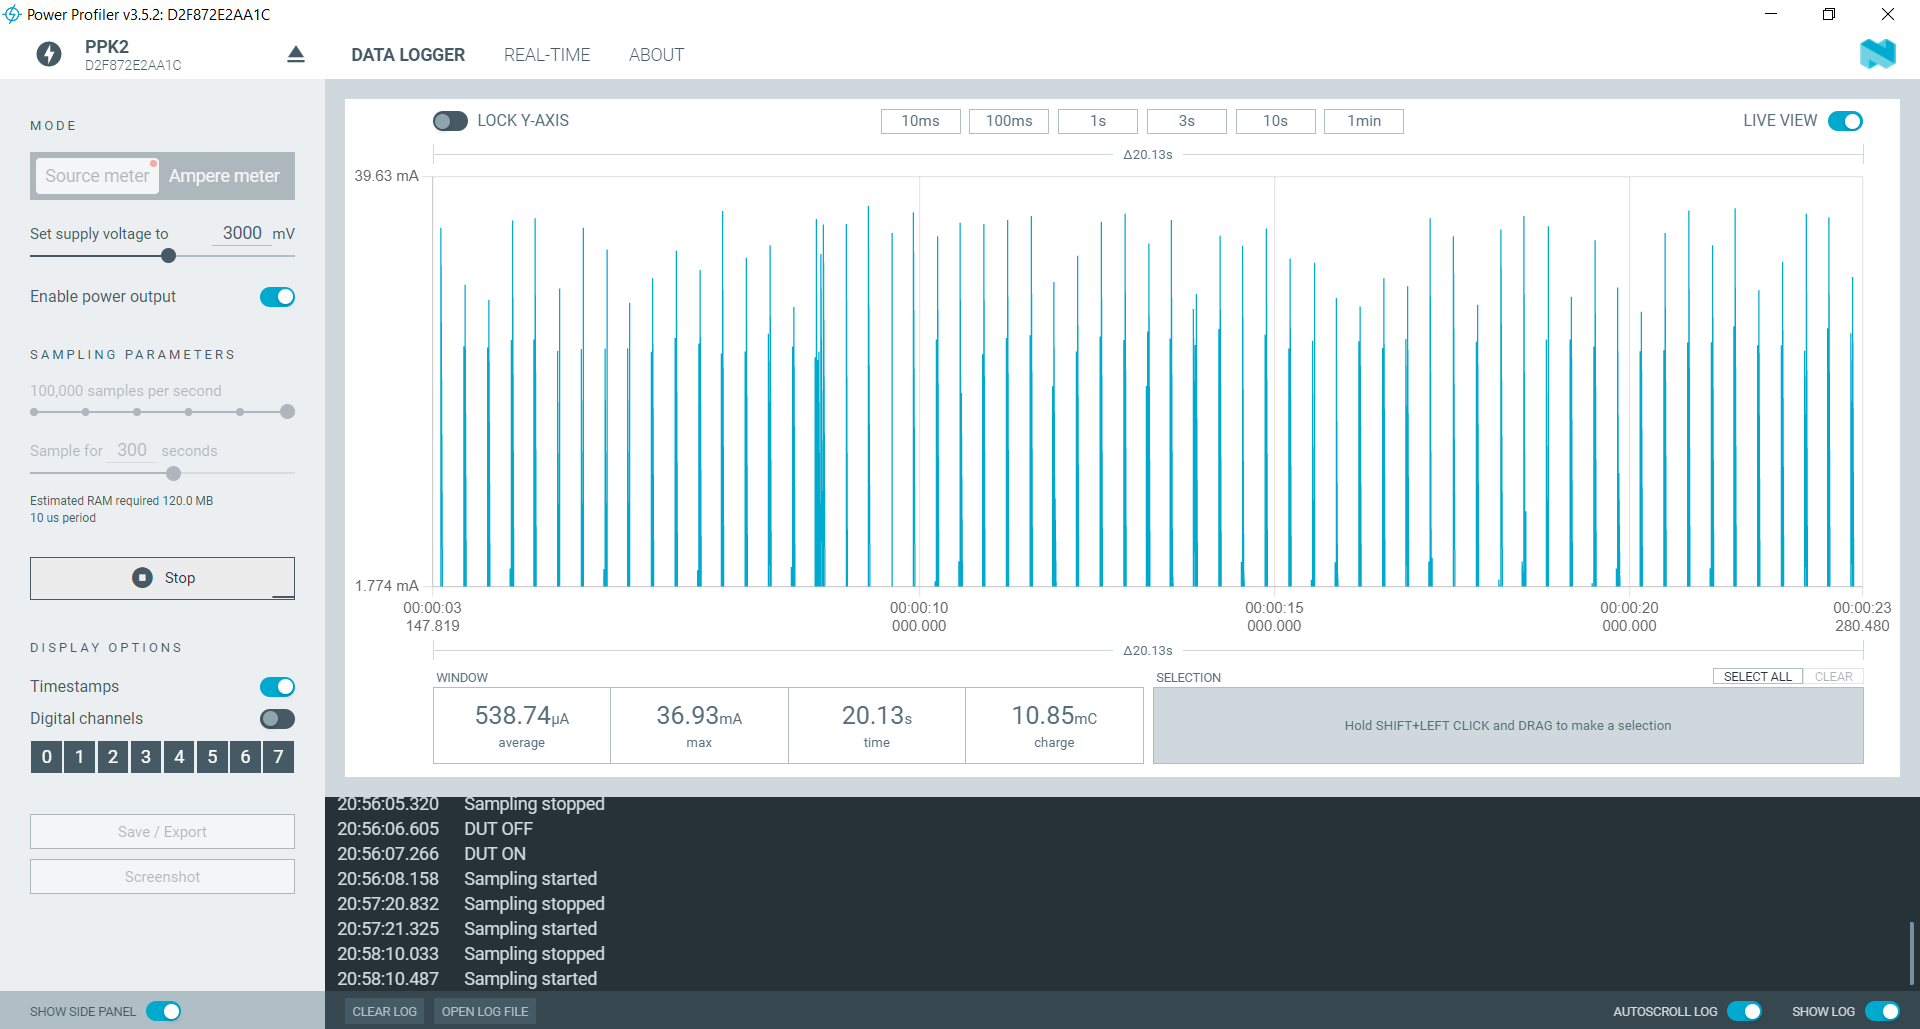
For the finally I want to show you the power consumption of this keyboard. I will use my power profiler kit from Nordic to do that.
With this we can use the battery life calculator and get some really nice operation time of 6 month.
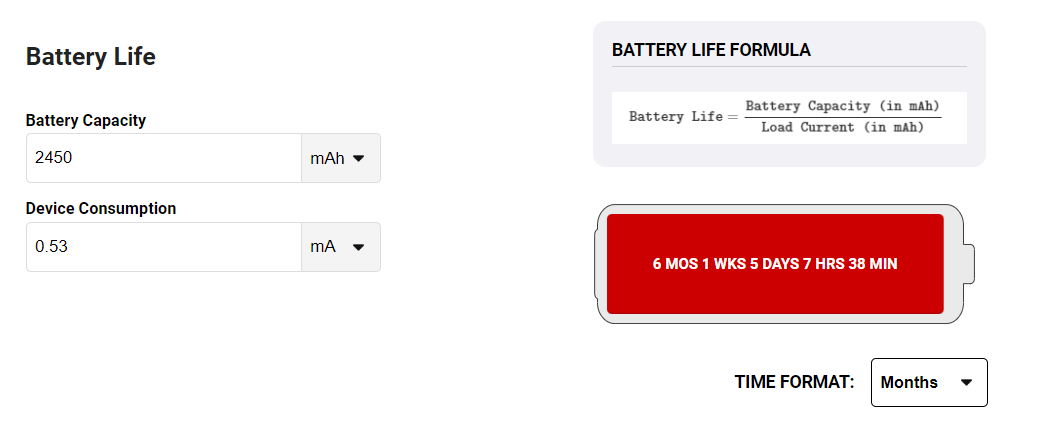
In real life of course we will get slightly less performance because more we click on the buttons more current the device draws, but still 4 or 5 months battery life is great! Not bad for 1.79$
Hope you liked it.
Cheers,
Mitko
Discussions
Become a Hackaday.io Member
Create an account to leave a comment. Already have an account? Log In.