 Justin Scott
My dear friend Emma at Cut Clover Flowers sent me an email a couple months ago titled "Not a vacuum tube but could be fun anyway?" She operates an independent flower farm about a half hour drive from her home. The farm has a greenhouse with sides (aka curtains) that roll up and down with a crank to maintain the temperature inside. She wanted a way to maneuver them automatically when the greenhouse temperature reached certain levels.
There are systems to do this available on the market. They replace the hand cranks with roll motors, which are operated by control boxes with built-in thermostats. These systems can cost over $4K. Emma wanted to know if I could do it cheaper.
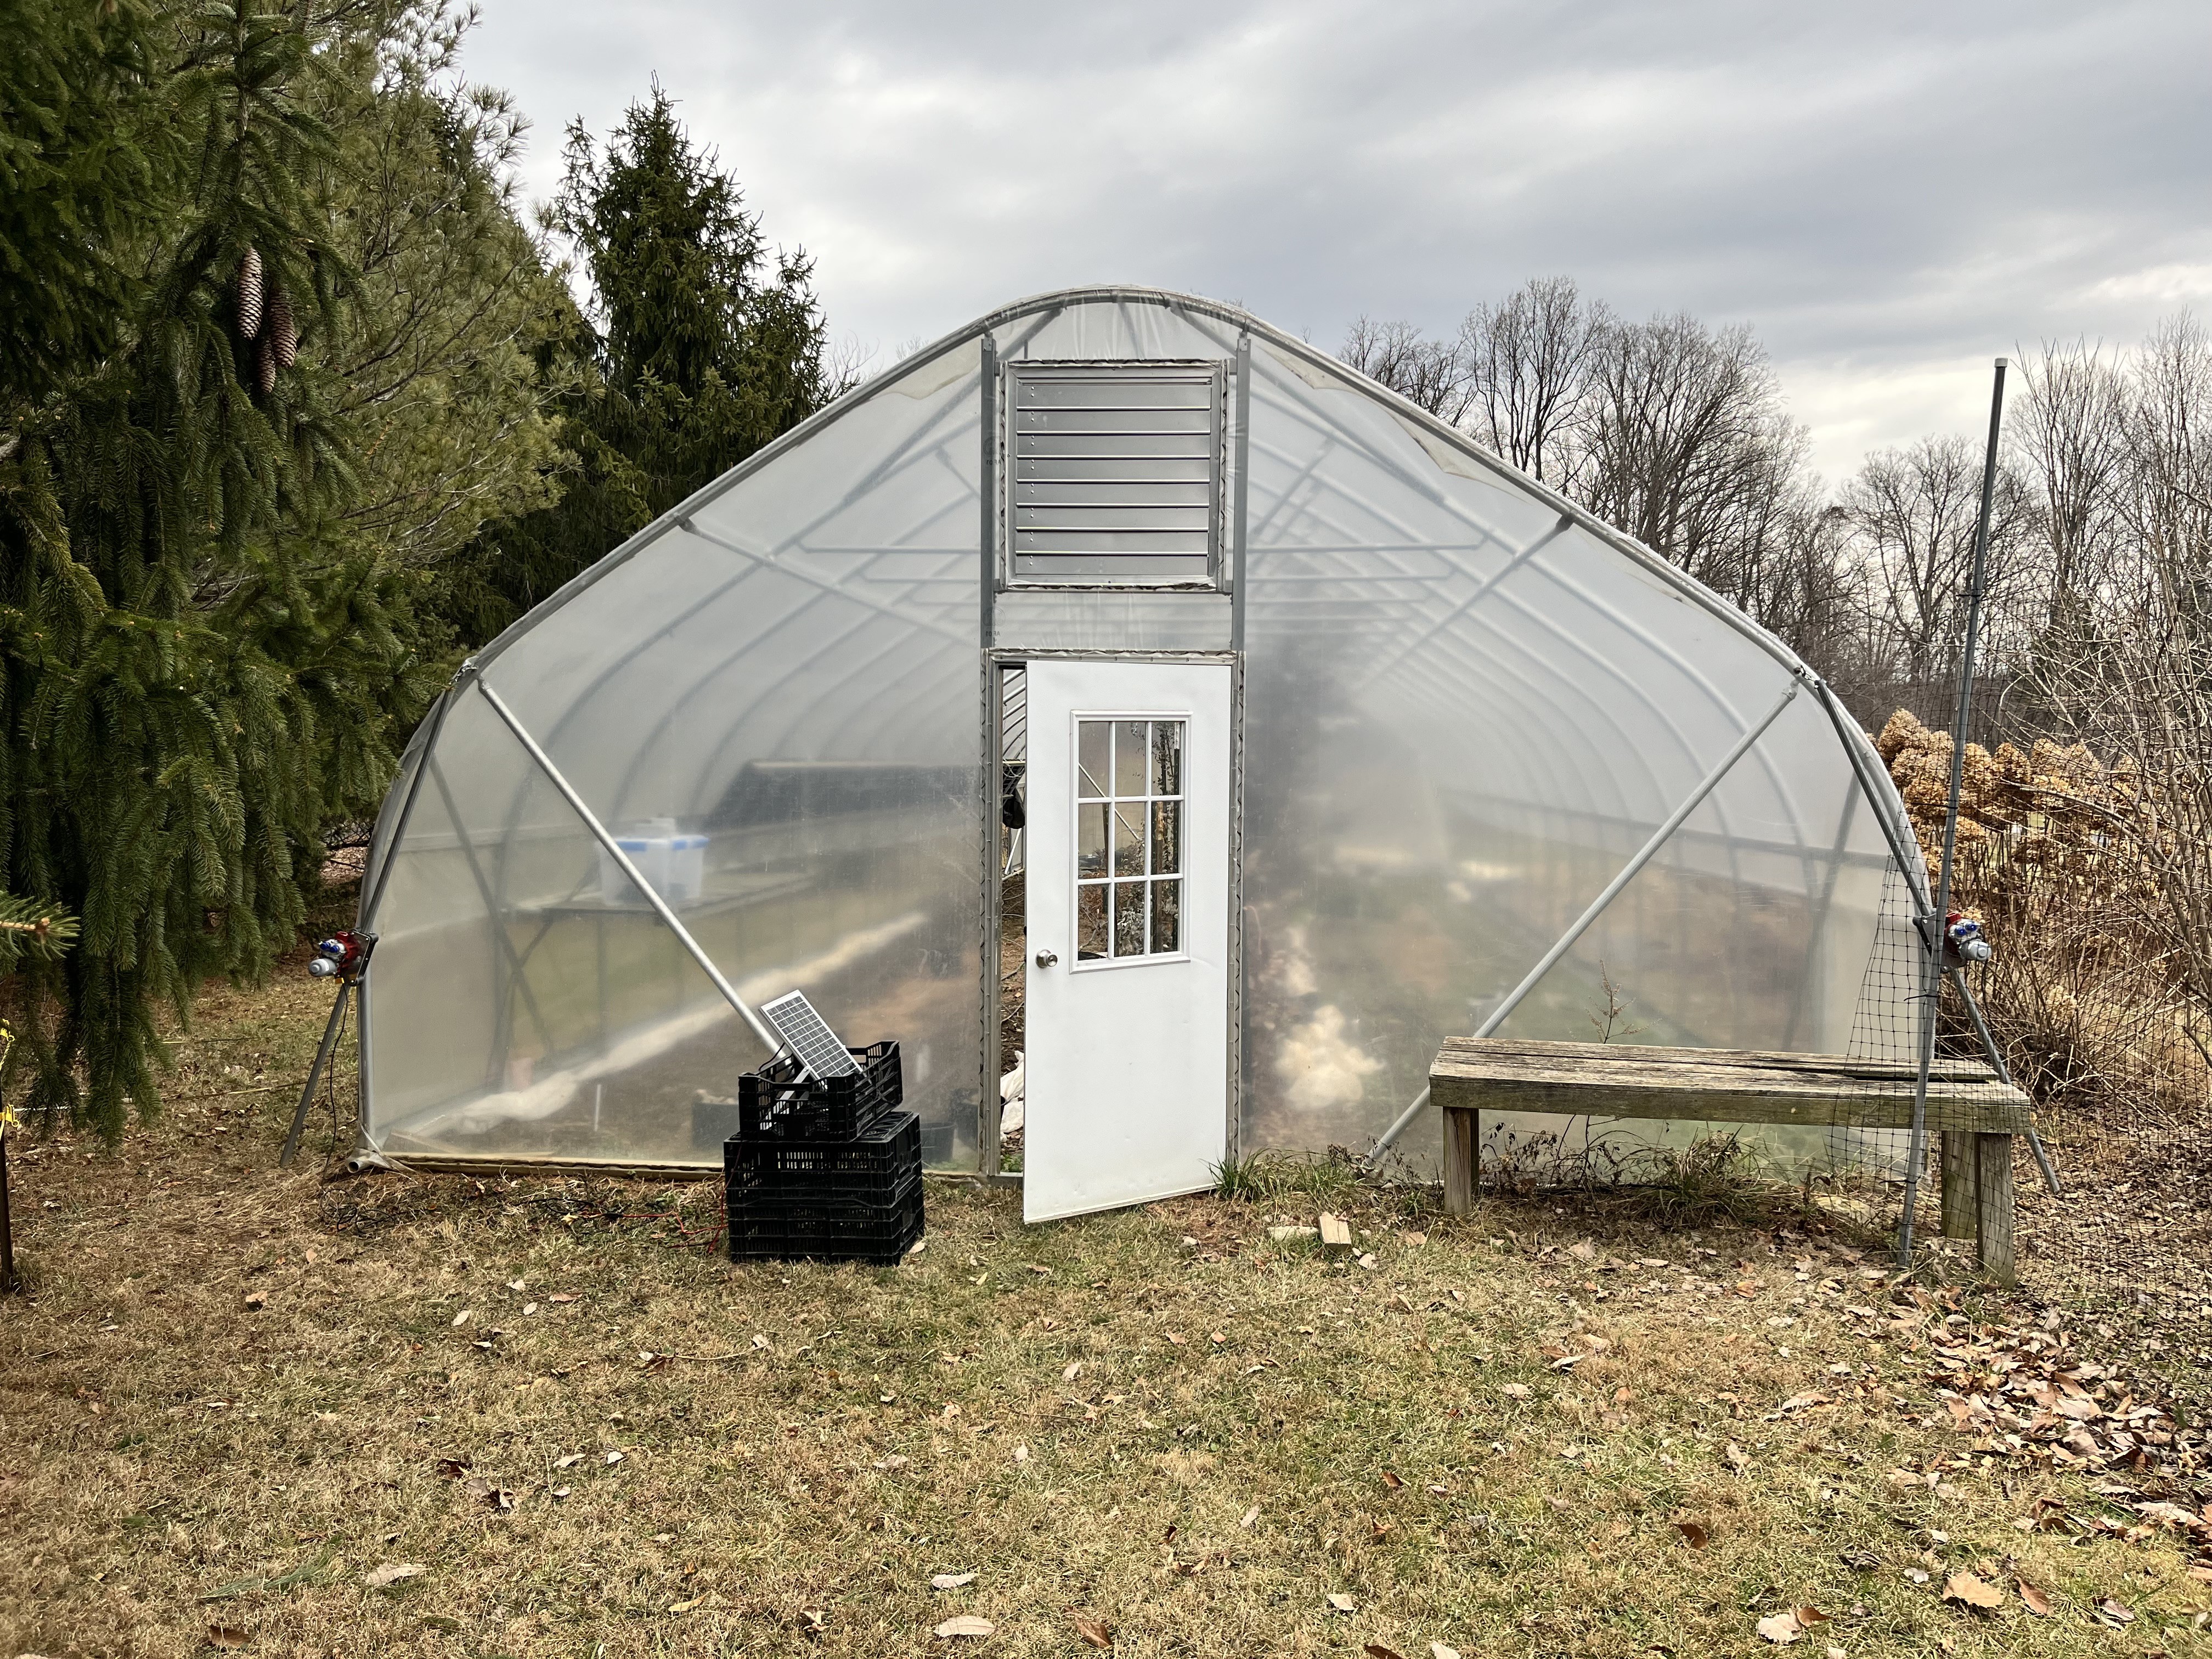
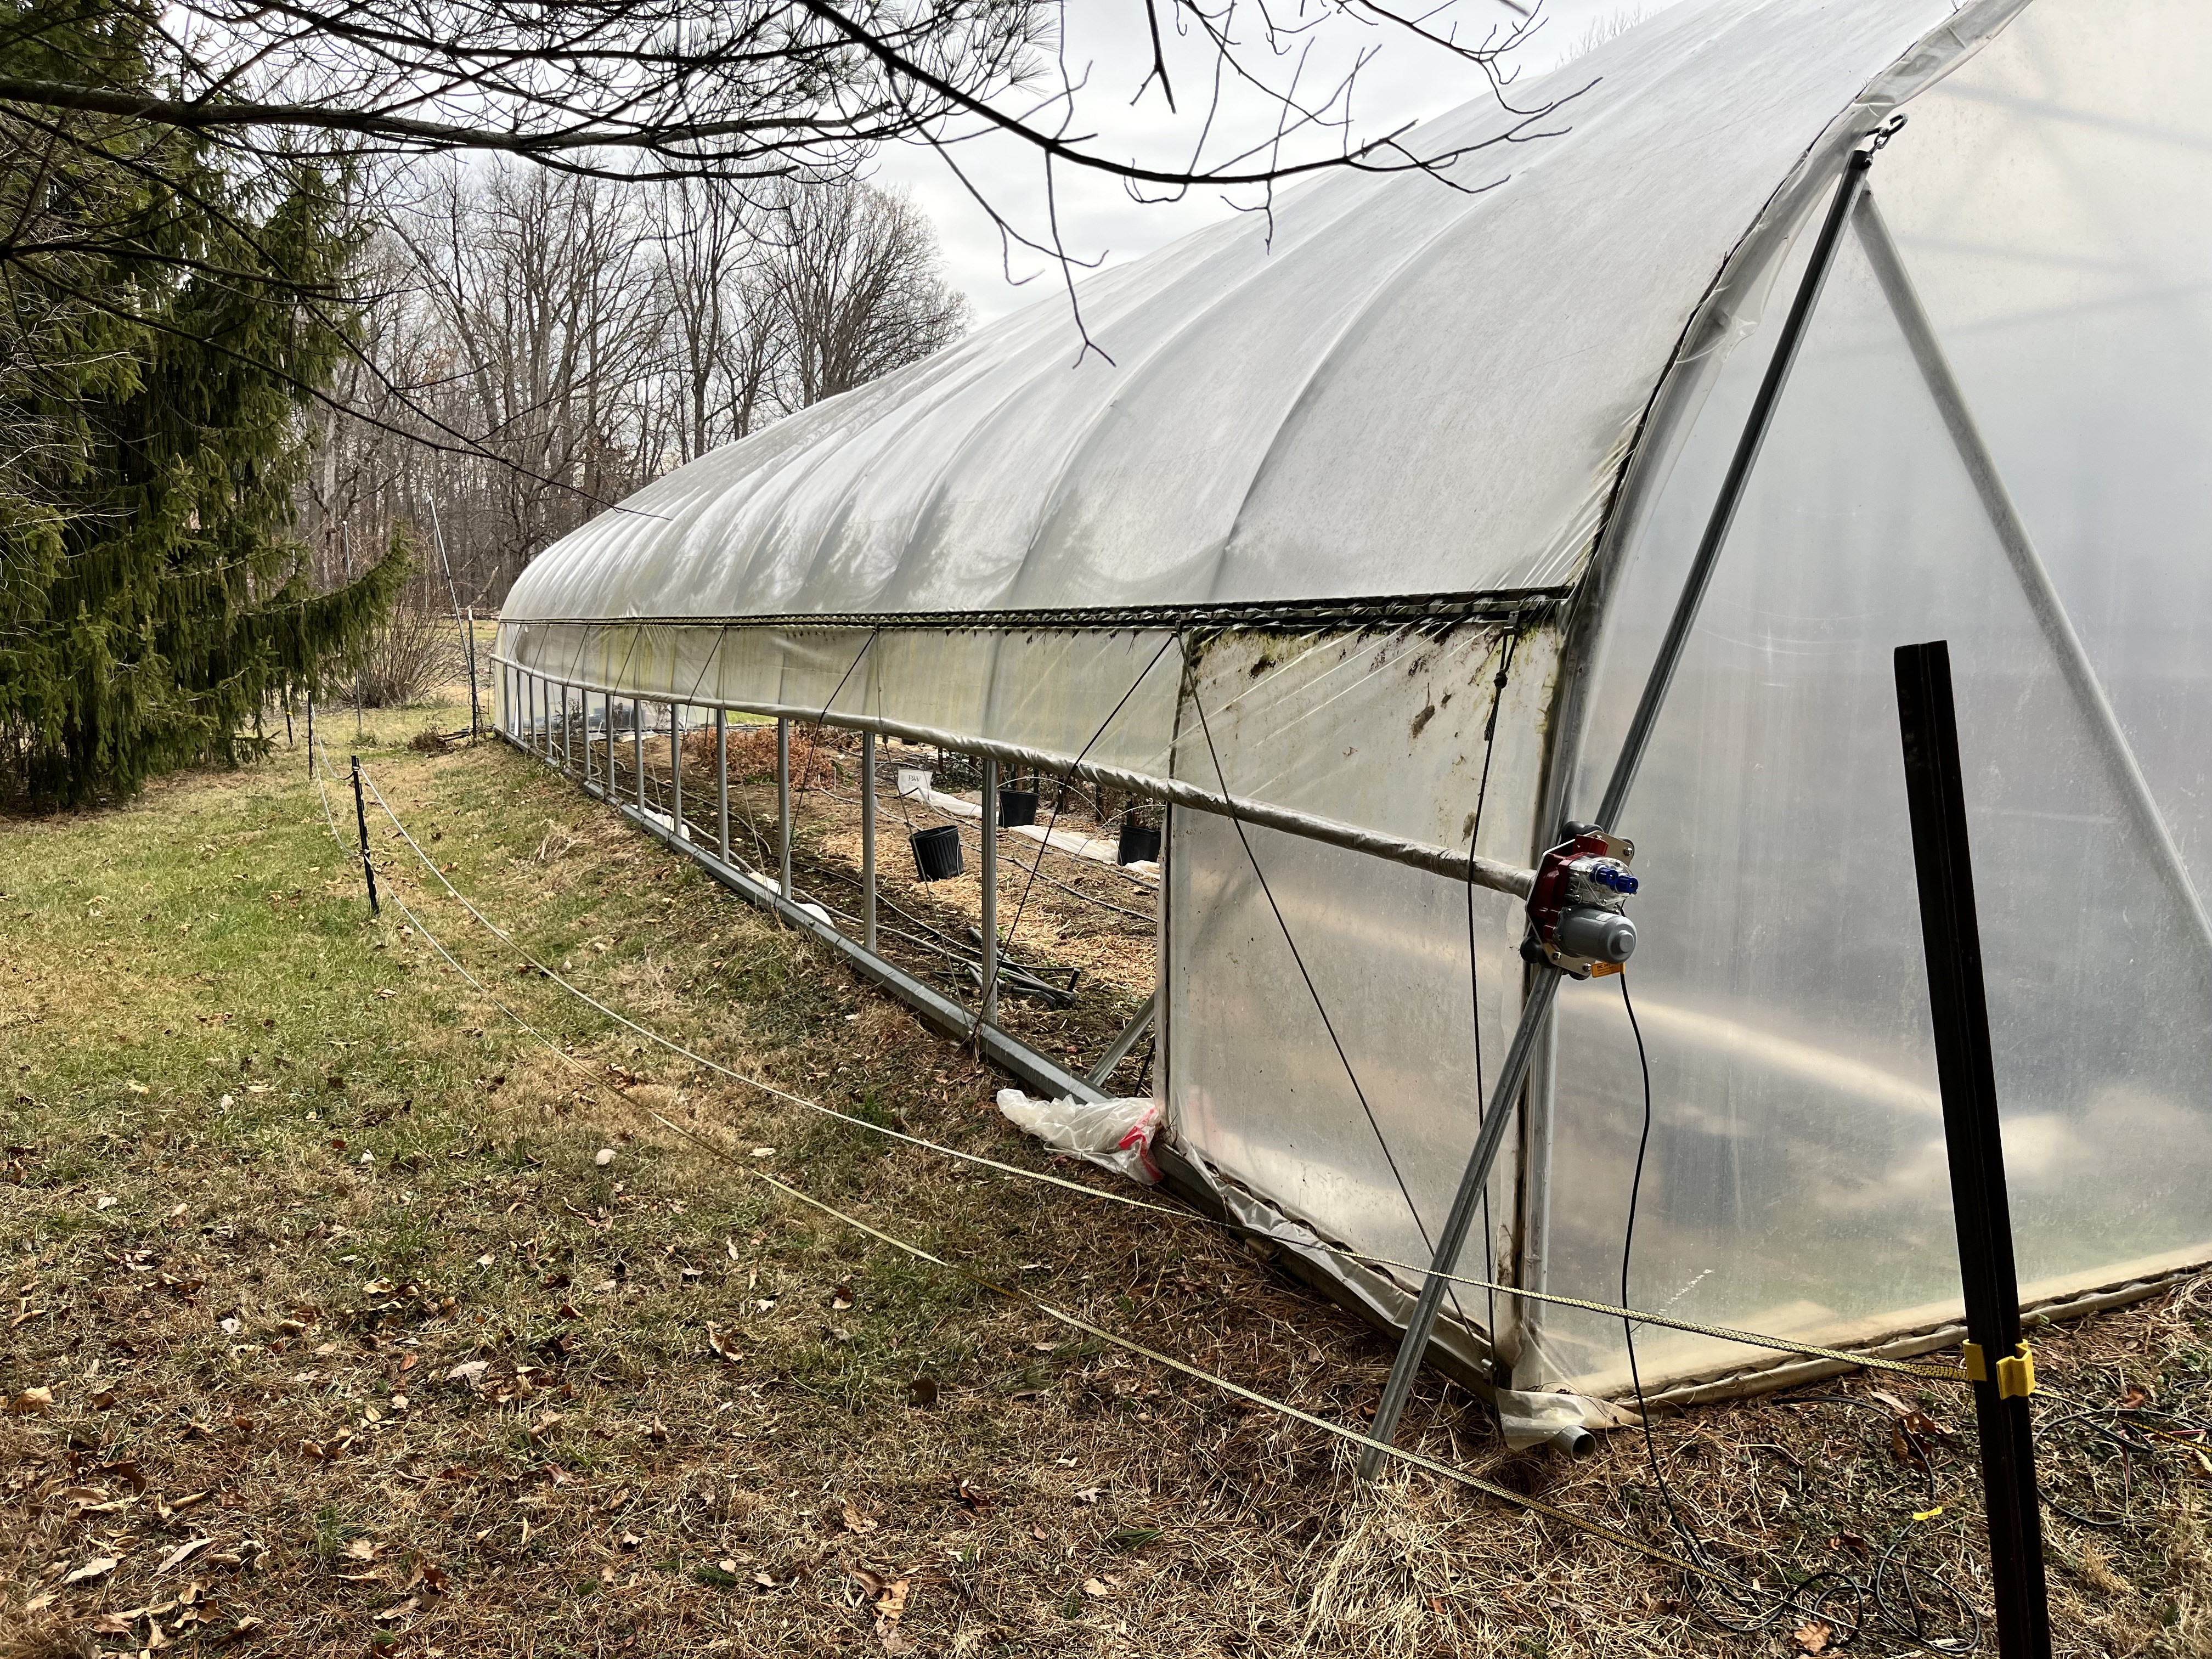
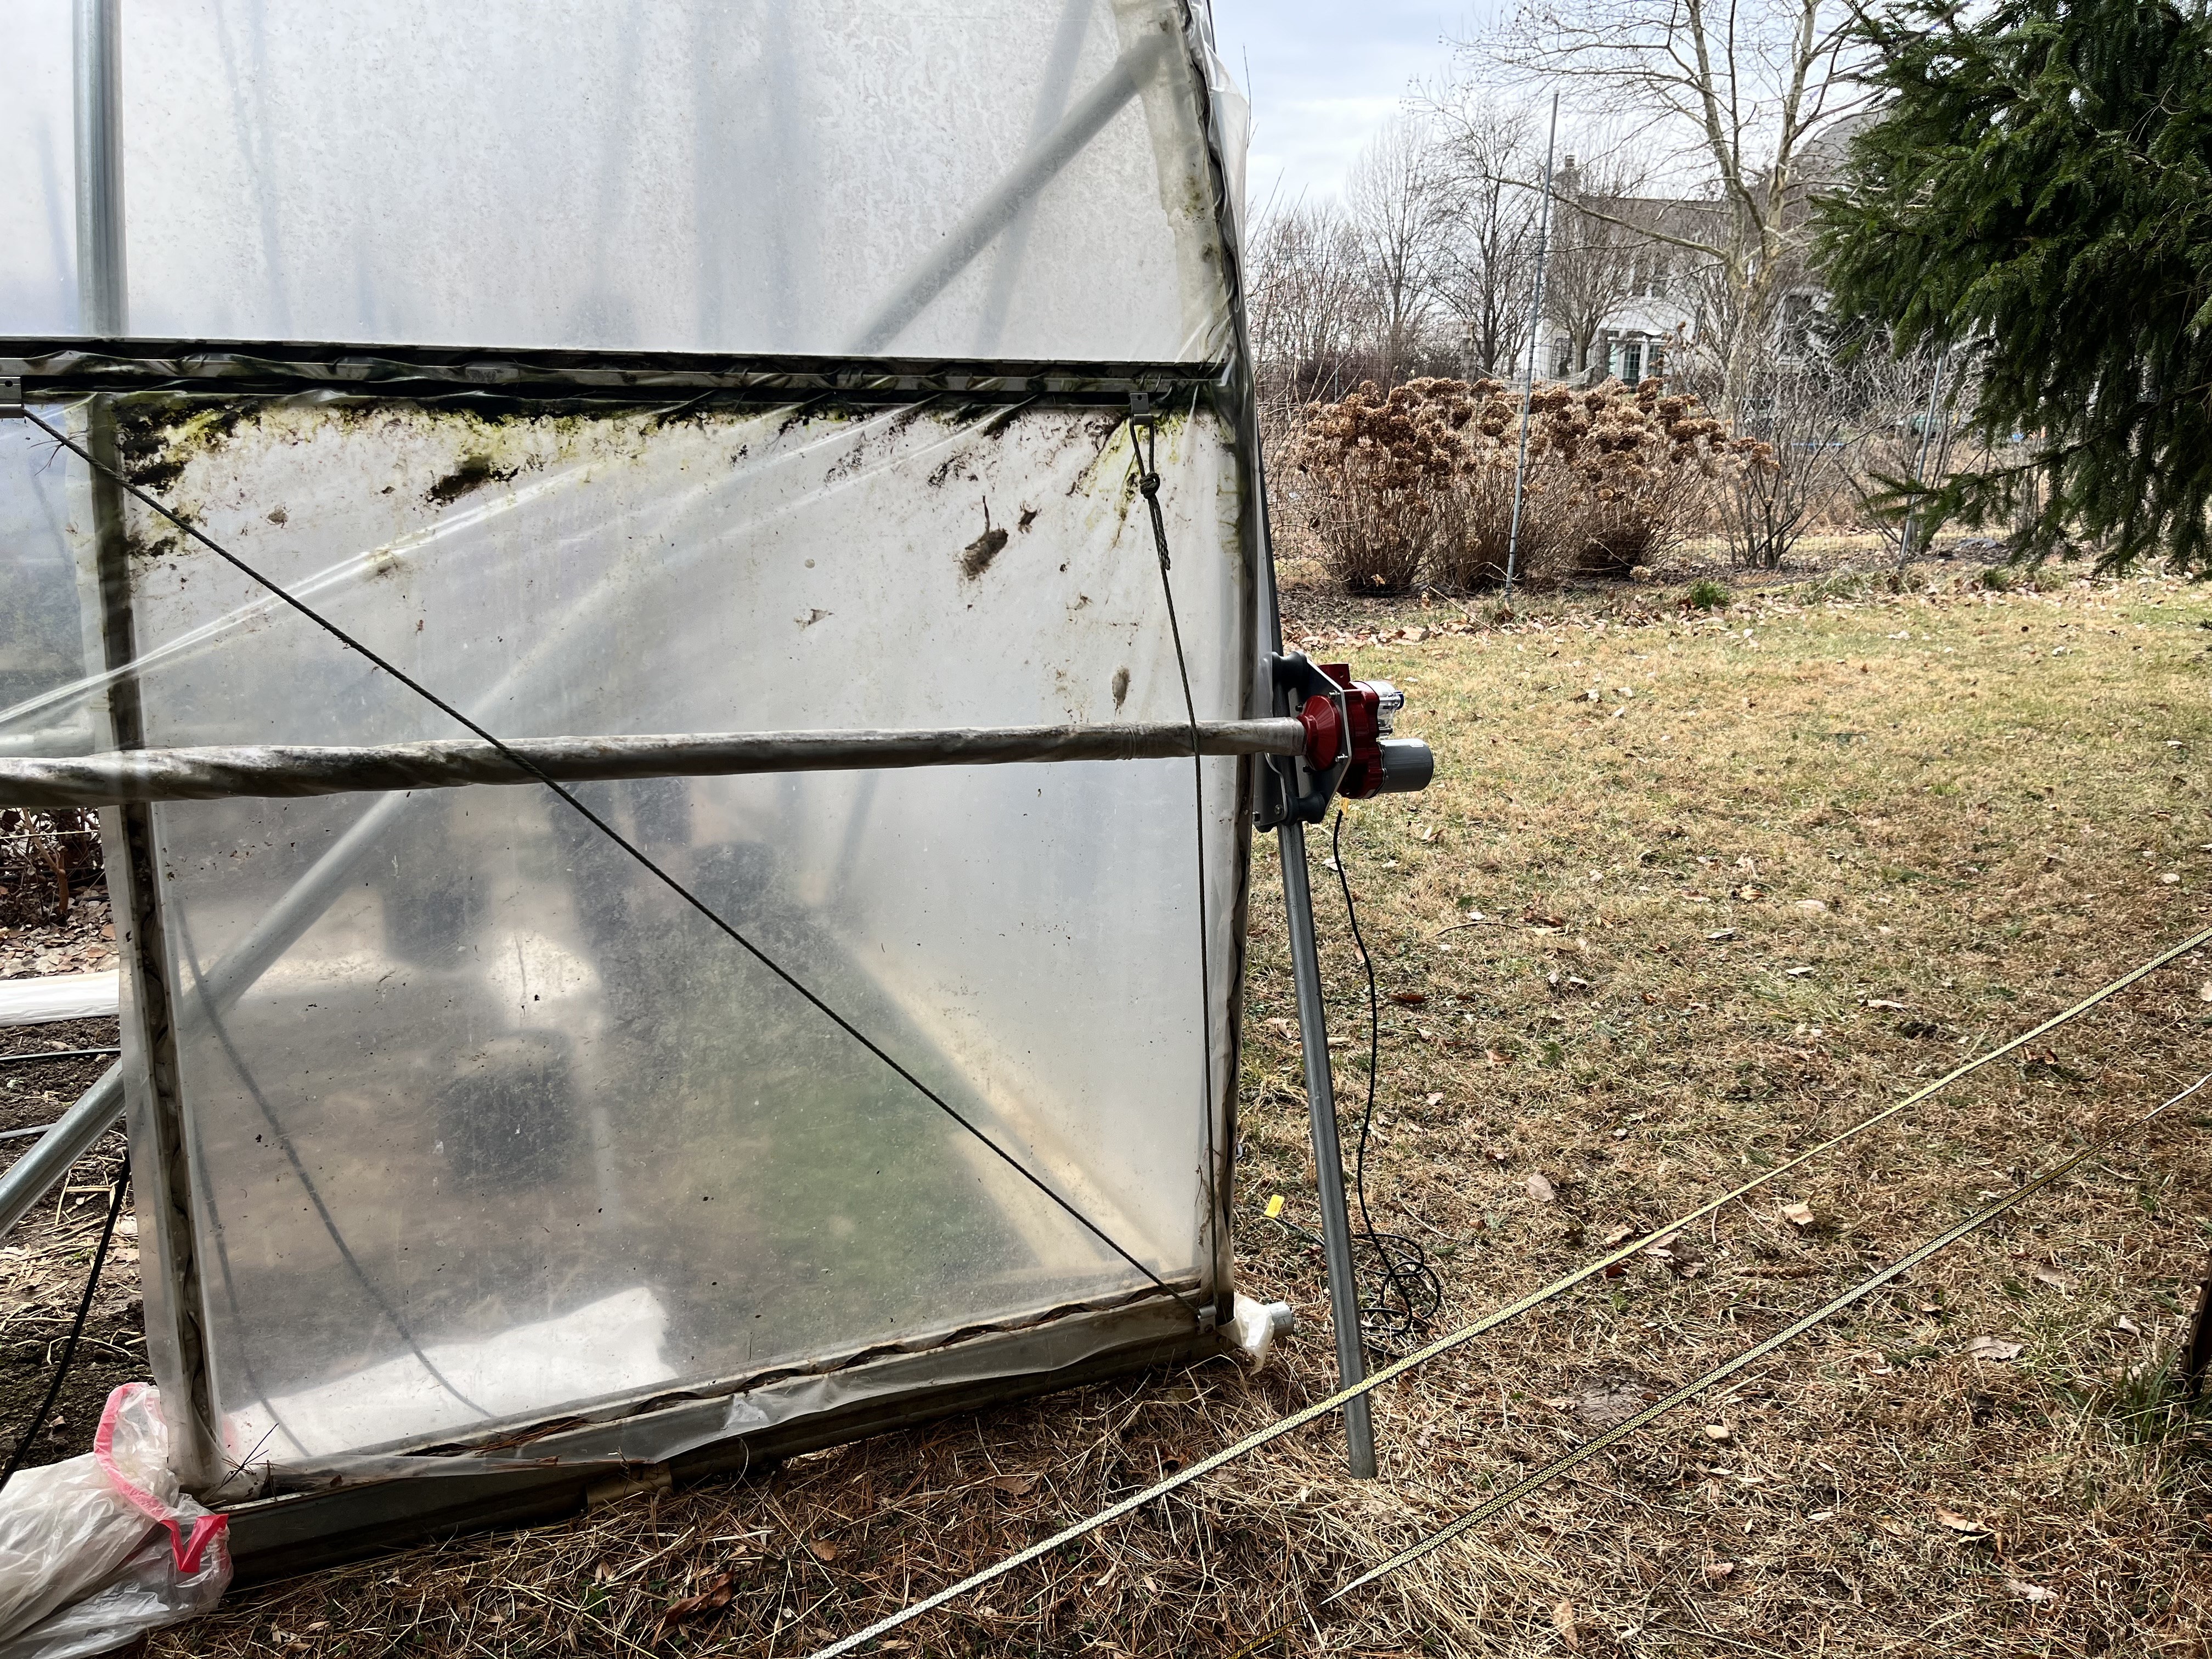
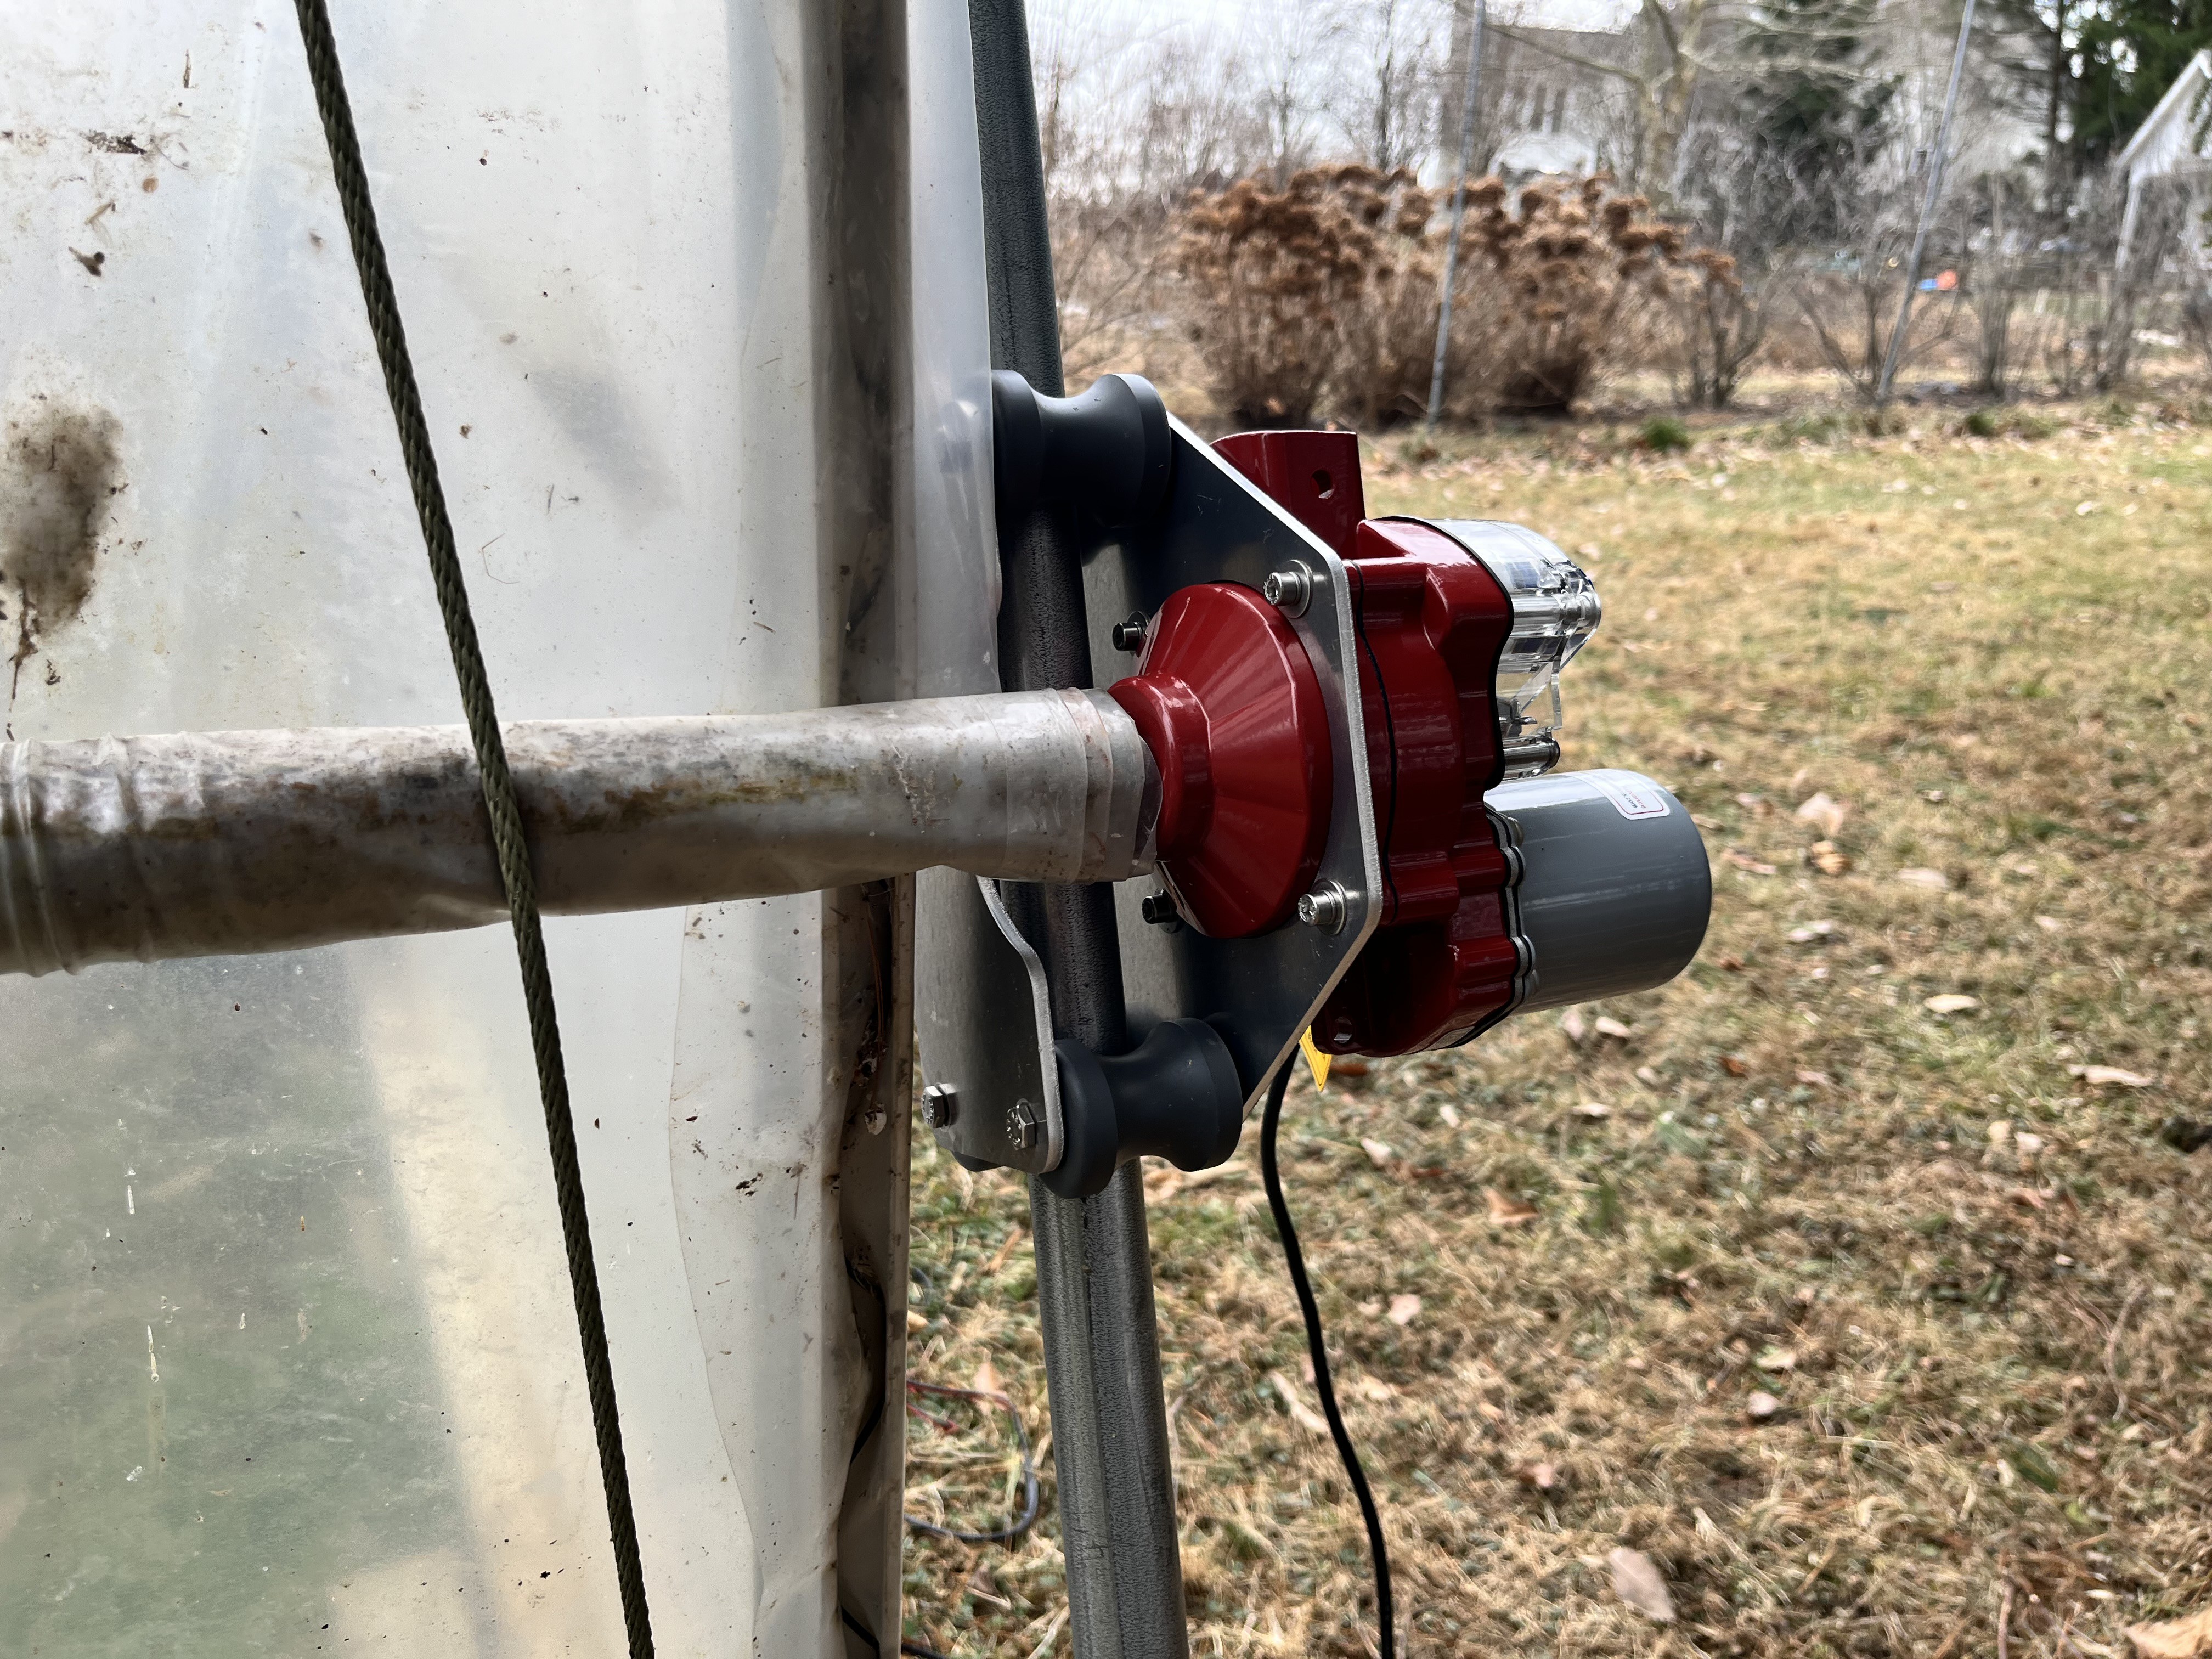
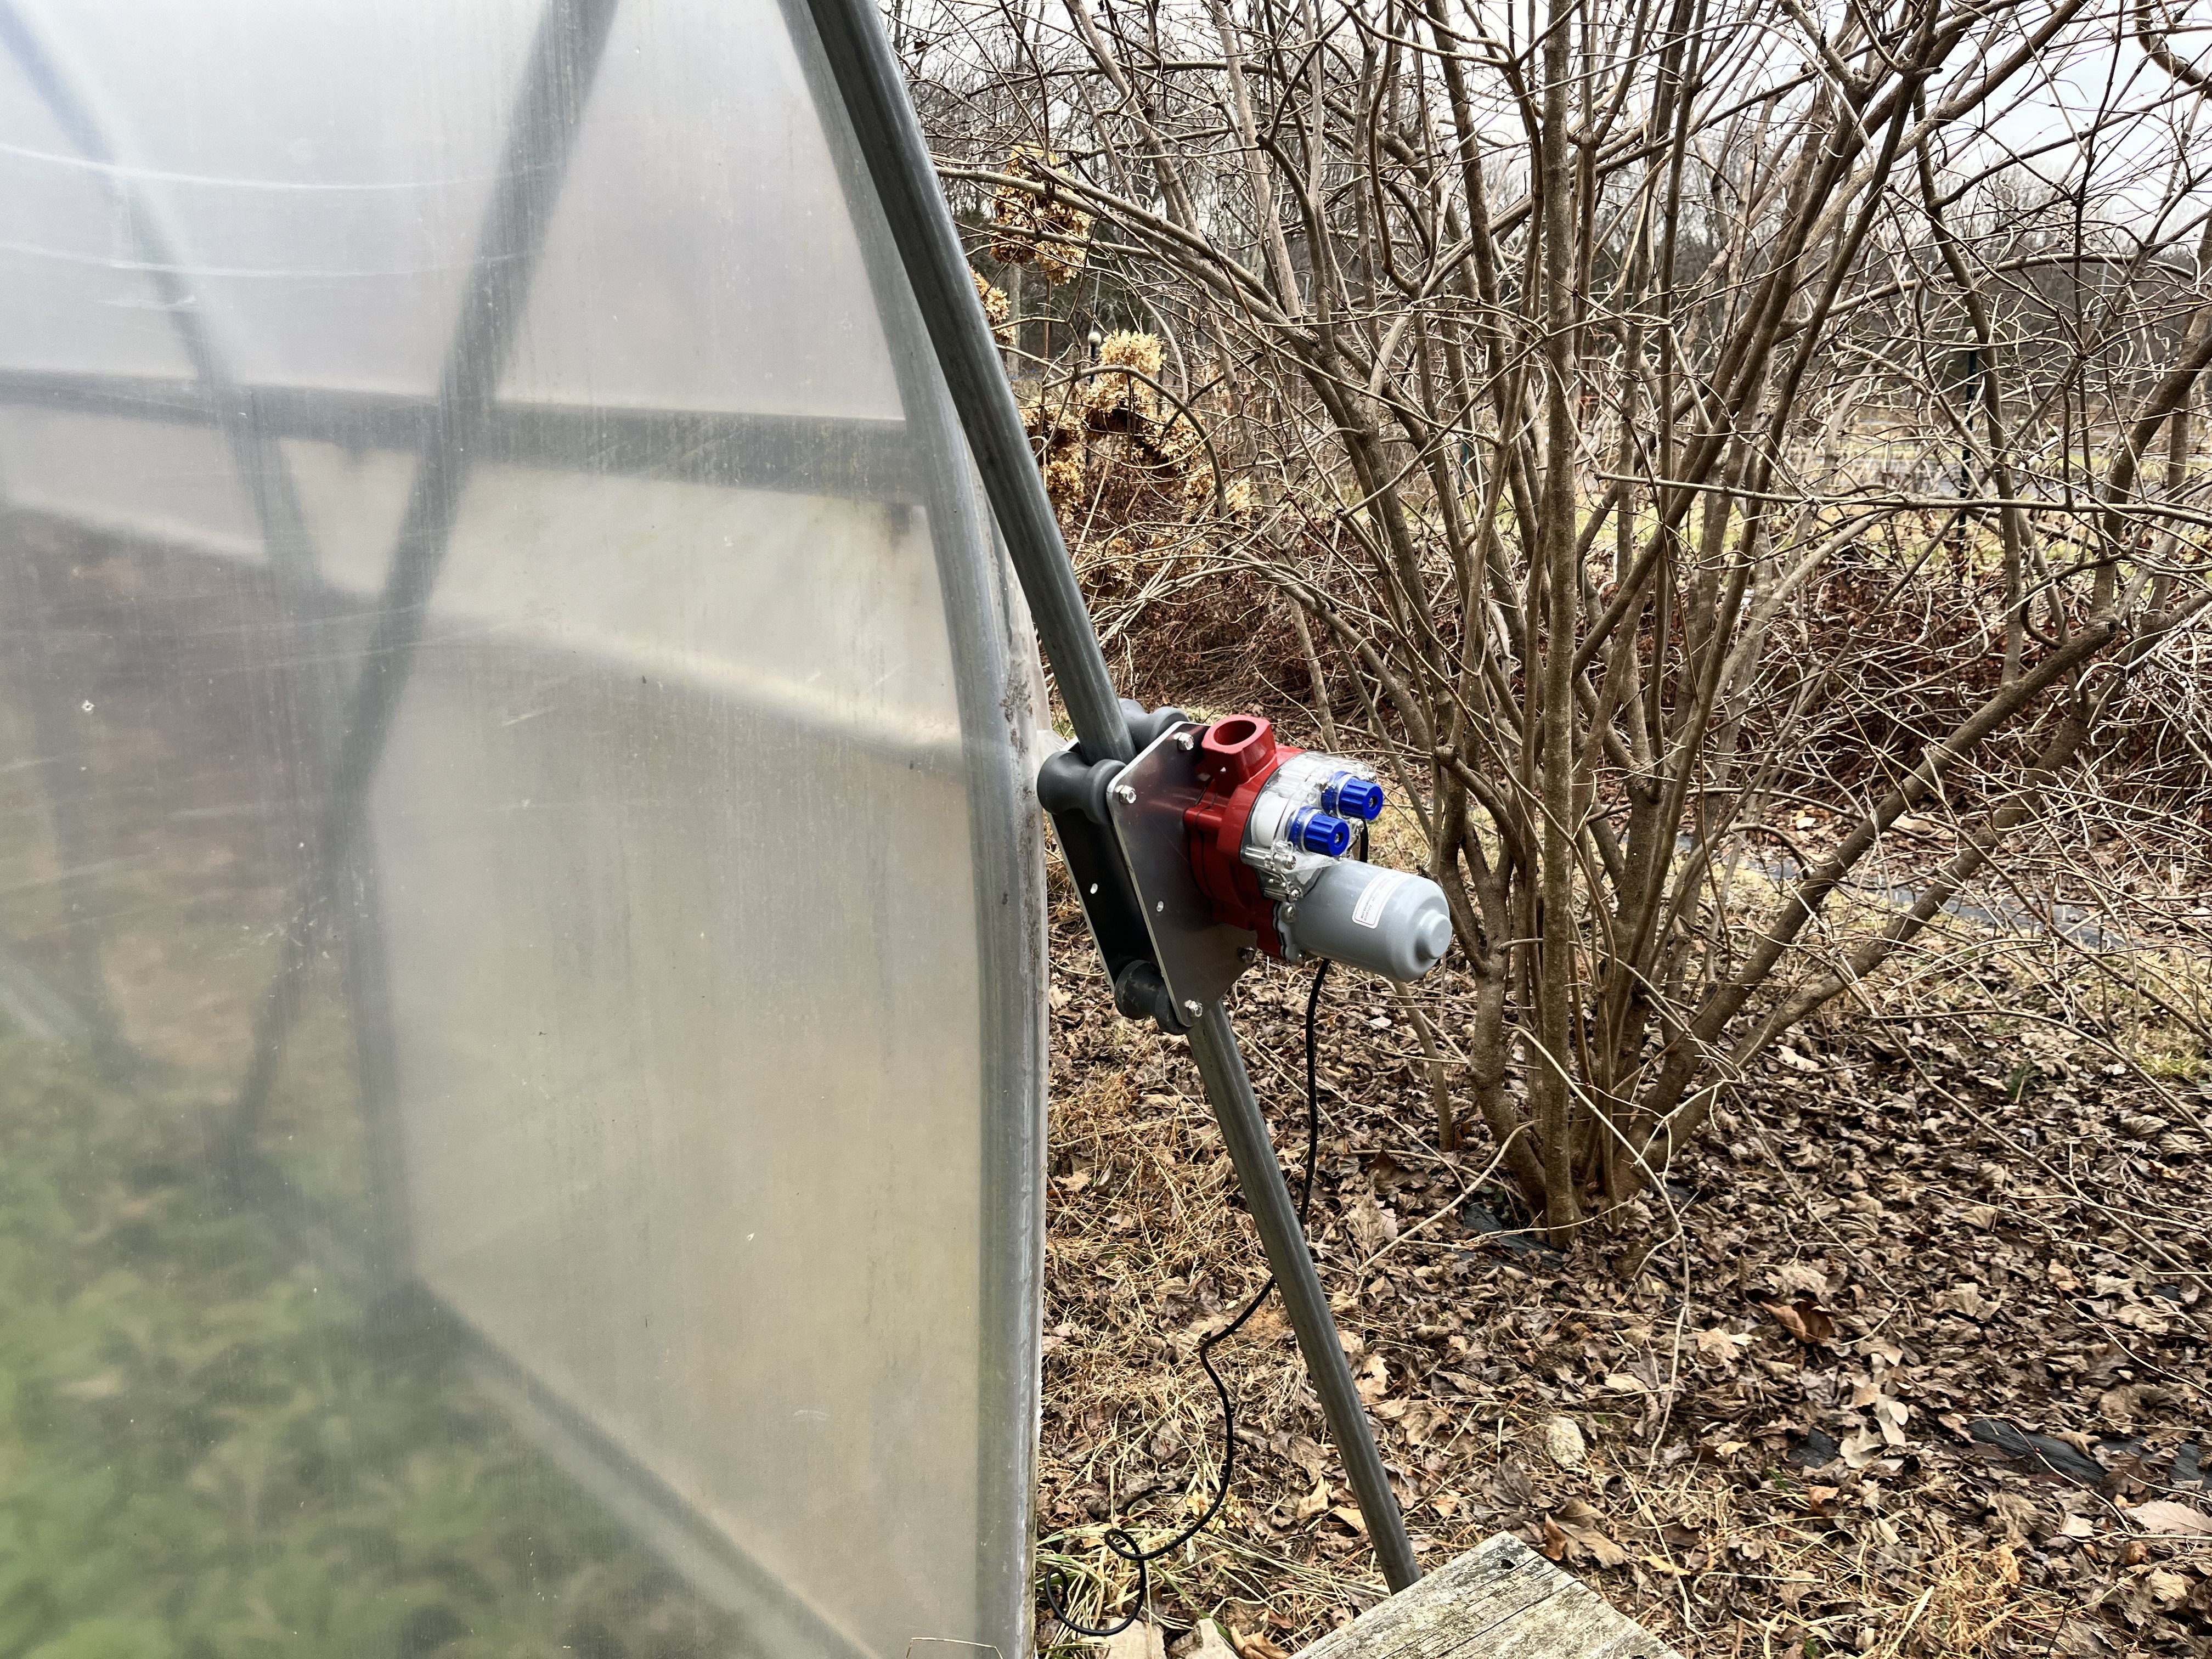
Each roll motor attaches to a trolley that travels along a guide pipe positioned vertically next to the greenhouse, one for each side. The motor turns a long metal pole that travels the length of the greenhouse, around which the curtain is wrapped. The motion of wrapping or unwrapping the curtain moves the motor up or down along its guide pipe. For more insight, check out the images and video on this page.
Emma pointed me to the following videos which feature much less expensive DIY systems. They operate on 120VAC line power. There was no power available at Emma's greenhouse, so she needed a solar powered system.
- Automatic greenhouse side curtains - Farmer Keith
- Automatic greenhouse side curtain wiring - Farmer Keith
- Greenhouse roll-up sides DIY - The Hodge 101
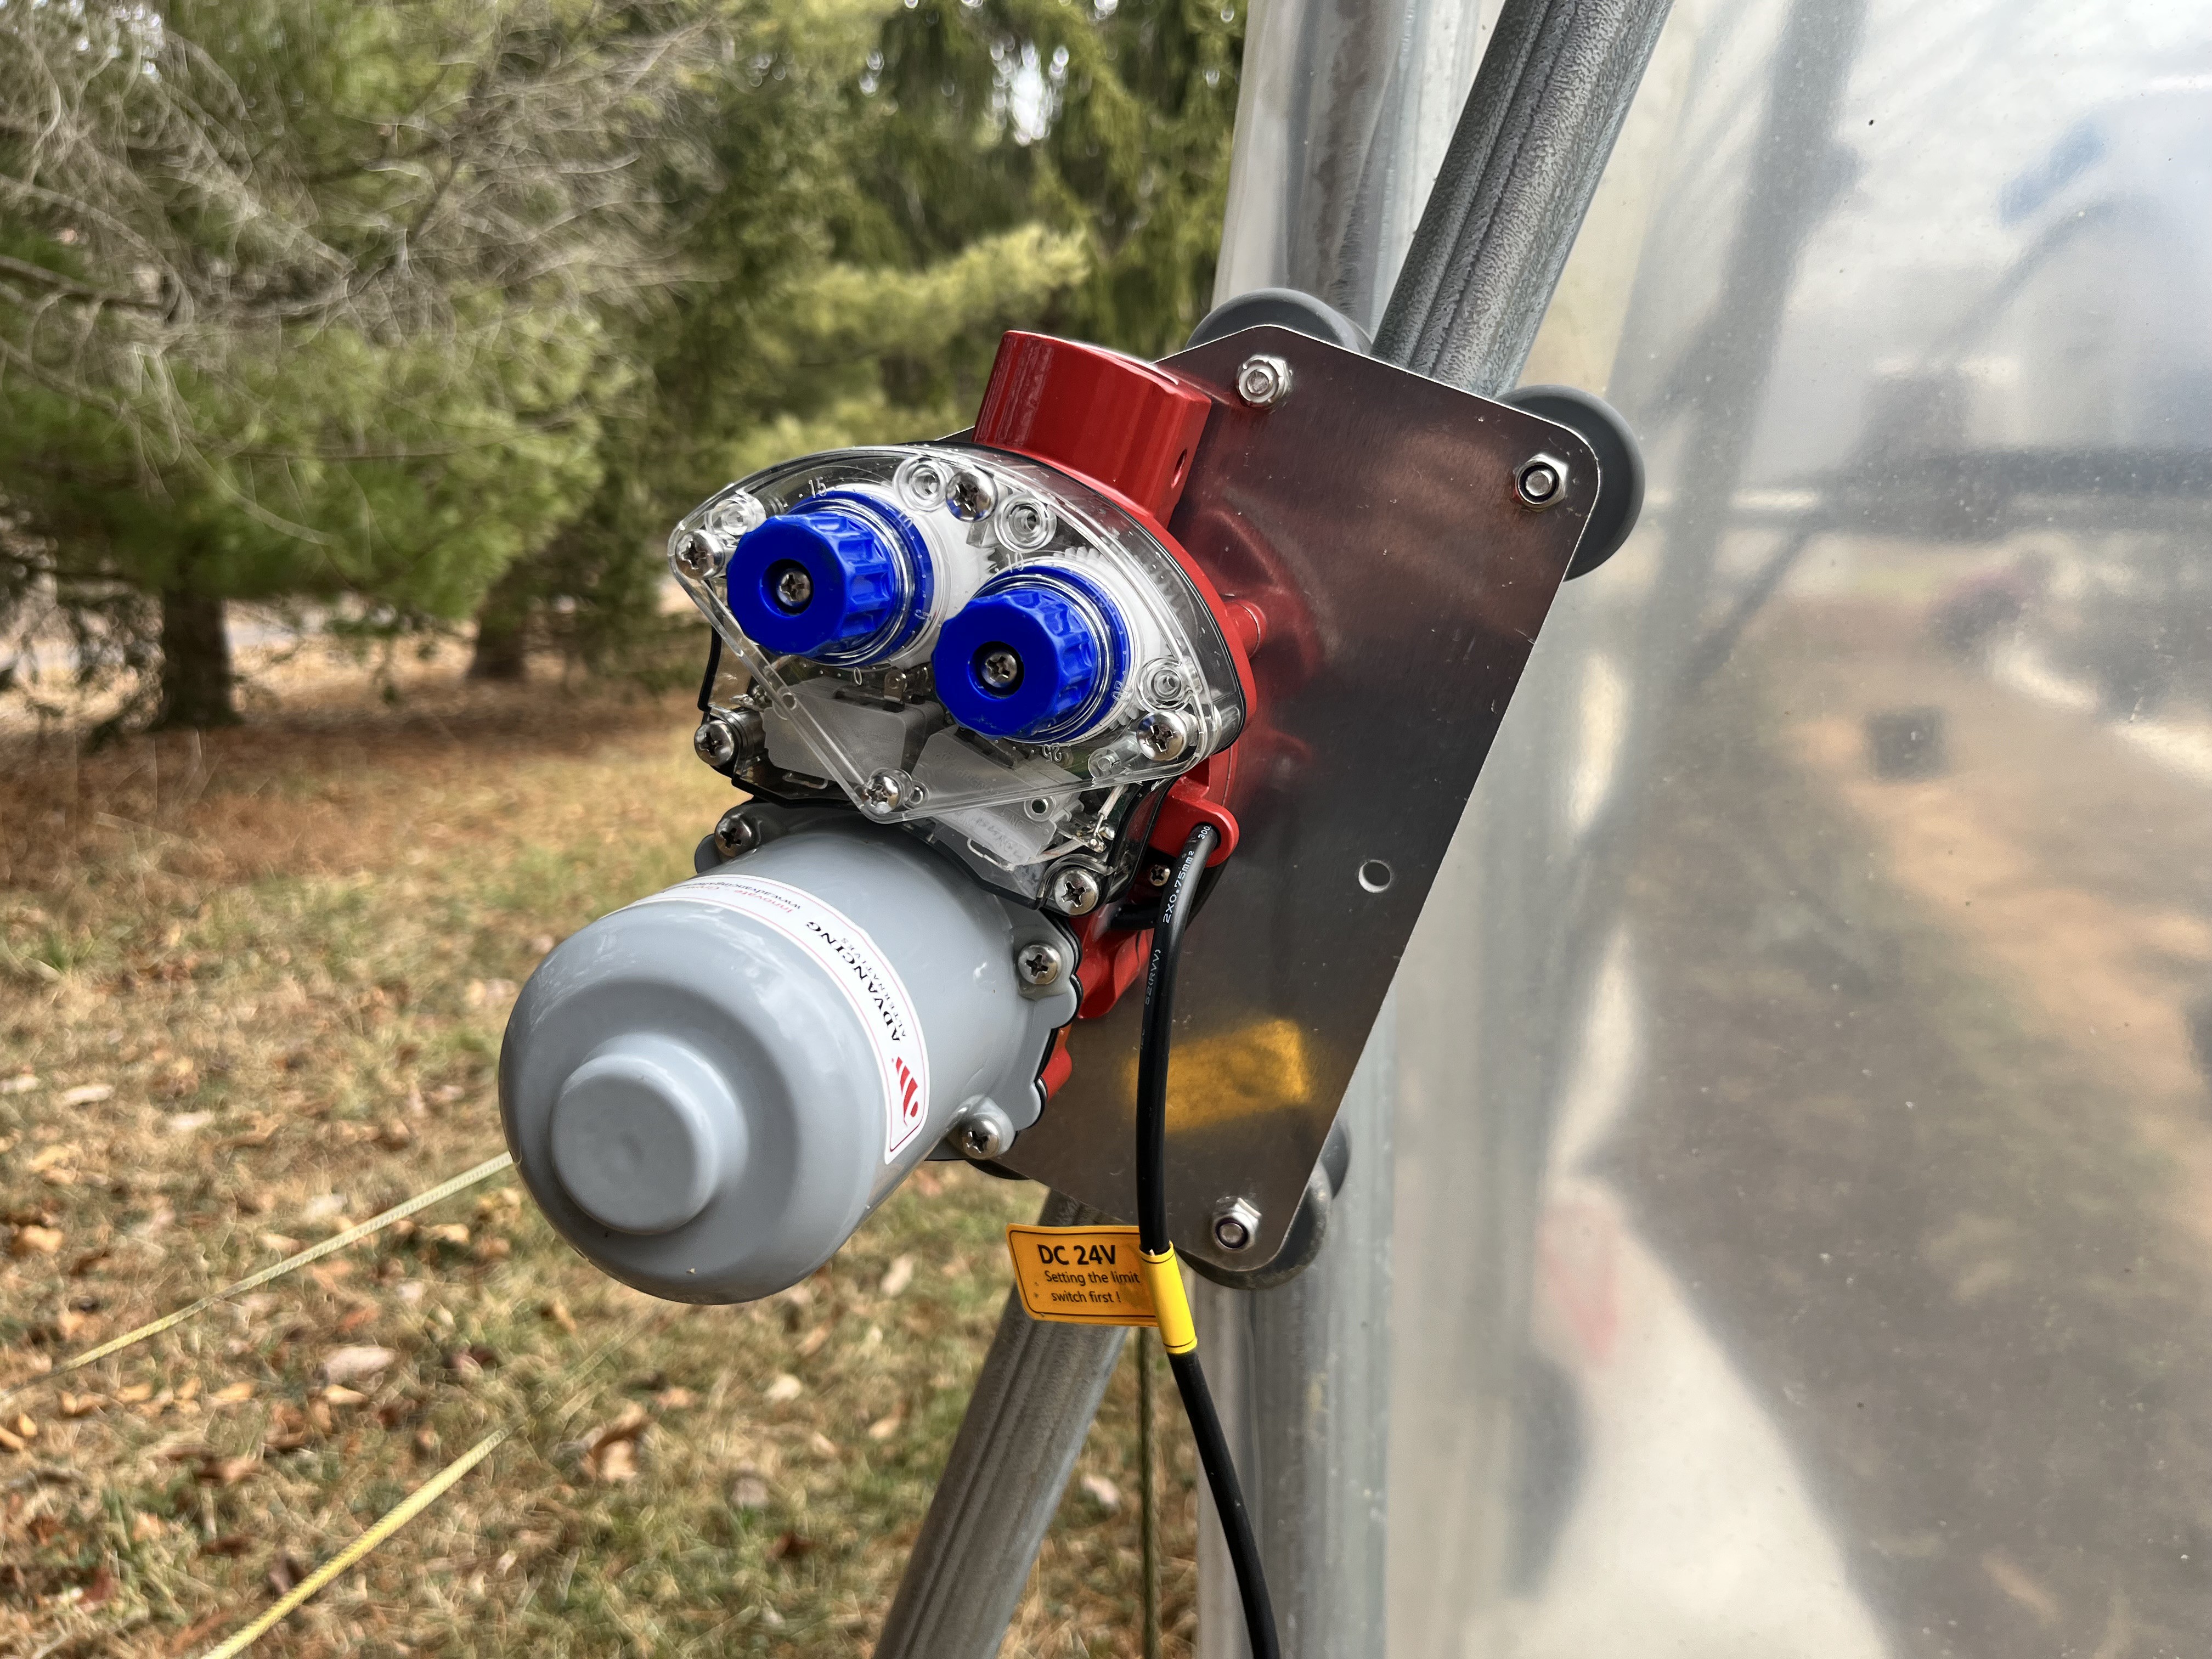
I selected the Advancing Alternatives LVM60 curtain motors. Cheaper motors are available but Emma wanted to go with a trusted brand. I calculated the number of watt * hours required, assuming the curtains would need to travel up and down once per day. I used this online calculator to find how many solar panel watts and battery amp hours we would need.
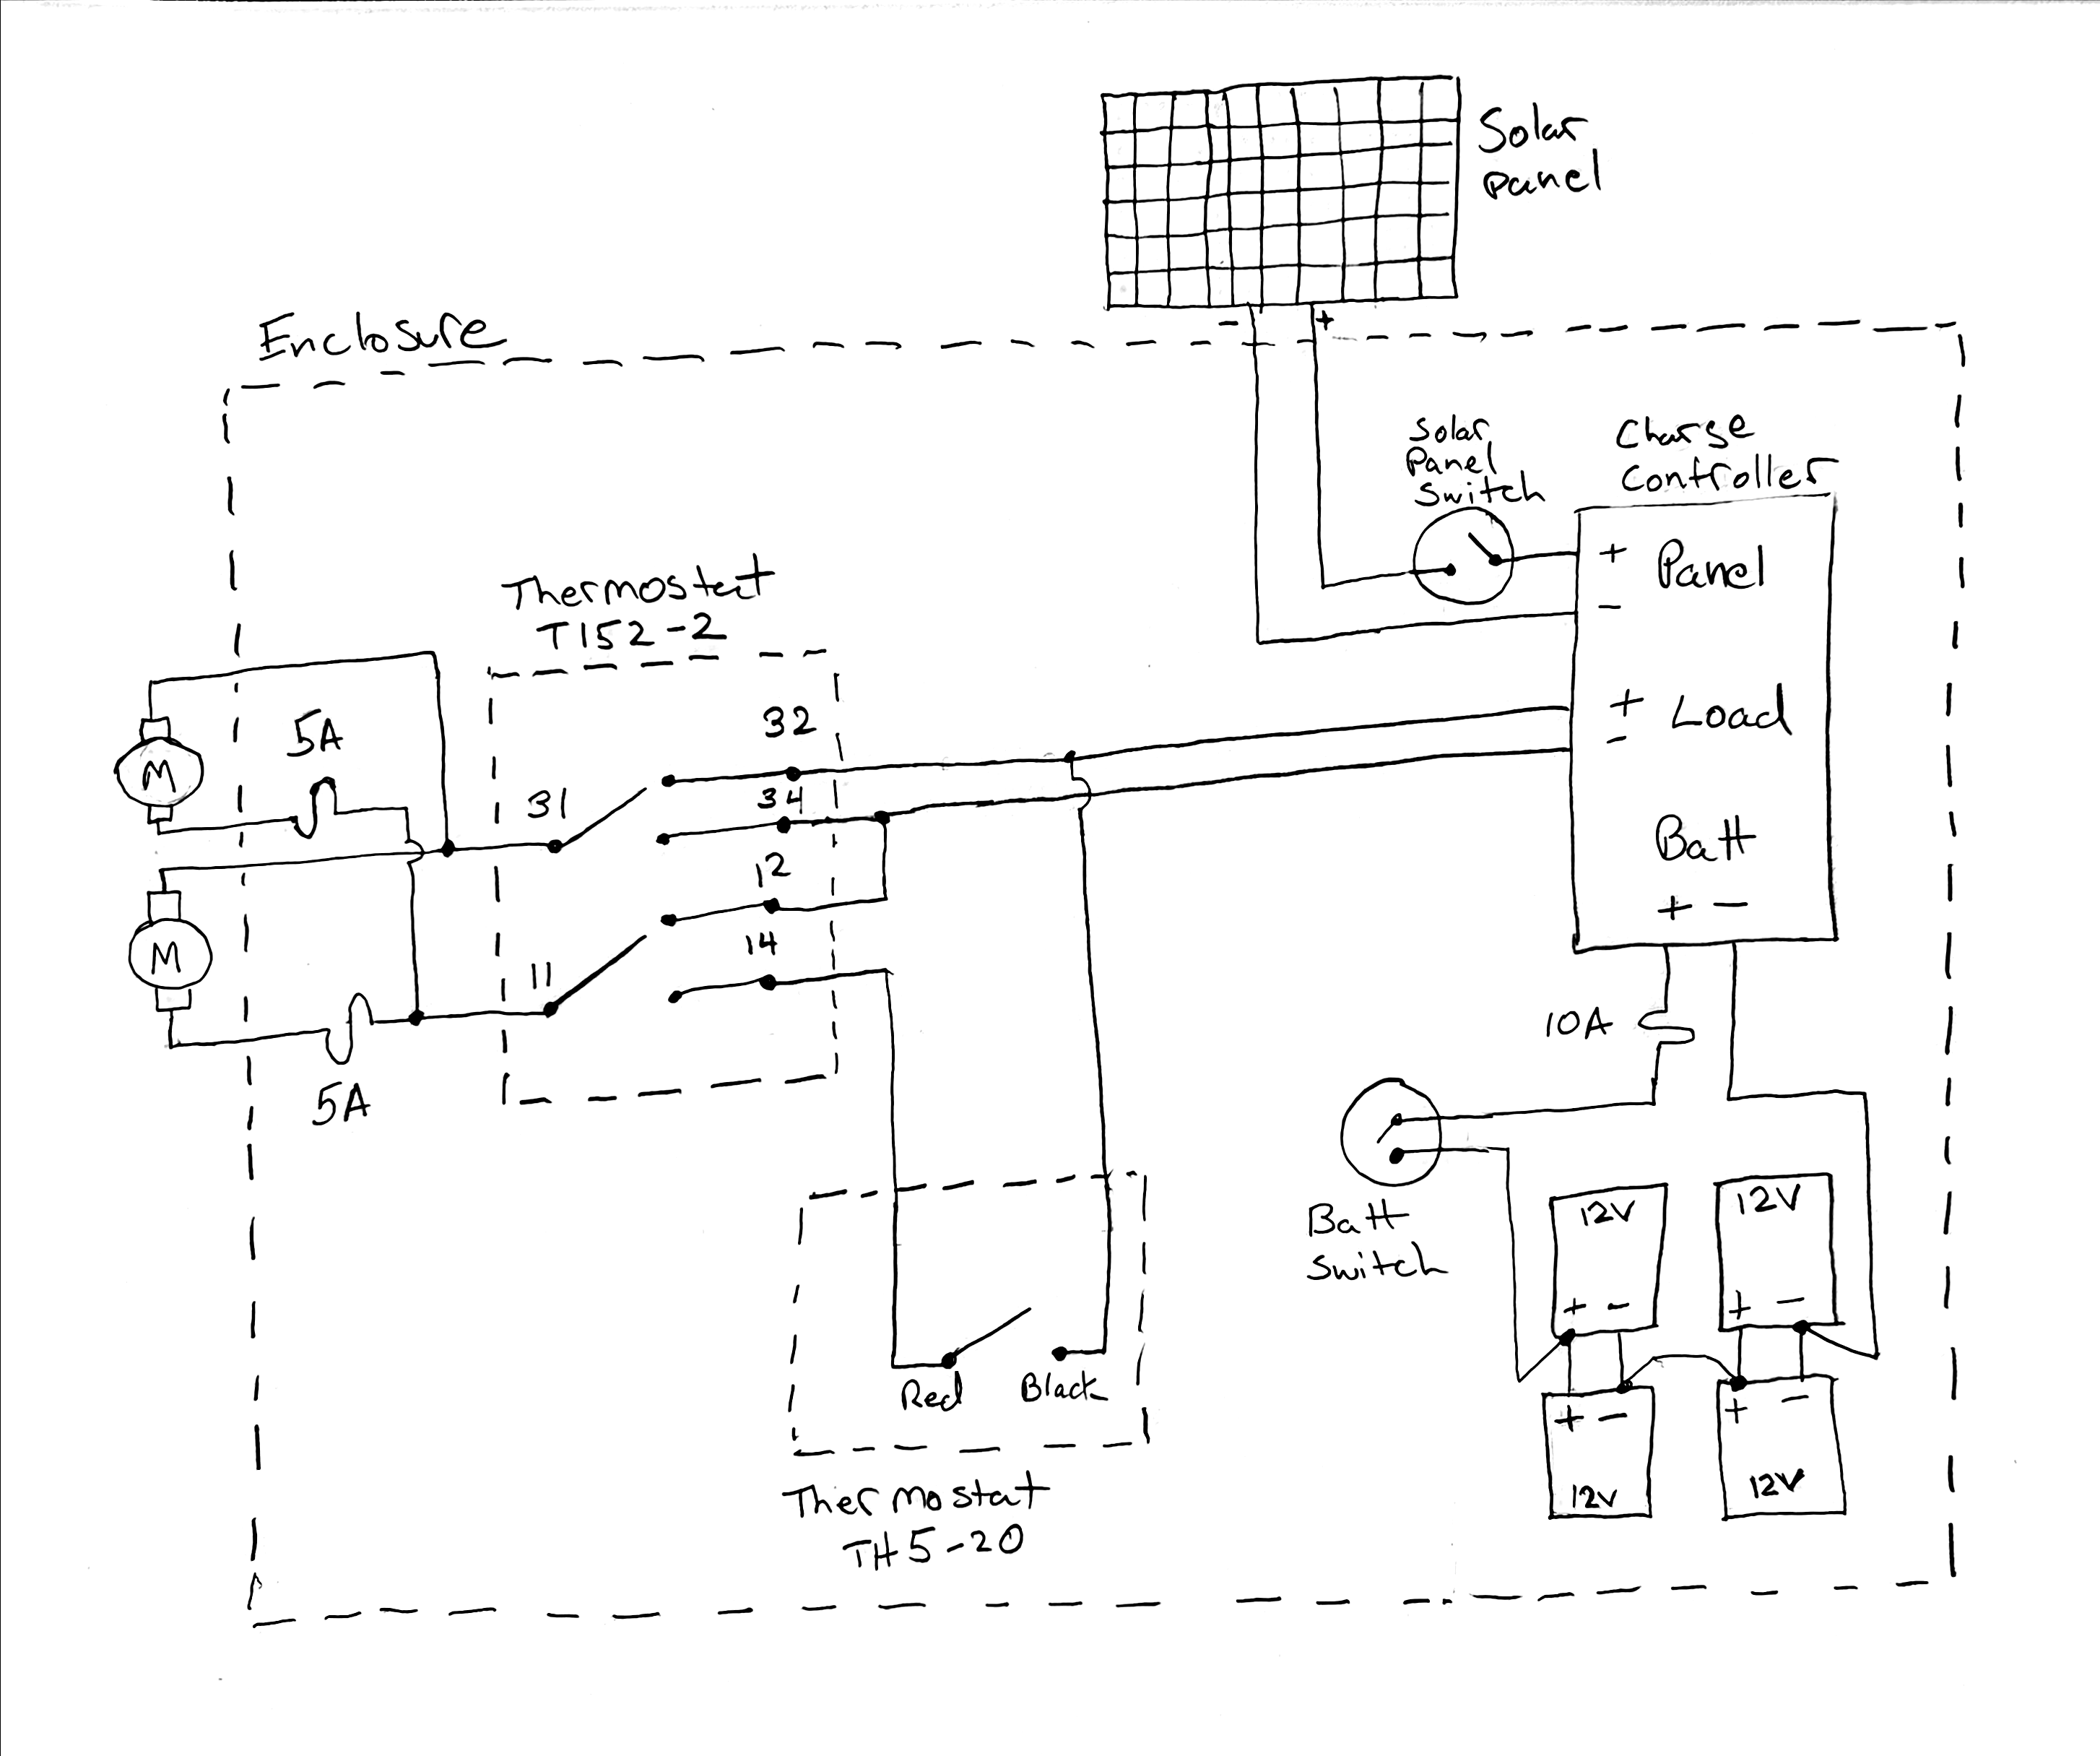
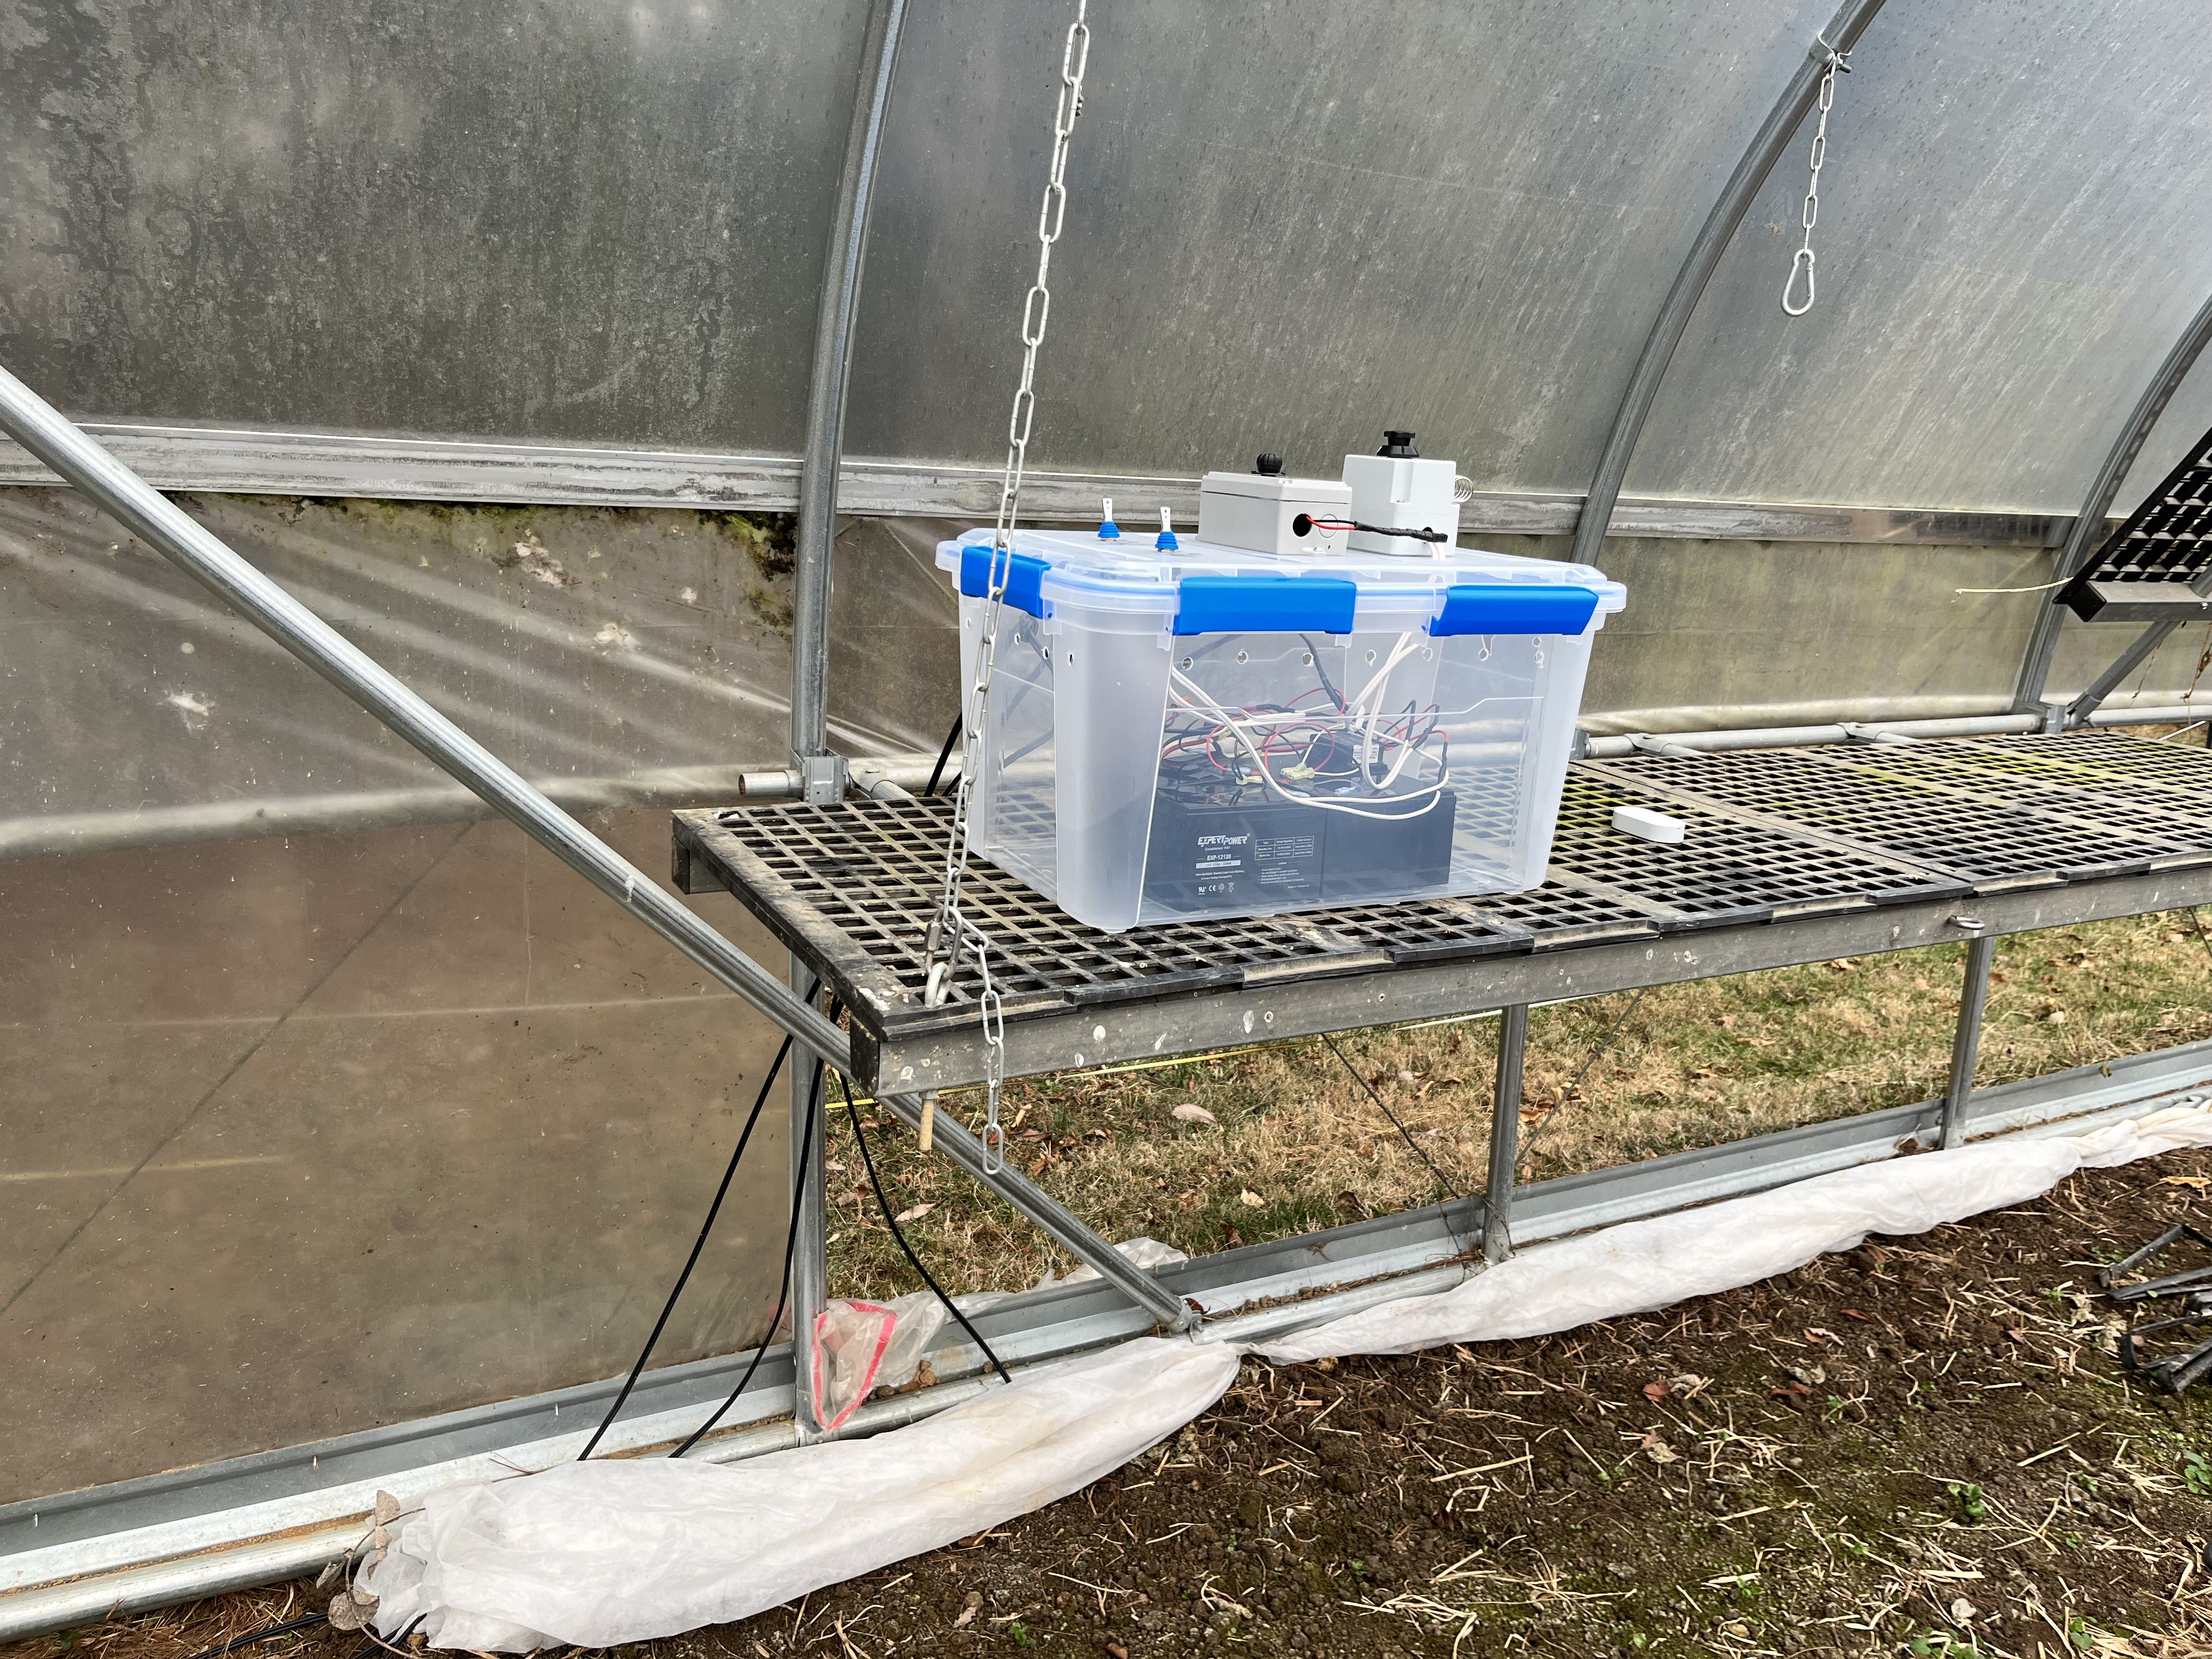
Armed with this information, I selected batteries, a solar panel, and a charge controller. The motors require 24VDC, so I chose everything to match this voltage. I realized late in the game that the greenhouse had two curtains instead of one, so I ended up buying four 12V, 12AH batteries when two 12V, 20AH batteries would have sufficed. The charge controller was not a trusted brand, but it drew the least amount of current (10 mA) of any I could find.
For controlling the motors, I used the same thermostat used by Farmer Keith in the videos above, taking care to wire it as he suggested (switching the load, not the source). Industrial thermostats like this one are mechanical and require no power (so cool!). This one has a unique double pole, double throw (DPDT) relay that makes it ideal for reversing the polarity to the motors, causing them to move in the opposite direction. I was worried because this thermostat is rated to switch AC current, not the DC current needed by the motors. DC currents are more capable of damaging switches than AC, especially when using inductive loads like motors.
I decided this was not a problem however, because the thermostat would only be used to turn on the motors, never to turn them off. The motors have built-in, adjustable limit switches that stop them when they have rotated to a certain position in each direction. There are diodes in parallel with each limit switch that allow the motors to move in the opposite direction if the current is reversed after the switch has been tripped. The motors would be turned on by the thermostat and then stopped by the limit switches when the curtains made it all the way up or down. Therefore the limit switches would be solely responsible for opening the circuit, and the thermostat would only be used to close it. The danger when switching inductive loads comes from the collapsing electromagnetic field when a switch opens while current is flowing. The field can create an arc between the switch contacts which can damage them. The risk is minimal when a switch applies power to an inductive load because the field has not been created yet.
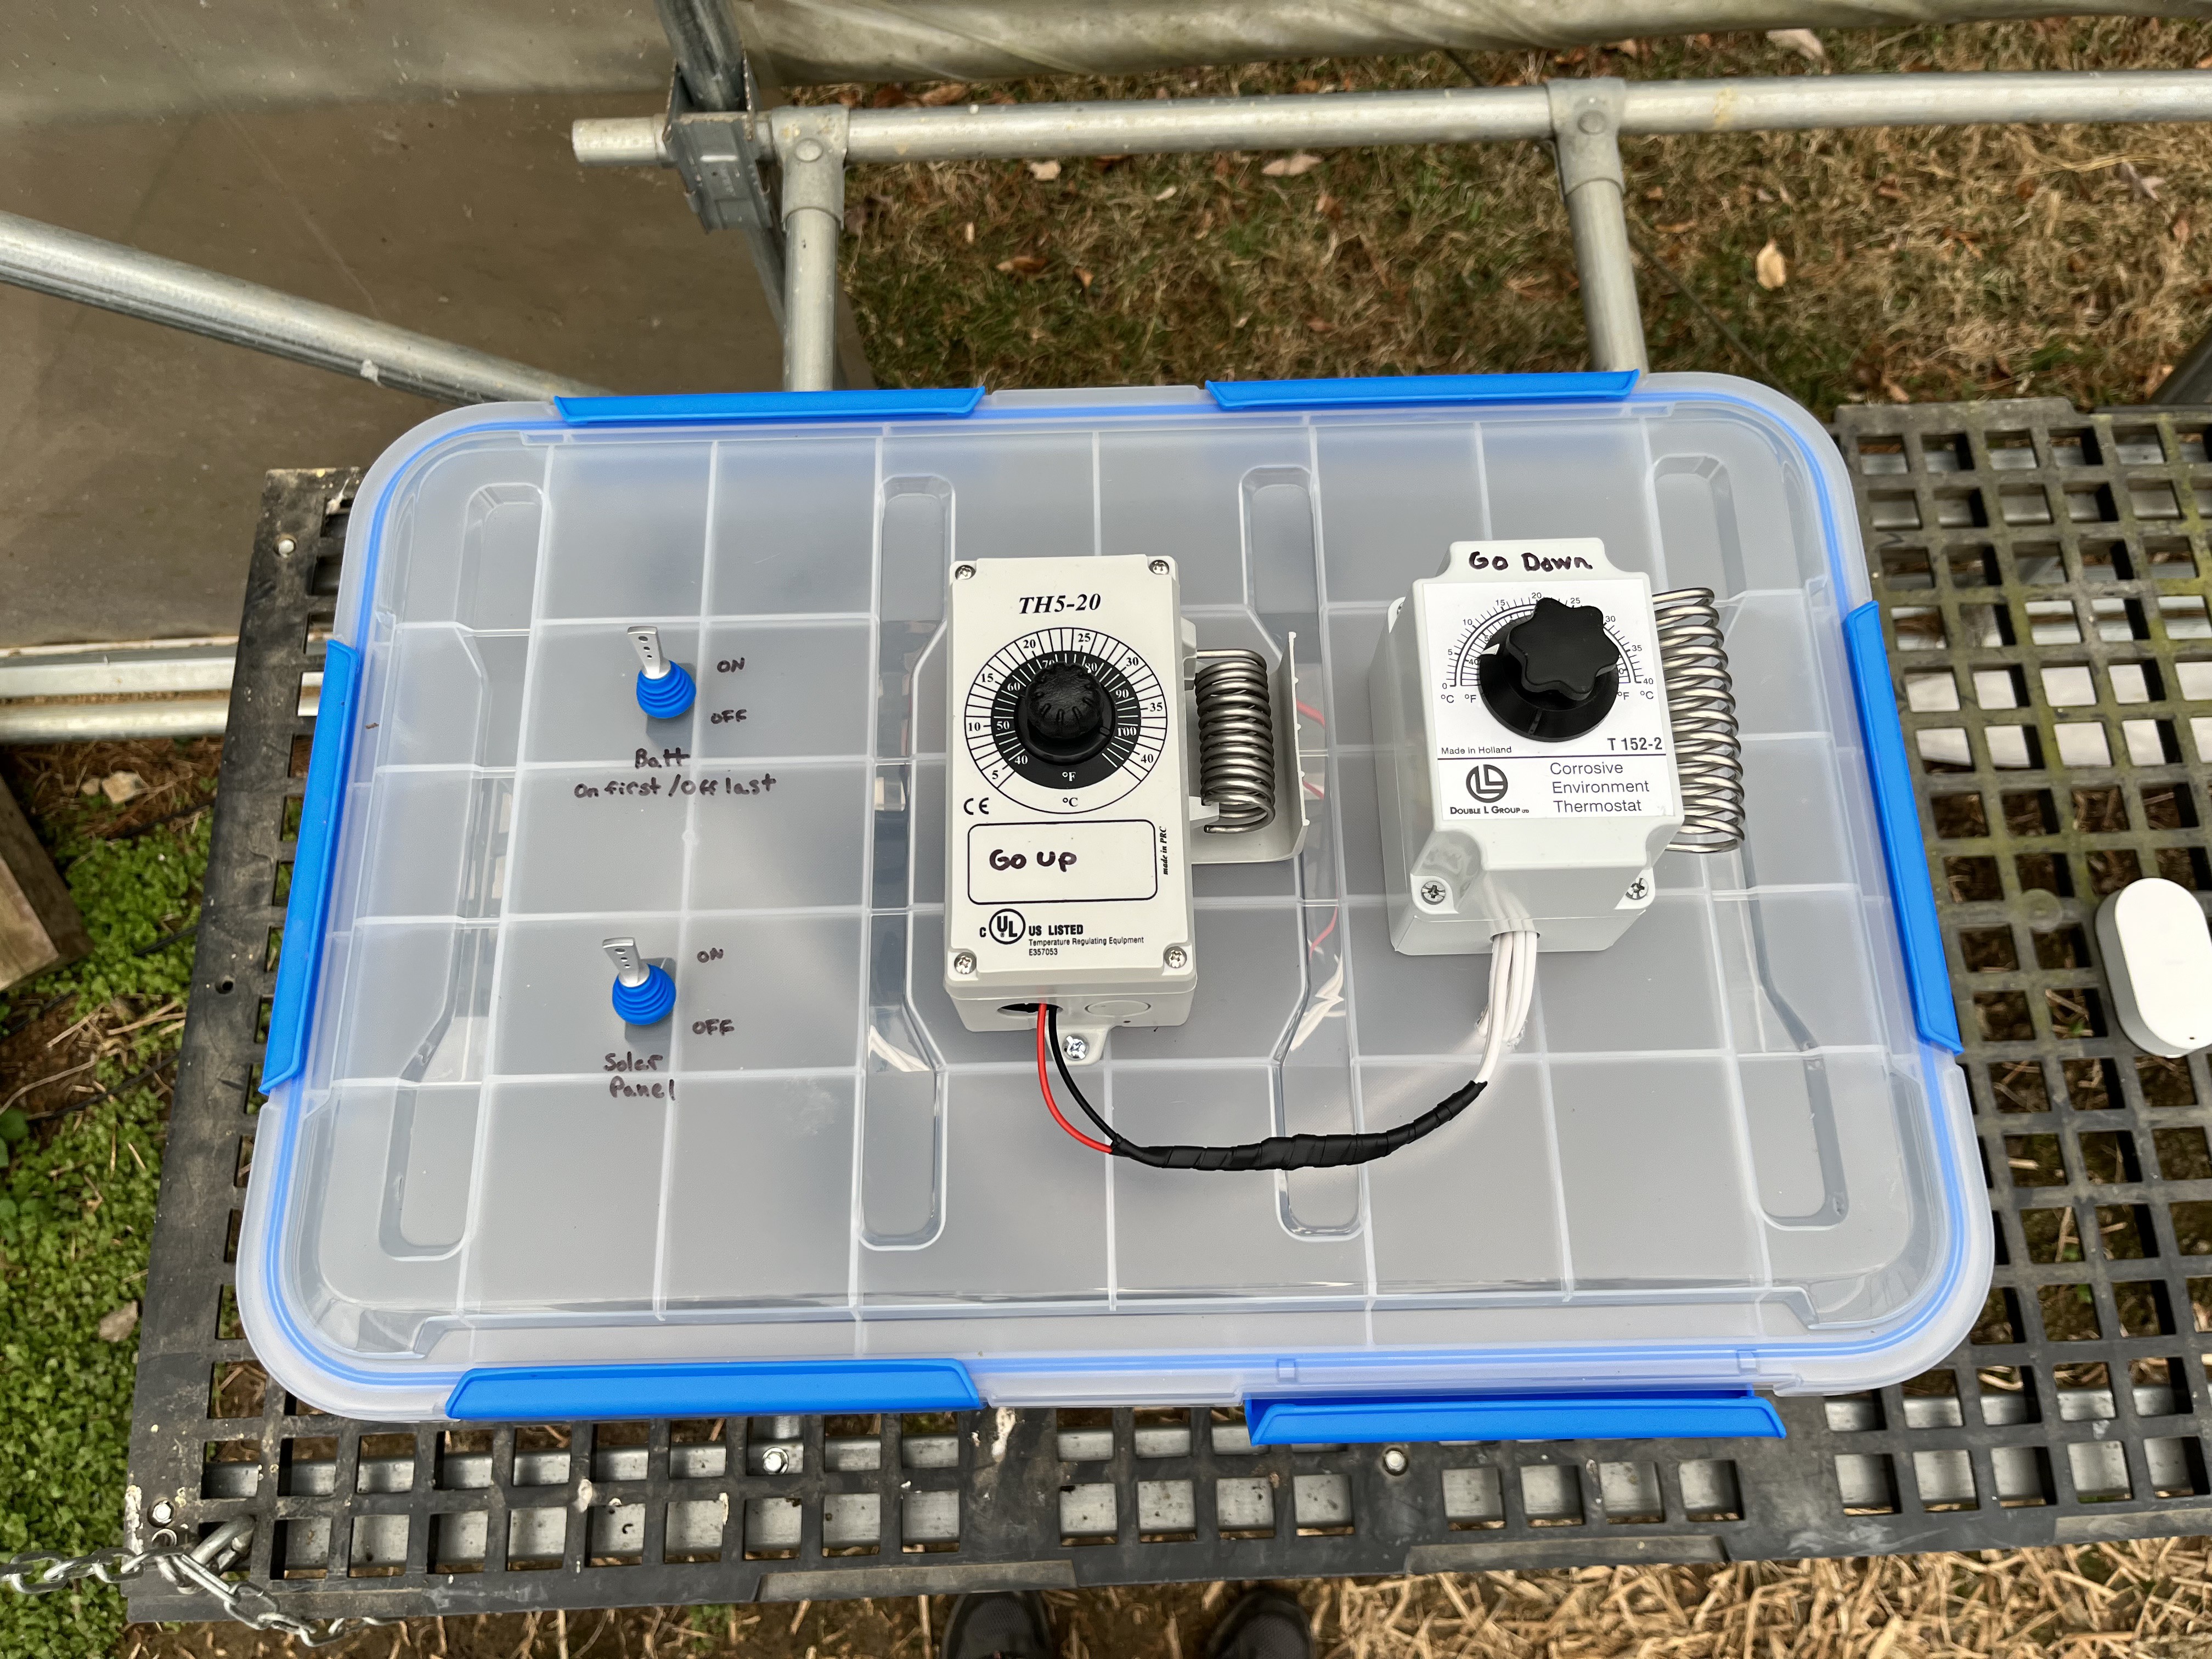
Emma wanted to have a much larger differential than the 4 degrees the thermostat provides. She wanted the curtains to be lowered at around 40 degrees F but not raised until the temperature inside the greenhouse climbed to around 80. To accomplish this, I added a second, less expensive thermostat which would stop the motors from moving in the up direction at temperatures below its setpoint.
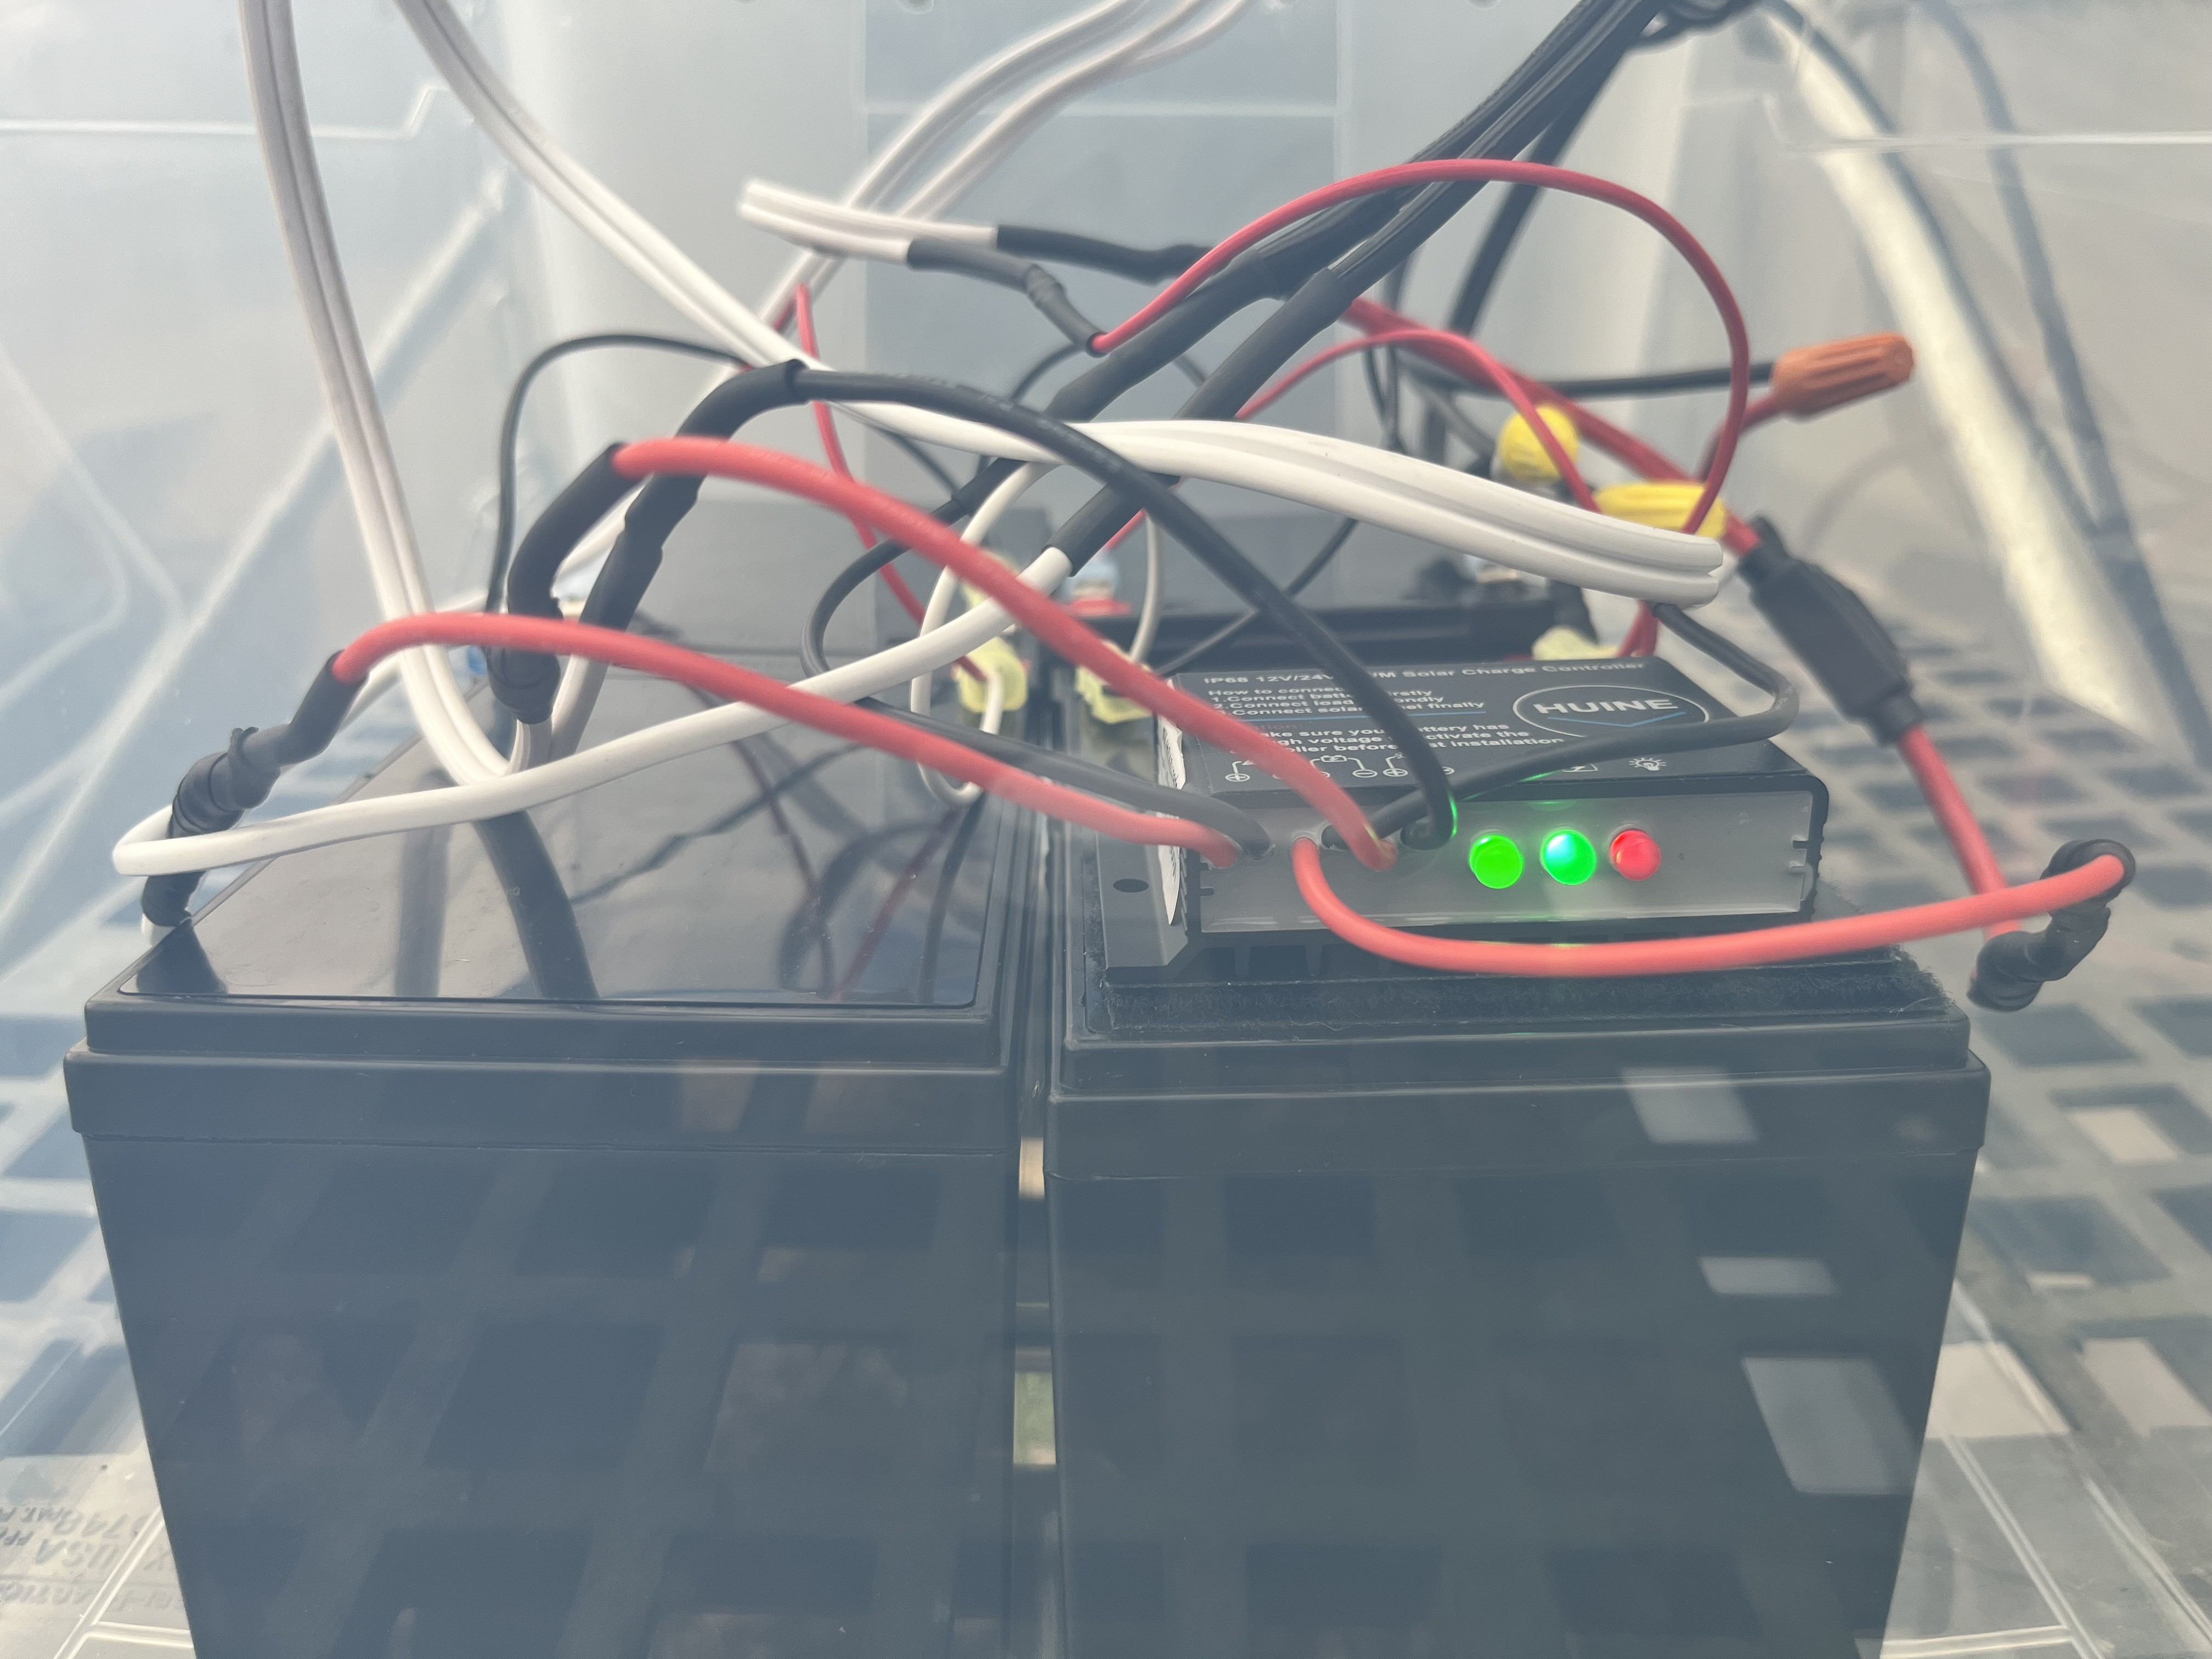
The wiring diagram for the entire system is below. I wired it for optimal battery charging as described here. Using adhesive Velcro, I mounted the batteries and controller in a plastic latch tote which I drilled holes in to allow for battery ventilation. Sealed lead acid (SLA) batteries are not completely sealed and do need to vent! I screwed the thermostats to the top of the tote and added two switches for turning off the batteries and solar panel. I also added 5A fuses to protect the motors and a 10A to protect the charge controller.
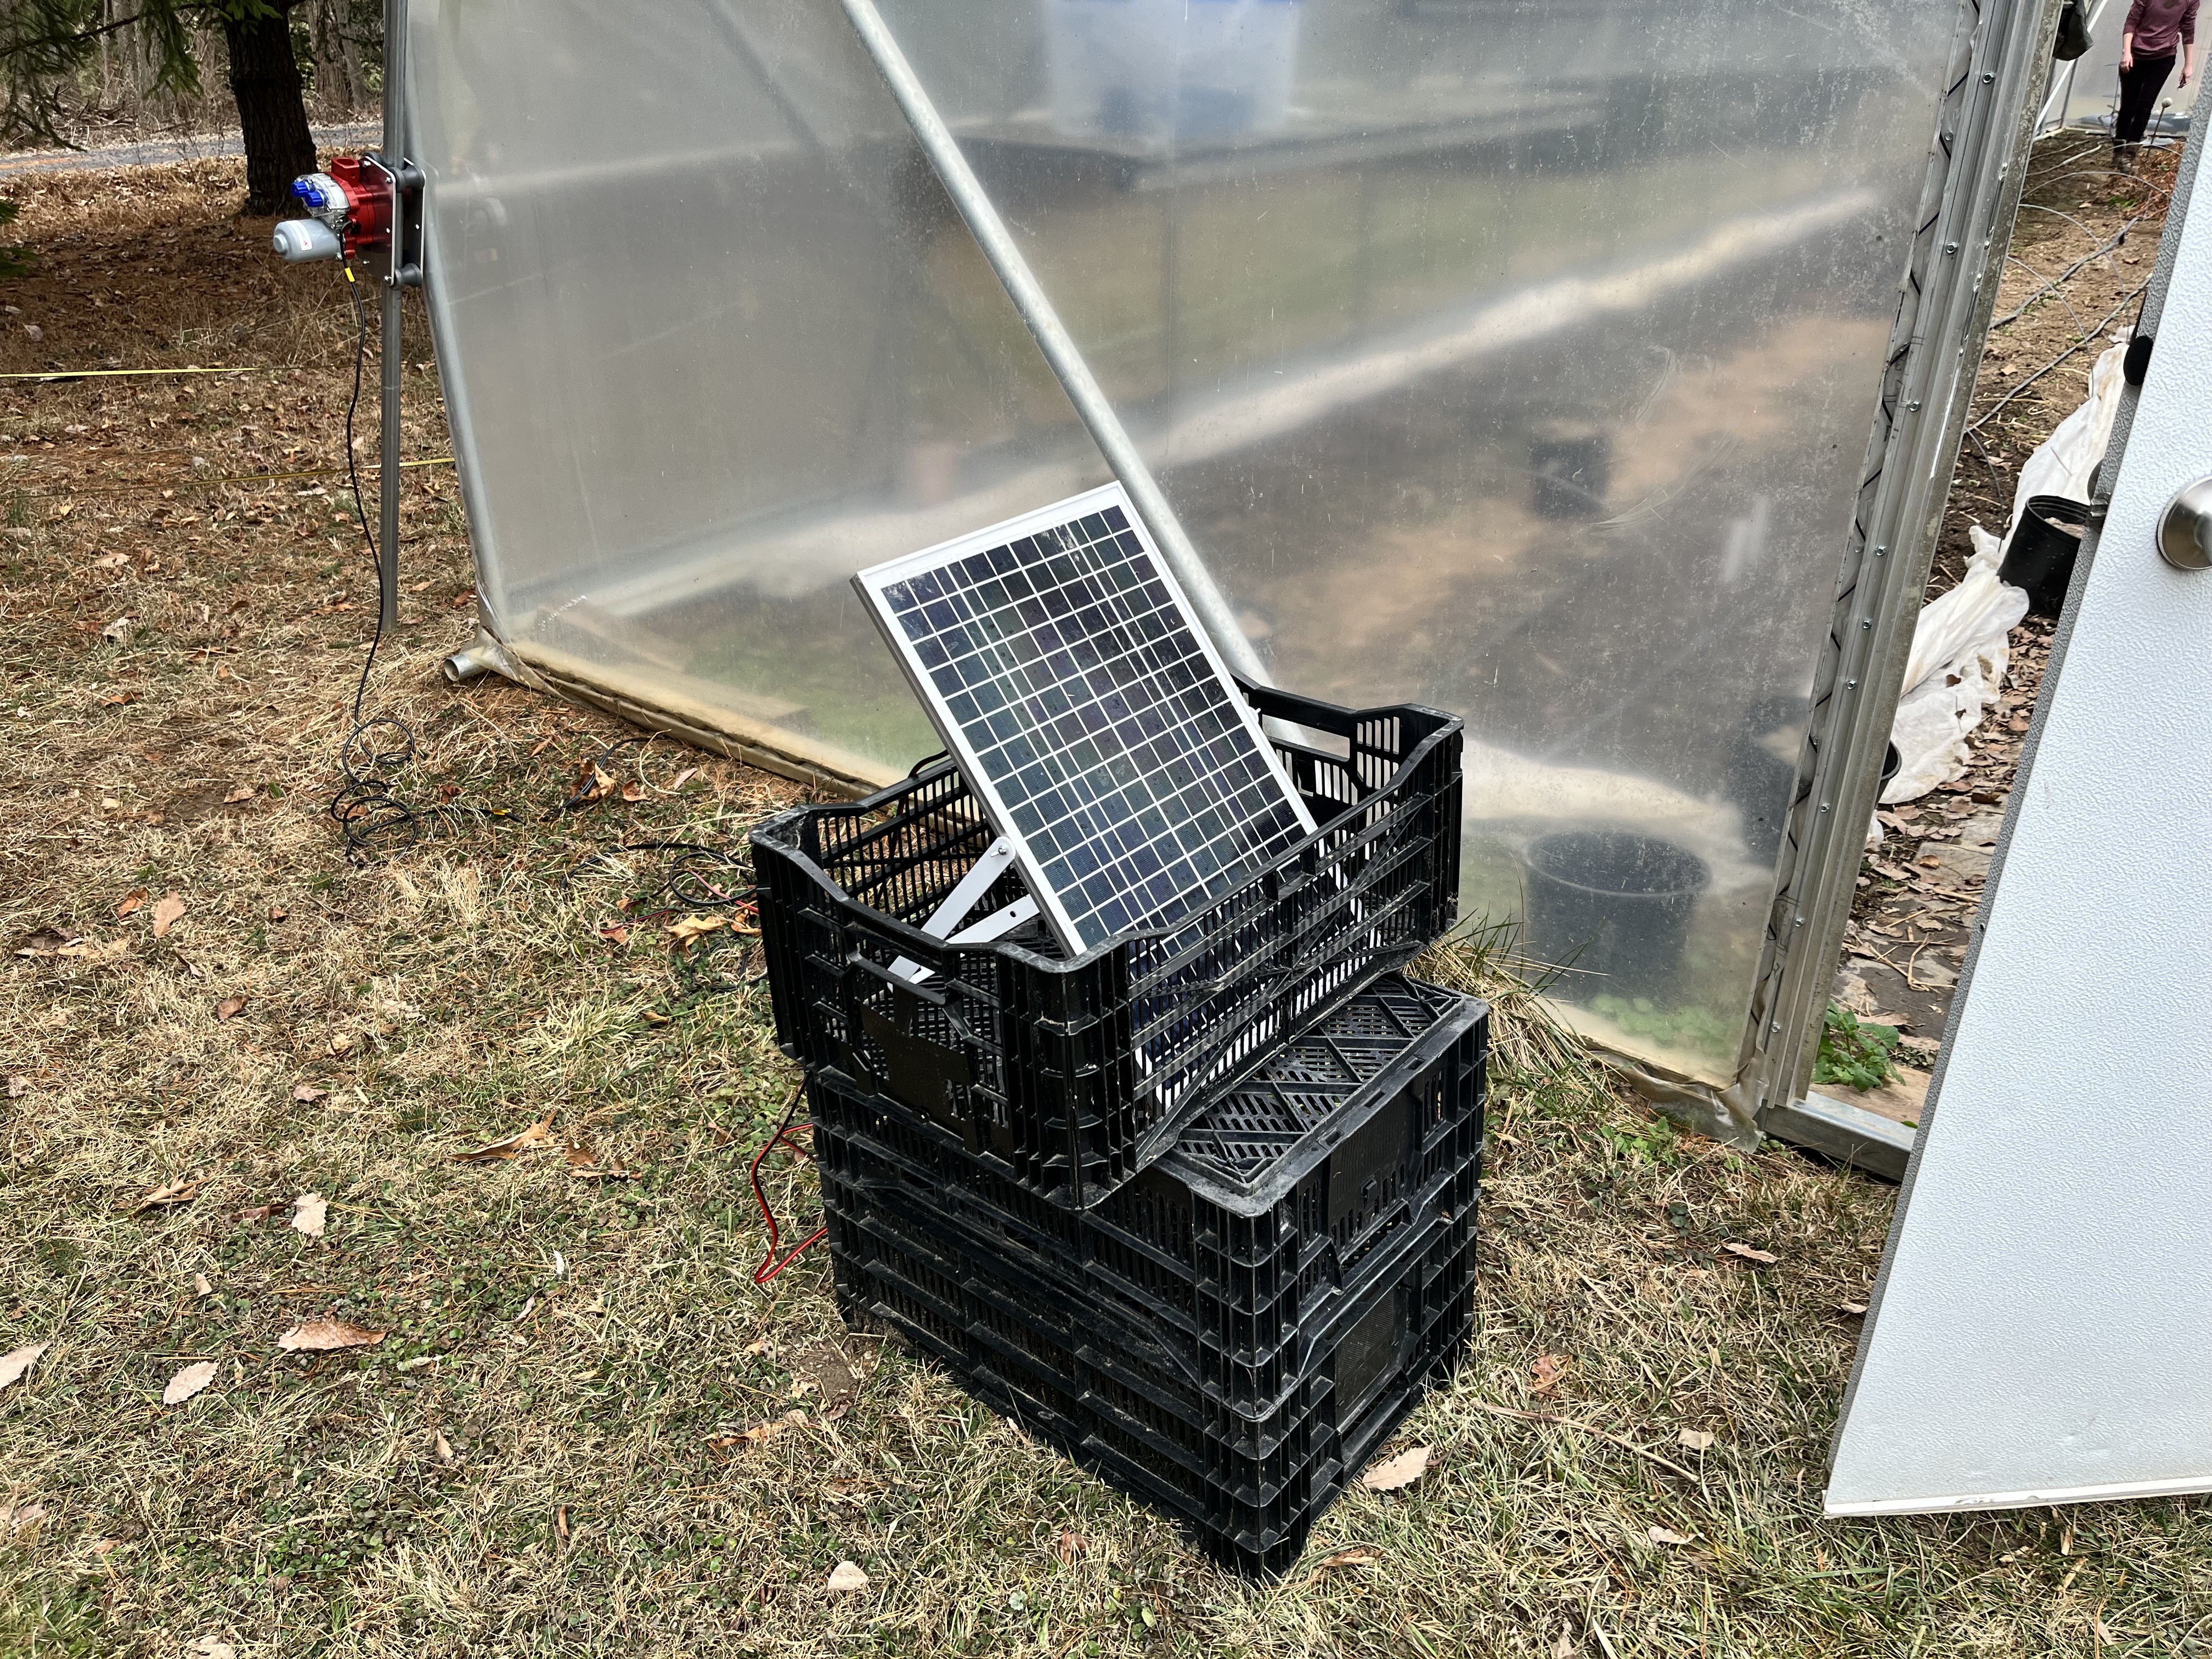
Installation went surprisingly well. We had to shorten the poles on the greenhouse curtains a bit with a hacksaw, but besides that the motor setup was simple. We were able to temporarily run extension cords to the greenhouse during installation. I used an old 20V, 5A laptop power supply to move the motors back and forth and set the limit switches. We purchased 14AWG landscape wire to connect the motors and solar panel to the control box. I soldered and heat-shrunk all the connections and wrapped the external ones with rubber splicing tape for durability. Here are photos of the system after install:

We also purchased some wifi thermometers that allow Emma to monitor the greenhouse temp from her home. The thermometers have a 200ft range to their wifi-enabled base station, which we were able to connect in the nearby farmhouse.
The installation was finished in one day: 12/11/22. Emma could see on her thermometer app that the system was maintaining a constant temperature in the greenhouse. See the chart below from Emma's app:
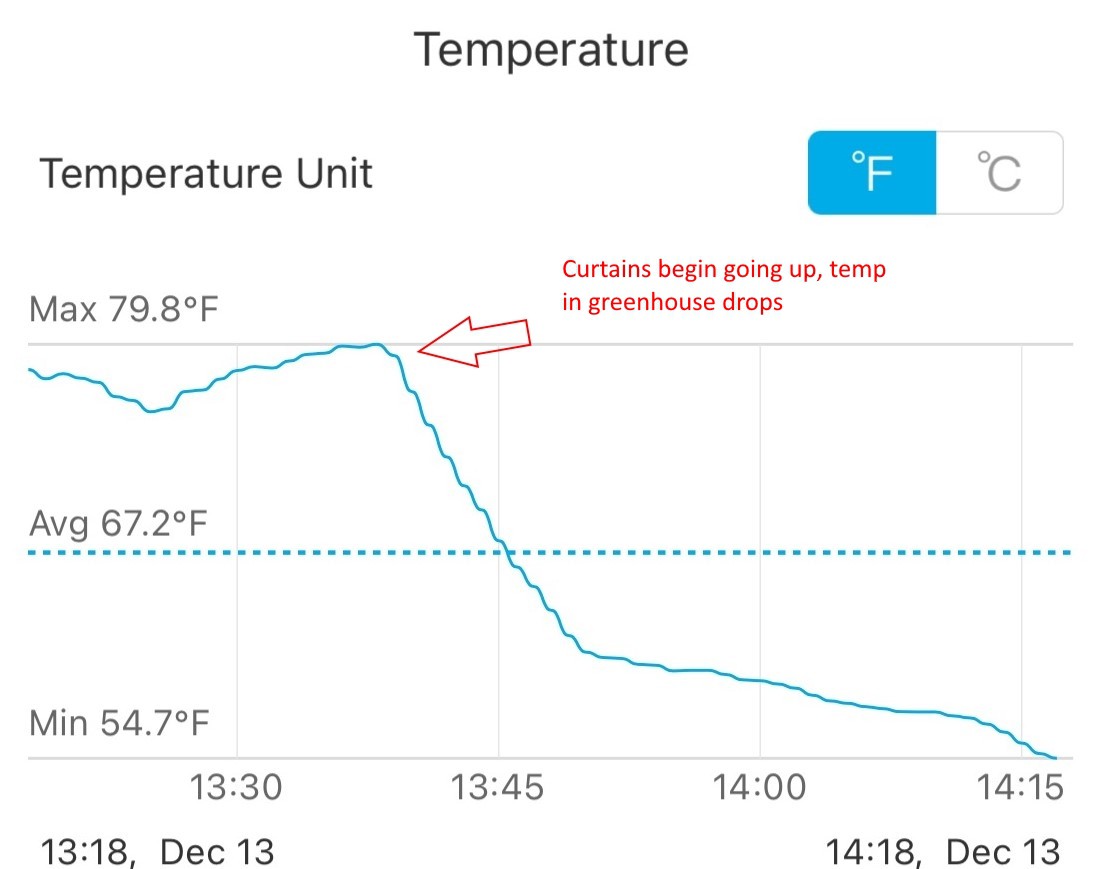
Over the next few weeks Emma noticed that the curtains would go up and down several times on sunny days. The temperature inside the greenhouse fluctuated more than we anticipated. I am hoping that my power budget is conservative enough to allow for a few more cycles per day than planned. The days which require the most power are when it's sunny, which is also when the batteries receive the most charge from the solar panel. Time will tell.
So far the system works well and Emma is pleased. The final cost was $1,276. It would have been only $794 if Emma went with the cheap motors. I am proud of the project overall; it was a ton of fun! See the build instruction links for more details.
Ideas for Future Improvement
- Add override switches for manually lowering and raising the curtains. Currently, this has to be done by changing the thermostat set temperatures.
- Add a way to easily plug in an external 24VDC supply to charge the batteries or power the system should the batteries fail.
- Add a wifi gate sensor like this one for remotely monitoring if the curtains are closed.