kutluhan_aktar
Although smart grocery carts improve the customer experience and plummet maintenance costs by providing an automated product tracking and payment system, the current integration methods are expensive investments for small businesses in the food retail industry since these methods require renovating (remodeling) store layouts or paying monthly fees to cloud services.
After perusing recent research papers on smart grocery carts, I noticed there is no appliance devised for converting regular grocery carts into smart grocery carts without changing anything else in an existing establishment. Therefore, I decided to build a budget-friendly and easy-to-use device giving smart grocery cart perks to regular grocery carts with a user-friendly interface.
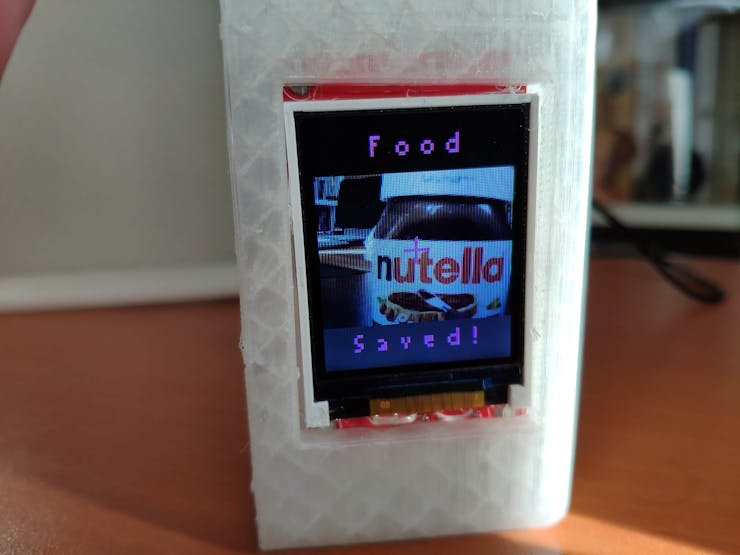
To detect different food retail products accurately, I needed to create a valid data set in order to train my object detection model with notable veracity. Since OpenMV Cam H7 is a considerably small high-performance microcontroller board designed specifically for machine vision applications, I decided to utilize OpenMV Cam H7 in this project. Also, I was able to capture product images easily while collecting data and store them on an SD card since OpenMV Cam H7 has a built-in MicroSD card module. Then, I employed a color TFT screen (ST7735) to display a real-time video stream, the prediction (detection) results, and the selection (options) menu.
After completing my data set including various food retail products, I built my object detection model with Edge Impulse to detect products added or removed to/from the grocery cart. I utilized Edge Impulse FOMO (Faster Objects, More Objects) algorithm to train my model, which is a novel machine learning algorithm that brings object detection to highly constrained devices. Since Edge Impulse is nearly compatible with all microcontrollers and development boards, I had not encountered any issues while uploading and running my model on OpenMV Cam H7. As labels, I utilized the product brand names, such as Nutella and Snickers.
After training and testing my object detection (FOMO) model, I deployed and uploaded the model on OpenMV Cam H7 as an OpenMV firmware. Therefore, the device is capable of detecting products by running the model independently without any additional procedures or latency.
Since I wanted to create a full-fledged device providing a wholesome shopping experience, I decided to build a web application from scratch in PHP, JavaScript, CSS, and MySQL. Therefore, I installed an Apache HTTP Server (XAMPP) on LattePanda 3 Delta, which also has a MariaDB database.
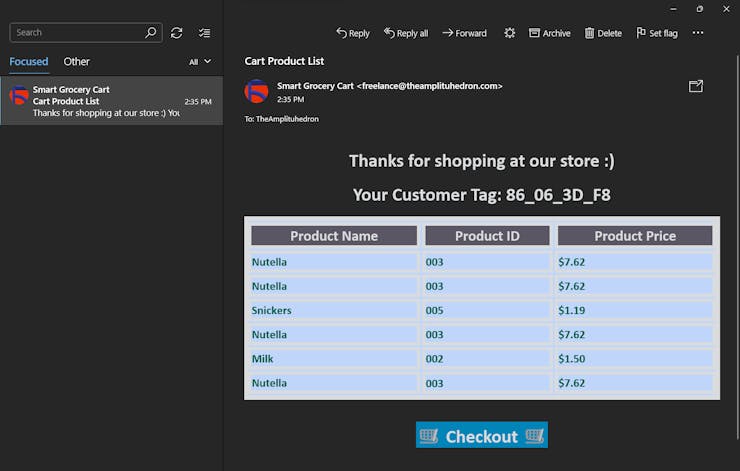
This complementing web application lets customers create accounts via its interface, receives requests from the device to add or remove products to/from the customer's database table, and creates a concurrent shopping list from the products added to the grocery cart. Also, the application sends an HTML email to the customer's registered email address when the customer finishes shopping and is ready to leave the store, including the generated shopping list and the payment link.
Since OpenMV Cam H7 does not provide Wi-Fi or cellular connectivity, I employed Beetle ESP32-C3 to get commands from OpenMV Cam H7 via serial communication and communicate with the web application via HTTP GET requests, which is an ultra-small size development board intended for IoT applications. To send commands via serial communication and control the selection menu after a product is detected by the model, I connected a joystick to OpenMV Cam H7. I also utilized the joystick while taking and storing pictures of various food retail products.
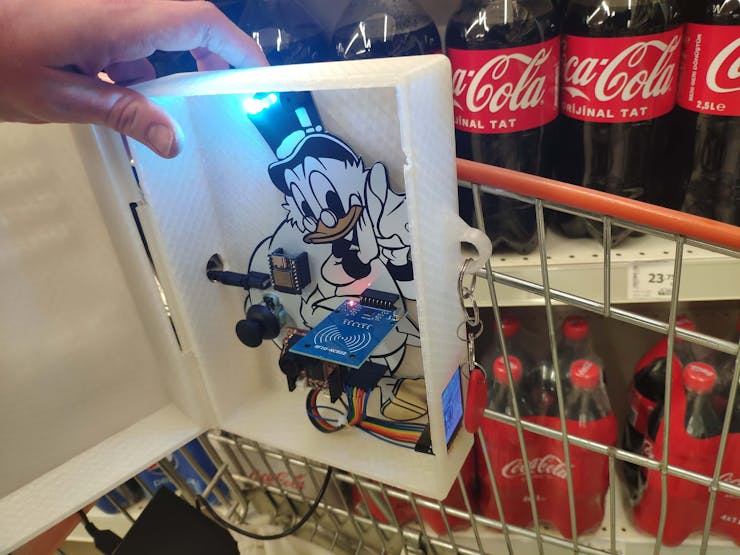
To enable the device to determine when the customer completes shopping and is ready to leave the store, I connected an MFRC522 RFID reader to Beetle ESP32-C3 so as to detect the assigned RFID key tag provided by the store per grocery cart. Also, I connected a buzzer and an RGB LED to Beetle ESP32-C3 to inform the customer of the device status.
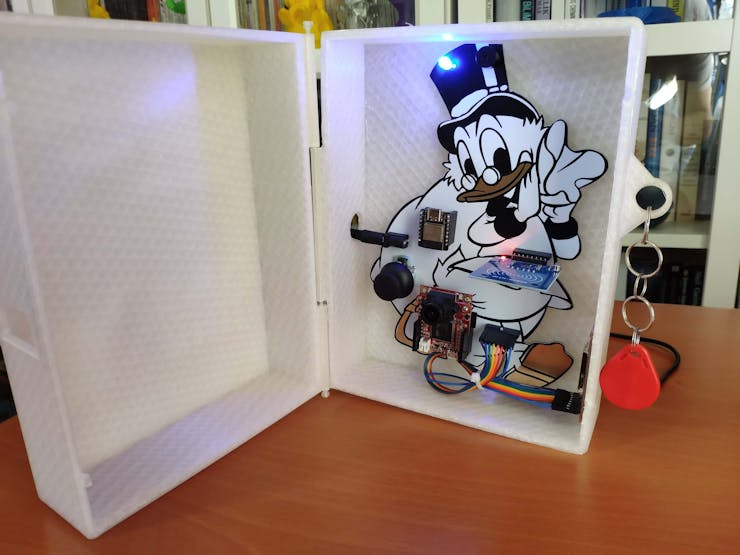
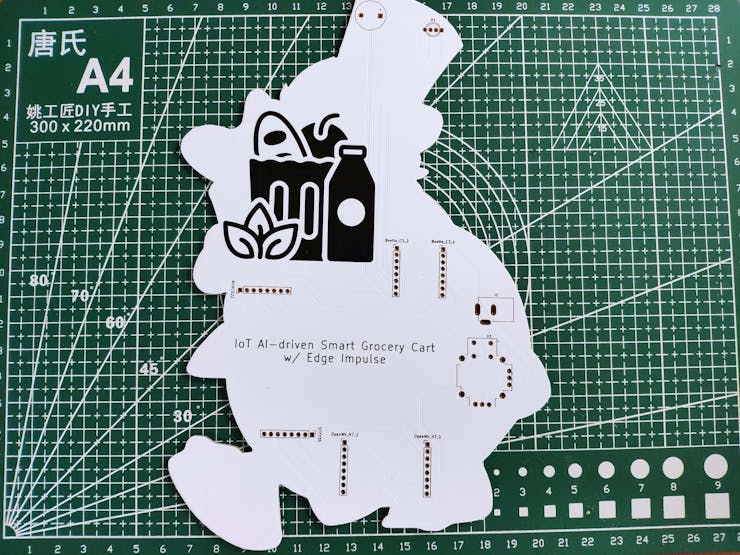
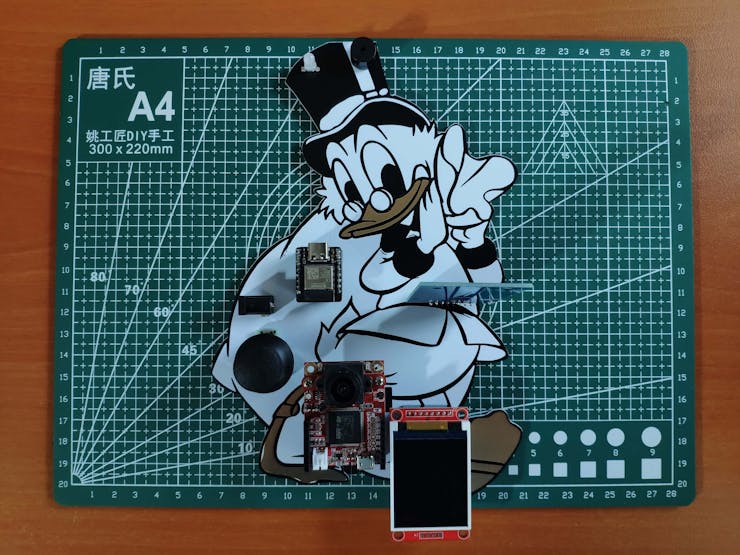
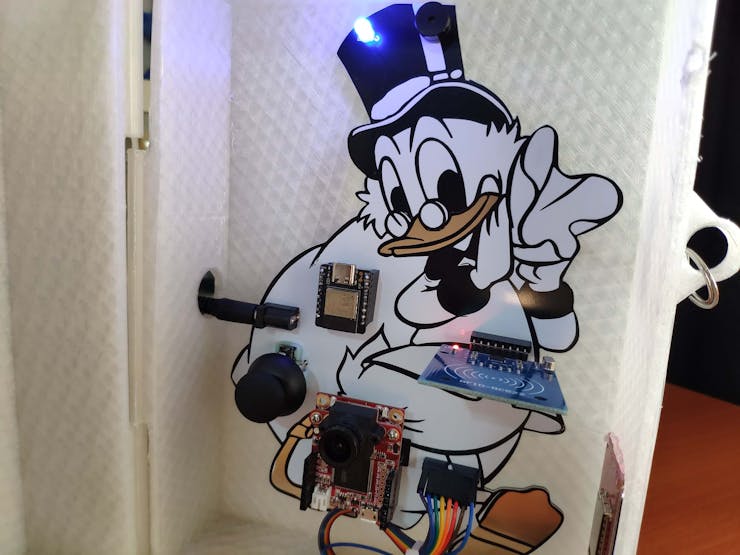
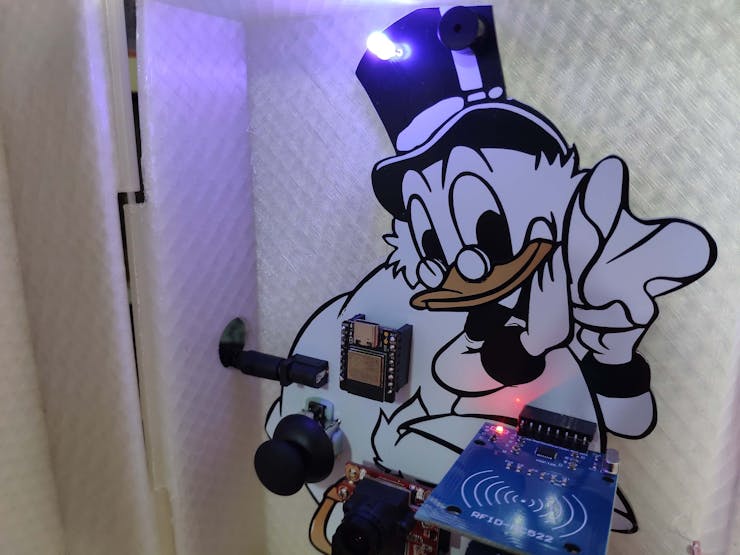
After completing the wiring on a breadboard for the prototype and testing my code and object detection model, I decided to design a PCB for this project to make the device assembly effortless. Since Scrooge McDuck is one of my favorite cartoon characters and is famous for his wealth and stinginess, I thought it would be hilarious to design a shopping-related PCB based on him.
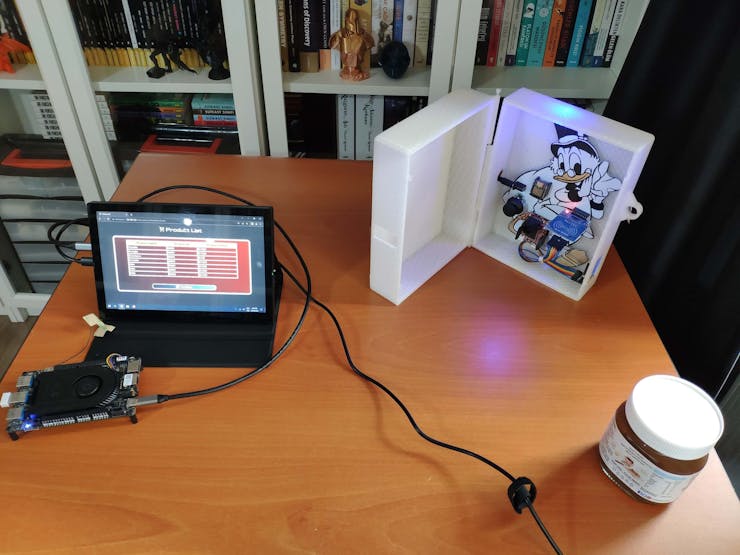
Lastly, to make the device as robust and sturdy as possible while being attached to a grocery cart and utilized by customers, I designed a semi-transparent hinged case compatible with any grocery cart due to its hooks and snap-fit joints (3D printable).
So, this is my project in a nutshell 😃
In the following steps, you can find more detailed information on coding, capturing food retail product images, storing pictures on an SD card, building an object detection (FOMO) model with Edge Impulse, running the model on OpenMV Cam H7, developing a full-fledged web application, and communicating with the web application via Beetle ESP32-C3.
🎁🎨 Huge thanks to PCBWay for sponsoring this project.
🎁🎨 Huge thanks to DFRobot for sponsoring these products:
⭐ Beetle ESP32-C3 | Inspect
⭐ LattePanda 3 Delta 864 | Inspect
⭐ DFRobot 8.9" 1920x1200 IPS Touch Display | Inspect
🎁🎨 Also, huge thanks to Creality for sending me a Creality Sonic Pad, a Creality Sermoon V1 3D Printer, and a Creality CR-200B 3D Printer.


Step 1: Designing and soldering the Scrooge McDuck-inspired PCB
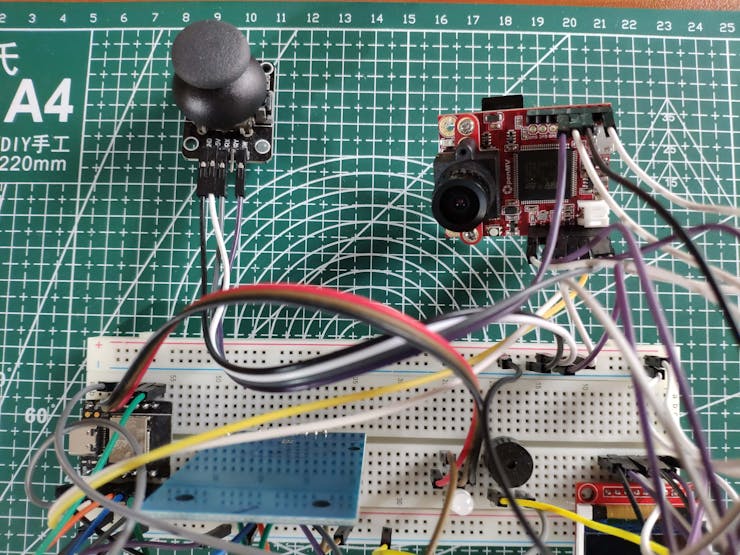
Before prototyping my Scrooge McDuck-inspired PCB design, I tested all connections and wiring with OpenMV Cam H7 and Beetle ESP32-C3. Then, I checked the connection status between Beetle ESP32-C3 and the web application hosted on LattePanda 3 Delta.
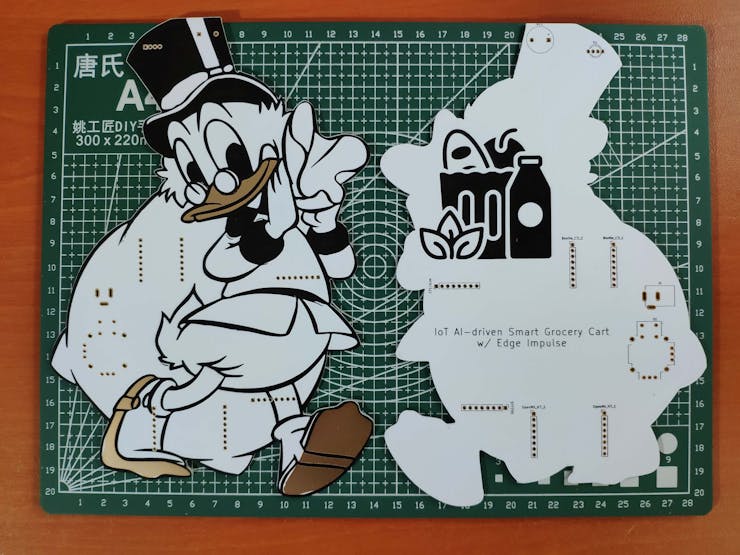
Then, I designed my Scrooge McDuck-inspired PCB by utilizing KiCad. As mentioned earlier, I chose to design my PCB based on Scrooge McDuck since I loved the juxtaposition of shopping and his well-known stinginess :) I attached the Gerber file of the PCB below. Therefore, if you want, you can order this PCB from PCBWay to build this device giving smart grocery cart perks to any grocery cart.

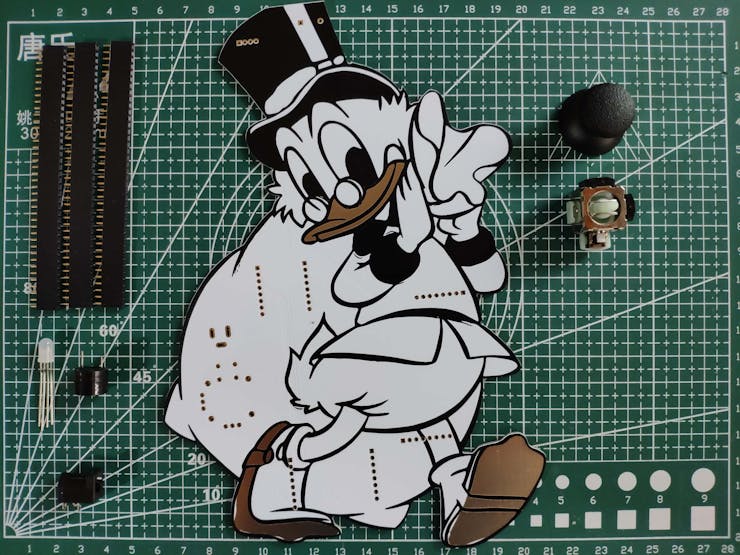
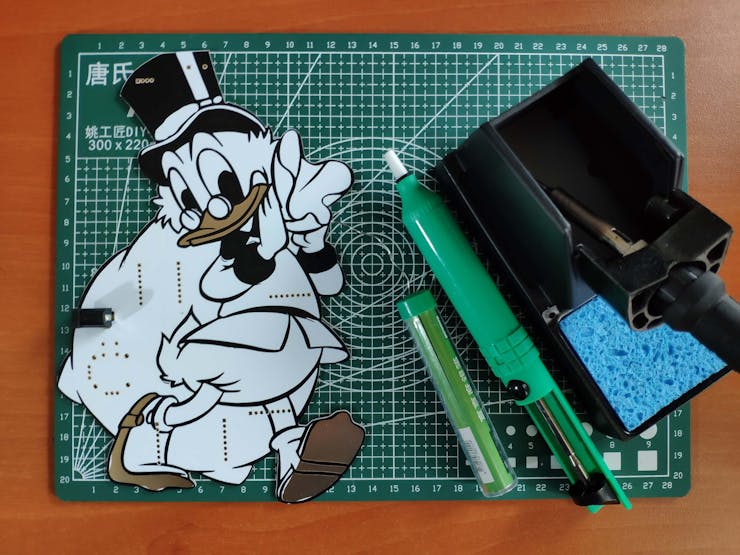
First of all, by utilizing a soldering iron, I attached headers (female), a COM-09032 analog joystick, a buzzer, a 5mm common anode RGB LED, and a power jack to the PCB.
📌 Component list on the PCB:
OpenMV_H7_1, OpenMV_H7_2 (Headers for OpenMV Cam H7)
Beetle_C3_1, Beetle_C3_2 (Headers for Beetle ESP32-C3)
MFRC522 (Headers for MFRC522 RFID Reader)
ST7735 (Headers for ST7735 1.8" Color TFT Display)
U1 (COM-09032 Analog Joystick)
BZ1 (Buzzer)
D1 (5mm Common Anode RGB LED)
J1 (Power Jack)
Step 1.1: Making connections and adjustments
// Connections// Beetle ESP32-C3 :
//                                MFRC522
// D7   --------------------------- RST
// D2   --------------------------- SDA
// D6   --------------------------- MOSI
// D5   --------------------------- MISO
// D4   --------------------------- SCK
//                                OpenMV Cam H7
// D0   --------------------------- P4
// D1   --------------------------- P5
//                                5mm Common Anode RGB LED
// D21  --------------------------- R
// D8   --------------------------- G
// D9   --------------------------- B
//                                Buzzer
// D20  --------------------------- +
//
//
// OpenMV Cam H7 :
//                                ST7735 1.8" Color TFT Display
// 3.3V --------------------------- LED
// P2   --------------------------- SCK
// P0   --------------------------- SDA
// P8   --------------------------- AO
// P7   --------------------------- RESET
// P3   --------------------------- CS
// GND  --------------------------- GND
// 3.3V --------------------------- VCC
//                                JoyStick
// P6   --------------------------- VRX
// P9   --------------------------- SW
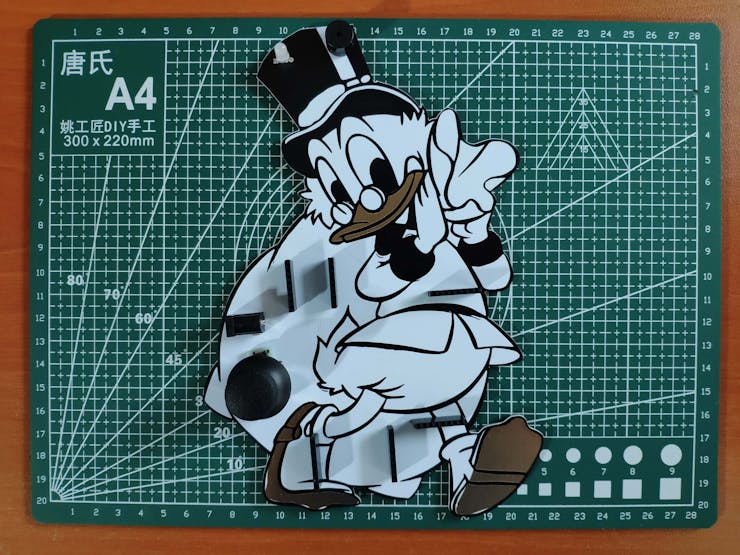
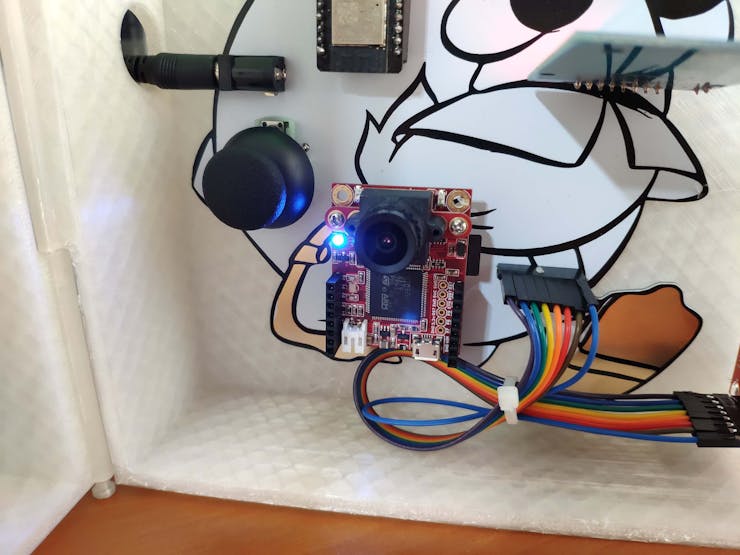
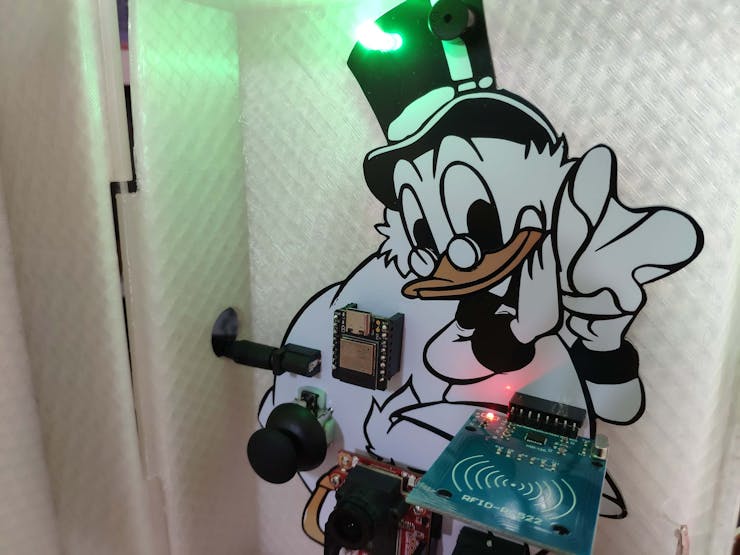
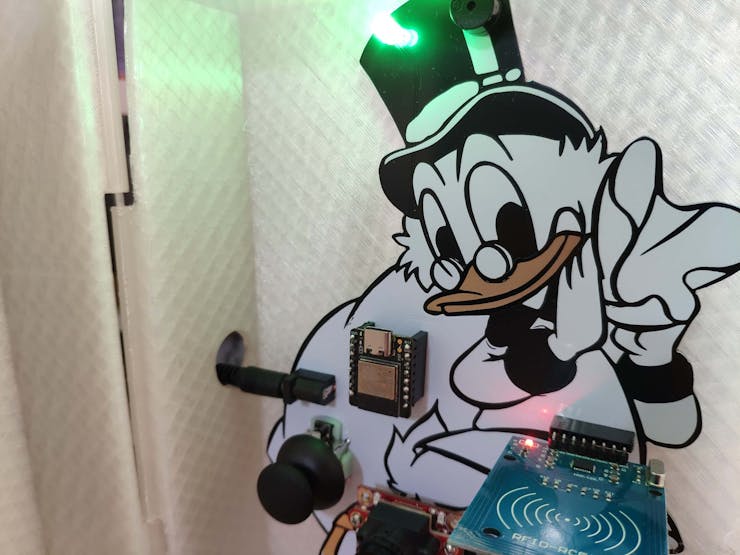
After completing soldering, I attached all remaining components to the Scrooge McDuck PCB via headers — OpenMV Cam H7, Beetle ESP32-C3, MFRC522 RFID reader, and ST7735 color TFT display.
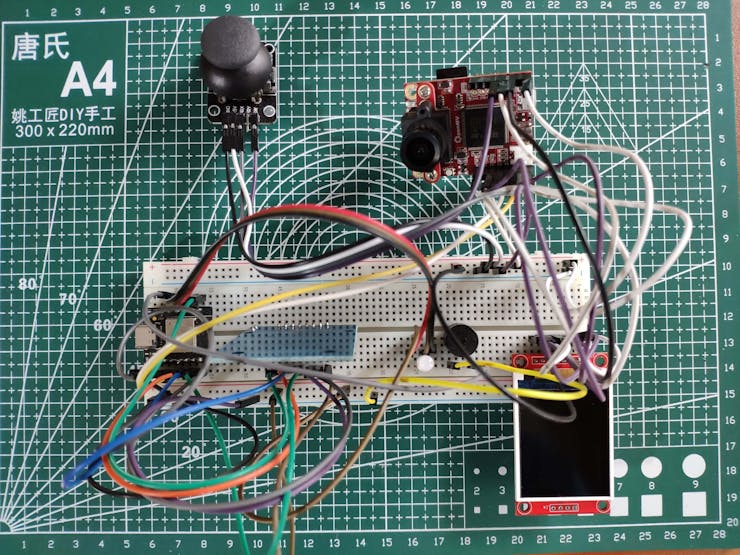
I connected a color TFT screen (ST7735) to OpenMV Cam H7 so as to display the real-time video stream, the detection results after running the object detection (FOMO) model, and the selection (options) menu. To save images under two categories and control the selection menu after a product is detected by the model, I connected an analog joystick (COM-09032) to OpenMV Cam H7.
To be able to transfer commands to Beetle ESP32-C3 via serial communication, I connected the hardware serial port of OpenMV Cam H7 (UART 3) to the hardware serial port of Beetle ESP32-C3 (Serial1). To enable the device to determine when the customer finishes shopping and is ready to leave the store, I connected an MFRC522 RFID reader to Beetle ESP32-C3. Also, I connected a buzzer and an RGB LED to inform the customer of the device status, denoting web application connection and serial communication success.
Step 2: Designing and printing a semi-transparent hinged case
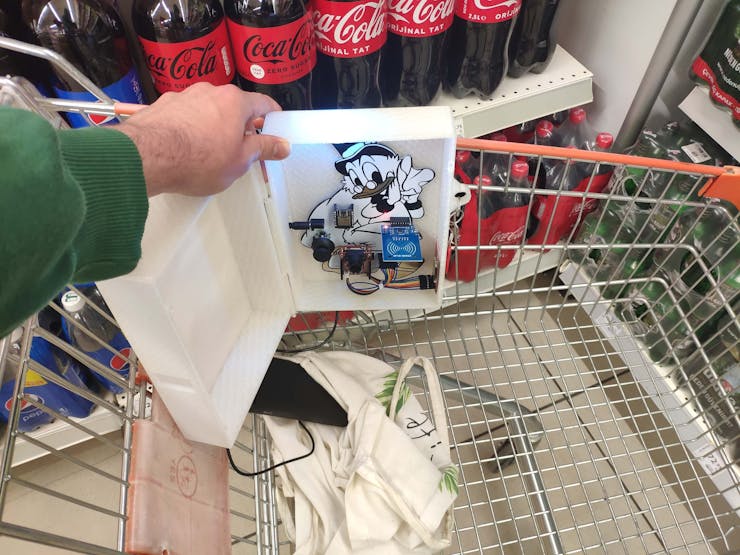
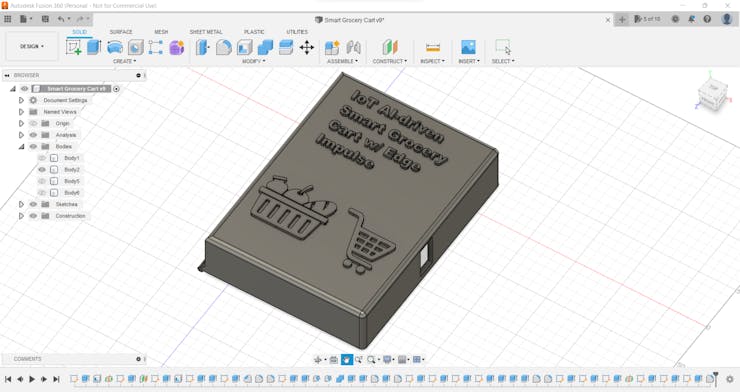
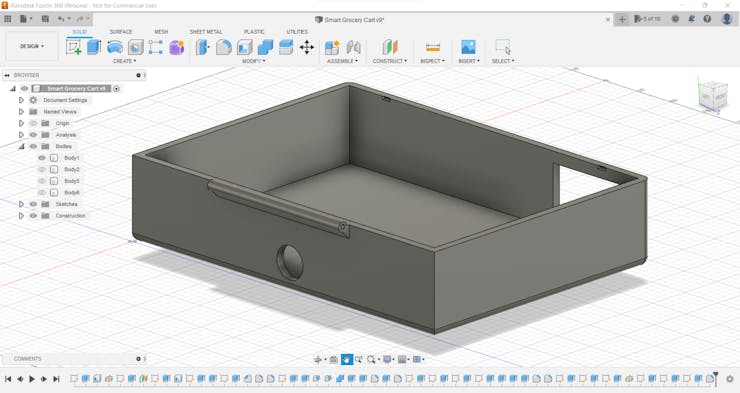
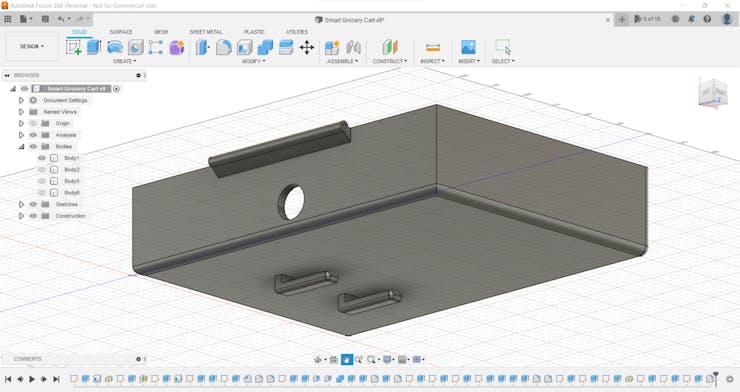
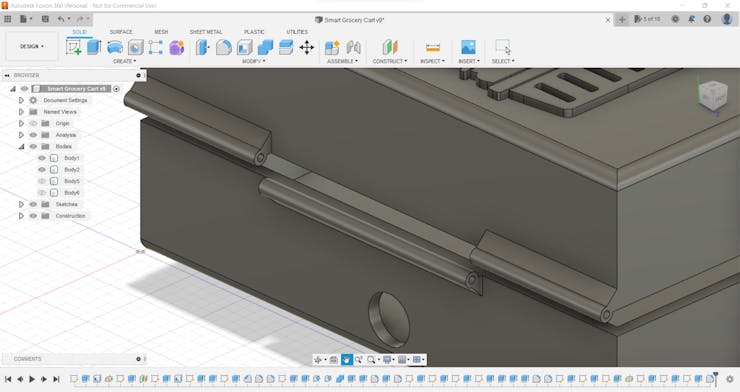
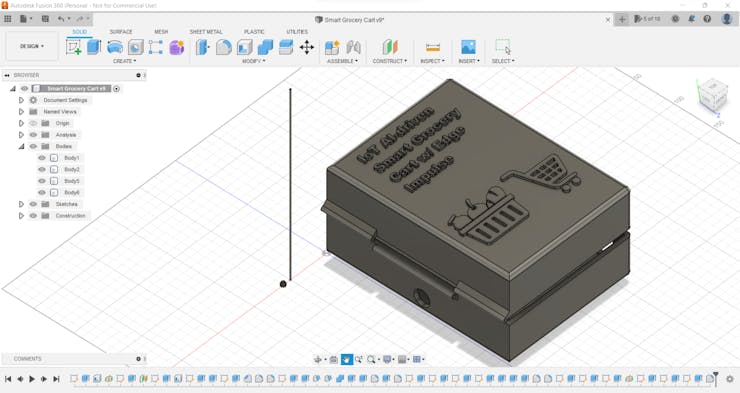
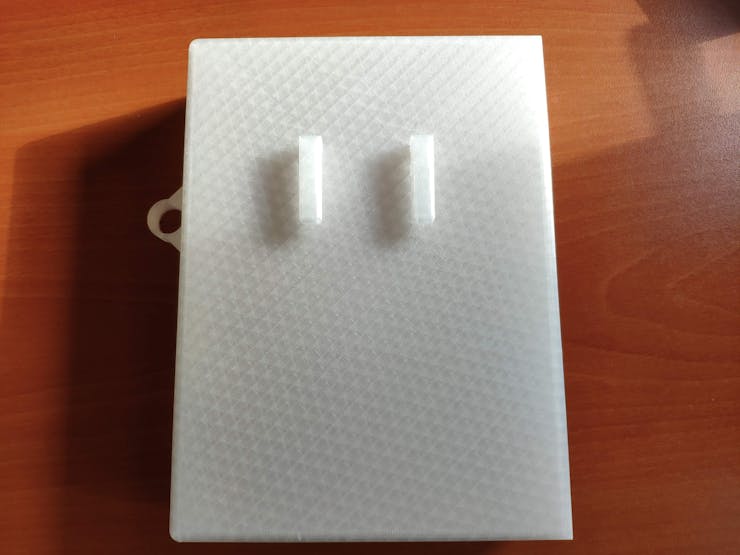
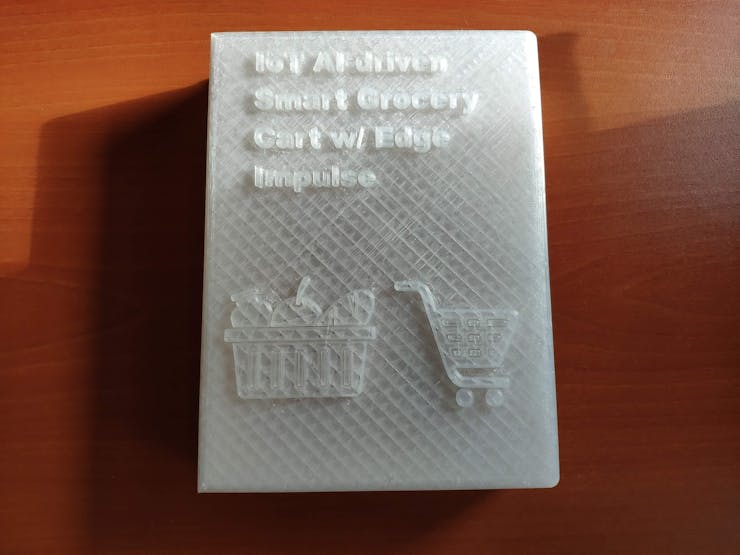
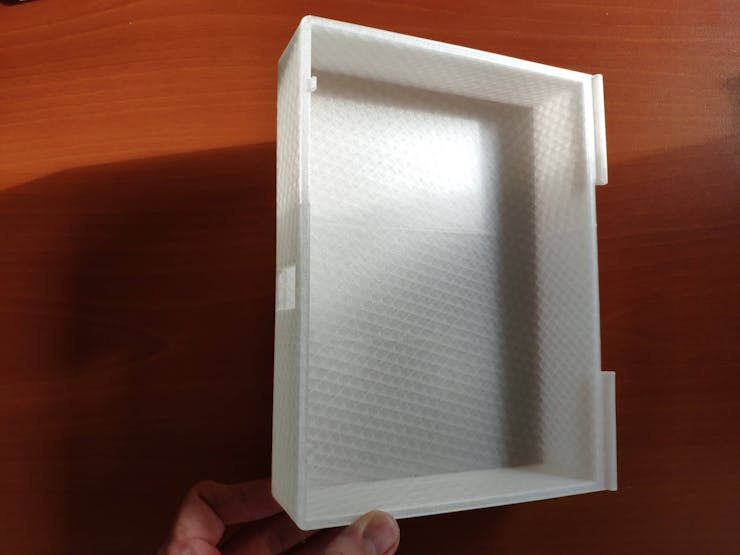
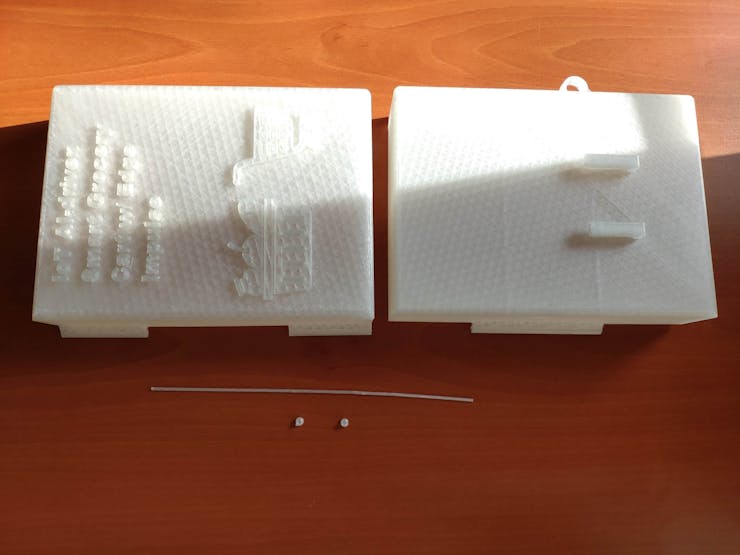
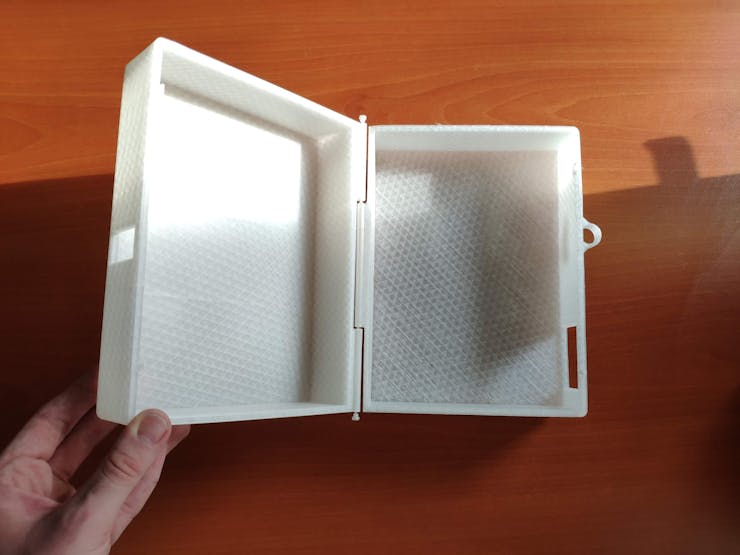
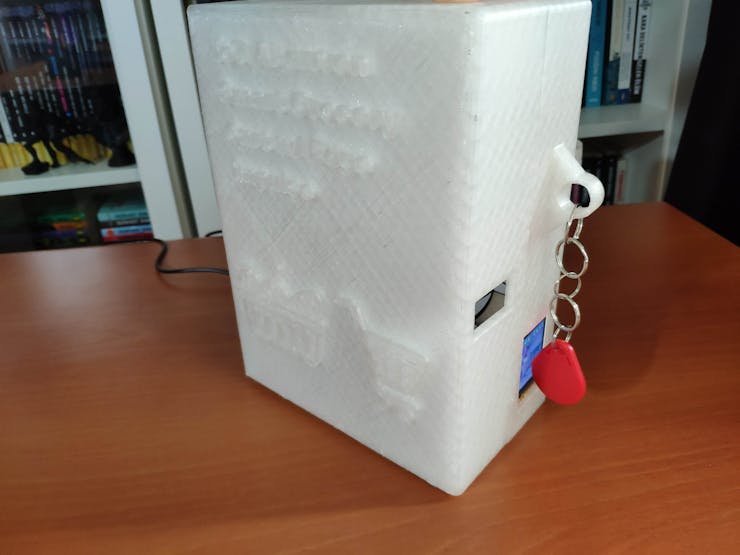
Since I focused on building a budget-friendly and easy-to-use device that captures food retail product images, detects products with object detection, and provides an exceptional customer experience, I decided to design a robust and sturdy semi-transparent hinged case allowing the customer to access the RFID reader and the joystick effortlessly. To avoid overexposure to dust and prevent loose wire connections, I added two snap-fit joints to the hinged case. Also, I decided to emboss different grocery cart icons on the top part of the hinged case to emphasize the shopping theme gloriously :)
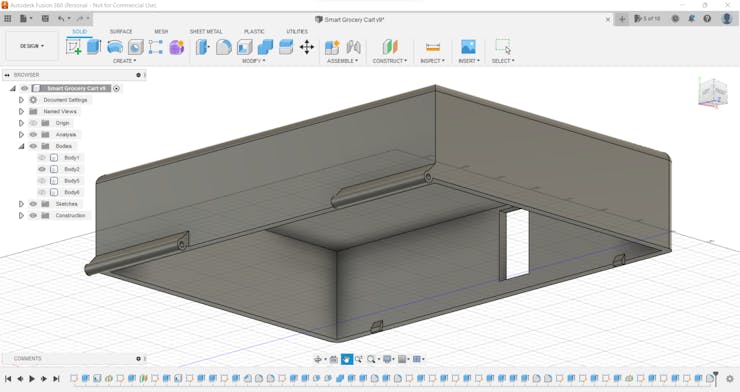
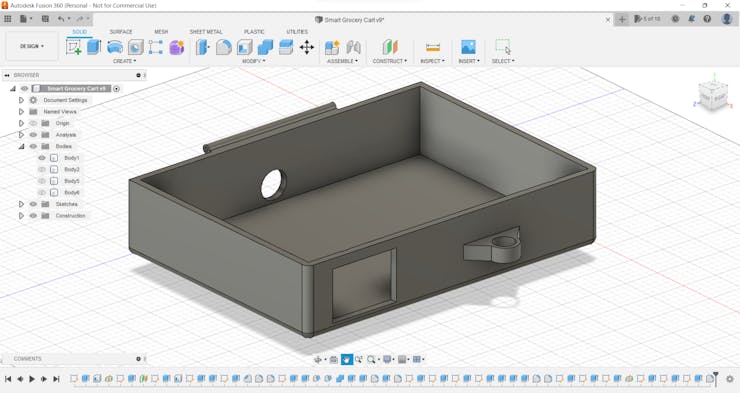
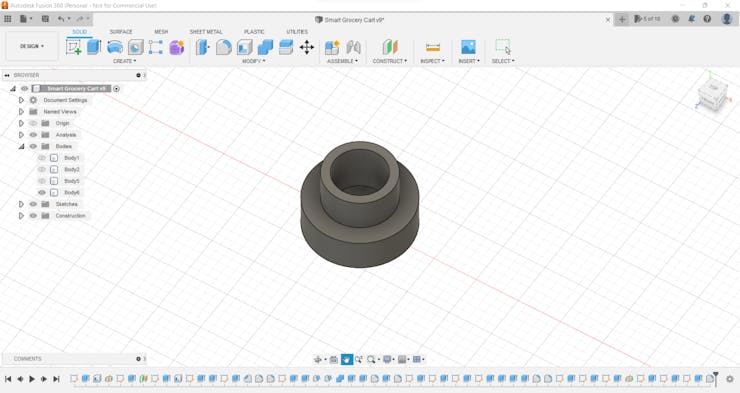
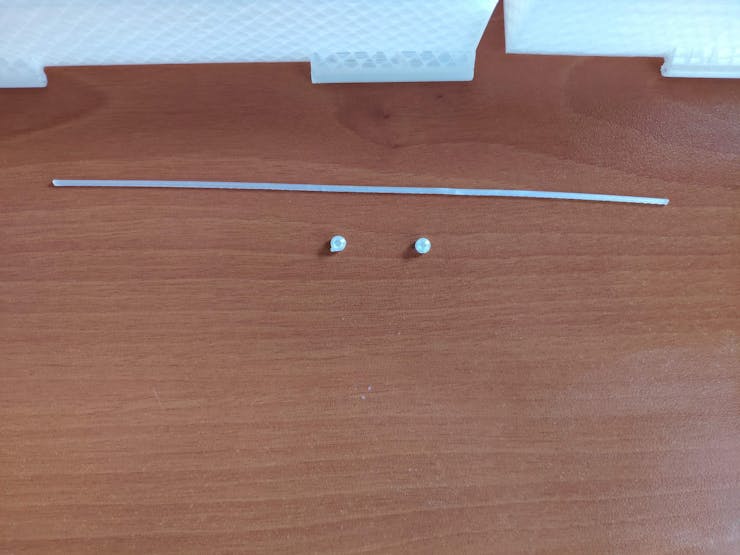
Since I needed to connect the top and bottom parts of the hinged case seamlessly, I designed a pin with pin ends (caps). To make the device compatible with any grocery cart, I added two hooks on the back of the bottom part. Also, I added a ring to the bottom part to attach the assigned RFID key tag.
I designed the top and bottom parts of the hinged case, the pin, and the pin ends in Autodesk Fusion 360. You can download their STL files below.
Then, I sliced all 3D models (STL files) in Ultimaker Cura.
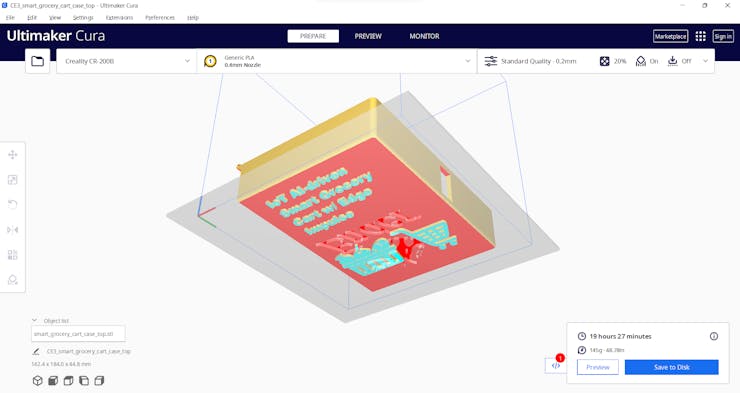
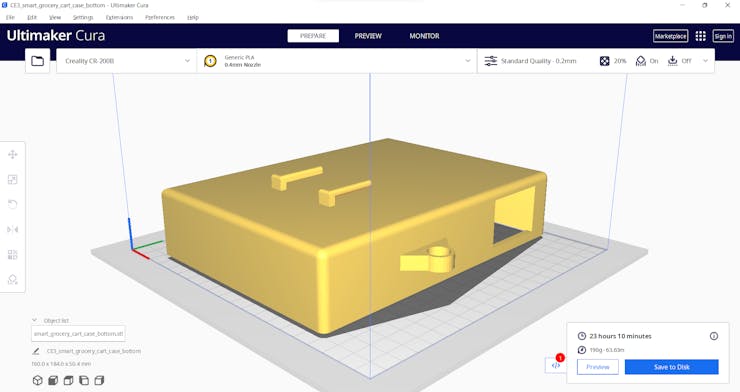
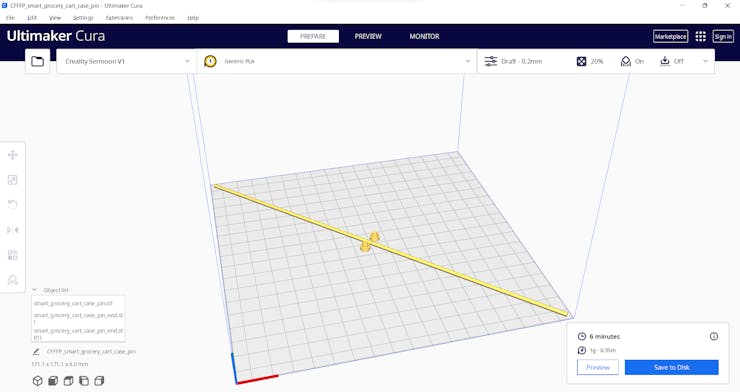
Since I wanted to create a semi-transparent solid structure for the hinged case representing product packaging, I utilized this PLA filament:
- Natural
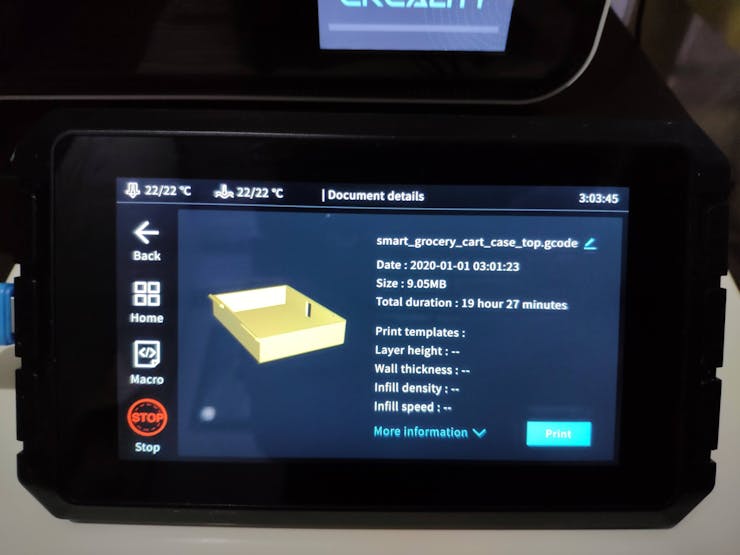
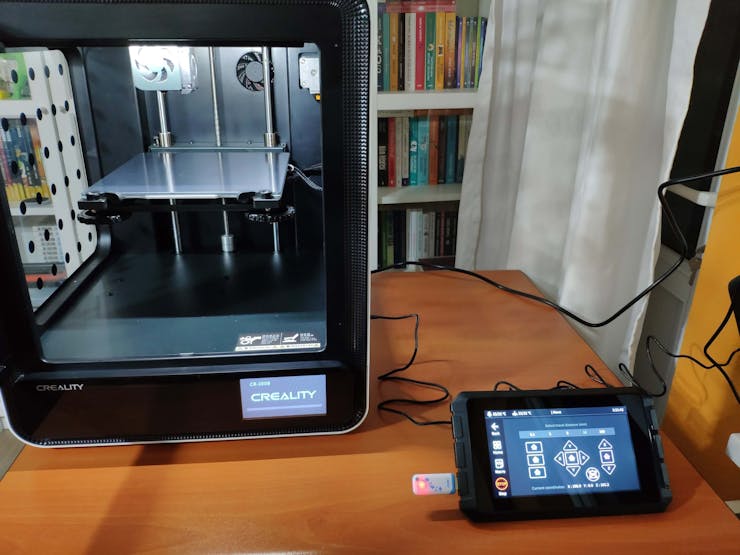
Finally, I printed all parts (models) with my Creality Sermoon V1 3D Printer and Creality CR-200B 3D Printer in combination with the Creality Sonic Pad. You can find more detailed information regarding the Sonic Pad in Step 2.1.
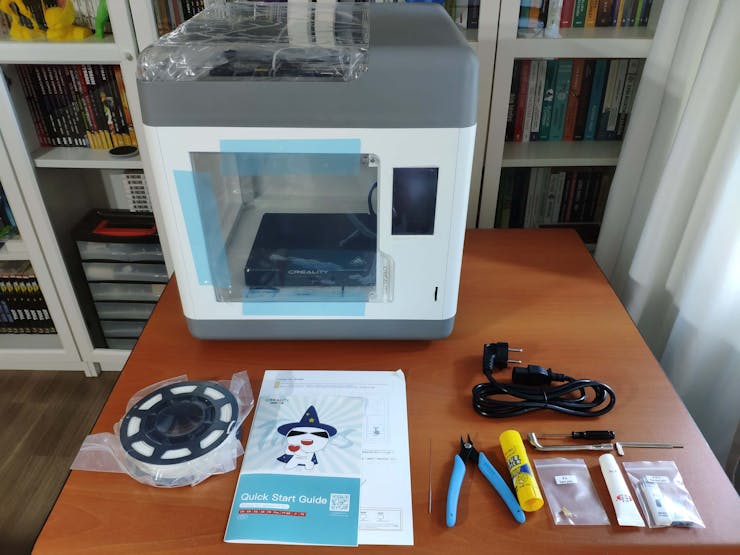
If you are a maker or hobbyist planning to print your 3D models to create more complex and detailed projects, I highly recommend the Sermoon V1. Since the Sermoon V1 is fully-enclosed, you can print high-resolution 3D models with PLA and ABS filaments. Also, it has a smart filament runout sensor and the resume printing option for power failures.
Furthermore, the Sermoon V1 provides a flexible metal magnetic suction platform on the heated bed. So, you can remove your prints without any struggle. Also, you can feed and remove filaments automatically (one-touch) due to its unique sprite extruder (hot end) design supporting dual-gear feeding. Most importantly, you can level the bed automatically due to its user-friendly and assisted bed leveling function.
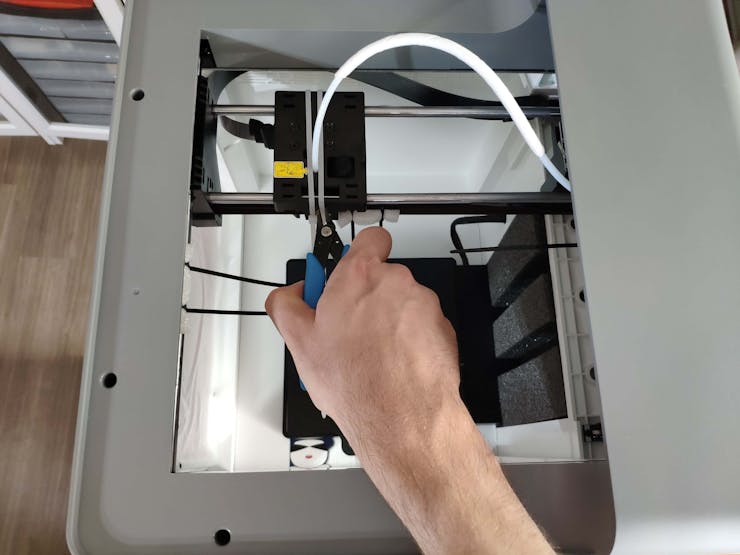
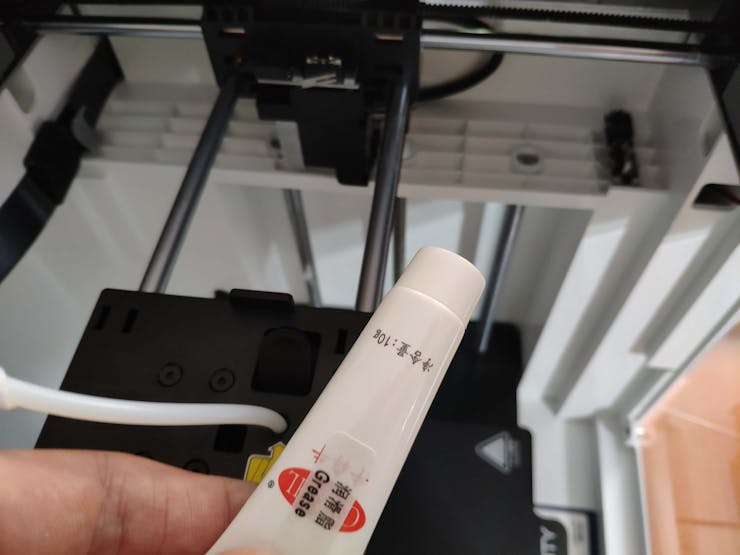
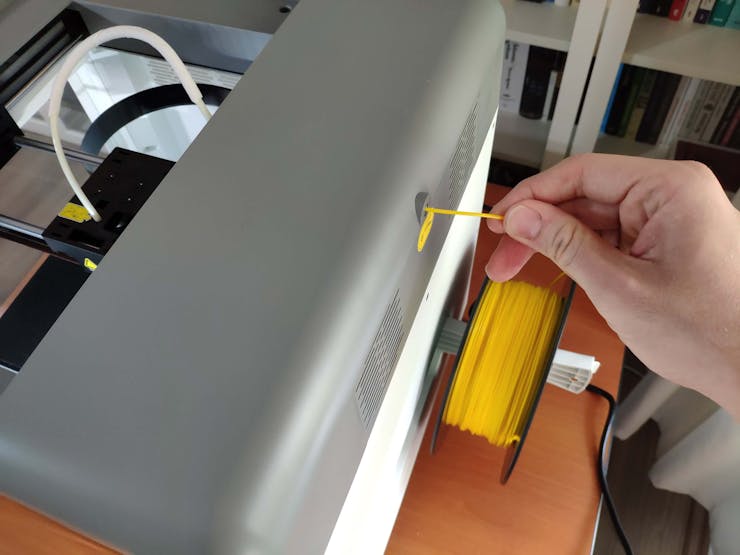
#️⃣ Before the first use, remove unnecessary cable ties and apply grease to the rails.
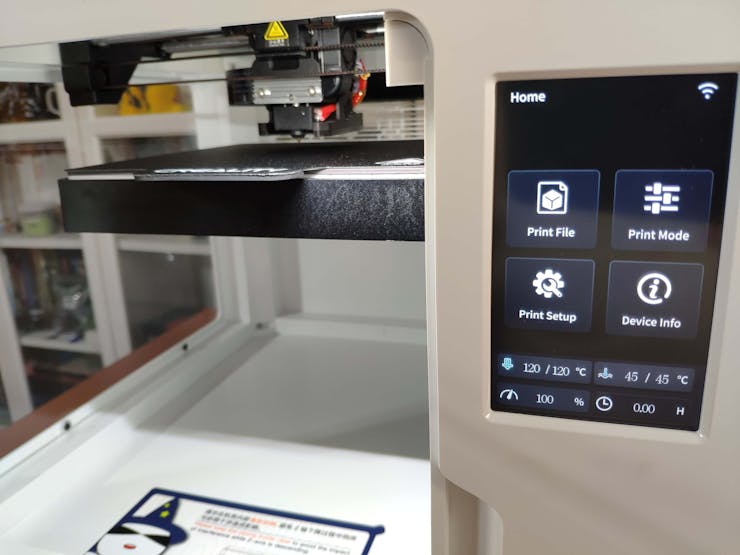
#️⃣ Test the nozzle and hot bed temperatures.
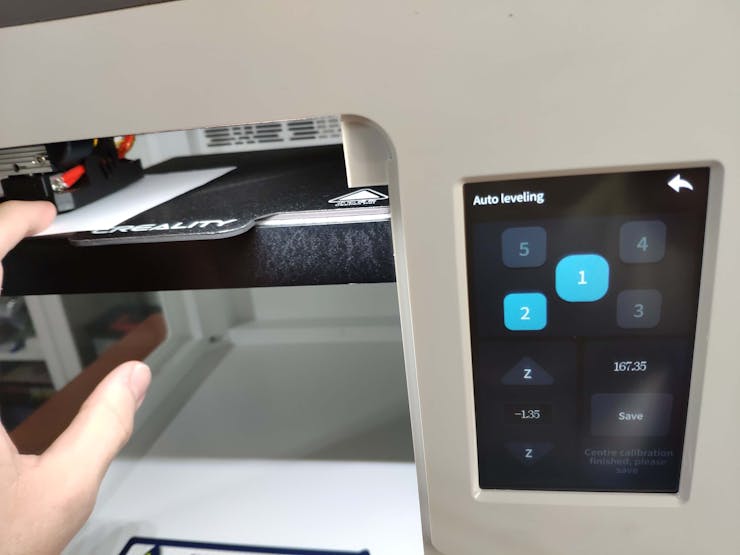
#️⃣ Go to Print Setup ➡ Auto leveling and adjust five predefined points automatically with the assisted leveling function.

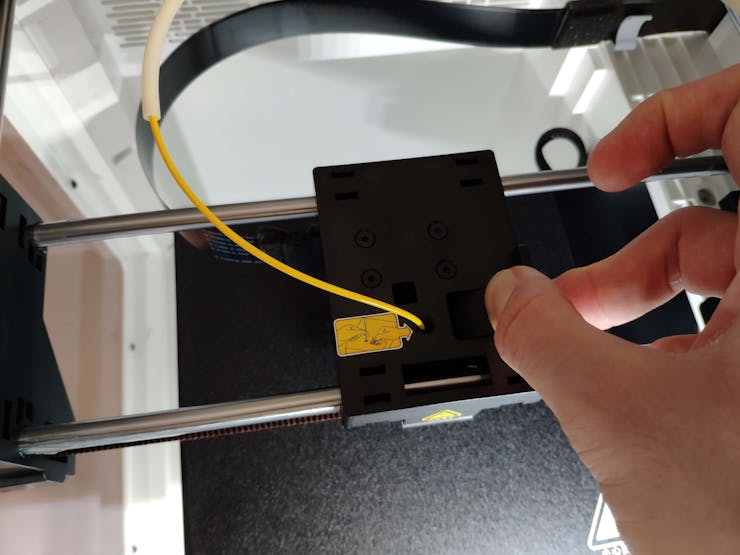
#️⃣ Finally, place the filament into the integrated spool holder and feed the extruder with the filament.
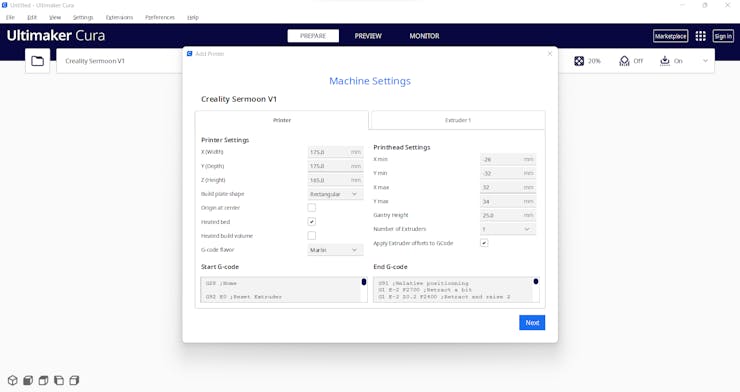
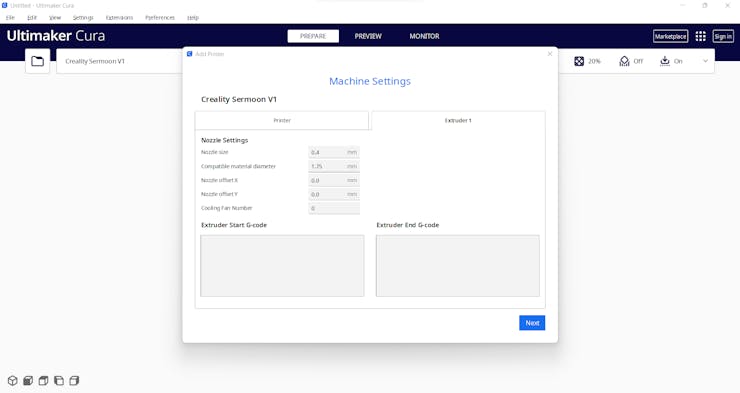
#️⃣ Since the Sermoon V1 is not officially supported by Cura, download the latest Creality Slicer version and copy the official printer settings provided by Creality, including Start G-code and End G-code, to a custom printer profile on Cura.


Step 2.1: Improving print quality and speed with the Creality Sonic Pad
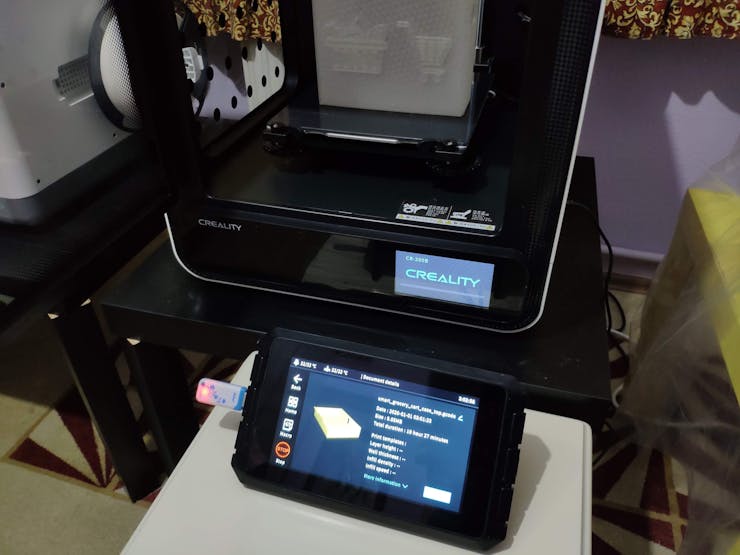
Since I wanted to improve my print quality and speed with Klipper, I decided to upgrade my Creality CR-200B 3D Printer with the Creality Sonic Pad.
Creality Sonic Pad is a beginner-friendly device to control almost any FDM 3D printer on the market with the Klipper firmware. Since the Sonic Pad uses precision-oriented algorithms, it provides remarkable results with higher printing speeds. The built-in input shaper function mitigates oscillation during high-speed printing and smooths ringing to maintain high model quality. Also, it supports G-code model preview.
Although the Sonic Pad is pre-configured for some Creality printers, it does not support the CR-200B officially yet. Therefore, I needed to add the CR-200B as a user-defined printer to the Sonic Pad. Since the Sonic Pad needs unsupported printers to be flashed with the self-compiled Klipper firmware before connection, I flashed my CR-200B with the required Klipper firmware settings via FluiddPI by following this YouTube tutorial.
If you do not know how to write a printer configuration file for Klipper, you can download the stock CR-200B configuration file from here.
#️⃣ After flashing the CR-200B with the Klipper firmware, copy the configuration file (printer.cfg) to a USB drive and connect the drive to the Sonic Pad.
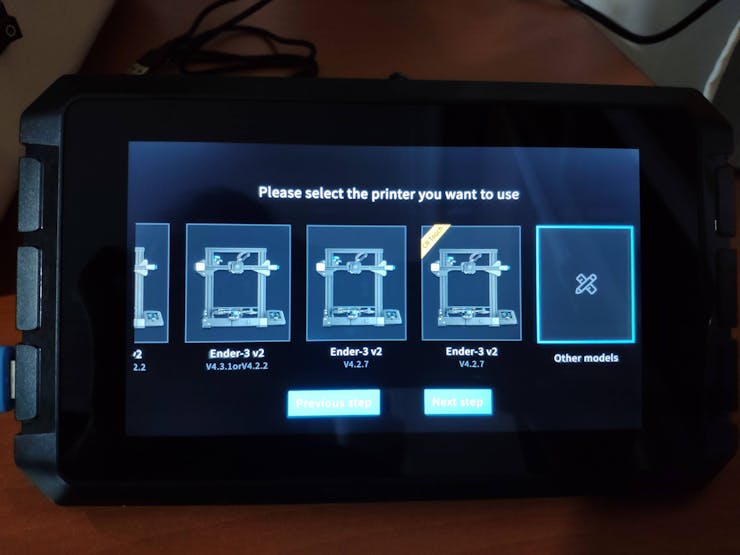
#️⃣ After setting up the Sonic Pad, select Other models. Then, load the printer.cfg file.
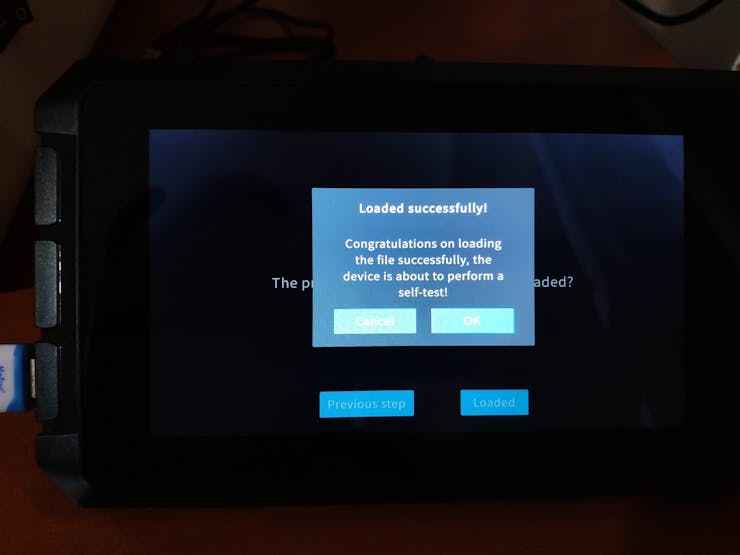
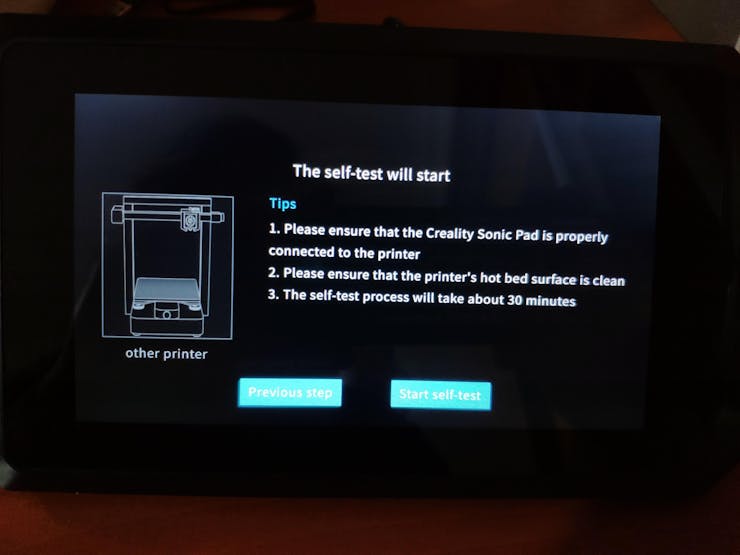
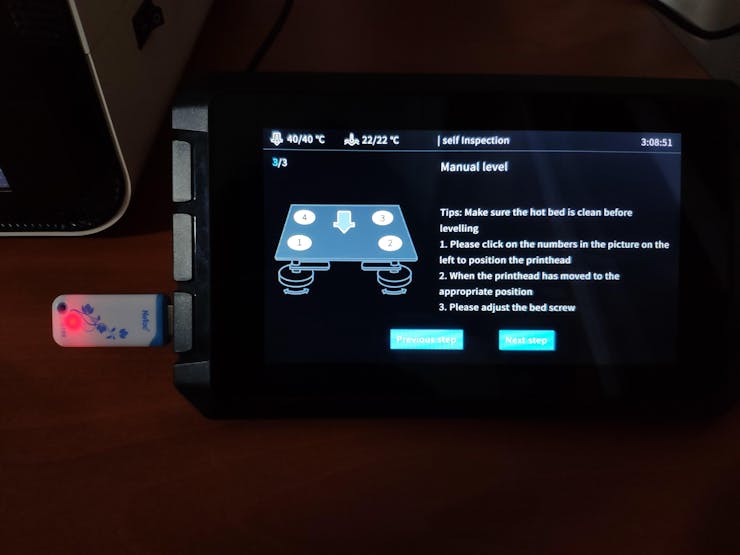
#️⃣ After connecting the Sonic Pad to the CR-200B successfully via a USB cable, the Sonic Pad starts the self-testing procedure, which allows the user to test printer functions and level the bed.

#️⃣ After completing setting up the printer, the Sonic Pad lets the user control all functions provided by the Klipper firmware.

#️⃣ In Cura, export the sliced model in the ufp format. After uploading .ufp files to the Sonic Pad via the USB drive, it converts them to sliced G-code files automatically.
#️⃣ Also, the Sonic Pad can display model preview pictures generated by Cura with the Create Thumbnail script.
Step 2.2: Assembling the semi-transparent hinged case
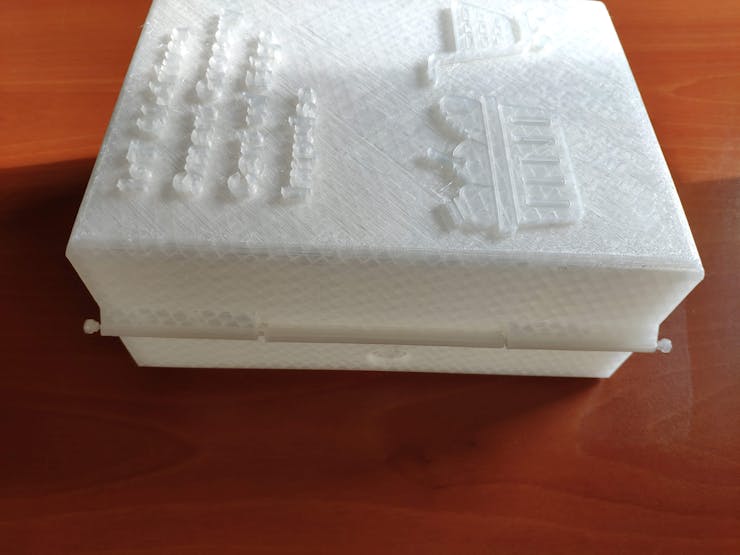
After printing all parts (models), I placed the pin through the hinges on the top and bottom parts and fixed the pin via the pin ends (caps).
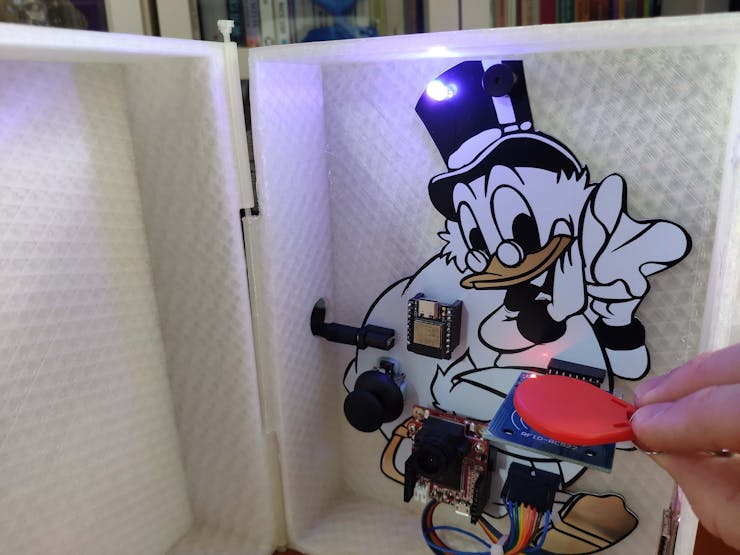
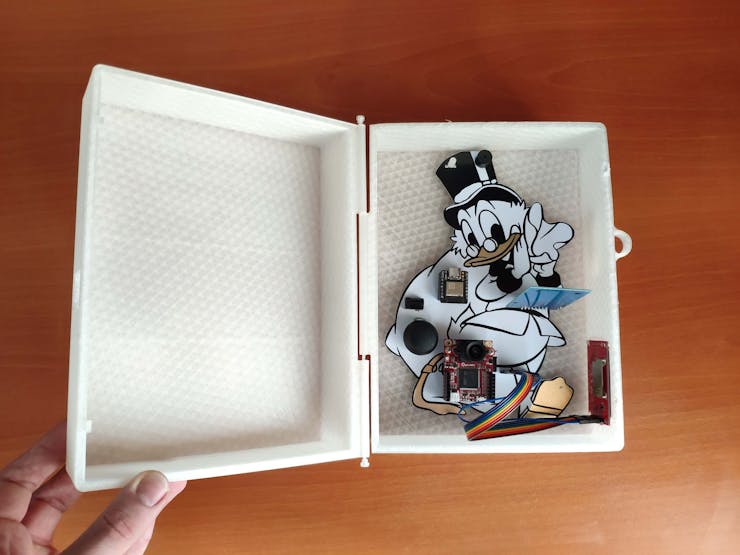
I affixed the Scrooge McDuck PCB to the bottom part of the hinged case via a hot glue gun.
Then, I attached the ST7735 TFT display to the hinged case via its slot on the bottom part to make customers see the screen even if the hinged case is closed via its built-in snap-fit joints.

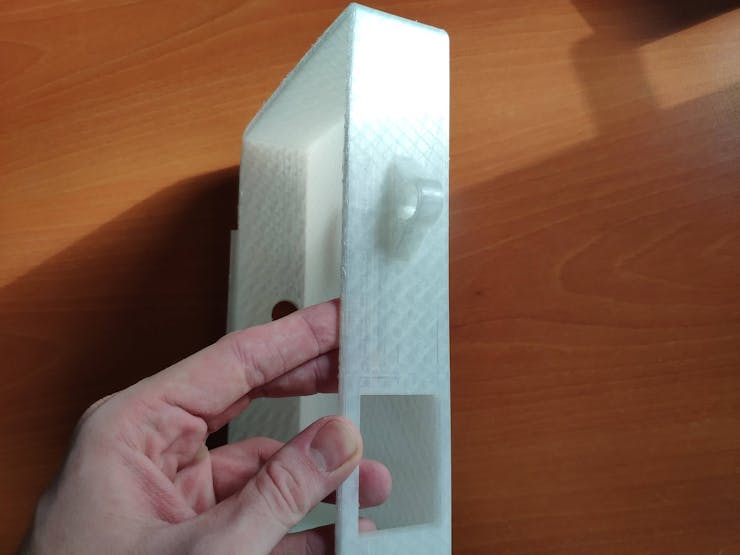

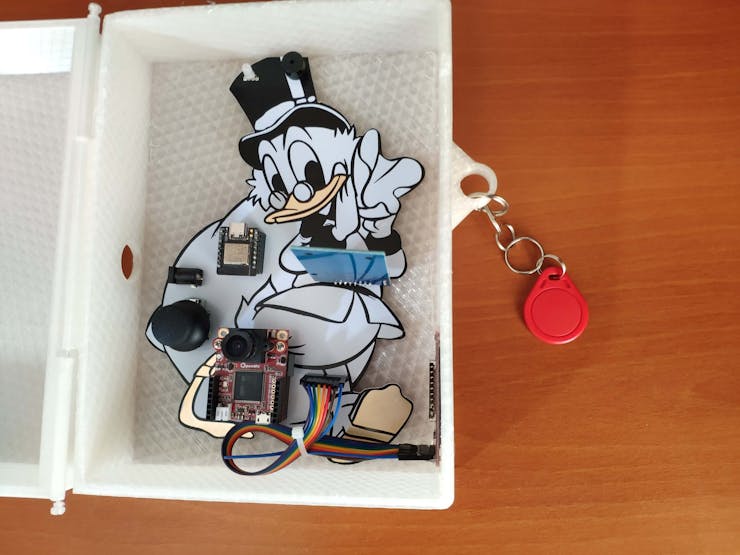
Finally, I attached the assigned RFID key tag to the ring on the bottom part of the hinged case. Via the slot on the top part of the hinged case, the customer can approximate the key tag to the MFRC522 RFID reader even if the case is closed.
Step 3: Creating a Twilio SendGrid account to send emails from localhost
Step 4: Developing a web application with a user-friendly interface in PHP, JavaScript, CSS, and MySQL
Step 5: Capturing and storing product images w/ OpenMV Cam H7
Step 5.1: Saving the captured product images to the SD card as samples
Step 6: Building an object detection (FOMO) model with Edge Impulse
Step 7: Setting up Beetle ESP32-C3 on the Arduino IDE
Step 8: Setting up the Edge Impulse FOMO model on OpenMV Cam H7
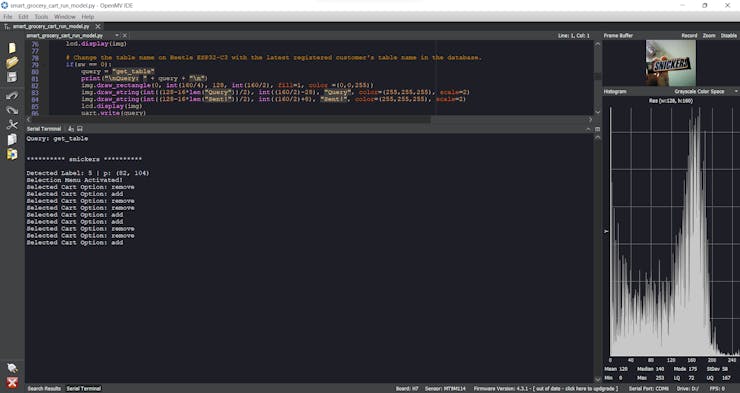
Step 9: Running the FOMO model on OpenMV Cam H7 to detect products and communicating with the web application via Beetle ESP32-C3
My Edge Impulse object detection (FOMO) model scans a captured image and predicts possibilities of trained labels to recognize an object on the given captured image. The prediction result (score) represents the model's "confidence" that the detected object corresponds to each of the five different labels (classes) [0 - 4], as shown in Step 6:
- Barilla
- Milk
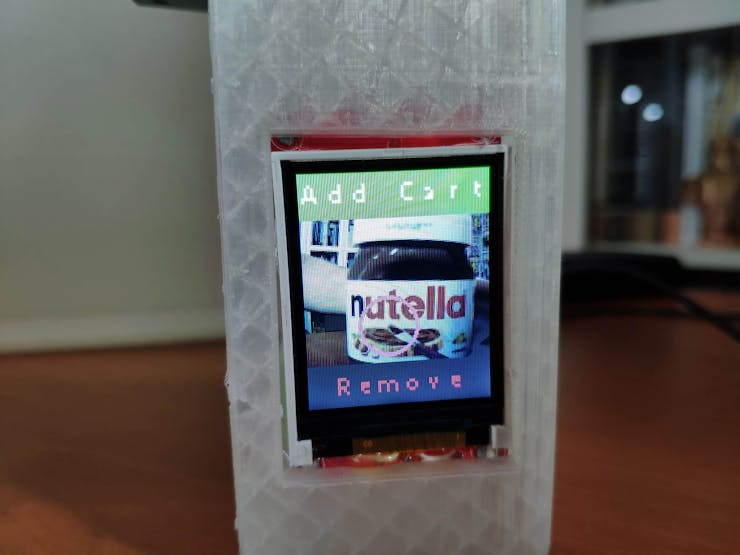
- Nutella
- Pringles
- Snickers
To run the smart_grocery_cart_run_model.py file on OpenMV Cam H7 when powered up automatically, save it as main.py on the SD card.
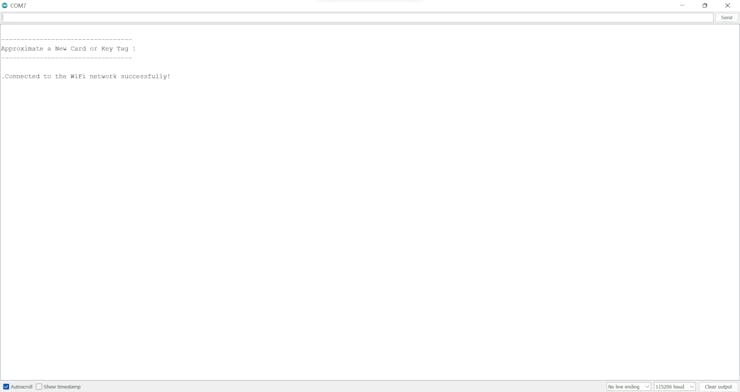
🛒🛍️📲 When Beetle ESP32-C3 connects successfully to the given Wi-Fi network, the device turns the RGB LED to blue.
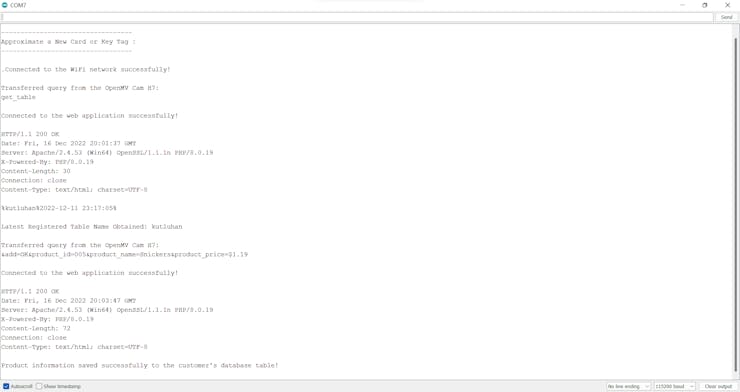
🛒🛍️📲 Also, the device prints notifications and the received commands on the Arduino IDE serial monitor for debugging.
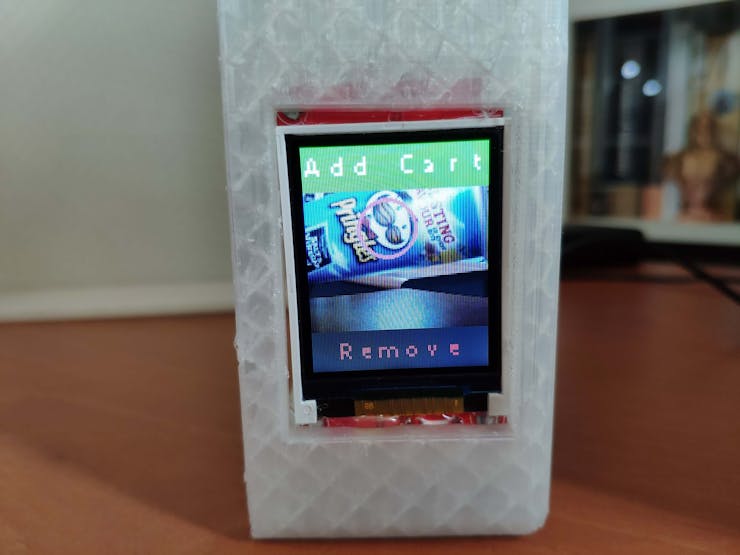
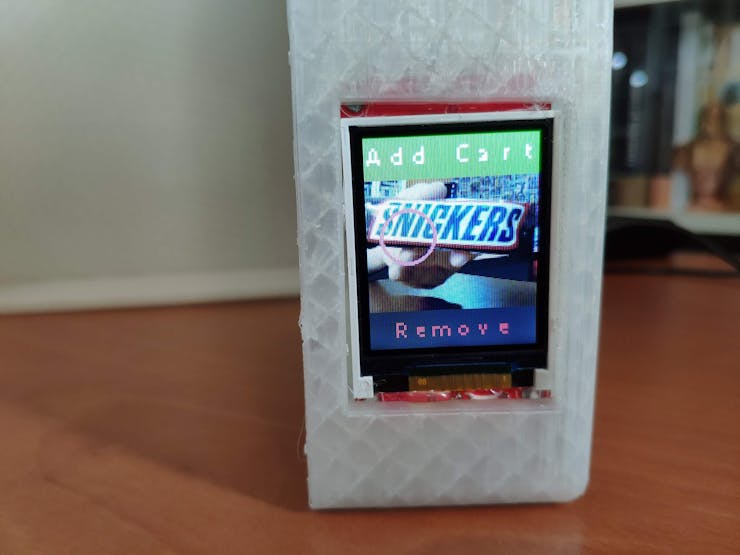
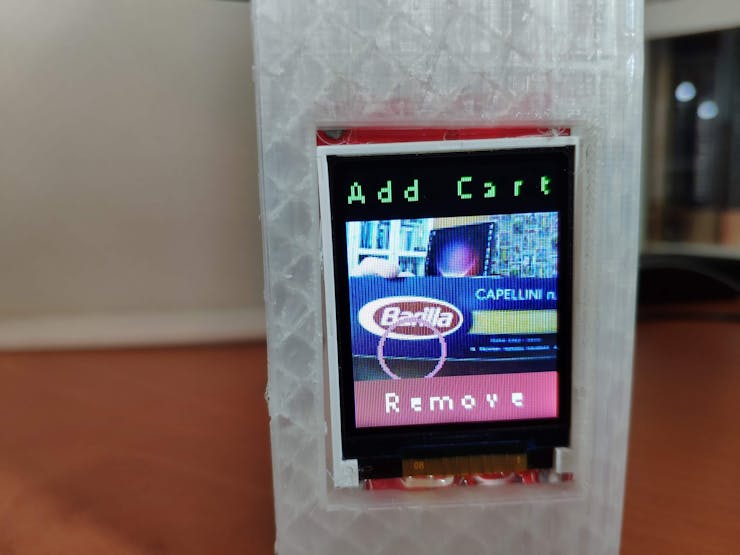
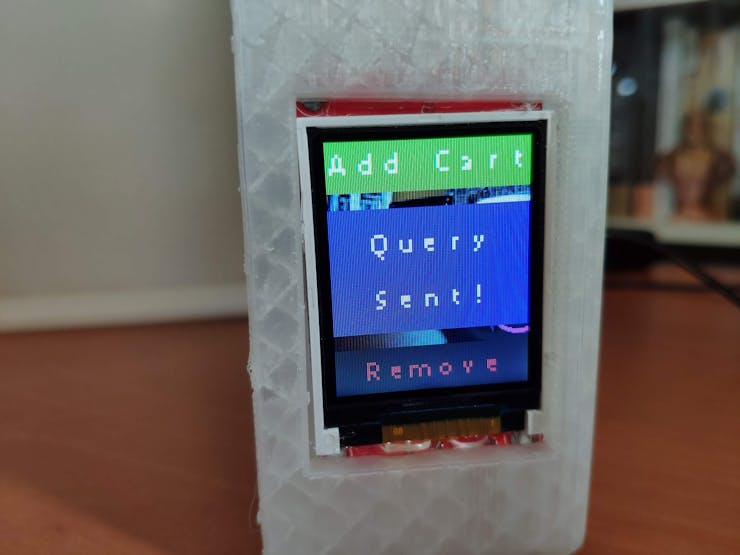
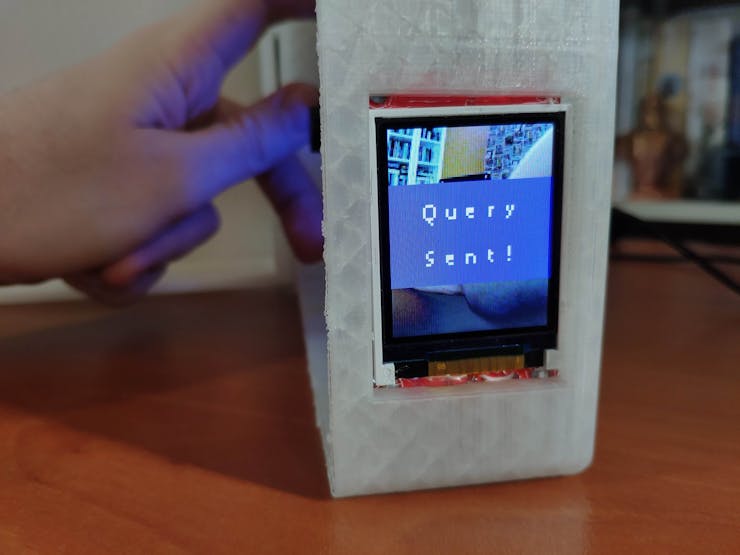
🛒🛍️📲 The device shows a real-time video stream on the ST7735 color TFT display.
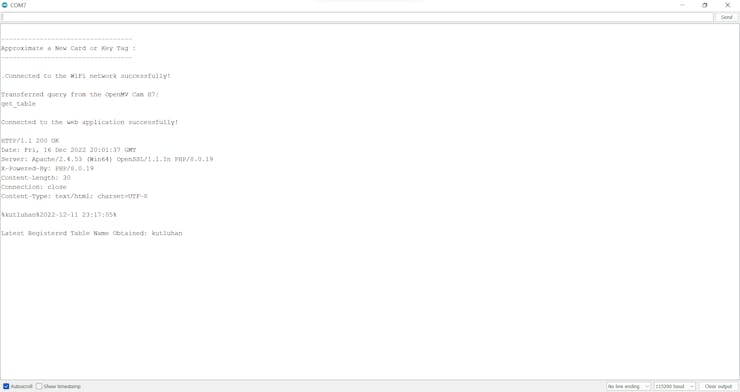
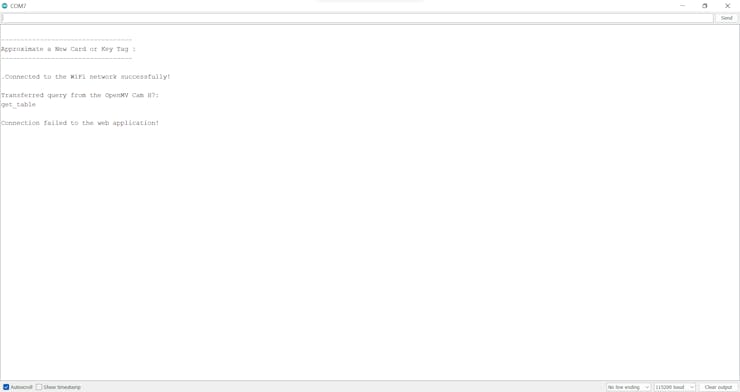
🛒🛍️📲 If the joystick button is pressed, OpenMV Cam H7 transfers the get_table command to Beetle ESP32-C3 via serial communication. Then, Beetle ESP32-C3 makes an HTTP GET request to the web application to obtain the latest registered customer's table name from the database for subsequent requests to the web application.
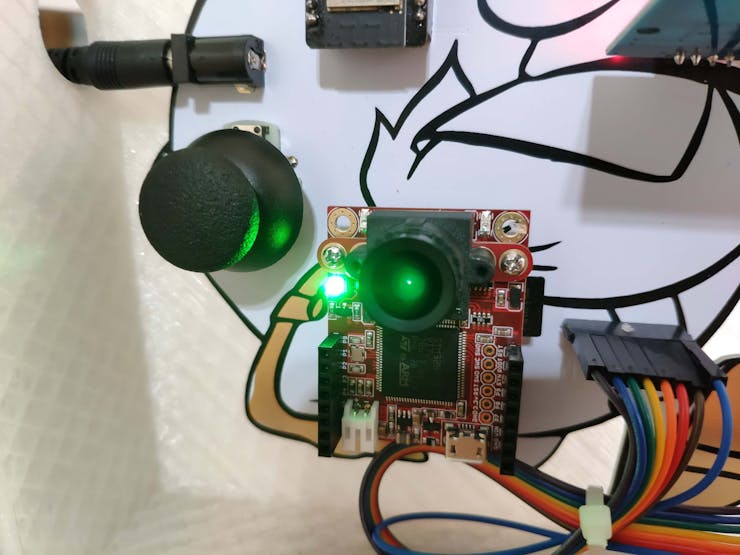
🛒🛍️📲 After transferring the command, the device informs the customer via the ST7735 color TFT screen and turns the built-in RGB LED on OpenMV Cam H7 to blue.
🛒🛍️📲 The device captures a picture and runs an inference with the Edge Impulse object detection (FOMO) model.
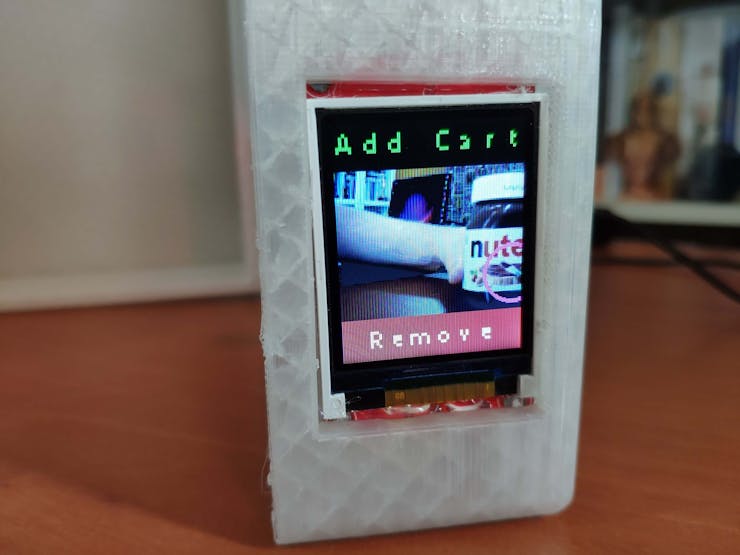
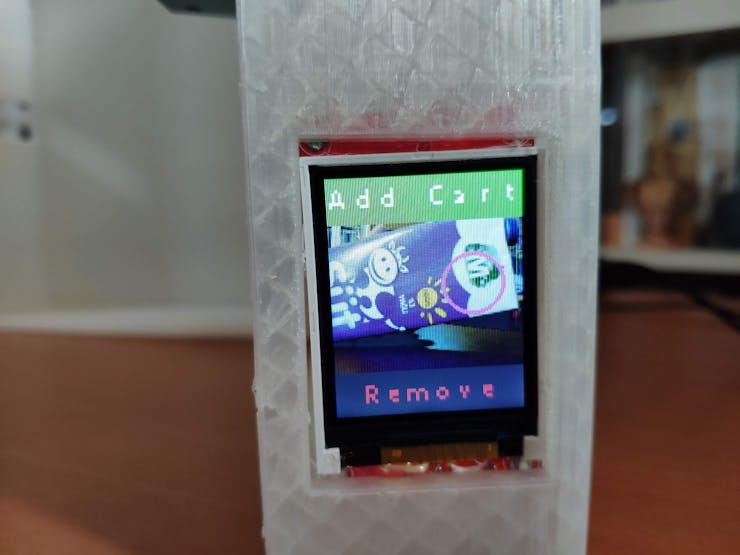
🛒🛍️📲 When the object detection (FOMO) model detects a product, the device pauses the real-time video stream and displays the selection (options) menu on the ST7735 color TFT screen, including two cart choice options:
- Add Cart
- Remove

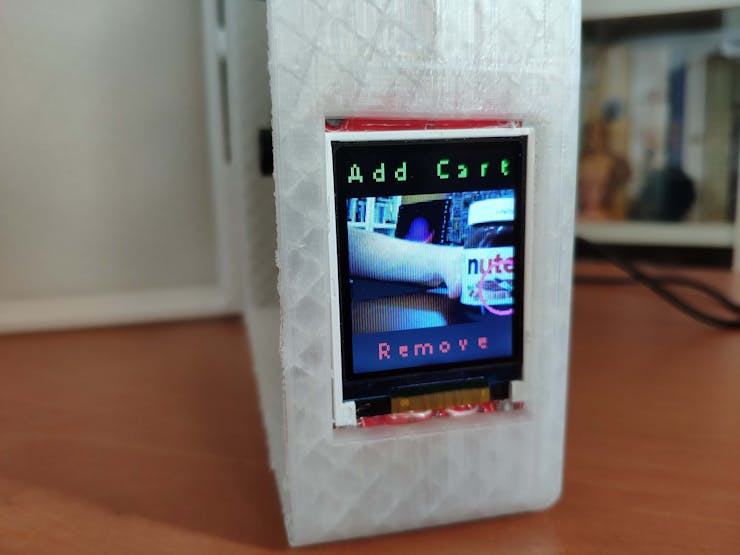
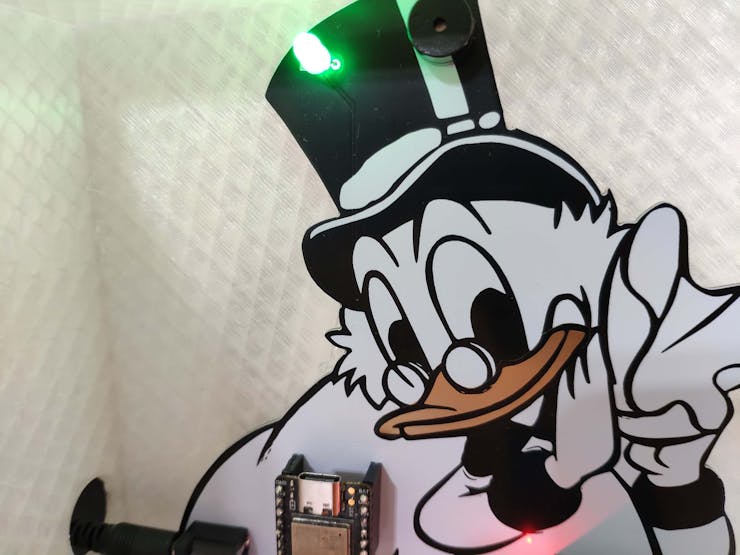
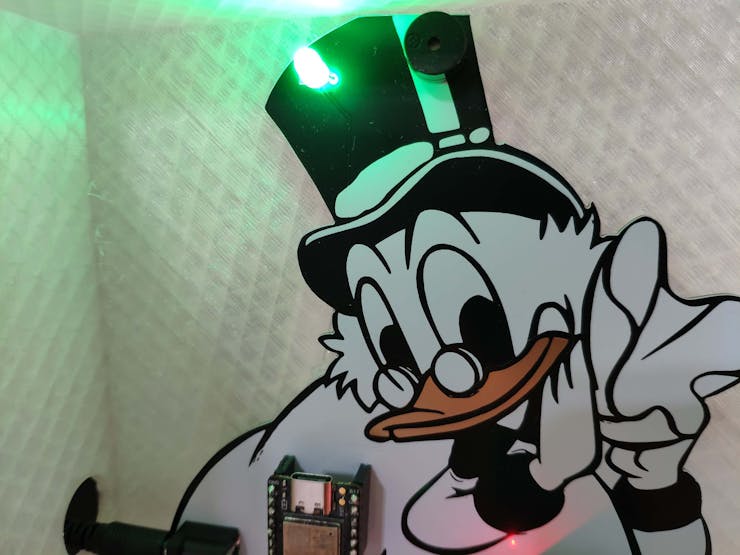
🛒🛍️📲 On the selection menu, if the joystick is moved up, the device changes the cart choice option to add, Informs the customer via the ST7735 TFT screen, and turns the built-in RGB LED on OpenMV Cam H7 to green.

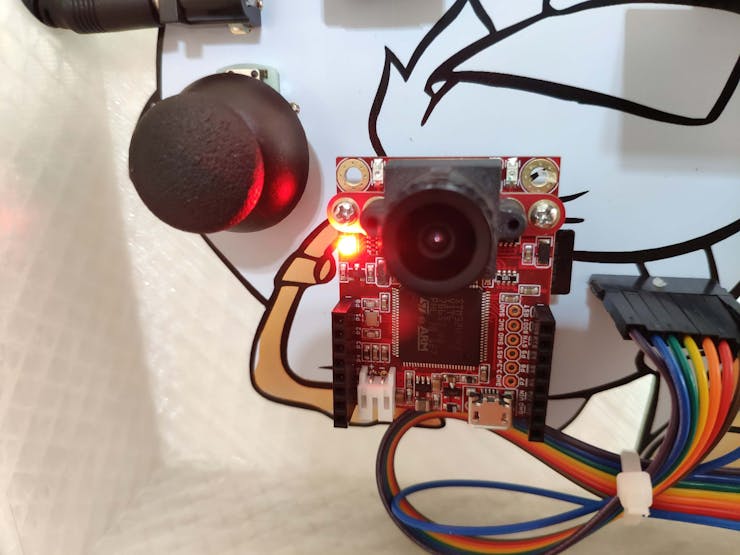
🛒🛍️📲 On the selection menu, if the joystick is moved down, the device changes the cart choice option to remove, Informs the customer via the ST7735 TFT screen, and turns the built-in RGB LED on OpenMV Cam H7 to red.
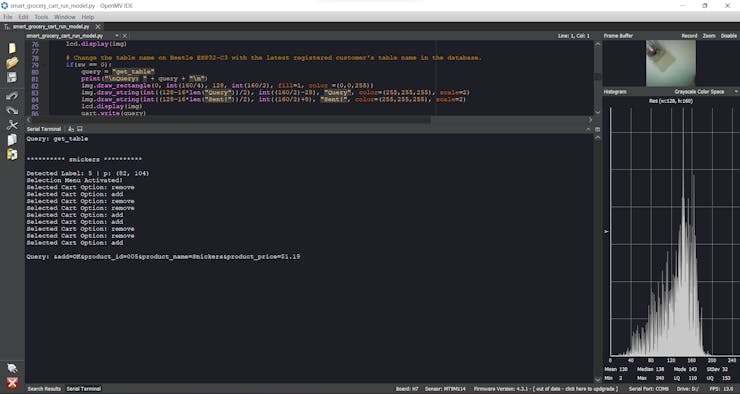
🛒🛍️📲 After selecting a cart choice, if the joystick button is pressed, OpenMV Cam H7 transfers the generated query string with the selected cart choice and the detected product's given details (ID, name, and price) to Beetle ESP32-C3 via serial communication.
🛒🛍️📲 If OpenMV Cam H7 transfers the query successfully, the device turns the built-in RGB LED to blue, notifies the customer via the ST7735 TFT screen, and closes the selection menu to resume the real-time video stream.

🛒🛍️📲 If Beetle ESP32-C3 receives the transferred data packet from OpenMV Cam H7 via serial communication successfully, the device turns the RGB LED to dark green and notifies the customer via the buzzer.
🛒🛍️📲 Depending on the received command, Beetle ESP32-C3 makes an HTTP GET request to the web application so as to add products to the database table, remove products from the database table, or obtain the latest registered customer's table name.
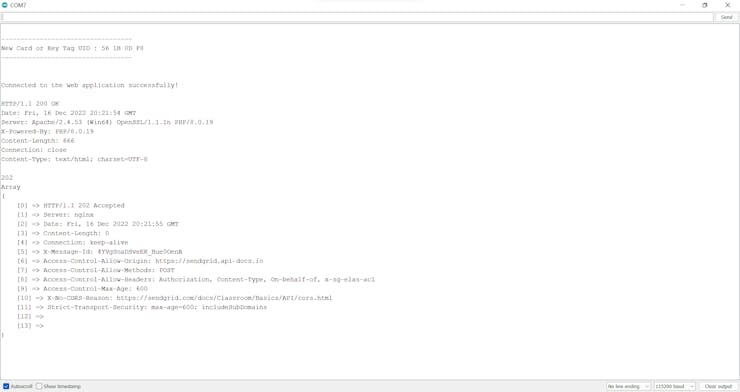
🛒🛍️📲 If Beetle ESP32-C3 connects to the web application successfully, the device turns the RGB LED to yellow.

🛒🛍️📲 If Beetle ESP32-C3 gets a response from the web application successfully, the device turns the RGB LED to green and prints the response on the Arduino IDE serial monitor.
🛒🛍️📲 On each recognized object (product), the device draws circles (centroids) with the assigned color — magenta.


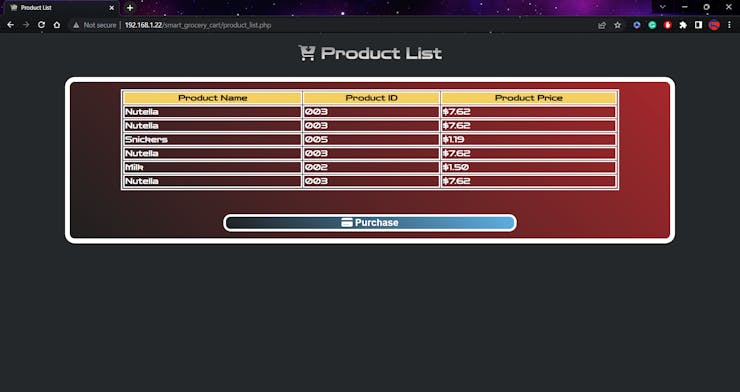
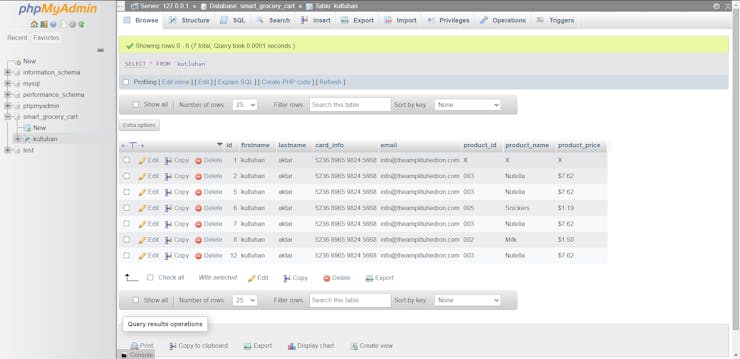
🛒🛍️📲 The web application adds or removes products to/from the customer's database table according to the HTTP GET requests made by Beetle ESP32-C3.
🛒🛍️📲 Then, the web application displays a concurrent shopping list of the products added to the grocery cart on the product list (payment) page — product_list.php — as explained in Step 4.

🛒🛍️📲 If Beetle ESP32-C3 detects the assigned RFID key tag of the grocery cart via the MFRC522 RFID reader, the device turns the RGB LED to magenta.

🛒🛍️📲 In this regard, the device determines the customer concluded shopping and is ready to leave the store. Therefore, Beetle ESP32-C3 makes an HTTP GET request to the web application so as to send an HTML email to the customer's registered email address, including the generated shopping list and the payment link.
🛒🛍️📲 Then, the web application sends the HTML email via SendGrid Email API to the customer's registered email address.

🛒🛍️📲 If Beetle ESP32-C3 throws an error, the device turns the RGB LED to red and prints the error details on the Arduino IDE serial monitor.

🛒🛍️📲 Furthermore, the device prints notifications and the generated query string on the OpenMV IDE serial monitor for debugging.
As far as my experiments go, the device recognizes different food retail products precisely, communicates with the web application faultlessly, and shows accurate circles around the detected objects :)
Videos and Conclusion
Further Discussions
By applying object detection models trained on numerous food retail product images in detecting products automatically while shopping, we can achieve to:
🛒🛍️📲 convert regular grocery carts into AI-assisted smart grocery carts,
🛒🛍️📲 make shoppers avoid tedious checkout lines and self-checkout stations,
🛒🛍️📲 improve the customer experience,
🛒🛍️📲 provide an automated product tracking and payment system,
🛒🛍️📲 reduce the total cost of integrating smart grocery carts for small businesses in the food retail industry,
🛒🛍️📲 provide an exceptional online shopping experience.