SCART VADER
1 Introduction
1.1 Motivation
Thanks to the emulators available nowadays I was able to make my own arcade cabinet. Although I employed genuine arcade joysticks and a vintage CRT display I didn’t get the same feeling that playing the original arcades. When playing the original, death was dramatic: if you "died" in the game and you wanted to continue playing you had to spend a valuable coin. Since emulators let you simulate the insertion of a coin just by pressing a key, in practical terms you have unlimited lives and the feeling is lost. To solve this I devised a joystick system with an integrated credit counter. The system disables the insert coin buttons unless credits are available and includes a little challenge that must be won in order to obtain them.
1.2 The challenge
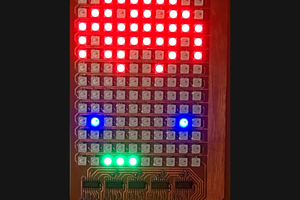
It is the Simon says electronic game created by Ralph Baer and Howard J. Morrison in 1978. The following description of the game has bee taken from wikipedia (https://en.wikipedia.org/wiki/Simon_%28game%29):
The device has four colored buttons, each producing a particular tone when it is pressed or activated by the device. A round in the game consists of the device lighting up one or more buttons in a random order, after which the player must reproduce that order by pressing the buttons. As the game progresses, the number of buttons to be pressed increases.
As in the original Simon says game there are several skill levels. The number of credits obtained when the game is won will depend on the selected skill level.
1.3 Features
- Includes four arcade joysticks using just an USB connector.
- No special drivers are needed.
- Each joystick has till twelve generic buttons and a backlighted insert coin button.
- The insert coin buttons are also employed in an integrated Simon says game in order to obtain credits.
- The insert coin buttons are disabled when there are no credits available.
2 Software configuration
When connecting the system to your computer it will recognize a set of joysticks. No special drivers should be needed. However, if the system is going to be used with arcade emulation software you will need to configure the emulator properly. First you will need to set the first four detected interfaces as the joysticks for the players 1, 2, 3 and 4. The fifth interface is used for interacting with emulators. From now on we will call it control interface. Although the operating system will detect the control interface as 12 buttons joystick, just the buttons in the ranges 1-6 and 9-12 are implemented. Those in the range 9-12 are intended to be used for coin-op game emulators and should be configured as the insert coin button for the player 1, 2, 3 and 4 respectively. The six remaining buttons of the control interface can be configured for tasks such as pausing the emulation, resetting the emulated system, etc.
3 Usage with coin-op game emulators
The joystick set has a counter of credits to be used in coin-op game emulators. The number of available credits is shown in the liquid crystal display. If there are available credits and a coin-op game emulator is running, a player can simulate a coin insertion by following the following instructions:
- If a Simon Says game is running (see bellow), wait till it finishes.
- Make sure a coin-op game emulator is running. Otherwise you will lose a credit.
- Make sure the emulated game support your player number. Otherwise you will lose a credit.
- Push the insert coin button of your player.
After this, the credit counter will decrease. In order to increase it you will have to play the Simon Says game embedded in the joystick set by following these steps:
- Push the Simon Says start button corresponding to the desired difficult level.
- The system will generate sequences of lights and sounds. Reproduce those sequences by pressing the colored insert coin buttons till the liquid crystal display flashes.
The maximum length of the sequence and the number of credits obtained when winning a Simon Says game depend on the selected...
Read more »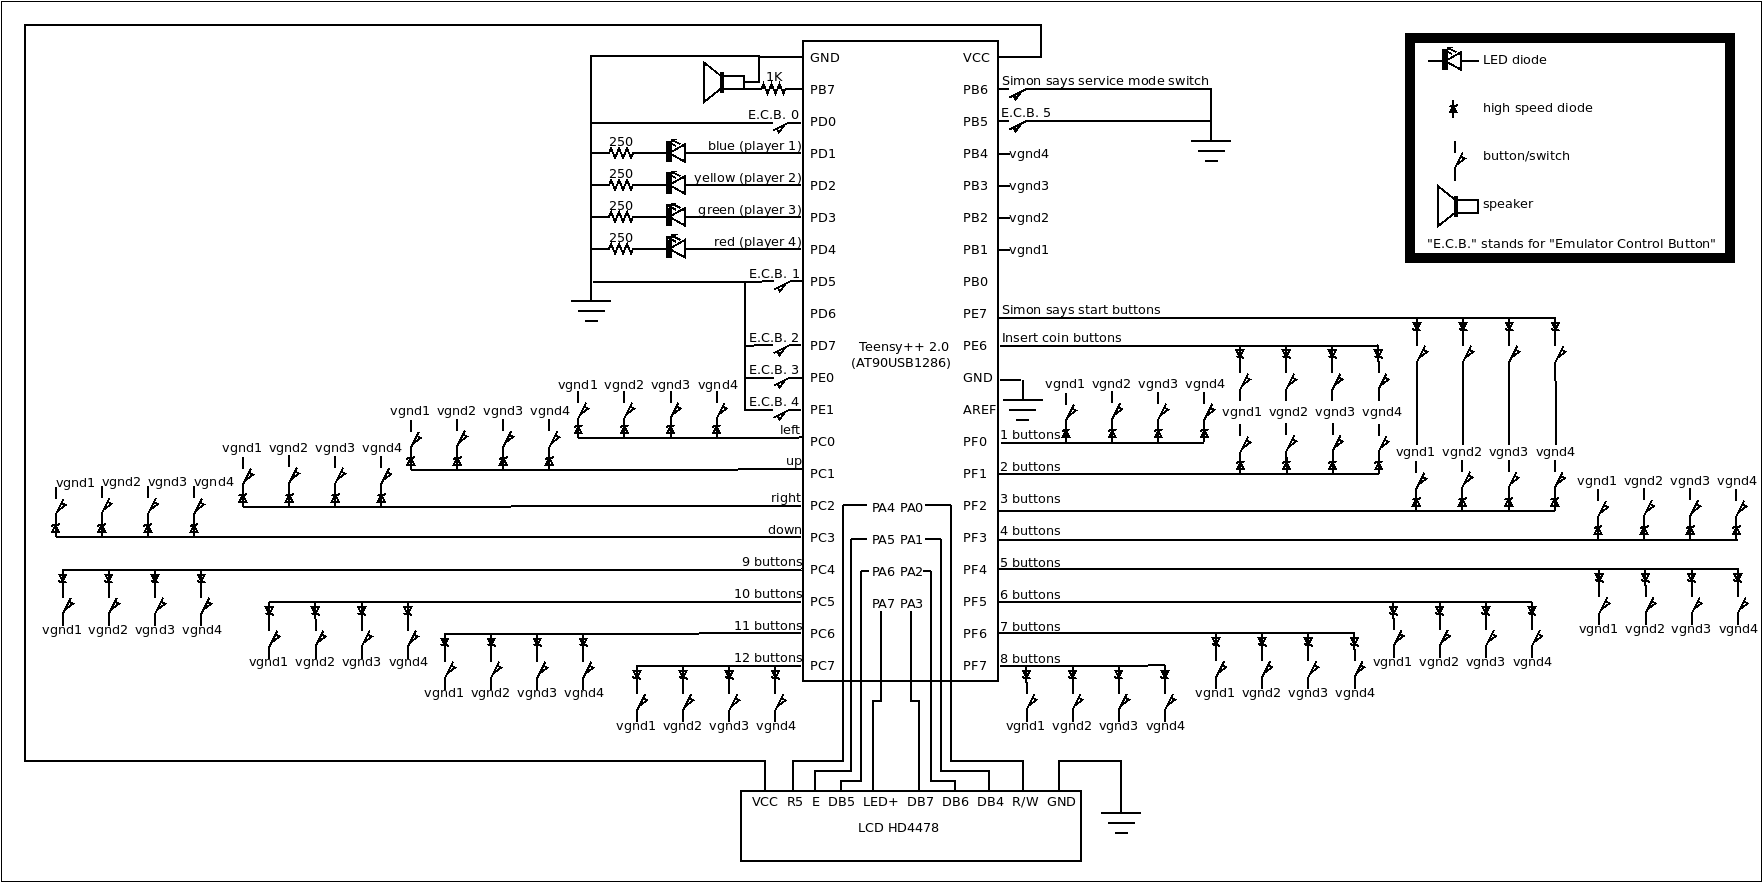
 deʃhipu
 Michele Perla