 Neil Lambeth
Sticking to the components that I already had, I set about designing a PCB using KiCad.
The micro controller I use here is the ESP32 based M5 Stamp Pico from M5 Stack. I like using this micro as it smaller than most of the other boards out there, so it will fit nicely in a Pi Zero sized footprint. Secondly, it has built in wireless programming using M5 Stack's UiFlow software. This is great for programming robots as you don't have to keep plugging them into your computer to upload new code. It also has just enough IO pins to do what I want it to do.
A slight drawback is that it doesn’t have a usb socket for programming (if you don't want to use UiFlow) – you'll need a separate usb-serial cable. Although this is not a deal breaker if it keeps the overall cost down. Unfortunately the Stamp Pico is quite pricey when it comes to ESP32 boards, It costs about $6.00, so I'll look into other options.
Here's a picture of the first iteration:
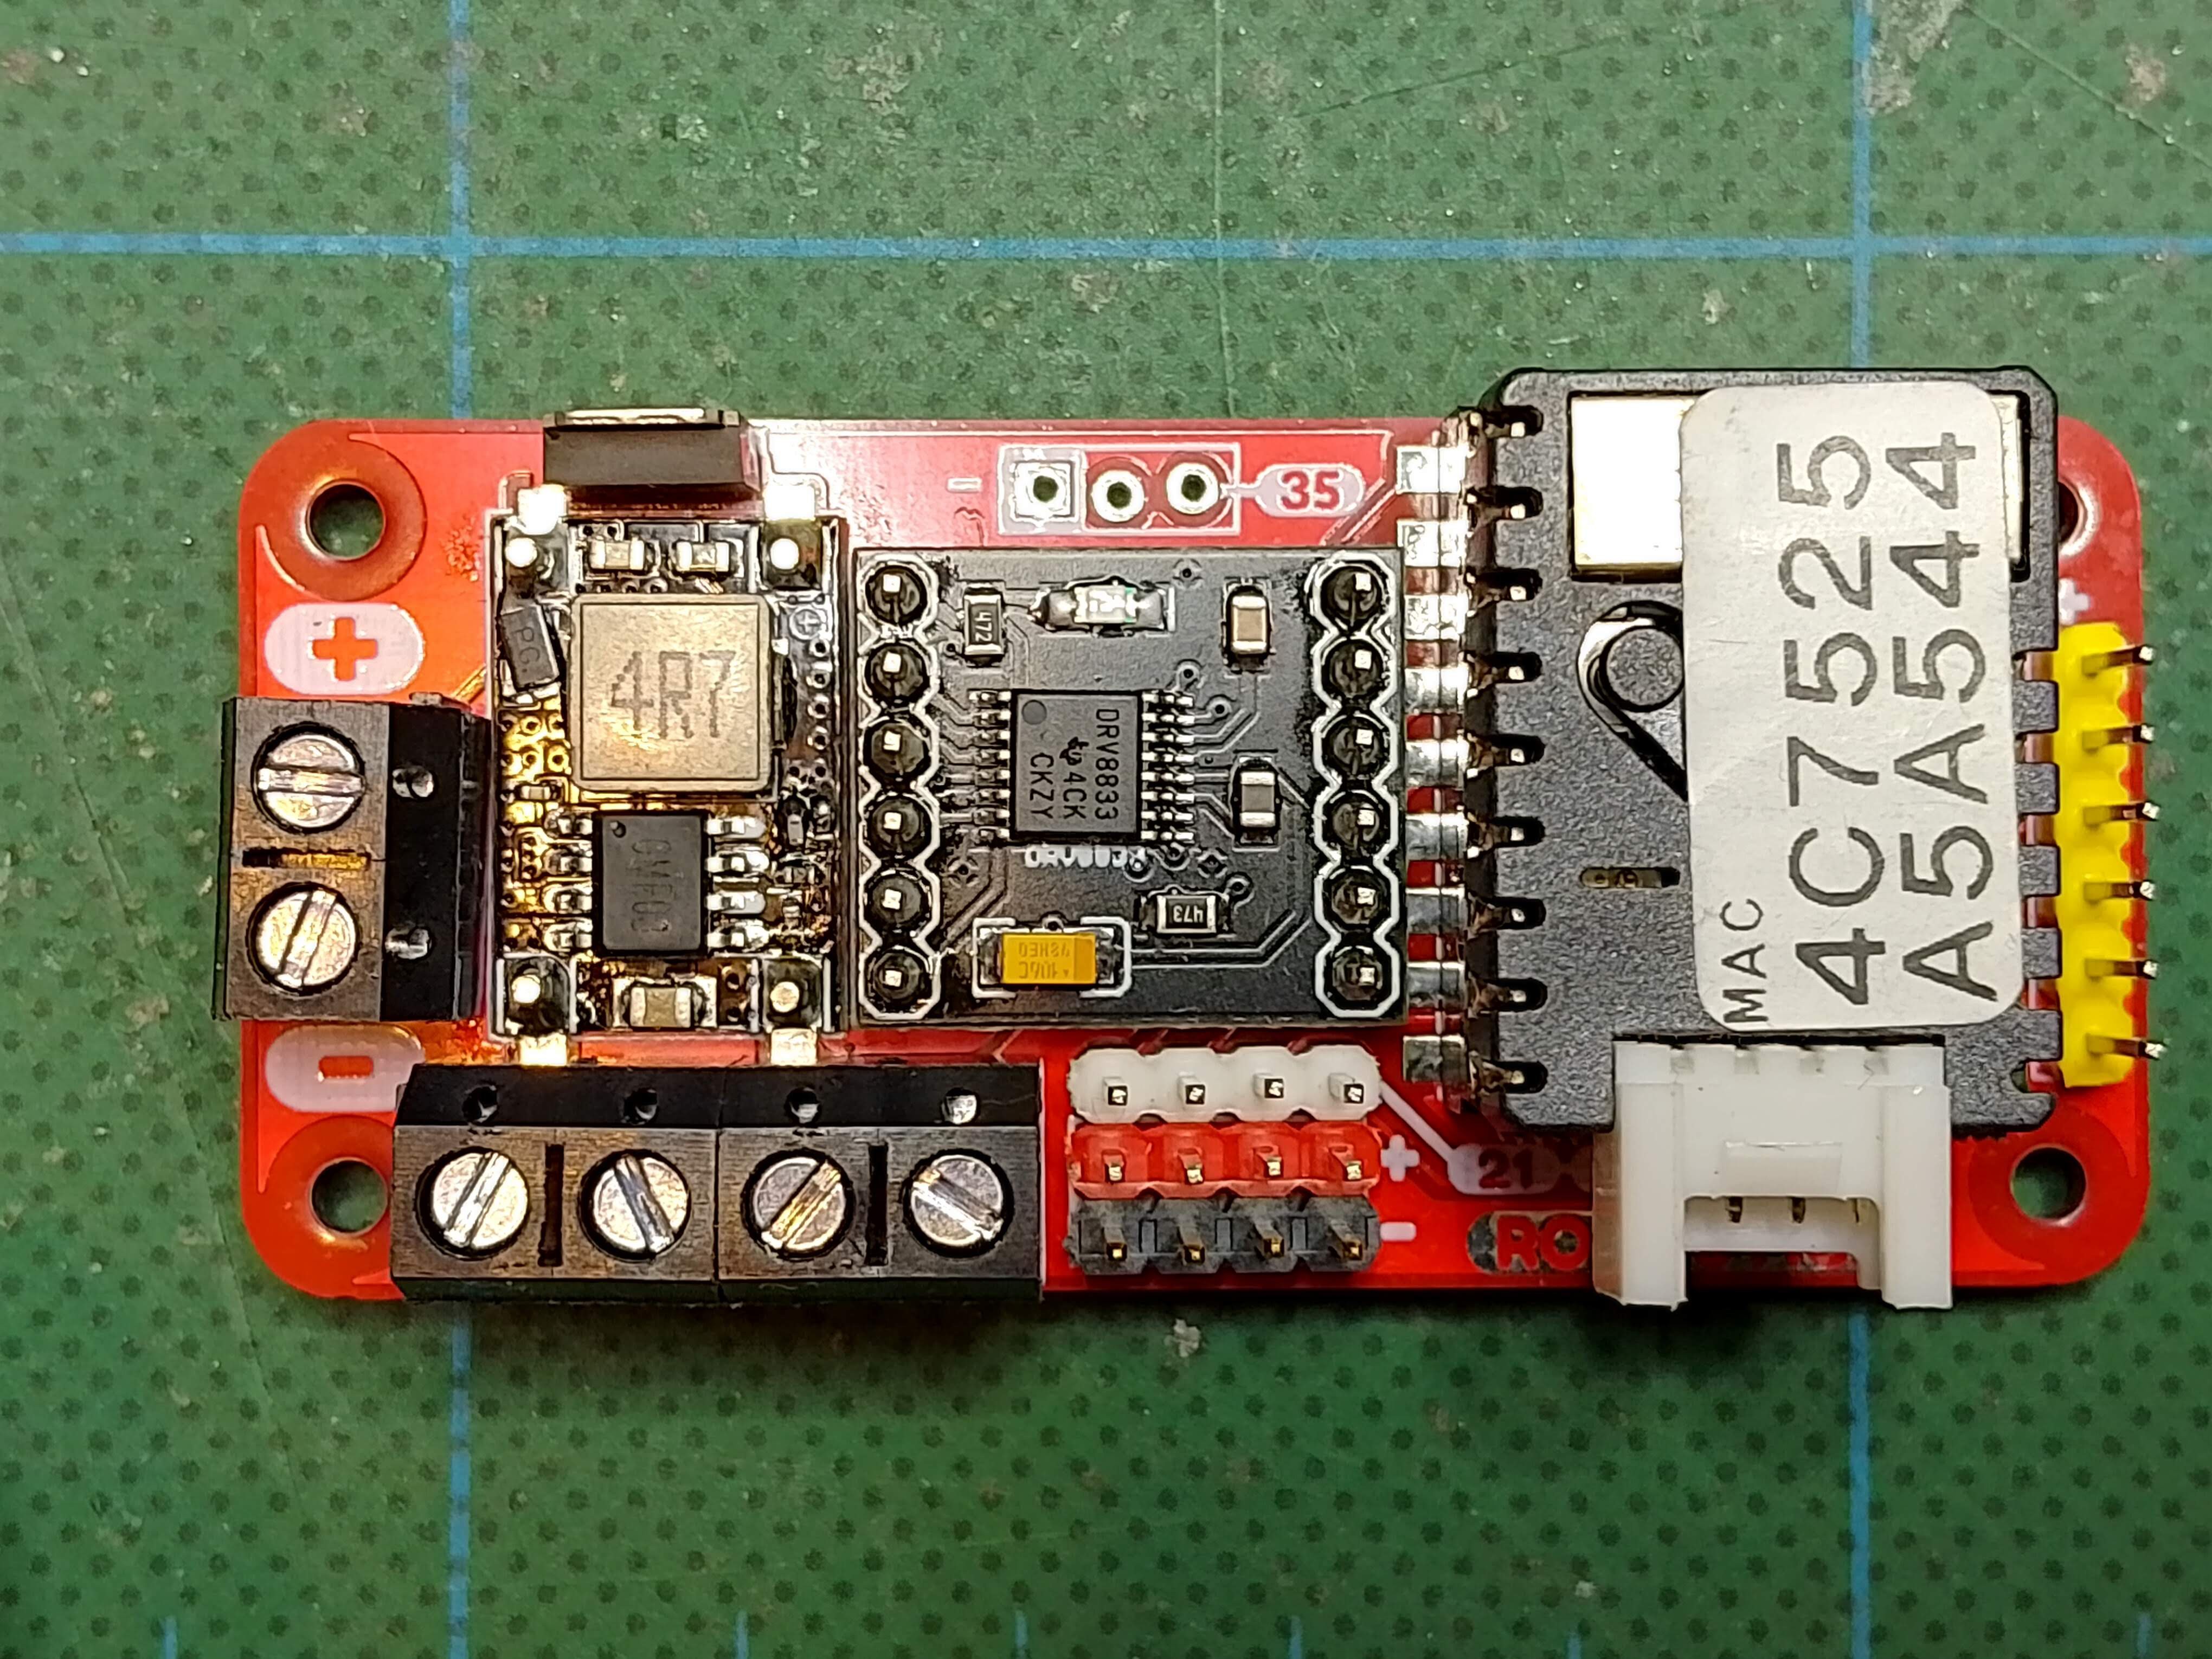
I'm pleased with how this came out as it met most of my requirements. There is a MOSFET above the DC/DC converter for reverse polarity protection. It's got screw terminals for the battery and motor connectors, and header pins for 4 servos or sensors. There is a 6-pin programming header on the right hand side of the board, for plugging in a USB to serial converter. The M5 Stamp module also has a 4 pin Grove connector – for 2 additional IO pins or I2C, so it's easy to add more devices.
Discussions
Become a Hackaday.io Member
Create an account to leave a comment. Already have an account? Log In.