 milosrasic98
1. Introduction
This project is a work in progress, but I think you can understand my idea from the pitch. The goal is to make the modules as user friendly as possible so that there is no (or minimal) learning curve for the teachers and students that want to use them. I loved physics when I was growing up, but it mostly consisted of textbooks and solving all kind of different problems, there was little no experimentation involved, and looking back at it now, it would have been so fun to do and also would get so many more kids into physics because they wouldn’t see it as just a bunch of equations but like something closer to them something they can play with.
2. Idea
As I’ve described above, my idea for this project is to develop small easy to use modules that would make that whole process of experimentation fun and engaging. Since these are elementary/high school projects we don’t need any crazy accuracy or anything like that, the goal of these experiments is to demonstrate a phenomenon or do some basic measurements. All lab equipment for experimentation is essentially just measuring a certain physical value, whether that’s time, brightness, voltage, force, etc. Some of the module ideas that I had until now are:
- Laser gates module
- For measuring time and speed, they can be set up to measure anything from lap times, to free falling objects, to objects on a slanted edge and so on
- IMU module
- A versatile module capable of measuring rotation, acceleration (even speed and position to some degree of accuracy), would be great for things like demonstrating the centrifugal force, taping this module to a ball and throwing it to see the data of how all of the speeds change, etc.
- Load cell module
- A module designed for measuring force, something that we all had to calculate in physics classes. Multiple of these modules could be used in a balance beam calculation to demonstrate load distribution, or adding pulleys to these load cells, and showing how the forces are distributed in that kind of system.
3. Laser Gates
While I haven’t built the module itself yet, here is a project that I did which represents what I’m talking about rather well, as well as the experiment that goes with it. I’ll begin by explaining the physics problem first.
The Problem
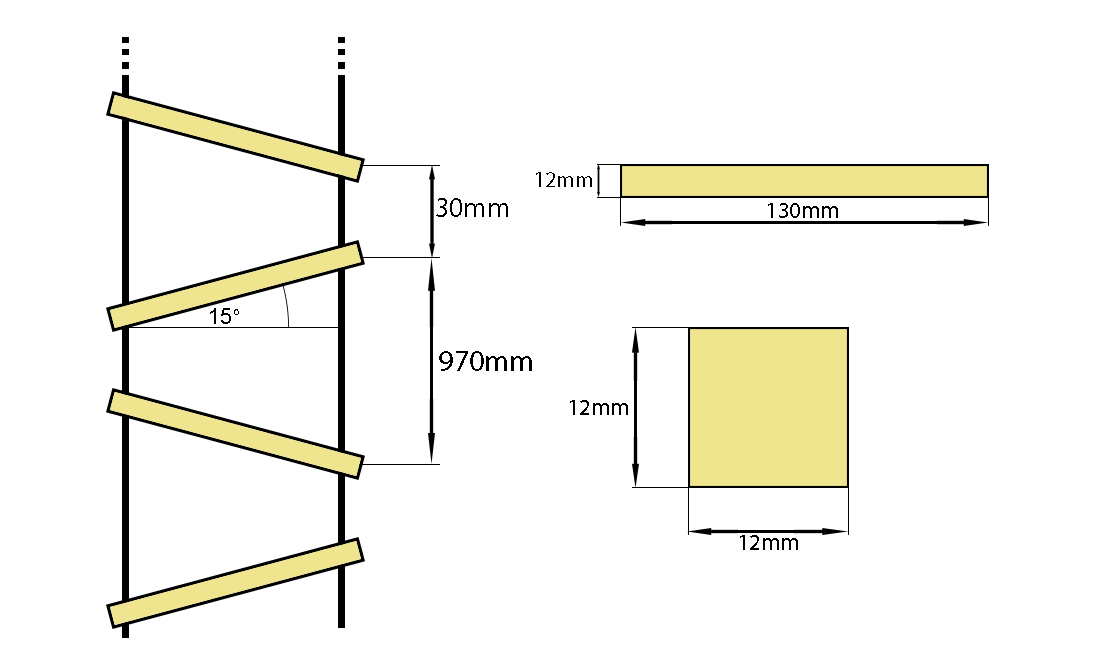
You have a chain made out of wooden bars with all of them attached at an angle as showed in the picture below. If you imagine 2 identical chains being dropped from the same height, but with one falling on a raised surface, which chain will reach the raised surface first, or to put it differently, on which chain will the last bar reach the raised surface first?
The Solution
The problem is rather interesting, and the answer is the chain that is falling on the raised surface. As the chains start falling down towards the raised surface, they will both fall at the same rate but as one of the chains hits the raised surface, because of the linkage, the bar will give a small tug to the chain as they come in contact with the surface, and in that way slightly accelerate the whole chain.
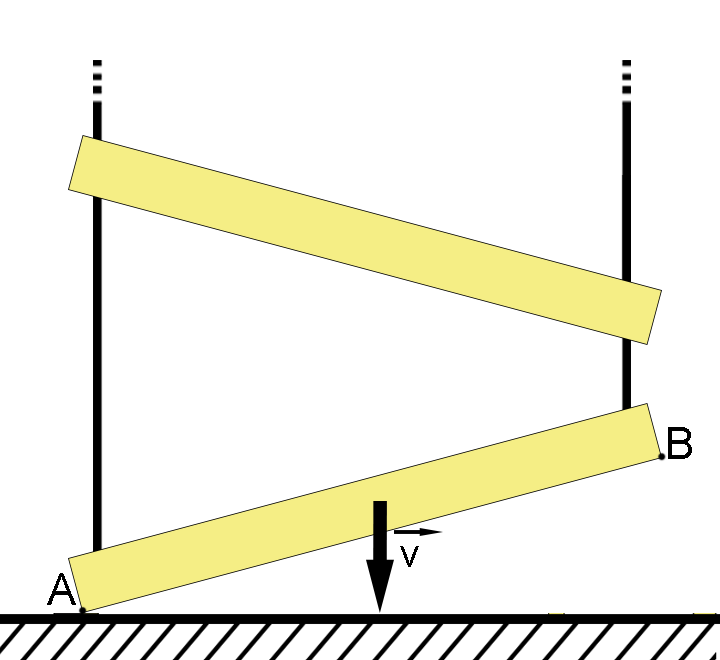
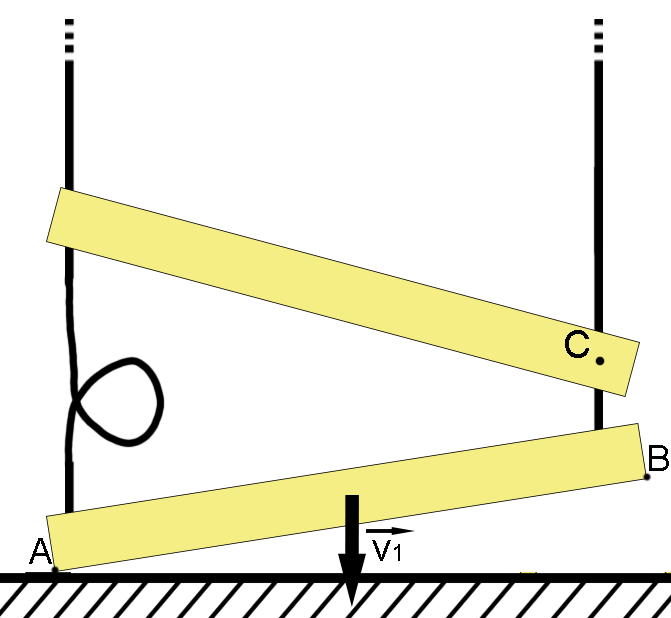
While that is theoretical explanation which may or may not be true, we have to set up an experiment to actually prove this. To do this, I relied on my vast experience of watching a lot of Mythbusters as a kid and of course tried filming it with a camera with a background that had lines at 50mm as a reference. To get the best effect I can, I added a small LED on the top of the last bar and used a sports cam which could at that time film at an astonishing 120 frames per second. I actually managed to prove the phenomenon as you can see from the picture below.

But that wasn’t enough for what I had to do, because besides proving the phenomenon, I also had to determine how parameters such as the surface, bar length, angle, etc, affect the end result. And this method wasn’t precise enough. To get actual results I could compare, I made what I wish to make now into the first module, a pair of laser gates. Technically there were 4 laser gates, 2 per the ladder I was dropping. As the ladders were falling down, the bars would cut the laser light which I could detect using an Arduino and get the time at which that occurred. As soon as I would detect 10 readings (number of bars) I would then print them all out on the serial monitor and analyze them further.
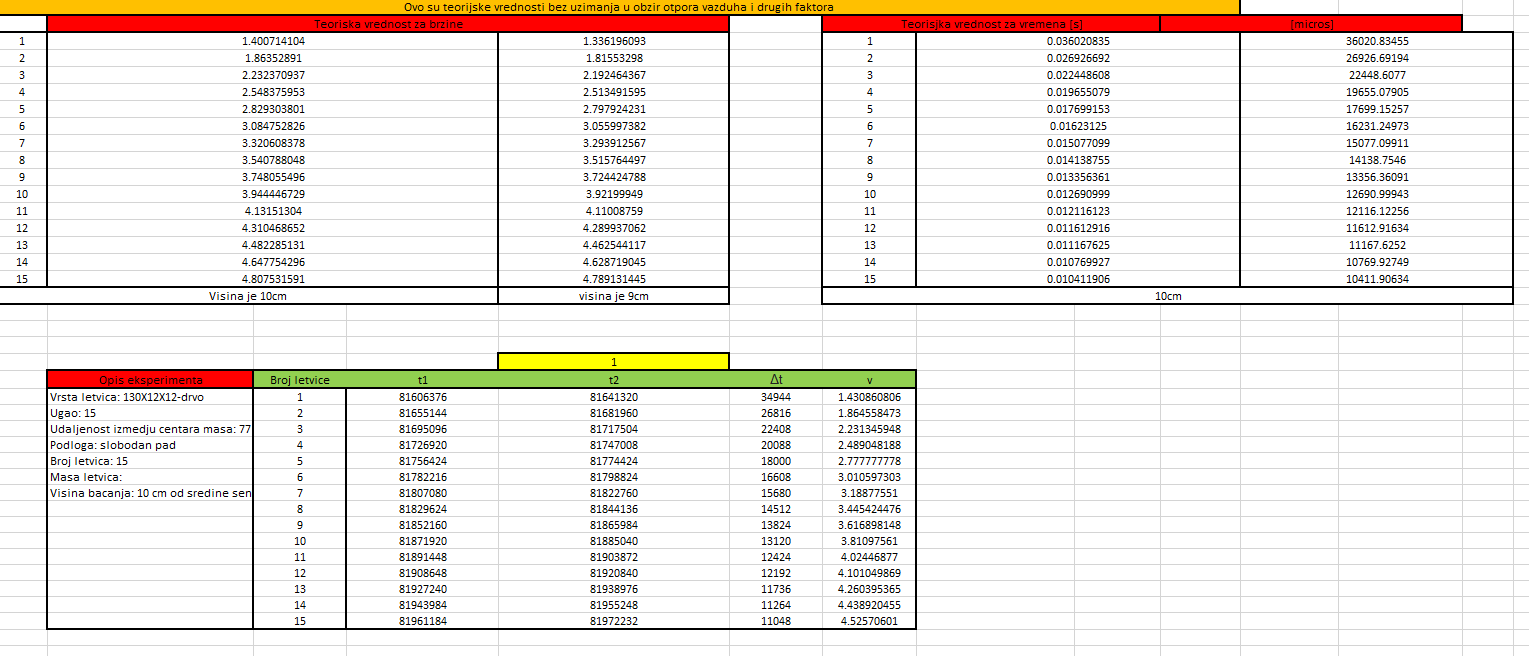
On the picture above you can see some of the recorded data that I imported into Excel and here are the Graphs both for time and speed from which we can see the phenomenon.
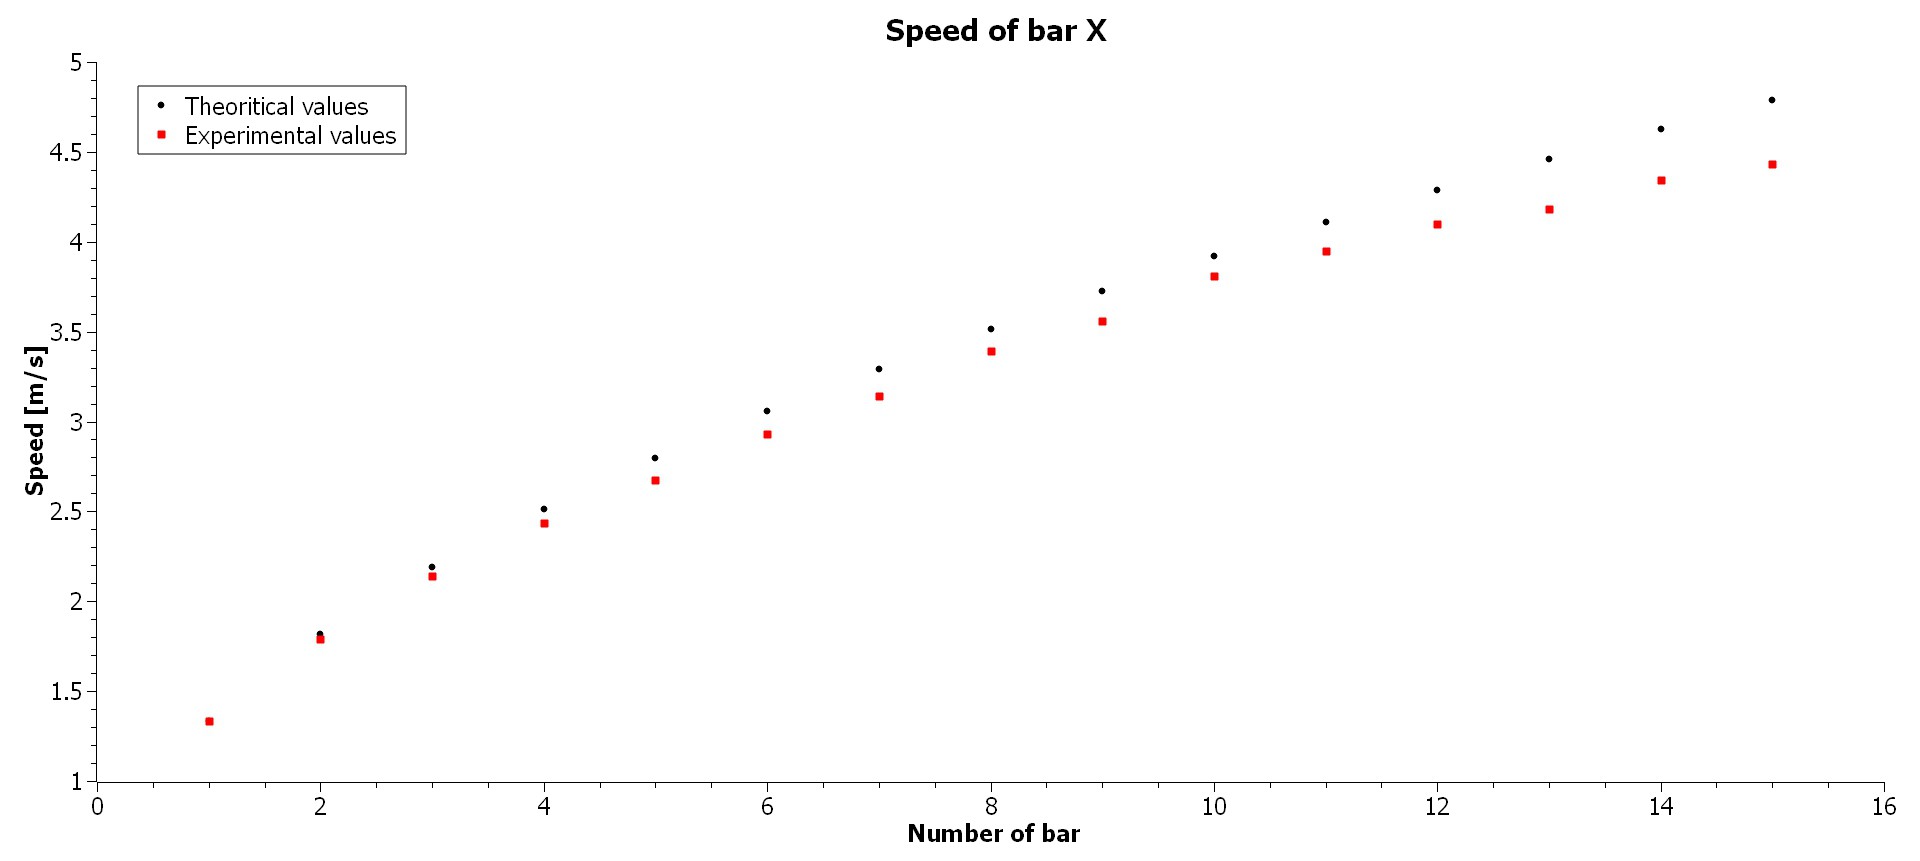


As the chain keeps falling down, you can see the trend of the chain that is falling on the raised surface going faster and faster, or if you look at the time graph, the times needed to cross between the laser gets are shorter for the chain that falls on the raised surface compared to the free falling one. Here a few videos of the tests.
4. Summary
While the results are from perfect the simple setup worked, and that’s with only using an Arduino Uno and wooden blocks which I glued in and screwed myself, no 3D printing or anything similar, the setup actually worked, I managed to prove the phenomenon with it and even test between different parameters. This is what I did back in high school and I was so thrilled to be able to prove a theoretical hypothesis through an experiment. My goal with this project is to empower kids to try and play with science through experimentation because I feel there’s a real need for that in school since most of the things done in school are purely theoretical. A lot of kids don’t like things like physics because to them physics is just more math, having kids in class work on their own experiments would push them to be more creative, push them to actually connect the hundreds of equations that they’ve written in notebooks to the real world to show them it’s not just some random math, that it’s actually connected to the world around them, through something that most kids will see as playing and having fun. My goal is to make these modules completely open source so anyone can make them as well as make them as low cost as possible and easy to use.
Thanks for reading about my project idea, hope you like it!
Milos