 Guillermo Perez Guillen
In this post I will show you the basic configuration of the Arduino Pro Nicla Vision and Arduino MKR WAN 1310 programming boards.
Nicla Vision Setup
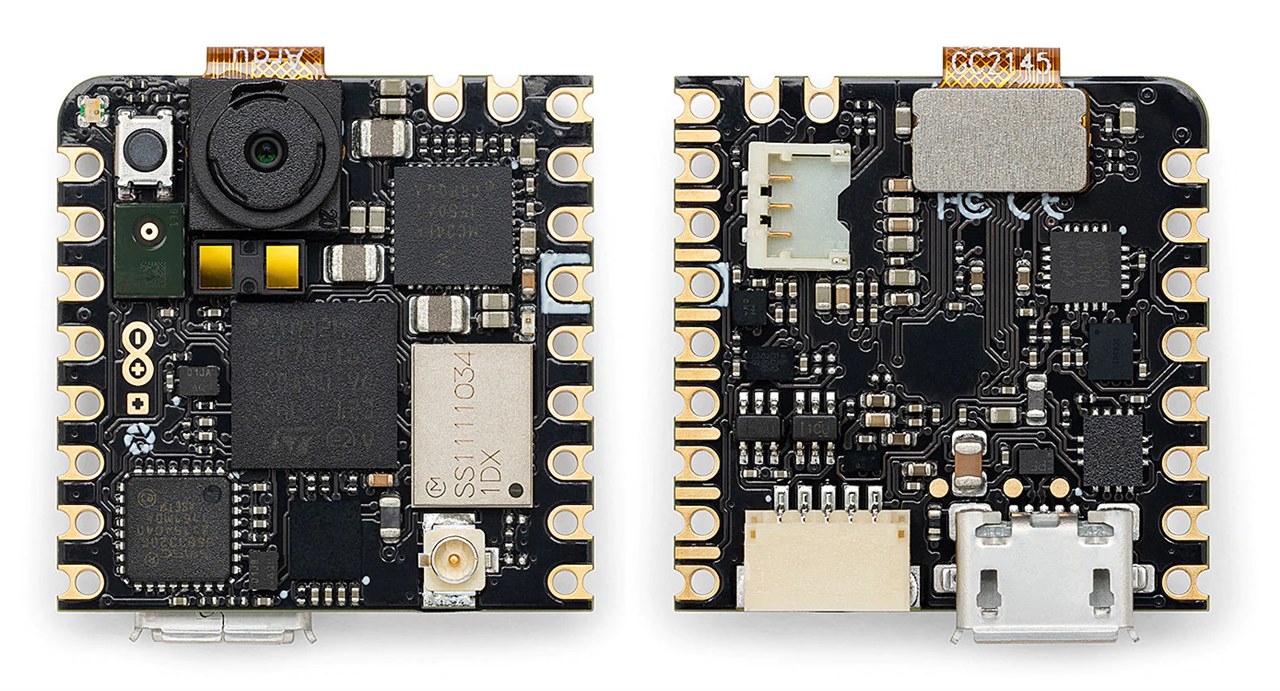
The Arduino Nicla Vision board is a ready-to-use, standalone camera for analyzing and processing images on the edge. Thanks to its 2MP color camera, smart 6-axis motion sensor, integrated microphone and distance sensor, it is suitable for asset tracking, object recognition and predictive maintenance.
In my case I configure my board with Arduino IDE version 1.8; wow we need to navigate to Tools > Board > Board Manager.

This will open up a new window, with all available cores. Find the one named Arduino Mbed OS Nicla Boards and install it.

When it is finished, it should say "INSTALLED" under the title. Exit the board manager, and go to Tools > Board > Arduino Mbed OS Nicla Boards. Here you can see all the Mbed boards listed, where you can select the board you are using. You have now successfully installed the core.

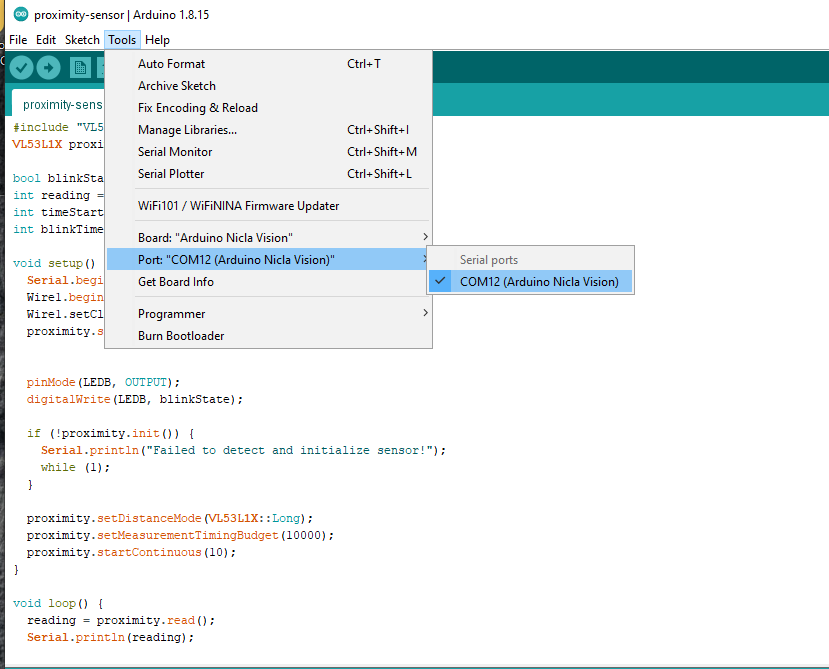
On Nicla Vision you can test an example code. So when you have selected the USB connection port of your board, please use the File > Examples > Nicla_Sense_System > Blink_Nicla
In my case, I successfully tested the Proximity Detection with Arduino Nicla Vision example. Below I show you the code:
#include "VL53L1X.h"
VL53L1X proximity;

bool blinkState = false;
int reading = 0;
int timeStart = 0;
int blinkTime = 2000;

void setup() {
  Serial.begin(115200);
  Wire1.begin();
  Wire1.setClock(400000); // use 400 kHz I2C
  proximity.setBus(&Wire1);


  pinMode(LEDB, OUTPUT);
  digitalWrite(LEDB, blinkState);

  if (!proximity.init()) {
    Serial.println("Failed to detect and initialize sensor!");
    while (1);
  }

  proximity.setDistanceMode(VL53L1X::Long);
  proximity.setMeasurementTimingBudget(10000);
  proximity.startContinuous(10);
}

void loop() {
  reading = proximity.read();
  Serial.println(reading);

  if (millis() - timeStart >= reading) {
    digitalWrite(LEDB, blinkState);
    timeStart = millis();

    blinkState = !blinkState;
  }
}
Here the VL53L1X library for Arduino
In my case the connection was via USB 2.0 through the COM12 port
You can see the demonstration in the video below:
Using the Nicla Vision Camera
Finally, we will test the camera of the Nicla Vision board. First we download the OpenMV IDE application here: https://openmv.io/pages/download

This software has many resources to program with python and examples like snapshot, machine learning, image processing, etc. In my case I took a snapshot. which I show below.

Nicla vision module is working well. If you are looking for more details of what I just did, then here is a link: https://docs.arduino.cc/tutorials/nicla-vision/getting-started
Arduino MKR WAN 1310 Setup
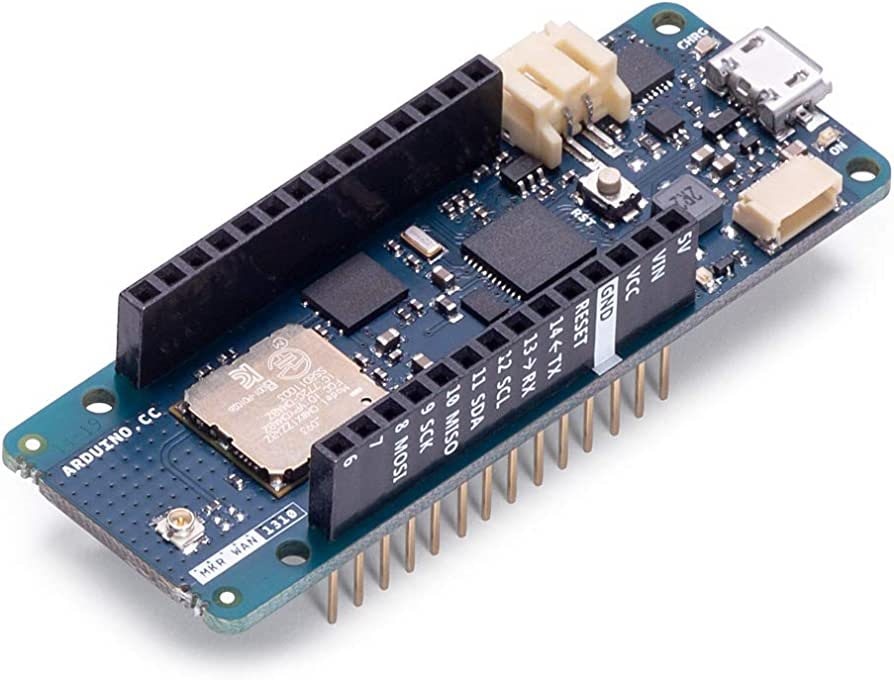
The Arduino MKR WAN 1310 provides a practical and cost effective solution to add LoRa connectivity to projects requiring low power. This open source board can connect to the Arduino IoT Cloud, your own LoRa network using the Arduino LoRa PRO Gateway, existing LoRaWAN® infrastructure like The Things Network, or even other boards using the direct connectivity mode.
Here we need to navigate to Tools > Board > Board Manager.
This will open up a new window, with all available cores. Type in "samd" in the search field, and install the Arduino SAMD Boards (32-bits ARM Cortex-M0+) core.

In my case update the library to version 1.8.13
When it is finished, it should say "INSTALLED" under the title.
Exit the board manager, and go to Tools > Board > Arduino SAMD Boards (32-bits ARM Cortex-M0+). Here you can see all the SAMD boards listed, where you can select the MKR board you are using. You have now successfully installed the core.

When you have selected the USB connection port of your board, you are now ready to start using your board! The easiest way to check that everything is working, is to upload just a simple blink example to your board. This is done by navigating to File > Examples > 01.Basics > Blink.
Discussions
Become a Hackaday.io Member
Create an account to leave a comment. Already have an account? Log In.