Close
0%
0%

Solar Powered LoRaWAN GPS tracker + phone charger

An environmental friendly visor using solar energy to charge handheld devices and supports GPS tracking/SOS through Helium LoraWAN network.

Public Chat
Similar projects worth following
The Solar Powered Visor uses the RAK 3172 LoraWAN module and PA1616D GPS Module to provide GPS tracking through LoRAWAN/Helium network. It also offers an USB-C port for convenient charging functionality for a wide range of devices, including AirPods, iPhones, and Android smartphones. Solar energy is the main power source while a 1000mAH rechargeable Lithium-ion battery is used for backup when there is no solar.

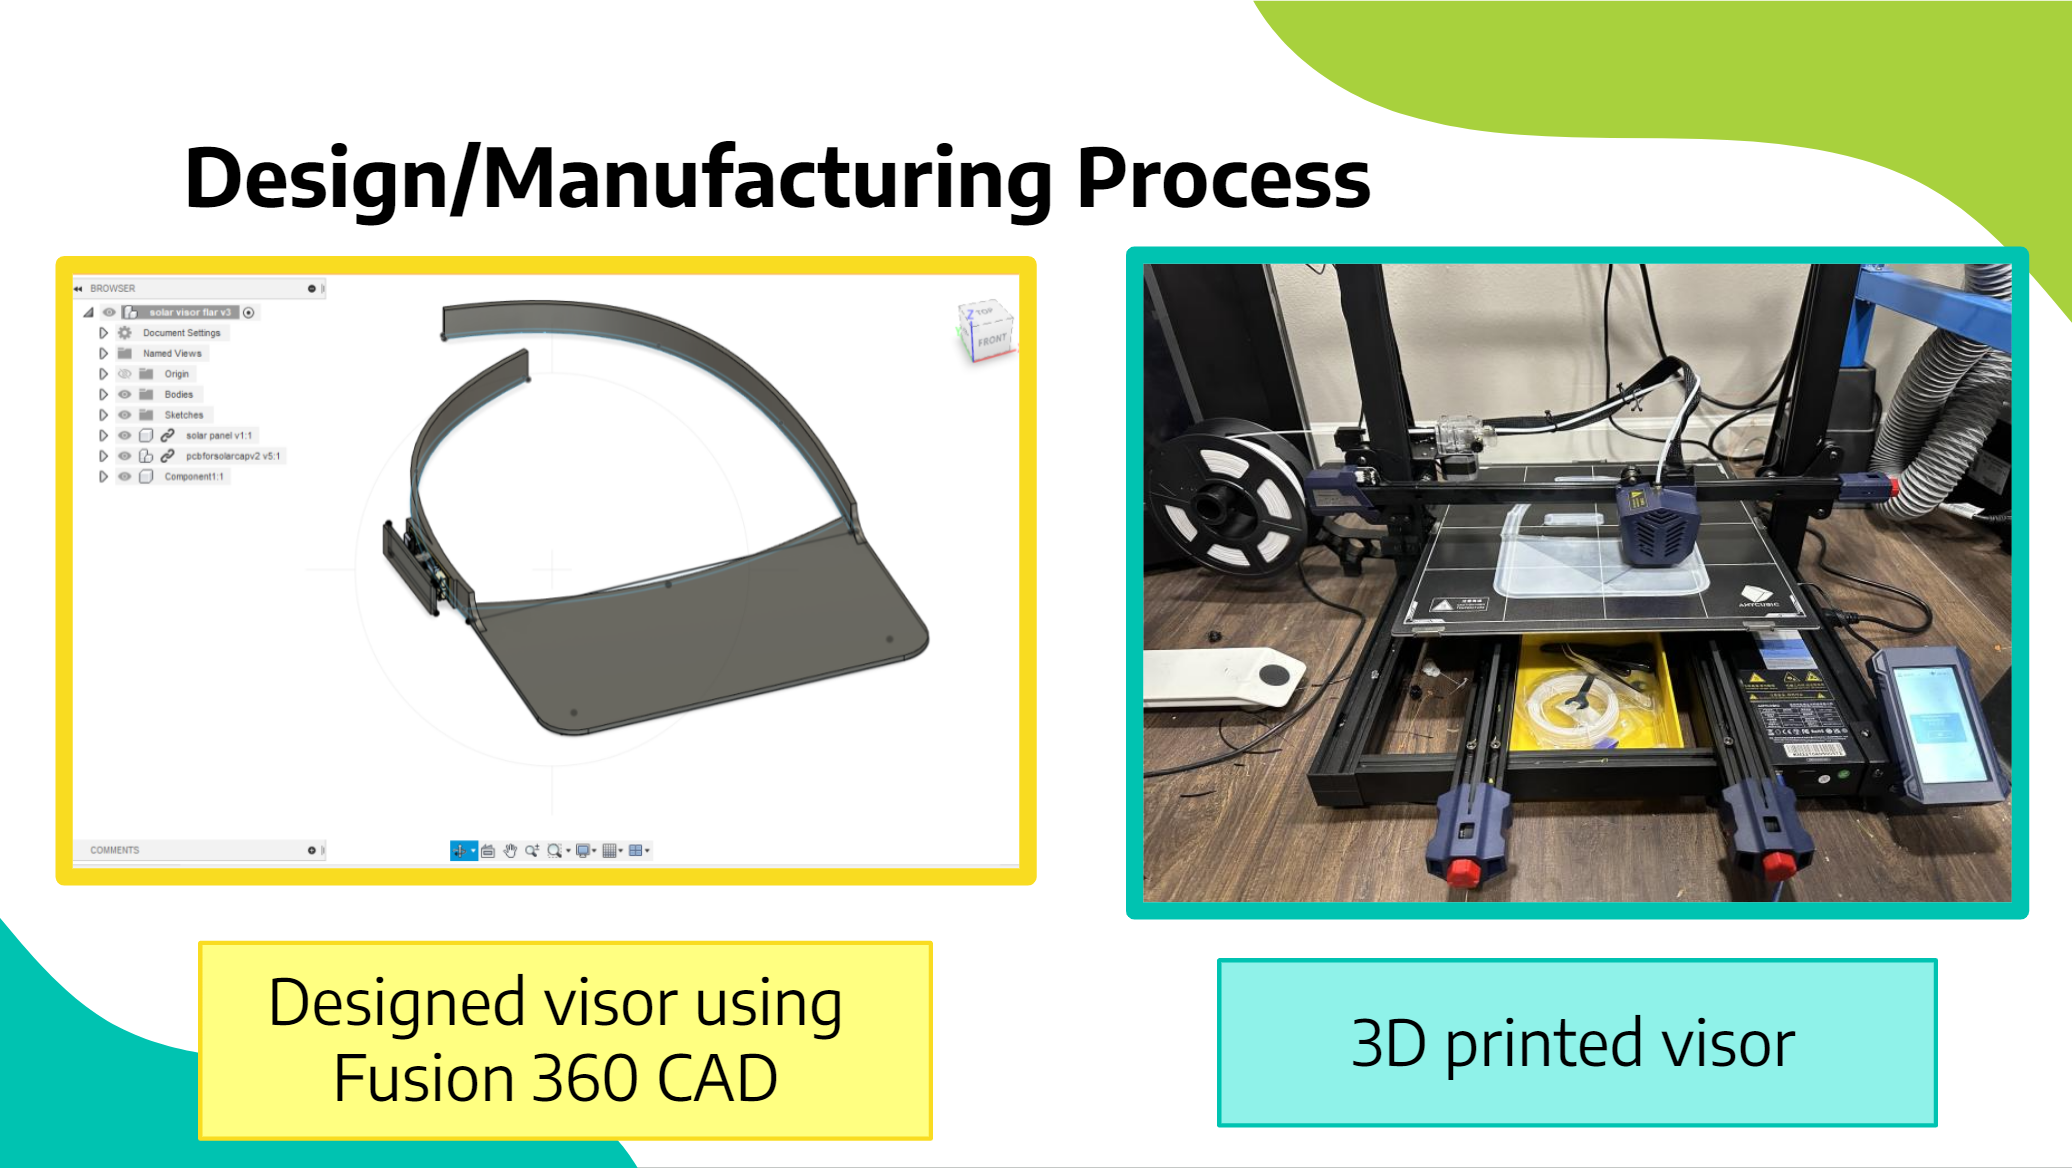
Our visor integrates revolutionary technologies such as LoRaWAN, Helium network, datacake integration to provide GPS tracking and phone charging using Solar power. It was developed using Fusion 360. All the required 3D and electronics design files are posted here for you to build it following the build instructions. 

We were inspired to do this project after a hike we did few months back. We lost our way, and our phones were starting to run out charge. 

With 58 million of the US population enjoying hiking the risk of an accident while your phone is out of charge could be fatal. The very apps that hikers use to navigate, are the apps that drain the most battery due to the need to connect to distant cell towers. 

We went through multiple prototypes over the last one year to get here. 

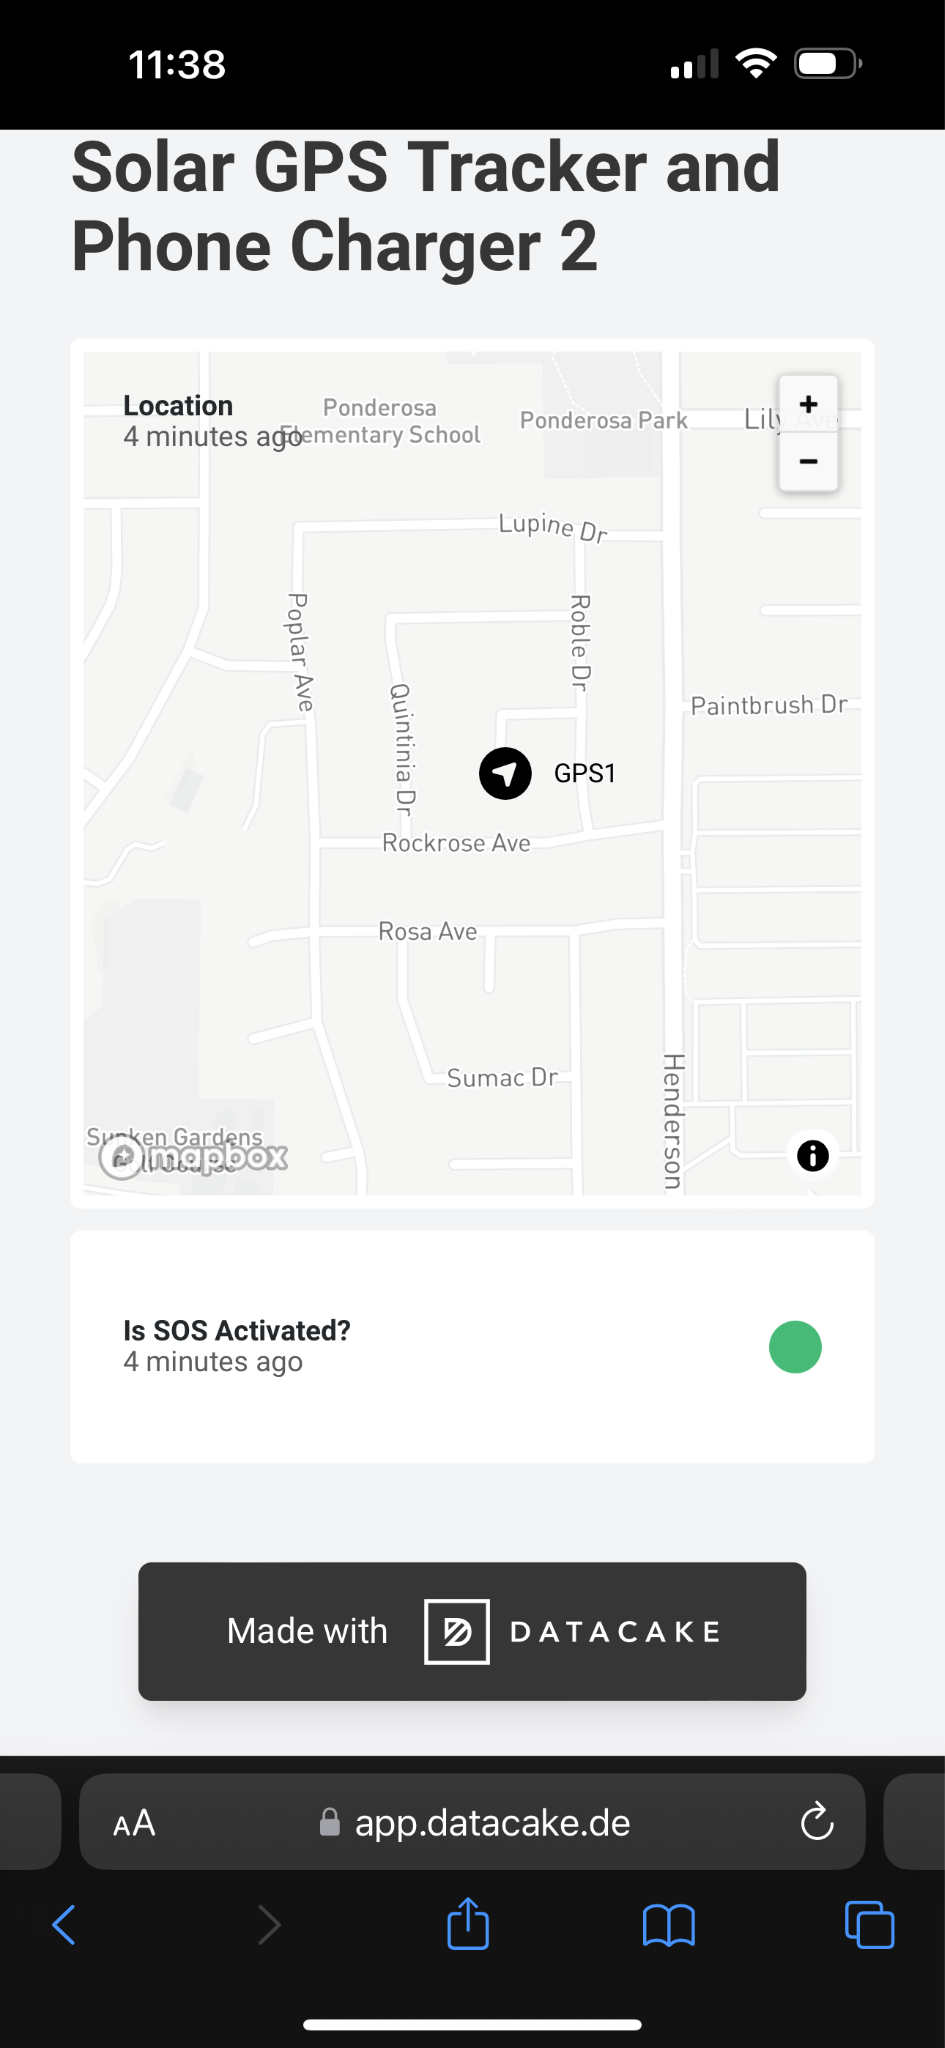
The technologies we used in this project include LoRaWAN, which is a low-power, long-range wireless communication protocol designed for Internet of Things (IoT) devices, allowing devices to communicate with Internet-connected applications over large distances with minimal power consumption. We used the Helium network for LoRaWAN. Helium is a revoutionary network powered by gateways installed by milions of people around the world as a way to crypto mine the Helium cryptocurrently. We also included a GPS tracker chip + SOS button, which allow hikers to notify people of their location in case of an emergency. We also used datacake, which is a platform for developing IoT applications. It provides dashboards that can be customized to present data from IoT devices. When the Visor SOS button is pressed, the RAK3172 module in our visor sends the location using Helium network. 

In summary, here are the technologies used:

1. LoRaWAN: Long Range Wide Area Network. It is a new wireless standard for low power IoT devices 

2. Helium: Worldwide network of 1M LoRaWAN gateways that provide connectivity in urban and remote areas

3. GPS: Global Positioning System is a satellite based navigation used for accurate positioning 

4. DataCake: website platform that provides ability to create dashboards to show data from IoT devices

LoRaWan_OTAA.ino

Arduino IDE project source code

ino - 5.66 kB - 06/29/2023 at 22:00

Download

visorDesignAndPCBProfile.f3z

Visor 3D design in Fusion 360

f3z - 9.31 MB - 06/28/2023 at 21:17

Download

bill of materials

Components used in the PCB

bill of materials - 30.08 kB - 06/28/2023 at 20:59

Download

PCBSchematic v50.f3z

Schematic and PCB layout

f3z - 9.77 MB - 06/28/2023 at 20:58

Download

View all 18 components

  • More Improvements

    Superpowered Jalapenos06/30/2023 at 21:07 0 comments

    Some improvements for our project are:

    - Applying for FCC certification and CE certification 

    - Buying components in bulk

    - Identify manufacturing facilities 

    - Labor+Shipping cost

    - More Aesthetic design

    - Waterproof

    - More comfortable to wear

  • Fourth VIsor + Fourth PCB Iteration

    Superpowered Jalapenos06/29/2023 at 23:44 0 comments

    For our fourth and final design, we added a lot of new features like GPS tracking, and an SOS button. We also found a solar panel that could generate enough power, so just stuck one big solar panel instead of 2 smaller ones. We built an enclosure for the PCB and left a hole for the SOS button. 

    Once the SOS is turned on, it will send an SMS message to your phone or any contact that you put in the code, with a link to the Datacake website. 


    The Datacake website will show a map with the location of the visor and if the SOS is still activated or not.

  • Third PCB Iteration

    Superpowered Jalapenos06/29/2023 at 22:22 0 comments

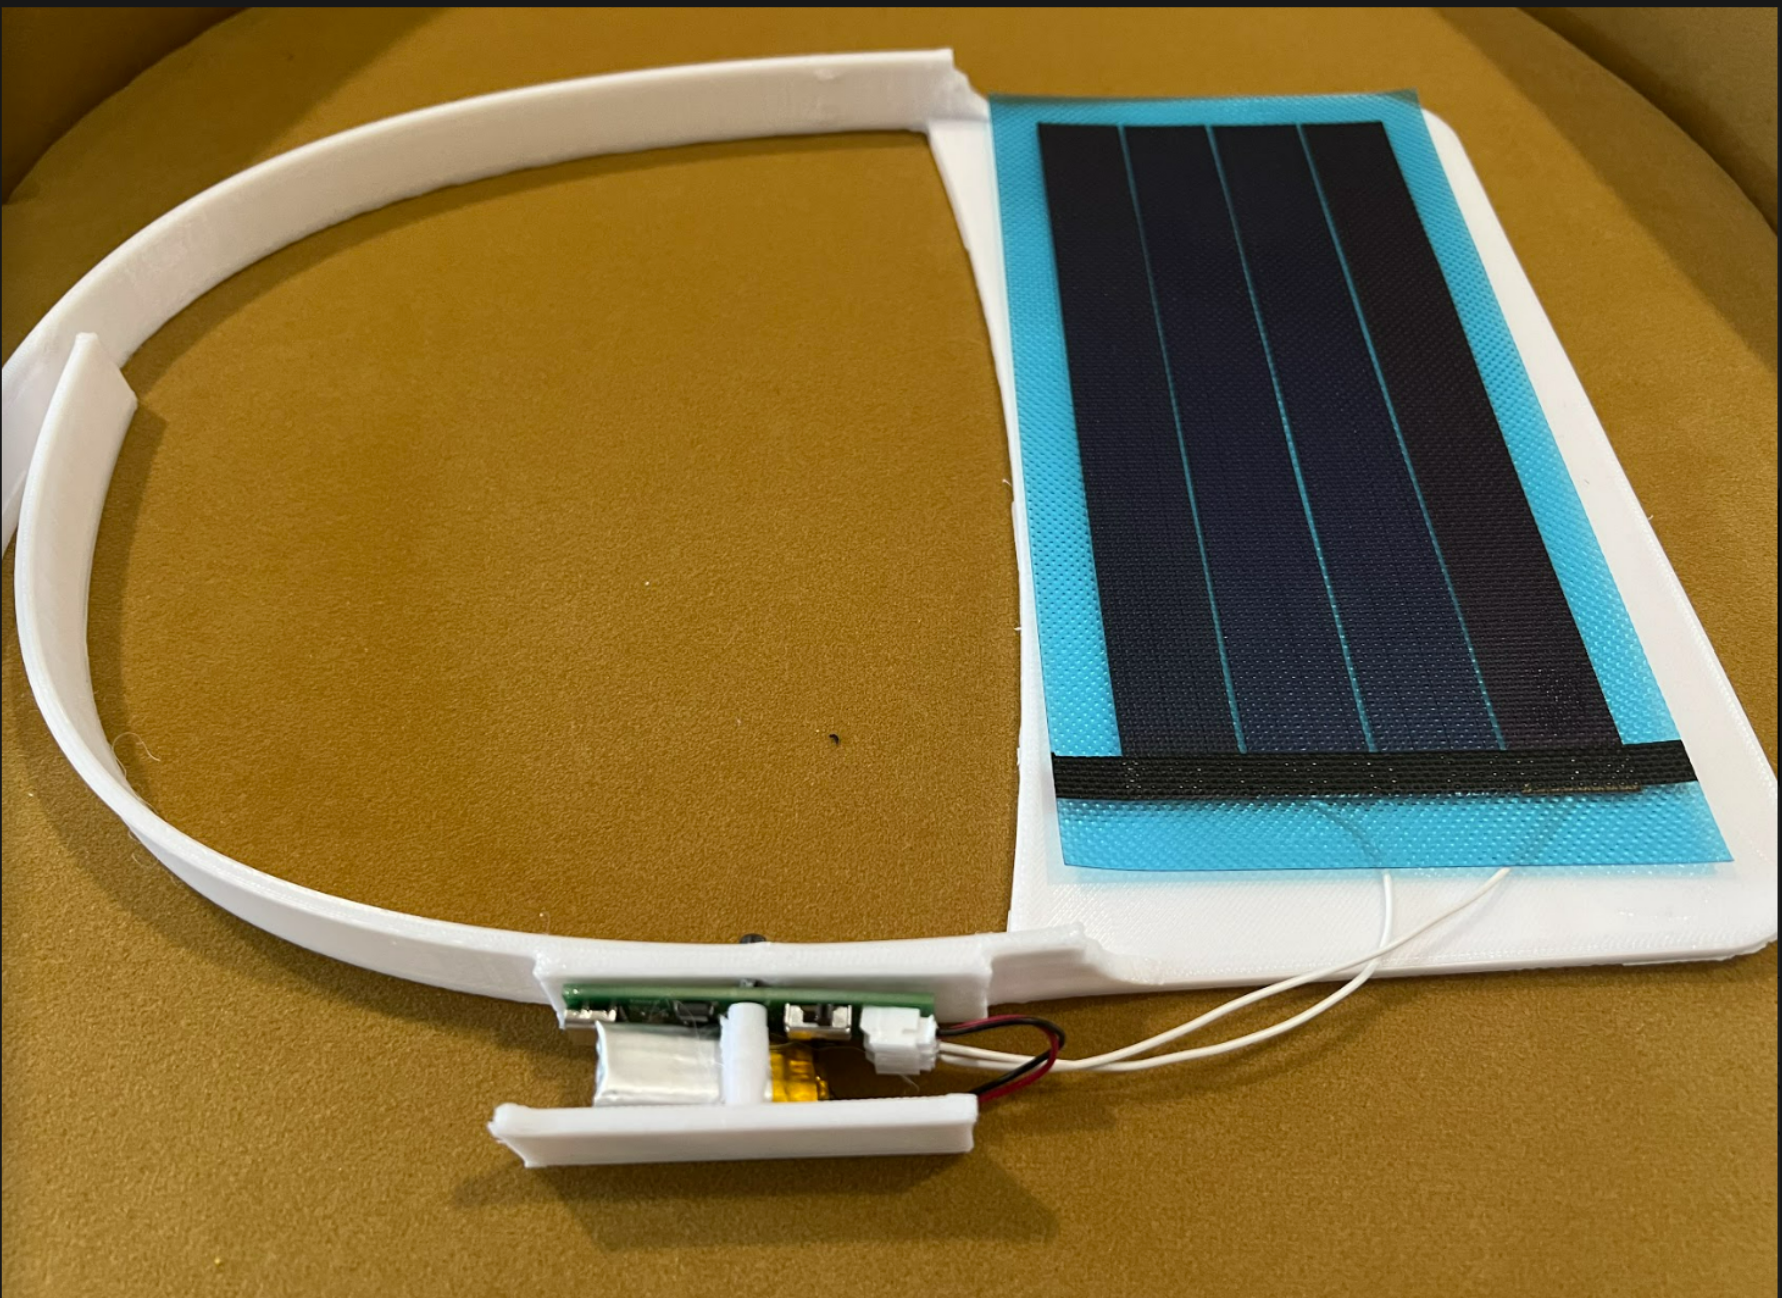
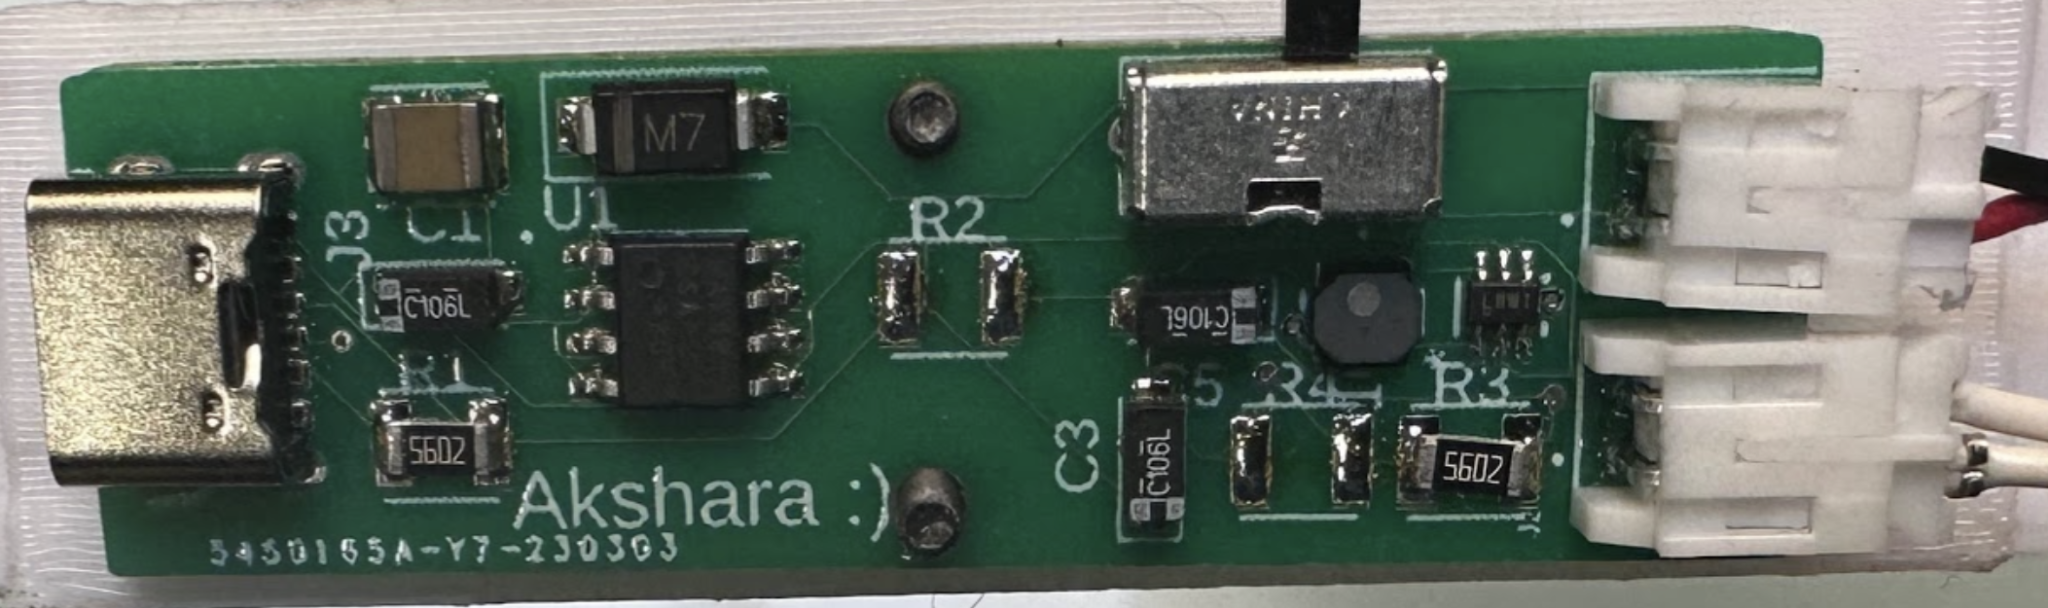
    Our third PCB iteration used SMD components and was a smaller size, and used the same battery as the second iteration. It was able to charge a Samsung phone, Airpods, and an iPhone!

    We figured out how to solve the data line issues that were stopping us from charging an iPhone by adding voltage dividers. We also used different regulators for this iteration because we needed to get 1 A from the circuit.

  • 2nd PCB Iteration

    Superpowered Jalapenos06/29/2023 at 22:19 0 comments

    Our second PCB iteration was medium-sized and used SMD components. We decided to use a small lithium-ion battery, (100mAh), to store charge for nighttime use. It was able to support Samsung charging, but we still needed to figure out how to charge an iPhone.

    This PCB was a bit smaller than the first, so it was easier to add to the design and looked more aesthetic on the visor.

  • Third Visor Iteration + First PCB

    Superpowered Jalapenos06/29/2023 at 21:46 0 comments

    Our third visor iteration used PETG plastic and was much more stable, which meant we could finally attach the solar panels and PCB. The PCB used through-hole components and was very noticeable, and the wires from the solar panels also stuck out. It didn't look the most aesthetic, and we got some feedback from our community after sending out a survey about maybe covering up the solar panels and PCB to make it look like a normal hat. 

    Some more cons were that the two solar panels were not secured properly, and fell out quite easily. This is a big problem because people should be able to walk around on long hikes with our visors. We also had a PCB enclosure, but it was very flimsy and we needed to improve the design of it.

    However, this was our first working design and we were extremely happy about it! It was able to charge a Samsung phone and Airpods, but not an iPhone due to data line issues. 

    We decided to make a list of future improvements, and this included:

    - adding iPhone charging support

    - making the design more comfortable + aesthetic

    - adding a battery for nighttime use

    We decided that our final visor design would look like this since we wanted the area of the visor to be longer a wider so it could fit a more powerful visor. We also chose a rectangular design so less area would be lost due to the curve:

    We made a video to show how to use this model: 

  • Second Visor Iteration

    Superpowered Jalapenos06/29/2023 at 21:40 0 comments

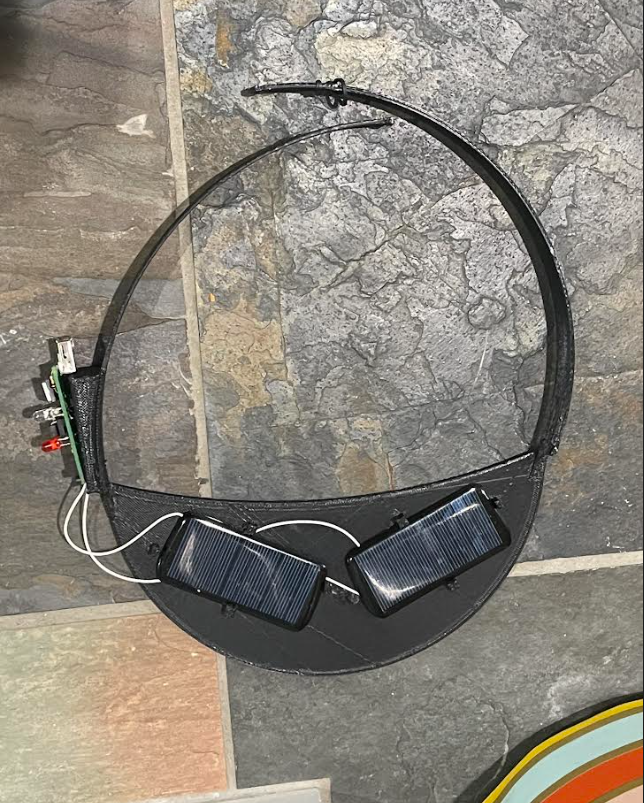
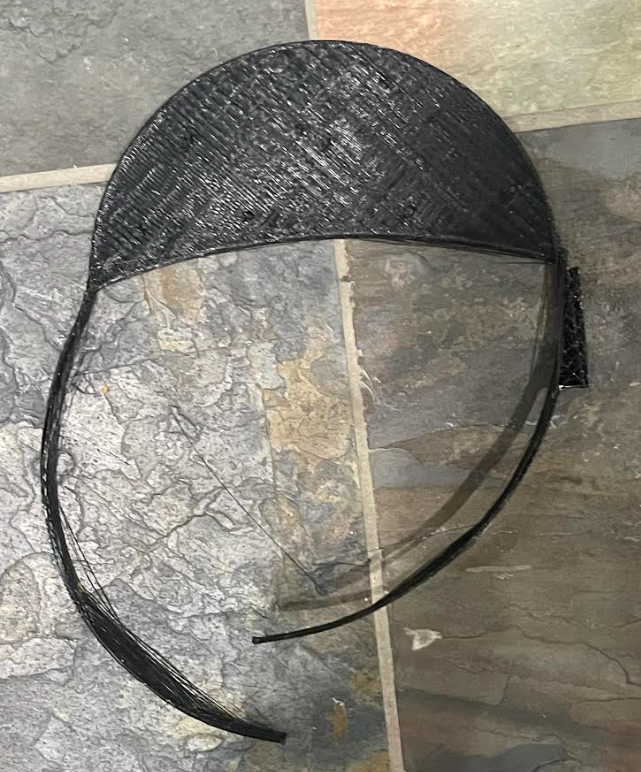
    Our second visor iteration also used PLA plastic, but the straps did not print out well and came out flimsy and with strings. It was not wearable. After this we realized that we definitely needed to use a different material.

  • First Visor Iteration

    Superpowered Jalapenos06/29/2023 at 21:39 0 comments

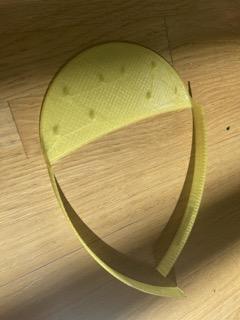
    Our first visor iteration had two solar panels in it and used PLA plastic. There was no PCB enclosure, and we used grooves to attach the solar panel. However, the grooves were very flimsy, the straps broke very easily because the PLA plastic filament for 3D printing wasn’t strong enough. Due to these issues, we decided to look for other 3D printing materials that would be more stable and tried designing a PCB enclosure in Fusion 360.

  • Finding the Components + First PCB

    Superpowered Jalapenos06/29/2023 at 21:23 0 comments

    When we started researching parts for the solar-powered visor, we weren’t able to find any flexible, small solar panels that could generate enough power, so we decided to use two solar panels that could each generate 5 volts in series. We decided to put notches on the top of the visor to hold these solar panels in place, and to put the PCB on the side. 

    For our PCB, we took a lot of time and consideration to find components on Digikey that would match our needs. For example, we needed a voltage regulator that could generate a 5v output, so we put many filters on the website by voltage, cost, size, and more. For our first iteration, we ended up using a 7805 voltage regulator. We also decided on using through-hole components for our first PCB to make it easier to solder and build. 

  • Deciding on our Project

    Superpowered Jalapenos06/28/2023 at 21:10 0 comments

      We brainstormed and made a list of projects that would be environmentally friendly and sounded interesting. This list consisted of many silly as well as really cool ideas: 

    • Solar-powered phone charger
    • Human Powered phone charger
    • Electricity storing flying pigeon
    •  We decided on Solar powered visor because solar power would be available everywhere outdoors, and most people need phone chargers when they are outdoors. 

      We also related to this problem a lot because all of our team went on a hike pre-pandemic, and we lost our way. Some of us hadn't brought our phones, and the other phones had run out of charge. It was a frightening experience, but we were luckily able to ask someone for help and found our way back.

      After deciding on using solar power, we wanted to think of where to put the solar panels on. We started brainstorming different ideas, like the top of your shoes, a hat, a backpack, a jacket, sunglasses, and more. However, we decided to just use a hat because it has the most flat area surface, and has the most exposure to the sun.

View all 9 project logs

  • 1
    Download visor design

    Download the Fusion 360 files from the File section to view the current design of the visor. 

  • 2
    Open Design

    Open the design in fusion 360

  • 3
    Print

    Export the design to STL and then use a 3D printing slicer SW like CURA to slice the model. Then send the design to the 3D printer. (When 3D printing visors make sure to use PETG plastic. When we tried using PLA plastic the visor wasn’t as durable)

View all 16 instructions

Enjoy this project?

Share

Discussions

Does this project spark your interest?

Become a member to follow this project and never miss any updates