 eGuidezhan
Project Preparation
If you are new to the Arduino heart rate monitoring project, you can check it out here.
The project operates by detecting your finger to calculate your heart rate.
By establishing the circuit connection and utilizing a simple calculation formula, the heart rate will be displayed on the LCD screen.
A reminder will be provided to ensure your fingers are placed correctly.
During the test, the LED will blink.
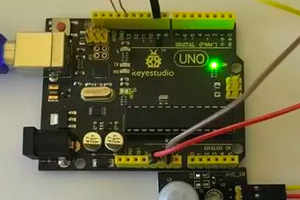
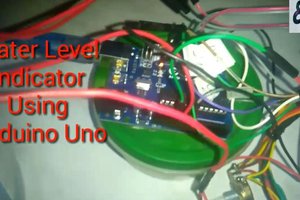
Monitor circuit for heart rate monitor
- Take a pulse sensor and connect its VCC pin to the 5V pin of the Arduino.
- Connect the GND pin of the pulse sensor to the GND pin of the Arduino.
- Connect the OUT/signal pin of the pulse sensor to the Analog-0 pin of the Arduino.
- Next, take an LED and connect its positive side to digital pin 3 of the Arduino.
- Connect the negative pin of the LED to the GND pin of the Arduino through a 220-ohm resistor.
- Then, connect the I2C module to the 16x2 LCD module.
- Verify the I2C module's compatibility with Arduino for interfacing.
- Connect the VCC pin of the I2C module to the 5V pin of the Arduino, and connect the GND pin of the Arduino to the GND pin of the I2C module.
- Connect the SDA and SCK pins of the I2C module to Analog 4 and Analog 5 pins of the Arduino, respectively, as shown.
- Ensure that all connections are accurate and secure.
Project Code
#include <Wire.h>
#include <LiquidCrystal_I2C.h>

LiquidCrystal_I2C lcd(0x27, 16, 2);

const int pulsePin = A0;
const int ledPin = 3;

void setup() {
  lcd.begin(16, 2);
  lcd.print("Heart Rate Monitor");
  pinMode(ledPin, OUTPUT);
}

void loop() {
  int pulseValue = analogRead(pulsePin);
  int heartRate = map(pulseValue, 0, 1023, 0, 200);

  lcd.setCursor(0, 1);
  lcd.print("Heart Rate: " + String(heartRate) + " bpm");

  if (heartRate >= 60 && heartRate <= 100) {
    digitalWrite(ledPin, HIGH);
  } else {
    digitalWrite(ledPin, LOW);
  }

  delay(1000);
}
This code calculates the heart rate by reading the analog values from the pulse sensor and displays the result on the LCD screen. In the Arduino's setup() function, we initialize the LCD and set the LED pin as an output. In the loop() function, we read the analog value from the pulse sensor and use the map() function to map it to the heart rate range of 0 to 200. Then, we print the heart rate value on the second line of the LCD screen and turn on or off the LED based on the heart rate range. Finally, we use the delay(1000) function to delay for 1 second to allow for proper heart rate updates.
Please note that this code is just an example, and you may need to make appropriate modifications and adjustments based on your specific hardware and libraries.
Project inspired by tech-sparks.com and techatronic

 Hulk
Hulk
 engineerkid1