 kutluhan_aktar
Chemical fertilizers are synthesized industrially out of estimated proportions of elements like nitrogen, phosphorus, and potassium[1], which provide necessary nutrients for plants to flourish vigorously. Due to intensive cultivation and the insufficient replenishment of nutrients, fertilizers mitigate precipitously declining soil fertility. In combination with organic fertilizers, chemical fertilizers can even revitalize arable lands. Although chemical fertilizers are indispensable to sustain soil fertility and avoid food shortages considering the current human population, they can also be noxious without painstaking attention to soil test reports. Since chemical fertilizers directly affect soil integrity and permeate through water bodies, they can contaminate the groundwater and the environment while contributing a remarkable gain in crop production. Also, chemical fertilizers infiltrate the soil and make plants vulnerable to various pathogens by hampering their roots[1].
When chemical fertilizers disperse throughout water bodies, they increase macronutrients in the environment, such as nitrogen, potassium, and phosphorus, resulting in contamination and eutrophication (nutrient pollution). These macronutrients can cause serious health problems due to overexposure. For instance, nitrogen can remain in water bodies for several years and cause nitrite (and nitrate) to accumulate exponentially. As a result of the high nitrite accumulation, nitrite-contaminated water can cause a blood disorder called methemoglobinemia (MetHb), also known as Blue Baby Syndrome. Furthermore, chemical reactions between nitrites heavily used in synthetic fertilizers instigate DNA damage, lipid peroxidation, and oxidative stress, which can all result in increased cellular degeneration. As a major health issue caused by the excessive use of chemical (synthetic) fertilizers, cellular degeneration can increase the risk of developing cancer. Forebodingly, a 2009 study by researchers at Rhode Island Hospital has found a substantial link between increased levels of nitrates in our environment and food with increased deaths from diseases, including Alzheimer's, diabetes mellitus, and Parkinson's[2].
According to earlier estimations, fertilizers provided approximately 70% of plant nutrients in 2020 at a global level[3]. Therefore, at this point, we cannot obviate the need for organic and chemical fertilizers to achieve sustainable crop production. Nevertheless, applying organic fertilizers in conjunction with chemical fertilizers can engender unexpected results and exacerbates the detrimental effects of chemical (synthetic) fertilizers. Since organic fertilizers behave differently depending on their manufacturing conditions, they change the degree of soil permeability of different soil types, such as loamy, peaty, silty, chalky, etc., not only unpredictably but also structurally. Hence, applying chemical fertilizers to the soil structurally altered by organic fertilizers may intensify the mentioned hazardous effects and lead to serious health conditions.
After scrutinizing the recent research papers on the effects of chemical and organic fertilizers, I noticed there are nearly no appliances focusing on detecting the excessive use of chemical fertilizers in the presence of organic fertilizers and providing real-time detection results for further inspection. Therefore, I decided to build a budget-friendly and easy-to-use proof-of-concept device to detect chemical fertilizer contamination levels with object recognition and inform the user of the model detection results simultaneously in the hope of averting the detrimental effects of fertilizer overuse by prewarning farmers.
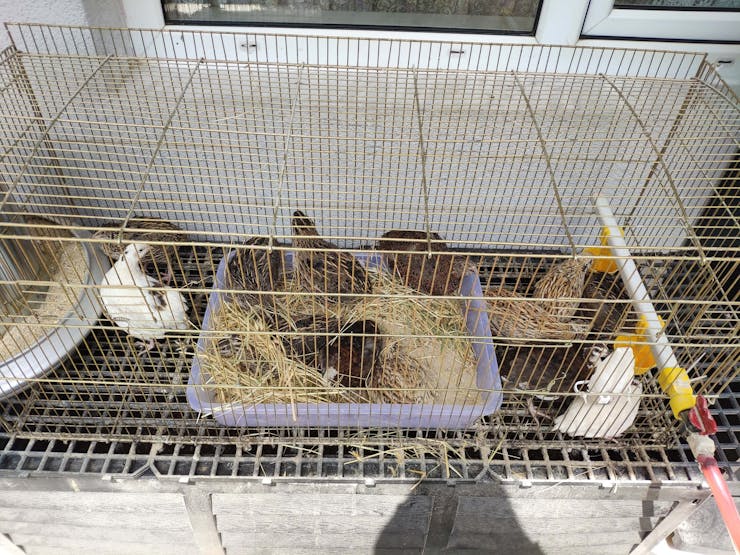
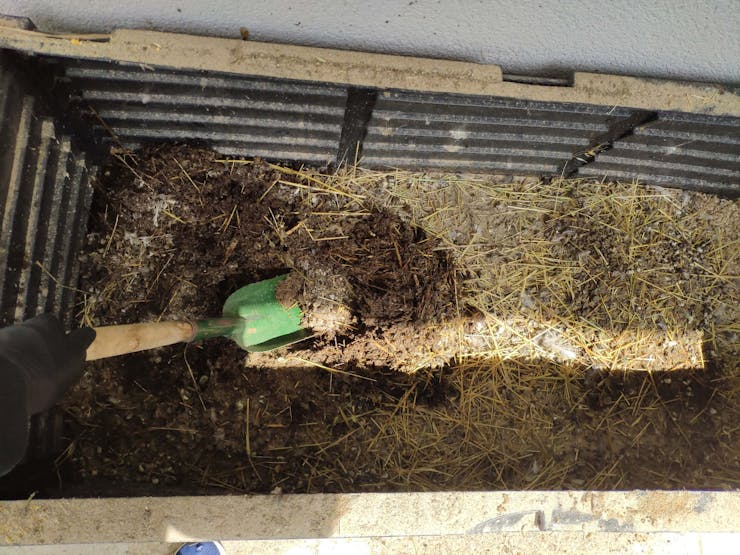
To detect chemical fertilizer contamination levels accurately in relation to organic fertilizers, I needed to collect data from a controlled environment manifesting different soil conditions so as to train my object detection model with notable validity. Since utilizing manure as organic fertilizer affects soil acidification, integrity, and structure depending on the manure decomposition stages (fresh, active, mature, and old), I decided to produce my organic fertilizers by composting manure. Fortunately, I am raising quails on my balcony and have experience in utilizing quail manure as organic fertilizer. To change the soil integrity and structure in relation to the applied organic fertilizer, I collected quail manure in different decomposition stages:
- Fresh (1 month)
- Active (3 months)
- Old (6 months)
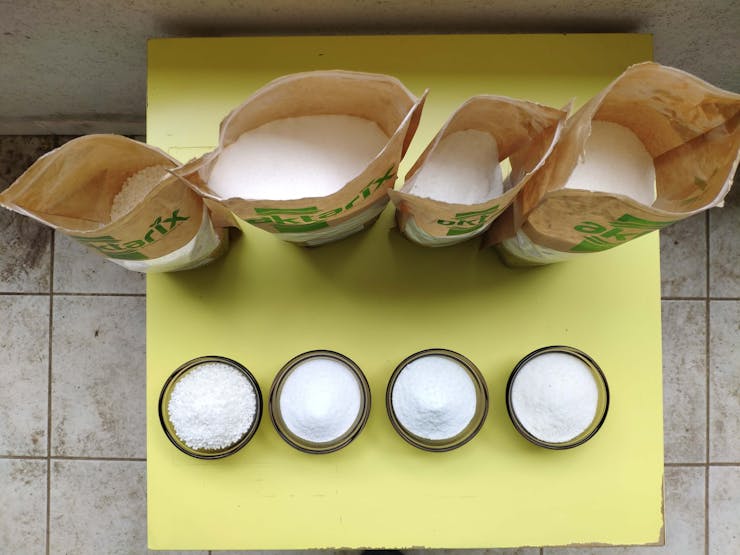
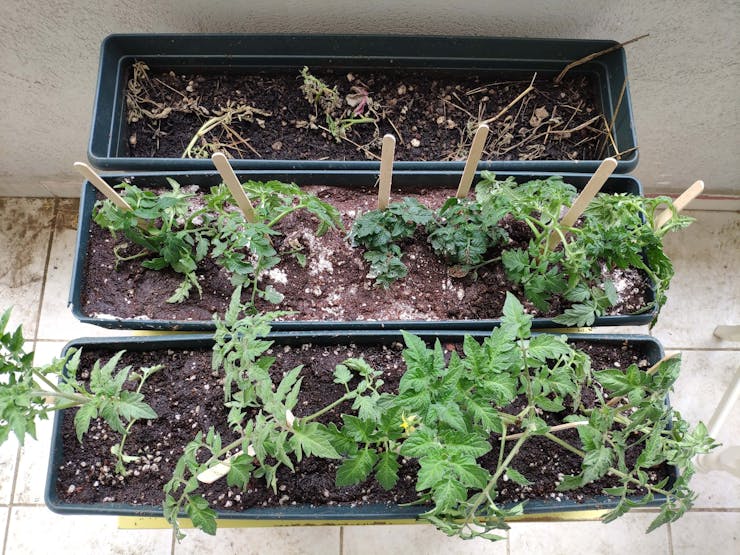
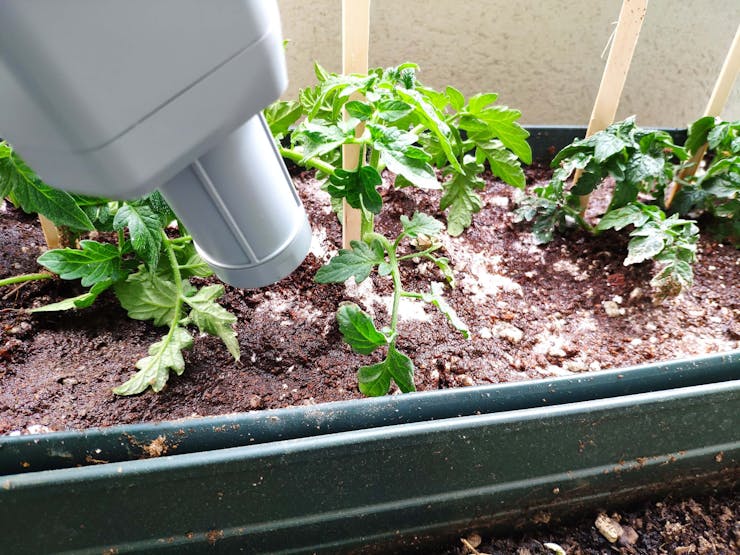
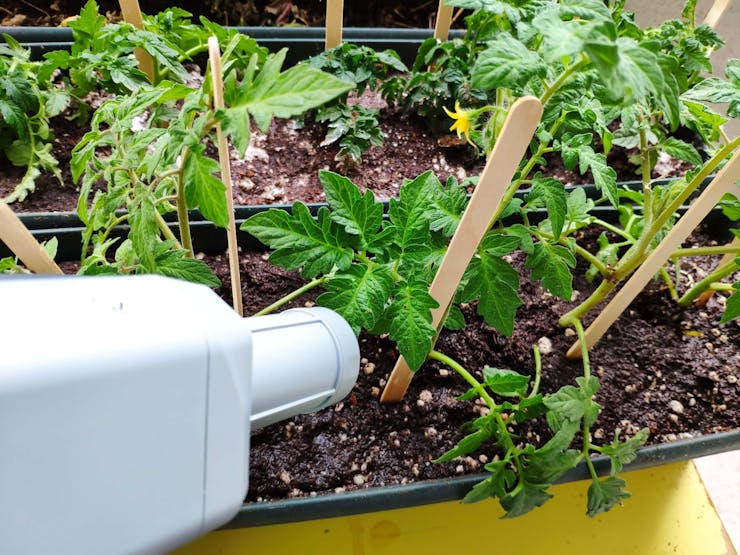
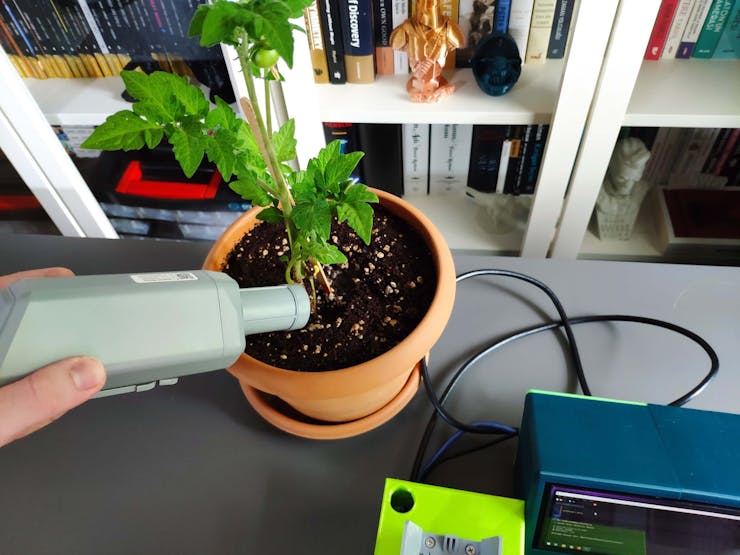
After producing organic fertilizers in different decomposition stages, I applied them to the soil in three separate flowerpots. Then, I added chemical fertilizers to each flowerpot in the same amount to examine the excessive use of chemical fertilizers depending on the soil integrity and structure. To demonstrate the fertilizer contamination effects on the environment, I sowed different types of tomato seedlings in each flowerpot.
- Calcium Nitrate
- Magnesium Sulphate
- Ammonium Sulphate
- Ammonium Phosphate
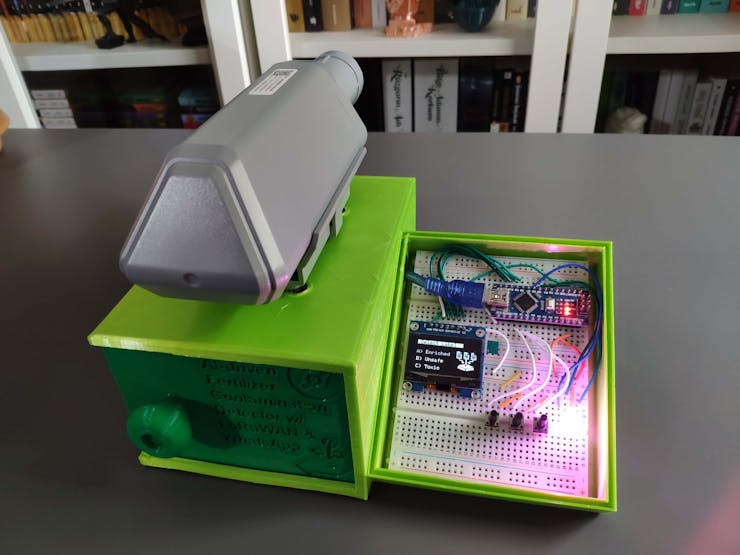
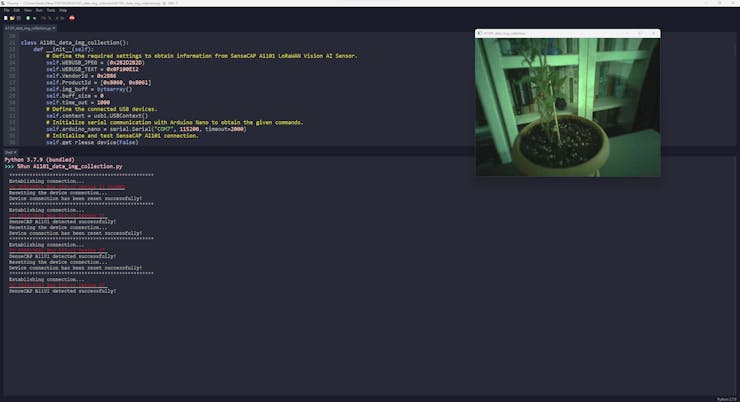
Since Wi-Fi and Bluetooth transmissions may not be suitable options for a device operating in farms, I decided to utilize a SenseCAP A1101 vision AI sensor manufactured by Seeed Studio. SenseCAP A1101 provides a 400Mhz DSP Himax camera for image recognition and a Wio-E5 LoRaWAN module for LoRaWAN long-range transmission. Also, it is compatible with different types of LoRaWAN® gateways and networks, such as the Helium LongFi Network. As shown in the following steps, I explained how to activate a SenseCAP M2 data-only LoRaWAN indoor gateway (EU868) and connect SenseCAP A1101 to the Helium LongFi Network through the SenseCAP M2 data-only gateway. SenseCAP gateways are only required if the Helium network does not cover your surroundings. Since SenseCAP A1101 supports uploading TinyML object detection models as firmware, I was able to run my model without a single line of code. Nevertheless, SenseCAP A1101 does not give you the option to capture images with different labels out of the box. Therefore, I connected three control buttons and an SH1106 OLED screen to Arduino Nano in order to build a simple remote control. Then, I employed LattePanda 3 Delta to program SenseCAP A1101 to capture images according to labels transferred by the remote control via serial communication.
After completing my data set by taking pictures of fertilizer-exerted soils from my three separate flowerpots, I built my object detection model with Edge Impulse to detect chemical fertilizer contamination levels. I utilized Edge Impulse FOMO (Faster Objects, More Objects) algorithm to train my model, which is a novel machine learning algorithm that brings object detection to highly constrained devices. Since Edge Impulse is nearly compatible with all microcontrollers and development boards, I have not encountered any issues while uploading and running my model on SenseCAP A1101.
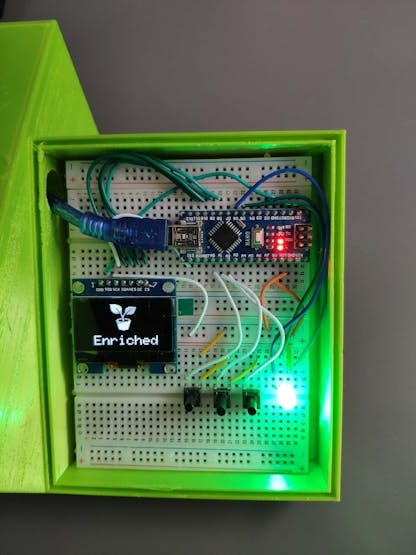
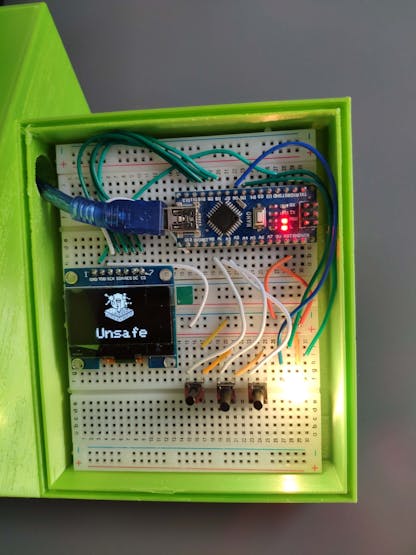
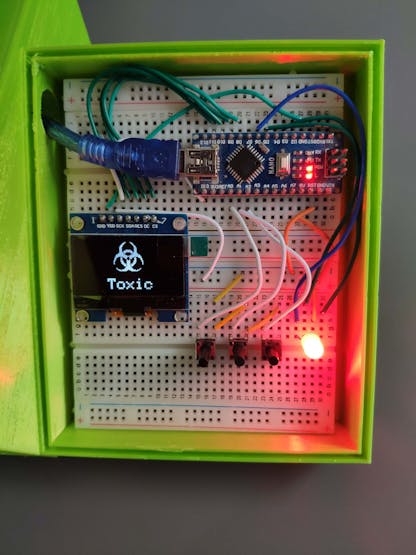
As labels, I utilized fertilizer contamination levels based on the soil integrity and structure altered by the applied organic fertilizer (manure) decomposition stage:
- Enriched
- Unsafe
- Toxic
After training and testing my object detection (FOMO) model, I deployed and uploaded the model on SenseCAP A1101 as its compatible firmware (UF2). Therefore, the device is capable of detecting fertilizer contamination levels by running the model independently without any additional procedures or latency.
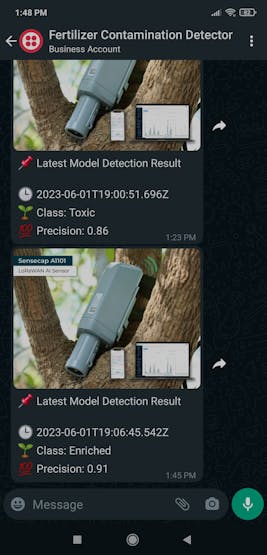
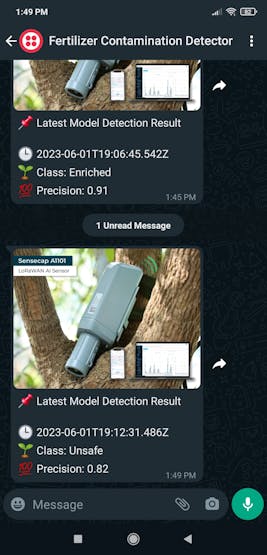
Since I focused on building a full-fledged AIoT appliance detecting fertilizer contamination levels despite utilizing the LoRaWAN network as the primary transmission method, I decided to develop a Python application from scratch informing the user of the recent model detection results via WhatsApp. Plausibly, all SenseCAP AI devices are capable of logging information to the SenseCAP Portal via the LoRaWAN network. Also, Seeed Studio provides the SenseCAP HTTP API to obtain registered data records from the SenseCAP Portal via HTTP GET requests. Therefore, firstly, I utilized the application to get the recent model detection results from the given SenseCAP Portal account.
Then, this complementing application employs Twilio's WhatsApp API to send the latest model detection results to the verified phone number, which SenseCAP A1101 registered to the SenseCAP Portal via the Helium LongFi Network.
Since I decided to capture images with SenseCAP A1101 and run my Python application on LattePanda 3 Delta, I wanted to build a mobile and compact apparatus to access LattePanda 3 Delta in the field without requiring an additional procedure. To improve the user experience, I utilized a high-quality 8.8" IPS monitor from Elecrow. As explained in the following steps, I designed a two-part case (3D printable) in which I placed the Elecrow IPS monitor.
Lastly, to make the device as robust and sturdy as possible while operating outdoors, I designed a plant-themed case providing screw holes to attach the SenseCAP A1101 bracket, a sliding front cover, and a separate section for the remote control compatible with a diagonal top cover with snap-fit joints (3D printable).
So, this is my project in a nutshell 😃
In the following steps, you can find more detailed information on coding, capturing soil images with SenseCAP A1101, building an object detection (FOMO) model with Edge Impulse, running the model on SenseCAP A1101, transferring data to the SenseCAP Portal via the LoRaWAN network, and developing a full-fledged Python application to obtain model detection results and inform the user via WhatsApp.
🎁🎨 Huge thanks to Elecrow for sending me an Elecrow 8.8" IPS Monitor (1920*480).
🎁🎨 Huge thanks to DFRobot for sending me a LattePanda 3 Delta 864.
🎁🎨 Also, huge thanks to Anycubic for sponsoring a brand-new Anycubic Kobra 2.


Step 1: Designing and printing a plant-themed case
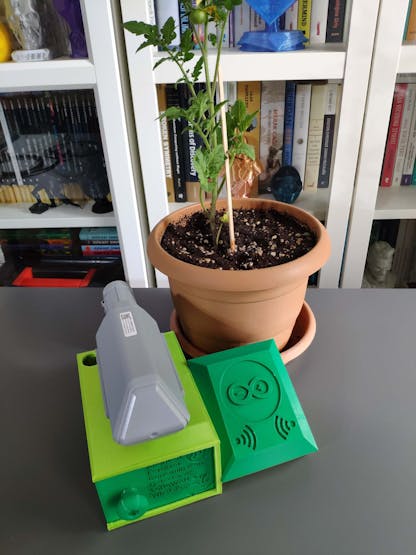
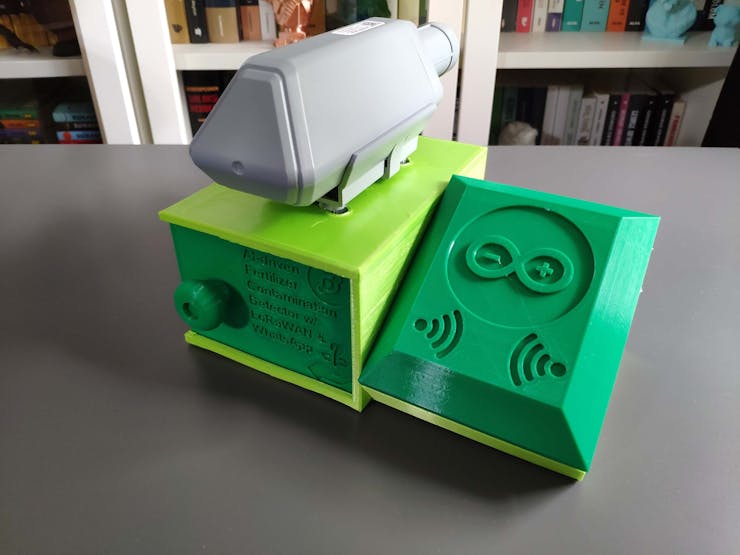
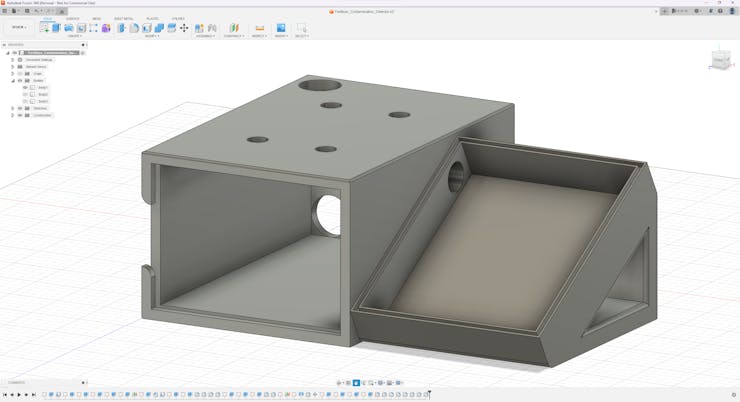
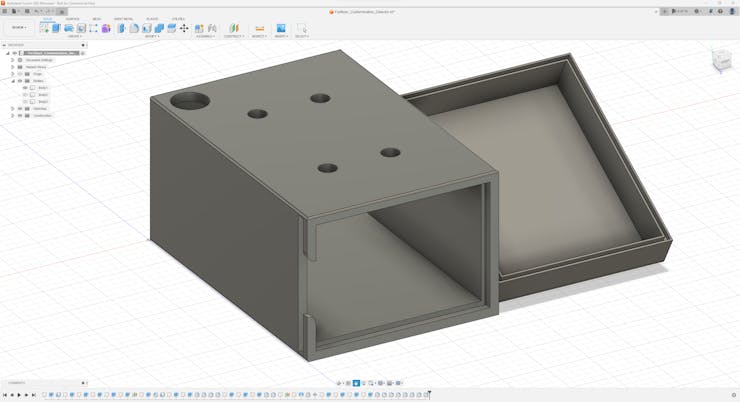
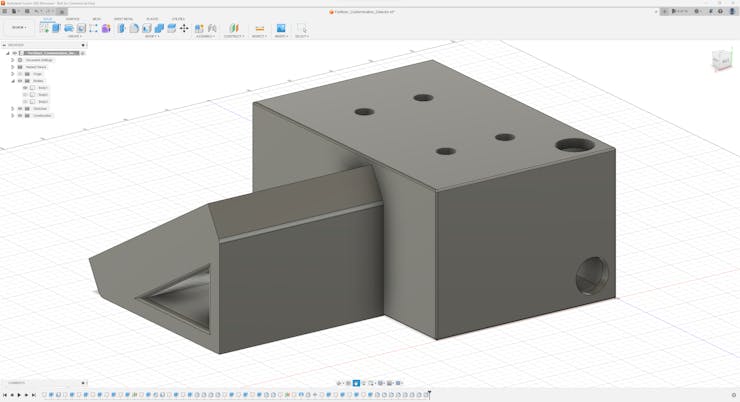
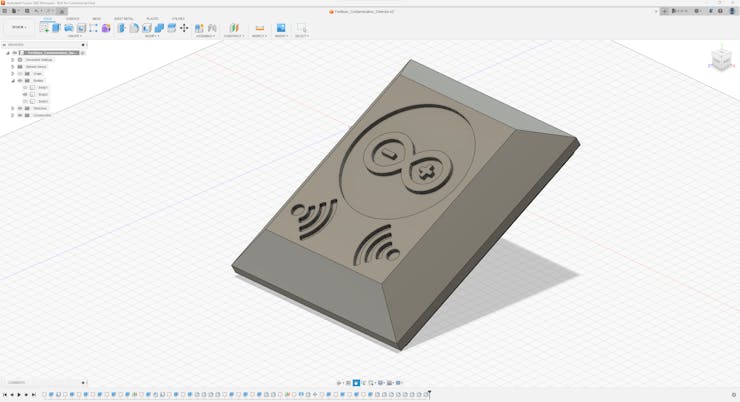
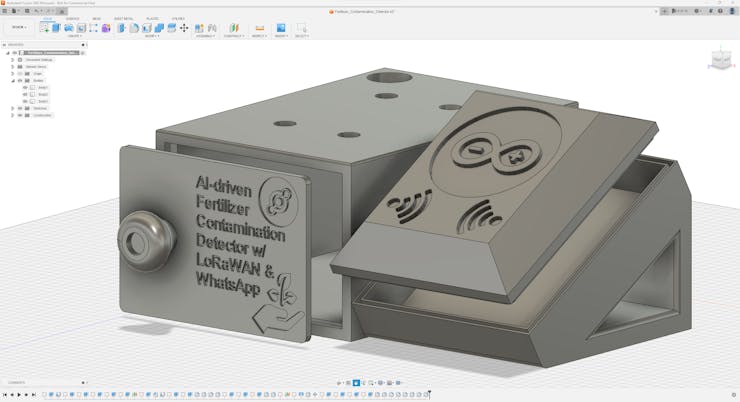
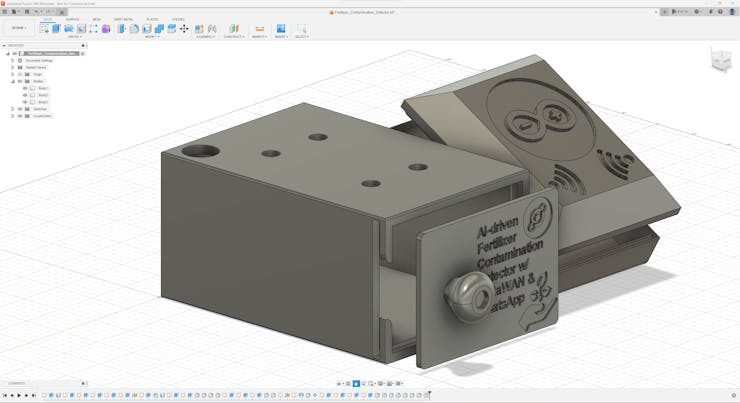
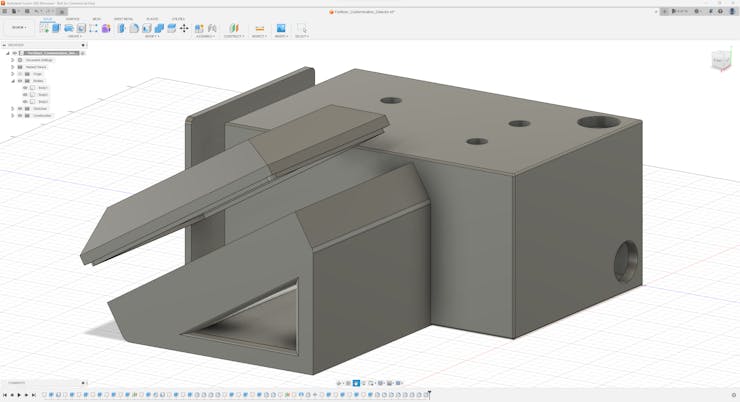
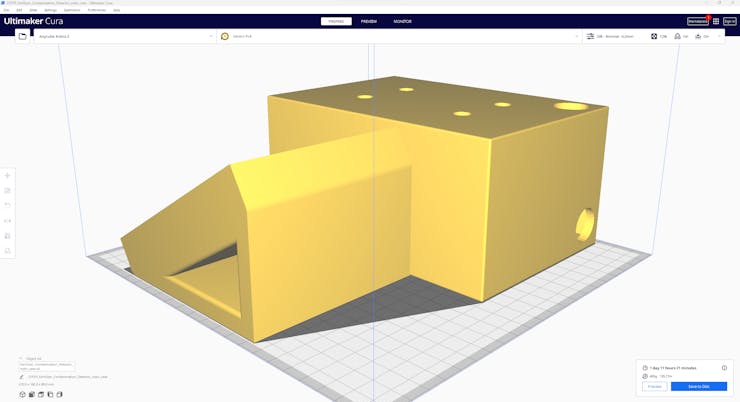
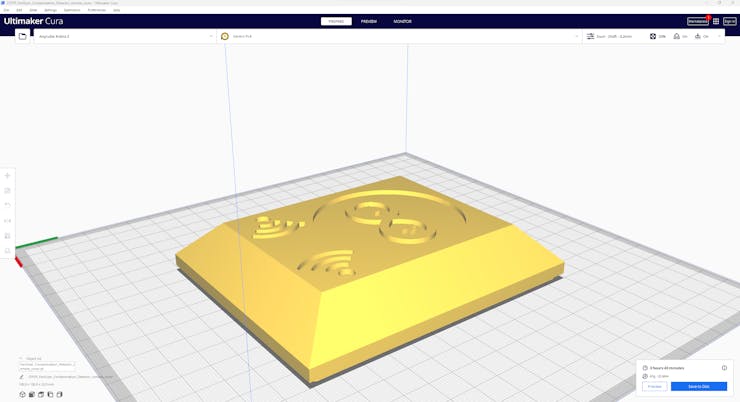
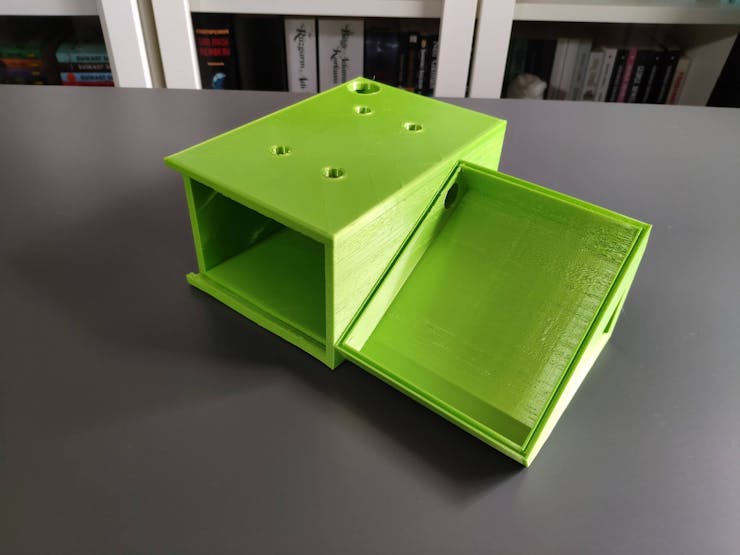
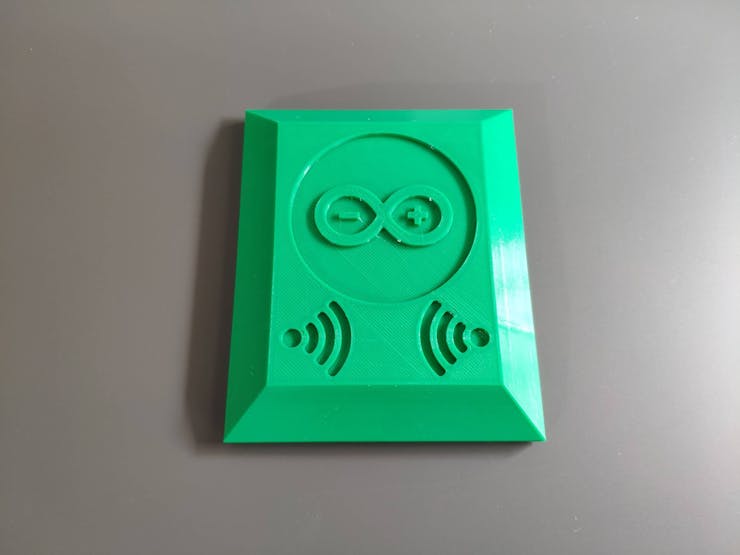
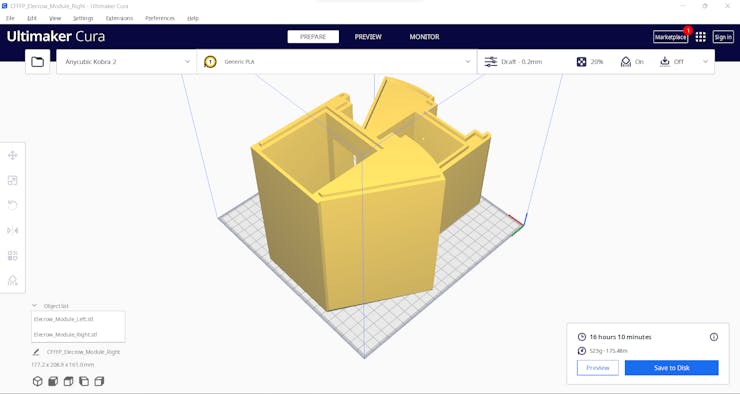
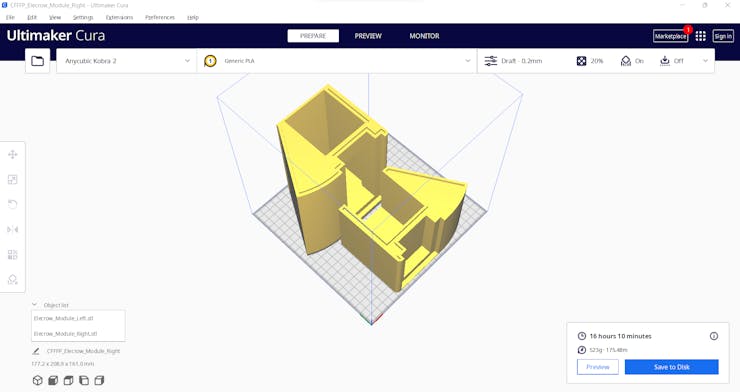
Since I focused on building a budget-friendly and accessible appliance that captures images of fertilizer-exerted soils and runs an object detection model to inform the user of the excessive use of chemical fertilizers over WhatsApp via the LoRaWAN network, I decided to design a modular and compact case allowing the user to place the remote control and position SenseCAP A1101 with LattePanda 3 Delta effortlessly. To avoid overexposure to dust and prevent loose wire connections, I added a sliding front cover. Then, I designed a diagonal top cover for the separate remote control section of the main case, mountable via snap-fit joints. Also, I decided to inscribe the Helium logo and the Arduino symbol on the sliding front cover and the diagonal top cover to highlight the LoRaWAN-enabled fertilizer contamination detection.
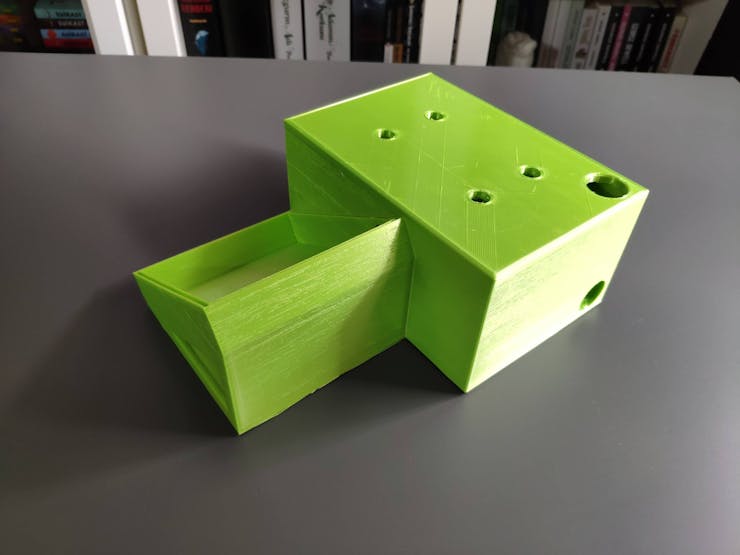
Since I needed to attach SenseCAP A1101 to the main case via its bracket, I decided to add compatible screw holes on the top of the main case. Due to the separate section, I was able to fit the remote control and connect it to LattePanda 3 Delta as a single unit.
I designed the main case, its sliding front cover, and the diagonal top cover in Autodesk Fusion 360. You can download their STL files below.
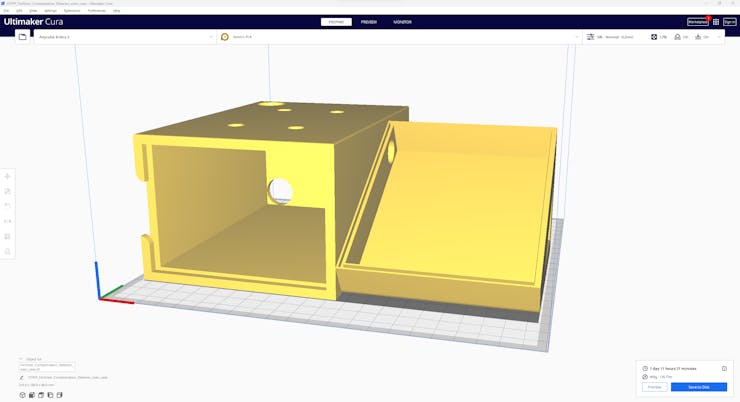
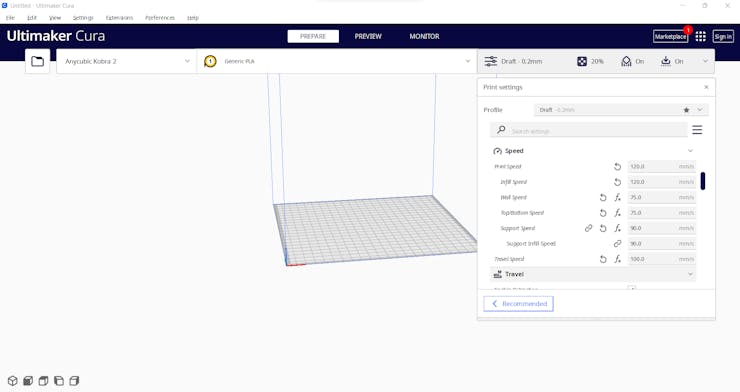
Then, I sliced all 3D models (STL files) in Ultimaker Cura.
Since I wanted to create a glistening plant structure for the main case and apply a unique verdant theme denoting burgeoning plants, I utilized these PLA filaments:
- eSilk Lime
- Green RAL 6029
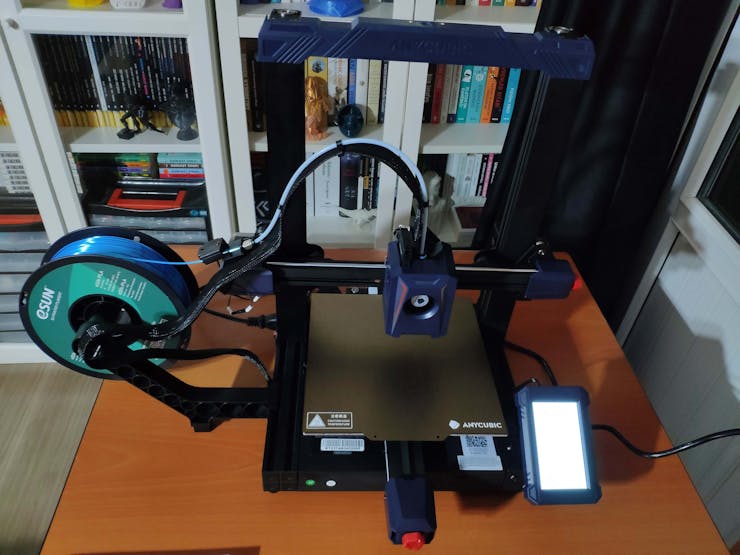
Finally, I printed all parts (models) with my brand-new Anycubic Kobra 2 3D Printer.


Since Anycubic Kobra 2 is budget-friendly and specifically designed for high-speed printing, I highly recommend Anycubic Kobra 2 if you are a maker or hobbyist needing to print multiple prototypes before finalizing a complex project.
Thanks to its upgraded direct extruder, Anycubic Kobra 2 provides 150mm/s recommended print speed (up to 250mm/s) and dual-gear filament feeding. Also, it provides a cooling fan with an optimized dissipation design to support rapid cooling complementing the fast printing experience. Since the Z-axis has a double-threaded rod structure, it flattens the building platform and reduces the printing layers, even at a higher speed.
Furthermore, Anycubic Kobra 2 provides a magnetic suction platform on the heated bed for the scratch-resistant spring steel build plate allowing the user to remove prints without any struggle. Most importantly, you can level the bed automatically via its user-friendly LeviQ 2.0 automatic bed leveling system. Also, it has a smart filament runout sensor and the resume printing function for power failures.
#️⃣ First of all, install the gantry and the spring steel build plate.

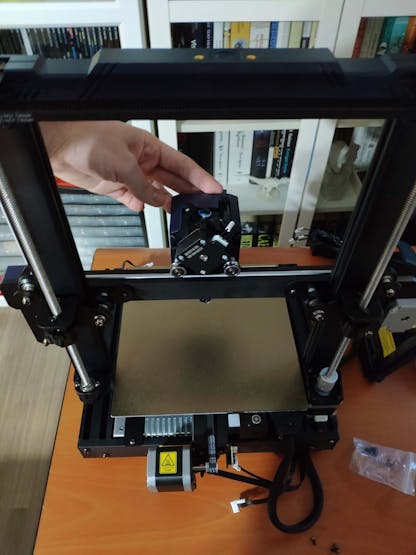
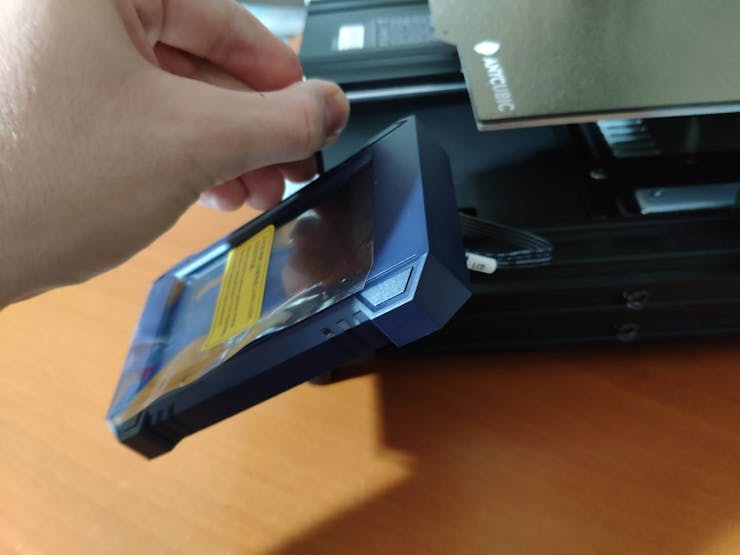
#️⃣ Install the print head, the touch screen, and the filament runout sensor.
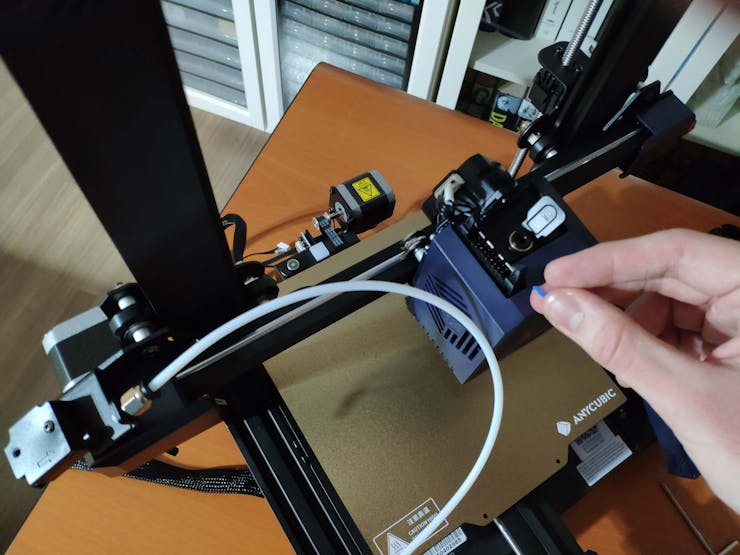
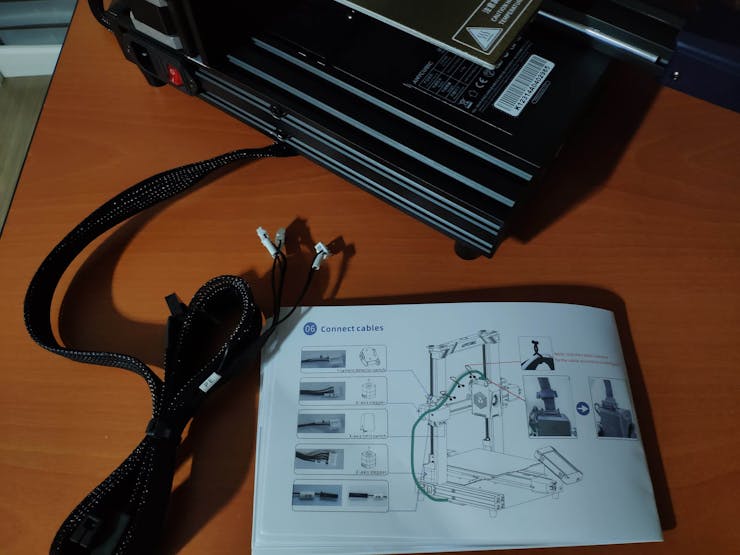
#️⃣ Connect the stepper, switch, screen, and print head cables. Then, attach the filament tube.
#️⃣ If the print head is shaking, adjust the hexagonal isolation column under the print head.
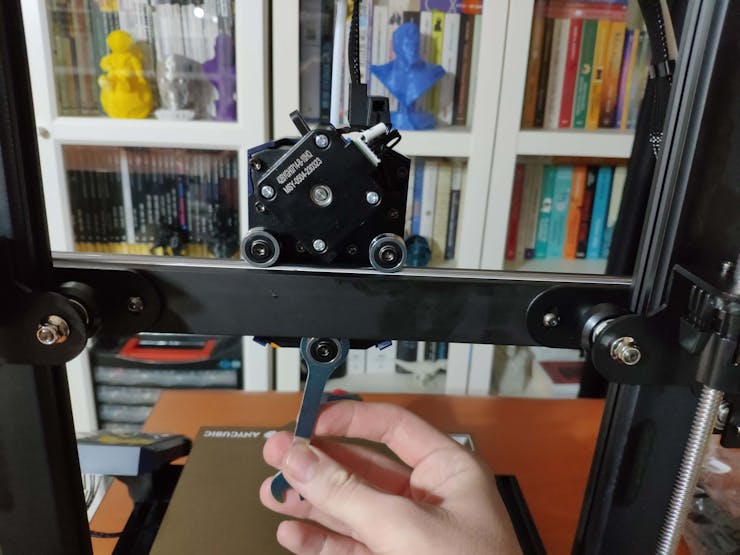
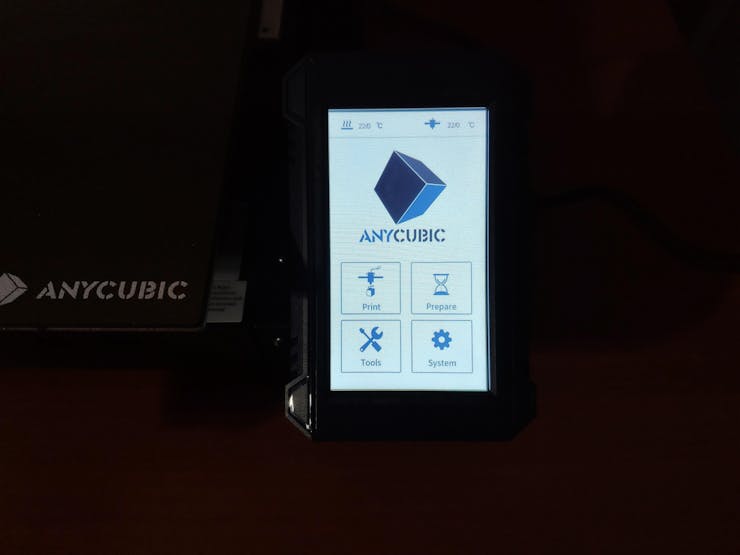
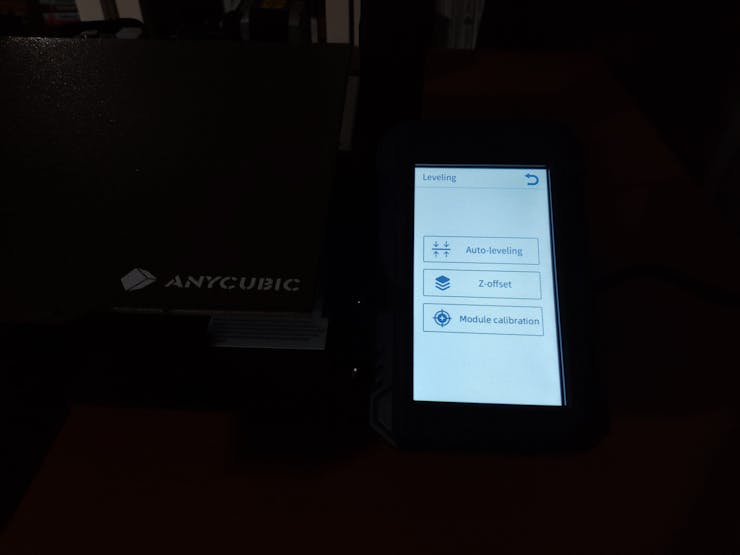
#️⃣ Go to Prepare➡ Leveling ➡ Auto-leveling to initiate the LeviQ 2.0 automatic bed leveling system.
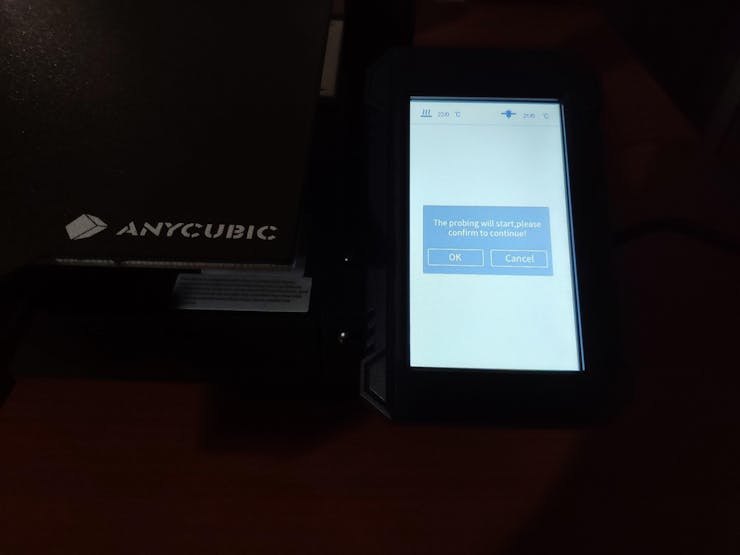
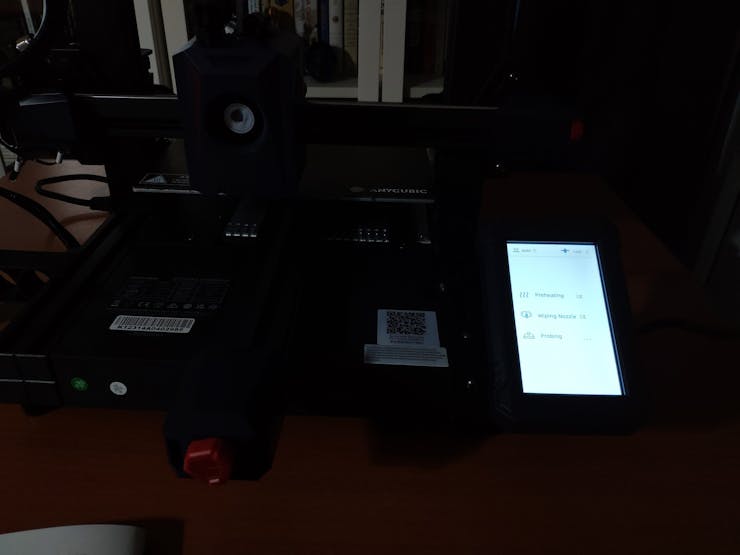
#️⃣ After preheating and wiping the nozzle, Anycubic Kobra 2 probes the predefined points to level the bed.

#️⃣ Finally, fix the filament tube with the cable clips, install the filament holder, and insert the filament into the extruder.
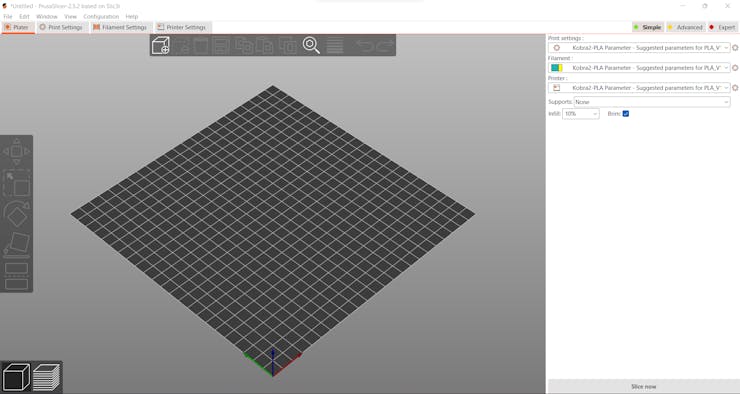
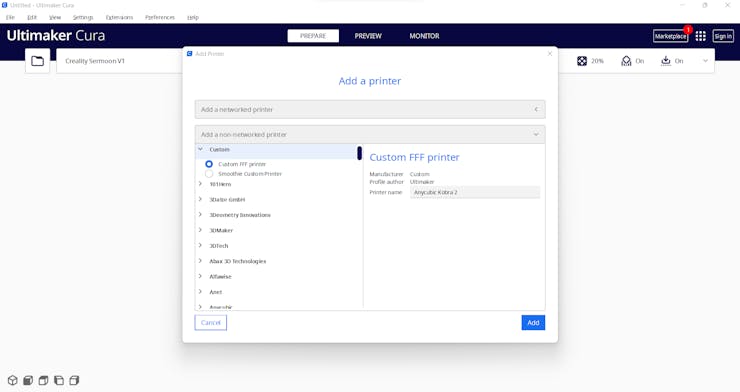
#️⃣ Since Anycubic Kobra 2 is not officially supported by Cura yet, download the latest PrusaSlicer version and import the printer profile (configuration) file provided by Anycubic.
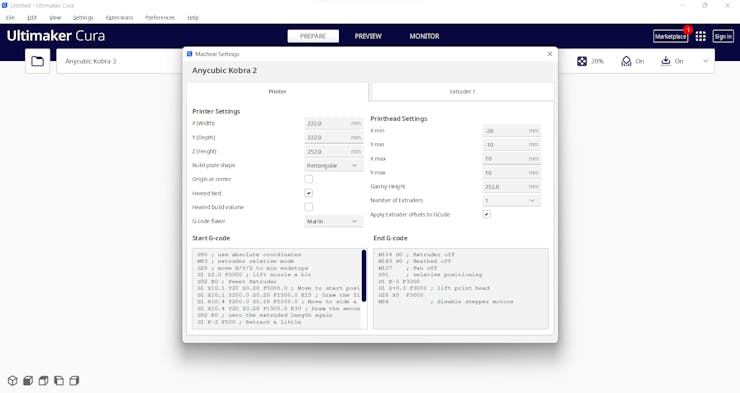
#️⃣ Then, create a custom printer profile on Cura for Anycubic Kobra 2 and change Start G-code and End G-code.
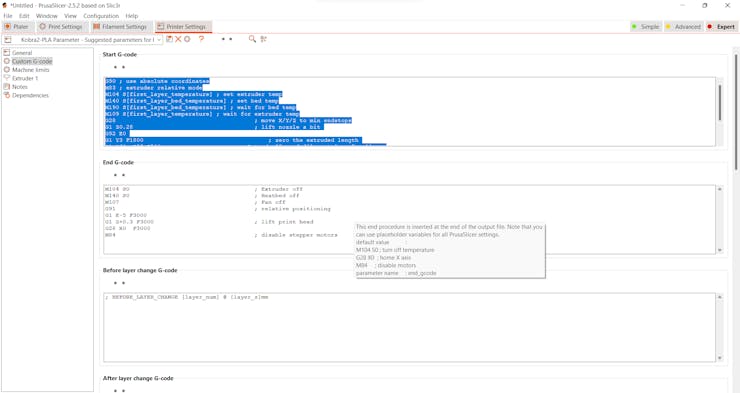
#️⃣ Based on the provided Start G-code and End G-code in the configuration file, I modified new Start G-code and End G-code compatible with Cura.
Start G-code:

G90 ; use absolute coordinates
M83 ; extruder relative mode
G28 ; move X/Y/Z to min endstops
G1 Z2.0 F3000 ; lift nozzle a bit
G92 E0 ; Reset Extruder
G1 X10.1 Y20 Z0.28 F5000.0 ; Move to start position
G1 X10.1 Y200.0 Z0.28 F1500.0 E15 ; Draw the first line
G1 X10.4 Y200.0 Z0.28 F5000.0 ; Move to side a little
G1 X10.4 Y20 Z0.28 F1500.0 E30 ; Draw the second line
G92 E0 ; zero the extruded length again
G1 E-2 F500 ; Retract a little
M117
G21 ; set units to millimeters
G90 ; use absolute coordinates
M82 ; use absolute distances for extrusion
G92 E0
M107

End G-code:

M104 S0 ; Extruder off
M140 S0 ; Heatbed off
M107    ; Fan off
G91     ; relative positioning
G1 E-5 F3000
G1 Z+0.3 F3000 ; lift print head
G28 X0  F3000
M84            ; disable stepper motors
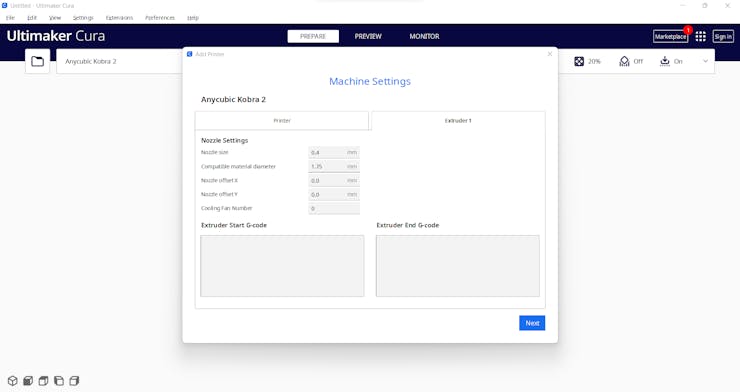
#️⃣ Finally, adjust the official printer settings depending on the filament type while copying them from PrusaSlicer to Cura.

Step 1.1: Assembling the case and making connections & adjustments
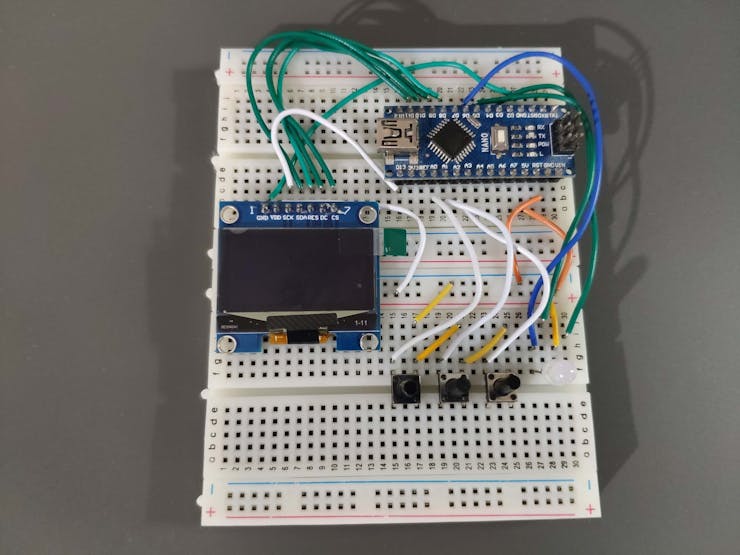
// Connections// Arduino Nano :
//                                SH1106 OLED Display (128x64)
// D11  --------------------------- SDA
// D13  --------------------------- SCK
// D8   --------------------------- RST
// D9   --------------------------- DC
// D10  --------------------------- CS
//                                Control Button (A)
// A0   --------------------------- +
//                                Control Button (B)
// A1   --------------------------- +
//                                Control Button (C)
// A2   --------------------------- +
//                                5mm Common Anode RGB LED
// D3   --------------------------- R
// D5   --------------------------- G
// D6   --------------------------- B
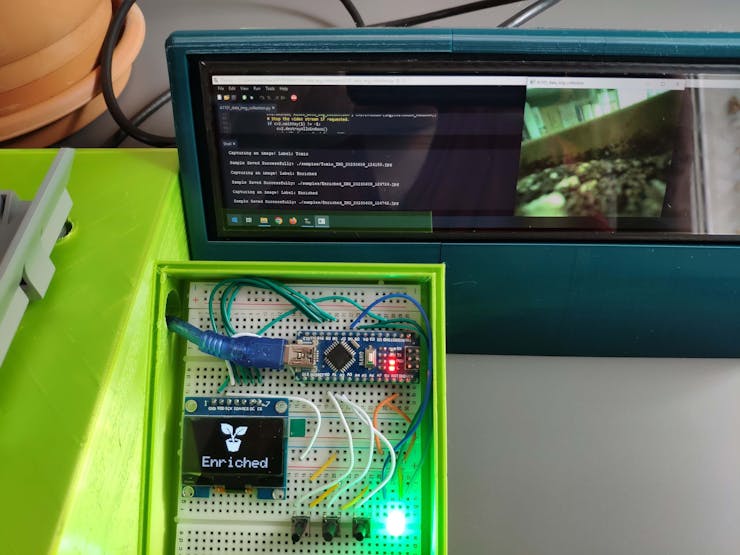
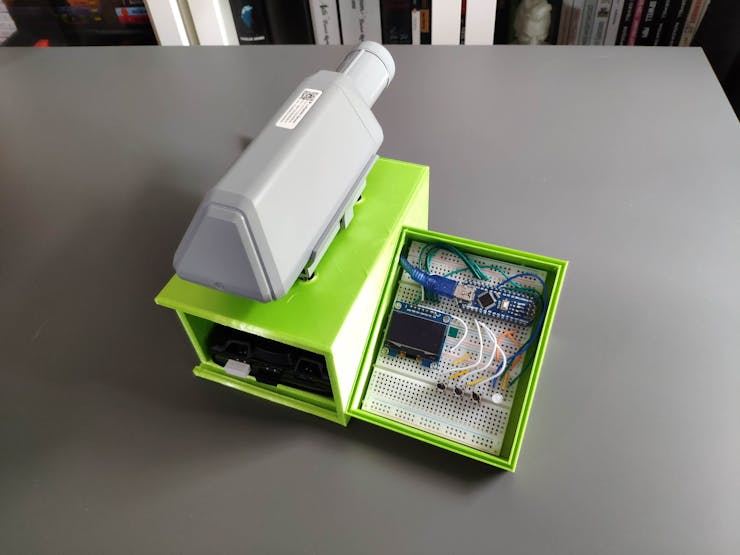
Since SenseCAP A1101 does not support capturing images with different labels out of the box, I decided to build a simple remote control with Arduino Nano to capture pictures easily. Then, I employed LattePanda 3 Delta to program SenseCAP A1101 to capture images according to labels transferred by the remote control via serial communication.
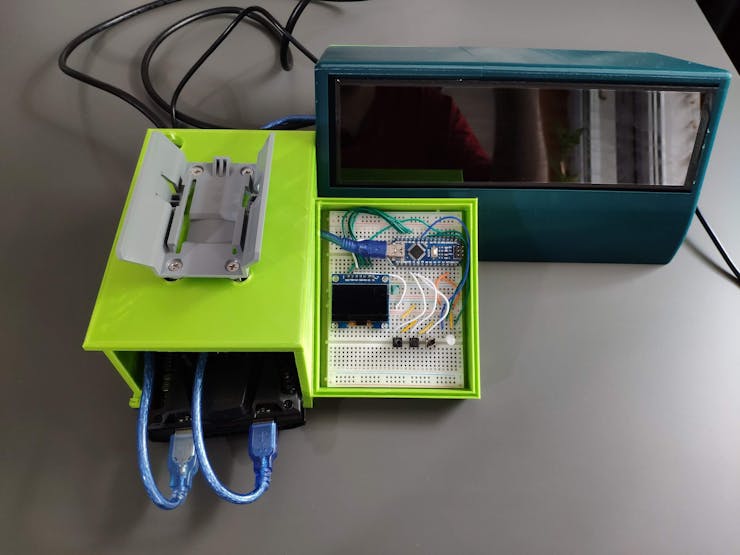
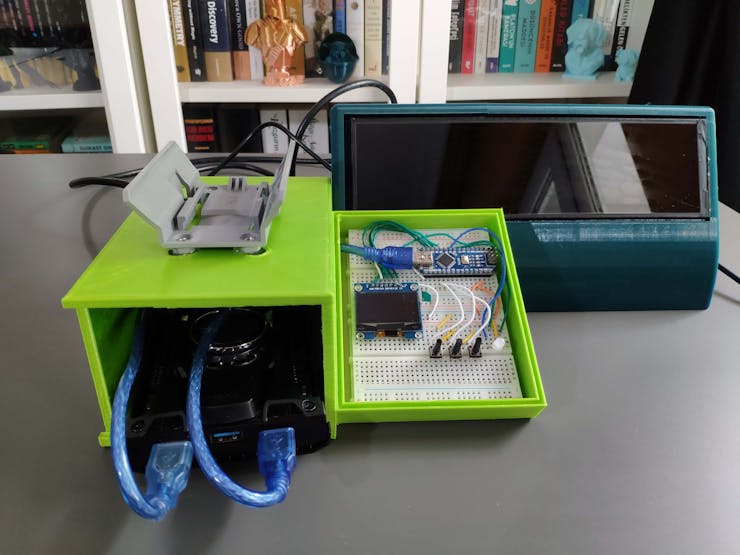
To be able to transfer commands to SenseCAP A1101 via serial communication, I connected Arduino Nano directly to LattePanda 3 Delta via a USB cable. I utilized an SH1106 OLED screen to display ongoing operations and visualize the selected fertilizer contamination classes (levels). Then, I added three control buttons to transfer the user commands to LattePanda 3 Delta via serial communication. Also, I added an RGB LED to inform the user of the device status, indicating serial communication success.
After printing all parts (models), I fastened the remote control to the separate section of the main case via a hot glue gun. I also utilized the SenseCAP A1101's screw kit to attach its bracket firmly to the screw holes on the top of the main case.
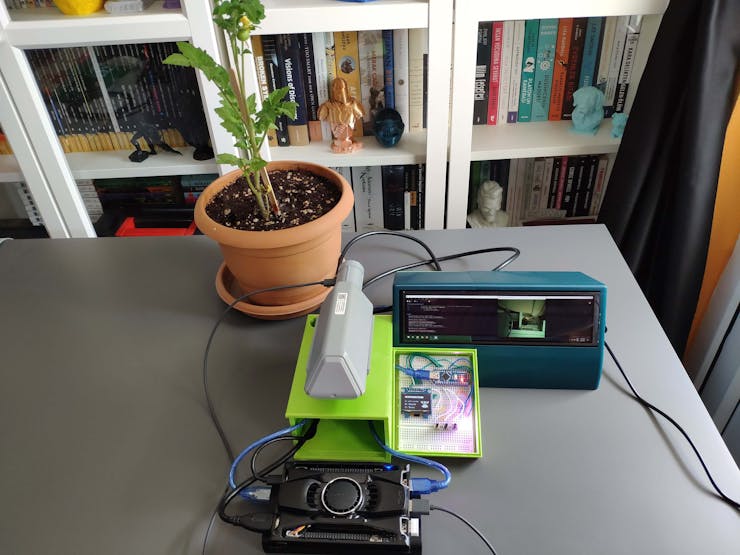
I placed LattePanda 3 Delta in the main case and attached SenseCAP A1101 to its bracket. Then, I attached the diagonal top cover to the main case via its snap-fit joints.
Finally, I inserted the sliding front cover via the dents on the main case.


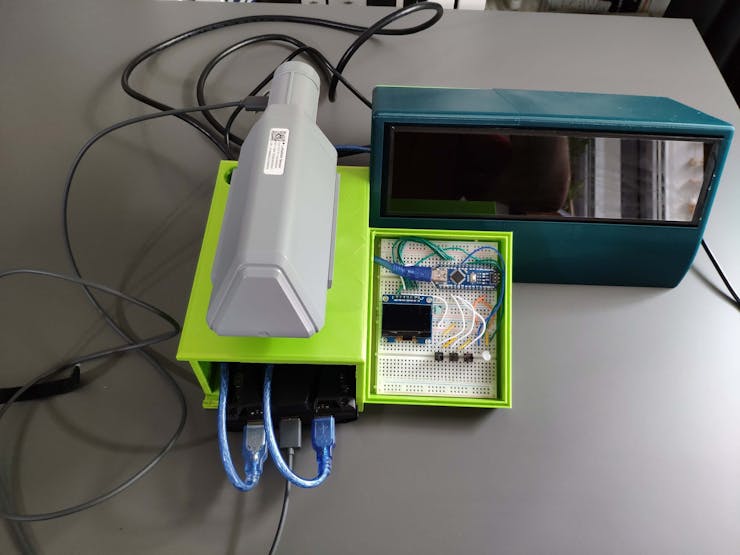
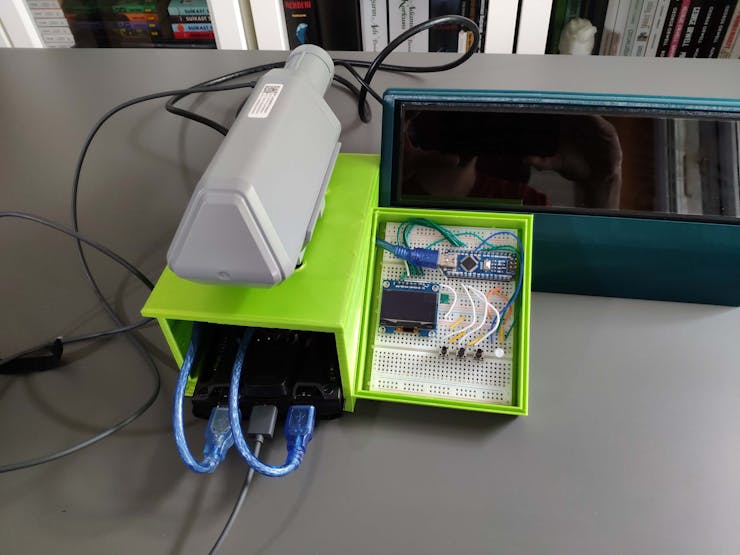


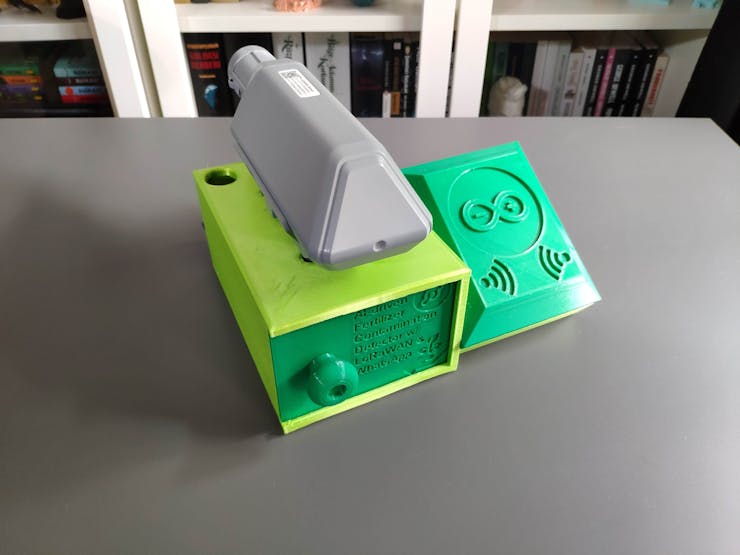
As mentioned earlier, the diagonal top cover can be utilized to hide the remote control when running the object detection model instead of collecting data.

Step 1.2: Creating a LattePanda Deck to display the video stream
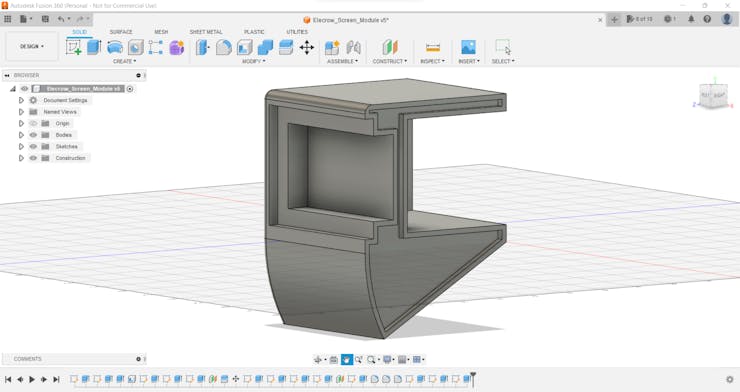
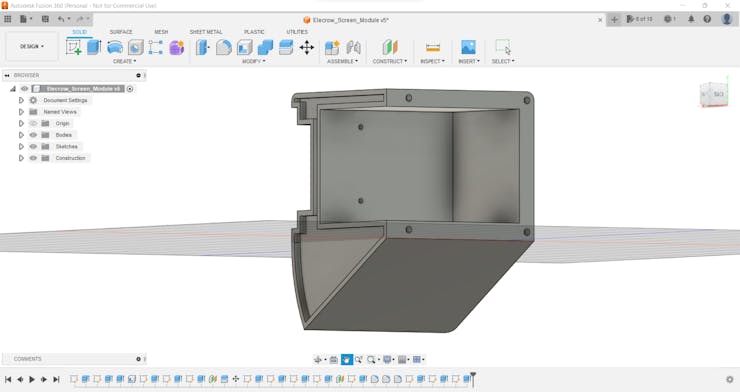
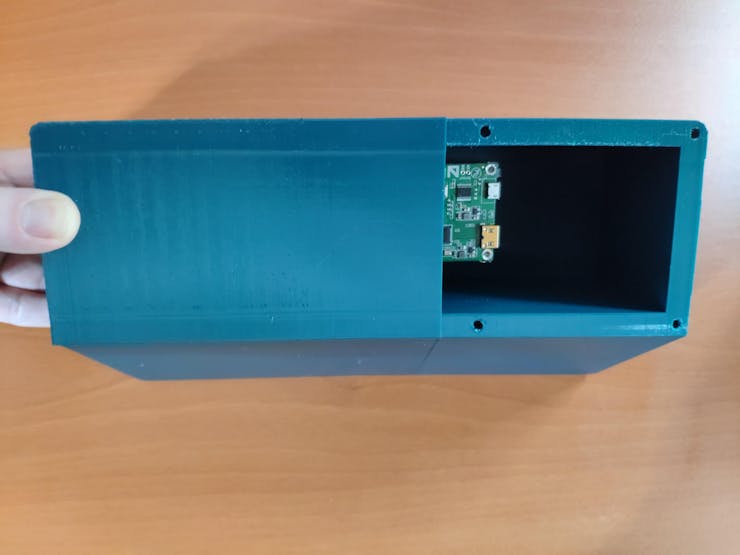
Since I decided to program SenseCAP A1101 with LattePanda 3 Delta to capture images depending on labels transferred by the remote control via serial communication, I decided to design a unique and compact LattePanda Deck to display the real-time video stream generated by SenseCAP A1101, which is not only compatible with LattePanda but also any single-board computer supporting HDMI.
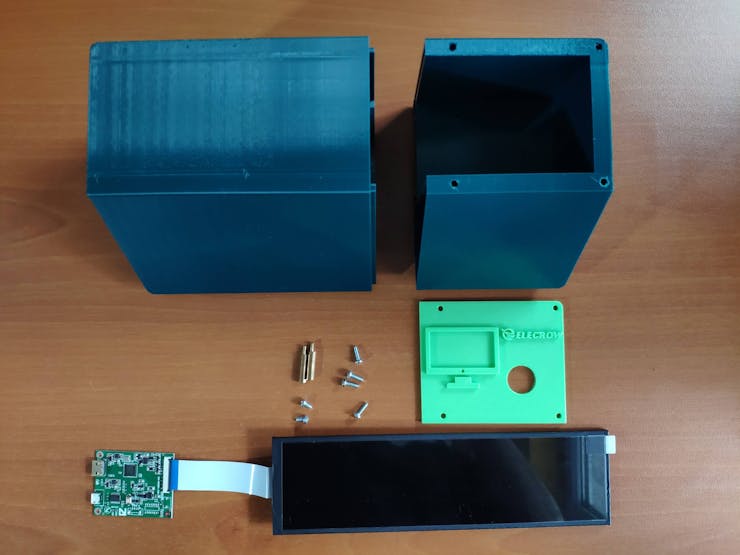
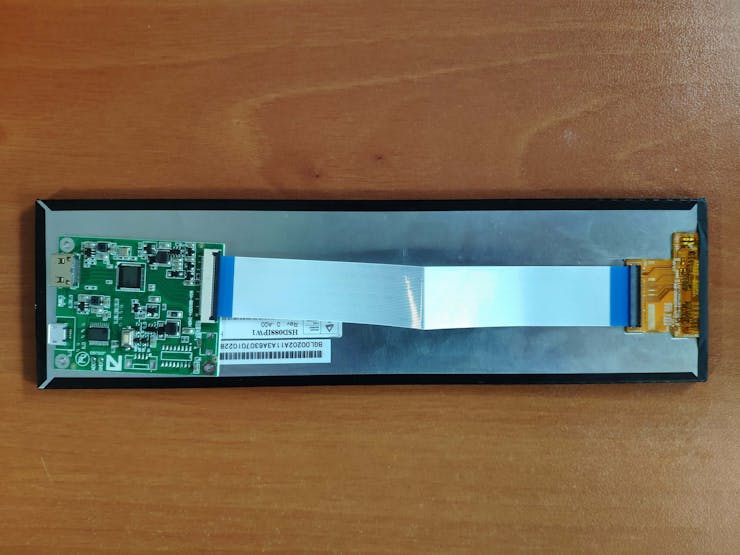
I decided to employ Elecrow's 8.8" (1920*480) high-resolution IPS monitor as the screen of my LattePanda Deck. Thanks to its converter board, this monitor can be powered via a USB port and works without installing any drivers. Therefore, it is a compact plug-and-play monitor for LattePanda 3 Delta, providing high resolution and up to 60Hz refresh rate.
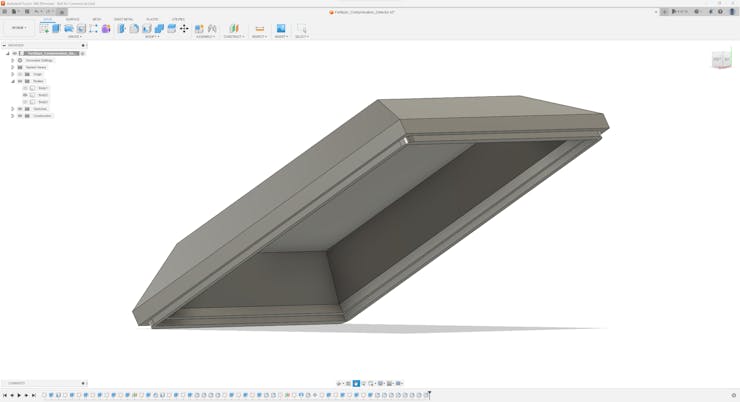
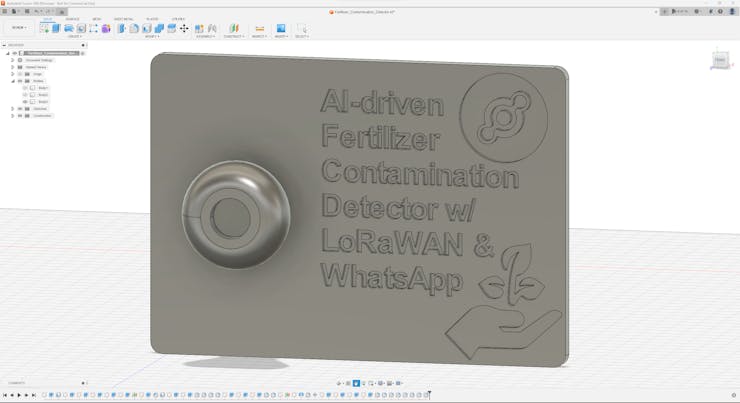
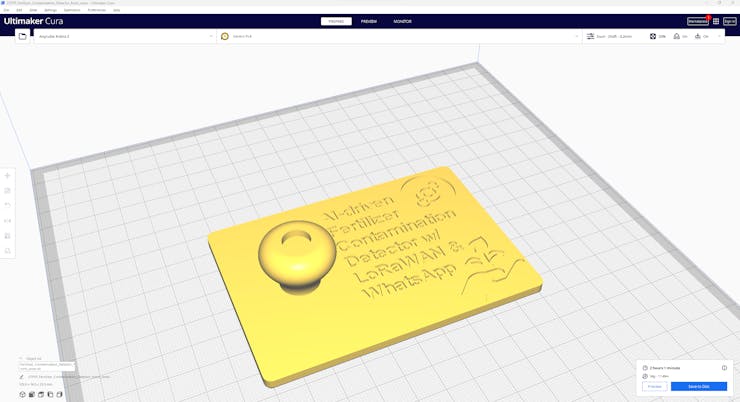
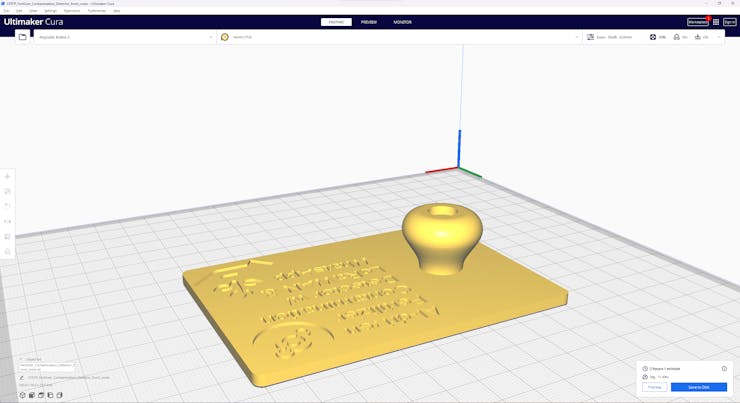
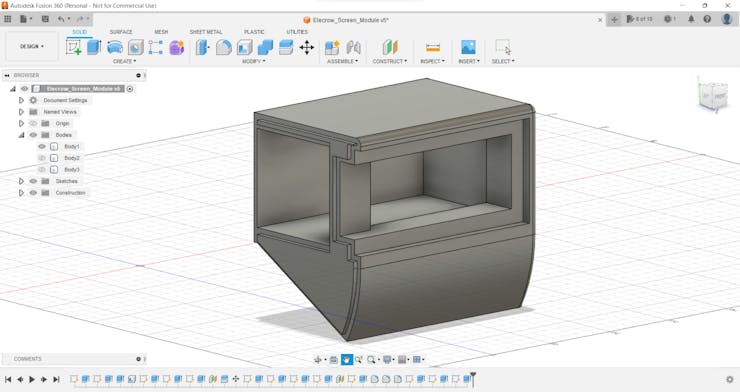
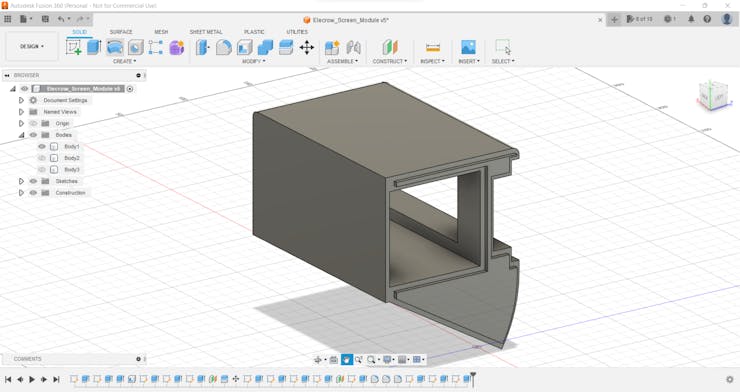
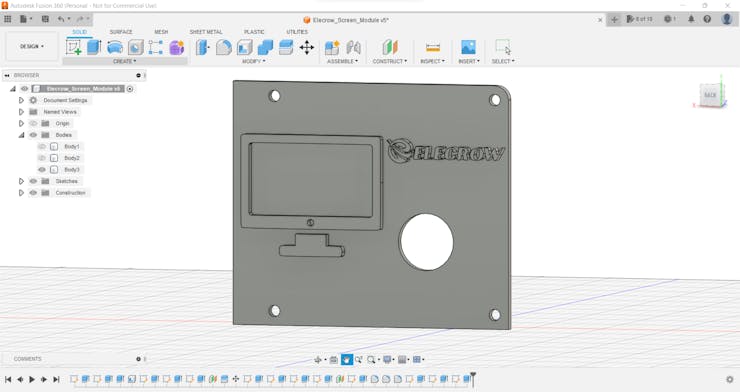
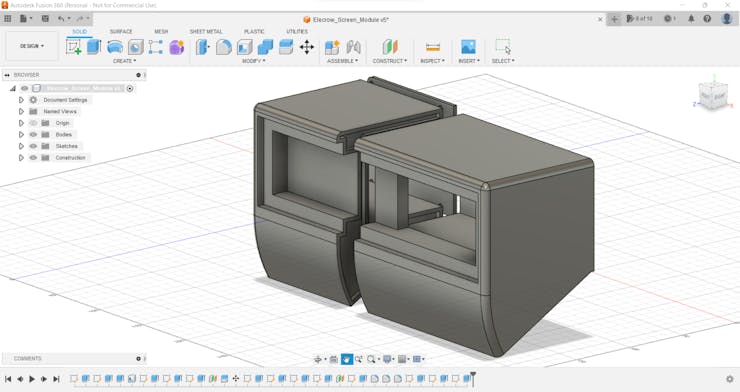
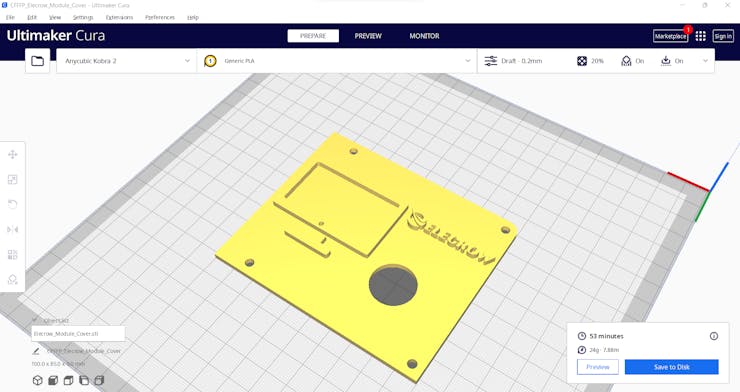
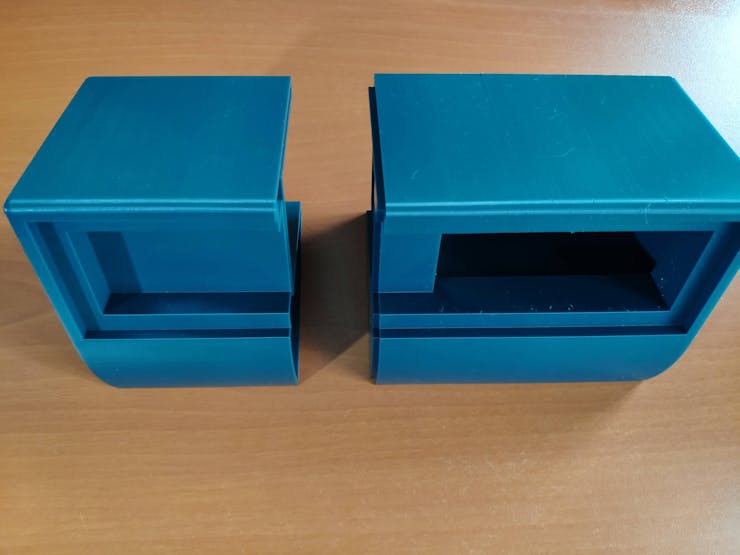
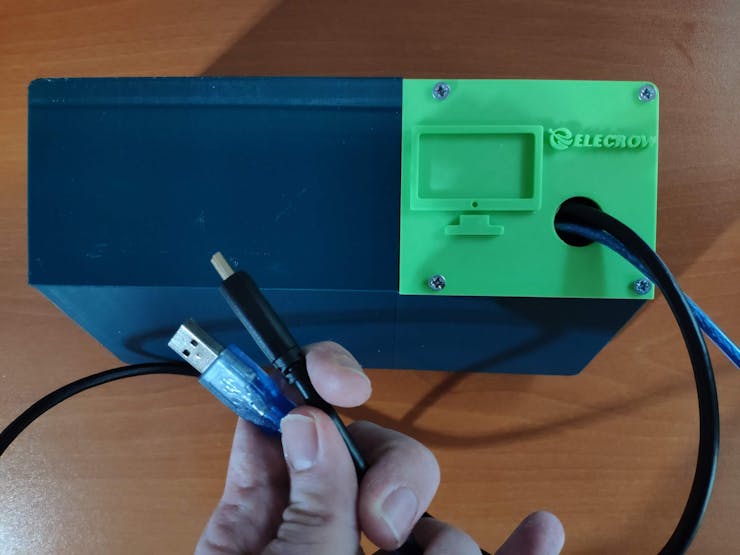
Due to the fact that I wanted to build a sturdy and easy-to-use deck, I designed a two-part case covering the screen frame and providing a slot for the converter board. To avoid overexposure to dust and provide room for cable management, I added a mountable back cover adorned with the brand logo.
I designed the two-part case and its mountable back cover in Autodesk Fusion 360. You can download their STL files below.

Then, I sliced all 3D models (STL files) in Ultimaker Cura.
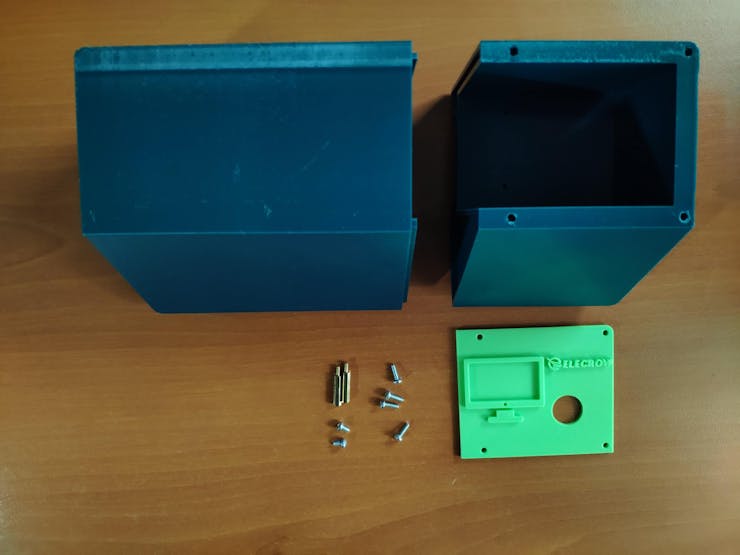
After printing all deck parts (models) with my Anycubic Kobra 2 3D Printer, I affixed the two-part case together via the hot glue gun.
Then, I fastened the Elecrow's IPS monitor to the case covering the screen frame and inserted the converter board into its slot.
After attaching the required cables to the converter board, I fixed the mountable back cover via M3 screws.

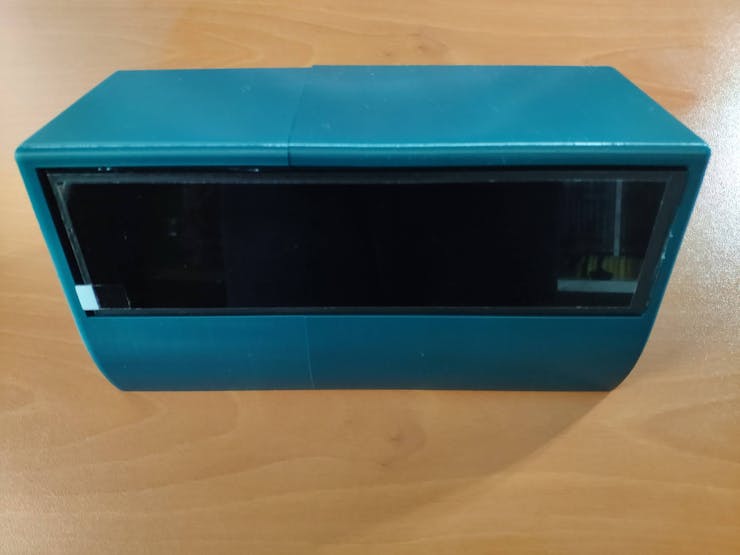
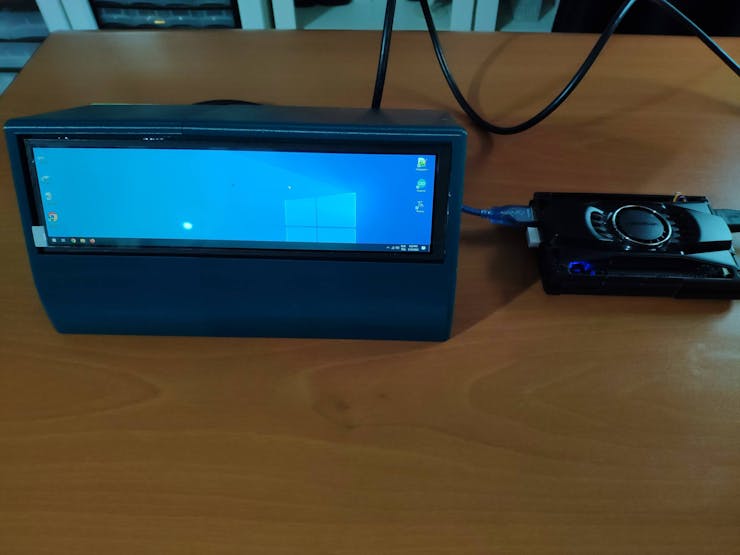
After connecting the converter board to LattePanda 3 Delta via its USB and HDMI ports, LattePanda recognizes the IPS monitor automatically.
Step 2: Creating an account to utilize Twilio's WhatsApp API
Step 3: Producing organic fertilizers from quail manure in different decomposition stages
Step 3.1: Adding chemical fertilizers and sowing tomato seedlings
Step 4: Utilizing Arduino Nano as a remote control to send commands via serial communication
Step 4.1: Displaying images on the SH1106 OLED screen
Step 5.0: Setting up SenseCAP A1101 on LattePanda 3 Delta
Step 5: Capturing fertilizer-exerted soil images w/ SenseCAP A1101 and communicating with Arduino Nano via serial communication
Step 5.1: Saving the captured images as samples on LattePanda 3 Delta
Step 6: Building an object detection (FOMO) model with Edge Impulse
Step 6.1: Uploading images (samples) to Edge Impulse and labeling objects
Step 6.2: Training the FOMO model on the fertilizer-exerted soil images
Step 6.3: Evaluating the model accuracy and deploying the model
Step 7: Connecting SenseCAP A1101 to SenseCAP Mate App and setting up the Edge Impulse FOMO model
Step 8: Transferring the detection results to the SenseCAP Portal via the Helium LongFi Network
Step 8.1: Activating SenseCAP M2 data-only LoRaWAN gateway (EU868)
Step 9: Developing a Python application to transfer the model detection results via WhatsApp
Step 10: Running the model on SenseCAP A1101 and informing the user of the results via WhatsApp
Videos and Conclusion
Further Discussions
By applying object detection models trained on numerous fertilizer-exerted soil images in detecting the excessive use of chemical fertilizers in relation to organic fertilizers, we can achieve to:
🌱🪴📲 prevent chemical fertilizers from contaminating the groundwater and the environment,
🌱🪴📲 avoid chemical fertilizers from dispersing throughout water bodies and increasing macronutrients in the environment,
🌱🪴📲 mitigate the risk of severe health issues due to nitrite-contaminated water, such as DNA damage, lipid peroxidation, and oxidative stress,
🌱🪴📲 protect wildlife from the execrable effects of excessive chemical fertilizer use.

References
[1] Devendra Singh, Shobit Thapa, Neelam Geat, Moti Lal Mehriya, Mahendra Vikram Singh Rajawat, Chapter 12 - Biofertilizers: Mechanisms and application, Biofertilizers Volume 1: Advances in Bio-Inoculants, Woodhead Publishing, 2021, Pages 151-166, https://doi.org/10.1016/B978-0-12-821667-5.00024-5
[2] Lifespan, Nitrates May Be Environmental Trigger For Alzheimer’s, Diabetes And Parkinson's Disease, ScienceDaily, 6 July 2009, www.sciencedaily.com/releases/2009/07/090705215239.htm
[3] Ayoub, A.T., Fertilizers and the environment, Nutrient Cycling in Agroecosystems 55, 117–121, 1999, https://doi.org/10.1023/A:1009808118692