 alnwlsn
When building these things, everyone always seems to fall short on what I would consider to be the most important parts - the mechanical connection from the bicycle to the generator, and whatever gets used to keep the bicycle stationary. I've seen wobbly wooden frames, loose belts, and questionable friction wheels.
But, everyone has to start somewhere, and to better understand the generator performance, I first started by making a very basic pulley system.
The "bicycle" I selected for this project was an old Huffy stationary bicycle that had been sitting in the basement. Why we inherited this unit is unknown to me, since it's about as bare-bones as can be, and does a terrible job at regulating the resistance on the wheel (which is done by a (cheap) standard bicycle brake mechanism with a screw on it). The frame is very flimsy, and something you would never accept for a road bike. Even the cheapest stationary bicycle on Amazon seem luxurious by comparison. On the other hand, it was free, and after a modification to the seat to accommodate a very tall person like me, I thought it would be usable.

I didn't think of taking a picture of the original bike for some reason, so here's one I found online. It says "PRO" fitness, so you know it's legit. Interestingly, mine had a spoked wheel instead of the solid looking one shown here.
It did have a rubber "tire" though, and that's what I went for for a trial run. The wheel is quite flat, and would make a decent pulley if you could keep the belt from falling off the side. For the pulley on the generator, I went to the 3D printer. From the hand crank experiment, I knew that I wouldn't have to turn the generator very fast, so I printed out the biggest pulley that would fit on my bed.
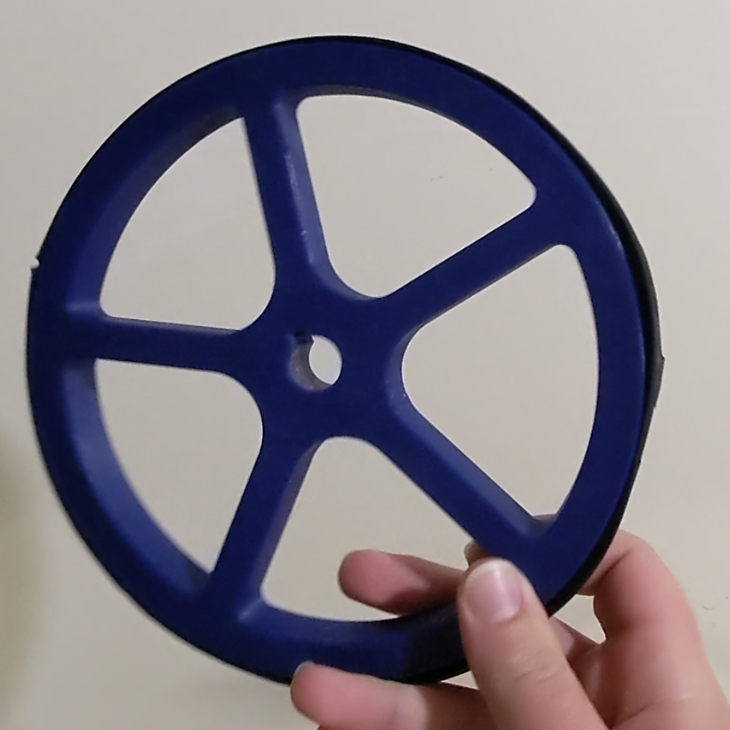
Because the rubber tire on the bicycle would do a good enough job gripping it, I just used a piece of rope for the belt. That would not fly for the 3D printed pulley, so I cut out a section of inner tube and stretched it over it, to form a second "tire". Then, I could run the rope "belt" around the belt and wheel, and with an inverse clamp to push the motor and bicycle apart, it was enough to get things working.
Here's the only picture I took of it, in January of 2022, complete with potatoes.
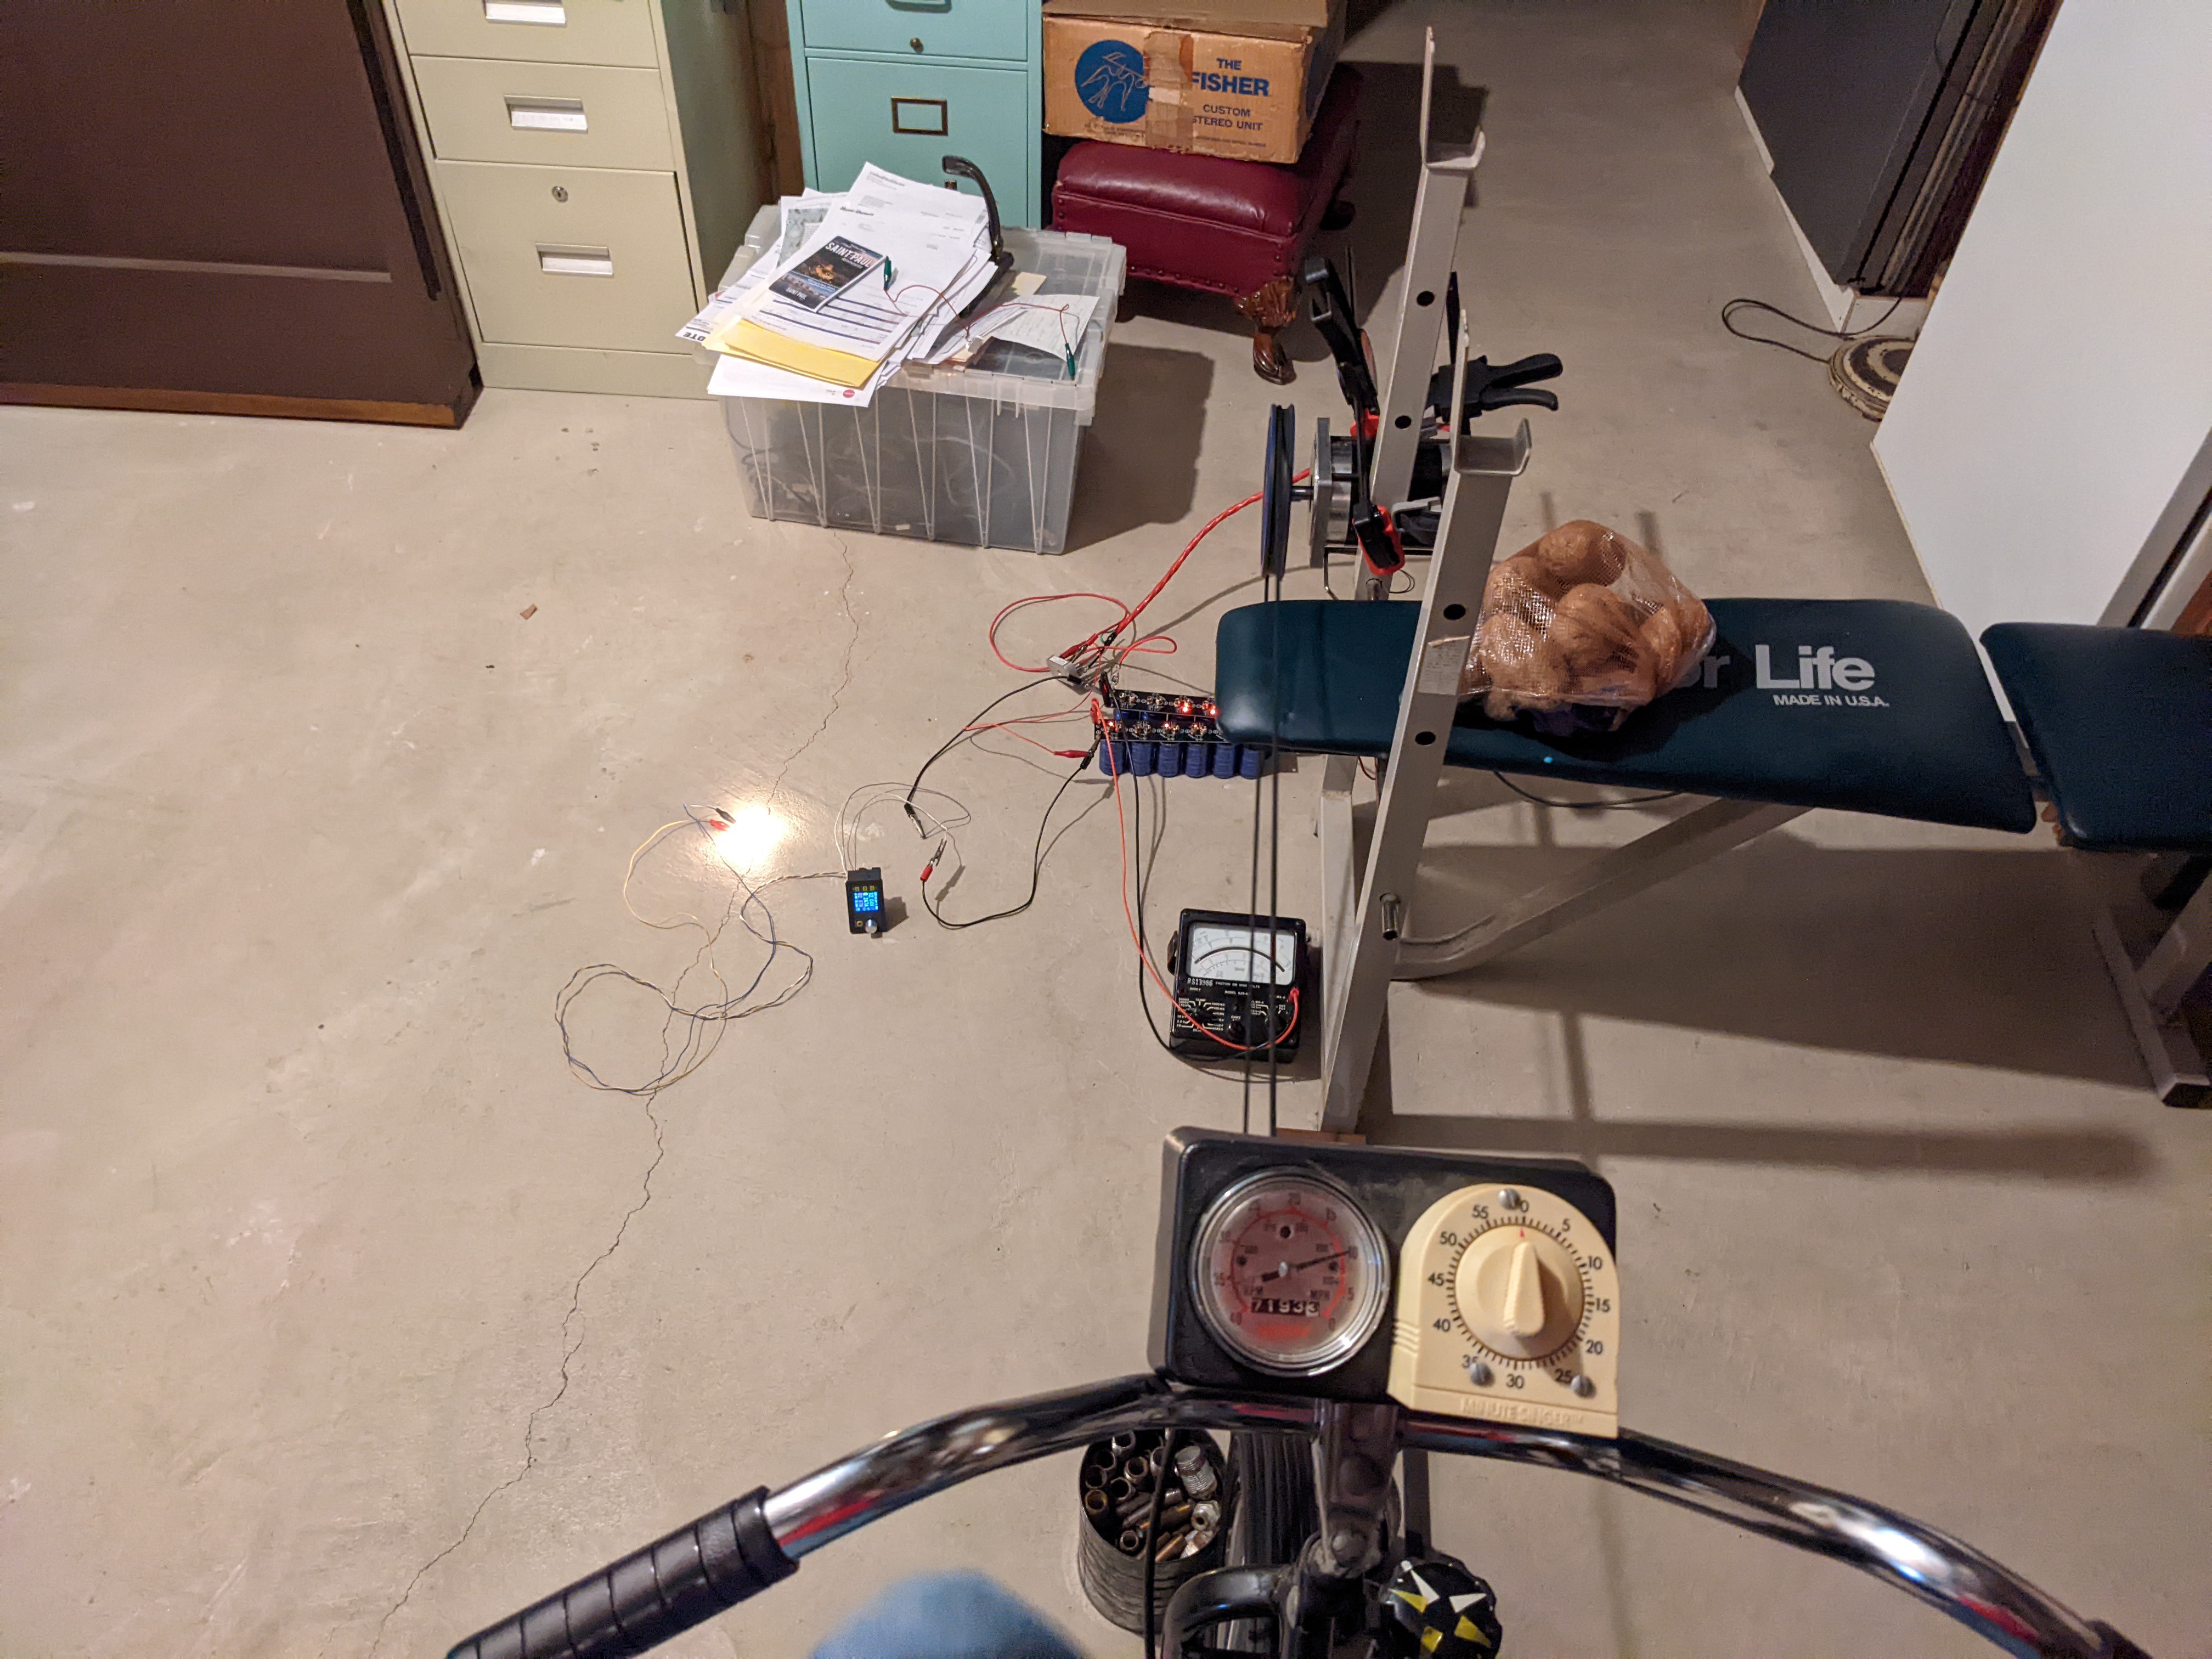
The coffee cans on the floor are filled with heavy metal scrap, and form the guides that help keep the belt on the bicycle wheel. As crude as this was, it did work, and I was able to power a light bulb for the fist time, before working my way up to a laptop. However, it had its problems - the belt would slip if not tensioned less than was need to lift the back of the bike off the ground, and it would also slip and fall off frequently, despite the guides. Above about 40-50 watts, it would slip and fall off, no matter what I tried. After a couple of months like this, I decided it was time for an upgrade, and I turned to EBay.
What I was looking for was a second roller chain set to replace the front wheel. As it turns out, I got the size of the generator pulley about right; 500 RPM was a pretty good target for the generator, and the generator-to-pedal ratio was about 6:1. The pedaling did seem a tiny bit fast, so I aimed for 7:1 in my redesign. Taking out the original bicycle chain setup, I could work out what ratio to look for. Not knowing the ins and outs of chain selection, I simply searched for kits that included both the chain and sprockets, so I could be sure they would all fit together. These seem to be sold as motorcycle and snowmobile replacement parts, so the chain I ended up getting was about twice as thick as the bicycle chain!

Incidentally, if you are looking for a decent introduction to chains for your own projects, I recommend Tim Hunkin's Secret Life of Components.
From here, I removed the front wheel and got to work on an intermediate shaft. I reused the existing ratcheting sprocket from the front wheel, which was threaded, so I got a chance to cut some threads on the lathe. Although threaded, the original manufacturers of the bicycle decided to weld the sprocket to the wheel for some reason, but a hacksaw soon isolated it.
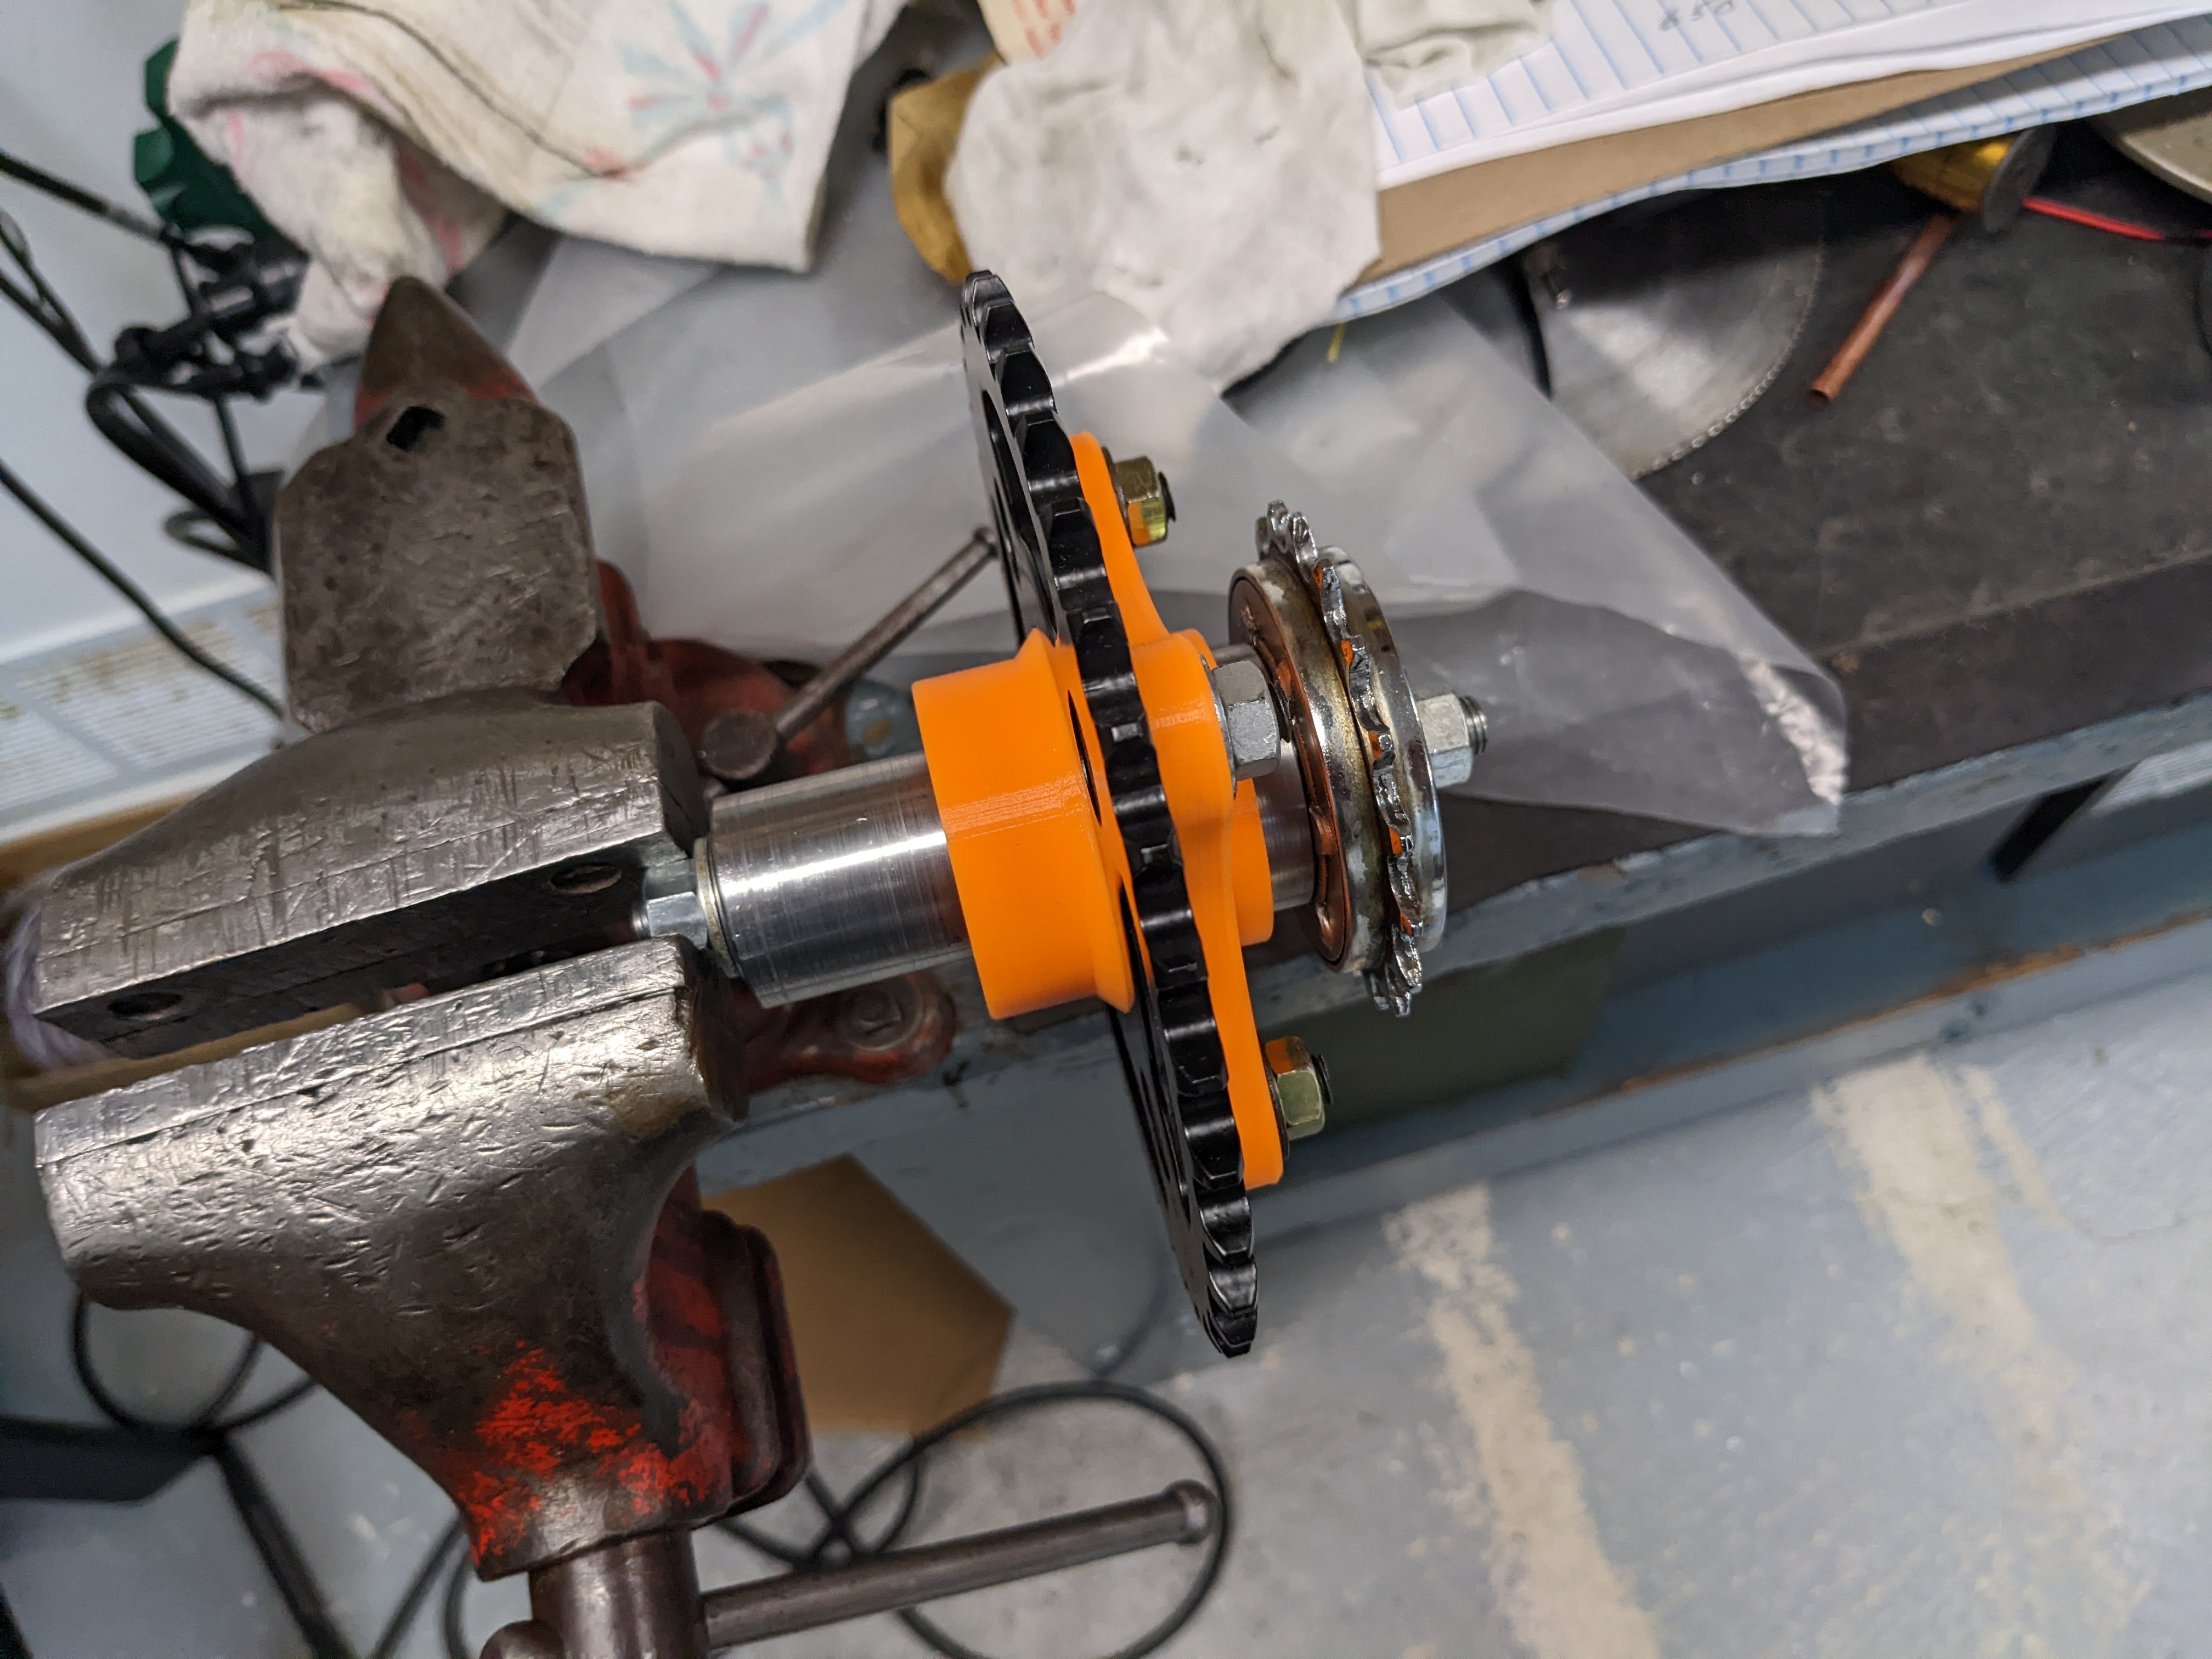
I cut a keyway on the shaft with the mill, and then for the other sprocket, I just went for a 3D printed adapter. Although it is just PLA, and has developed some cracks, it has never let me down. After a few evenings of machining getting the shaft right, it sure does show why 3D printing is "rapid" prototyping!
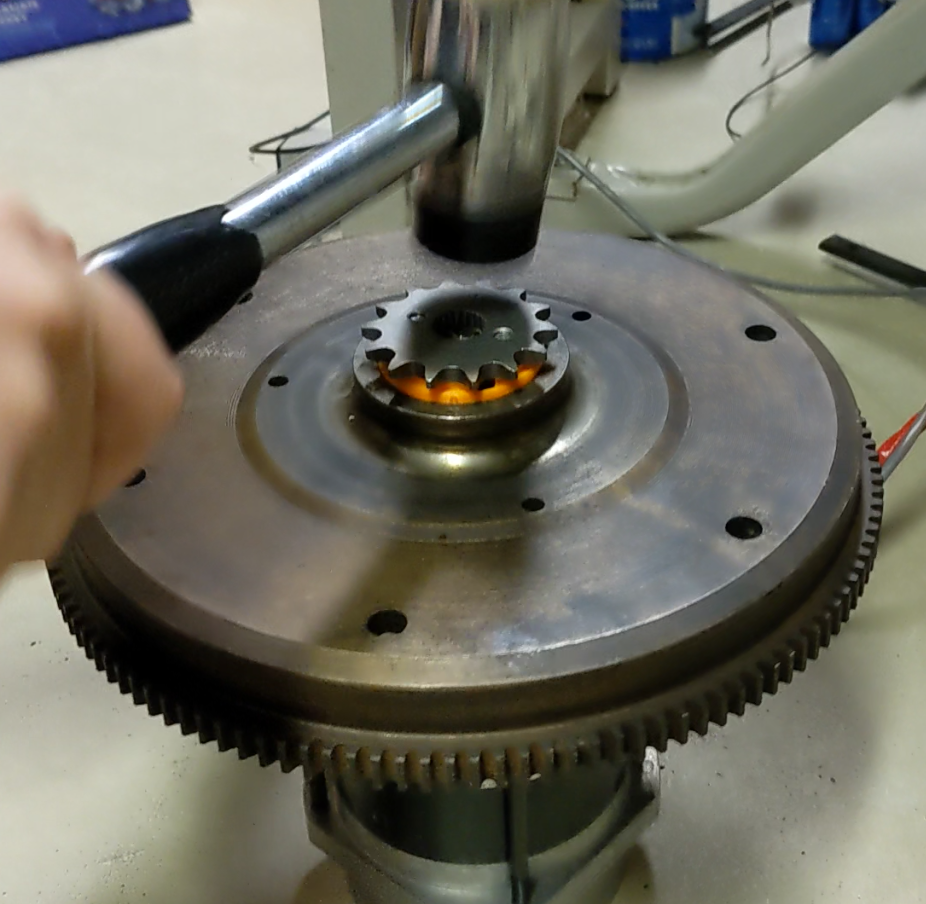
For the generator side, I enlarged the hole in the small sprocket, and made another 3D printed adapter. I also borrowed a spare VW beetle flywheel to throw on there, hoping it would help smooth things out, like momentum on a normal bicycle. I wasn't really sure if it would do anything, but when you have a stack of flywheels in the garage, it doesn't really hurt to try it anyway.
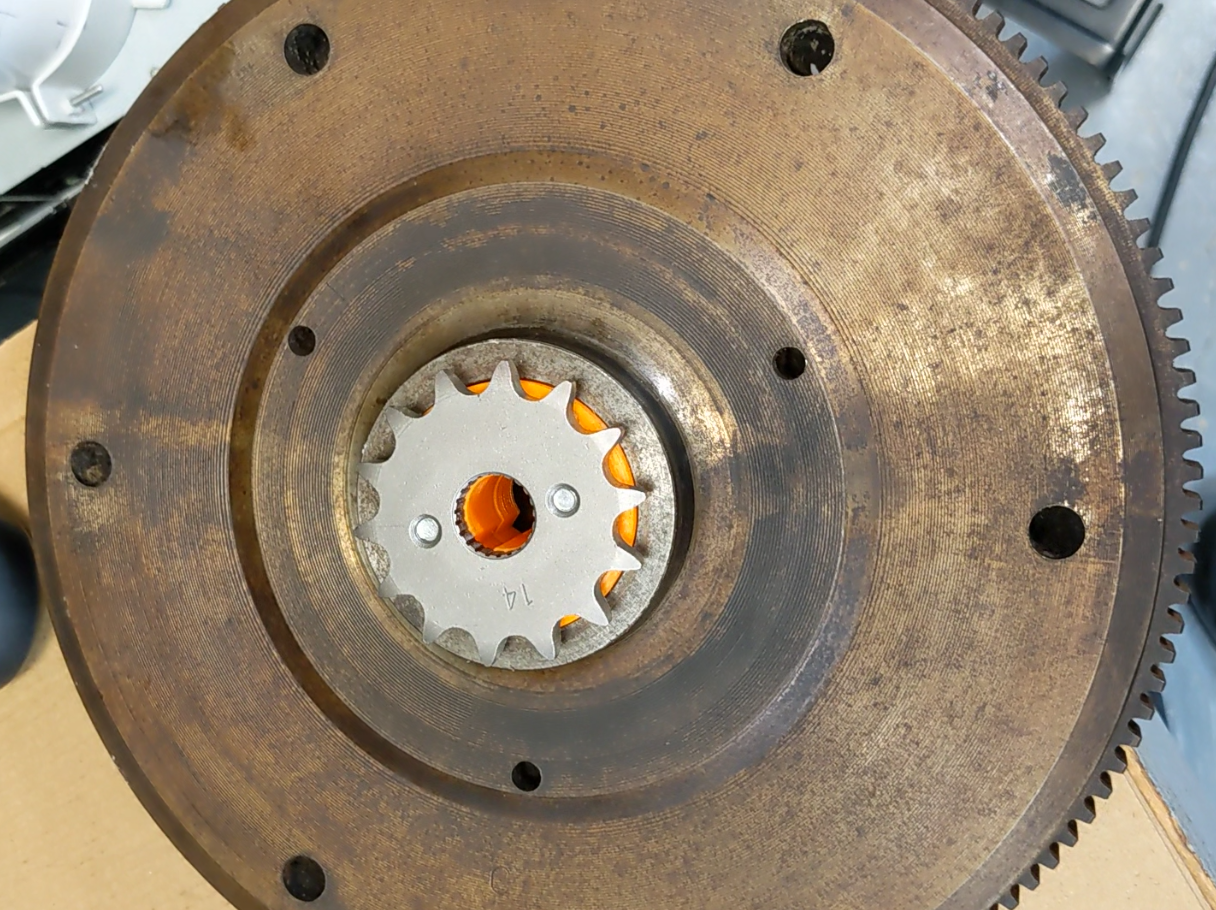
The assembly was then gingerly hammered into place for a press fit. Being PLA, I knew it had the potential to loosen over time, but after over a year, it seems to have pretty well stay put. Remember, everything in the powertrain here is rated for a fraction of its originally designed duty.
Next up, it was time to mount the generator to the bicycle. Because of the way I had to mount the sprocket, the original mounting face was now nearly covered by the flywheel bell. I decided to cut corners once again and simply decided to enclose the generator in a tight wooden box. The box is a tiny bit too small, and assembled around the motor housing with a bunch of screws, clamping it securely in place from all sides.

Three bolts through the frame of the bike mounts the assembly onto the bike, and washers behind it adjusts the chain tension. Although this mount does tend to flex a bit at the free corner, it's still a tremendous improvement over the old rope and pulleys, and I think it's reasonable that I would end up injuring myself in some way before I ever come close to damaging this setup.
Discussions
Become a Hackaday.io Member
Create an account to leave a comment. Already have an account? Log In.