 Kaushlesh C. ( KD9VFU )
Cyberdeck designs are quite diverse and when I decided to build one, my goal was to create something practical that I could use daily, not just a cool piece of tech that collects dust. This project took me over a year, during which I went through many design iterations, learning from both good and bad choices along the way.
After finishing my first build, it became clear to me that usability is key. If my cyberdeck isn't convenient to use, I'll just end up using my other devices instead. So I didn't want to build a cyberdeck just to say I had done it. I wanted to make something I would actually use frequently, not something that would just sit in storage until I wanted to show it off. That's why I started asking myself, "How will I use the cyberdeck?" instead of "Why should I build a cyberdeck?"
How will I use it?
The first question to answer is how will I use it?
- Outdoor activities like going on a camping trip.
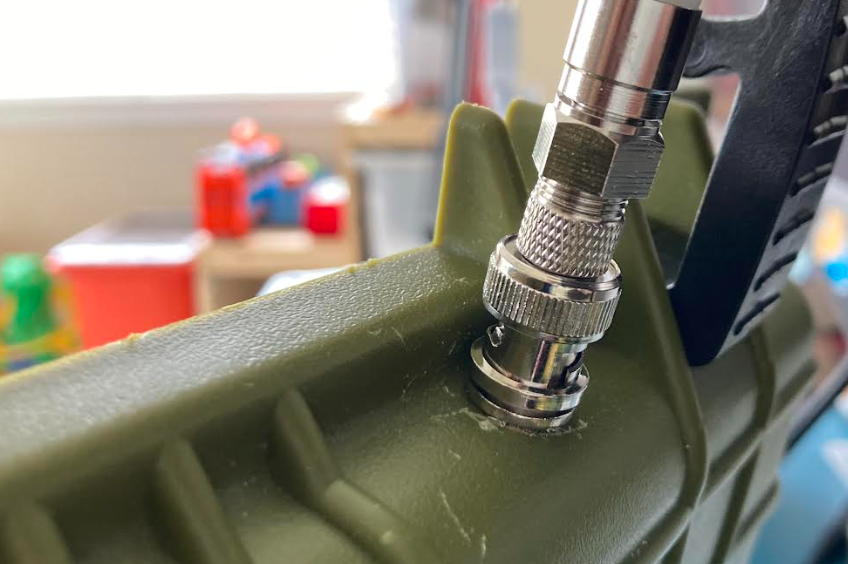
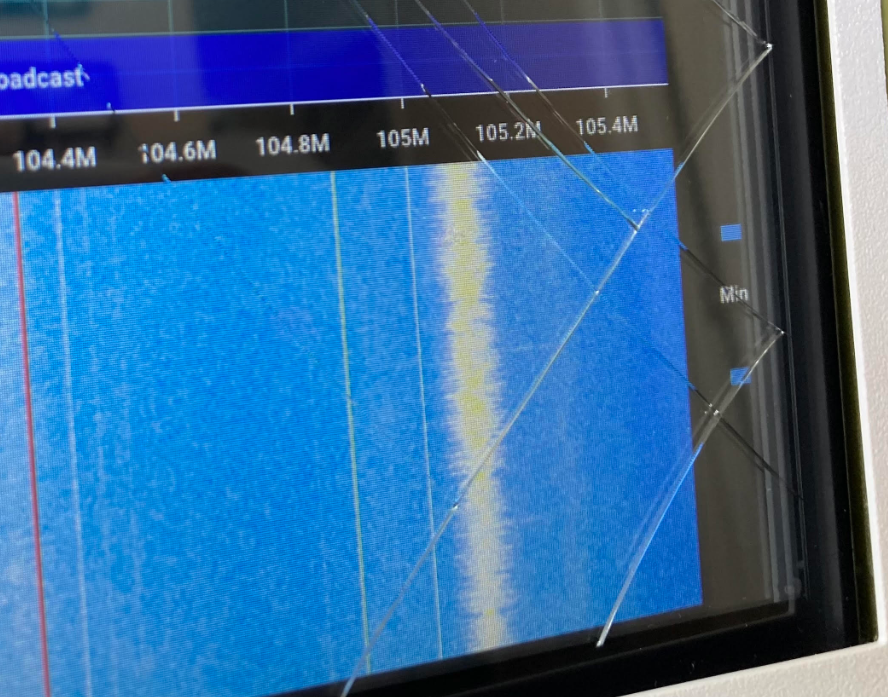
- Ham radio, field day, digital modes for a Ham radio.
- Play games on retropie.
- Play music and connect a speaker.
- Navigation, GPS location.
- Complete Wikipedia on a raspberry pi?
- General purpose internet browsing device.
- Capture outdoor photos, time-lapse or capture an image on a trigger
What should be the most important features?
The next step was to decide what parts do I need, and what should be the desired specifications.
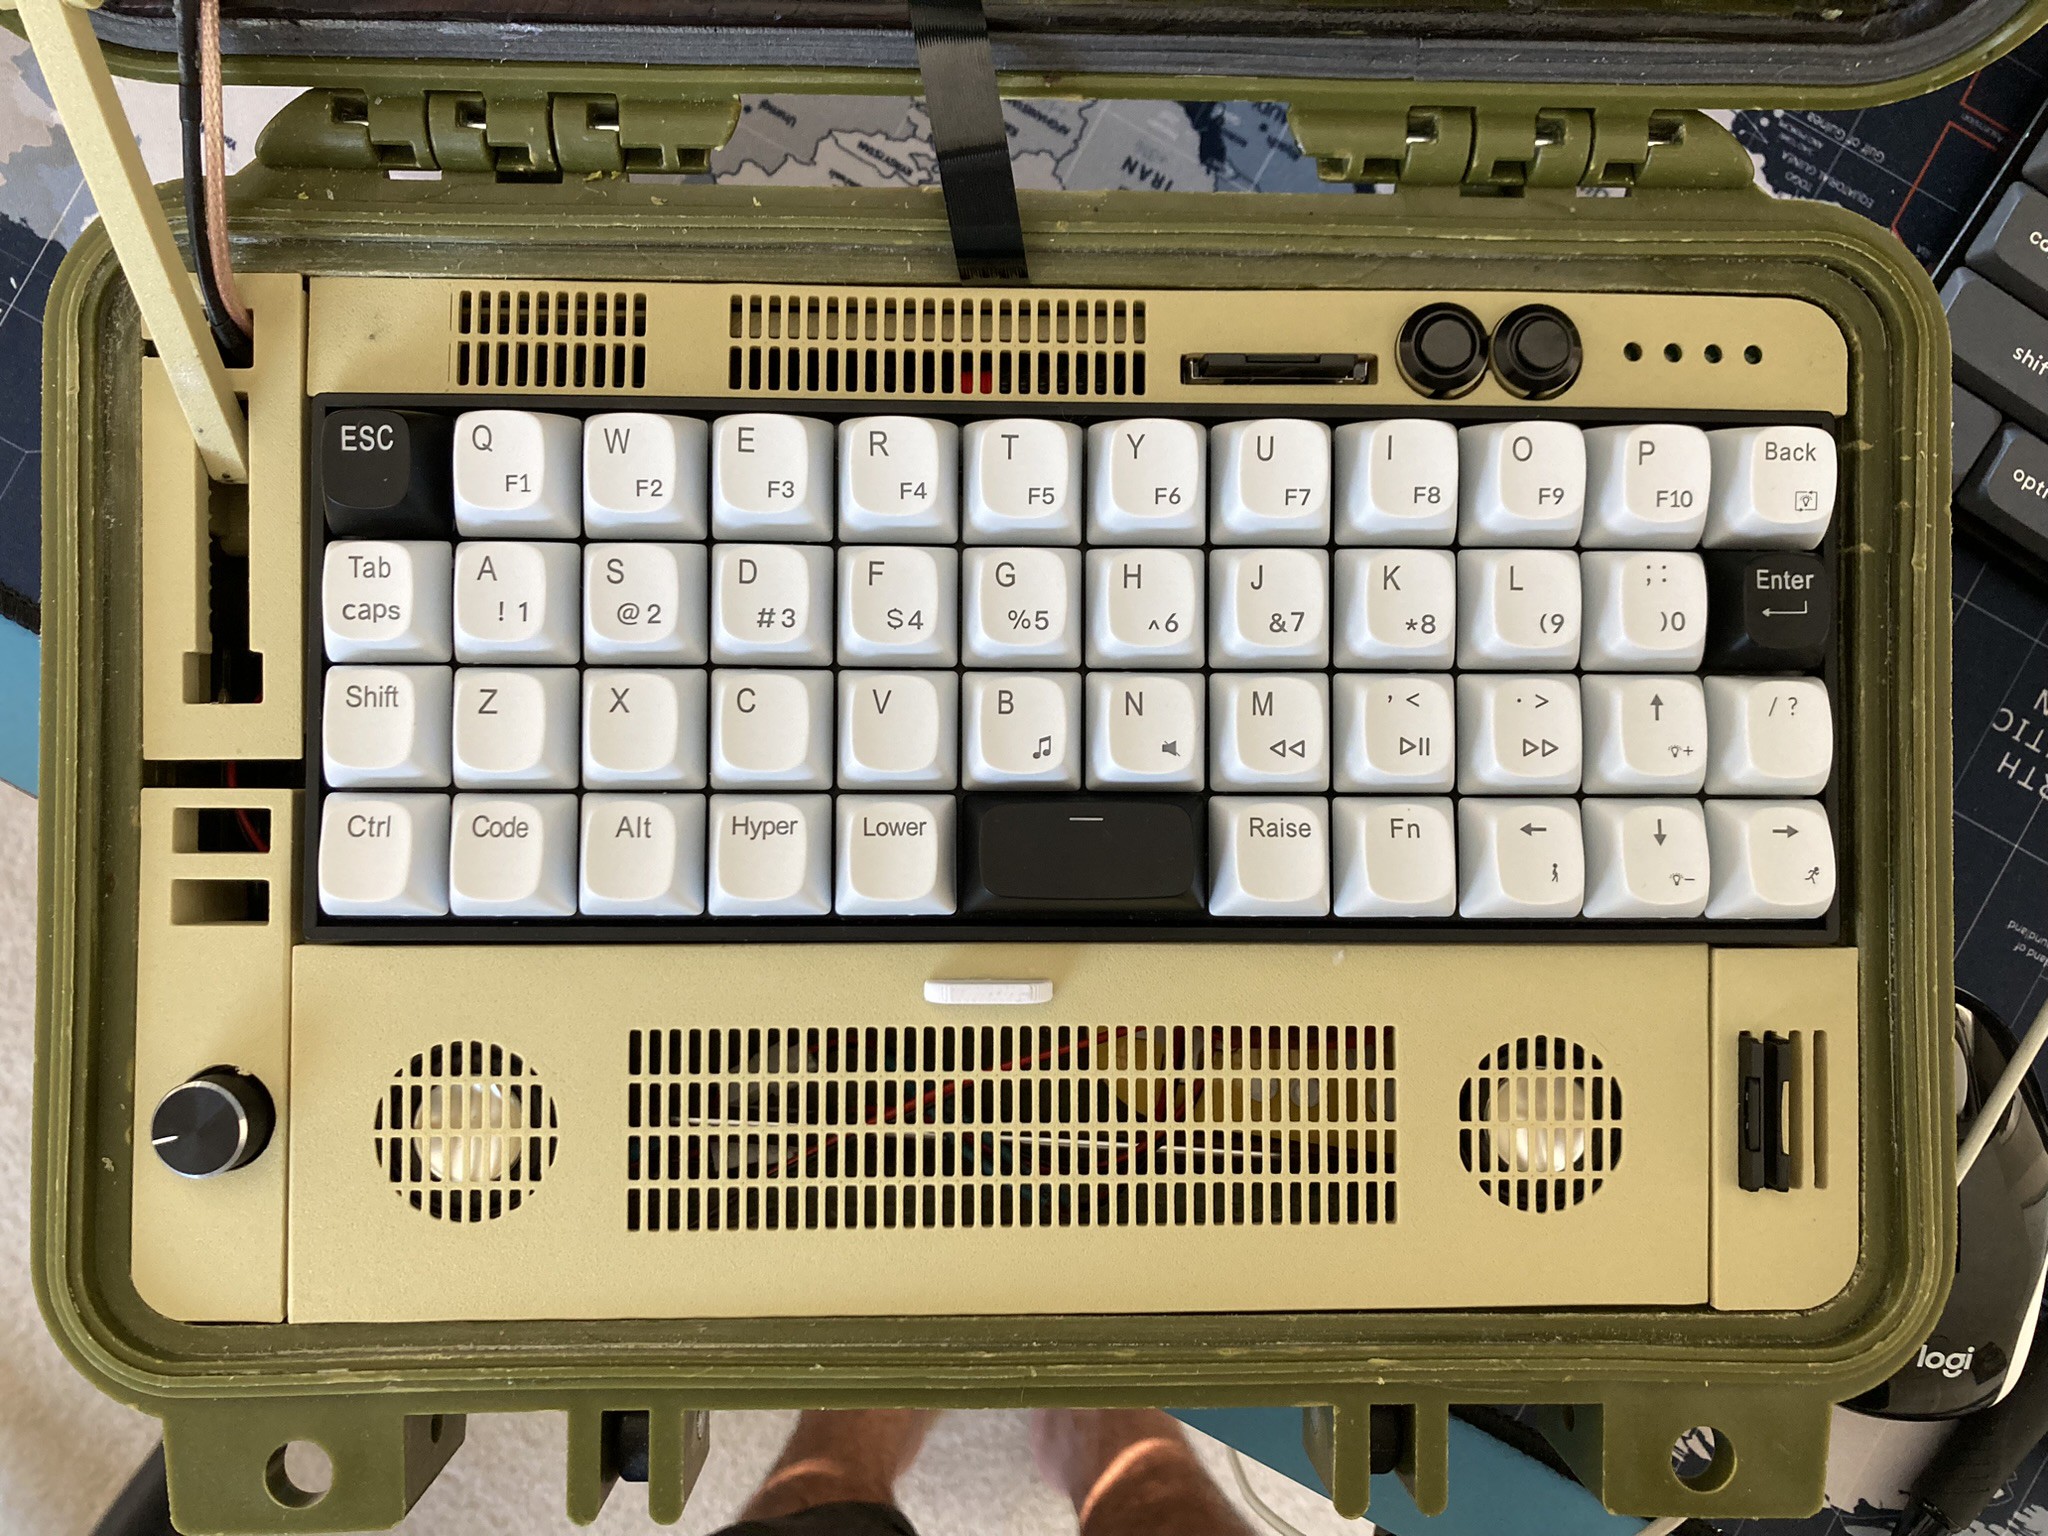
- Use of a Raspberry Pi 4 with a memory capacity of 8GB.
- A portable and waterproof case that's also compact.
- A battery system that's rechargeable, with a capacity to run for up to 20 hours.
- Compatibility with USB accessories such as GPS, SDR, and others.
- Inclusion of a standard-sized keyboard and mouse for easy typing.
- Capability to swap SD cards for accessing different OS's like gaming, SDR, navigation, etc.
- Parts that are 3D-printable and a construction process that's straightforward.
- Easy disassembly for part replacement when needed.
- A substantial LCD display, with optional touchscreen functionality.
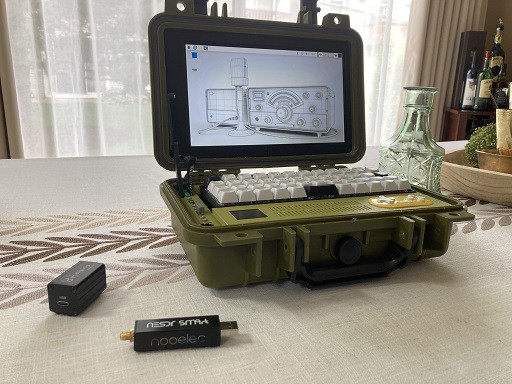
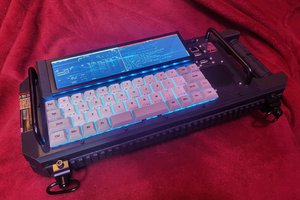
I kicked off this project in 2022. Since then, I've gone through several changes in the design. Now, I've got the latest version ready, but I'm open to the fact that it might change again in the future. I'm excited to discuss the building process, the features of the cyberdeck, the challenges I faced in the design phase, how I chose the parts, and importantly, how the cyberdeck can be fixed, repaired, and put back together.
Creating the 3D models: I'm not an expert in complex 3D modeling software, I just know how to use Tinkercad. So, my designs are pretty straightforward and don't have lots of fancy curves. Some people might say it's slower, but I like the simplicity of adding and subtracting on 3D objects.
When I'm designing and 3D printing, I use a few different strategies:
- Small prints: Instead of printing the whole part at once, I'll design the full part, but only print a little bit of it to check the fit. I do this over and over until it fits right. This means I can print things in just 10-20 minutes, check the fit, and then redesign it quickly if I need to.
- Measure-design-print-remeasure: I start by measuring the size of the actual object, then I design and 3d print the part. If it's too big or small, I measure the difference, and then change the design.
- Modular design: I design separate parts and test them on their own (like a base for the Raspberry Pi or a place for a pushbutton). I keep these parts in my main design when I do a full print. This way, I can move parts around within the whole assembly. So, for instance, if the Raspberry Pi is too close to the battery, I can just move the part that holds the Raspberry Pi.
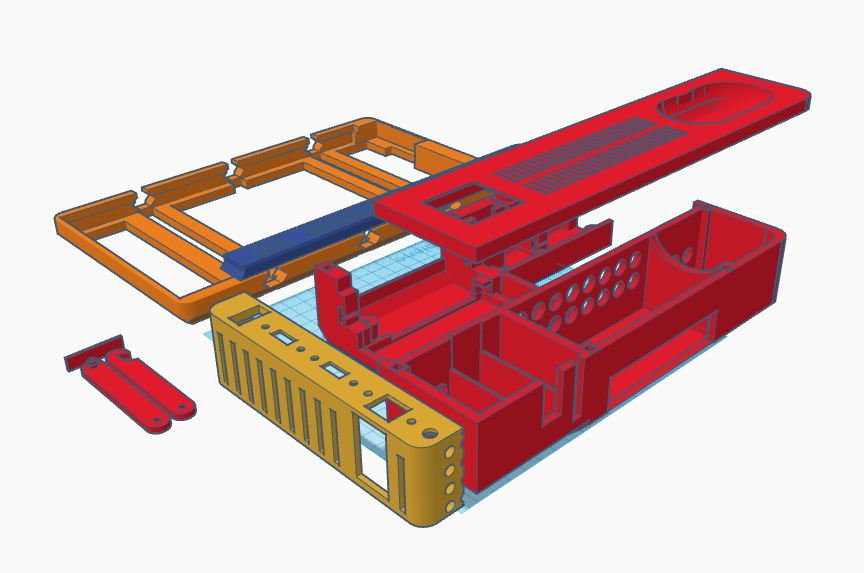
Image : 3d printable parts
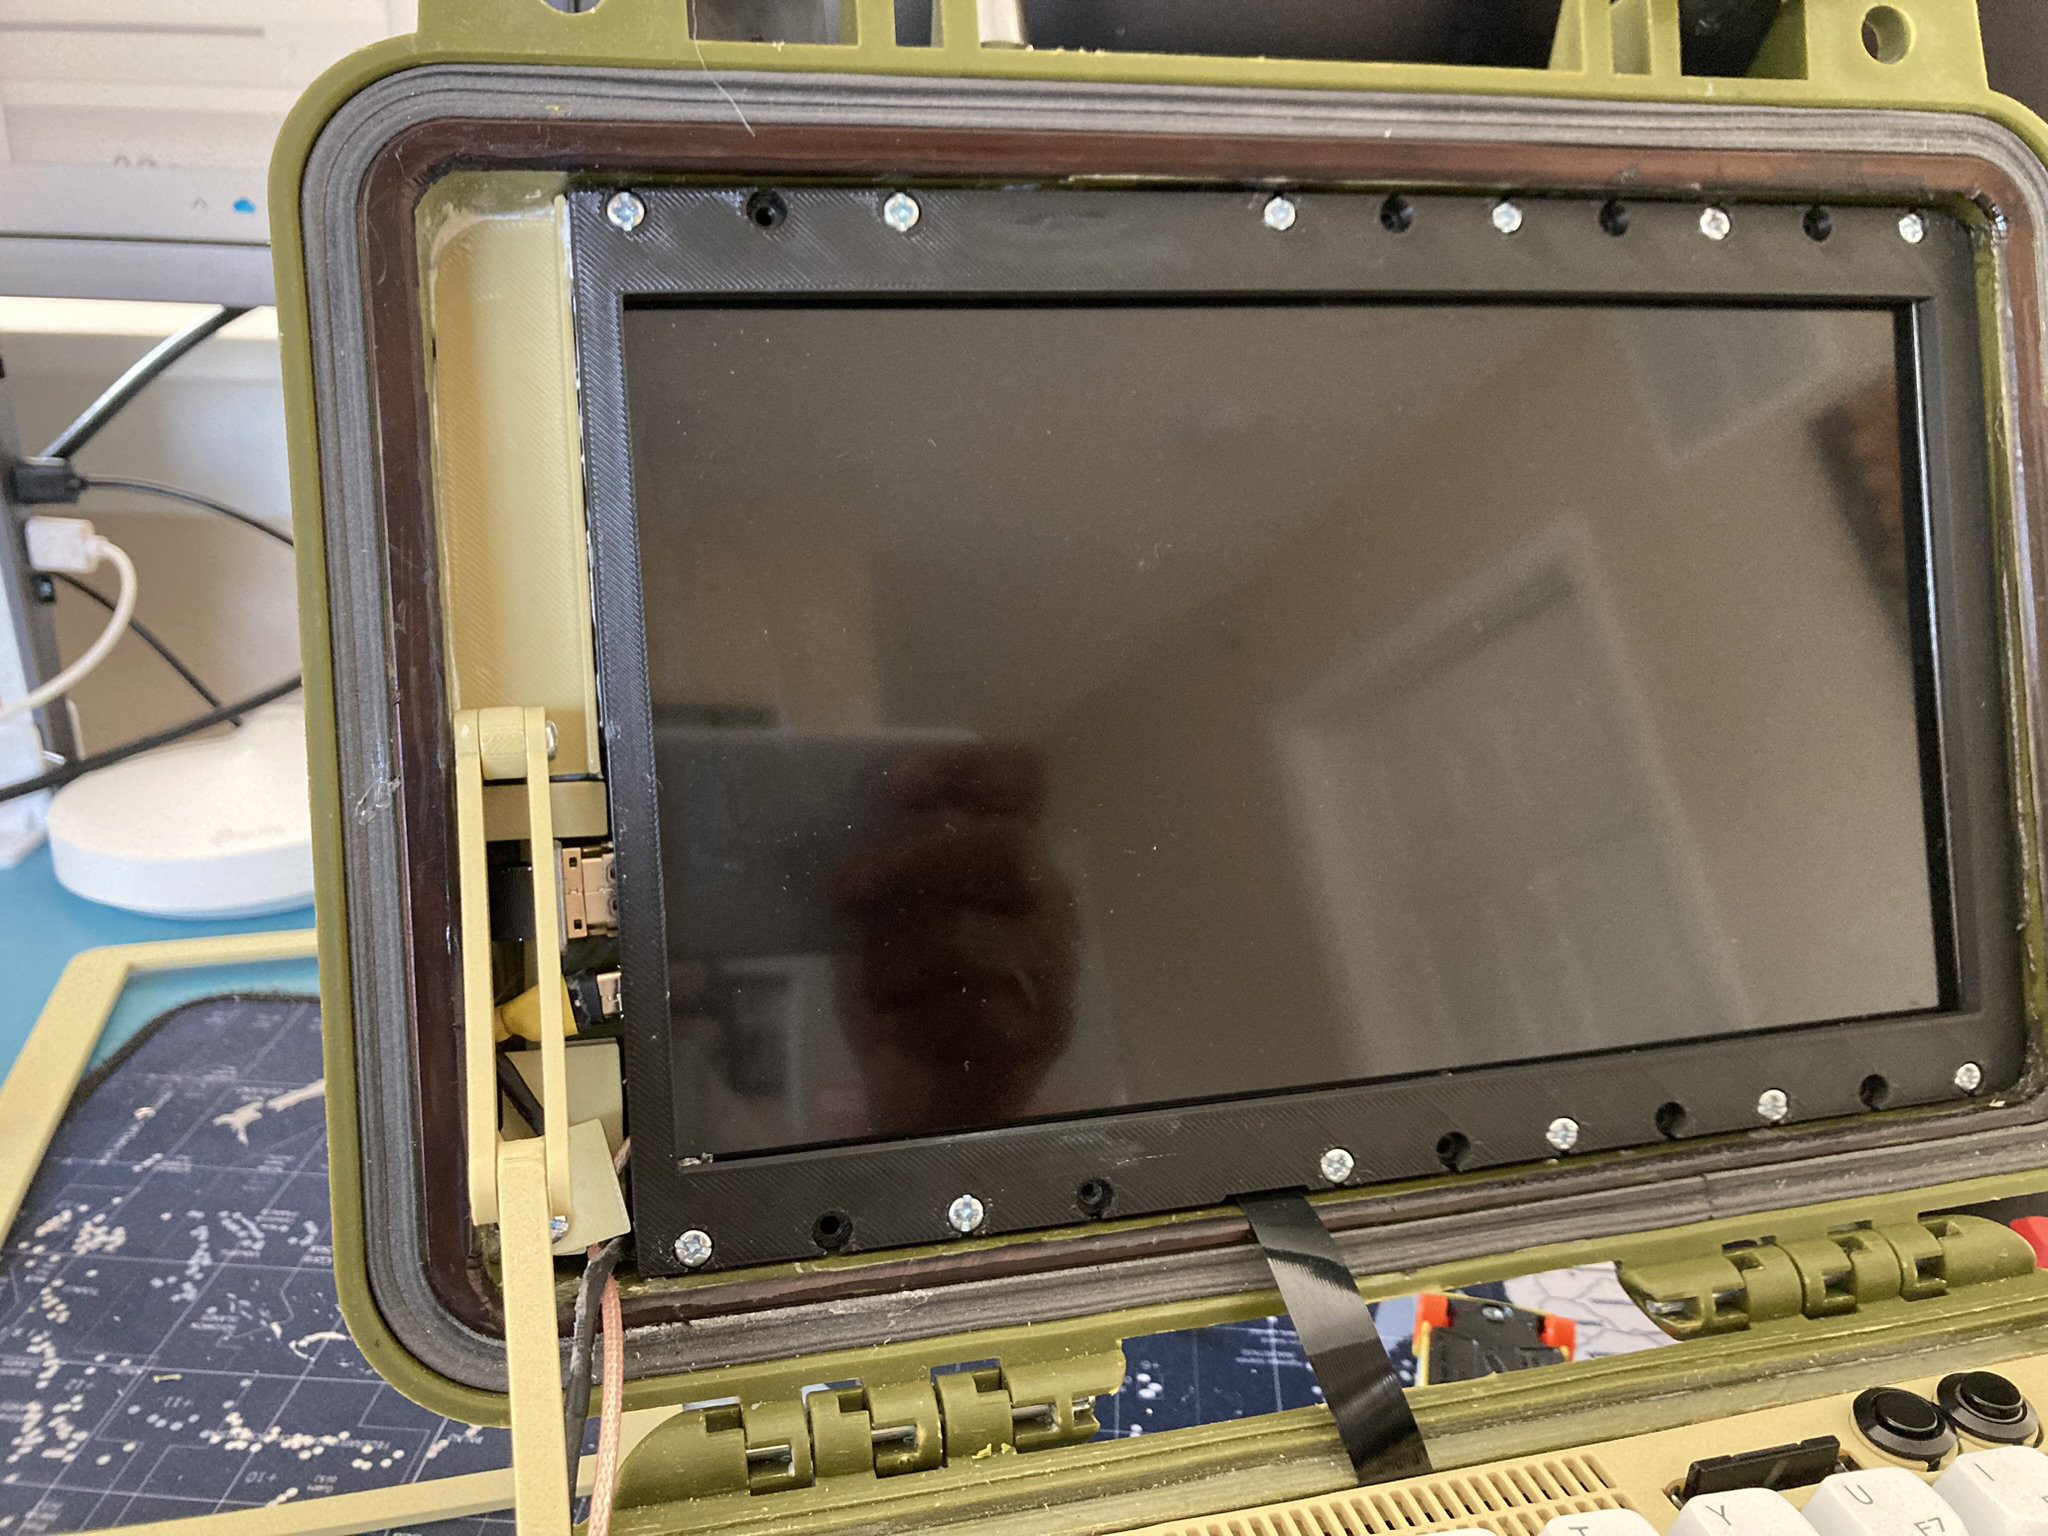
Assembly : Please watch my video for detailed assembly. Essentially, I 3d printed all the parts, and assembled the Raspberry pi as the centerpiece, and other peripherals, around it.
<Insert step by step images of assembly>
A few interesting things: During the build, there were several...
Read more »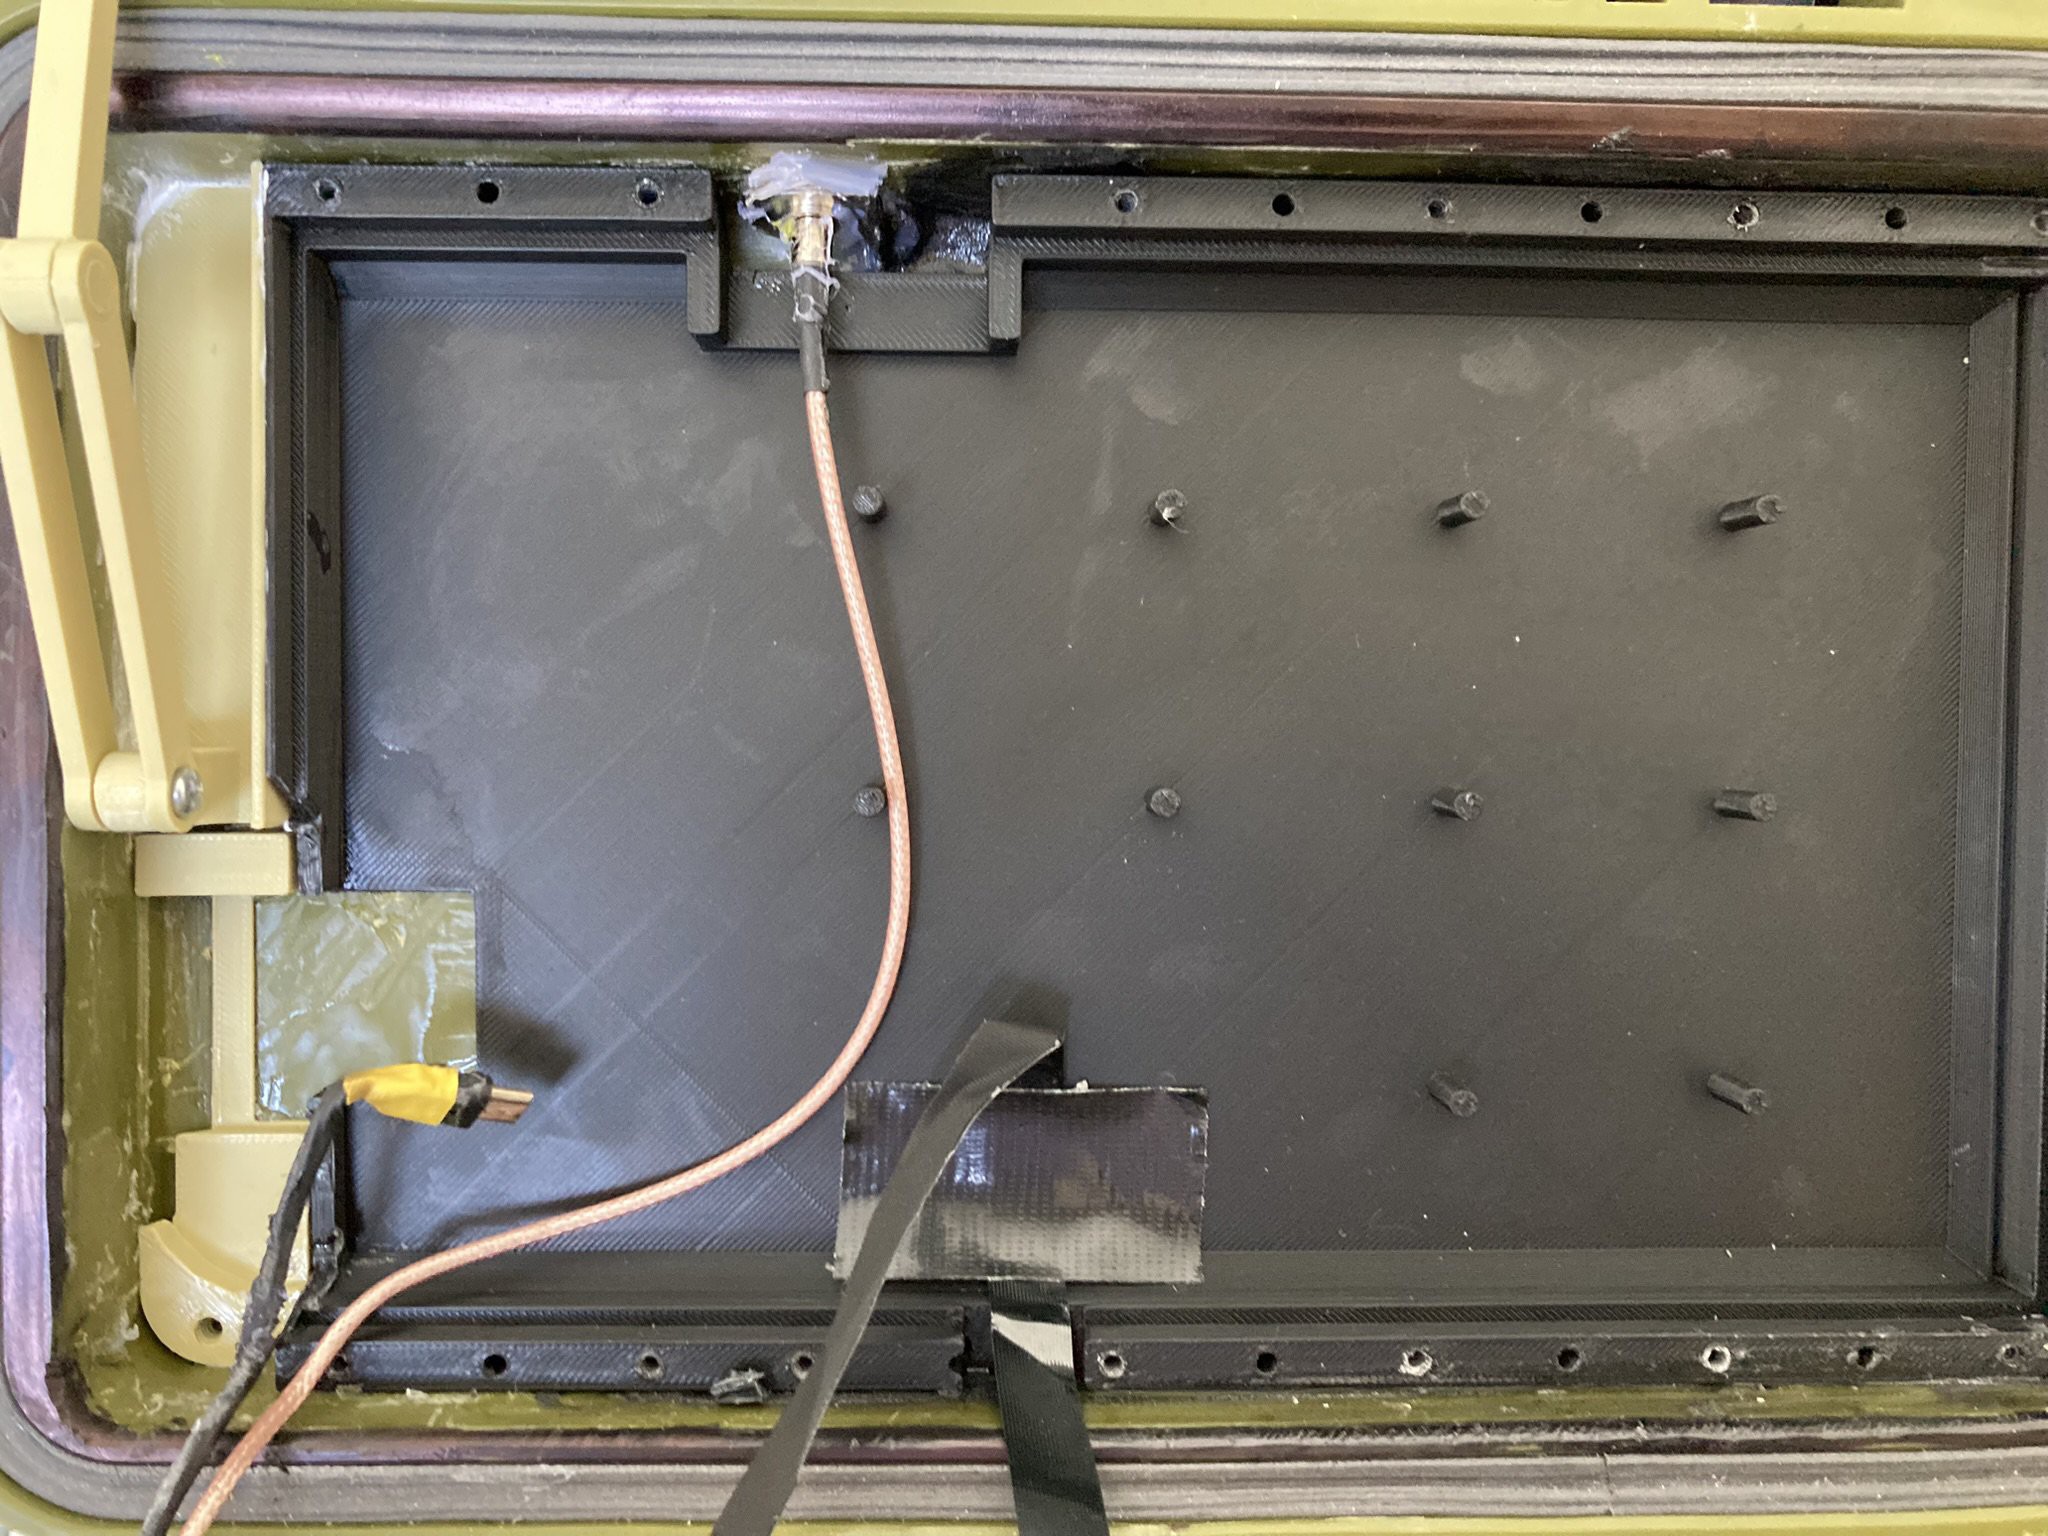


 Garra
Garra
 Cees Meijer
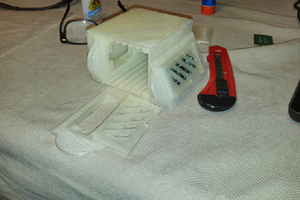
 txdo.msk
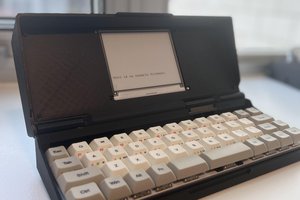
 zerowriter
Super cool looking!