 Paul McClay
Made a thing from brass thicker than paper and that isn't just a flat cutout:
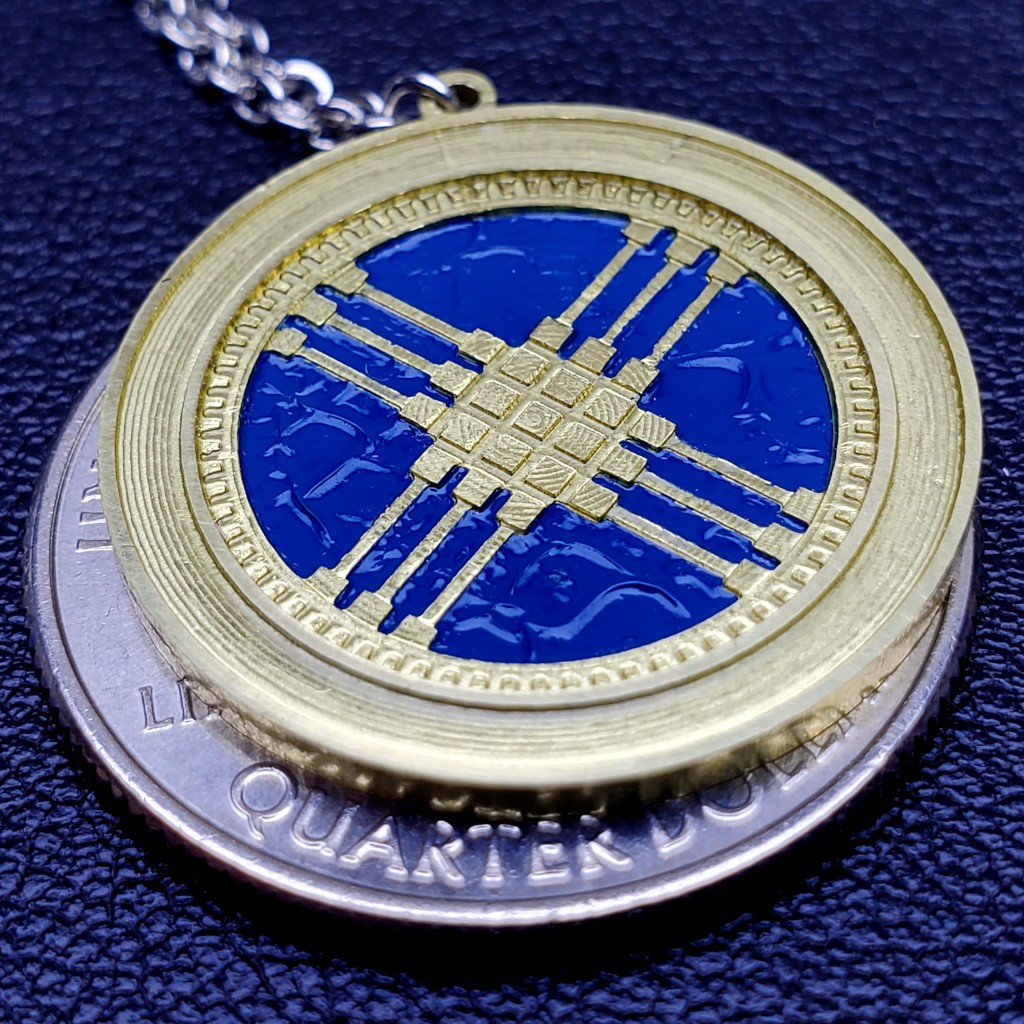
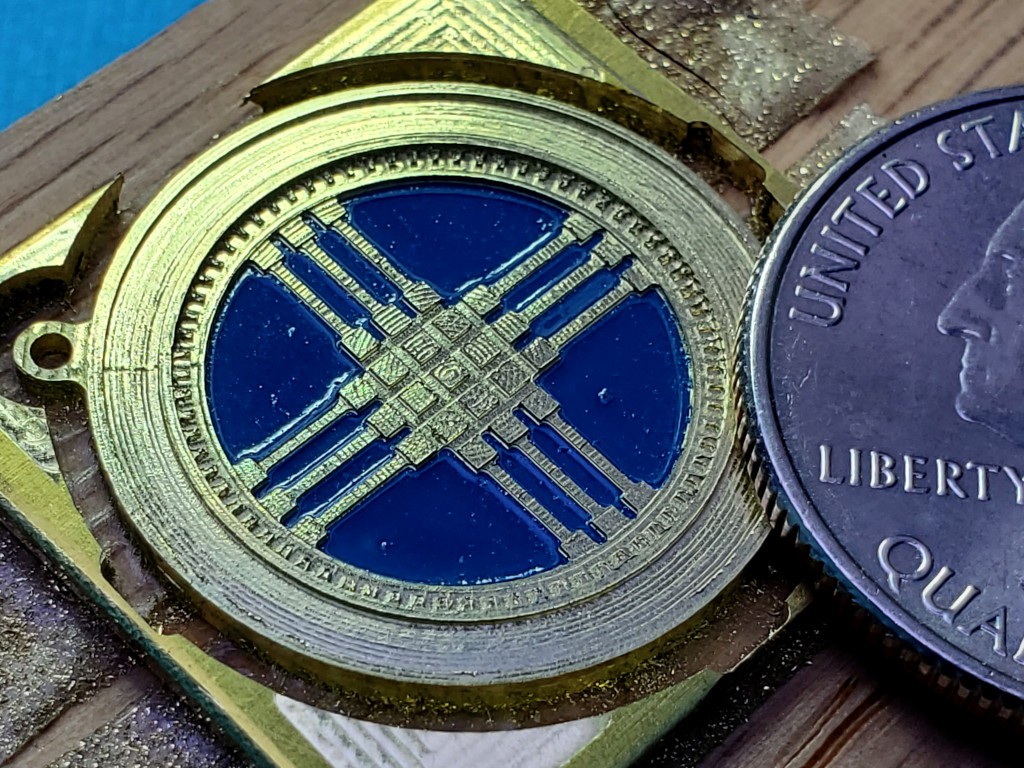
It's a shanyrak[1], as stylized in the national emblem of Kazakhstan[2][3]. Because my wife is Kazakh.
Yes, the paint wrinkled when I sprayed clear over it. A lesson in alkyd/acrylic/time issues. Call it a rough draft/proof-of-concept piece. Or maybe I should brag up my successfully executed wrinkle finish.
In October last year (writing in Feb '24), in a press to maybe possibly get a competitive HaD Prize final entry together (failed but that's a different story), I tried cutting something more interesting than a backlash test pattern in a chunk of brass thicker than a thin sheet, which failed in a confidence-inspiring way.
Months of other stuff happened.
When opportunity to try again came around, I had the idea of (re)starting with a simple figure that my wife might like -- a shanyrak -- since she tolerates all this nonsense. And Valentine's day was imminent.
That was supposed to be simple but turned into another scope creep fest... ...which could turn this into a dissertation that never gets finished so maybe I'll just add some notes to the [2] footnote in case I ever come back to write more about that.
Process
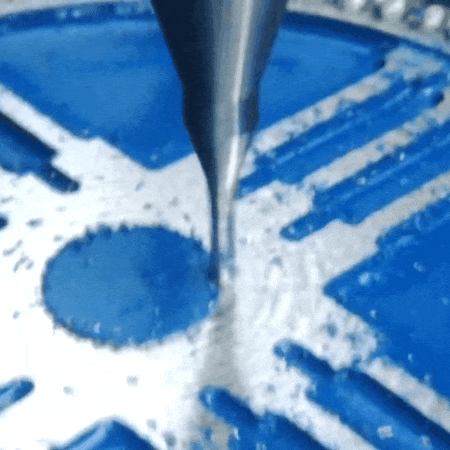
roughing + lowest flats
I rough cut the face, outline, and the center pocket down to a level above any detail with a 1mm end mill. Then cut the deepest pockets to final shape & depth with a 0.38 mm (0.015 in) mill.
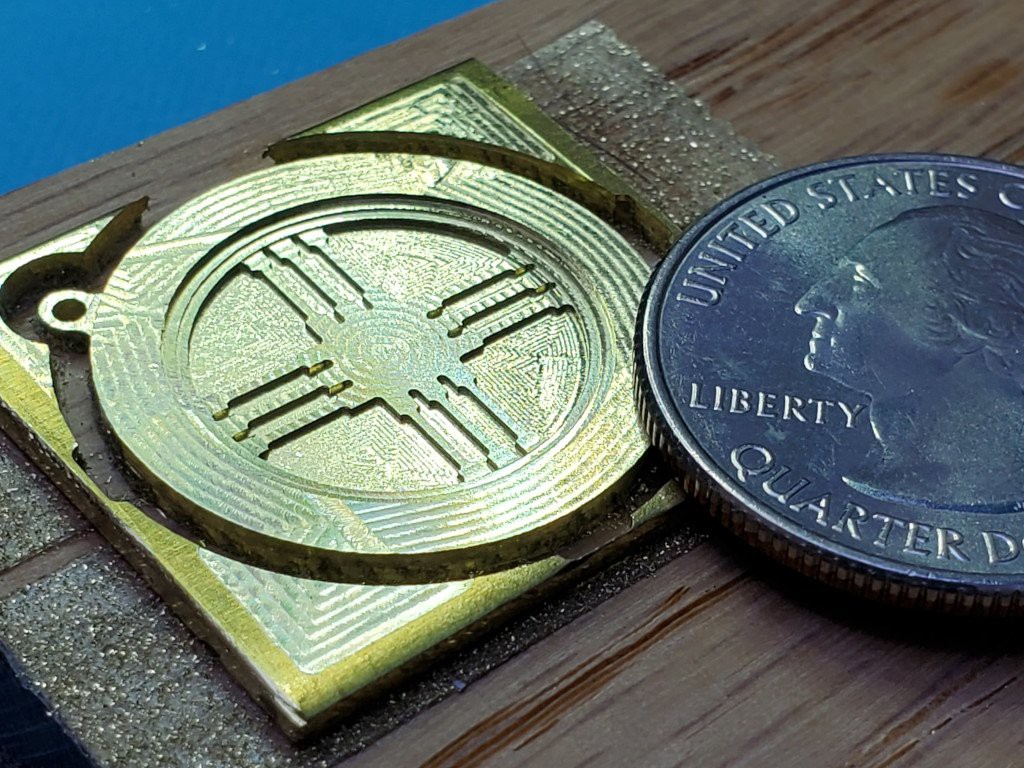
I guess it doesn't take much metal to make a (relatively) big pile of glitter.
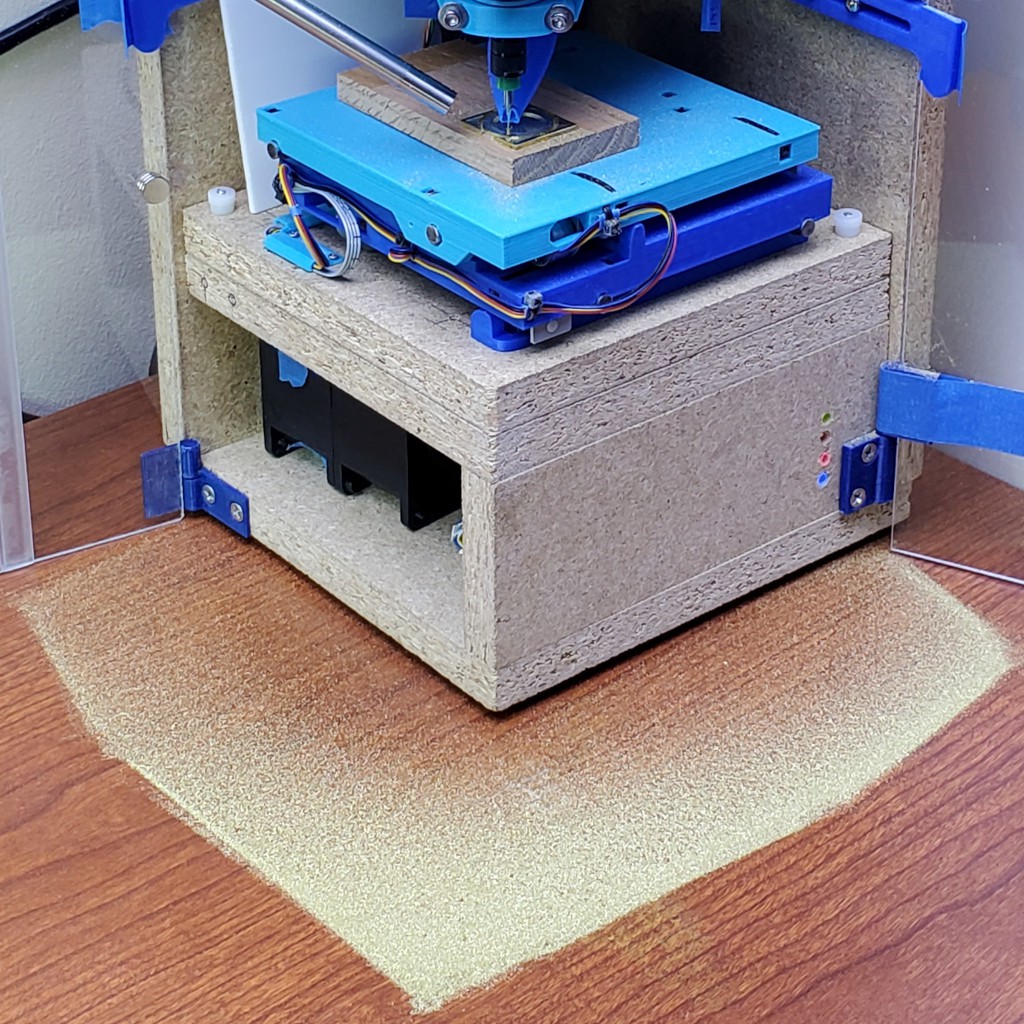
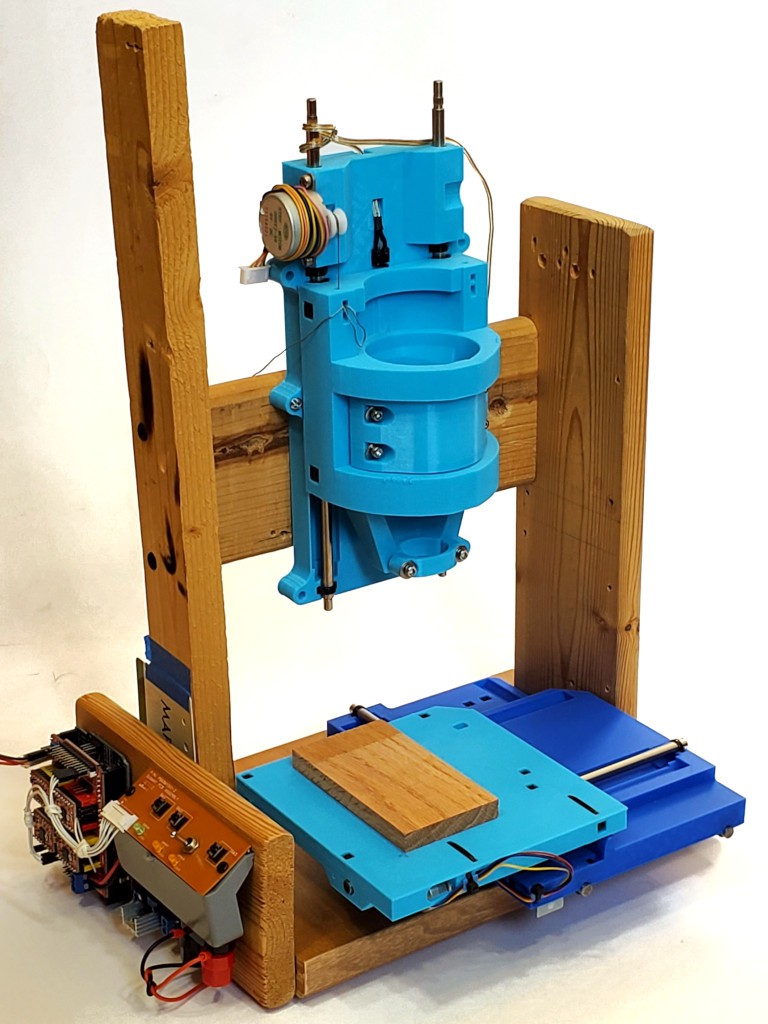
Here's an opportunistic illustration of the divided project architecture: 1) the CNC core, whether this project here or elder sibling #Minamil 2dc: a minimal CNC mill, and 2) a structure that can be something fancy like parallel work in progress at #"Desk Accessory" CNC Milling Machine but doesn't have to be.
The CNC part doesn't care whether it's in a tidy little box or scattering chips to the winds. If you're here for the CNC you can build the CNC and carry on.
This pic shows a concrete illustration of the realized practicality of having a "desktop" CNC on my desk. The mess stayed in the box and that little patch is trivial to suck up with a hand vac. So long as it's sitting on a flat surface, which I think is a reasonable expectation for a desk.
(having written "vac" I probably should add "HEPA". and the opening in the box under the XY table is for an air filter that isn't there yet -- the double-stack fan (high static pressure) will pull air down and (filtered) out the back so fine dust doesn't float up out the open top of the enclosure. which it does. that arrangement worked pretty well in the previous frame build. that all could be replaced with a vacuum hose stuck in a hole in the same spot -- which could be interchangeable if the fan and vac hose were the same diameter. i'll have to write all this air/dust stuff in a log at some point and trade all these words for a link to that. after finishing the fan/filter box there.)
paint - and lost messages from the future
Paint's not my thing. What I learned from this encounter is to do pretty much everything differently.
I think I cleaned the surface adequately. It was freshly cut and cut dry so it should have been pretty clean after vacuuming out chiplets anyhow.
I used a rattle can, which meant masking around the workpiece and covering a fairly large area to manage overspray.
Lesson: dust again after masking & draping.
This was weird: That's probably too much paint for a first/single coat. I ended up spraying a load of paint on the thing because the paint spray wasn't landing in the narrow pockets between the bars. At all. You don't believe me. I should have taken a picture. I don't doubt that surface tension would be strong at this scale -- and such was plainly evident. But I'm pretty sure most of the atomized paint spray droplets were smaller than the width of those pockets so some spray should have hit the bottom of the pocket before encountering any other paint to interact with. I've seen closely spaced fresh cut edges attract debris (can't really call that "chips") in plastic. Could something like charge concentration on the cut edges here have repelled paint droplets? Or attracted paint to the raised surfaces so it didn't get to the pockets (but the tops of the bars didn't attract a lot of paint -- maybe most of what landed there got drawn off the ends of the tops of the bars by surface tension)? In the earlier event, touching the plastic edges killed the attractive effect. In this case I'd touched the cut edges plenty -- tho carefully not with my fingers and perhaps not with anything conductive. But brass is decidedly not dielectric so how would any local concentration of charge happen/persist? Maybe if the piece as a whole were charged up, sitting on wood, then maybe sharp edges would concentrate field effects? Maybe I'll be embarrassed when someone points out the obvious answer that doesn't require any mysterious foo force? Anyhow, I just piled up more paint on there until adjacent paint piles (piling up because surface tension) amalgamated and wetted the surfaces that were no longer not under paint.

Next time I can remember to dust again after masking and draping -- or I can just paint with a paint brush. And let the selective spray mystery remain a mystery.
That's Rusto-Oleum "All-Surface" paint. I thought it might stand a better chance of sticking to bare brass than some random hobby acrylic paint that I have (that would be a more nearly correct color). I didn't bother to consider compatibility between this stuff and the clear that I wanted to spray over it to keep the brass shiny. And it's not a great color; the blue is supposed to be sky. Because a bona fide Şañyraq will be overhead. So, yeah, wrong paint.
unpaint - and details
The idea behind leaving a little thickness of metal over surfaces that weren't supposed to be painted was that all the paint that wasn't supposed be there wouldn't be there anymore after milling from roughed surfaces down to finished details.
clean up - clear over - and lose the chemistry bet
I did a little manual cleanup under magnification, polished the two circular rims which are the highest features on the face, washed it with TSP (because teh Internet said to) and sprayed it with a gloss clear acrylic blue-paint-wrinkling agent to (maybe) keep the metal shiny. Here's the first pic again to show that ended up looking like:
I've got some ideas for maybe getting a cleaner product straight off the machine next time.
[1] but IMO that's an unhelpful rendering. You're reading this in English so call it "shangrak". Or "shangarak" if you really want to account for all the letters, but then at least half-swallow the middle a. My guess is that whoever decided to render Шаңырақ (latterly Şañyraq) as "shanyrak" knew mainly Russian (i.e. Muscovian) or other non-Kazakh Cyrillic script language because they got Ш-to-sh but missed ң-to-ng, suggesting they couldn't be bothered to distinguish ң from н. Bah.
[2] which seems to be almost-but-not-quite standardized - which complicates modeling it :-/
- a drawing - with some helpful numbers; at arms length looks like it's supposed to be a reference, but it's not great and I haven't found any instance that matches; and not flat (there's one in a cabinet somewhere that looks pretty flat)
- a high profile example - said to be quite large for the room tho pic doesn't really show scale, so it's meant to be in close in front of lots of eyeballs -- but it's just not very well made
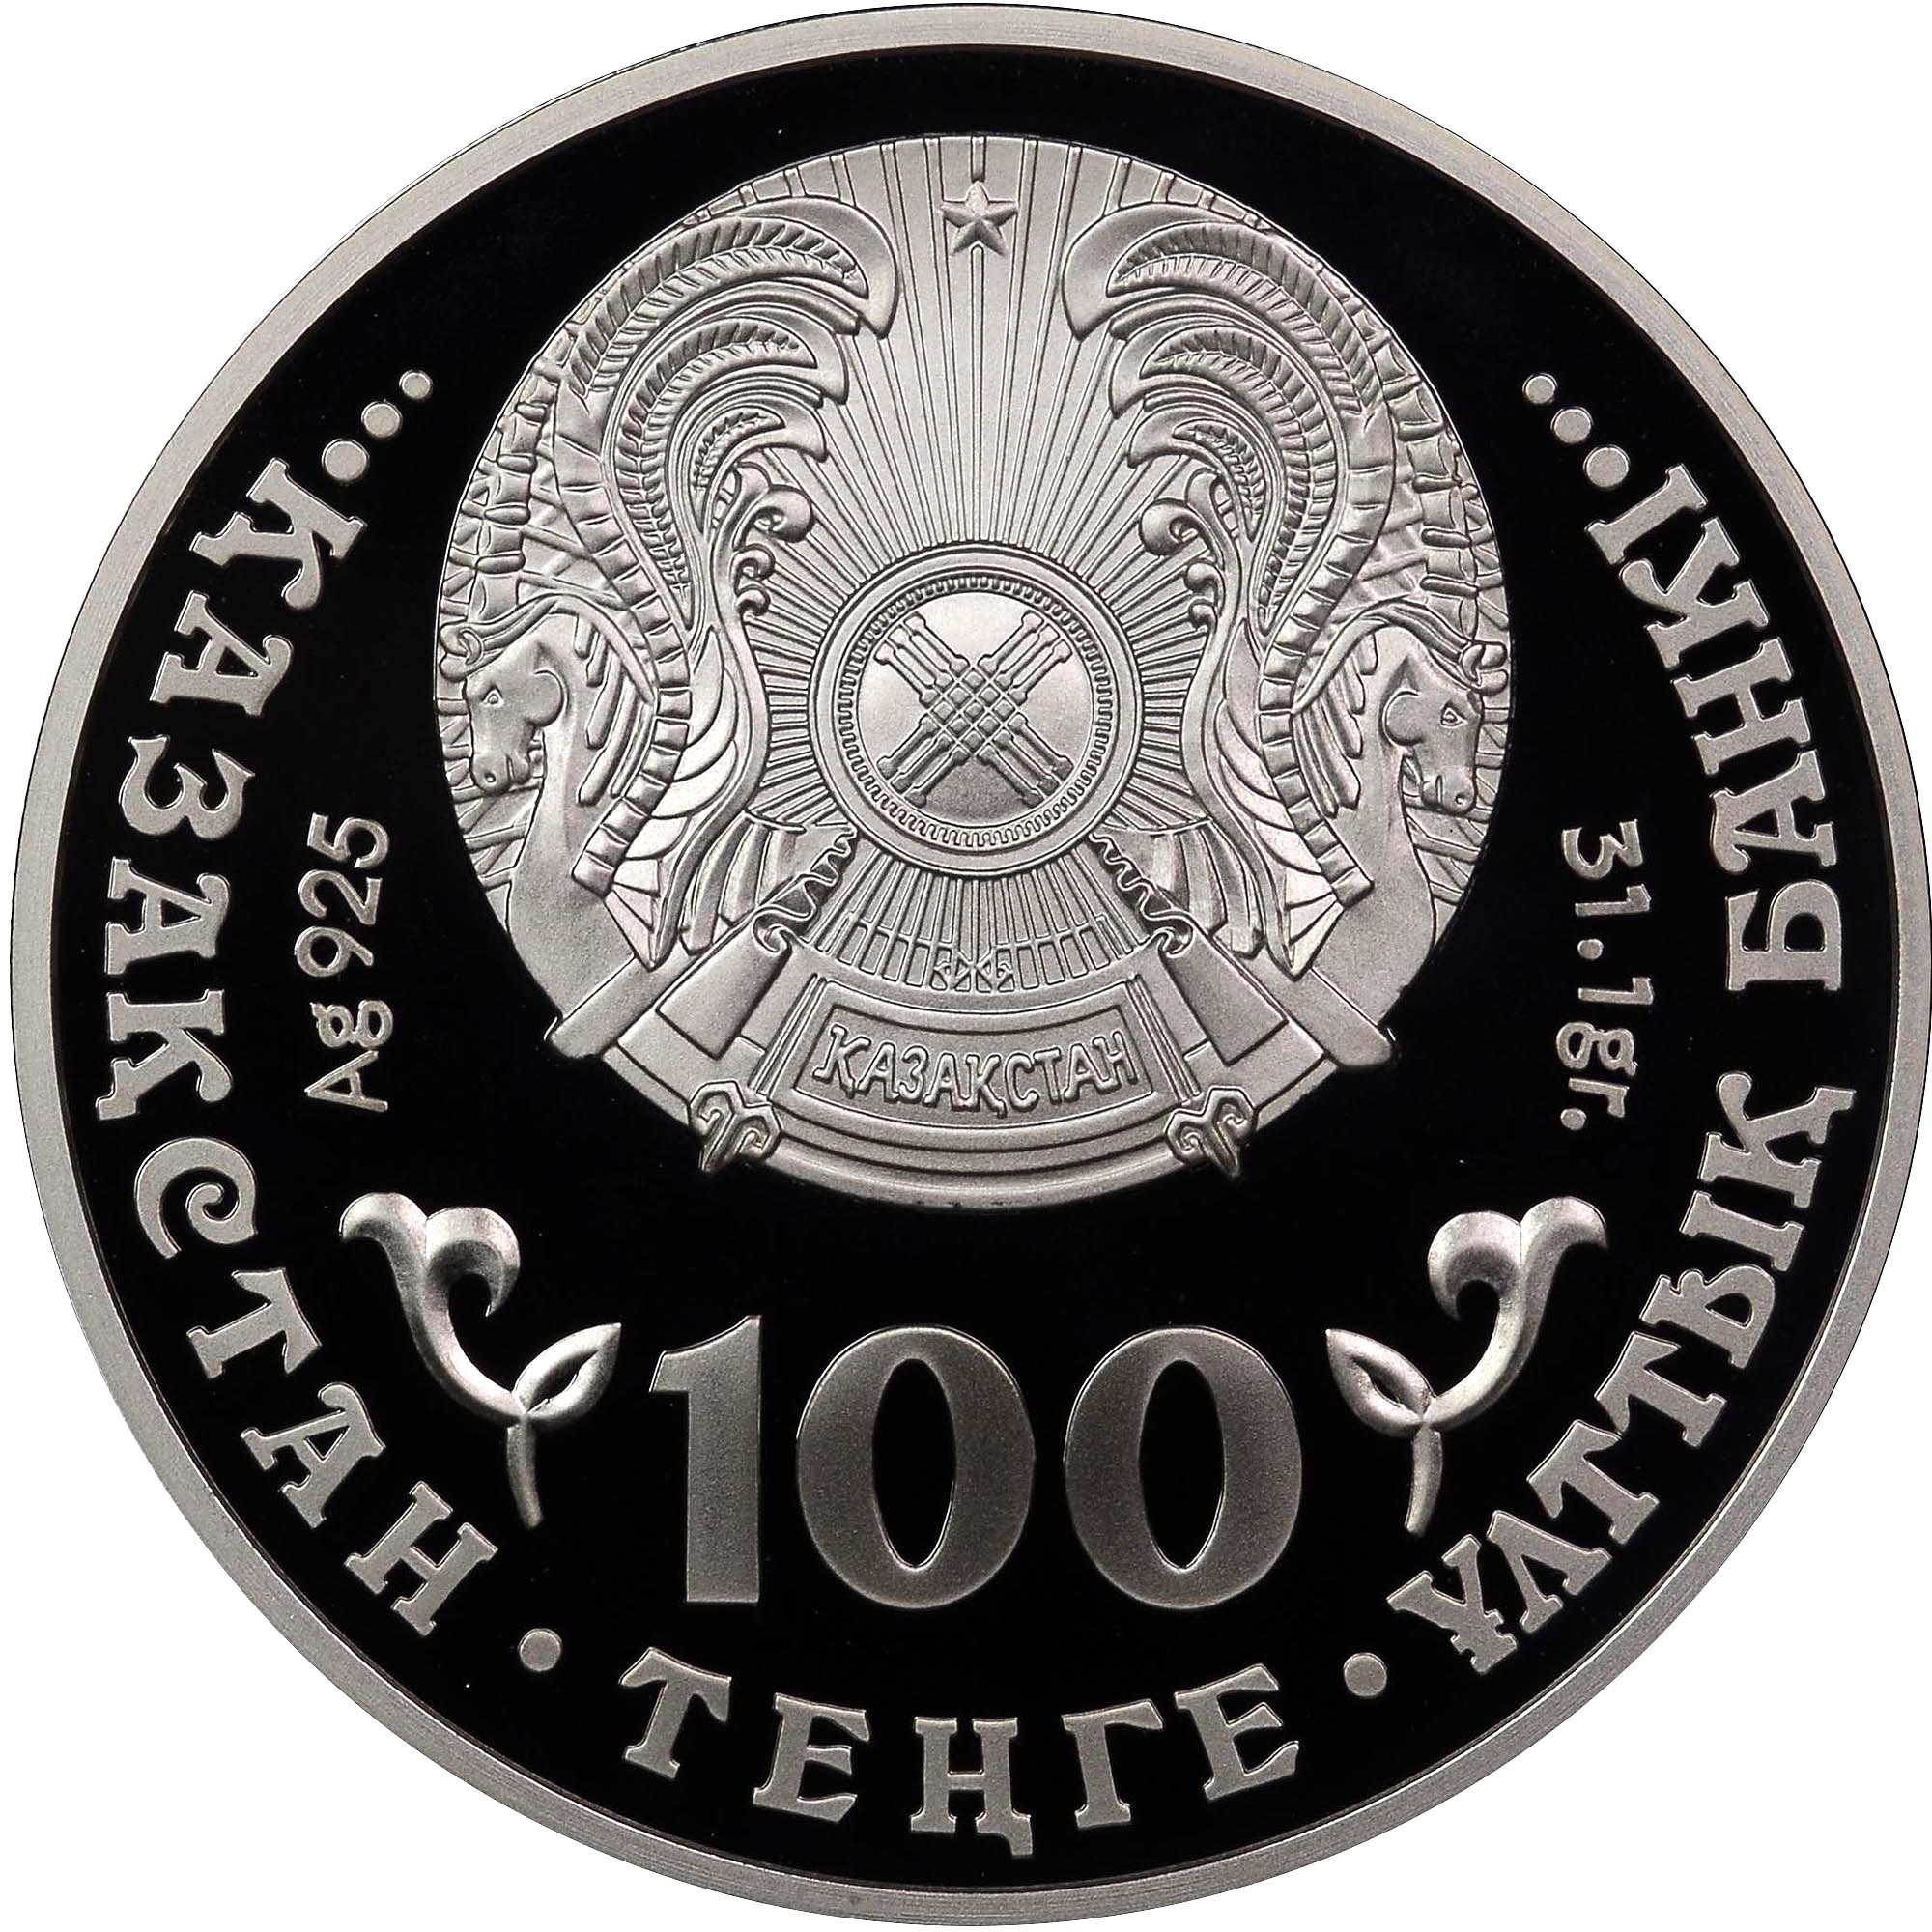
- money - I figured if anyone would aim for "official" proportions it would be the keepers of the currency -- but they kinda punted the Şañyraq details
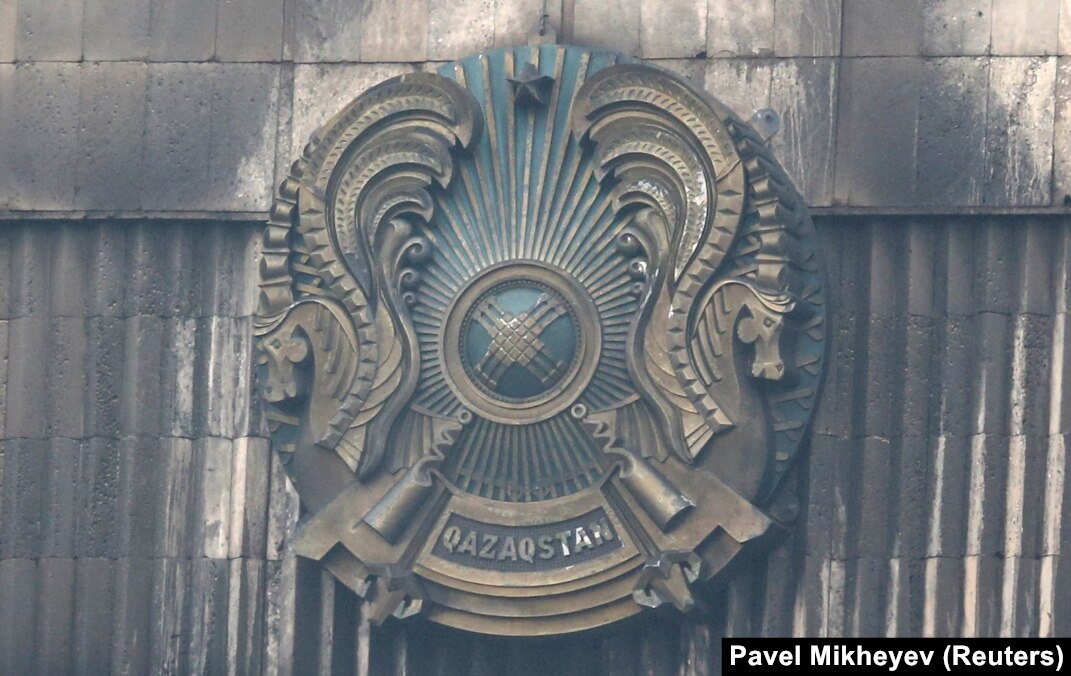
- architectural - IMO this looks like the cleanest rendition I've found, but it's awfully dirty :-/
- big early instance - b/w photo at top. was that the definitive artifact? where is it now?
[3] "Qazaqstan" in proposed (re)adoption of latin script
Discussions
Become a Hackaday.io Member
Create an account to leave a comment. Already have an account? Log In.