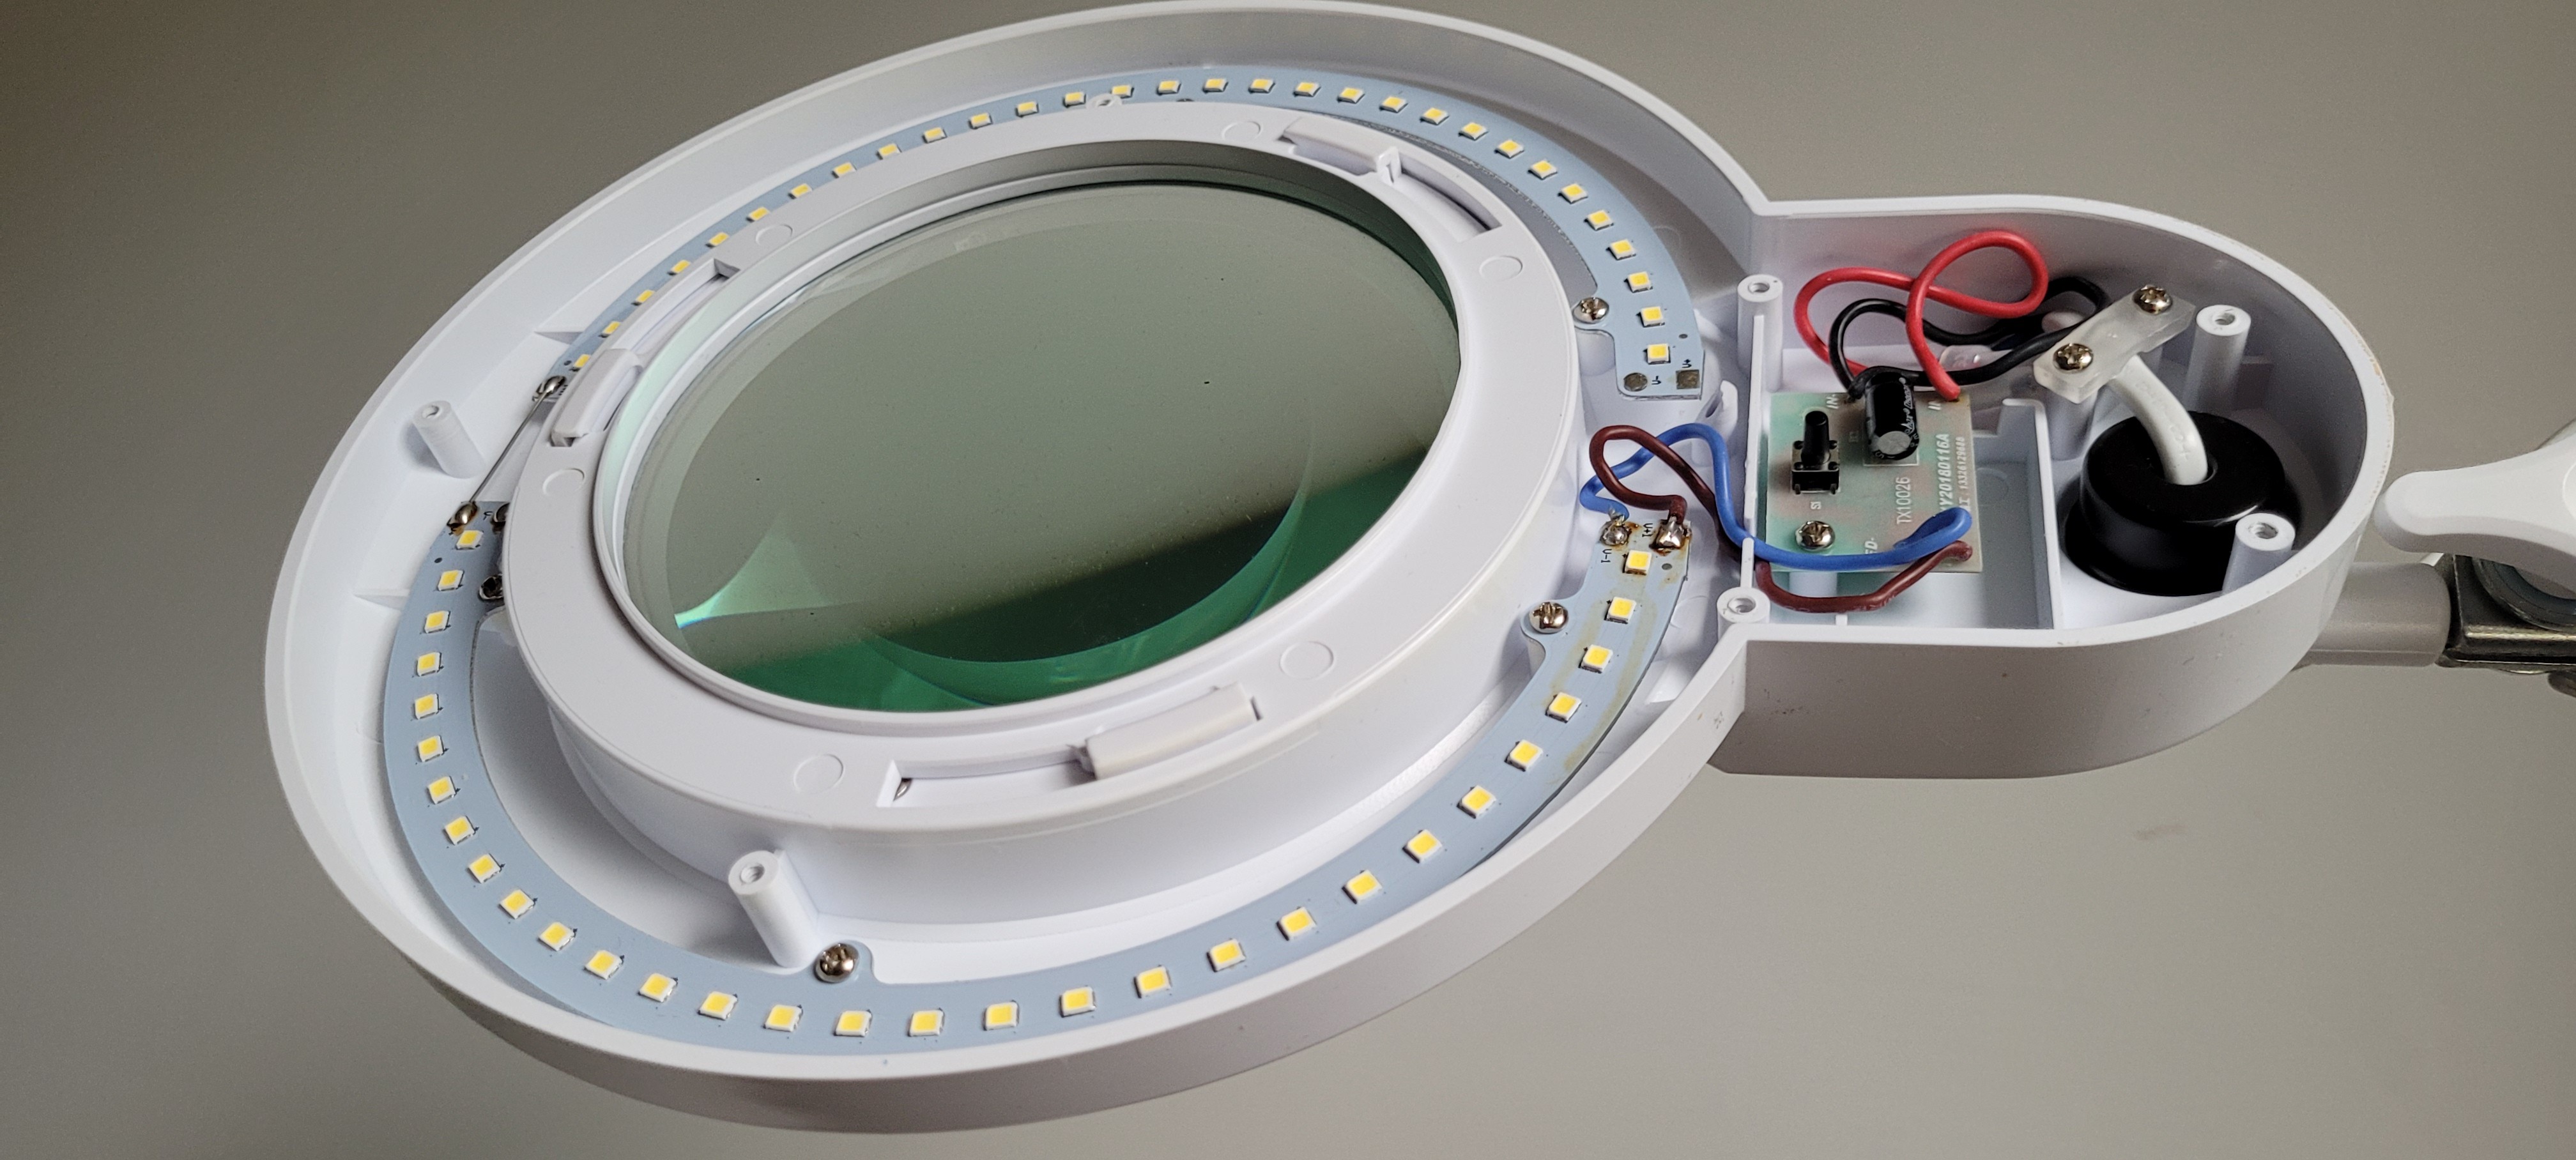
Now it's time to assemble the driver and LEDs in the case. First, I dismantle the original parts from the case. Eight screws in total. Six screws for the LED panel and two screws for the controller.
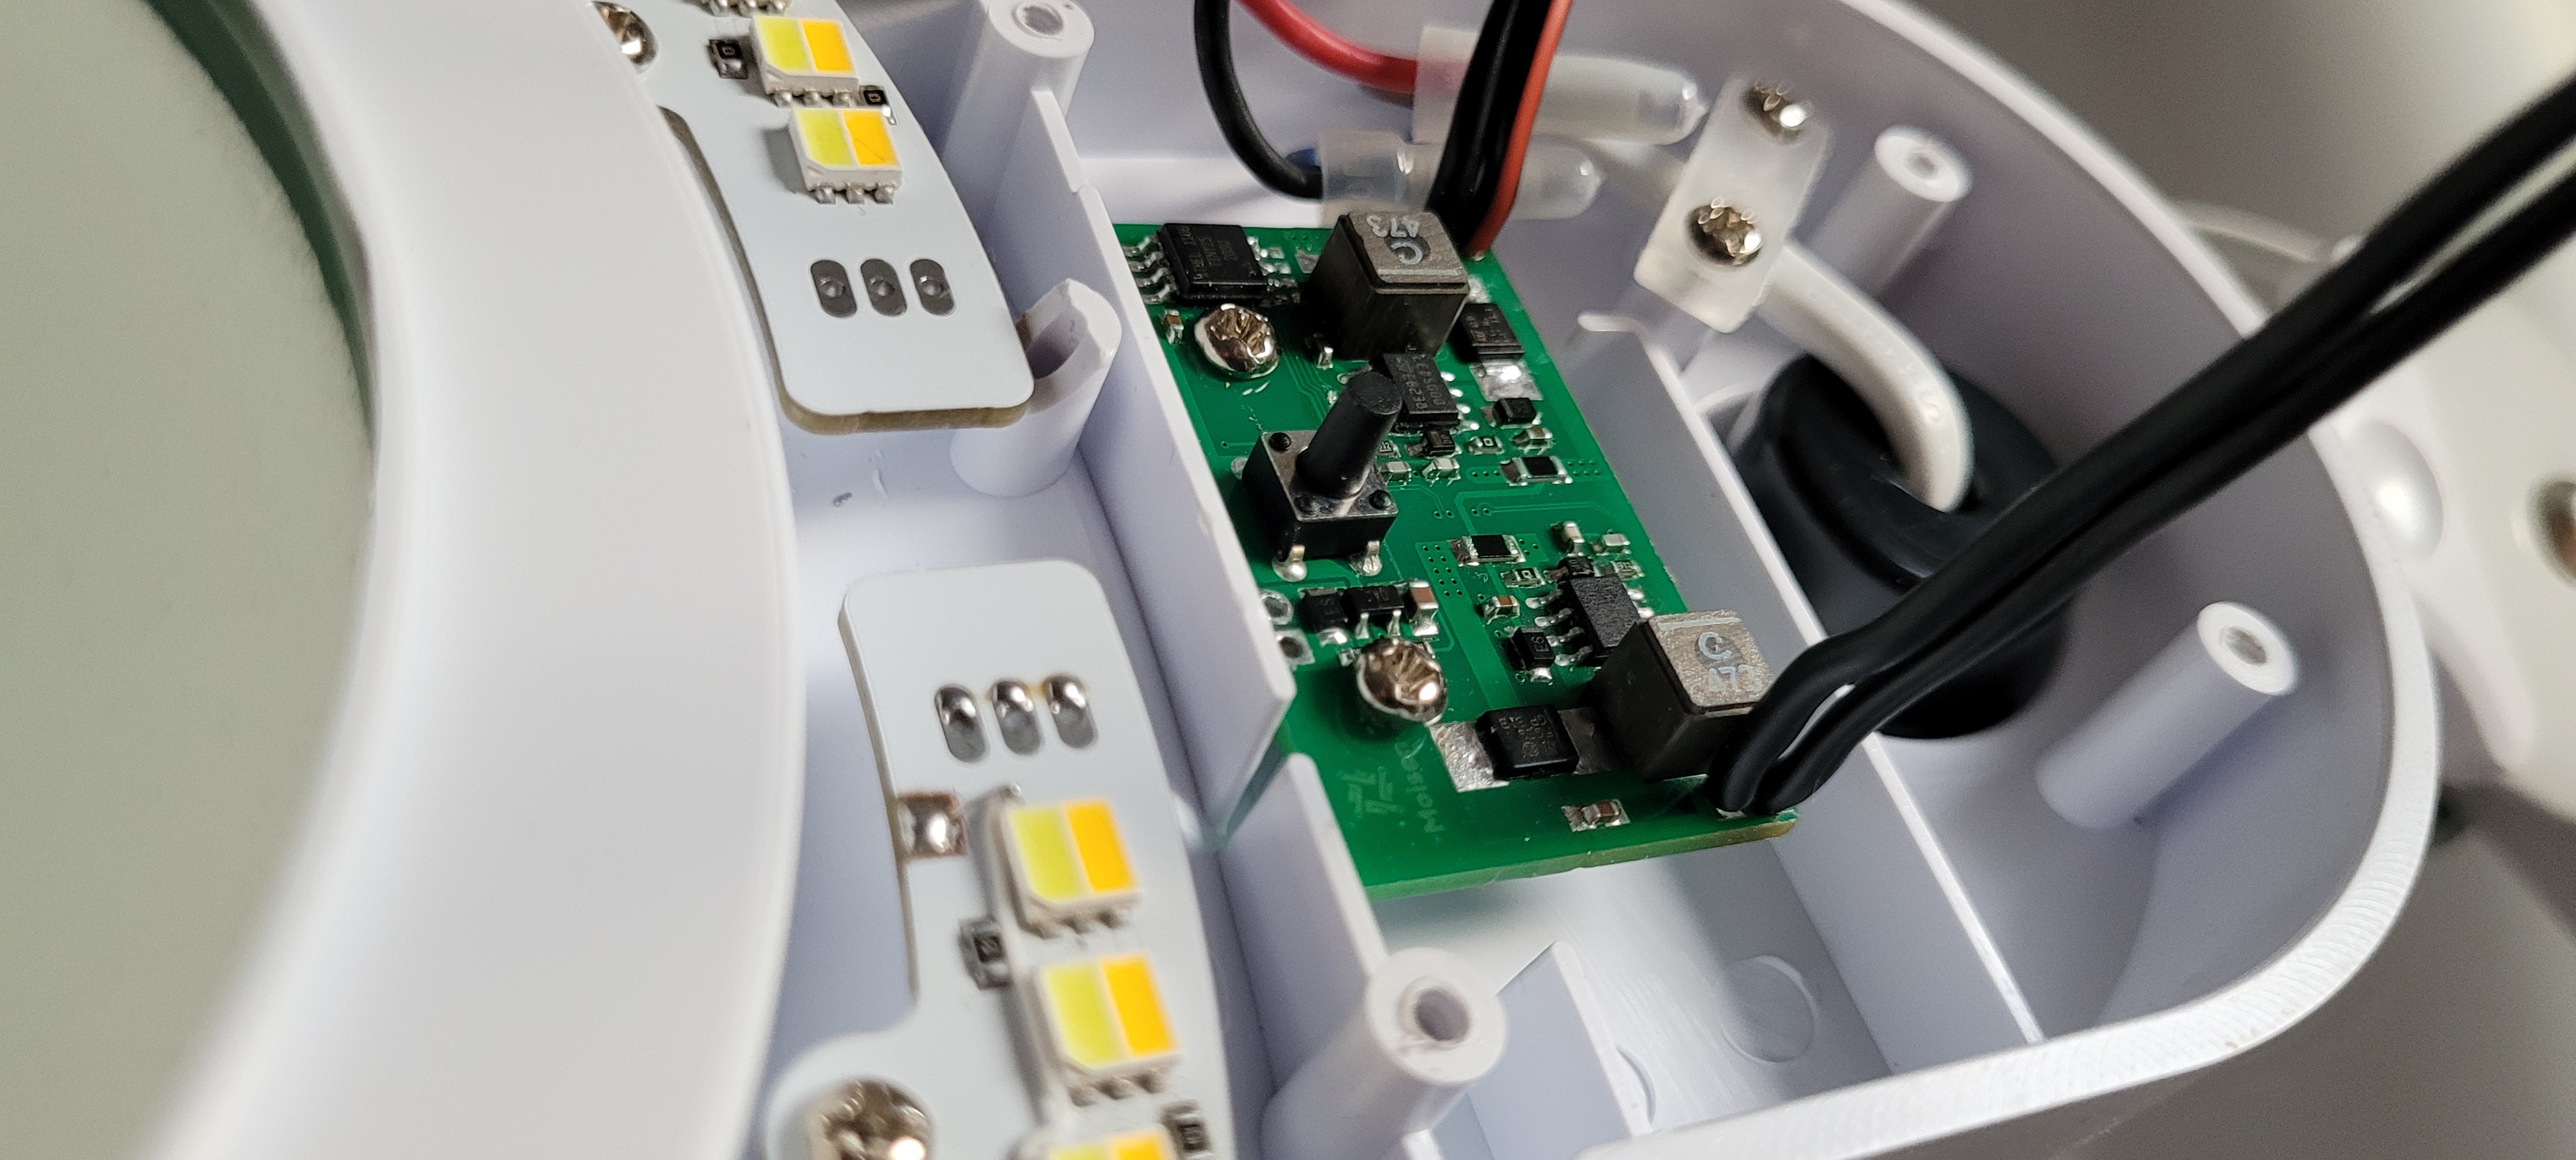
However, I still had to solve the problem of audible noise before assembling the components in the enclosure. In the end, it turned out that the source of the audible noise in the form of high-frequency sound (about 11-16 kHz) was the power coils. I decided to replace the power coils for both channels. I changed the value from 22uH to 47uH. I used a dedicated coil for the LED5000 chip, which was designed by Coilcraft. It is a model XFL6060-473. After installing the coils and adjusting the capacitance values of the capacitors in the LC circuit, the annoying sounds disappeared.
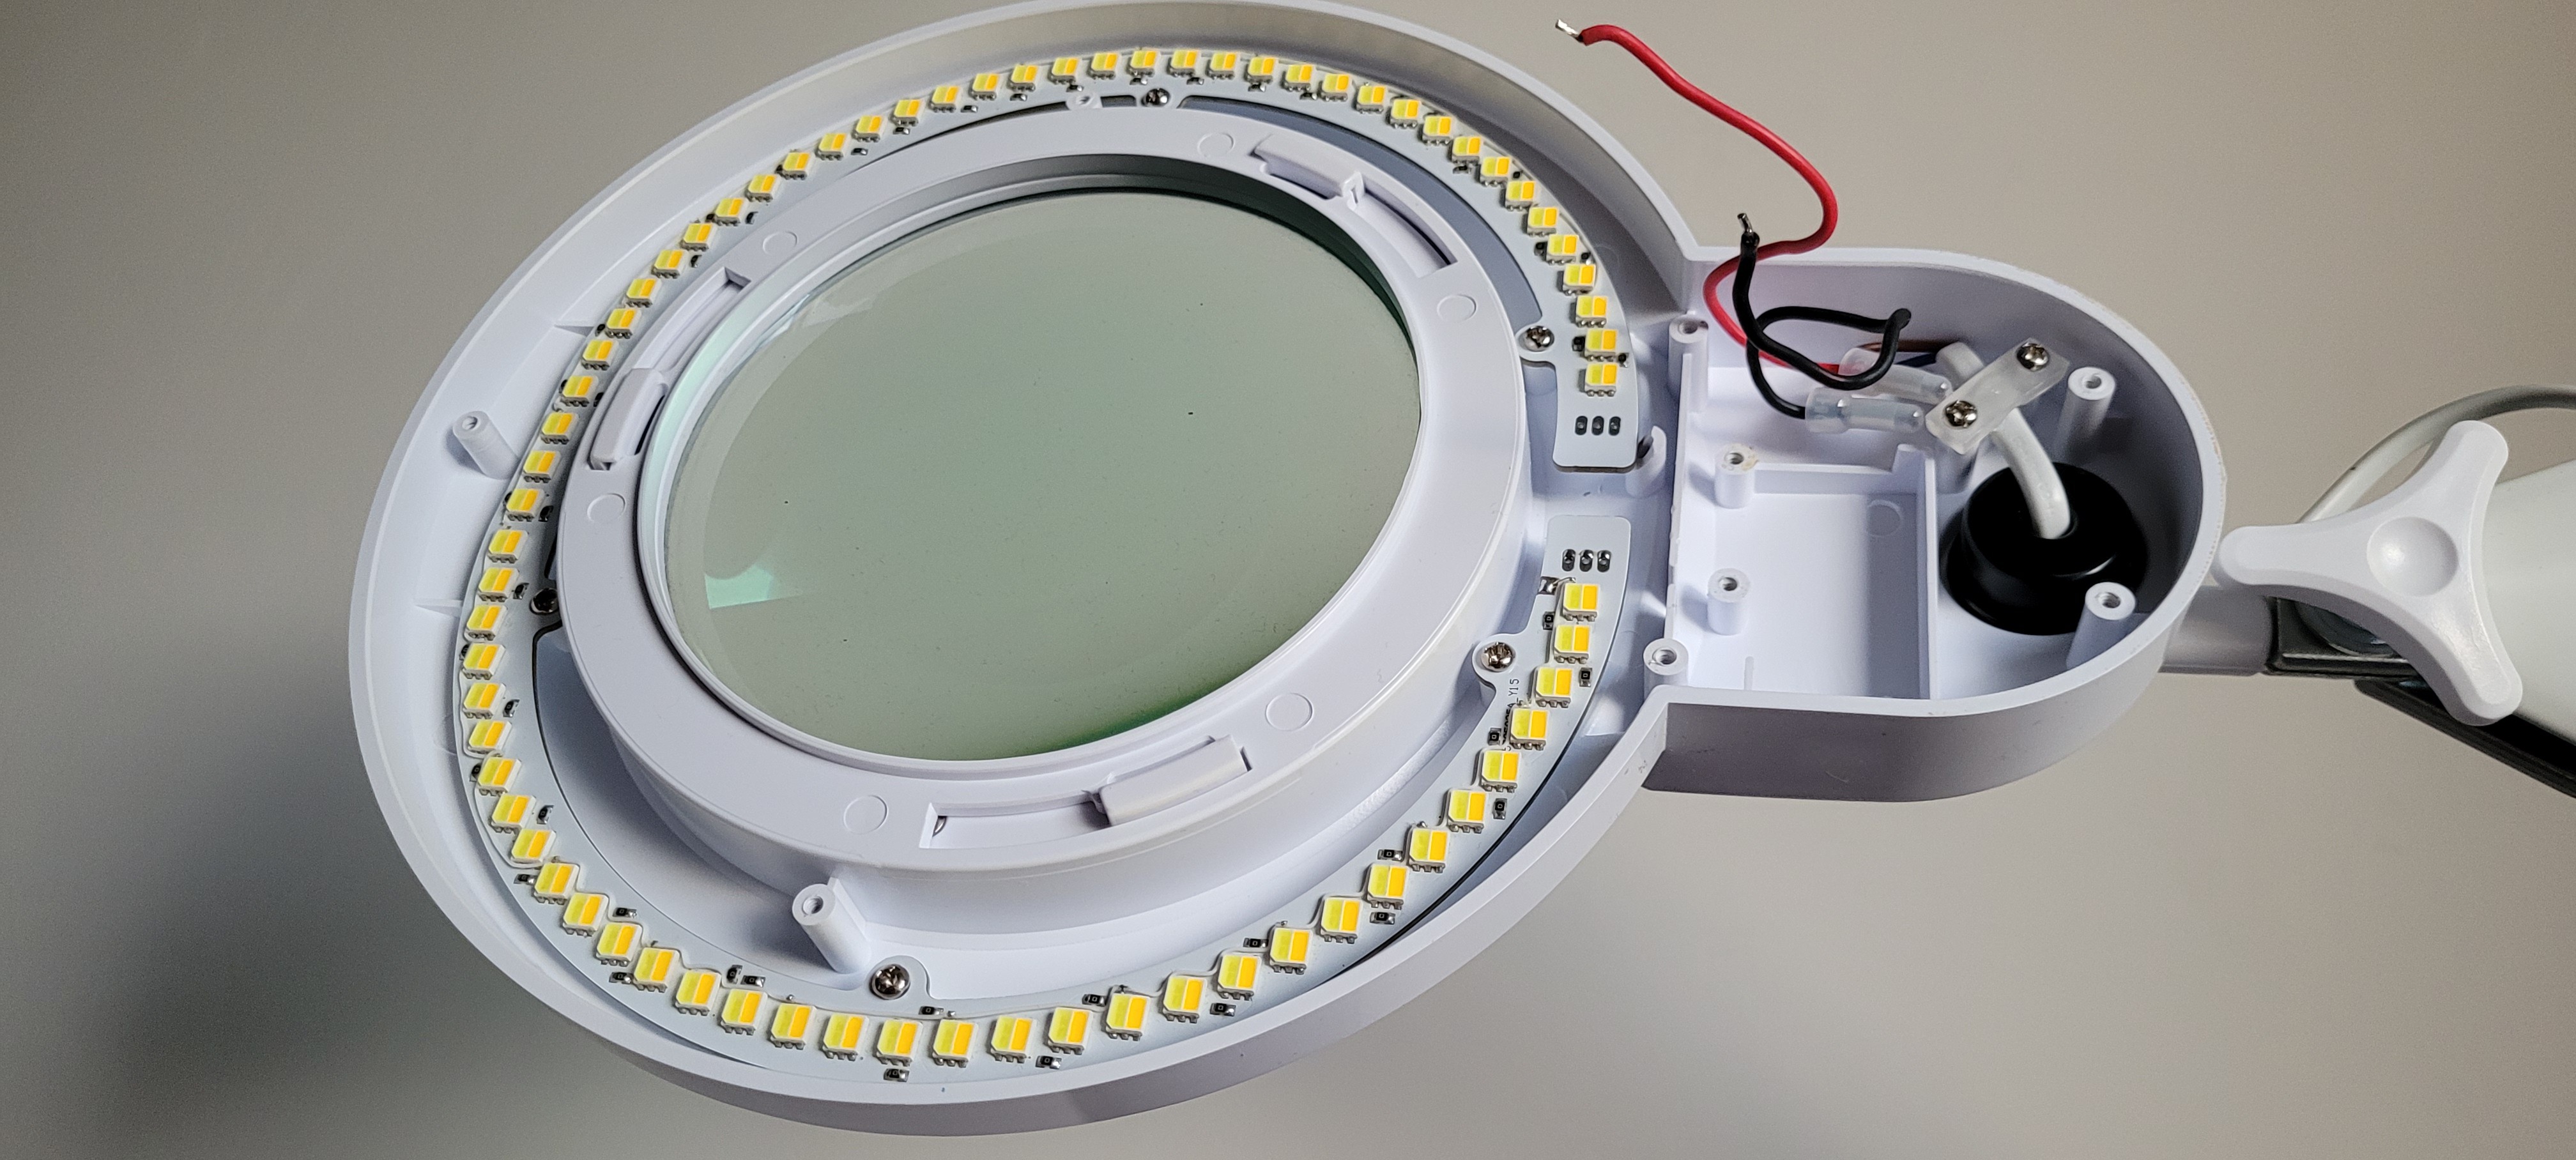
The new panel fits perfectly into the mounting holes:
The controller board takes up a bit more space than the original controller board. In this case, it's not a problem.
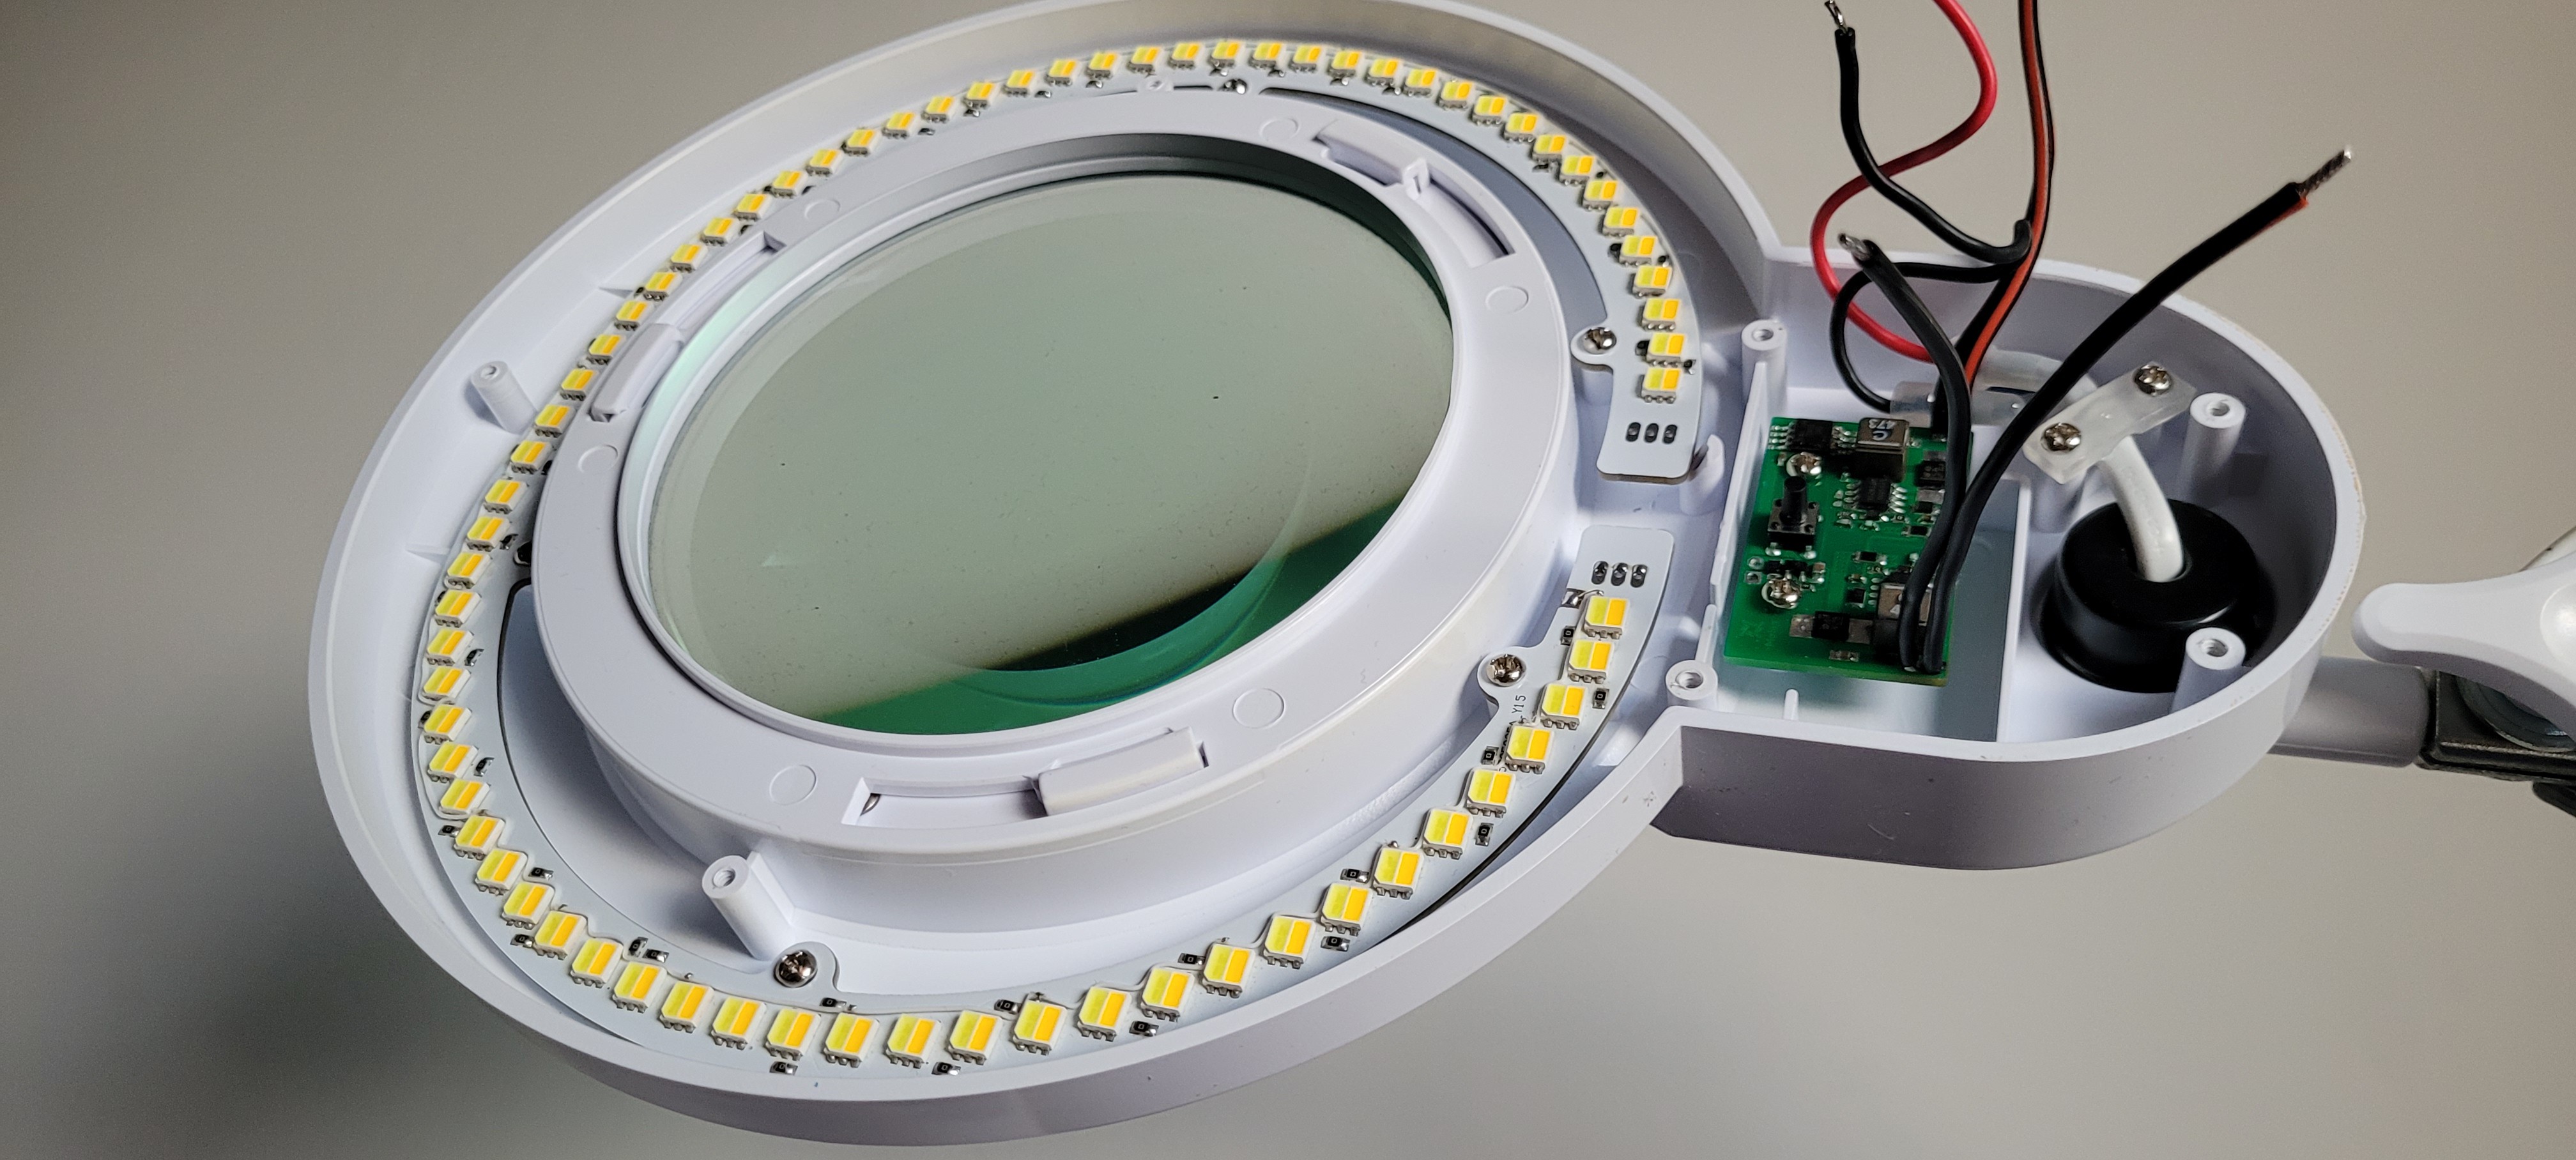
After mounts all pcbs in housing I soldered connecting wires. Two wire for the Warm Channel, Cold Channel and power supply. Total six wires.
First launch in housing. Not everything work perfectly. First mode where brightness of the warm and cold leds are set to 100% not working.
The LEDs are not light continuously. I observe the diodes blinking with a period of about 0.5s on both channels. It may be a problem with the current efficiency of the power supply. During the prototyping of the boards, I powered it from an external laboratory power supply. I need to debug.
The other modes work exactly as I assumed. On a short video presentation you can see the effect:
Discussions
Become a Hackaday.io Member
Create an account to leave a comment. Already have an account? Log In.