 Dan Julio
A recent camping trip left me wanting a USB Battery pack with a built-in LED light. Of course there are no end to inexpensive options available online but why buy when you can build? Are we not makers? Plus I wanted my USB Battery to have a proper on/off control and not be controlled by the current draw of things plugged into it. Fortunately upon returning home I had enough stuff laying around and Big Battery Buddy was born pretty quickly. OK, 2-3 days effort which is a lot more than just buying the damn thing. But I'm going with "it's the principle that matters".
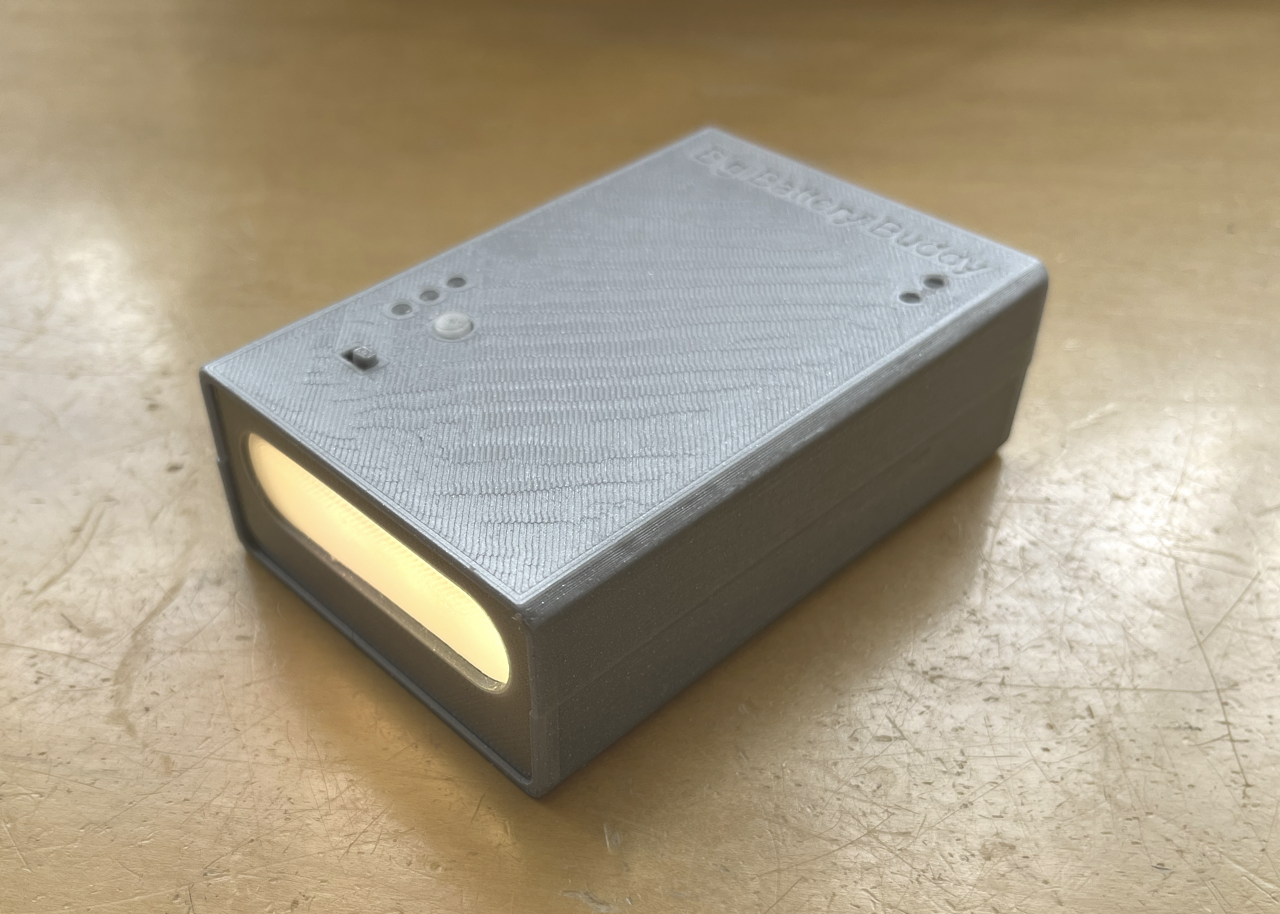
Big Battery Buddy Features
- 6600 mA battery
- Up to 3A charge from a USB-C or Micro-B USB connector (OK, one isn't going to get 3A through the Micro-B... but it's wired in parallel to the USB-C on the dev board)
- Up to 3A 5V output (1A on a Type A USB connector, 2A on the USB-C connector)
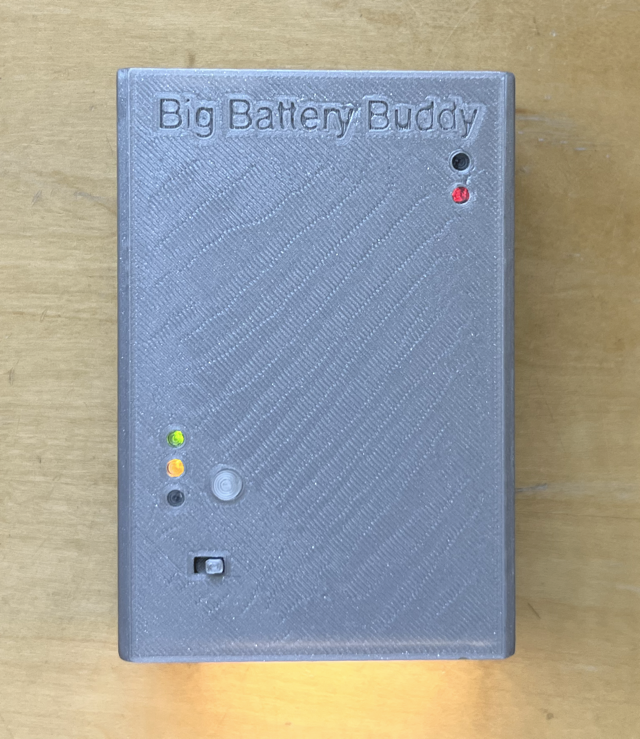
- Soft power control with low-battery shutdown
- Battery level readout
- Built-in LED illuminator
For this project I was able to supply over 99% of the parts.
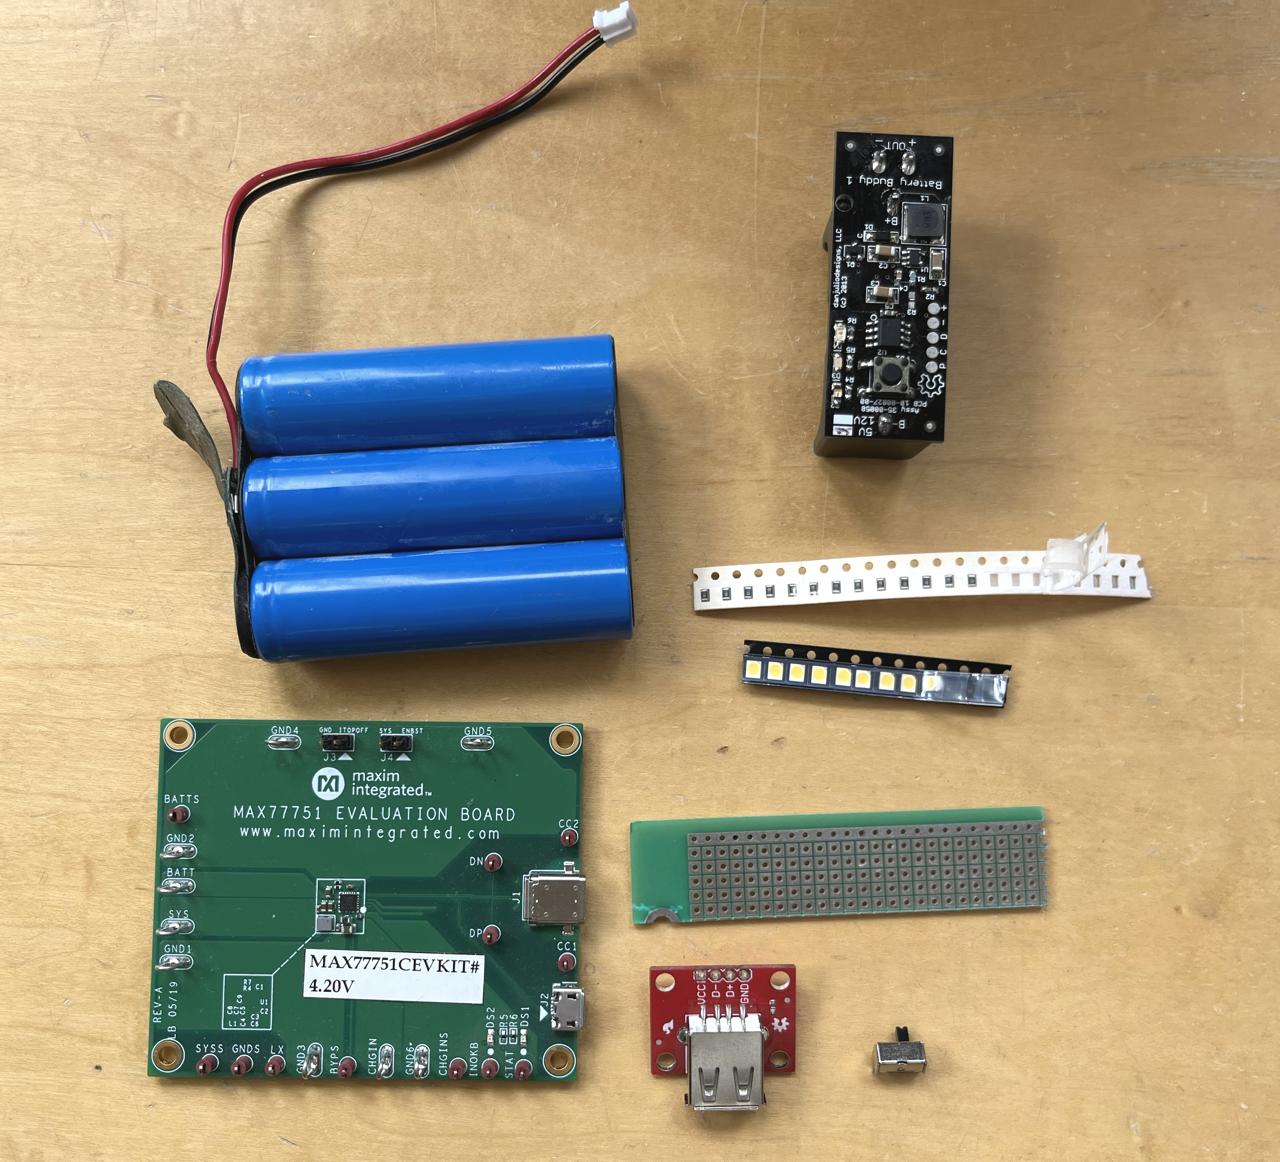
Parts List
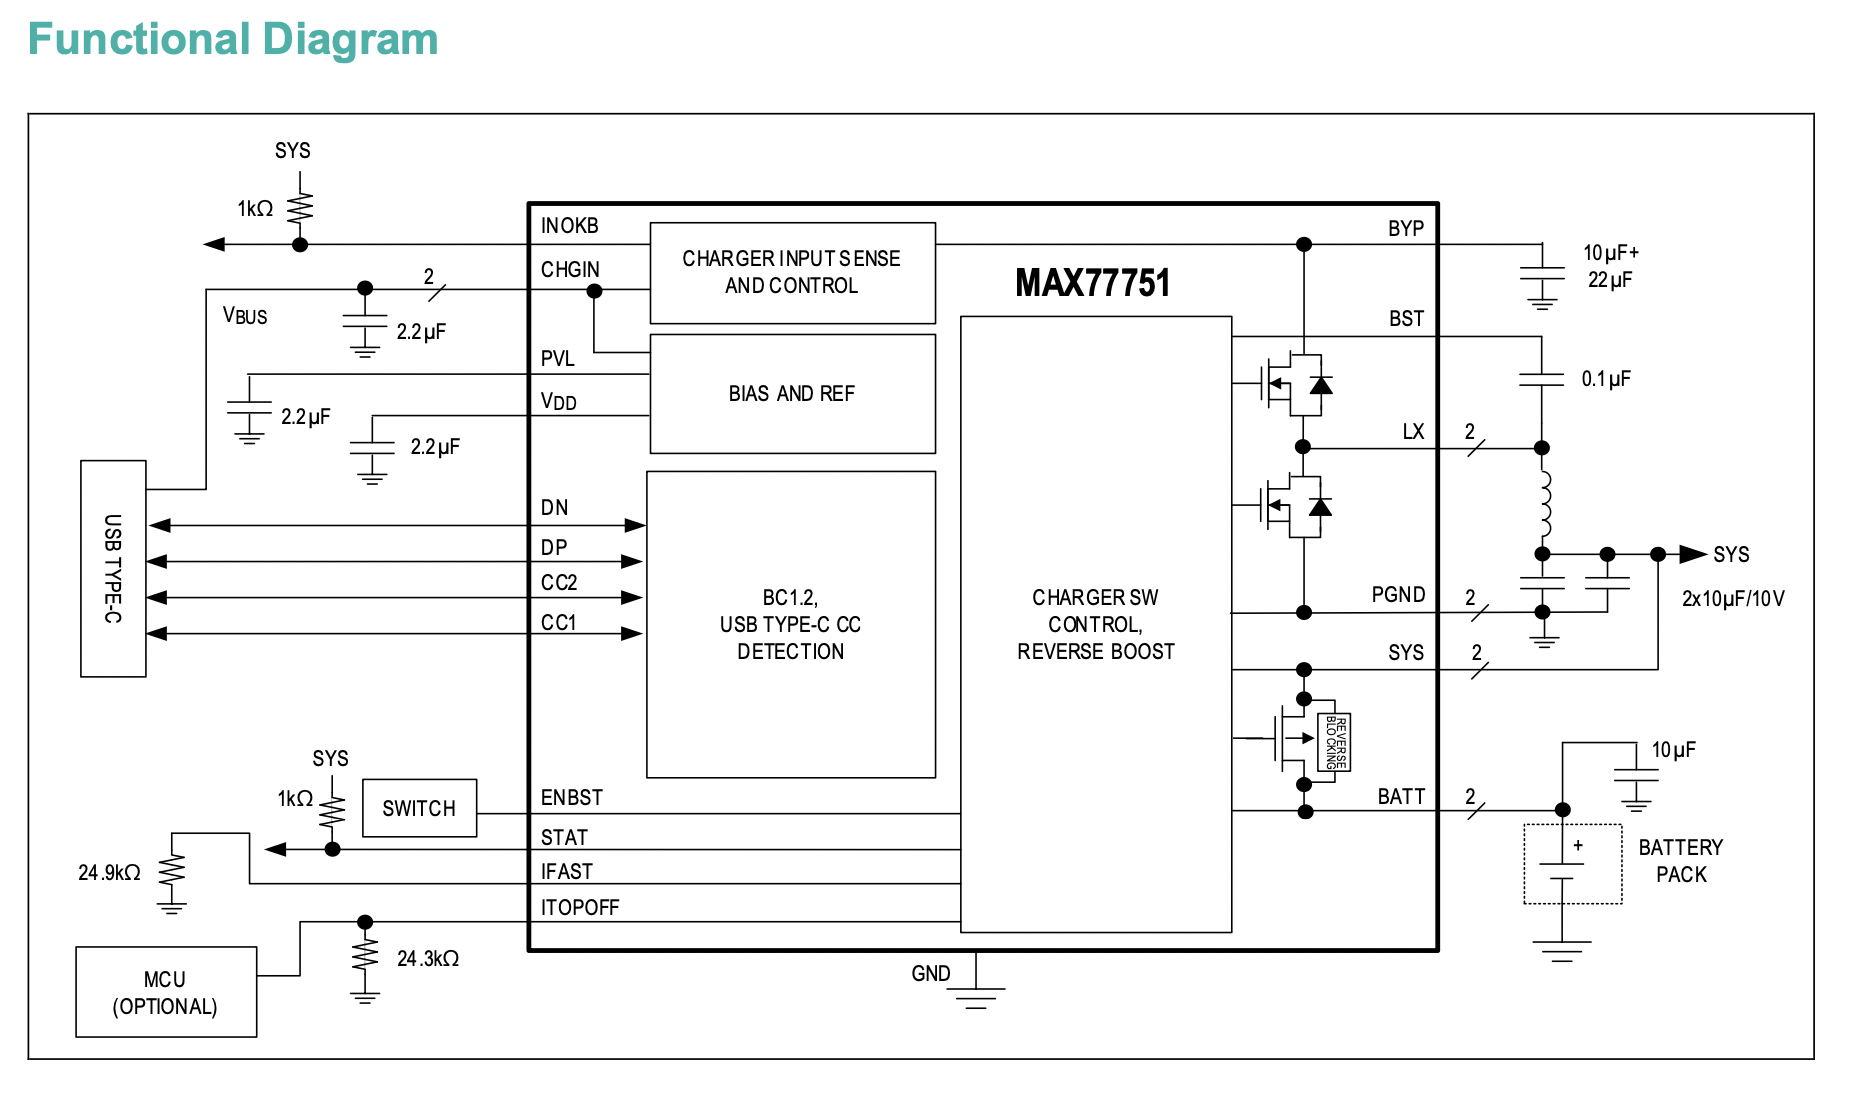
- Maxim MAX77751 dev board. This is a 3A charger with the ability to also generate 5V @ 2A on the same path it uses for input so a USB-C connector could both source and sink power. I can't even remember why I had this board.
- My own Battery Buddy board. This harkens back to 2013 and was an early attempt at a Li-Ion battery device. It is essentially a boost converter with a low-power PIC micro-controller providing power control, battery level monitoring and low-battery cut-off.
- A 3-cell 3.7V 6600 mA Li-Ion battery (I think originally from Adafruit).
- A Sparkfun USB Type A breakout board
- A bunch of small warm-white LEDs, 0805 sized 110 ohm resistors, a switch, misc perf board, wires, screws, etc.
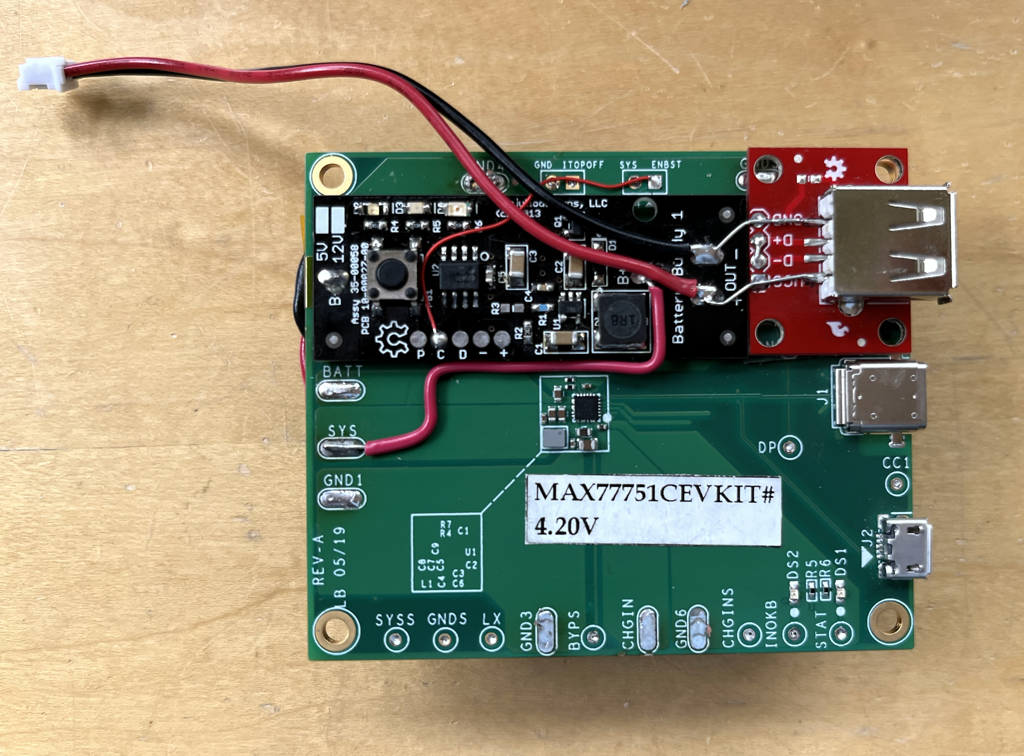
The Battery Buddy board provides power for the Type A USB connector and the same enable that is connected to its boost converter chip also enables the MAX77751 boost circuit. It also provides power button, battery level LEDs and low-battery cut-off functionality.
The MAX77751 is high-current charger for a single-cell Li-Ion/Lipo battery designed for USB-C connections. The thing that I found interesting about it is that it has a boost converter and can also back-drive the USB C charge input. It's also smart enough to know not to enable the boost if it is currently charging. That lets my BBB drive 5V out of the Type A connector and light the LEDs when it's charging if I want too.
Assembly
The hardest part of this project was removing all the test connectors from the MAX eval board since that thing has a lot of ground planes! I had to use a big iron. Then the Battery Buddy and USB breakout were simply double-sticky tape mounted to it and wired up. The Battery Buddy takes power from the MAX SYS output.
I wired short and heavy gauge wire between the battery pack protection PCB and the MAX board since the currents could be over 3A (I also tested the battery to make sure it could supply more than 3A).
D- is shorted to D+ on the Type A USB to signal the typical "dumb" charger to anything plugged in.
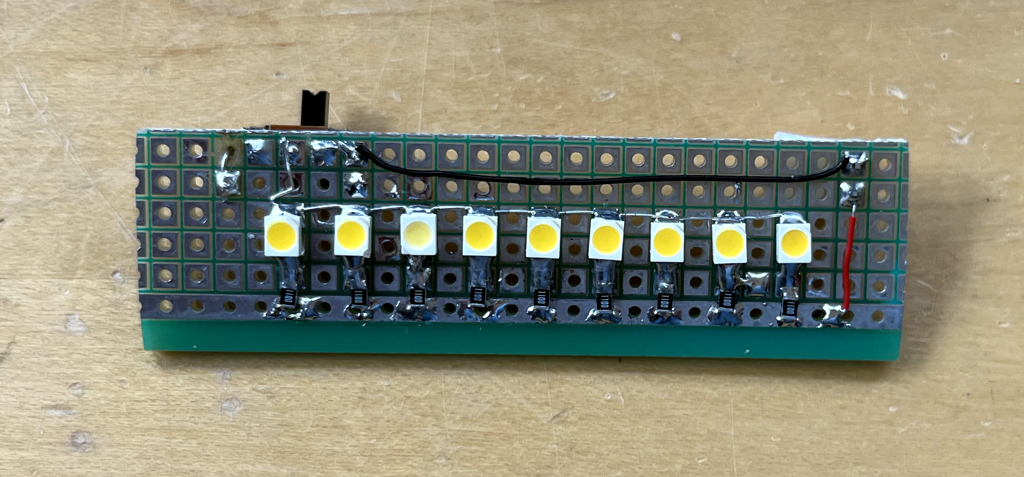
The LED board was fairly easy to wire together using a piece of a perf board. The LEDs are wired in parallel, each with its own series current limiting resistor (~16-18 mA/LED) and powered from the Battery Buddy 5V output. Somehow I damaged one LED so I ended up with a total of 9 at the end.
The most time was spent in OpenSCAD designing the case (and with calipers measuring). The source is attached and generates eight different sub-assemblies. Five of them I could print on my own printer but three of them were printed by a friend who also has transparent PLA. I count those pieces as something that had to come from elsewhere.
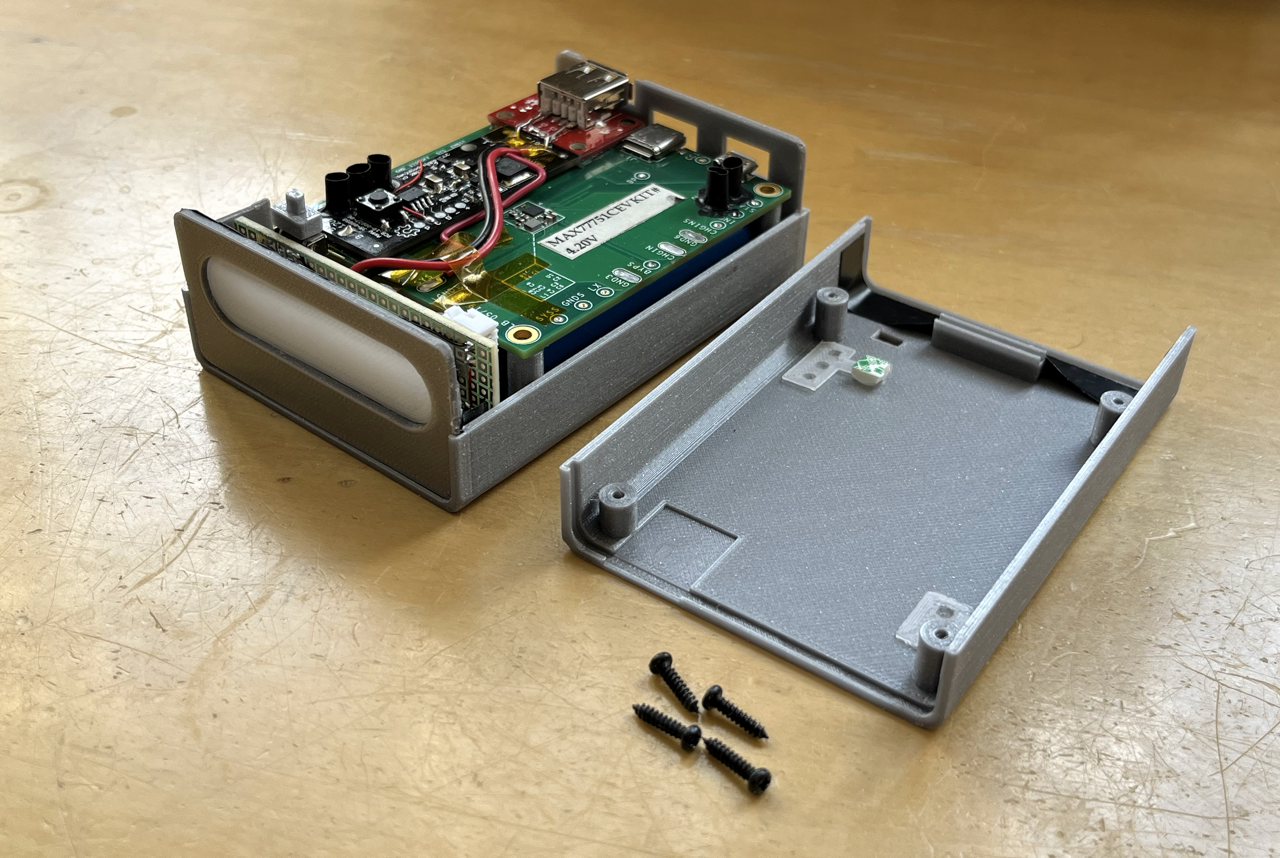
The case halves are screwed together with the endplates sitting in slots. The LED diffusers are glued in place and the slide switch cover just rides on the switch. The second set of printed parts went together fairly smoothly after a couple of design modifications and a little sanding... I used some shrink wrap glued to the PCBs to isolate light coming from the status LEDs on the PCBs. I'm really happy with how it turned out although even a 1.5mm thick 3D printed transparent diffuser loses a lot of light.
Thanks for reading.
Discussions
Become a Hackaday.io Member
Create an account to leave a comment. Already have an account? Log In.