 WJCarpenter
I didn't think about it until the water heater was actually being installed, but the outside case of it is sheet metal. It's some kind of steel. So, I started thinking about using magnets to place the relay enclosure on the side of the heater.
My first attempt was to use one of those rubbery refrigerator magnets that advertisers send us all the time. I cut up one of them (for something that we never have and never will use, but we have their magnet on our refrigerator) to exactly the size of the enclosure footprint. I use cyanoacrylate (CA) glue (aka, superglue) to attach it to the enclosure. In a test, the base stuck pretty well to the side of the heater, but when I added the top with the electronics, it was a very weak bond. It was way too easy to move it around, and I imagined that vibration and gravity would eventually drop it off the side and onto the floor.
I have some small, round rare earth magnets on hand. They are called rare earth magnets because it's what NASA uses to airlift elephants and whales to the moon. Those beauties are strong. If you don't have any experience with them, you might not know that it can take two men and a boy to pull two of them apart. If you don't have that kind of labor force handy, you get them apart by sliding them, and even then it's a struggle. If you relax your grip for even a second, they jump back together and laugh at you.
I used CA glue to attach 3 doughnut-shaped magnets, 4-5 millimeters each, to the already-attached rubbery magnet. As I expected, that made an incredibly strong bond with the heater case. I had to slide the enclosure to an edge of the case to pull it off. I thought that pulling it straight off might damage the enclosure base itself. Needless to say, for the intended use, this was a complete success. The aesthetics weren't fantastic since there was a gap of a couple millimeters (the thickness of the magnets) between the enclosure base and the heater case. For this kind of project, out of the way in the basement, that was not a big deal. It bugged me a little, but it's the kind of thing that only I would know about.
For more general reasons, I wanted to see if I could figure out how to embed the magnets into the bottom of the enclosure base. That might be more meaningful in some future project. Using the YAPP template, I had already made openings for screw holes. It was a simple matter to change the size of those to the diameter of some of my rare earth magnets. I took the opportunity to fix the spacing of the holes, and I also made it configurable to make holes for magnets, holes for screws, or neither.
It's one thing to have a hole the right size for a magnet. It's another thing to keep the magnet in that hole. I wanted to have a thin layer of 3D printed material covering one end of the magnet cavity. If I put the covering at the top of the hole (on the inside of the enclosure), then it could create problems with the 3D printing process, possibly requiring supports. I decided to put the covering on the bottom (on the outside of the enclosure) to avoid that potential problem. That would also hide the magnets, which I think is aesthetically better. The magnets are strong enough that I wasn't worried about them having to act through that small distance, and a bonus was that the magnetic force would tend to keep the magnets pressed into the cavities.
The YAPP template doesn't have anything for a cut-out that doesn't go all the way through some face of the enclosure. I figured out that I could put a thin layer entirely covering the base of the enclosure after YAPP had already done all its work. The end of the OpenSCAD file now looks like this:
//---- This is where the magic happens ----
YAPPgenerate();
if (hbrb_use_magnets) {
  color("blue")
    translate([hbrb_wall_border,hbrb_wall_border,0])
    cube(size = [shellLength-(2*hbrb_wall_border),shellWidth-(2*hbrb_wall_border),hbrb_magnet_bury_thickness], center = false);
 }
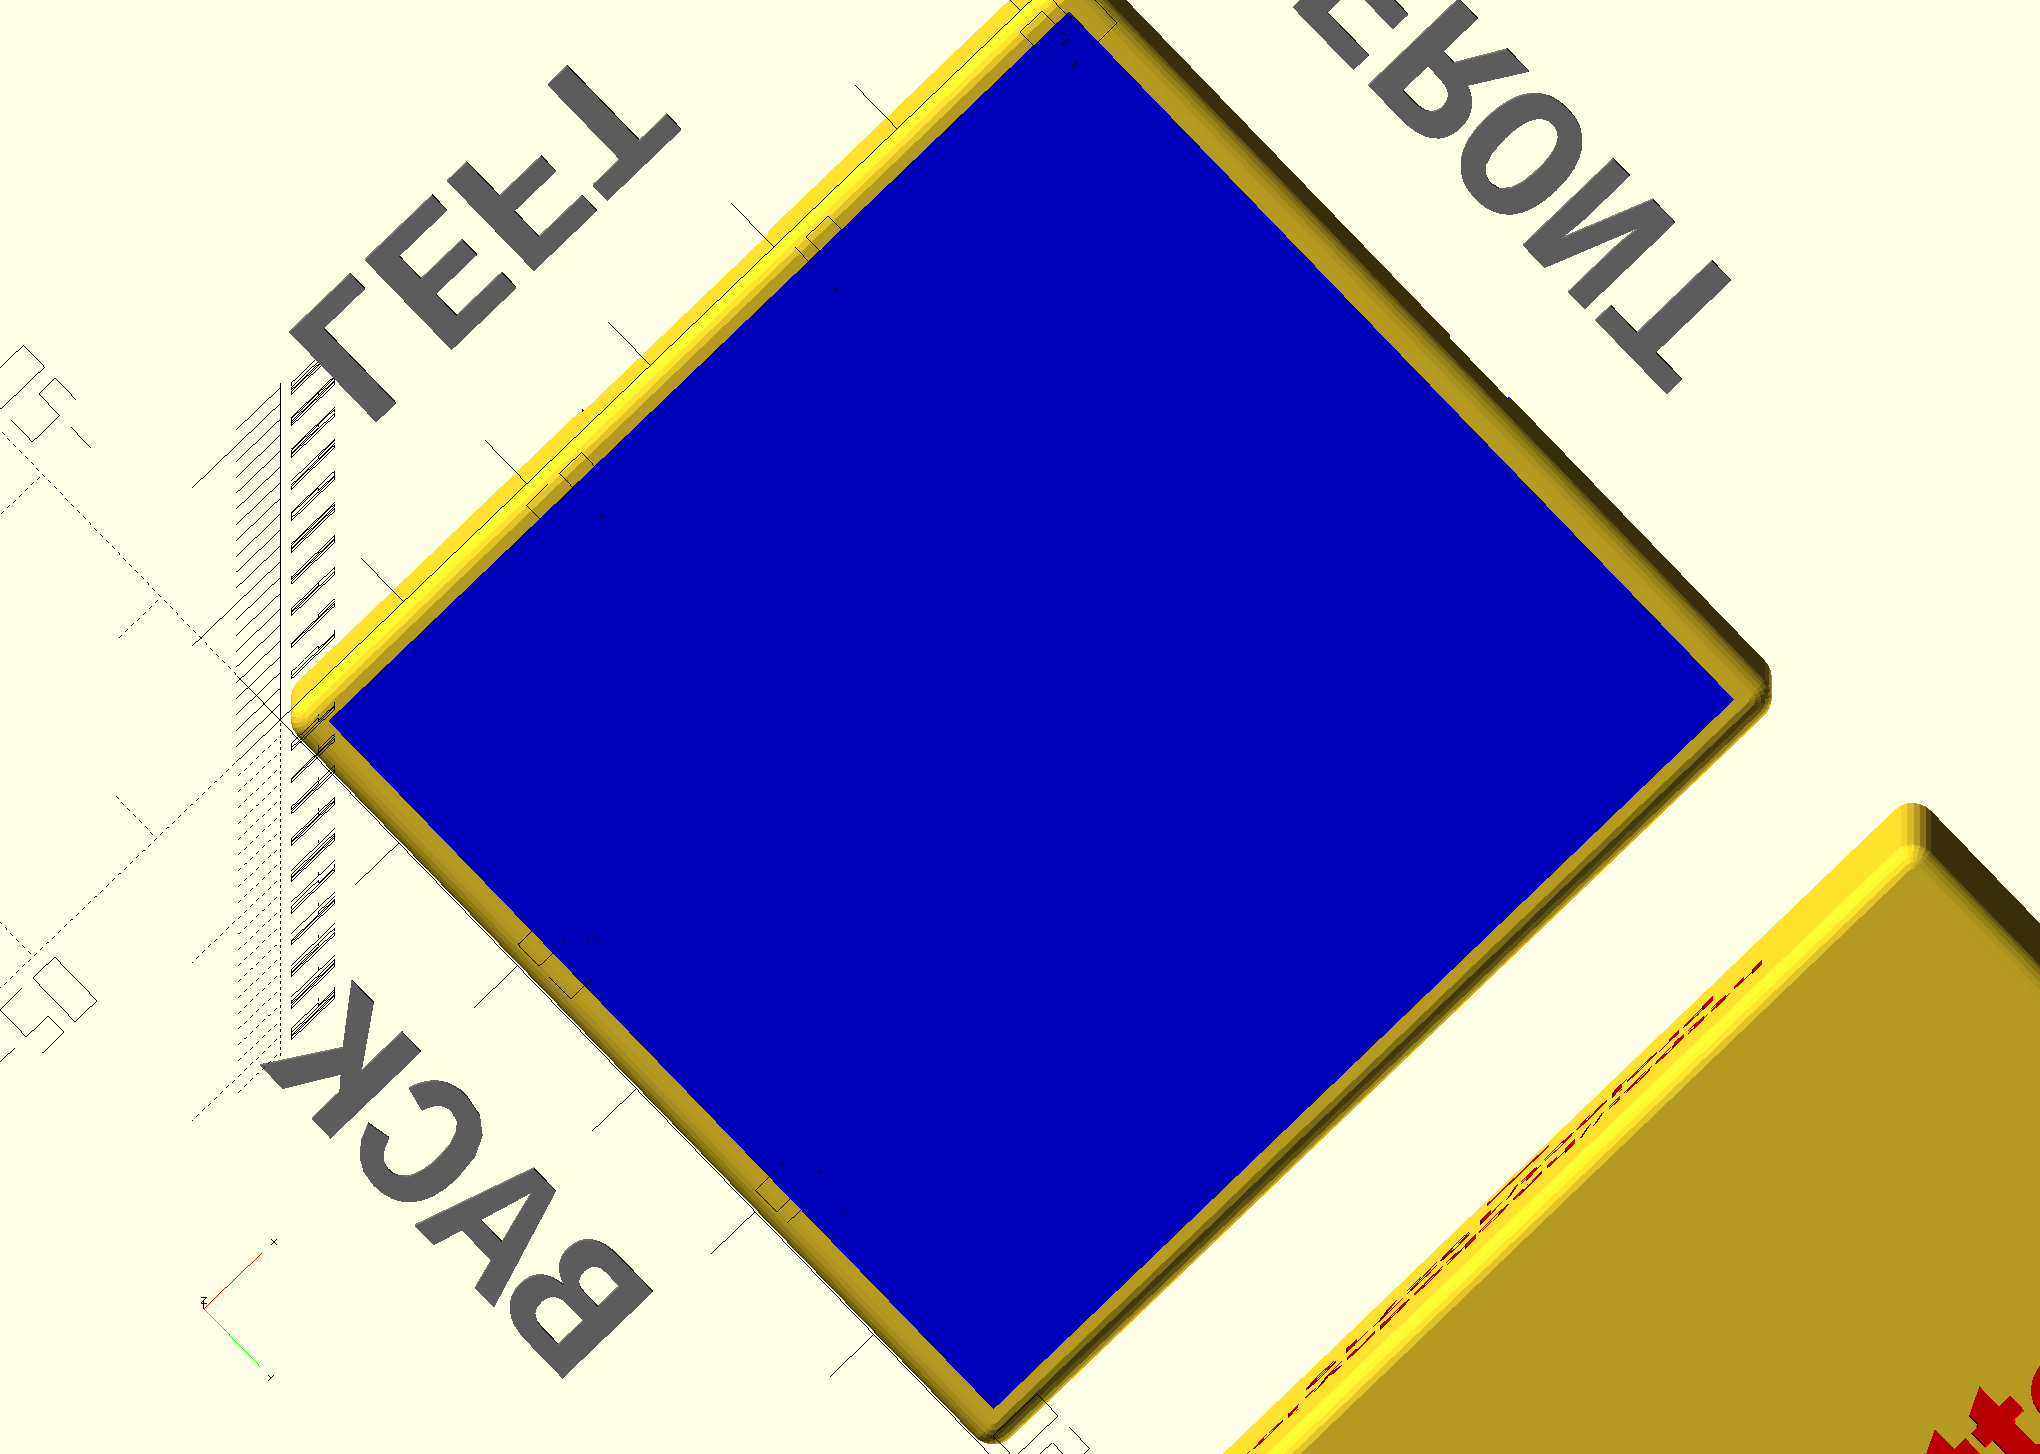
Here's what it looks like from the bottom, rendered in blue:
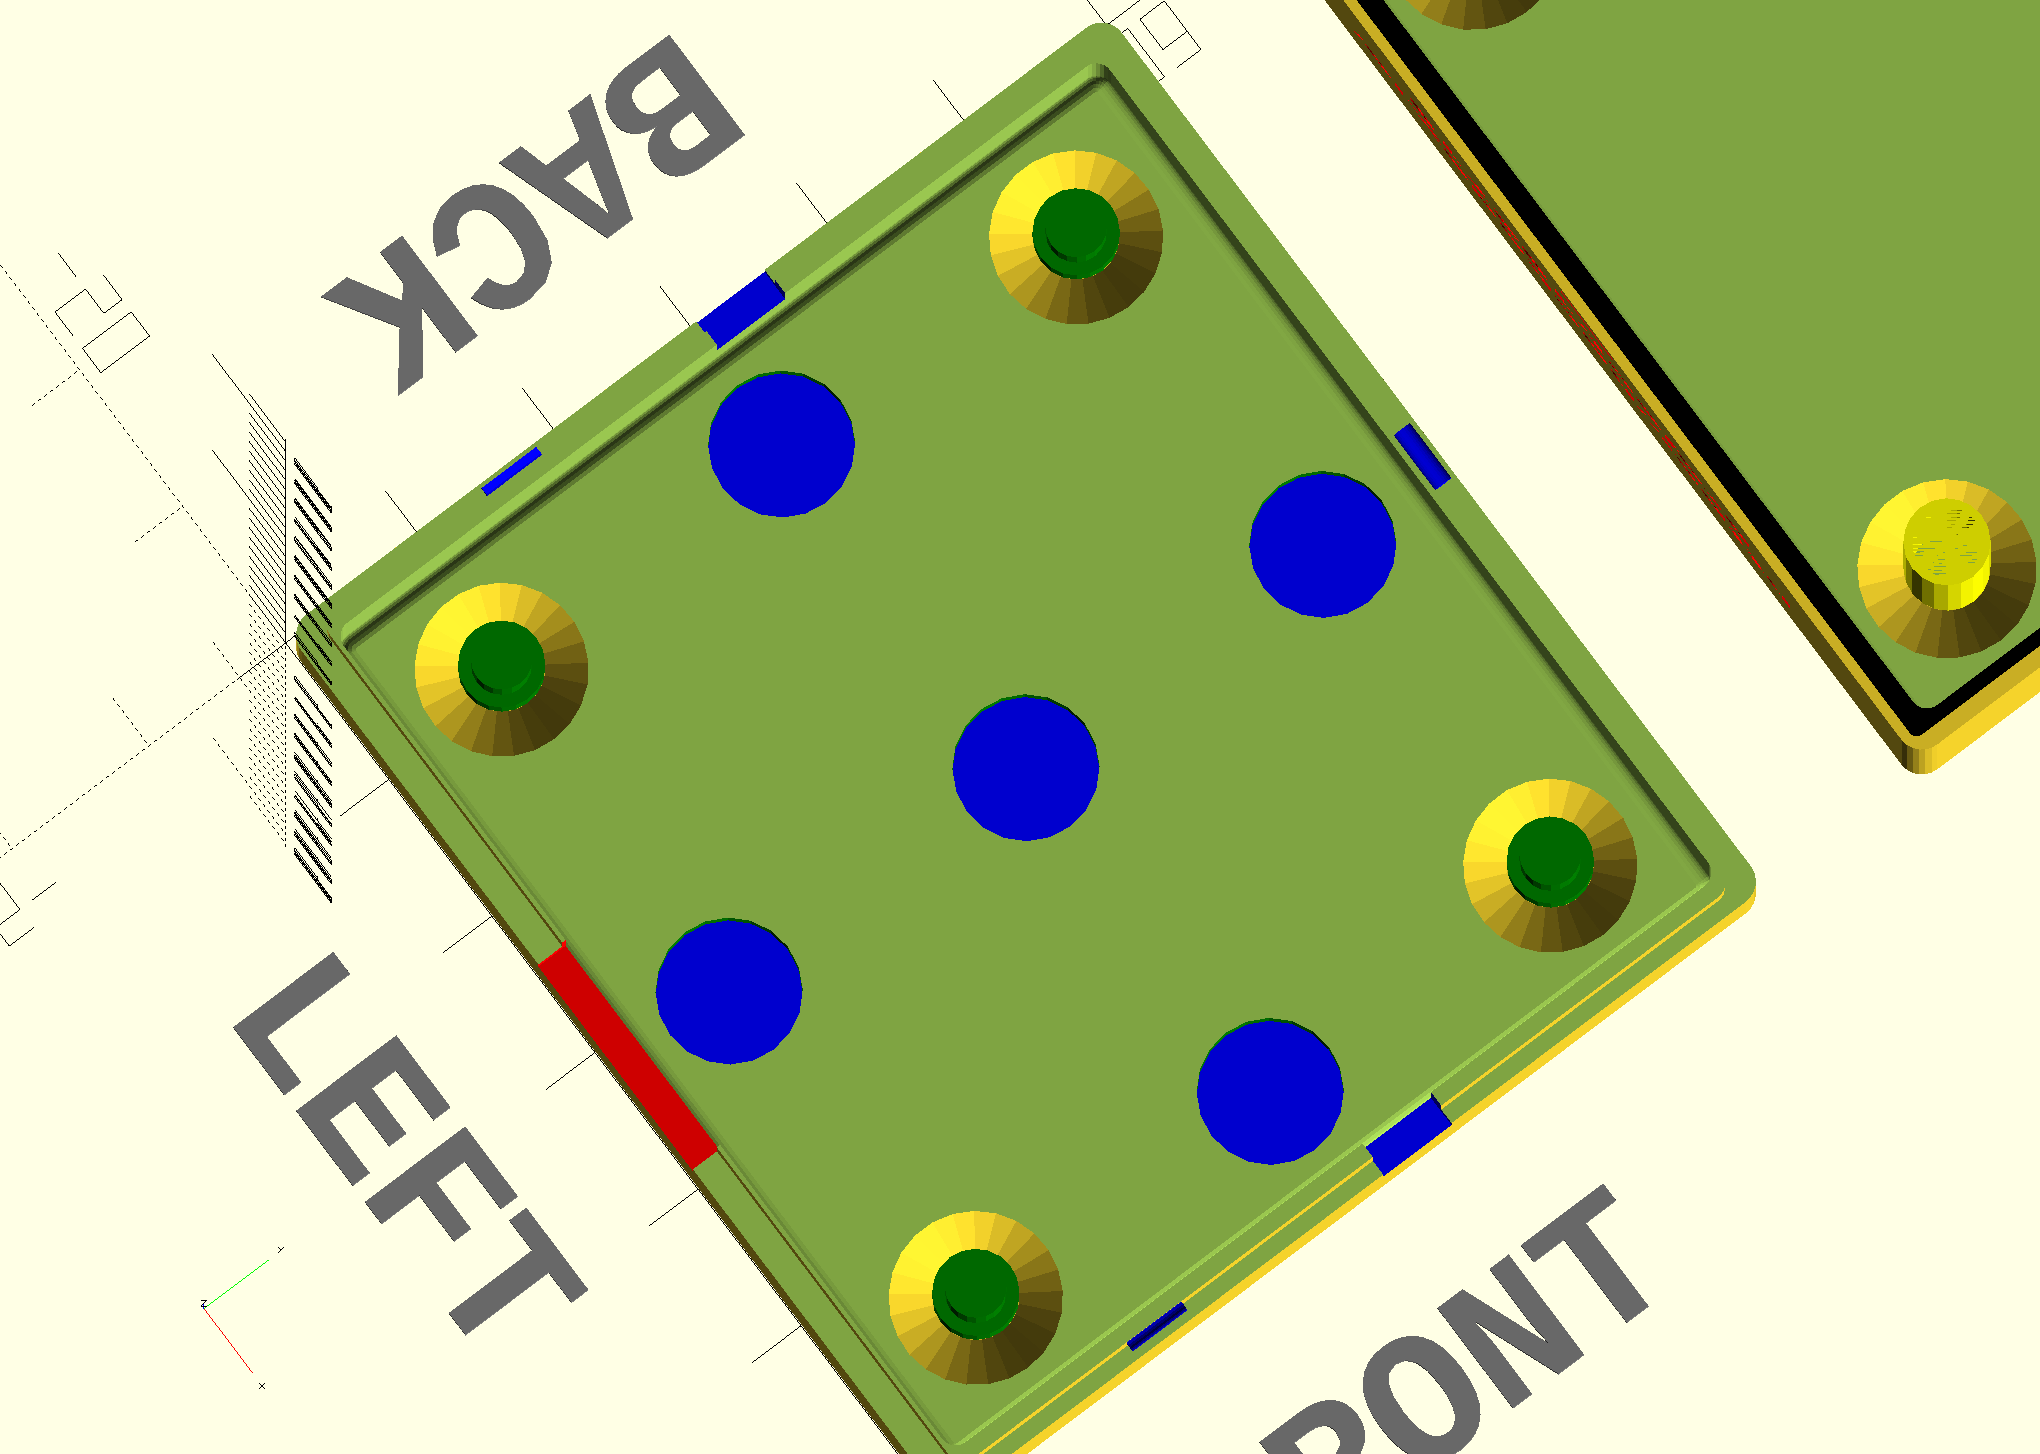
Here's the same thing viewed from the inside:
I made the magnet holes just slightly larger in diameter than the magnets and secured the magnets in place with CA glue. Here's the printed result:
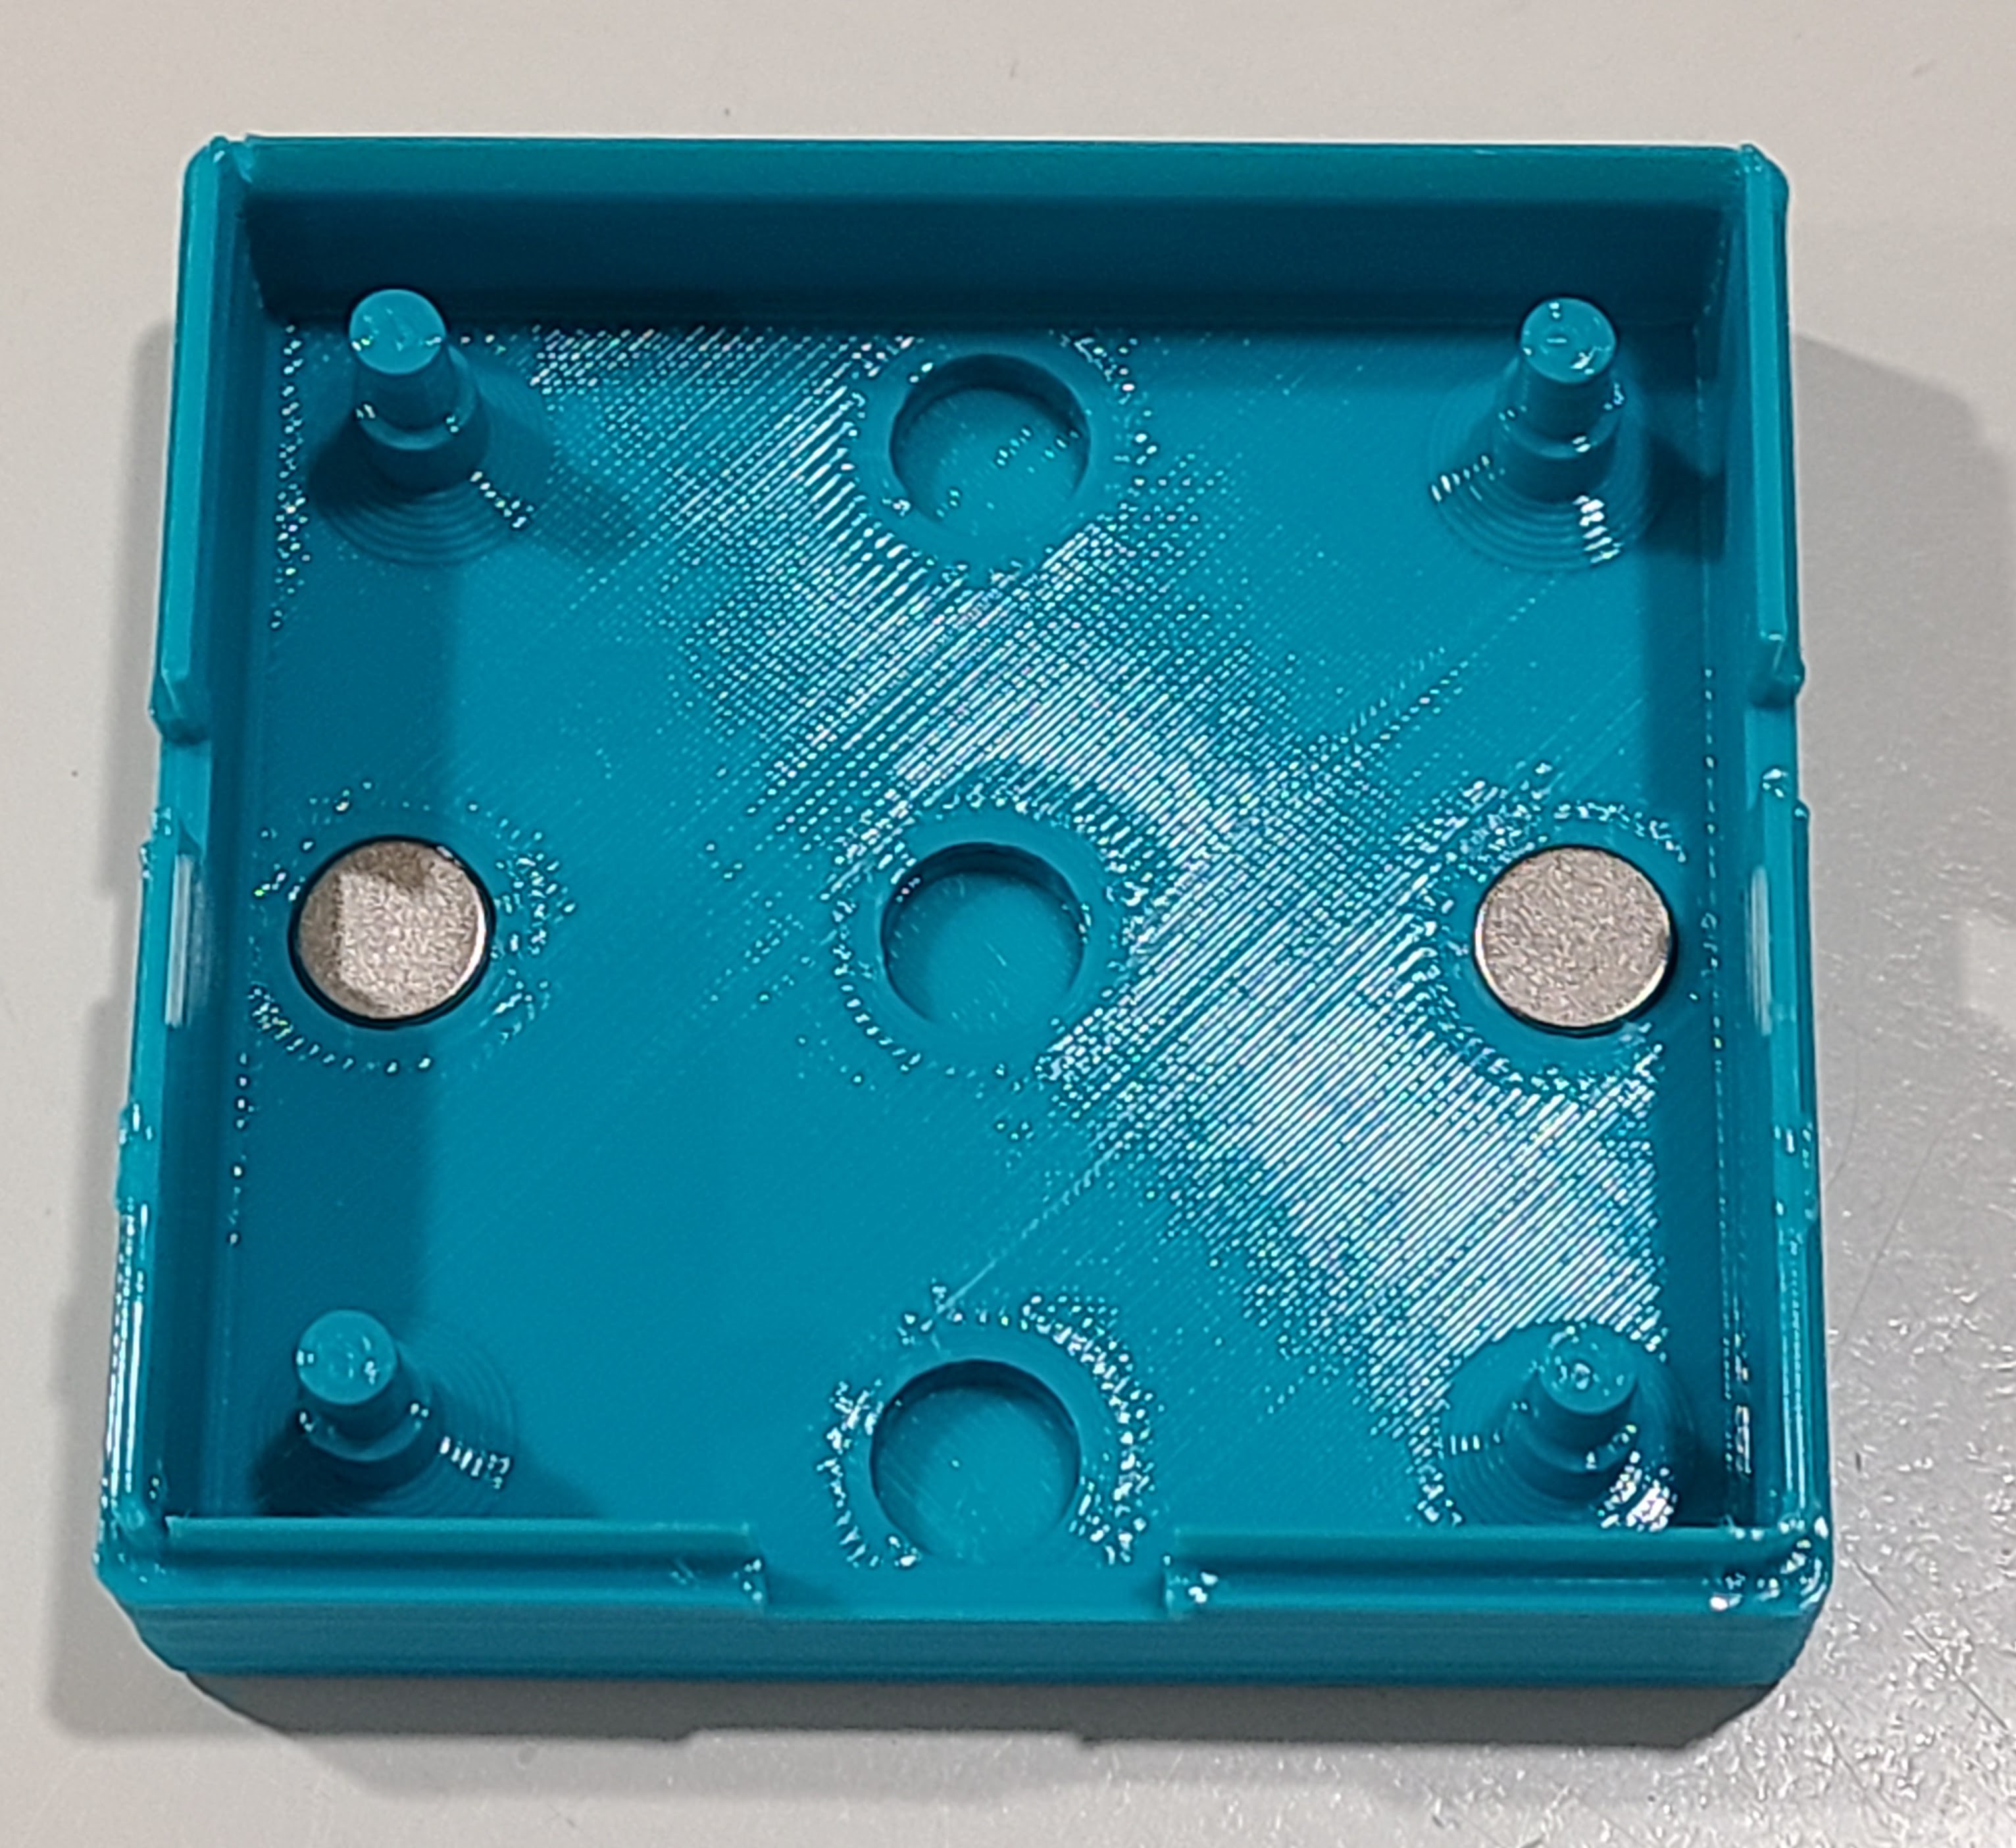
Even though I adjusted the thickness of the base floor to account for both the thickness of the magnets and the thin layer that I added, the magnets still stick up above the inside floor ever so slightly. That's because I didn't account for the shrinkage of the filament during printing. It wasn't significant enough for me to adjust and print it again.
On my first attempt, I tried to make the thin layer covering the magnets 0.5 mm. I was careless in my thinking though. With my 0.28 mm layer height, that resulted in just a single printed layer. I'm a little afraid that those strong magnets might try to pull through that single layer, so I adjusted my numbers to get two layers of printed material. I could have done something to adjust the thickness of the first layer in my slicer, but I didn't want to fool around with that.
I was so pleased with how that turned out that I decided to make a second enclosure to hold a pushbutton that I would wire in parallel to the contacts inside the water heater. Recall that the pushbutton on the relay box enclosure goes through the electronics and exercises the complete automation. This second button would be directly wired to the water heater and would be a DIY version of Navien's HotButton add-on. I modified the OpenSCAD file to make it configurable which enclosure to render. It was mostly a matter of conditionally setting various dimensions and making cutouts and engravings conditional.
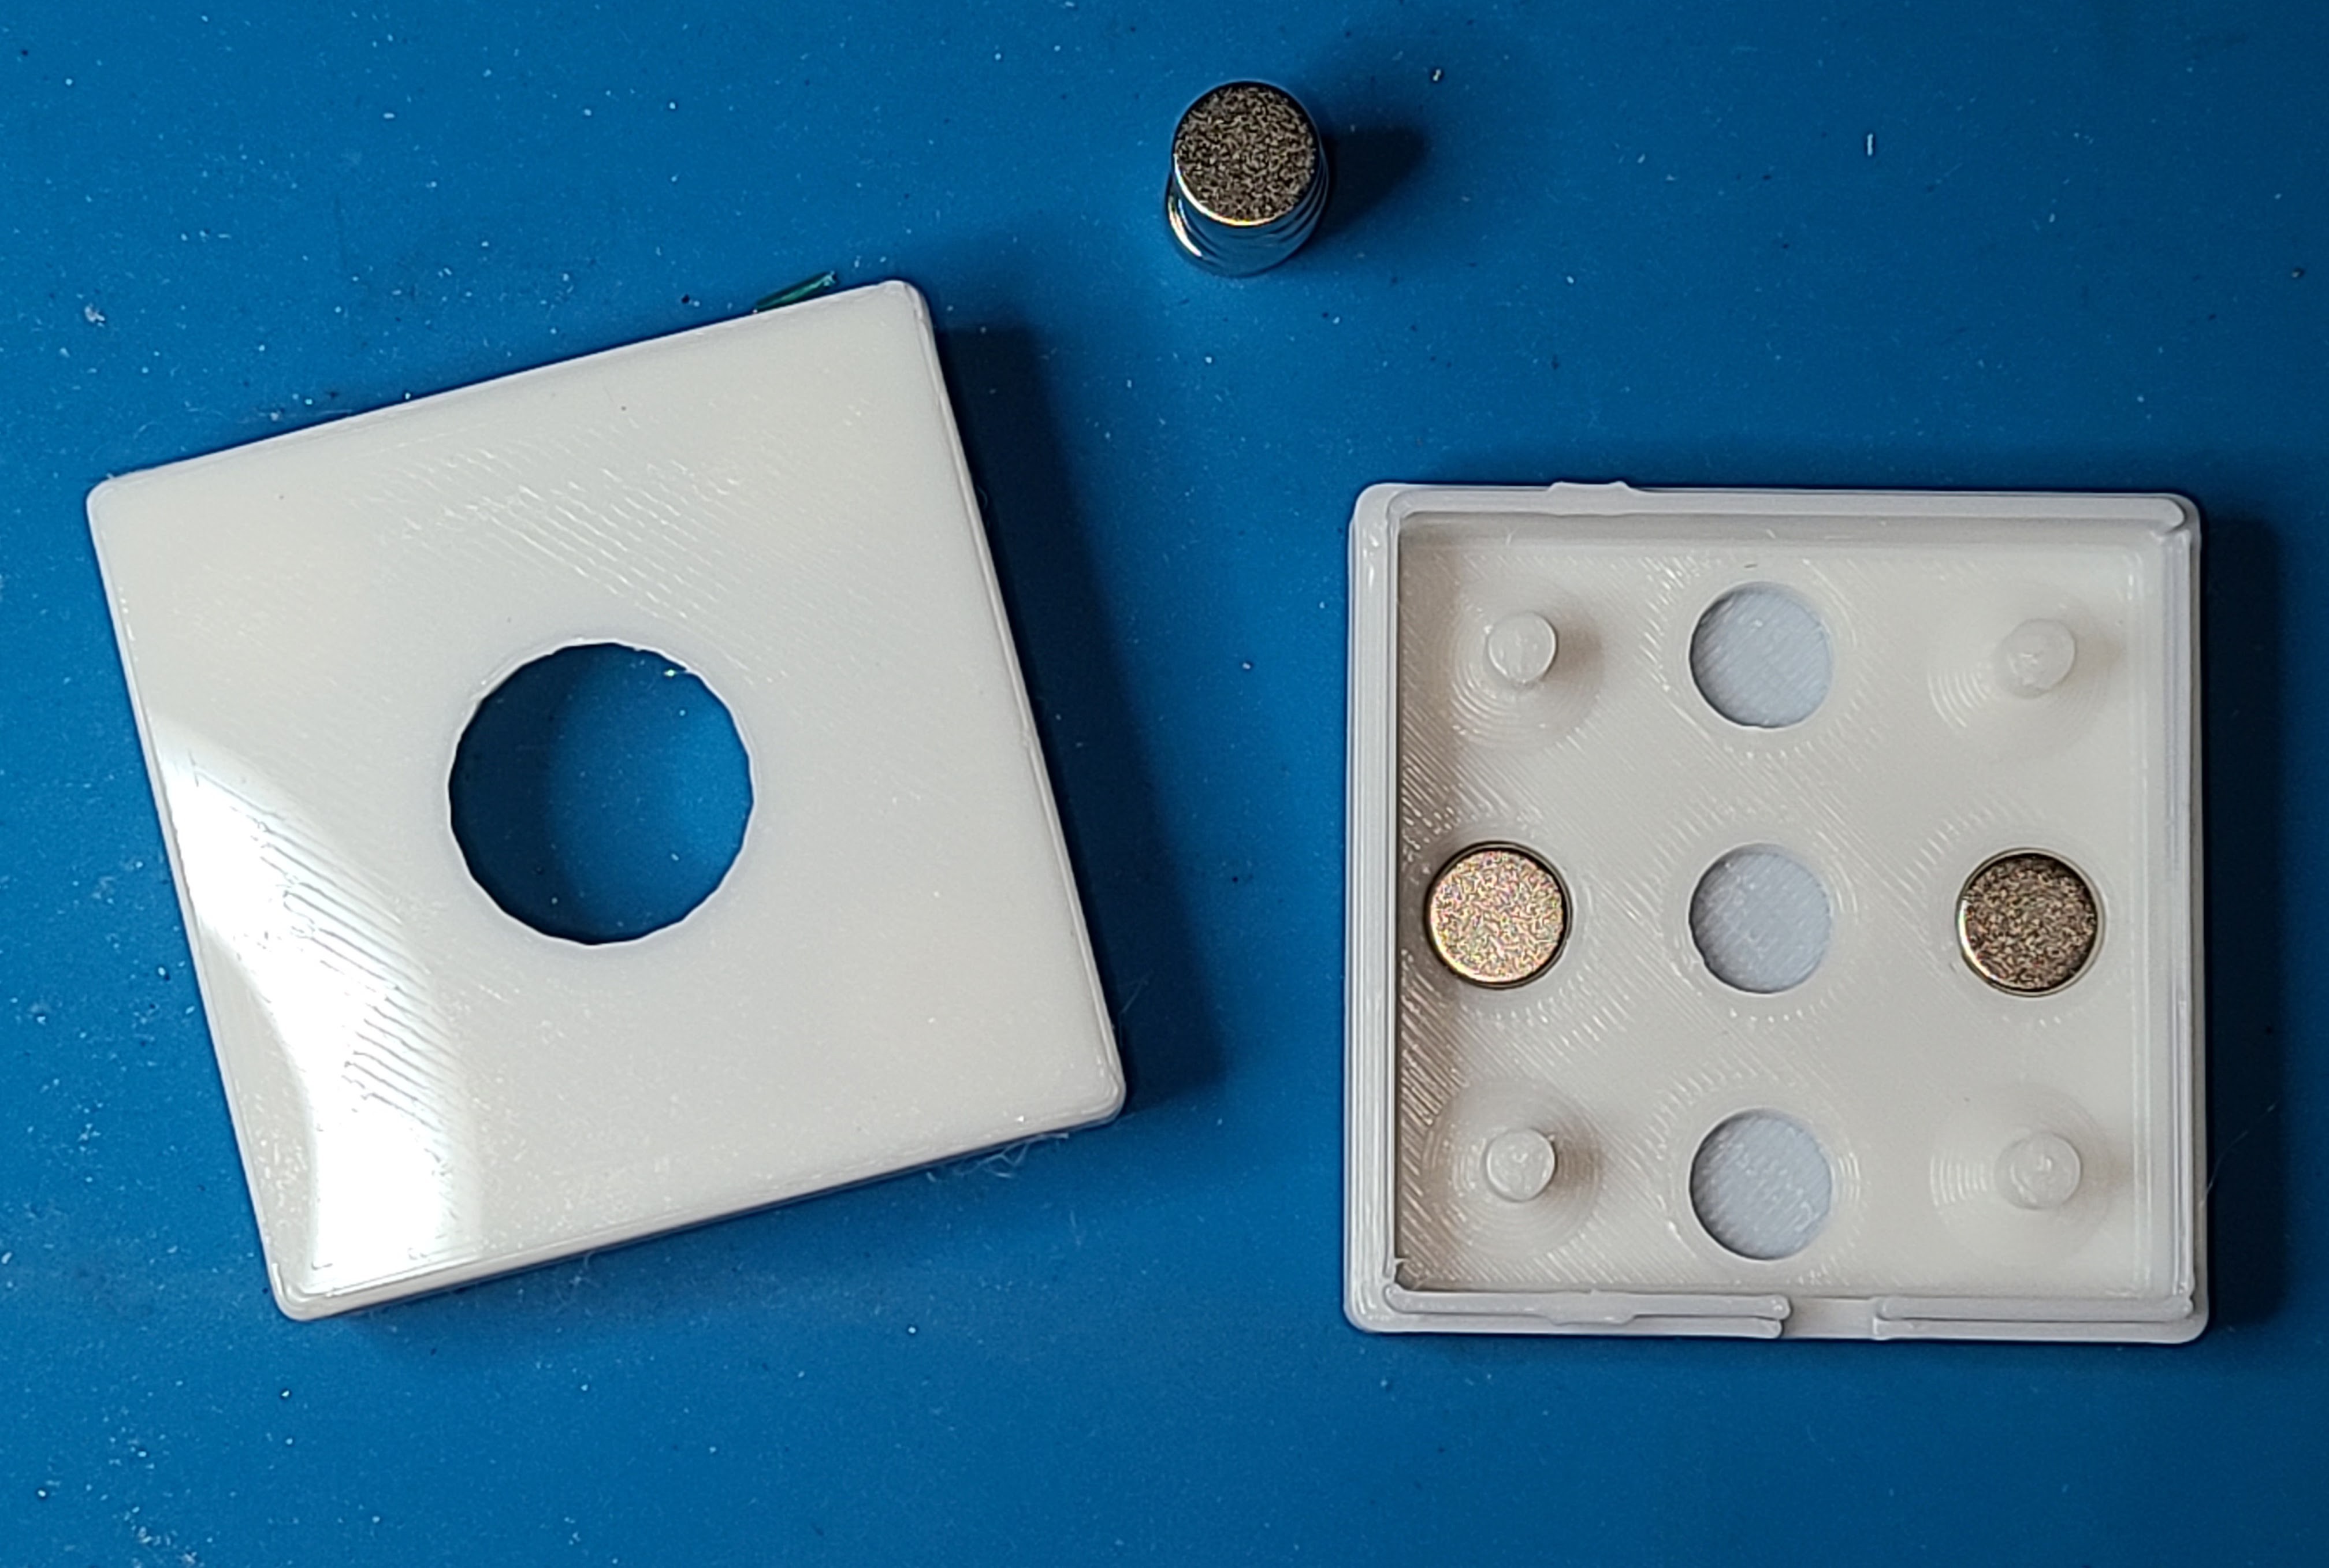
Here's that printed enclosure. It's a bit smaller and the cutout for the button is in the more traditional top of the enclosure.
All in all, I'm pretty pleased with the results of this and will certainly use it other ways in the future.
Discussions
Become a Hackaday.io Member
Create an account to leave a comment. Already have an account? Log In.