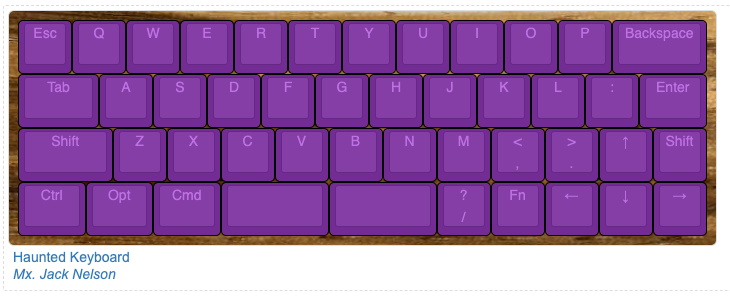
 Mx. Jack Nelson
When I first soldered the switches onto the Haunted Keyboard I learned how invaluable a mounting plate is. It was impossible to get all of the switches to be perfectly aligned with the footprint I had used, which left plenty of room for the switch pins to wiggle around and go crooked while I was soldering them without a plate.
Last week I decided that if I could design a PCB, I must be able to design a plate for the switches. I started by creating the layout for the Haunted Keyboard in KLE so that I could grab the raw data and input it into the SwillKB Plate & Case Builder.
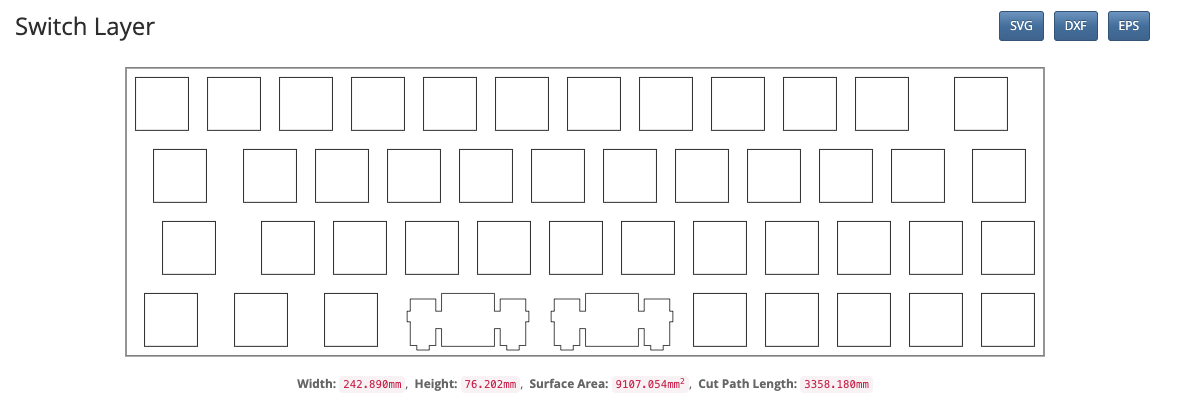
The next step was exporting the .dxf and importing it into KiCad. I followed the guide by Noah Kiser - Convert .dxf to Gerbers for FR4 Mechanical Keyboard Plates to achieve this plate, with through holes for the screws in almost the right locations. If anyone knows how to copy an edge cuts layer from one KiCad file to another, I'd love to know.
I sent the gerbers to JLCPCB and got the plate manufactured as a PCB. Processing it as a PCB was unnecessary, however, I learned that I could have just used their CNC services with FR4 as the medium. I'll do that next time, and skip the electrical checks for something with no electrical components.
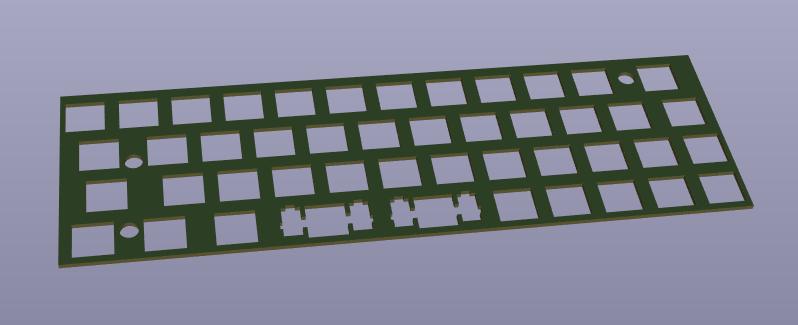
When it came in the mail the black painted surface was shiny and amazing. I'm glad I waited the extra day for the black board. The switches fit perfectly, and we were off on board number two right away.

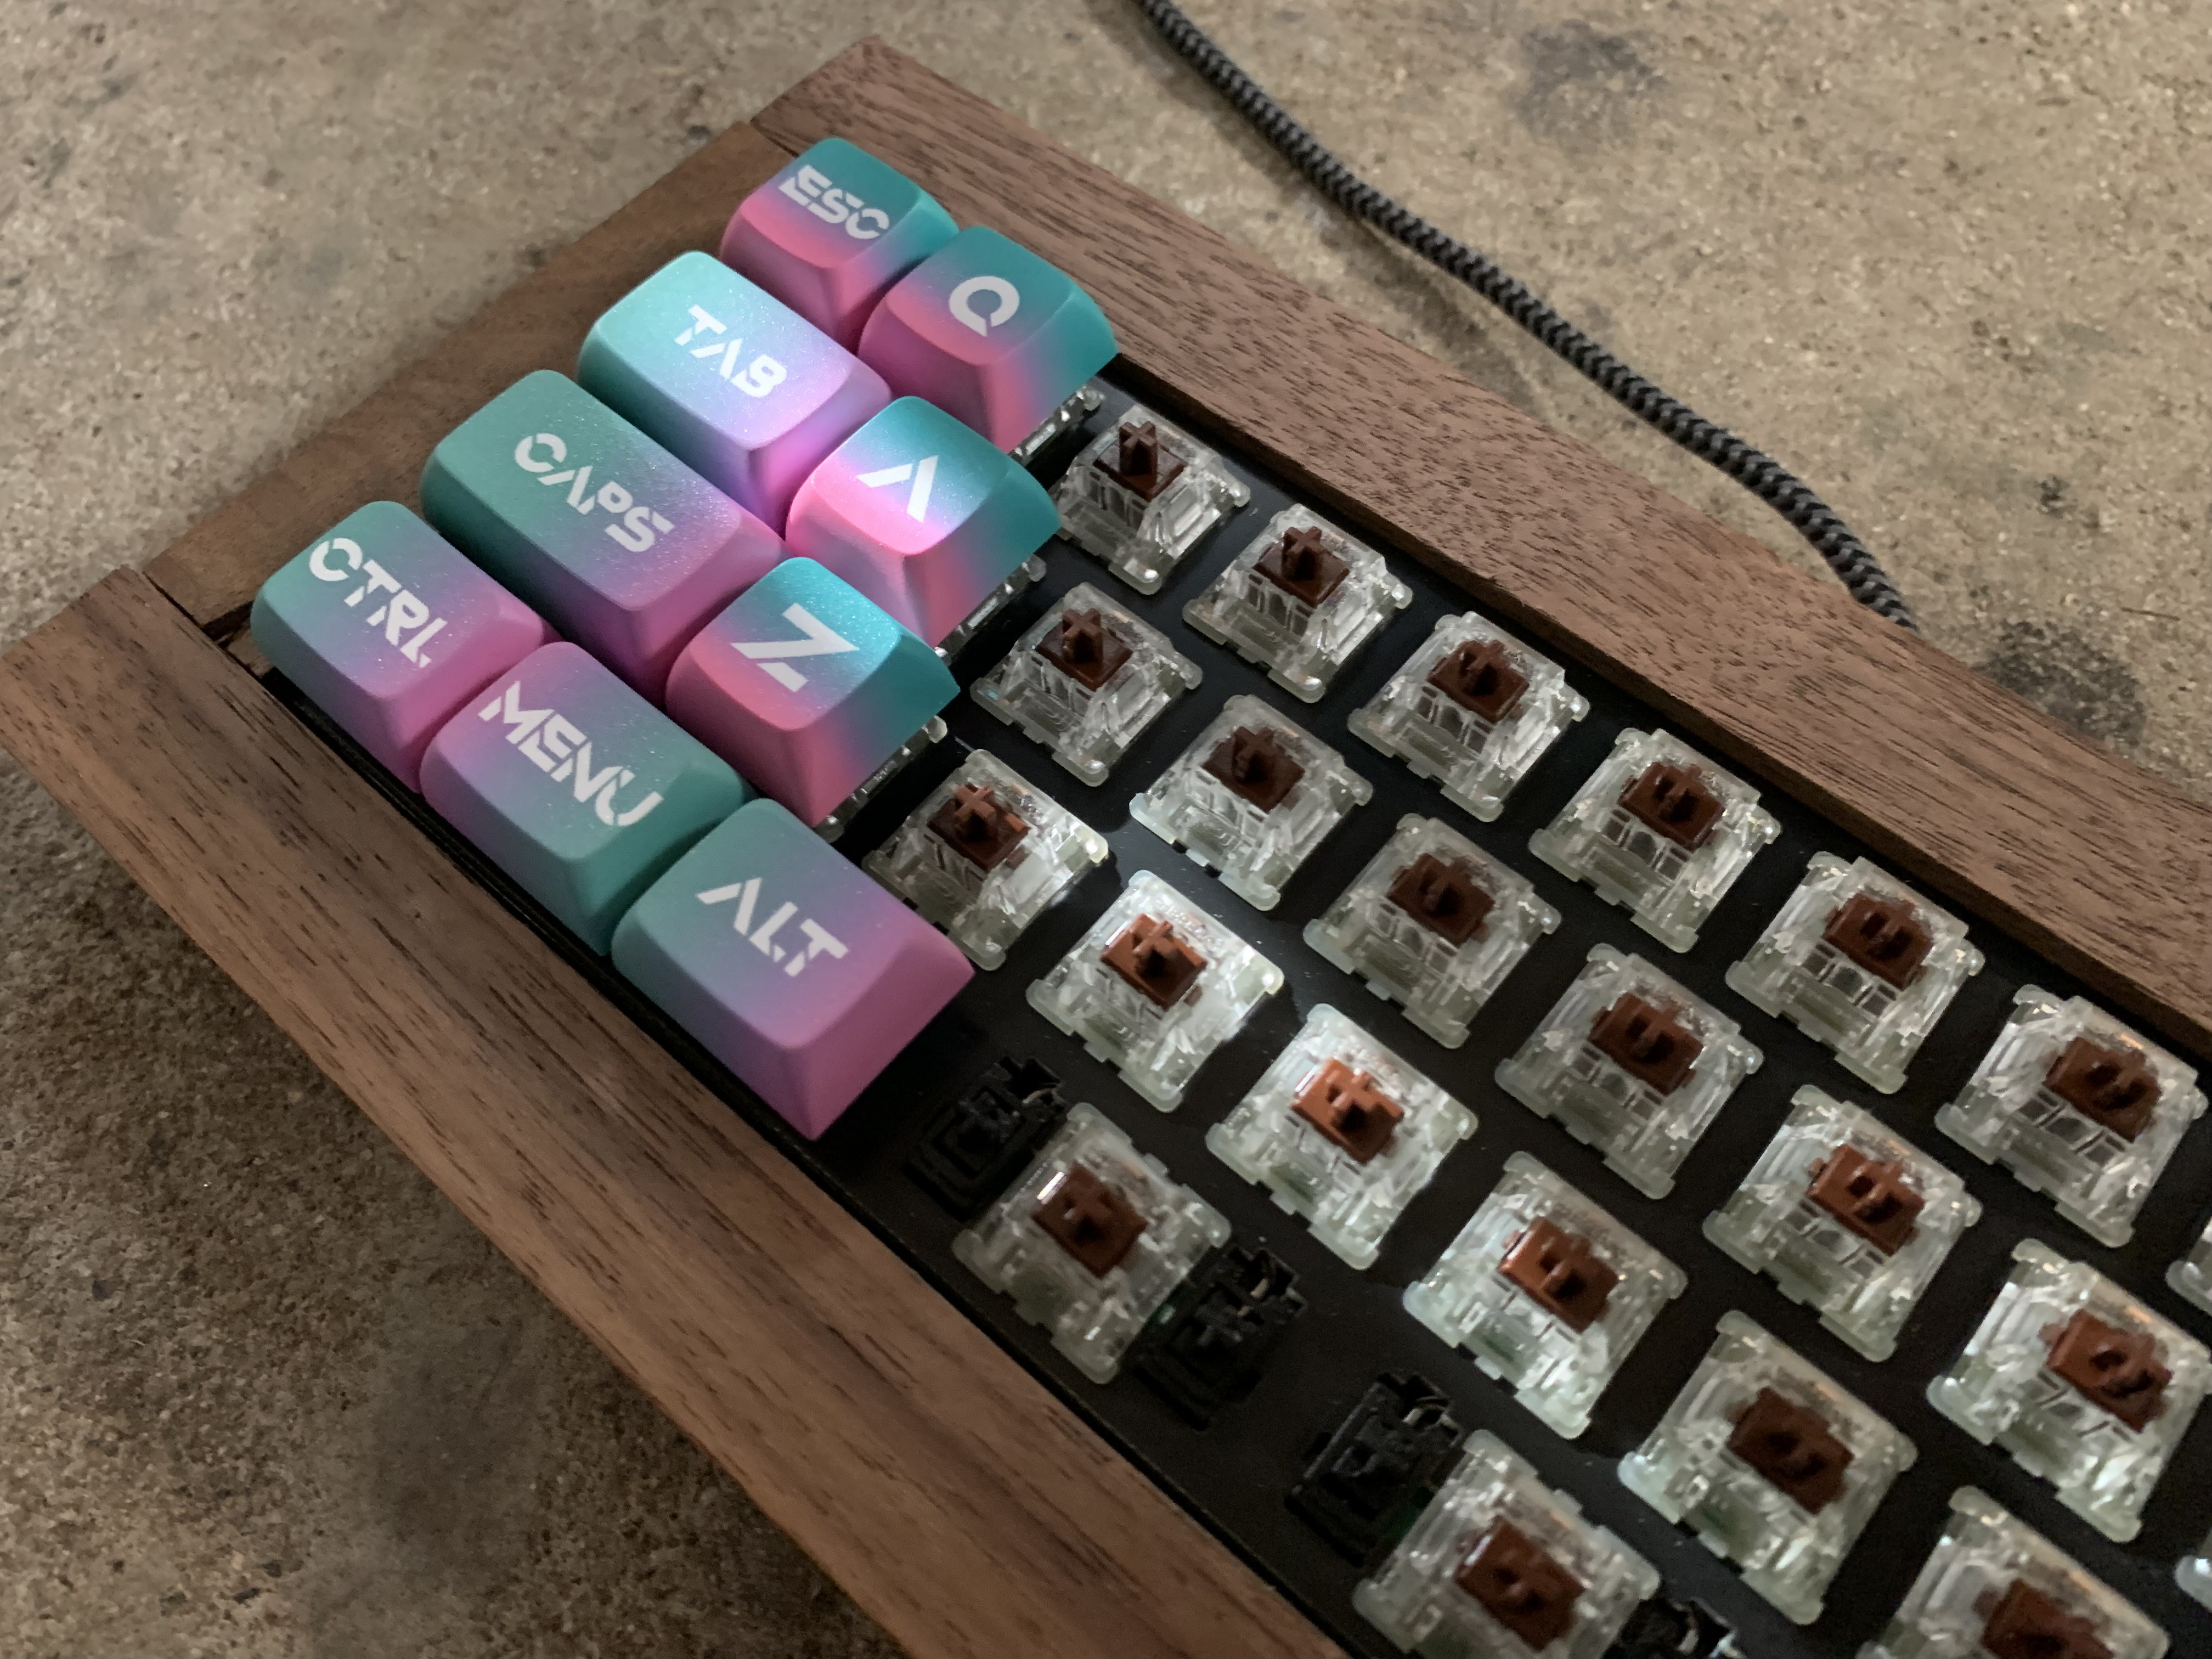
Look at how even those rows of switches are. They're criminally perfect. Somehow I didn't quite expect everything to line up, but the switches fit into the plate nicely, the stabilizer bars fit under the plate perfectly, the plate fit over the stabilizers, and everything lined up with the PCB.

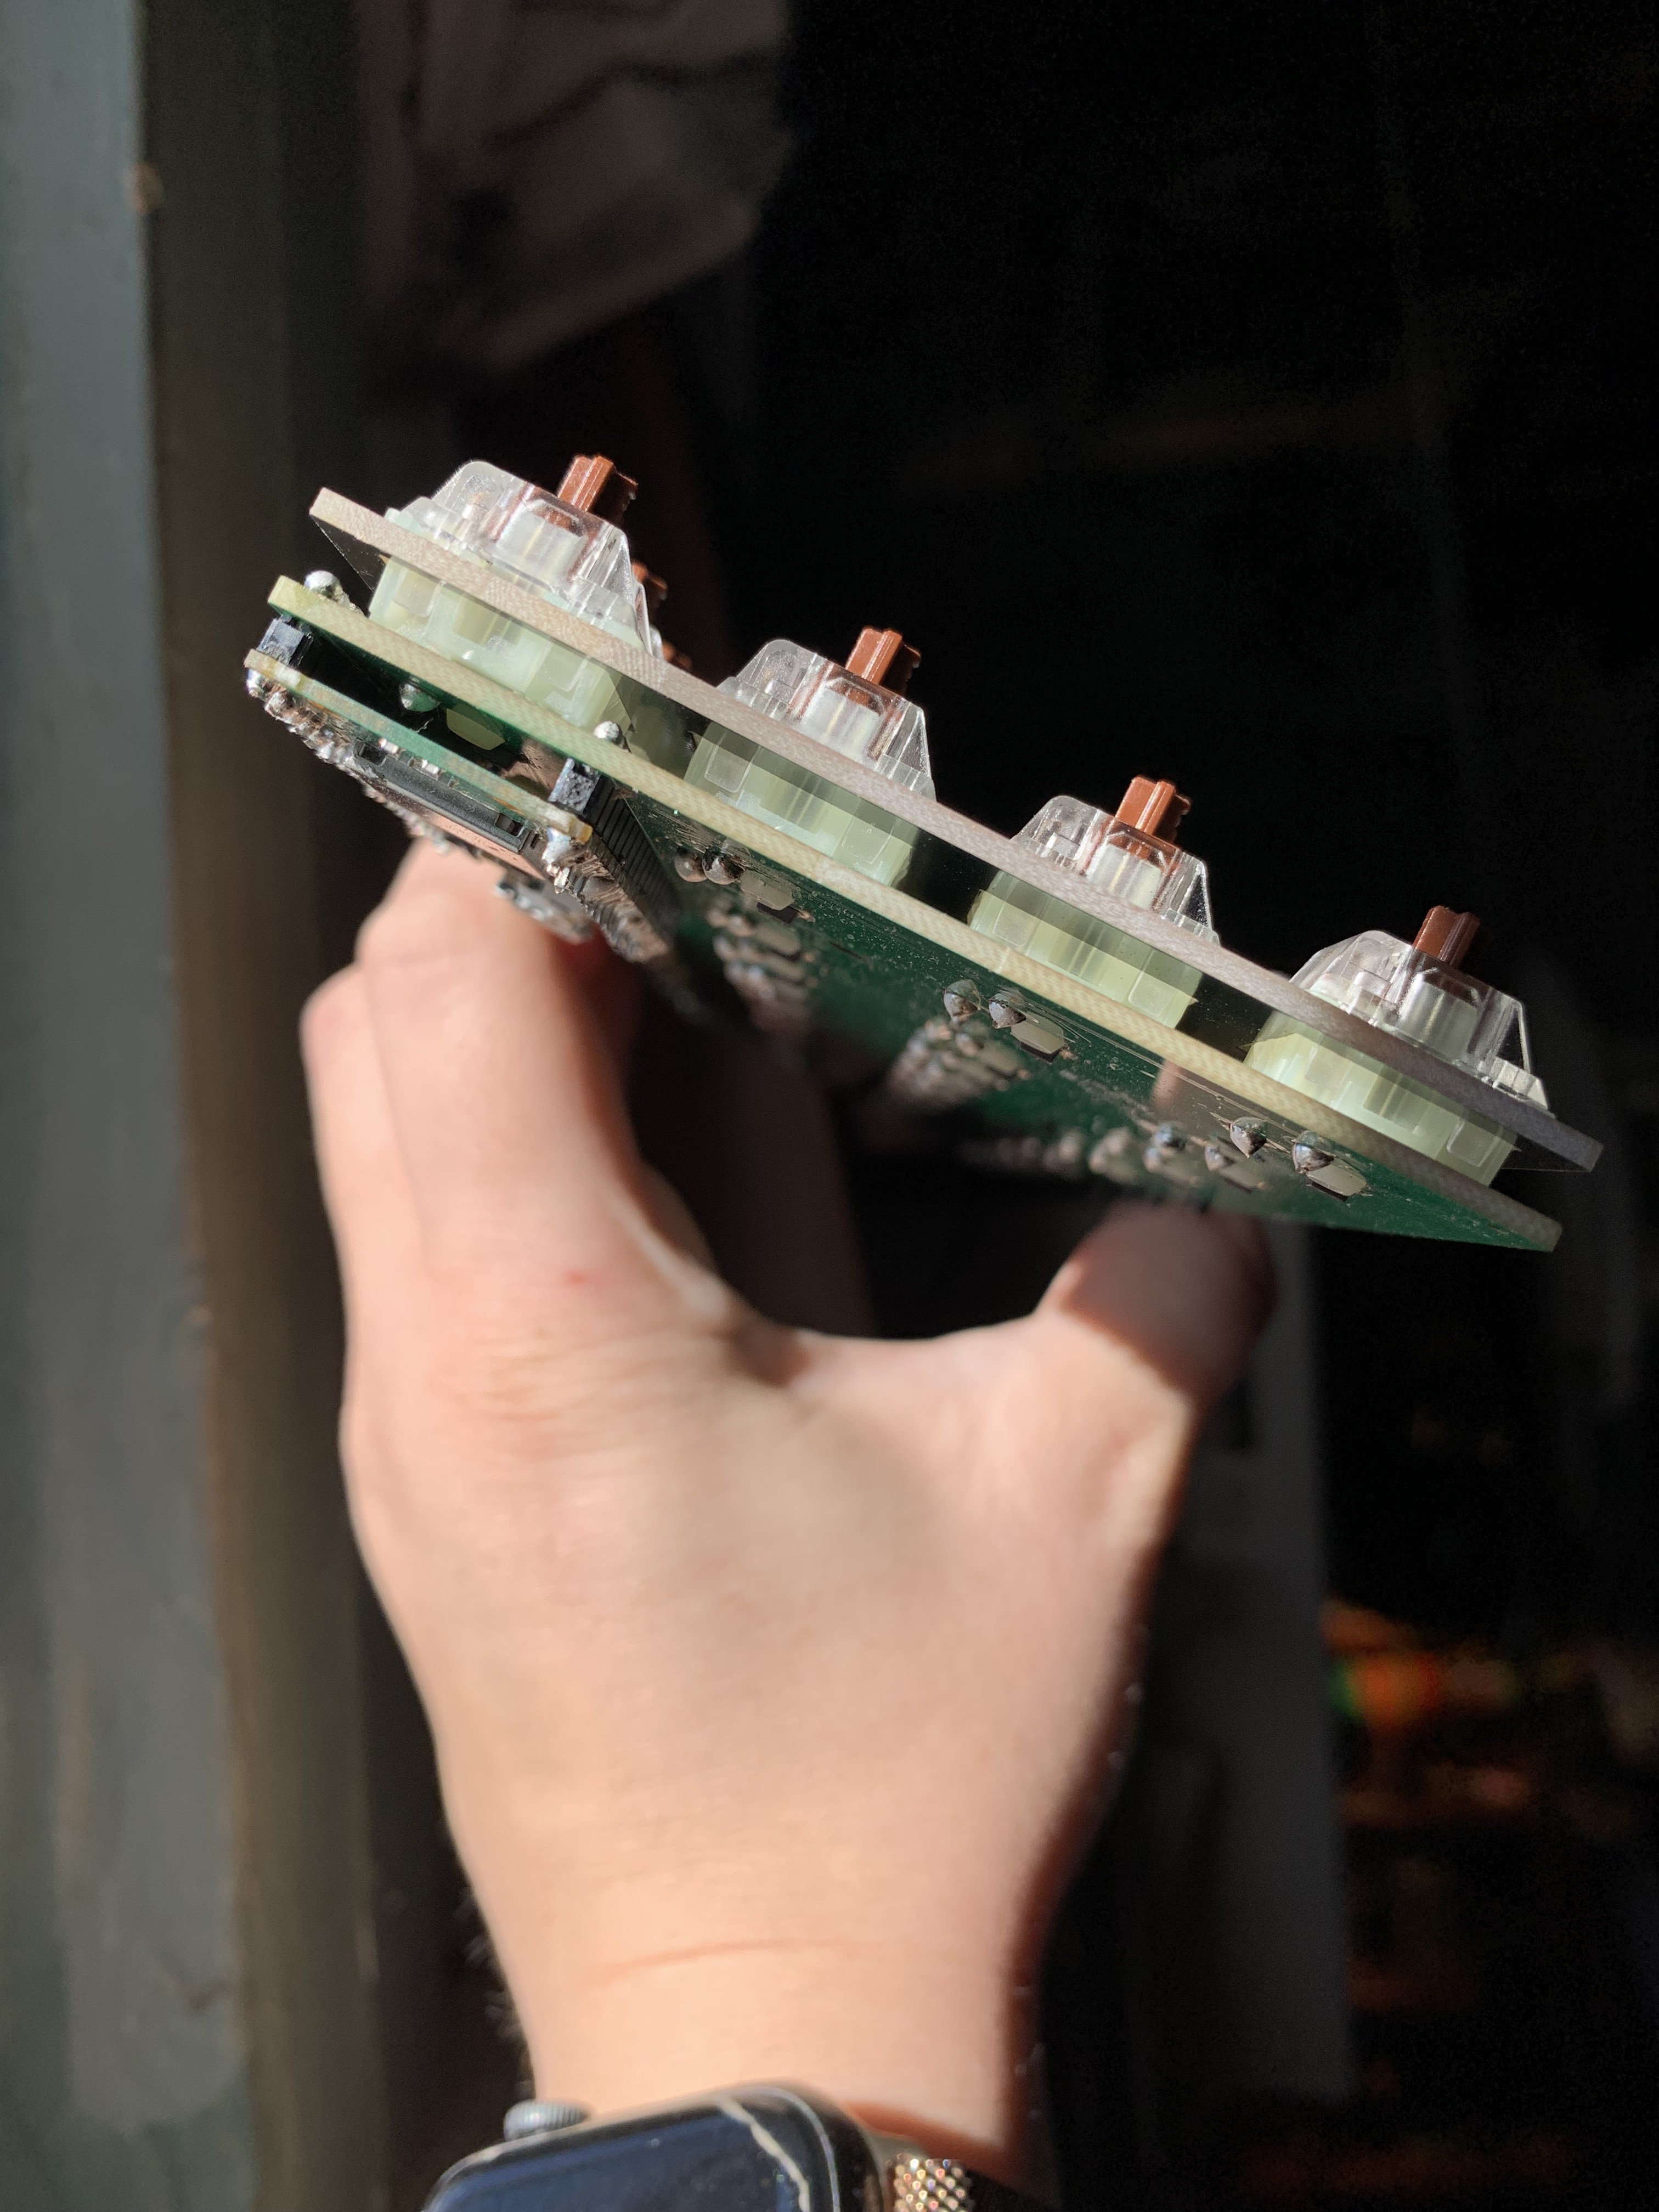
I did all the soldering with this new solder that we got, and that stuff flows. I ended up getting more solder on each of the solder points than I meant to, but I struggled to get a lighter amount on. This is the result, and I was very pleased when it all worked the first time I turned it on.

The switches are now all sandwiched nicely between the PCB and the plate, and the Pi Pico W is aligned much more evenly on this board. I trimmed the ends of the headers off for a better fit in the case. I'm understanding why keyboards often look just like this.
The board looks great in the case without keycaps. I partly want to just look at those tidy rows of switches forever.

But keycaps are a must. I decided to go a different direction for this board and use a cyberpunk set of XDA keycaps. They have really prominent legends, which makes it a very different experience from the first Haunted Keyboard which had barely-there legends.
The final result is a totally different board, with a different attitude and a different sound.

The next step will be some foam. But for now, V2 is up and running, and I've substituted a general purpose AI integration for the spooky one. This board responds as a helpful assistant, instead of a snarky ghost. It did have one last thing to say before being reprogrammed...
"Beware, mortal, for even the helpful keyboard may carry a haunted legacy."
Discussions
Become a Hackaday.io Member
Create an account to leave a comment. Already have an account? Log In.