 piat.jonathan
Now that i have the platform i needed a way to make it convenient to use while in the car. At first i tried using it with no physical niput but it required to :
- have a laptop or phone connected to the device via wifi (the Pi acts as an access point)
- connect via SSH and trigger the script to capture a sequence
- drive ...
- transfer the bag to a usb key and shutdown the Pi through ssh
- when hoem and working on the Pi, switch the WIFI to host to have it to connect to my home router
All these steps prevented me from really doing capture on road. I did it once with the laptop on the passenger seat and a road bump throwed the laptop down in the car. What i wanted to have is a setup similar to an action camera :
- no display (because i don't need one and its bulky)
- a switch to switch between AP and host for th Pi Wifi
- one button to trigger capture
- indicator to see if the capture is ongoing
- no need to copy files to usb key by hand
I ended up soldering a small stripboard PCB with one button, one led, a set of switches.
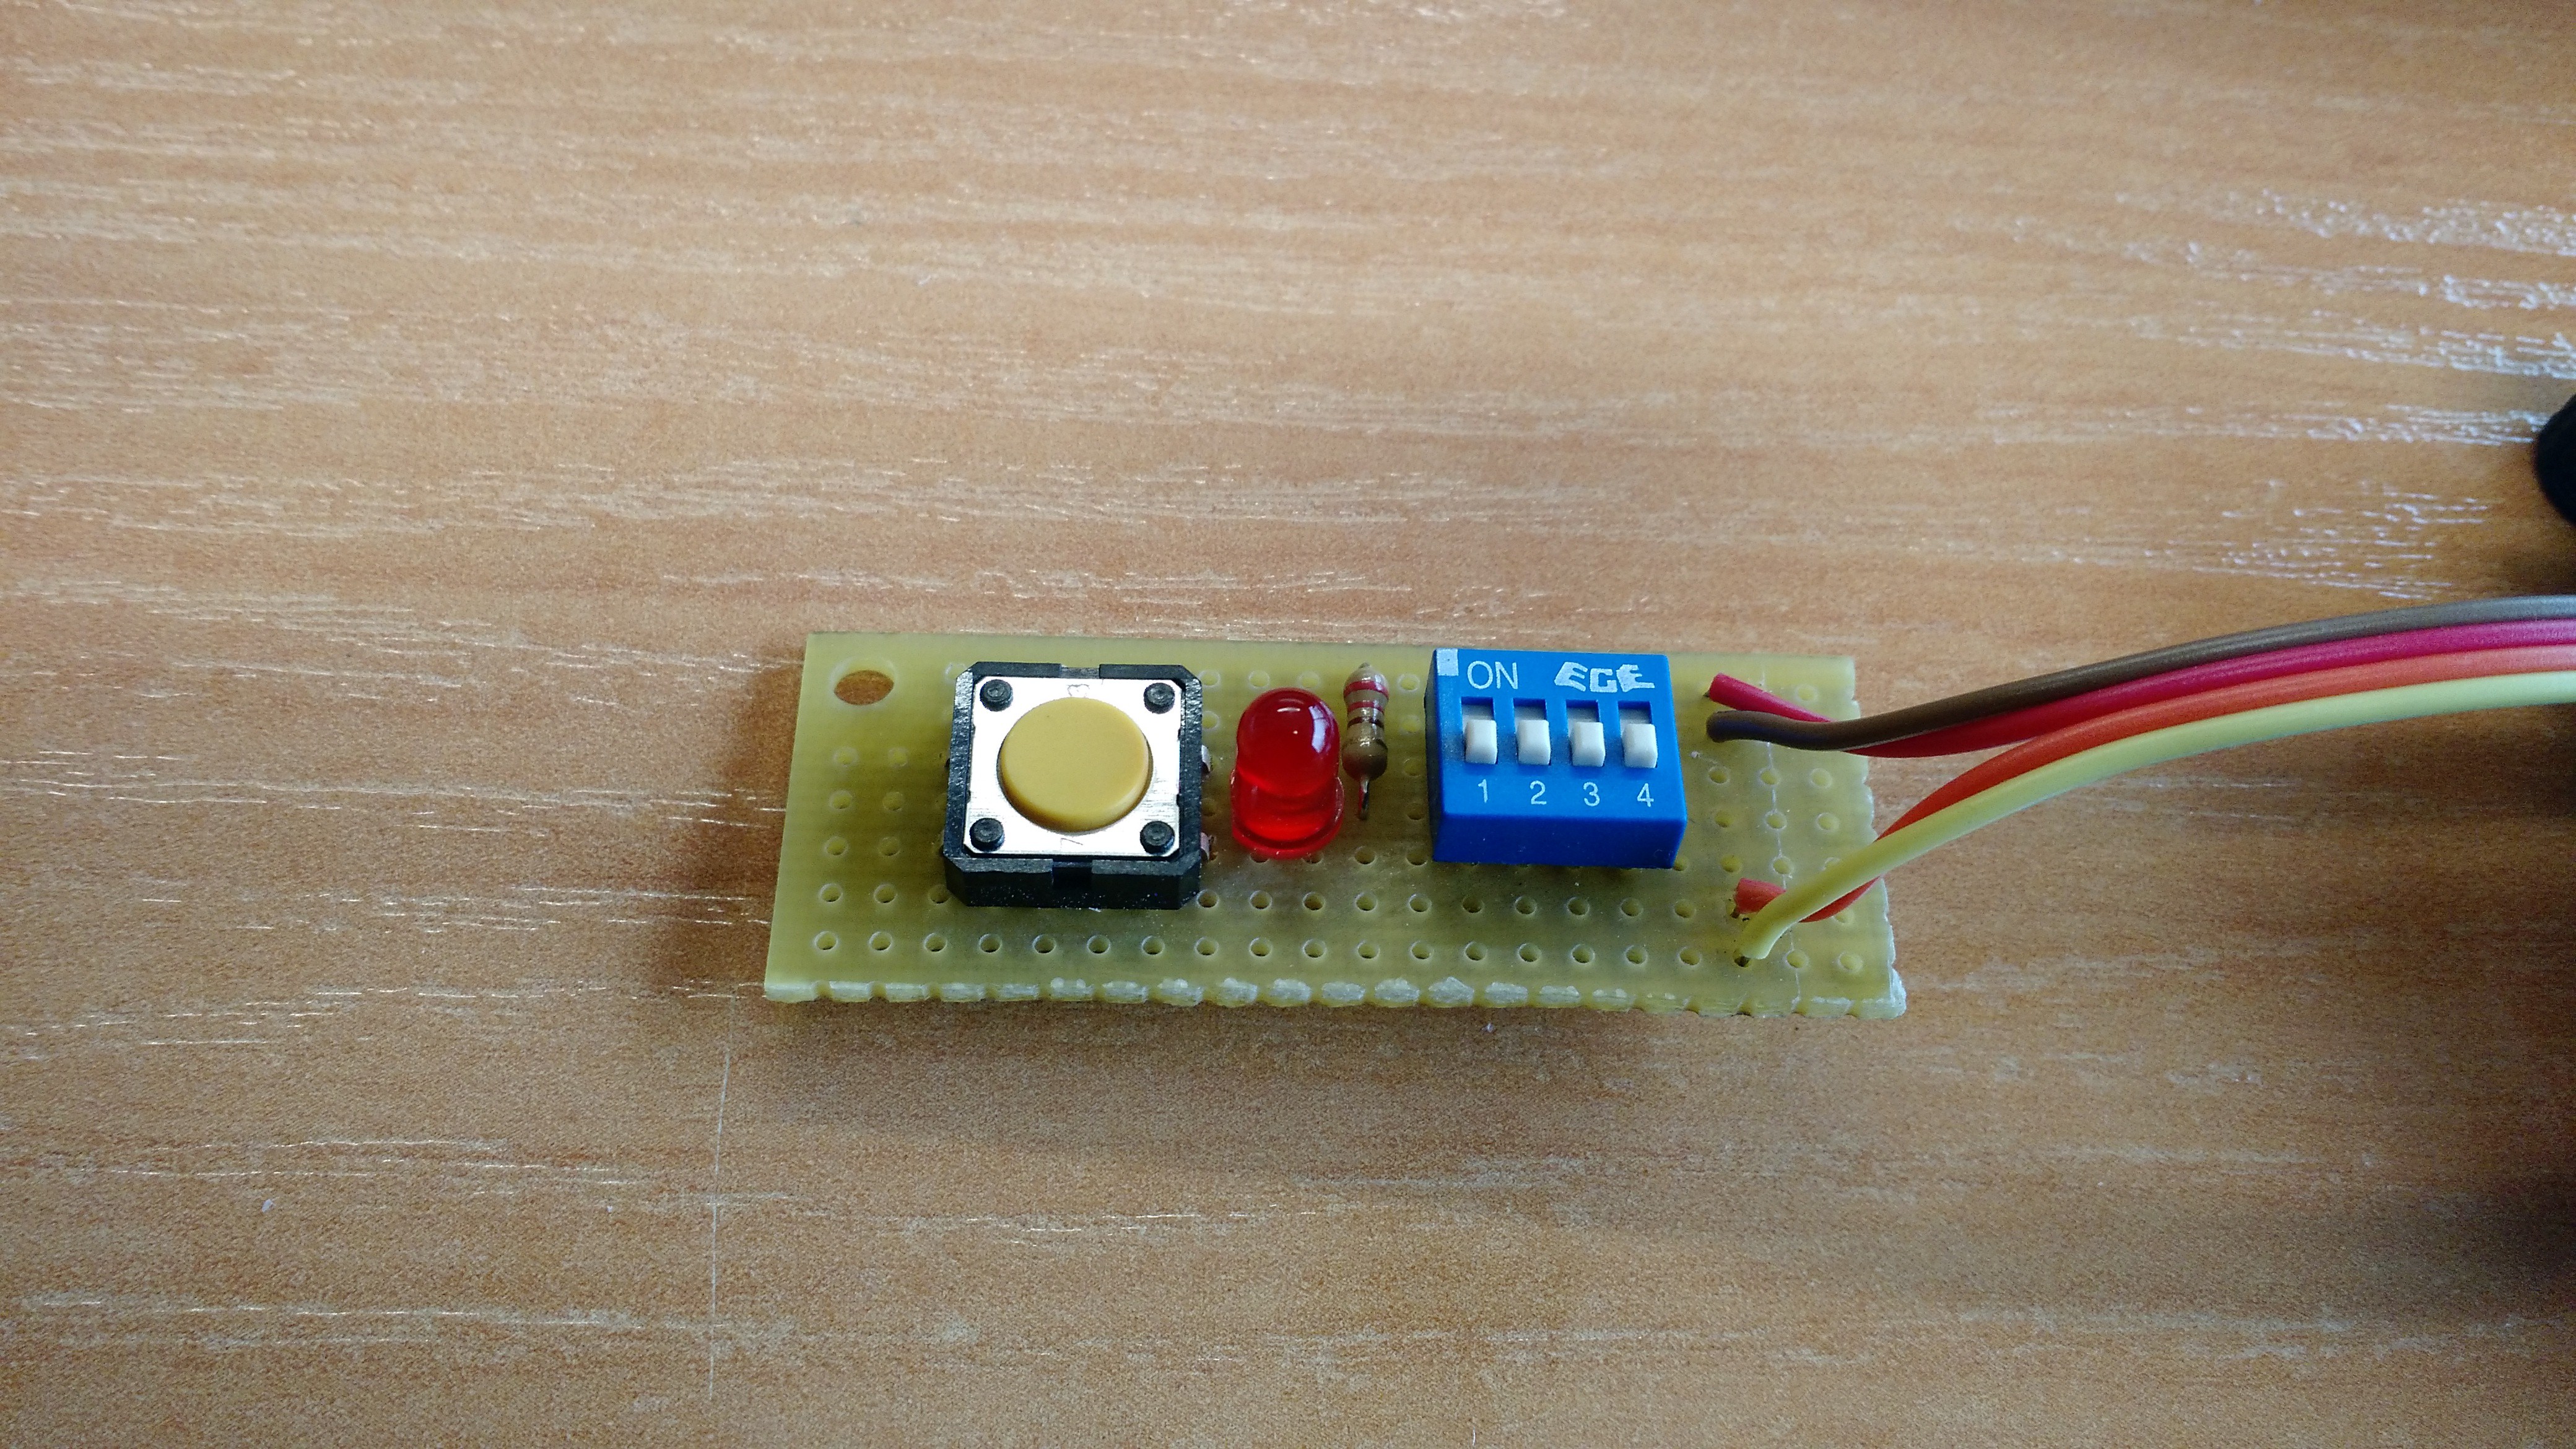
The board is connected to the Pi with only two IOs (only one of the switches is used for now). One GPIO is connected to the push button and drives the LED, one GPIO is connected to one of the switches. I setup daemons on the raspberry pi to :
- monitor changes on the switch and change the WIFI behavior accordingly
- monitor falling edges on the button and trigger a 2min capture
The script for the wifi is fairly simple as it only move configuration files around and reboot the pi3 wifi, but the button handling script does more. The button is configured to that it will ground the IO when pressed. The cathode of the LED is connected to the IO and the anode is connected to 5v through a 220ohm resistor. When pressed the button will light the LED, the script will detect the falling edge on the Pi input and switch the IO direction from input to output and with low level which will keep the led lit even if the button is released. After the that the script tries to mount a USB key connected to the PI, trigger the capture with bag file saved to the USB key. When the capture ends, the script umount the USB key, and get the IO back to its input state. As a consequence the led is lit while the capture is running and turns off when the user can remove the USB key. This means that to capture a sequence i just need to press a button, drive around and wait for the LED to turn off. Then i can tae the USB key and play the files on my laptop.
The next step is to add functionalities with the other switches, such as : configure capture time, change resolution ...
Next step is to design a 3D printed mounting to attach the camera to the windshield !
Discussions
Become a Hackaday.io Member
Create an account to leave a comment. Already have an account? Log In.