 Michael Gardi
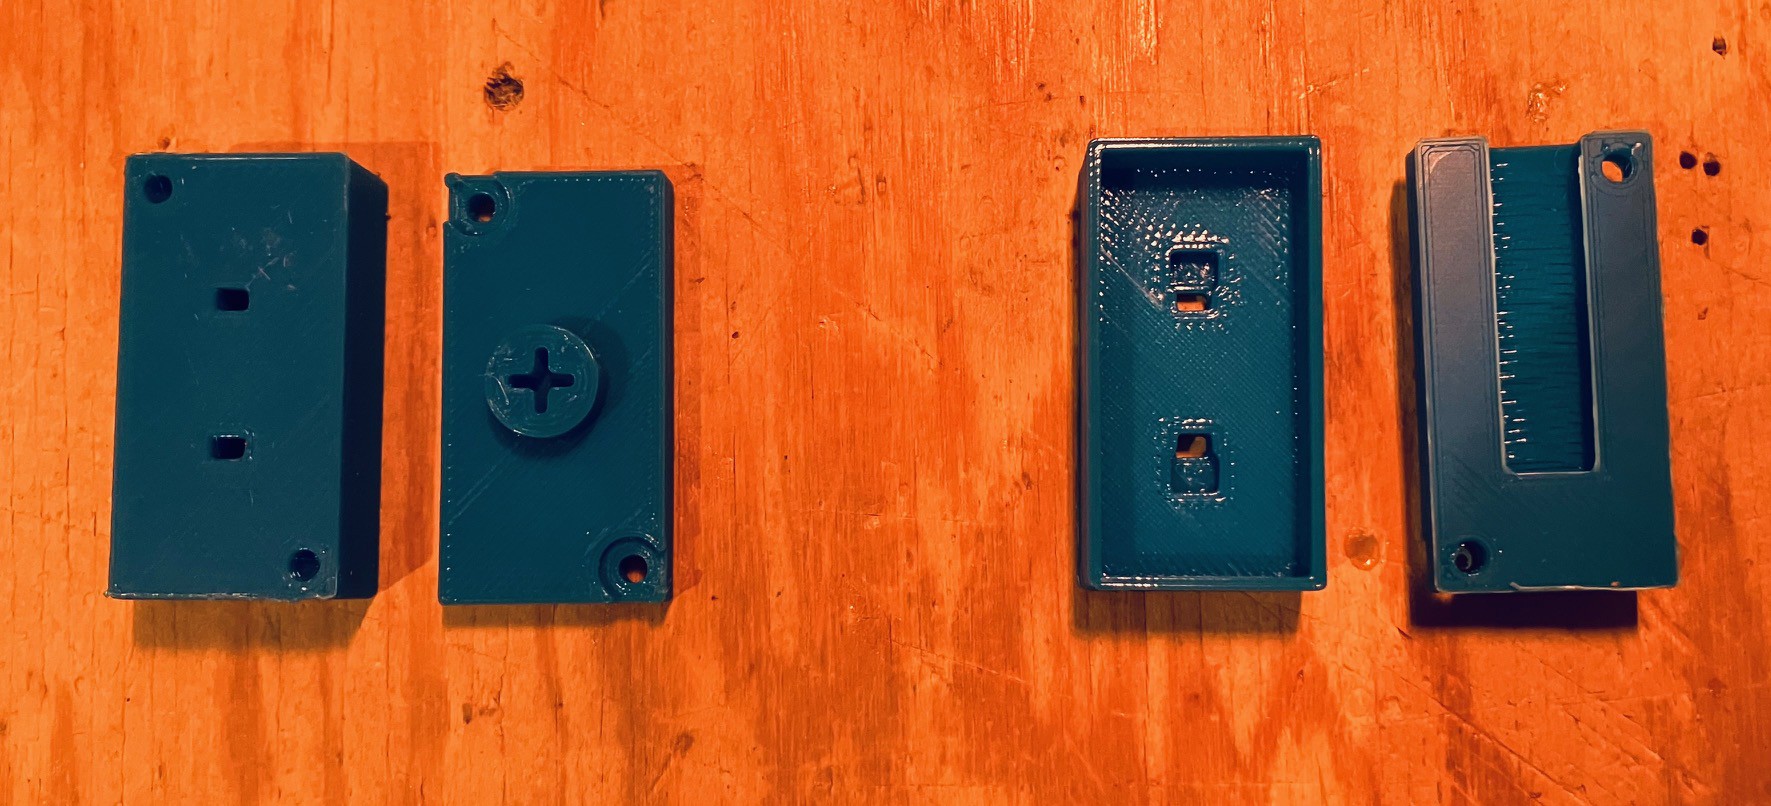
To make this project work, I needed to create a working button with hall effect sensors that could hold and read a tile. I was able to reuse a single tile holder from the previous project that I had used for testing. Below you can see the two parts that make up the button, bottom views on the left and top views on the right. The one piece with the square slits for the sensors is obviously to hold the tile, and the other is an MX compatible mount to attach to the switch.
Mounting the Sensors
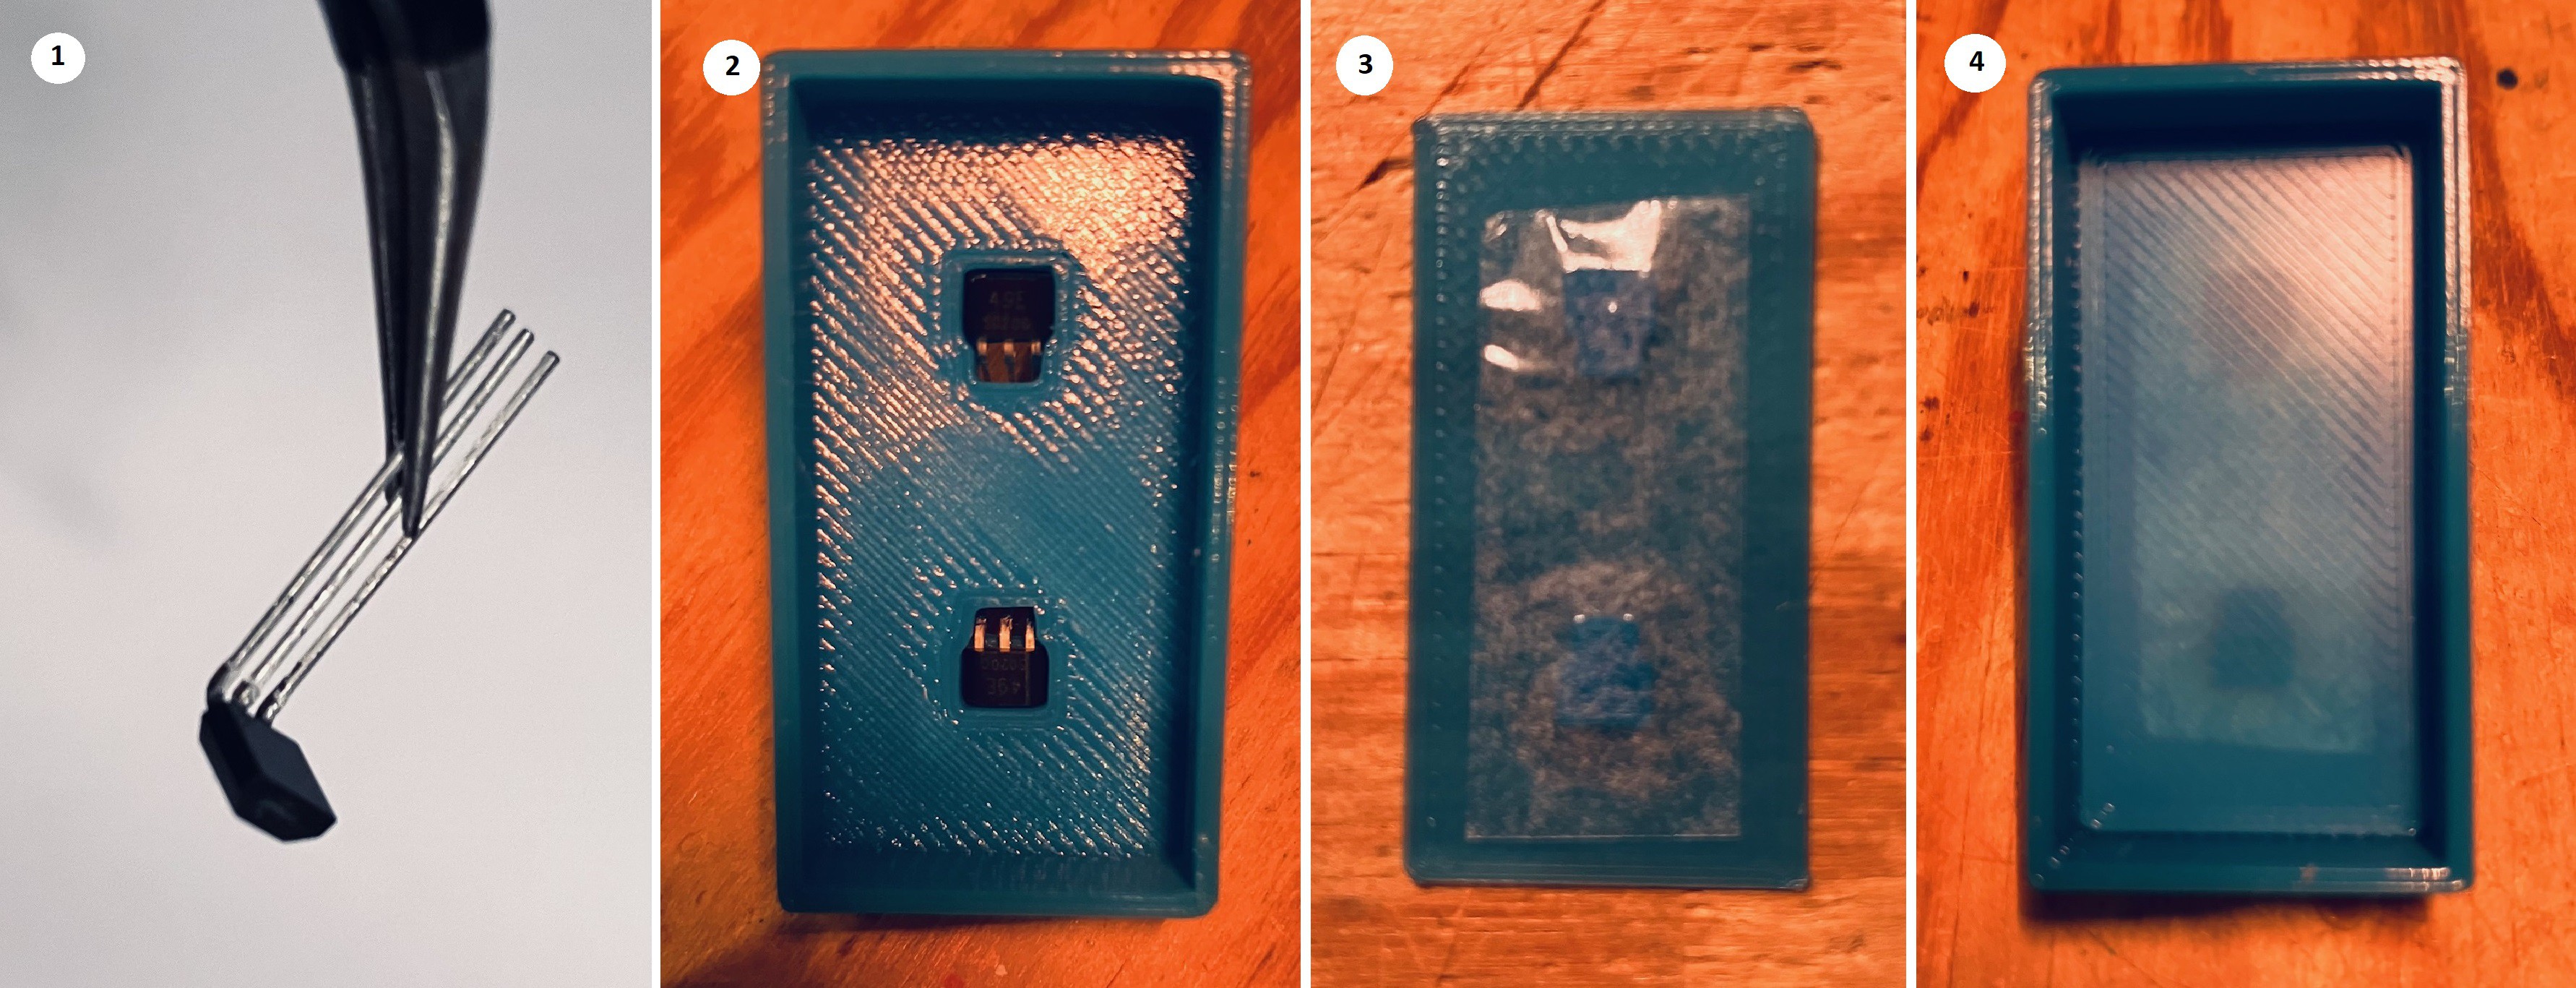
- Start by bending the leads on the SS49E linear sensors at about 1 mm from the base towards the flat side of the sensor to about 80 degrees.
- Insert the sensors into the two slots by sliding the leads through the slot's holes and pressing them in place. You should be able to feel them quietly clicking into place.
- Get one of the slot bottom cover pieces. Notice that there are two raised bumps. I added a piece of clear thin two sided tape on the raised bump side.
- Place the bottom cover into place making sure that the bumps and tape are facing down. Press firmly to ensure a good seal. You could place a tile in the slot when pressing down.
Wiring the Sensors
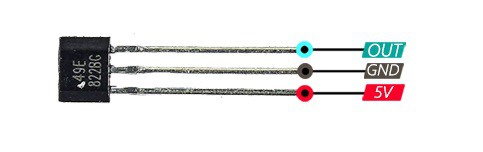
The SS49E linear hall effect sensors have the following pinout.
Trim the leads on the SS49E sensors and spread them out a bit for easier access as show below (left).
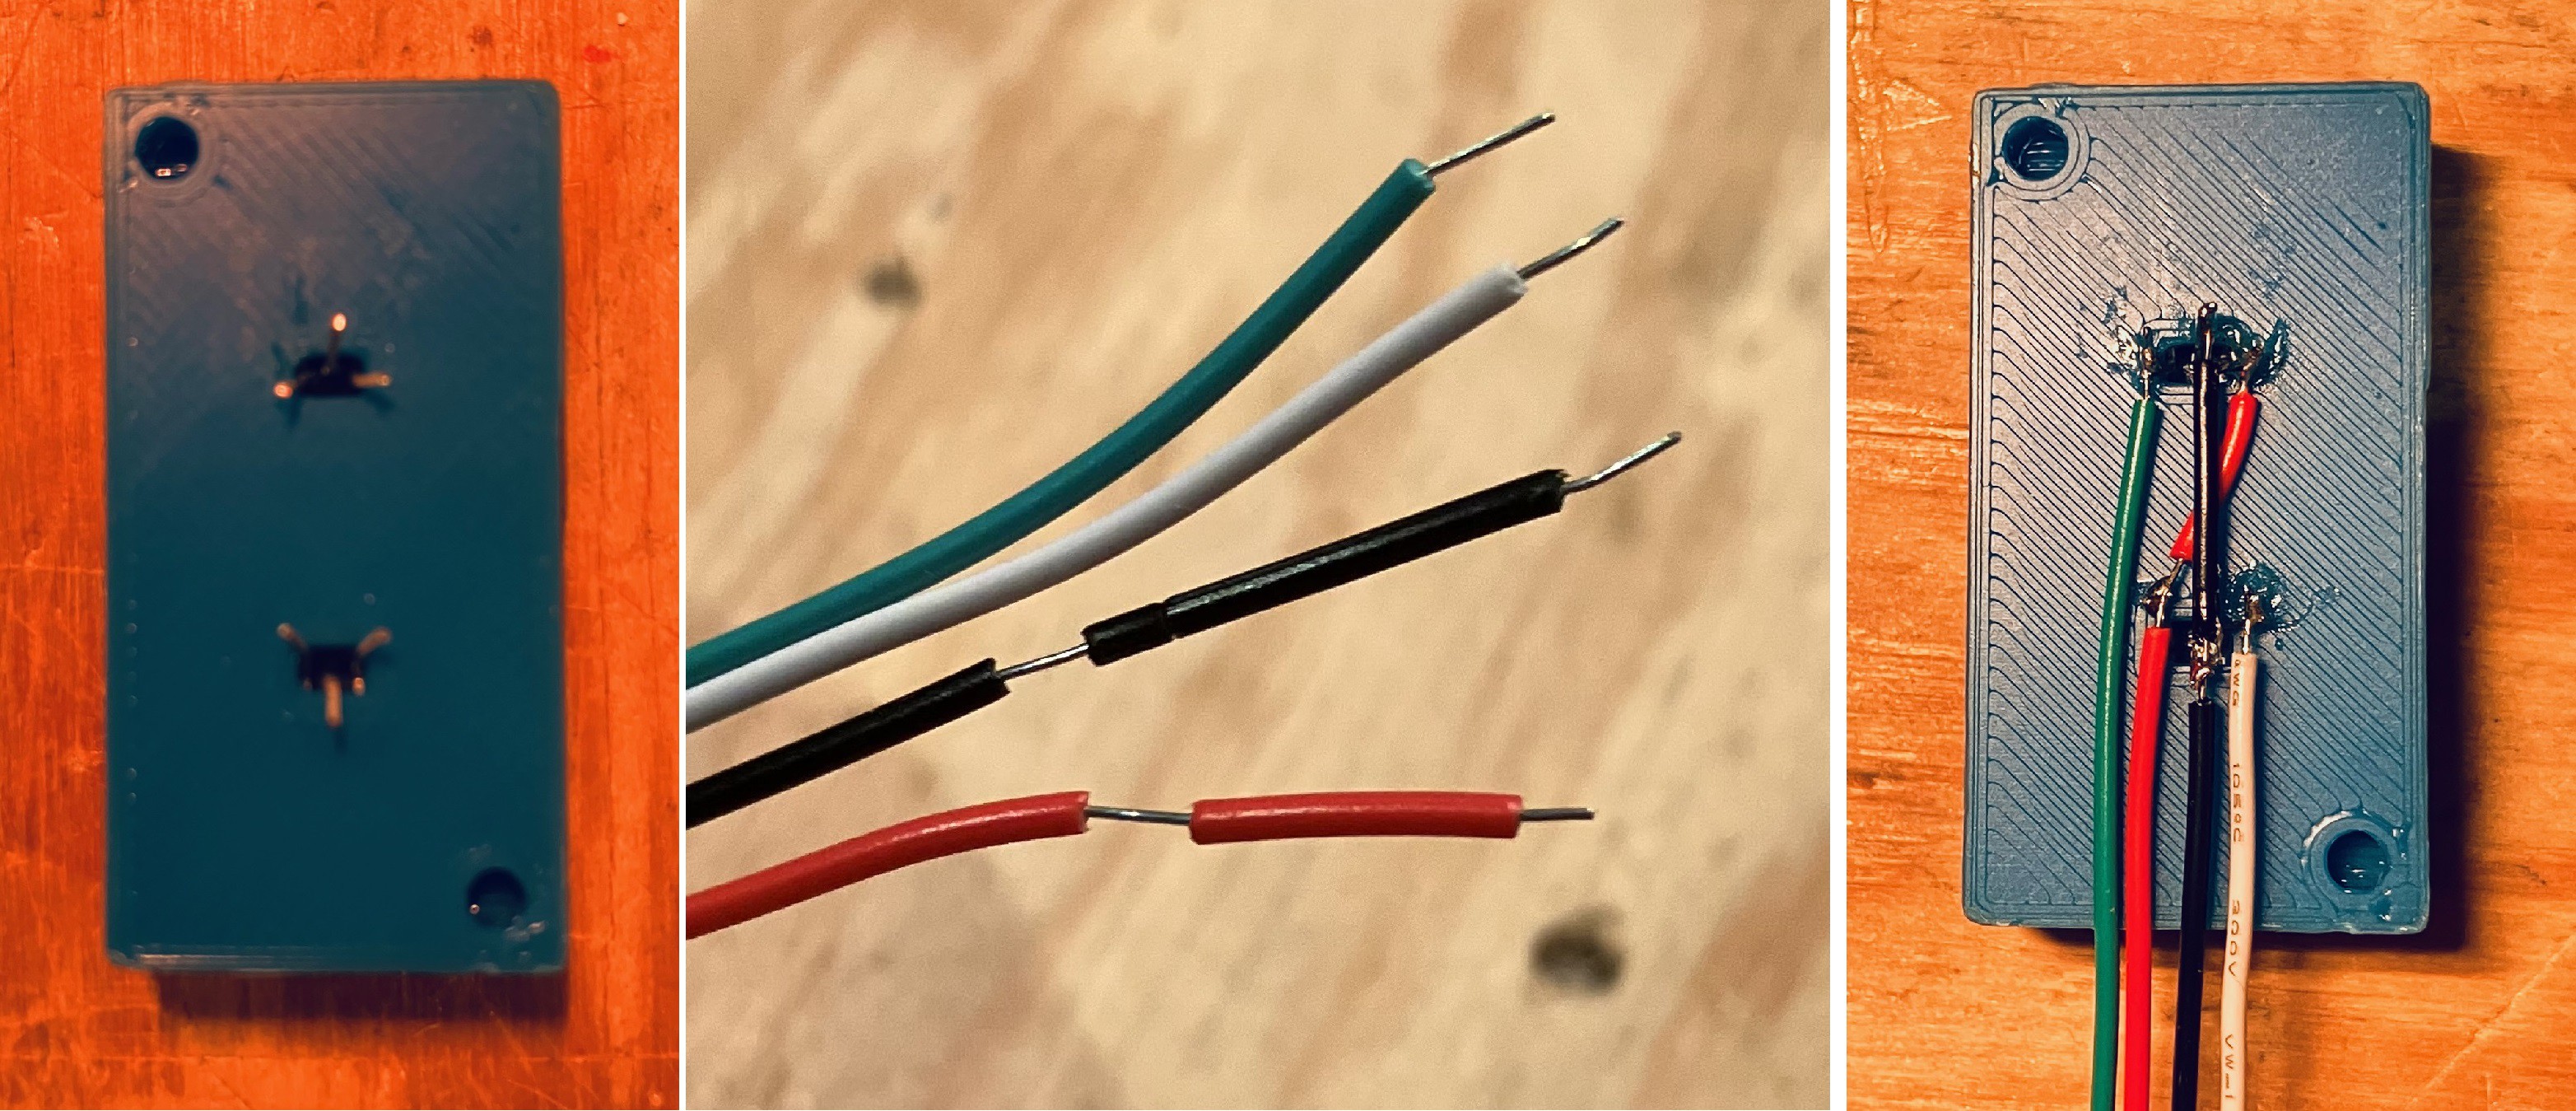
Prepare some wires as seen in the middle photo above. The wires are about 180 mm long and the short length of insulation on the red wire is about 15 mm long, on the black wire 20 mm or so. Wire the sensors as seen in the right photo above. It's a bit tricky but doable.
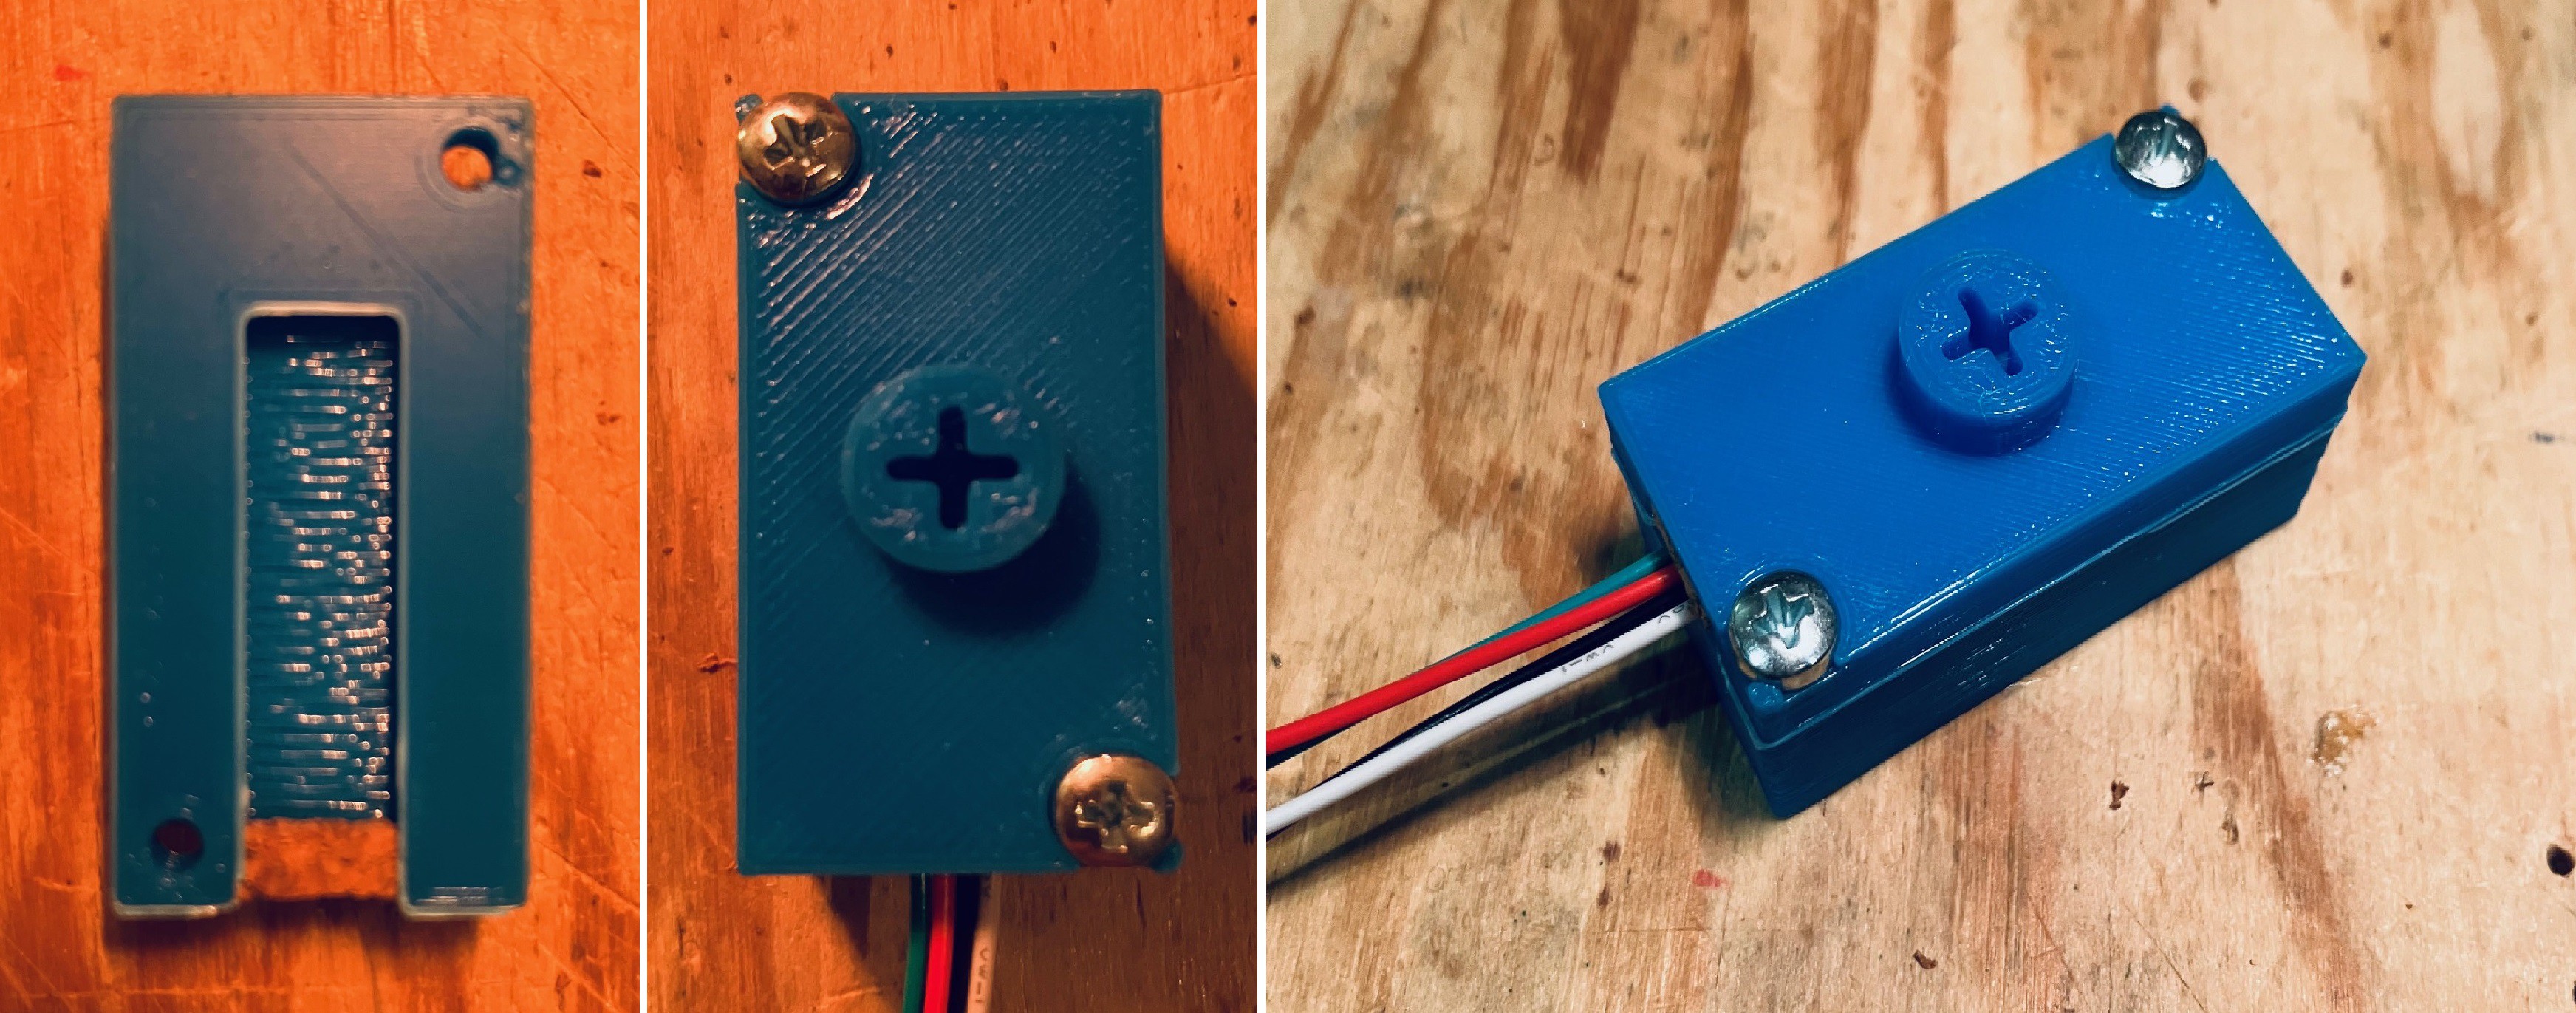
Before I attached the two pieces together I added a small piece of cork that I had lying around to the end of the slot where the wires will run out to hold them firmly in place. You could use some inner tube rubber, or even a bit of hot glue to accomplish the same thing. Finally bolt together the two halves of the button together using a couple of M3 x 6 mm bolts.
OK that's one down seven to go.
Discussions
Become a Hackaday.io Member
Create an account to leave a comment. Already have an account? Log In.