 Mike Kushnerik
Initial Planning
As with any good project, I started by doing some boring planning and requirements making to get started in the right direction.
As an initial target, I defined the below basic requirements:
- Must be handheld and cordless (battery power required)
- Should be the rough dimensions of a normal wand from the films
- Must have an RGB LED of sorts in the tip area for illuminating when a spell is cast
- Must have some trigger (ideally motion based) for detecting when a spell is being cast
Now that we have our targets defined, we can move on to selecting our hardware to satisfy them!
Electronics Hardware Design
Power Source

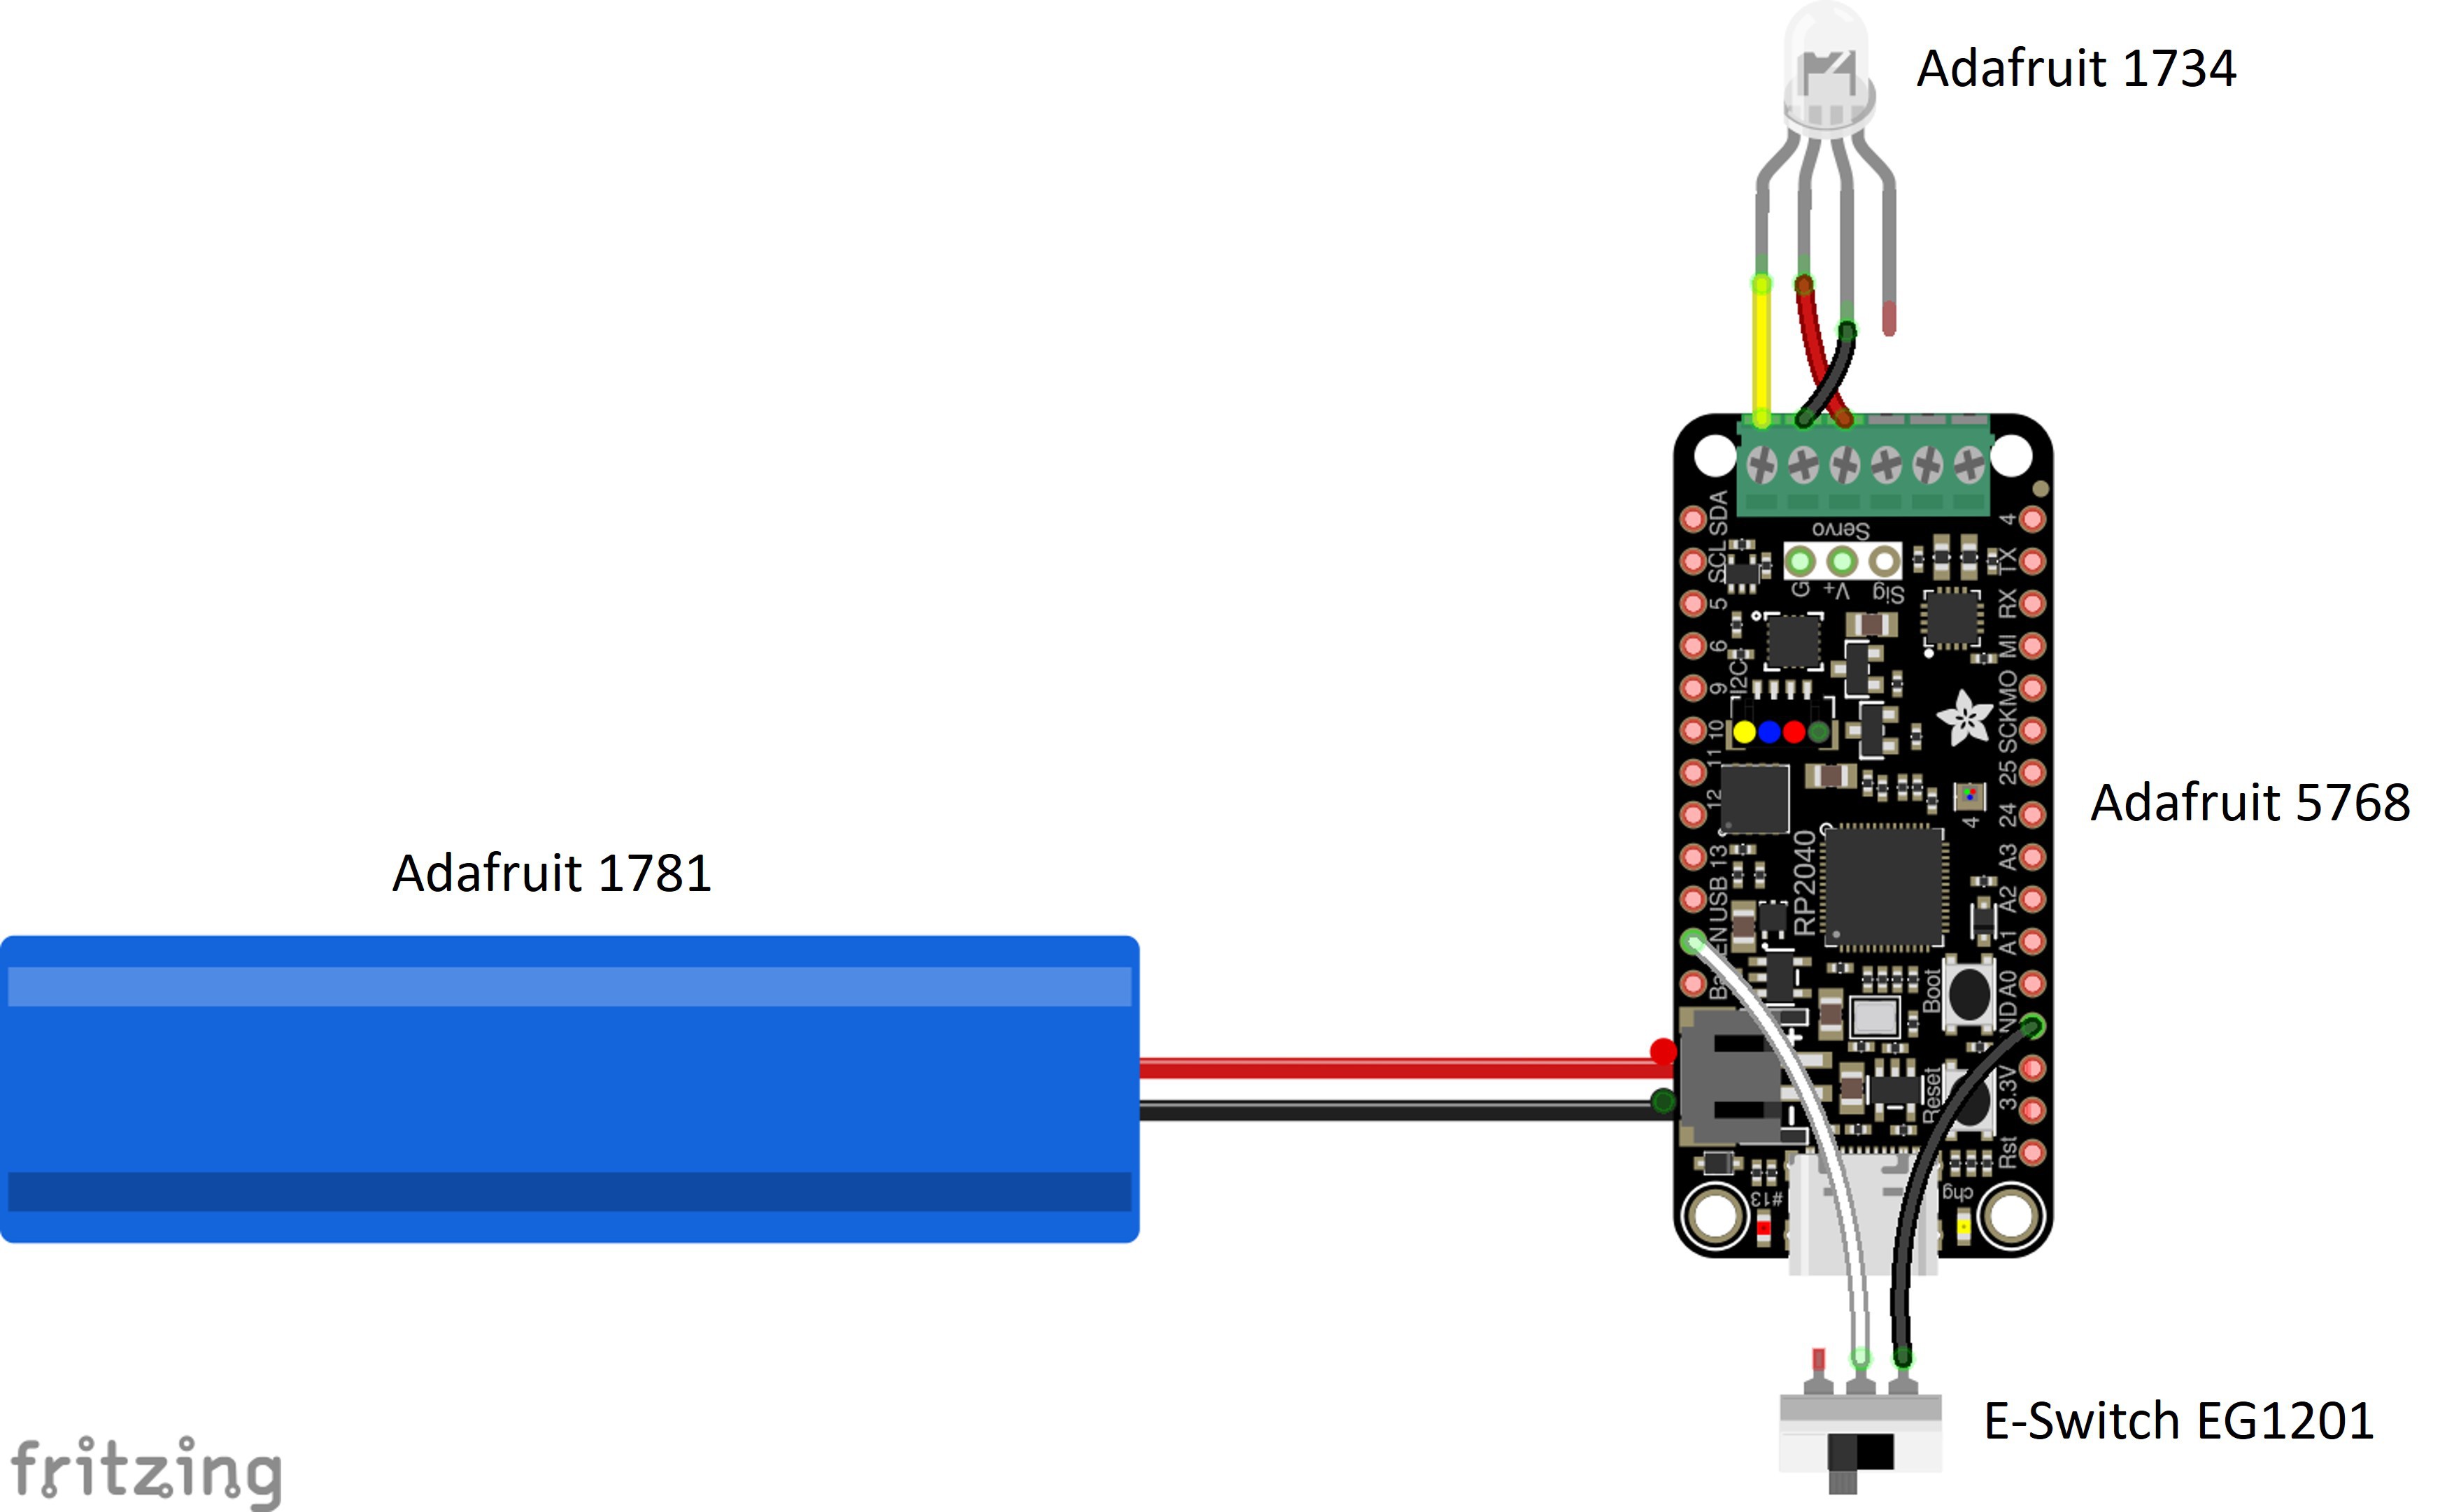
After reviewing the requirements I decided it would probably be best to go with some type of lipo/lithium ion battery to power the device. Seeing as we are going for a compact wand-like form factor, I decided a cylindrical cell would be best as this should be easy to design our wand shape around. Doing some searching, I stumbled across this 18650 size cylindrical cell from Adafruit that has 2200mAh of capacity and an integrated protection circuit! Also, it's already terminated to a JST PH connector which will work nicely with our microcontroller board selected next...
Microcontroller

I did quite a bit of searching for different dev boards out there to satisfy our requirements and even (for a second) considered designing a custom PCB, but ended up settling on the Adafruit feather ecosystem as they have an onboard charging IC for lipo/lithium ion batteries with a JST PH input connector. Specifically, the RP2040 Prop-Maker Feather was perfect for this project as it has a Triple-Axis Accelerometer (ST LIS3DH) onboard that we can use for our spell detection and has easy to use screw terminals for wiring up our tip RGB LED.
Full disclosure, I actually started this project and did most of the development with a normal RP2040 Feather (pink edition of course) with an LIS3DH breakout. Then a week before Halloween I realized that there is a thing called an Adafruit RP2040 Prop-Maker Feather that literally has everything I needed on one single board...
So then, over the course of (1) day, I redesigned everything and switched over to the Prop-Maker Feather to make it easier for assembly and so others can make this project without a ton of soldering.
TLDR: I need to research betterer before starting a project.
RGB LED

For the wand tip RGB LED that indicates when a spell is being cast, I was originally considering just using a normal common cathode RGB LED like I have used on other projects previously but I ended up changing my mind and going with these cool 5mm PTH Neopixels from Adafruit. The terminal block NeoPixel port on the RP2040 Prop-Maker Feather will also make it super easy to get it connected up and providing beautiful RGB goodness.
Mechanical Hardware Design

Now that we have all our electronics hardware defined, it's time to package them all together in a nifty wand-like enclosure! This was easily the biggest time dump for this project as I went back and forth multiple times on the direction I would take for this.
Originally I was thinking to have a two piece clamshell split down the middle of the wand with several screws, but that would easily kill the overall aesthetics and make disassembly a pain.

After much deliberation and several redesigns and test prints, I ended up going with a two piece assembly where the wand is essentially an outer shell that includes the Neopixel tip LED and the 18650 battery which then mates with a separate "carrier" piece that contains the Prop-Maker Feather.
The only kinda tricky portion is that wires need to run through the wand from the Neopixel in the tip, past the 18650, to the Feather at the base. However, after some test assembling, this is only a *minor* pain in the a** to assemble.
Software Design
I'm going to do my best to keep the software explanation brief as the Arduino sketch is somewhat self explanatory as I included tons of comments to explain what I'm doing in each statement. To get started, I created a high level signal flow diagram below that explains the spell detection and classification process.

Read Accelerometer Data, Calculate Motion Score, and Averaging
We start our signal chain with (3) acceleration values corresponding to each axis of our accelerometer (x, y, z). These values are sampled when an event is received from our LIS3DH and then the absolute value of each signal is taken and summed together to create a pseudo "motion score" which is then averaged over a configurable number of events (see "SAMPLE_NUM" parameter).
Spell Detection
Once our averaged motion score is ready (after SAMPLE_NUM samples are collected) we then check if the averaged value is above a threshold (see "MOTION_THRES_SPELL" parameter) we define for judging whether the user is casting a spell or not. If the averaged score is above the threshold and the wandOrientation is facing up, we set the spellActive flag and then begin collecting our two primary signals which are used for spell classification: maximum spell motion and spell duration.
For maximum spell motion, we basically just use a variable (spellMaxMotion) to hold the maximum motion score measured during the spell. Whenever a new motion score is available, it's compared to this value and replaced if greater.
For spell duration, we just increment a counter (spellDuration) every time a motion score is received while spellActive is true. Simple enough, right?
In order to detect the end of a spell, I needed to add some hysteresis since the motion score can occasionally fall below the spell threshold for a frame event once and a while. I do this by adding an inactive counter (spellInactiveCount) which is used to count the number of consecutive motion values below the spell threshold (MOTION_THRES_SPELL). If the inactive counter becomes greater than the timeout threshold (see "SPELL_TIMEOUT_COUNT" parameter), the spell becomes inactive and we begin spell classification using our two spell signals.
Spell Classification
For classification of each spell we use...you guessed it...more thresholds! For this I defined a 4x4 array in which each spell has (4) variables used to judge if it was the spell that's been cast: minimum motion (spells[x][0]), maximum motion (spells[x][1]), minimum duration (spells[x][2]), maximum duration (spells[x][3]).
After a spell has been classified, another function (spellAnimation) is called to display the spell animation on the Neopixel. Once the animation is complete, the whole process starts over and we're ready to cast our next spell!
Provided Example Spells
Admittedly I didn't spend a huge amount of time designing cool spell animations and finely tuning the spell thresholds in the final sketch, but I do provide (4) spell examples that can be easily modified and expanded to your liking.
I'm most proud of spell 0 ("Lumos") which is activated with a low motion input (18-25 motion score) and short spell duration (3-6 frames). The cool part of this spell is that it actually responds similar to Lumos in the Harry Potter films by illuminating the wand tip with a bright white light and (using our handy wandOrientation function) will stay lit while the wand is facing upward. Once the wand faces down (orientation < "LUMOS_ORIENTATION_THRES"), the light is turned off and the spell is inactive. This makes for a super cool trick to enhance your Hogwarts costume/cosplay or a useful tool if your power goes out this winter.
Conclusion
This project has been a super fun activity for me to get ready for the Halloween season and also learn a bunch about accelerometers and motion sensing. I hope you all also get some enjoyment by building this project yourselves!
As far as future improvements, I still need to do some minor tuning of the spell parameters and I'm sure there are bugs that will be uncovered once I get to testing this out more. I will be sure to update this project page as I gradual updates.
Other than that, I could see a more complicated version of this project that uses some sort of machine learning (maybe with some support from Edge Impulse) coupled with an IMU to refine the spell detection/classification method and make it more accurate to spell casting in the films or Hogwarts Legacy (video game). Stay tuned for next Halloween...maybe...