 zerowriter
ZeroWriter is an open e-ink typewriter designed as an entry level project to get people in to hardware, raspberry pi, 3D printing, and DIY.
This project started as a personal attempt to make an affordable eink typewriter, similar to the Freewrite or Pomera DM30. The idea was to use a raspberry pi zero 2 w as the brains, so I could focus on quickly getting together the hardware and get to writing. It's easy enough for a beginner, because I am a beginner!
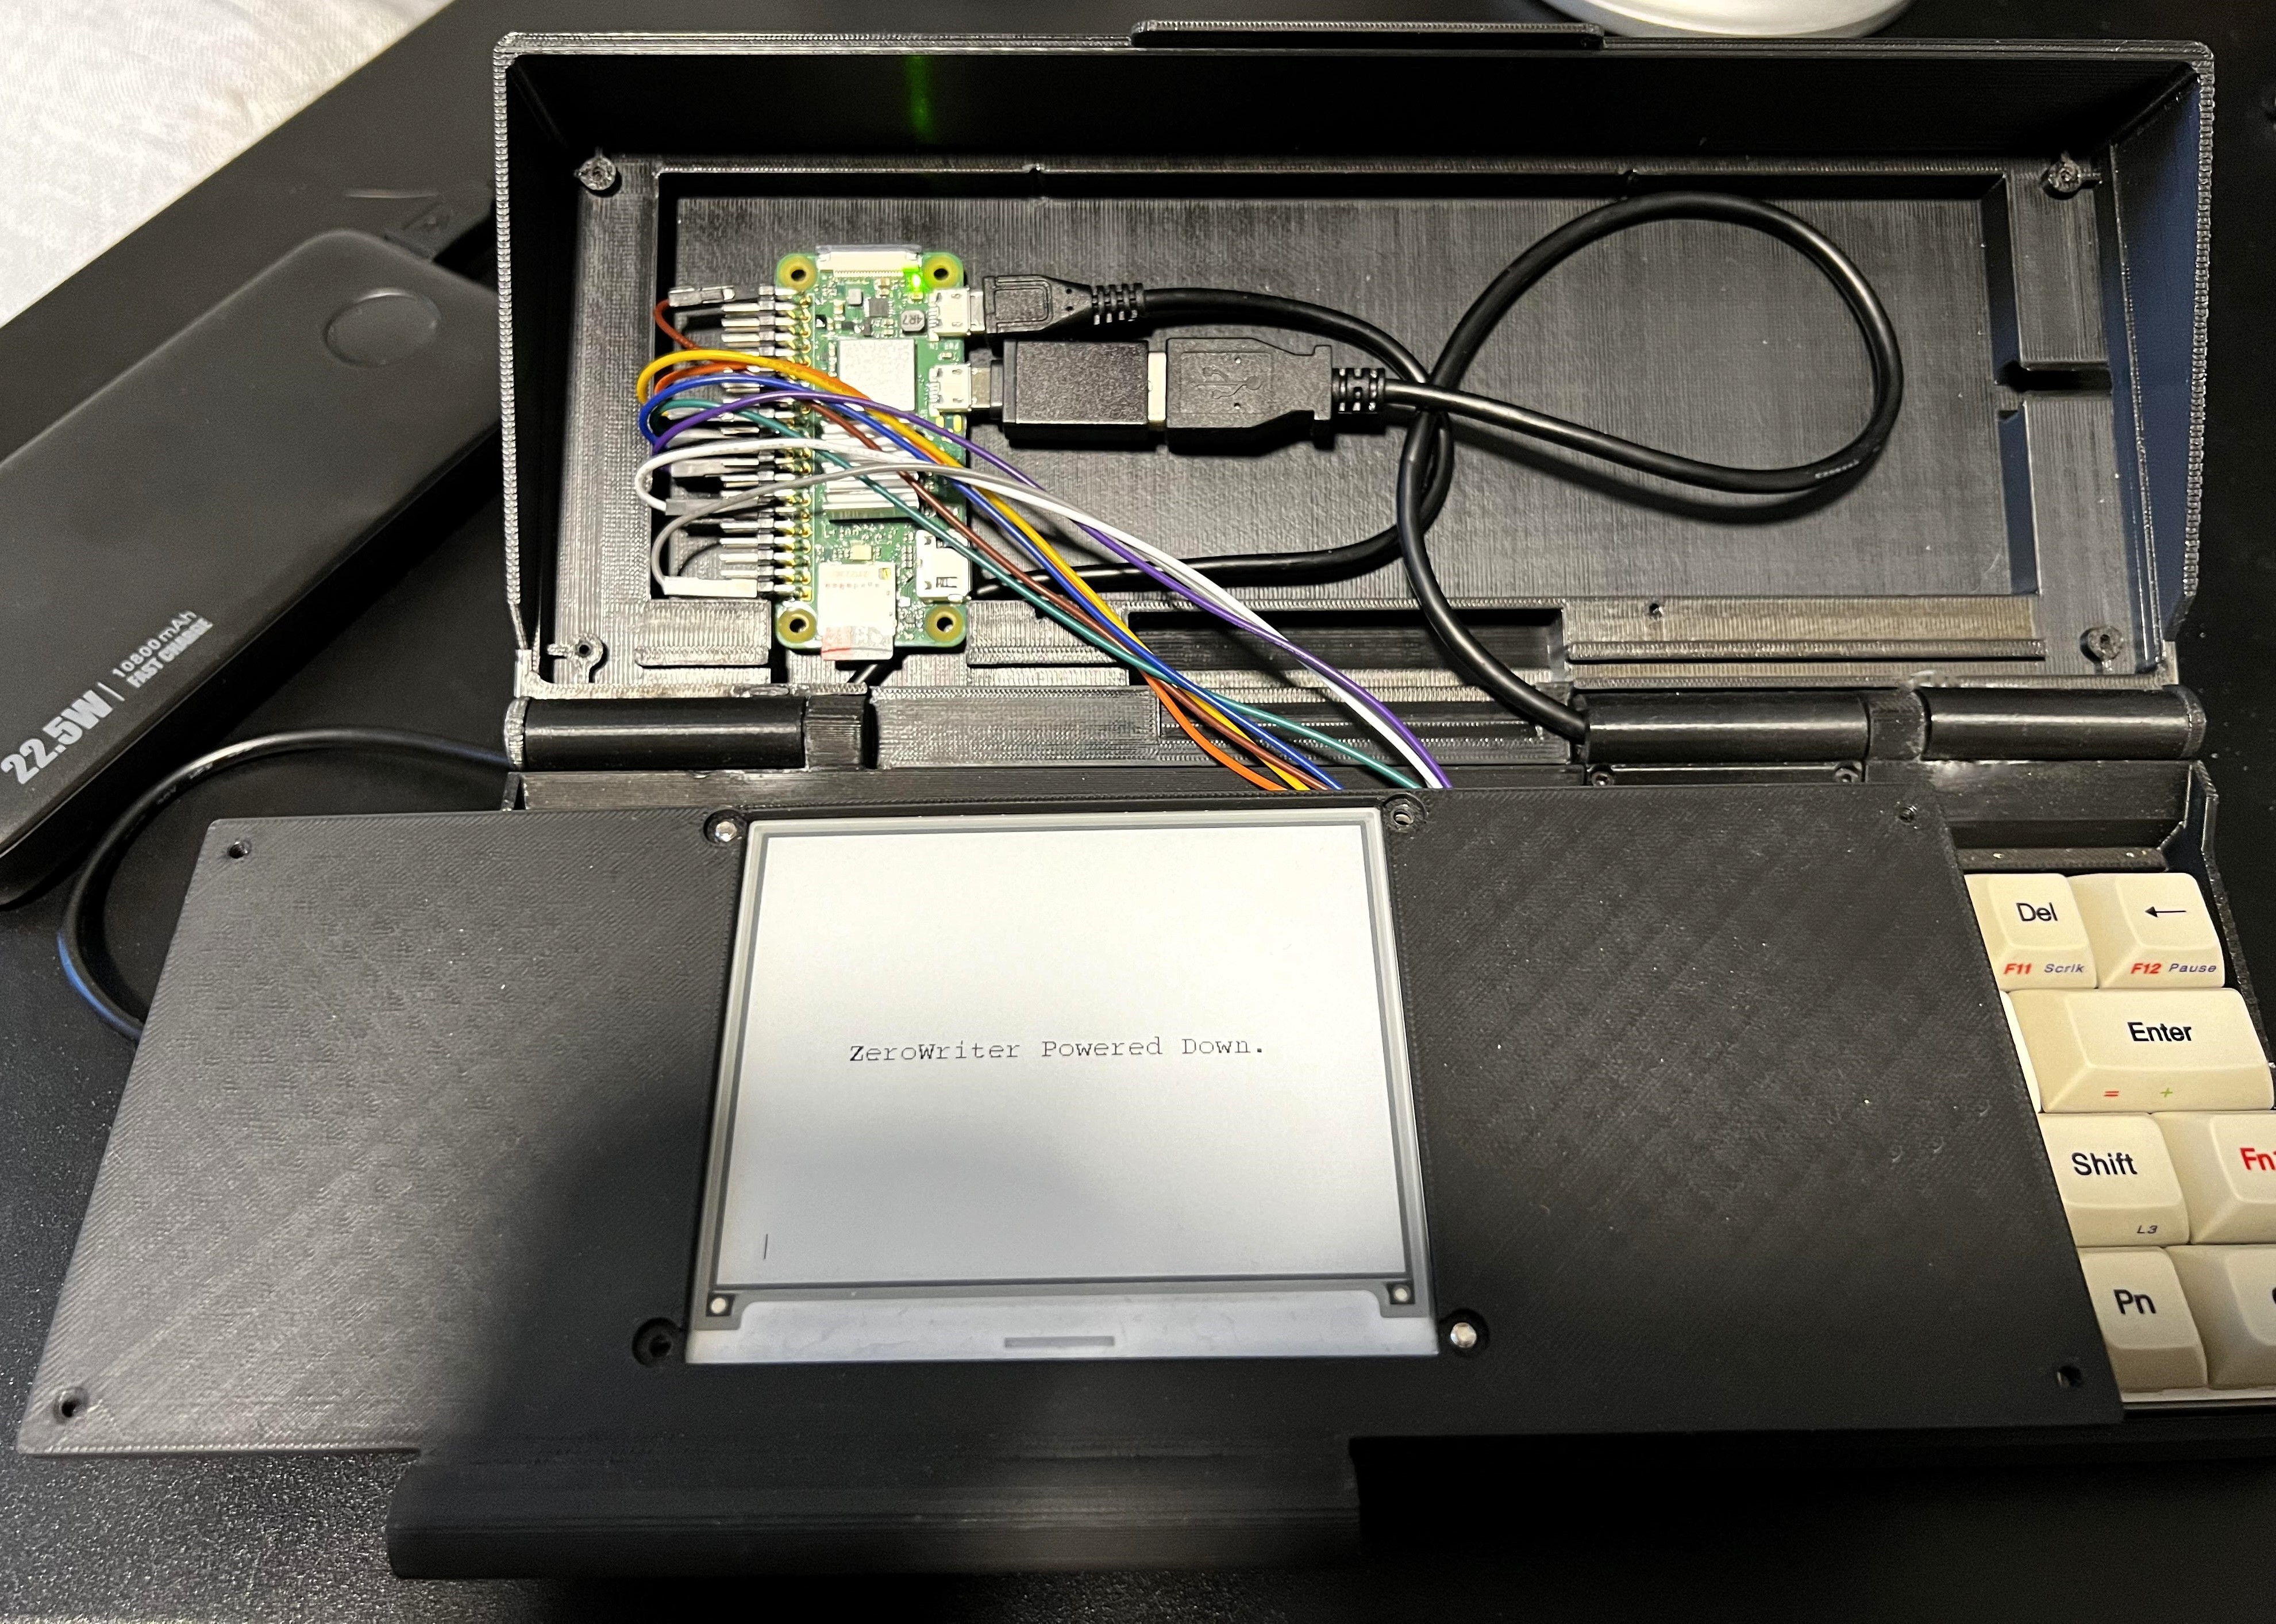
You can choose to either build a minimal typewriter (pi zero 2w + waveshare display + any usb keyboard) OR you can use the 3D print files and full build to complete something like pictured.
This project is adapted heavily from the Penkesu computer. I would recommend reading about that build for more detail about getting the hardware assembly together.
If you are doing the build as pictured, you need basic soldering to solder the header pins to the pi zero 2w. It is recommended to use right-angle header pins (listed) so you can create a lower profile in the housing, which makes the display seat nicely.
Full Hardware List:
https://github.com/zerowriter/zerowriter1/blob/main/componentslist
Refer to Pikensu computer for more parts/general assembly instructions -- it is very similar, except the pi zero sits behind the display instead of under the keyboard.
A complete typewriter as pictured can be completed for under $200 USD. A minimal setup can be completed for about $50 USD, depending on parts you have lying around.
Hardware Notes:
Don't try to make a pi zero (first generation) work. Go with a zero 2w. The extra power and performance keeps the refresh rate manageable.
The waveshare eink display has to be the 4.2" B+W model. Good news: it is cheap! You can read a lot about waveshare eink displays and LUT limitations online. The short of it: use the 4.2" model that runs at 400x300 resolution and can utilize Ben Krasnow's modified LUT (included in the code for this project). If you want a snappy display, you have to crack the LUTs or use a "solved" display. You could potentially try something like PaperTTY but I prefer the "clean" solution.
I suggest a Vortex Core 40% keyboard. It is reasonably priced (40% are expensive, sorry), has customizable firmware, and looks pretty good. I would prefer to use a custom 40% build that fits the chasis (hey keeb enthusiasts -- anyone want to make and open source one?) but for budget / time I think the prebuilt is pretty OK. As you can see, over half the budget is the keyboard. A cheap 40% alternative would be awesome. If you swap the keyboard, you'll have to modify the STL files to match, so just keep the Vortex Core's dimensions in mind.
External Battery: For simplicity, this project uses an external battery pack. These are handy to have anyway, and super easy to replace down the line. If you want to turn on the typewriter, you plug in the battery pack, and it boots within 5s. If you are a bit more comfortable tinkering, you can certainly install your own lipo + battery controller chip but it adds some complications (like reading battery level and state, etc), so I cut it for this build.
STL / 3D-Printing Files:
I'm no designer. I got some guys on fiverr to modify the Pikensu's STL files so I would have something good enough to get my typewriter going. There's some leftovers that could be cleaned up -- some extra holes I left on the enclosure for routing cables and testing stuff... but the guts are all there and it comes together fairly well. I printed the components locally without trouble. Support your local print shop / maker.
You can contact me if you want printed files shipped to you, if there is enough interest I could do a bulk order and distribute.
Software Setup:
Refer to github: https://github.com/zerowriter/zerowriter1/blob/main/how-to-setup-your-pi
I'm not a Linux guy so I wanted this to be doable a first project for anyone, even with no Linux or command-line experience. I did a full install on a new SD card yesterday in about 10 minutes following those steps.
Overclocking:
Overclocking the pi zero seems to have pretty significant effects on the display latency / refresh. But a heavily overclocked zero has more power requirements, and the added heat/power seems to interfere with the wifi chip. But definitely feel free to play with this and find some stable overclock values that you like.
Going Further:
Here's stuff I'd like to make happen, in order of what I think would benefit everyone the most. Keep in mind -- this is supposed to be a DIY project for writers, not for pi enthusiasts or programmers.
- stay true to the draft idea -- we don't need editing features and bloat. if a typewriter can't do it, do we really want or need it here?
- an open source, DIY 40% keyboard. Preferably to similar specs as the vortex core, but open source. Maybe switch to an ortho keyboard? Would be great if we could keep it inexpensive
- file management and sync services support (like google) -- this isn't so hard to get working, but I don't know how to do it in a way that makes it easy for the end user (stay true to the beginner friendly idea)
- STL files need some work -- the housing is tight and the unit doesn't QUITE sit properly, i think it needs a few more MM in height so it doesn't feel so packed-in. It's a bit squeaky. Could use posts for the pi zero to sit flush instead of being wedged in. Lots of minor stuff.
Custom orders / DIY kits.
If there is interest in buying an assembled unit or kit, shoot me a message on here or reddit. I'm toying with the idea but it's kind of a lot of work/support so I'll only consider it if there is a lot of interest.