 Michael Gardi
The new and improved backpack PCB arrived. Better late than never I guess. I started by soldering on some headers.
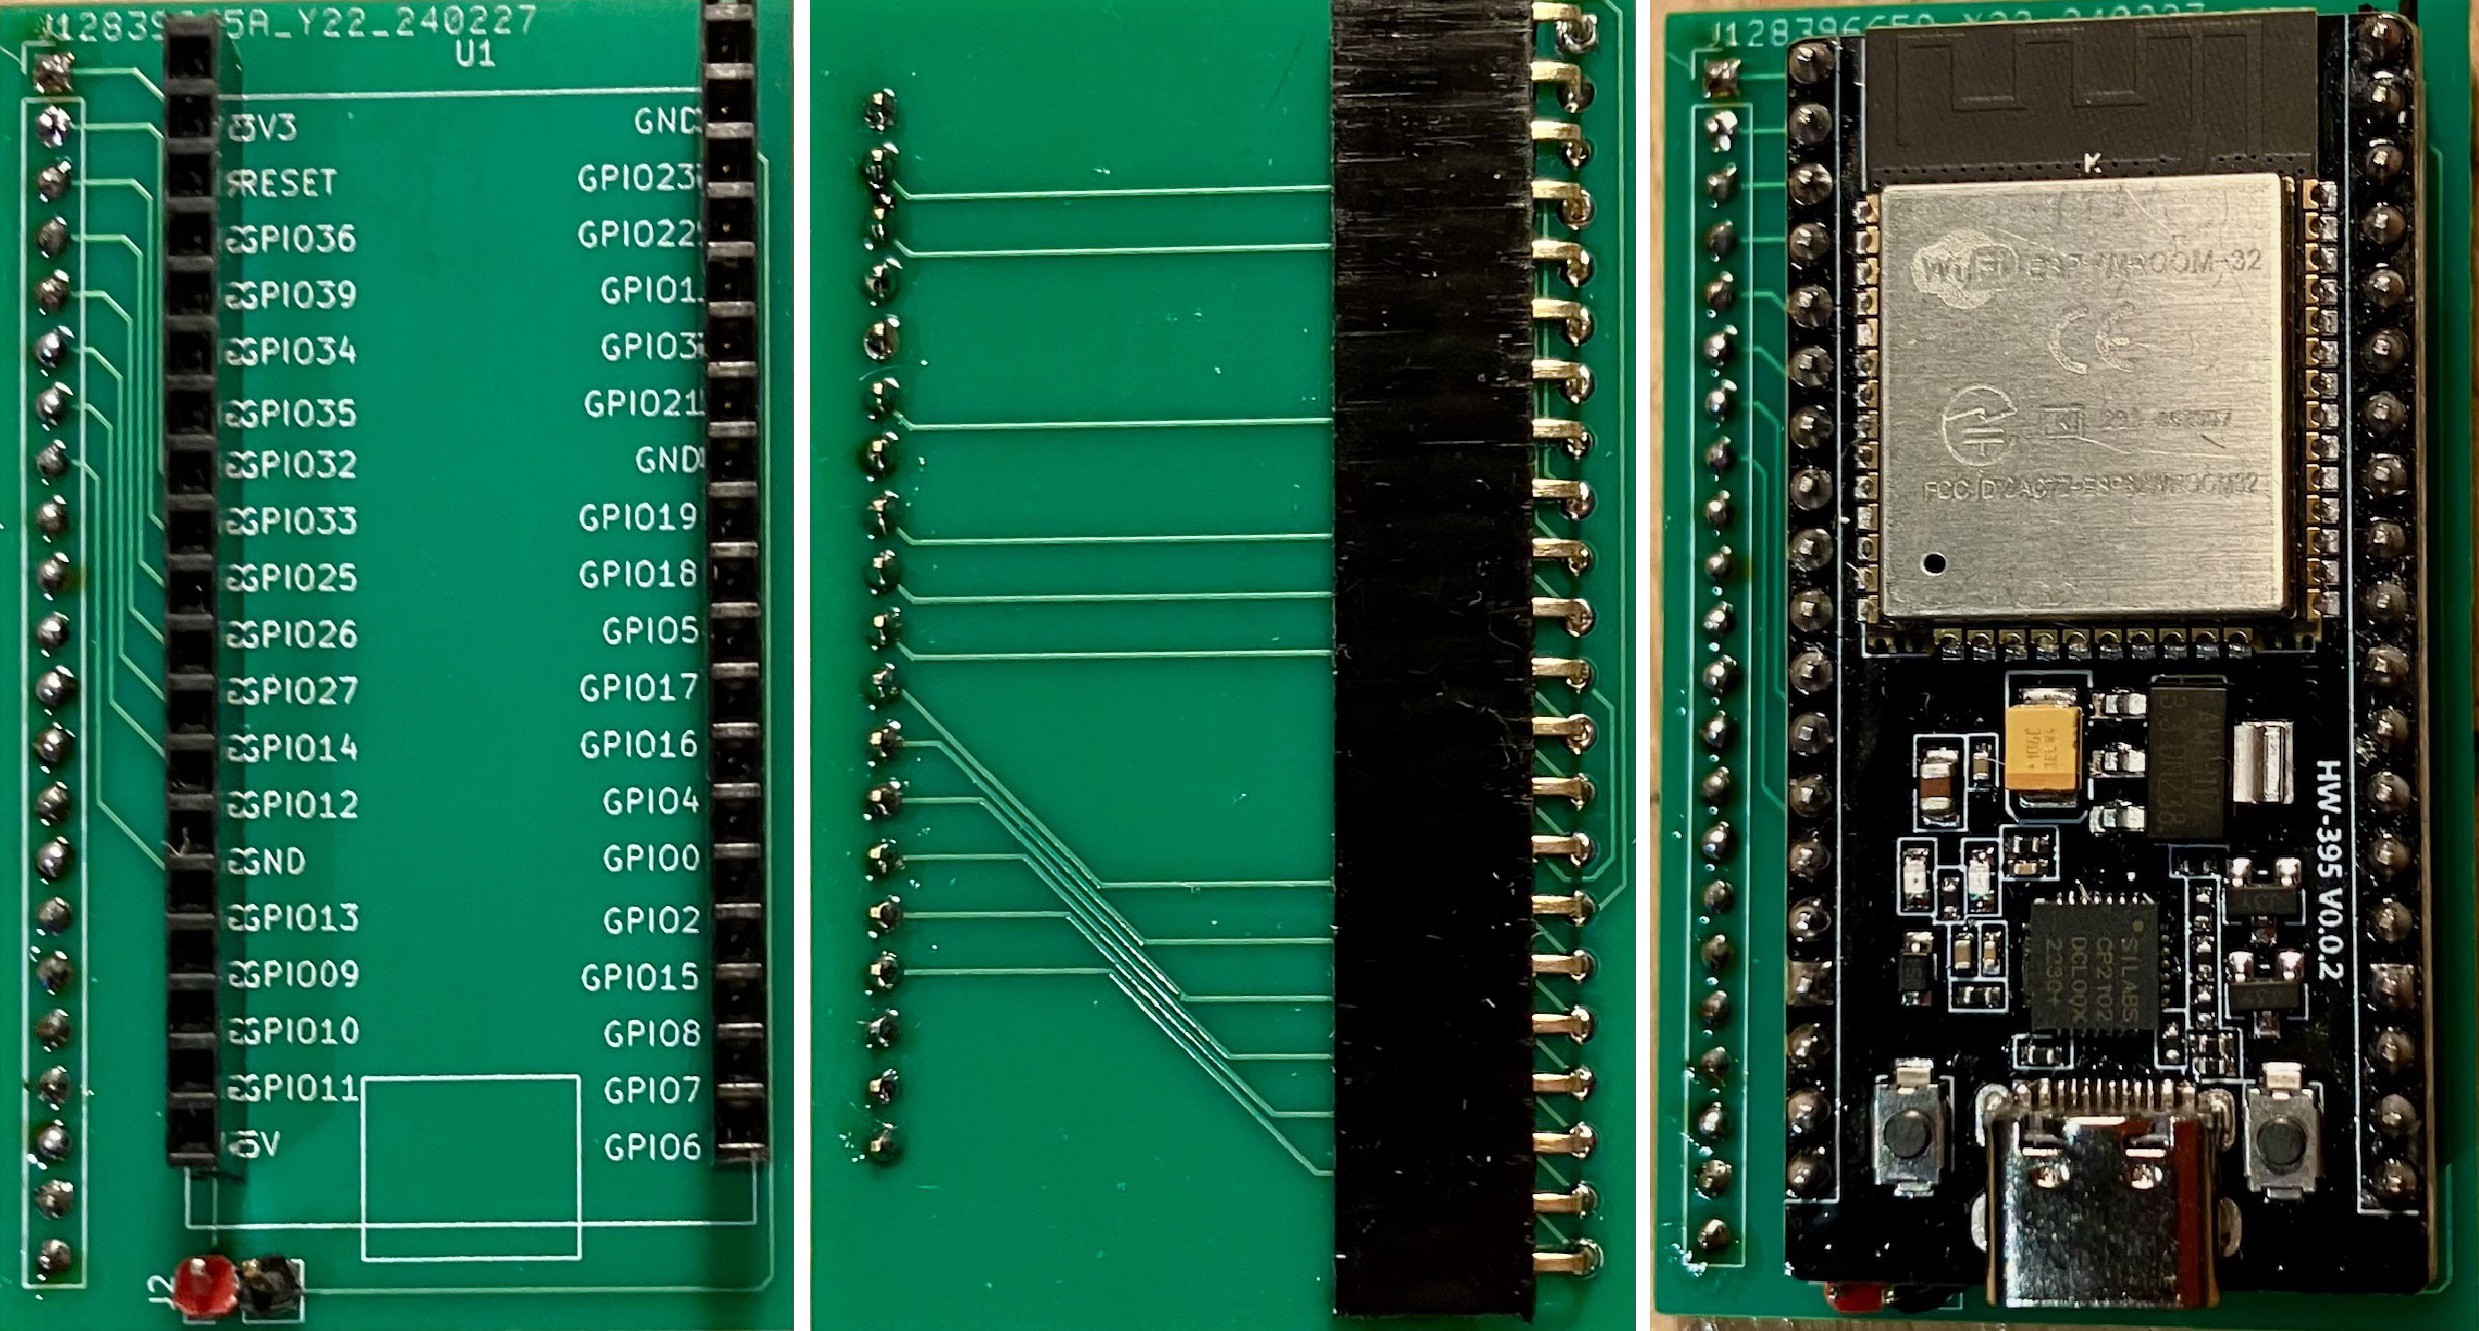
I soldered a couple of female straight headers to hold the ESP-32, a couple of male pins to connect to the +5V and GND on the ESP, and a 90 degree Female header to attach the backpack to the CHESSmate PCB. In the rightmost image I have mounted the ESP-32 onto the board.
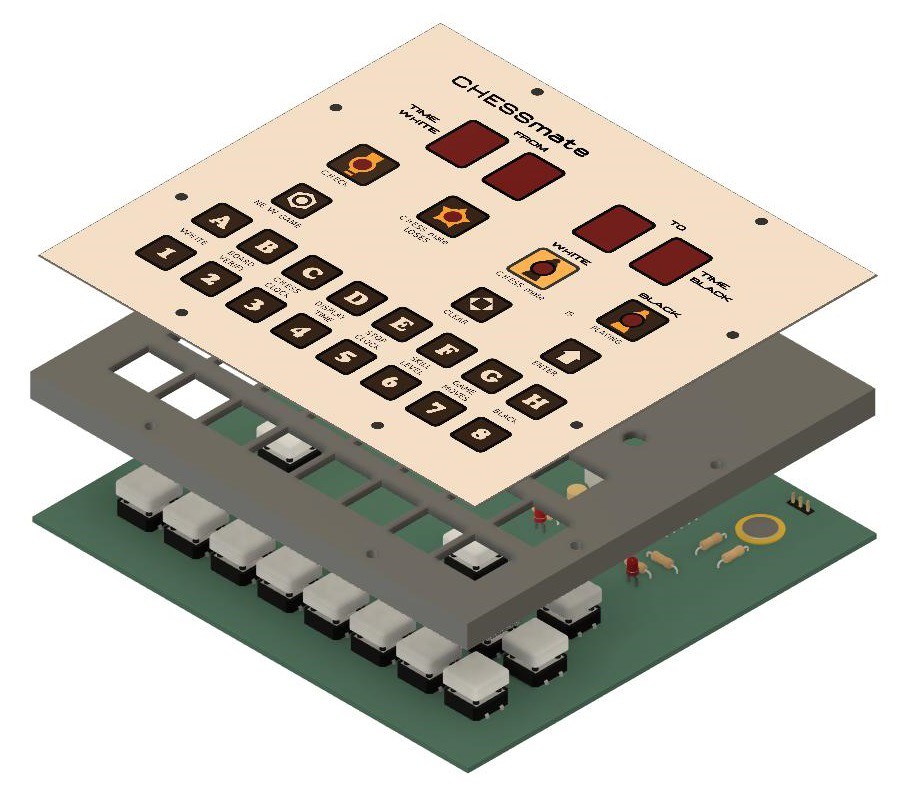
With the backpack ready I attached the stack comprised of the:
- Membrane
- 3D printed standoff with cutouts for the displays, LEDs, and buttons
- CHESSmate PCB
to the case with eight M3 x 14mm bolts.
Then I mounted the backpack CPU.
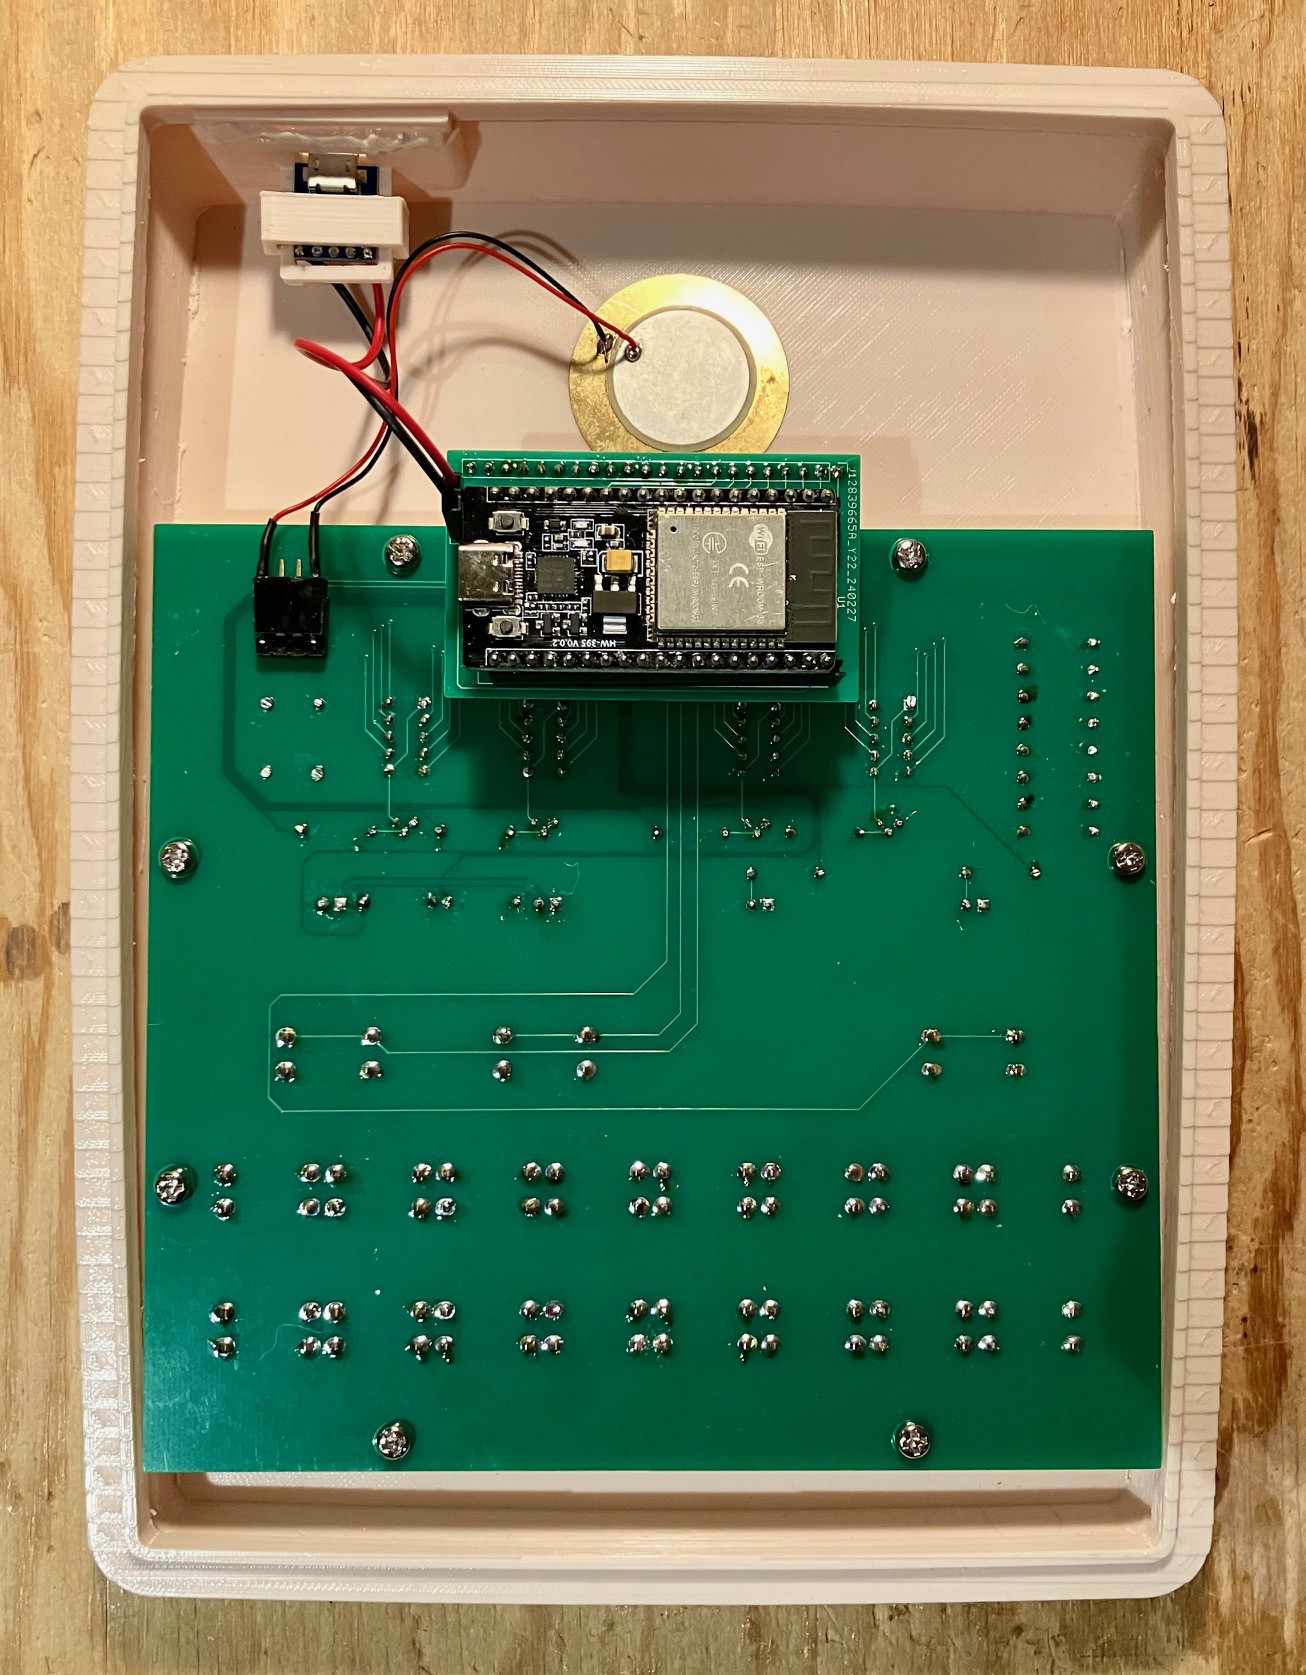
Once it was in place I connected the micro USB connector power leads to the backpack PCB and mounted the piezo speaker to the case with two sided tape.
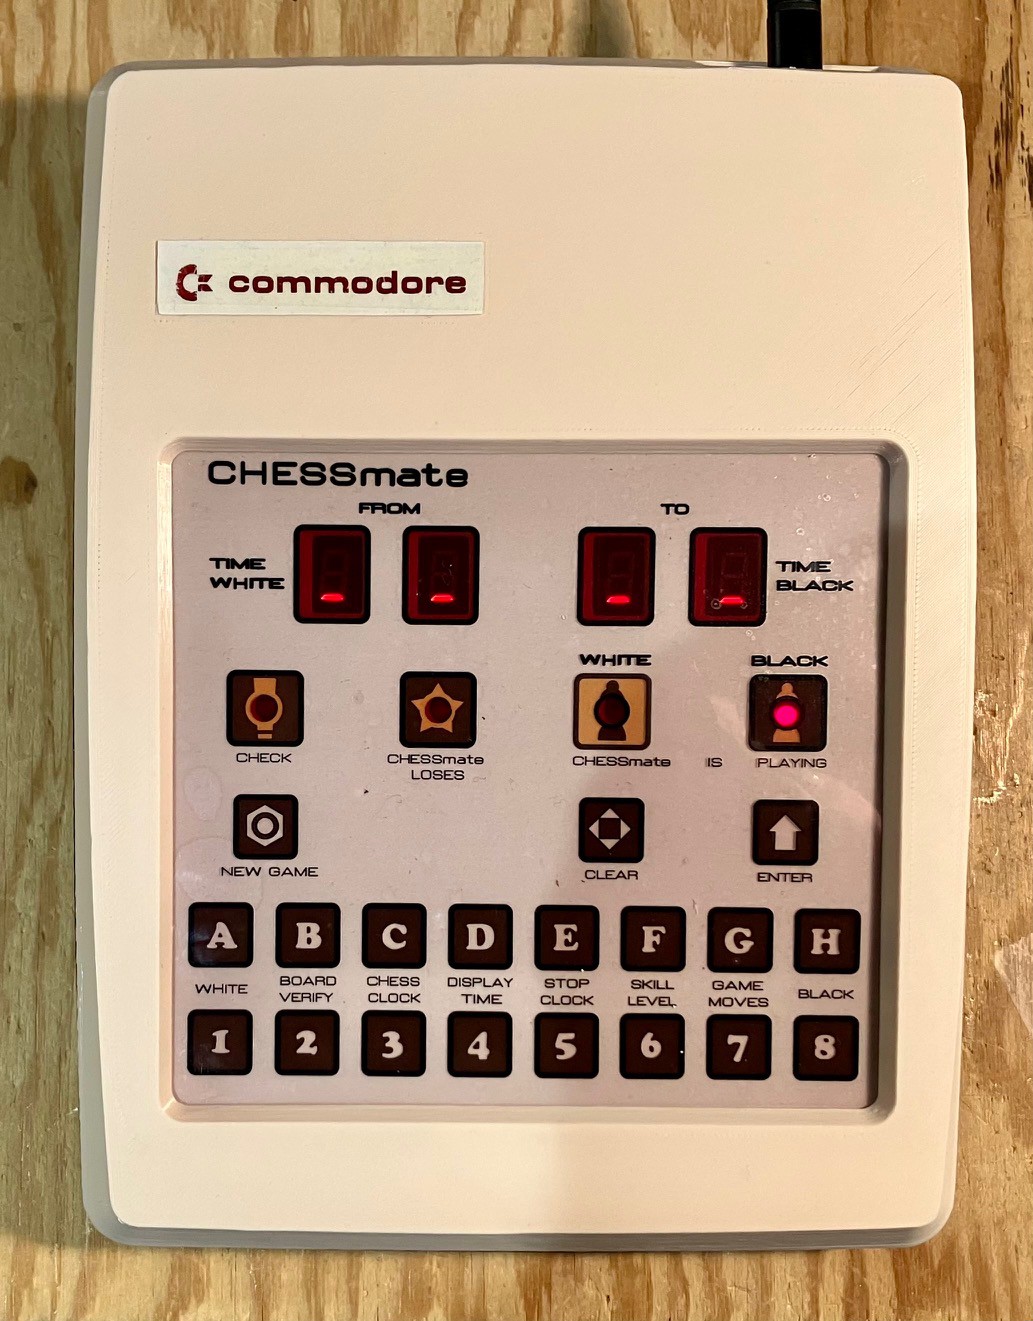
Popped the bottom of the case on, applied power, and viola a working CHESSmate reproduction.
Discussions
Become a Hackaday.io Member
Create an account to leave a comment. Already have an account? Log In.
Nice! So the membrane is flexible enough so you can push the switches through it without overstretching it?
Are you sure? yes | no
Yes it seems to work pretty well. The push buttons are a couple of mm above the frame which helps I think. We’ll have to see how it holds up over time but it’s easy to replace.
Are you sure? yes | no
Looks great ( as always) !
Are you sure? yes | no
Thanks Cees.
Are you sure? yes | no