 kutluhan_aktar
Also, distance education can benefit undergraduate students or interns while acquiring new skills to improve their careers. Since accessing online lectures and courses is effortless thanks to online course providers, distance education allows students to obtain new skills, certifications, and degrees with the highest course quality, even from renowned pioneers of various fields.
Nonetheless, distance education still lacks the glamour of providing directions or suggestions without a live Q&A session while working on a student project or a solution for a real-world problem. Since it is crucial to give students insightful and engaging feedback while conducting experiments, distance education methods are yet dependent on the availability of constructive Q&A sessions for experiment-based learning.
After scrutinizing recent research papers on distance education, I noticed there are very few methods focusing on applying object detection with artificial intelligence to provide auto-generated insightful suggestions and guidance, especially for lab-related studies. Since lab-related studies rely on experiments with different types of lab equipment, I decided to build an AI-driven interactive lab assistant counseling students regarding lab equipment, their proper utilization, and history.
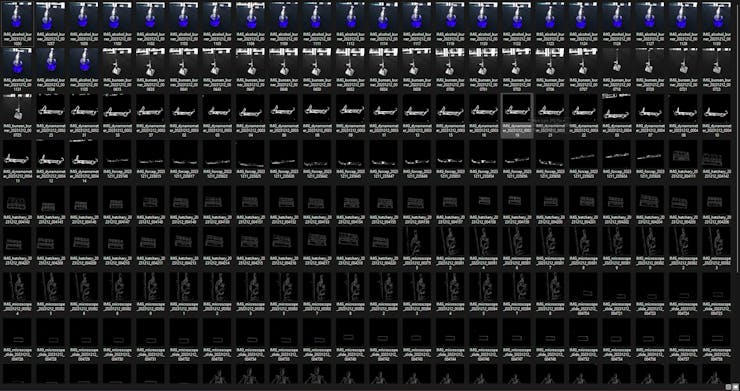
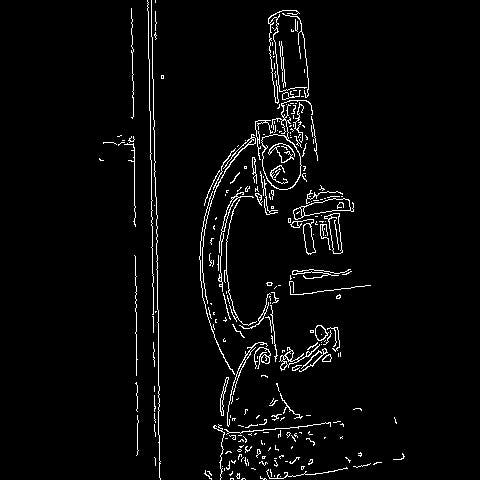
Since lab equipment can be opaque, transparent, in various shapes, and change volume depending on the research subject, it is arduous to construct a valid and notable data set for object detection models. Thus, I decided to employ OpenCV modification features to convert images to generate meaningful data samples for diverse lab equipment regardless of their complex structures. Depending on the given lab equipment, I utilized canny edge detection, erosion and dilation morphological operators, Gaussian blur, and color space conversions so as to generate unique and meaningful samples.
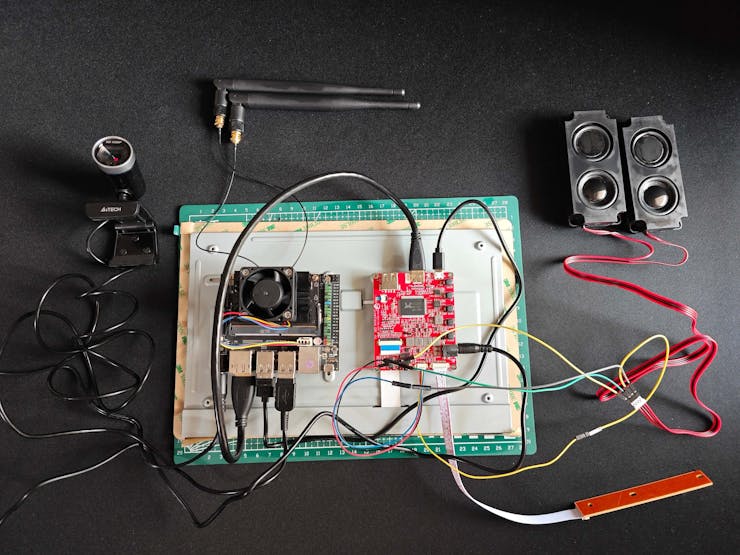
Since NVIDIA Jetson Nano is a compact and easy-to-use platform tailored for running multiple neural networks in parallel for applications like image classification, object detection, segmentation, and speech processing, I decided to utilize Jetson Nano as the centerpiece of this lab assistant. To collect lab equipment images (samples), I connected a high-quality USB webcam to Jetson Nano.
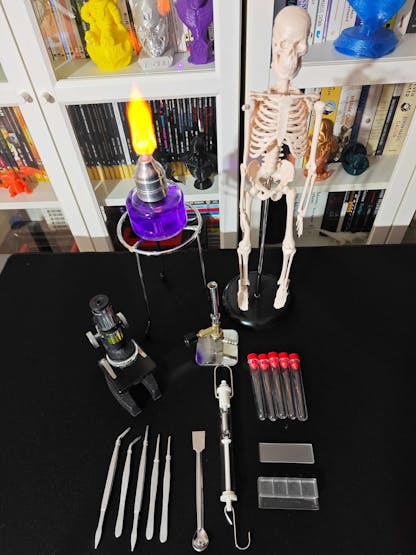
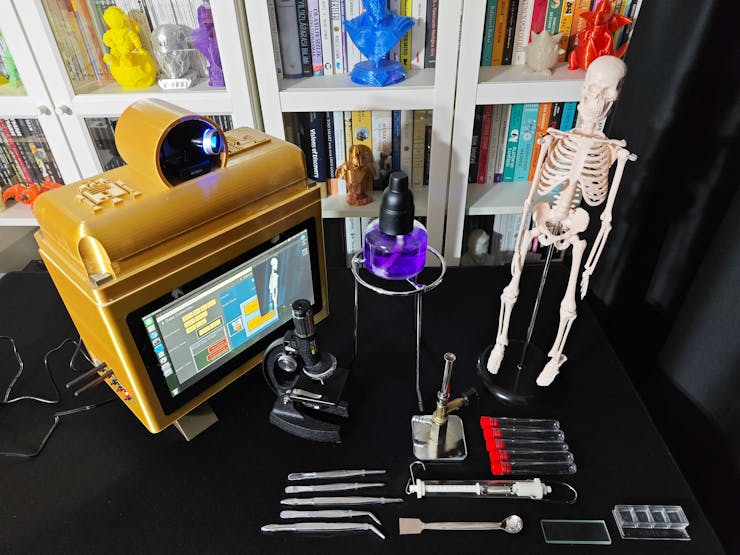
In order to construct my data set, I established a basic laboratory, including various lab equipment related to biology, chemistry, and physics. After applying and testing different OpenCV features on the camera feed for each lab equipment, I collected my data samples so as to construct a notable data set.
After completing my data set, I built my object detection model with Edge Impulse to detect diverse lab equipment from my laboratory. I utilized the Edge Impulse FOMO (Faster Objects, More Objects) algorithm to train my model, which is a novel machine learning algorithm that brings object detection to highly constrained devices. Since Edge Impulse is nearly compatible with all microcontrollers and development boards, I have not encountered any issues while uploading and running my model on Jetson Nano. As labels, I utilized the names of each lab equipment (10 classes). Furthermore, while developing this project, I employed some Edge Impulse Enterprise features to improve device accessibility, as described in the following steps.
After training and testing my object detection (FOMO) model, I deployed and uploaded the model on Jetson Nano as a Linux (AARCH64) application (.eim). Therefore, this lab assistant is capable of detecting lab equipment by running the model independently without any additional procedures or latency. Even though the RGB image format is required to run the model with the Python SDK, I managed to run my model with the modified frames, according to the applied OpenCV features for each lab equipment while collecting data, by iterating temporary image files as modified samples. Thus, the model accuracy is vastly increased for on-device real-time analytics.
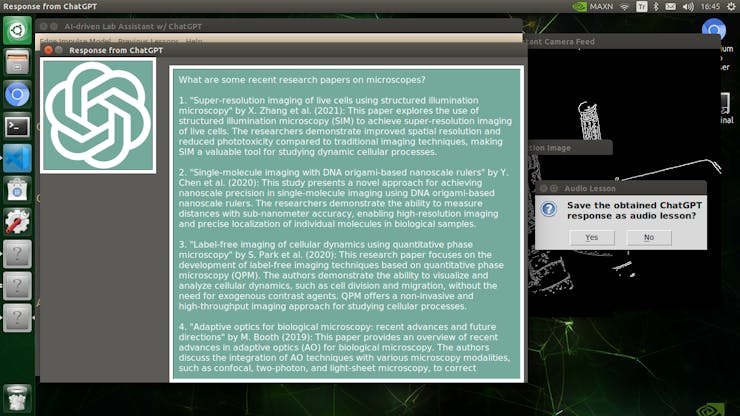
Since I focused on building a full-fledged AI-based lab assistant, after running the object detection model successfully, I decided to employ the OpenAI API to obtain ChatGPT-powered insightful suggestions and guidance as auto-generated lessons so as to inform the user (student) of the detected lab equipment thoroughly. To enable ChatGPT to generate effective lessons not dependent on a single approach, I provided different inquiries (topics) related to the given lab equipment automatically.
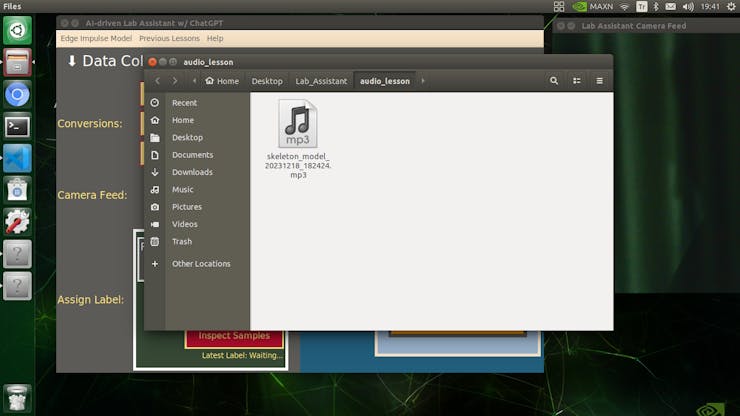
After generating ChatGPT-powered lessons successfully, I decided to use the gTTS (Google Text-to-Speech) module to convert the generated lesson to speech and provide students with the option to save the speech as an audio file on the system for later study sessions or repeating a course.
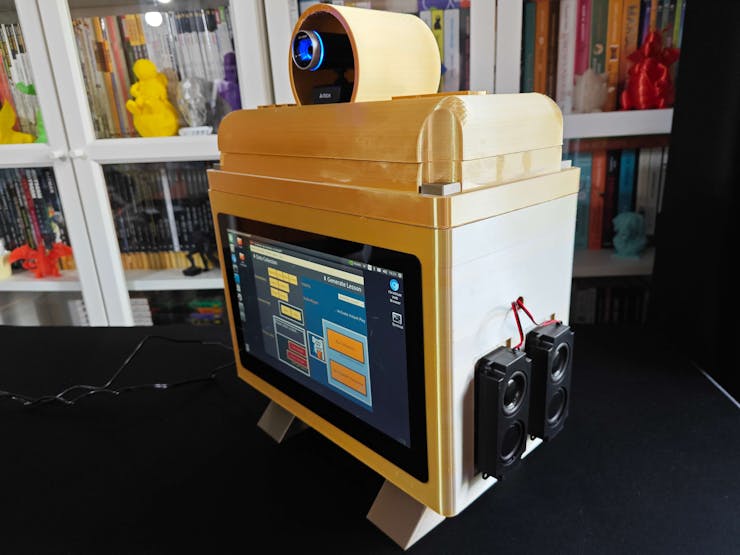
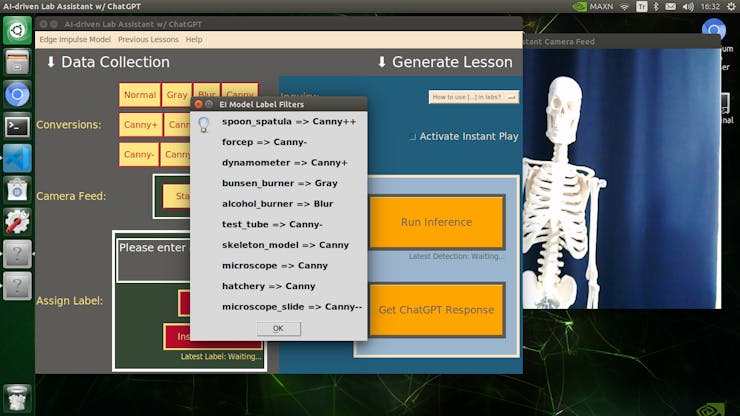
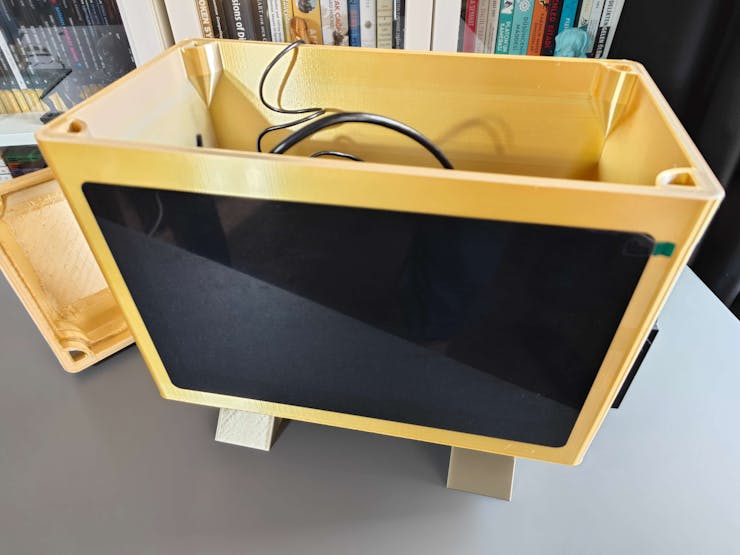
Since I wanted to make this device as accessible as possible, hence the interactive emphasis, I decided to develop an enhanced user interface from scratch with Tkinter (guizero). To let students utilize the user interface (Tkinter application) effortlessly, I utilized a CrowVision high-quality 11.6” (1366x768) touchscreen module. Thanks to its slidable rear-side spacers, I was able to mount Jetson Nano to the back of the screen perfectly. Also, since Jetson Nano does not include built-in speakers, I was able to connect 5W speakers directly to the control board of the screen so as to play the ChatGPT-generated lessons.
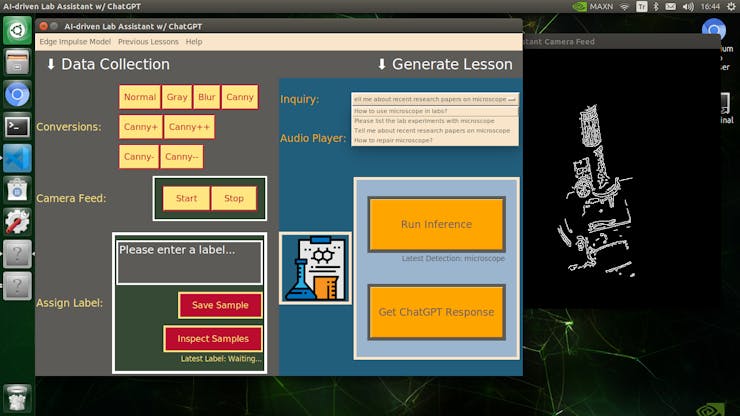
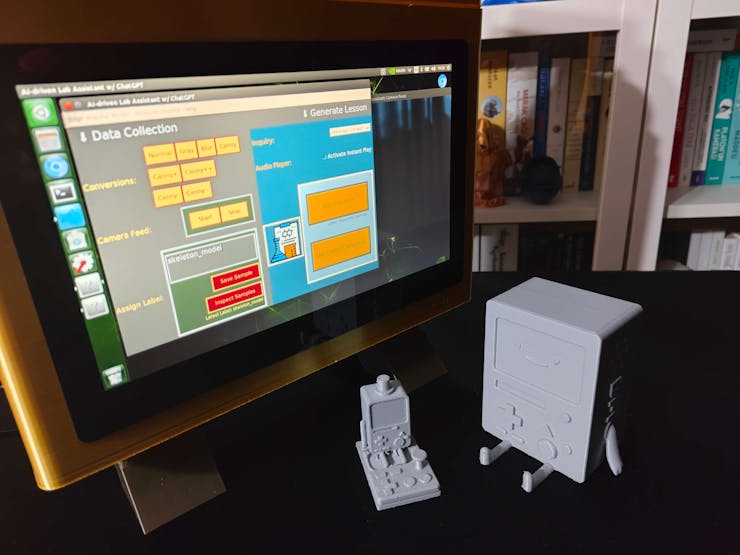
As explained in the following steps, the user interface (GUI) provides these features:
- change the applied OpenCV feature on the real-time camera feed,
- display the modified camera feed,
- assign labels and collect image samples,
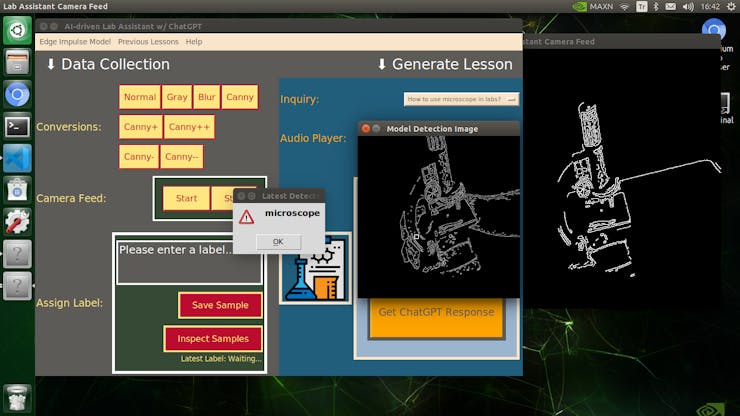
- run an inference directly with the OpenCV-modified frames,
- display the model detection results,
- select a topic (inquiry) related to the detected lab equipment,
- generate a lesson via ChatGPT through OpenAI API according to the selected inquiry,
- inspect the ChatGPT-powered lesson (text) on a new window,
- select to convert the generated lesson to speech and play it immediately,
- save the converted lesson as an audio file on the system.
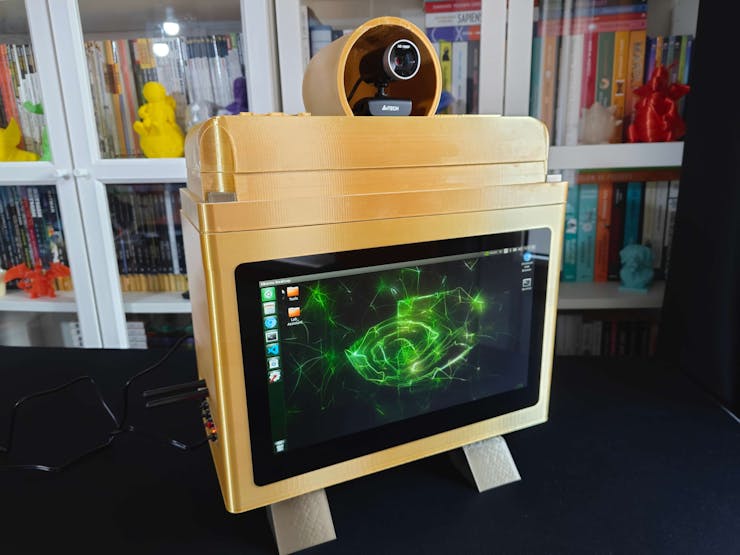
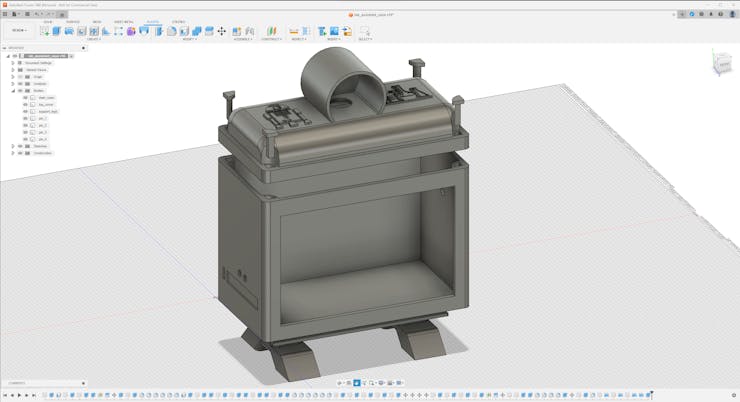
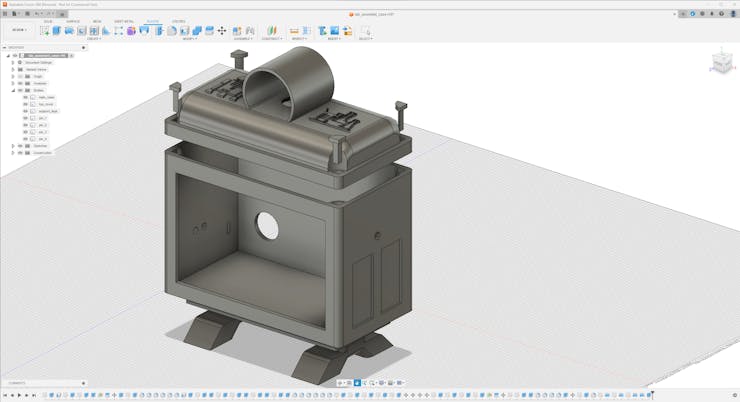
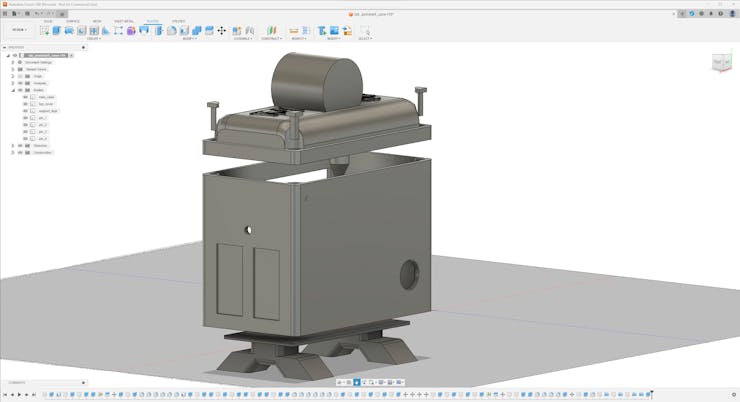
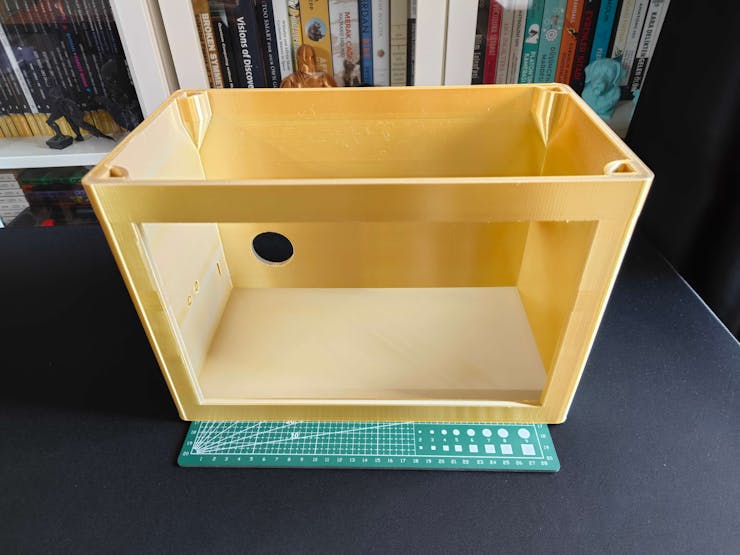
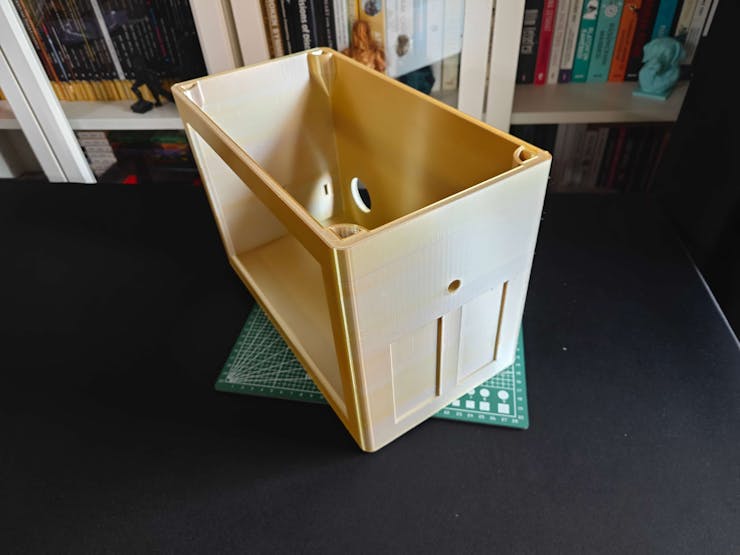
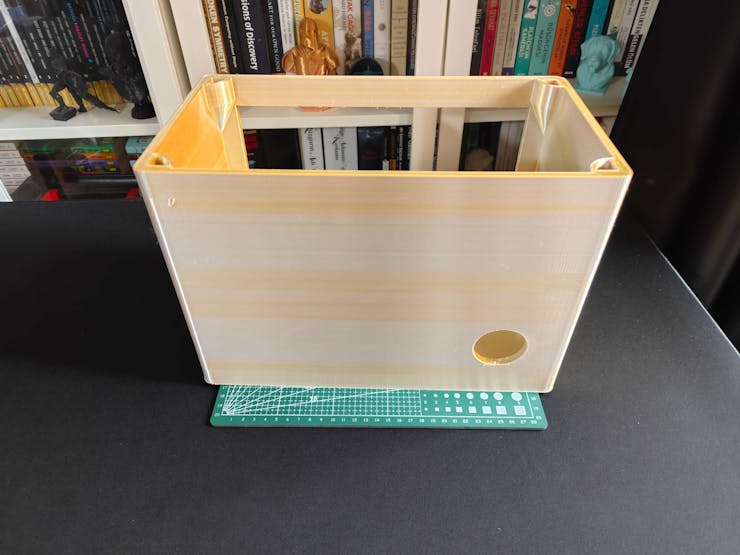
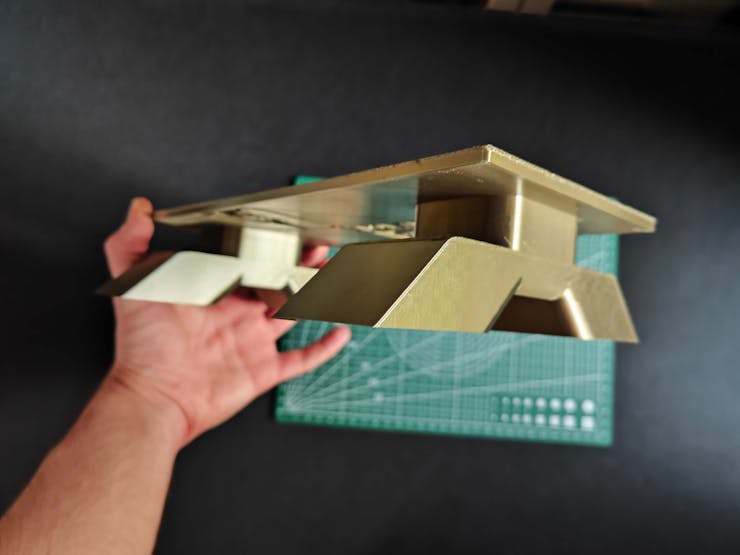
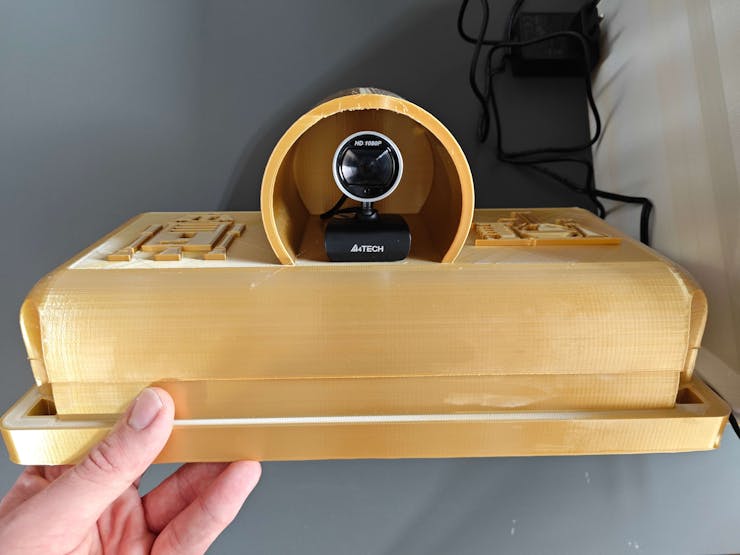
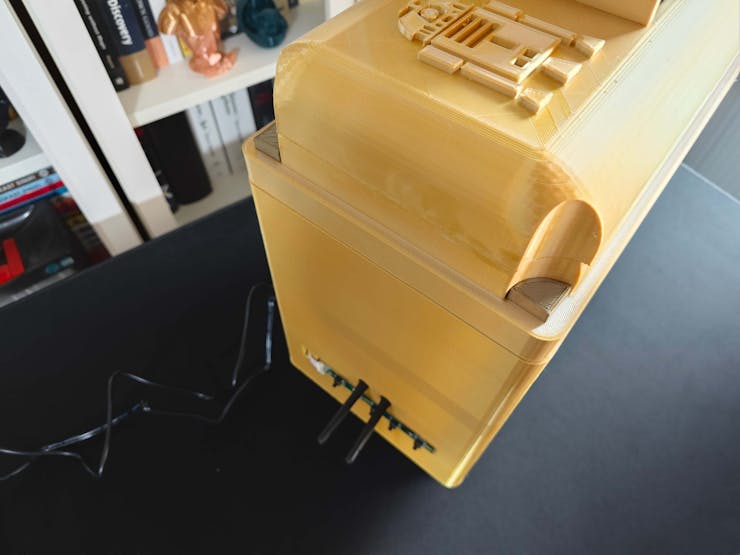
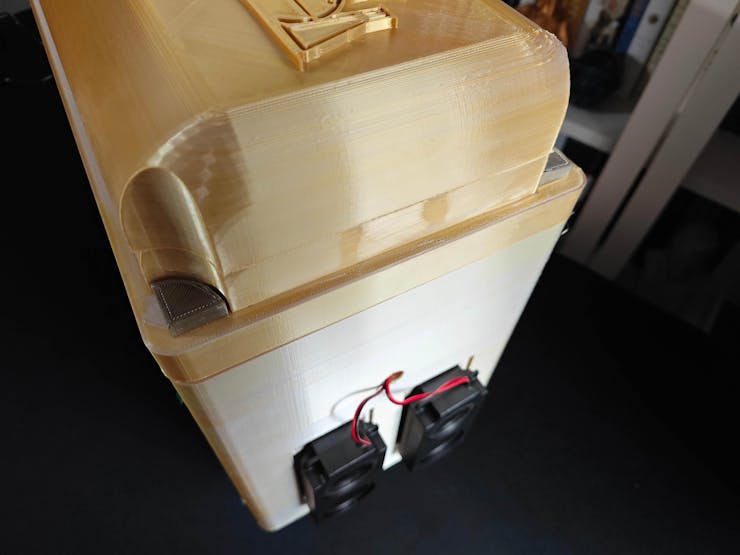
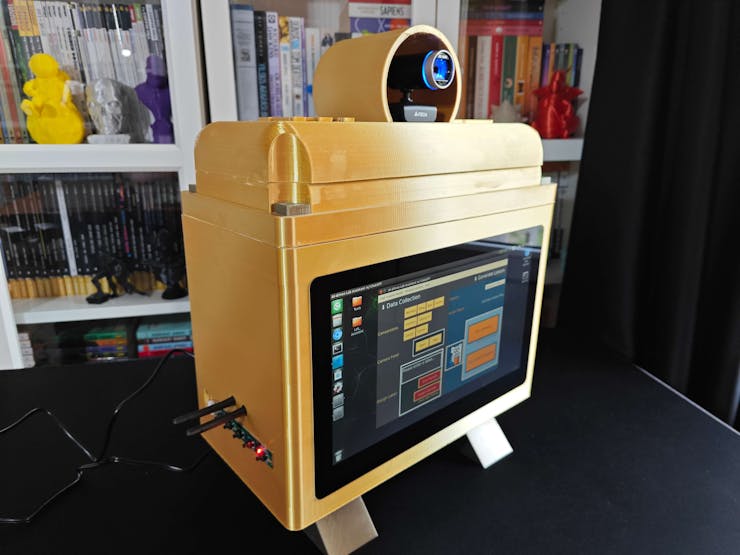
Considering I wanted to make this lab assistant a compact plug-and-play device, I designed a BMO-inspired (from Adventure Time) case with removable top and bottom parts (3D printable) that allow the user to attach the 11.6” touchscreen module, USB webcam, external speakers, and the OSD adjustment board. Also, the main case includes slots for AC8265 NIC antennas.
So, this is my project in a nutshell 😃
In the following steps, you can find more detailed information on coding, applying OpenCV features to the camera feed, generating ChatGPT-powered lessons, converting lessons to speech, and developing a full-fledged user interface (Tkinter).
🎁🎨 Huge thanks to ELECROW for sponsoring a CrowVision 11.6'' TouchScreen Module (1366x768).
🎁🎨 Also, huge thanks to Anycubic for sponsoring a brand-new Anycubic Kobra 2 Max.


Step 1: Designing and printing a BMO-inspired case
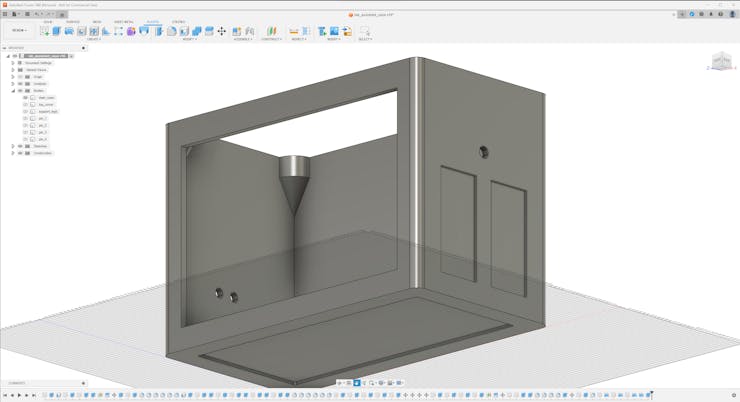
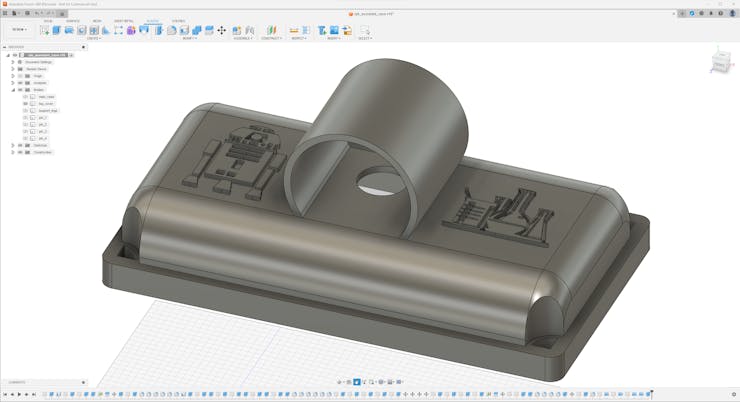
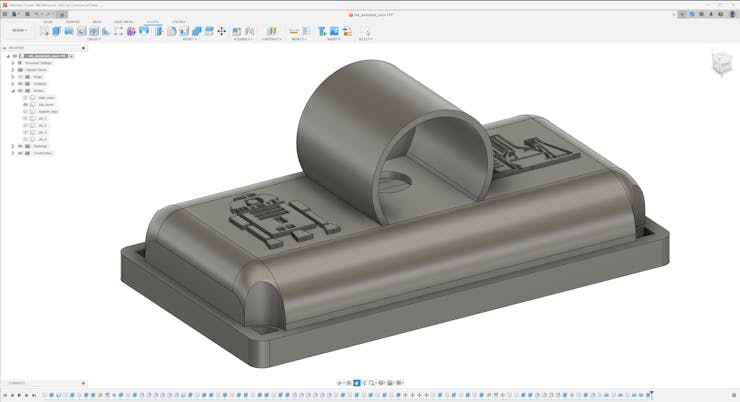
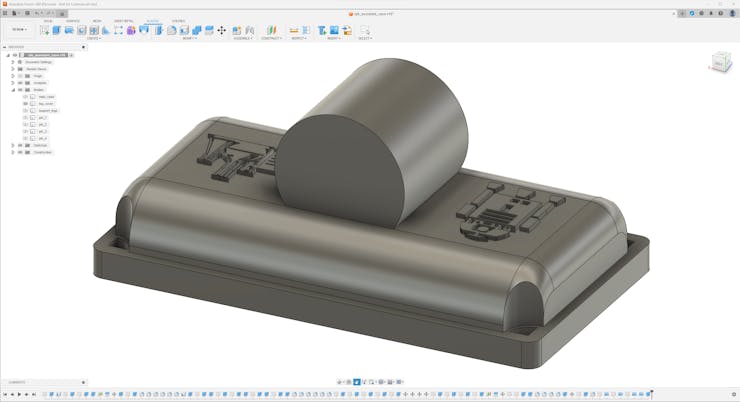
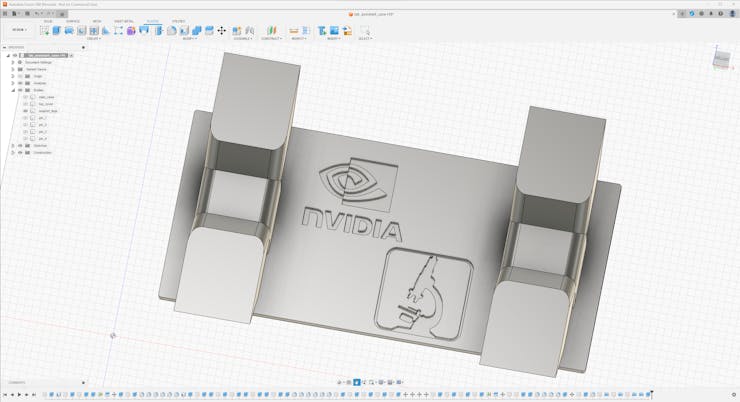
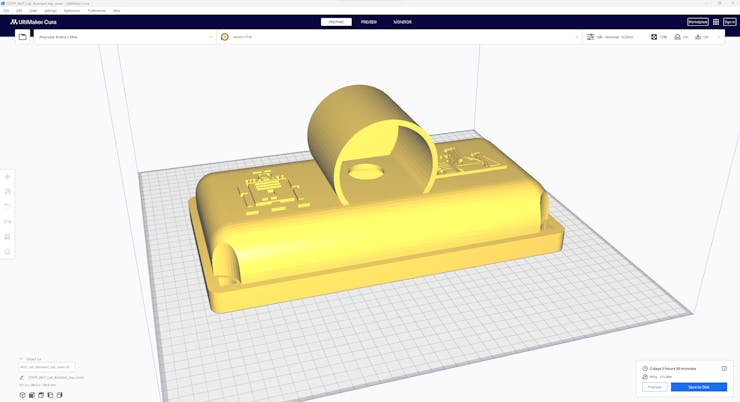
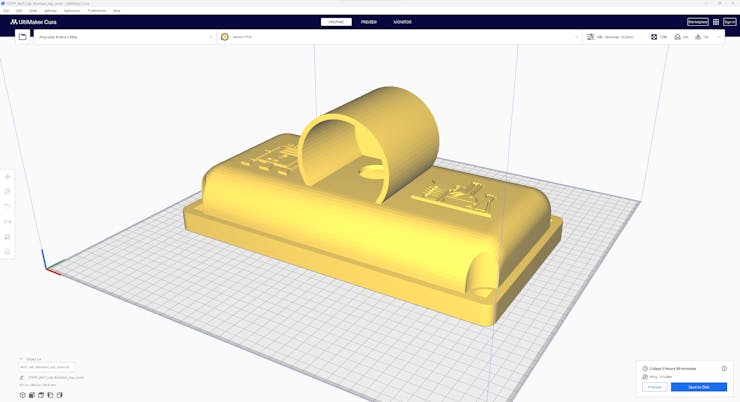
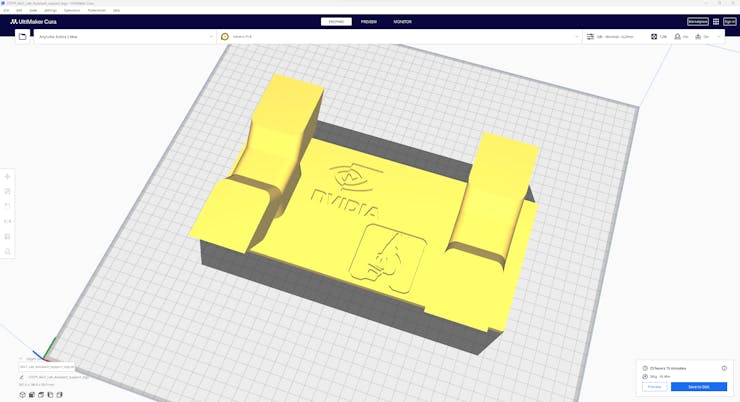
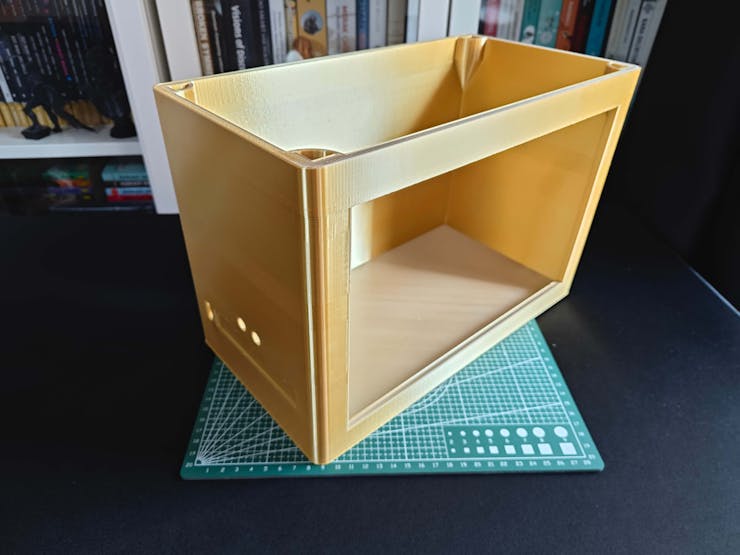
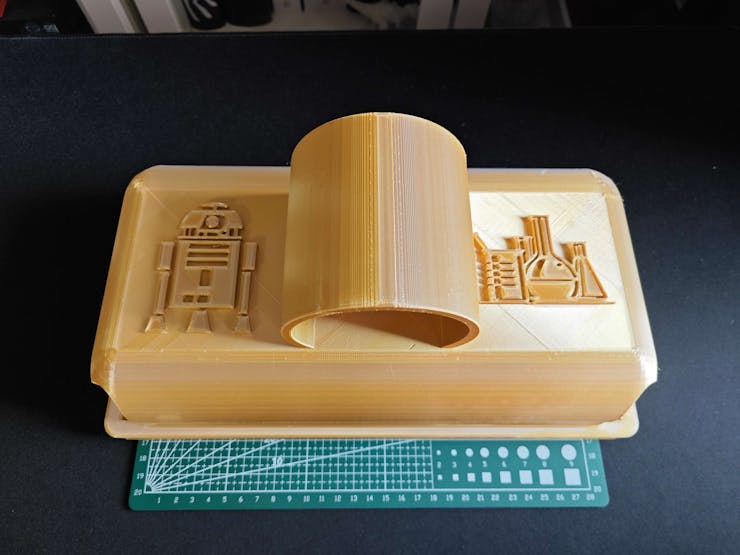
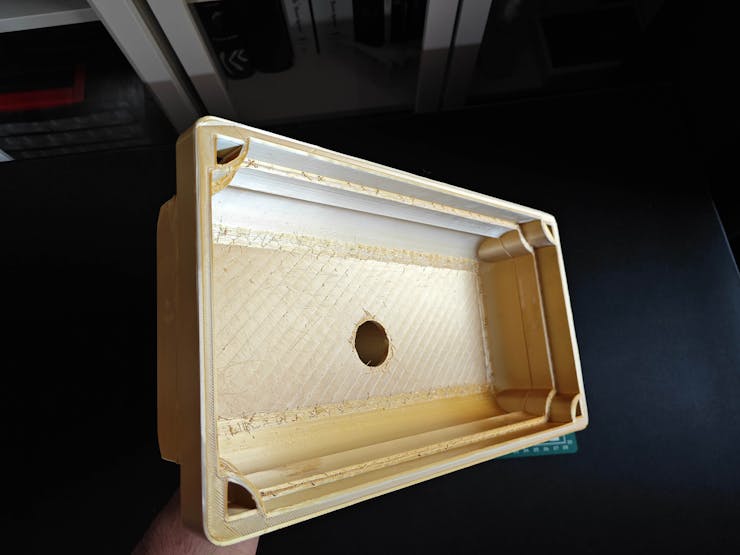
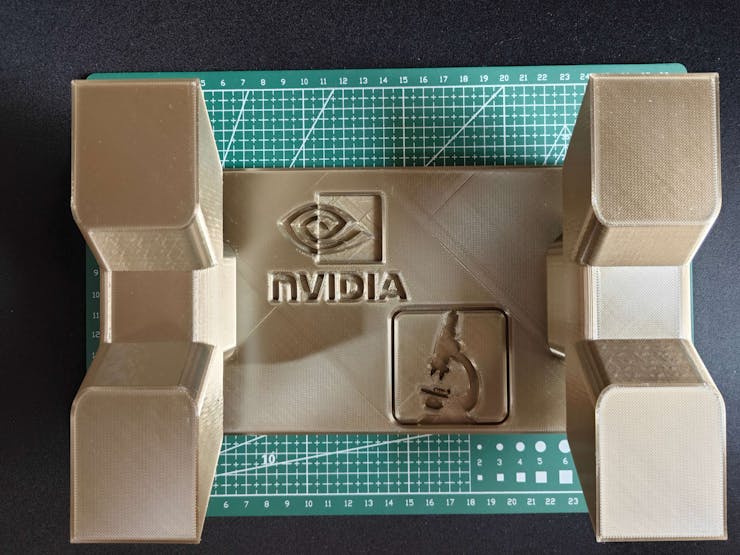
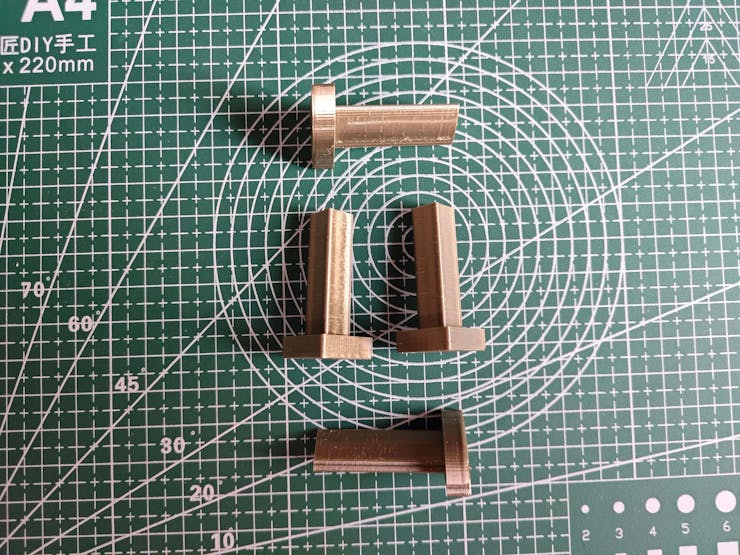
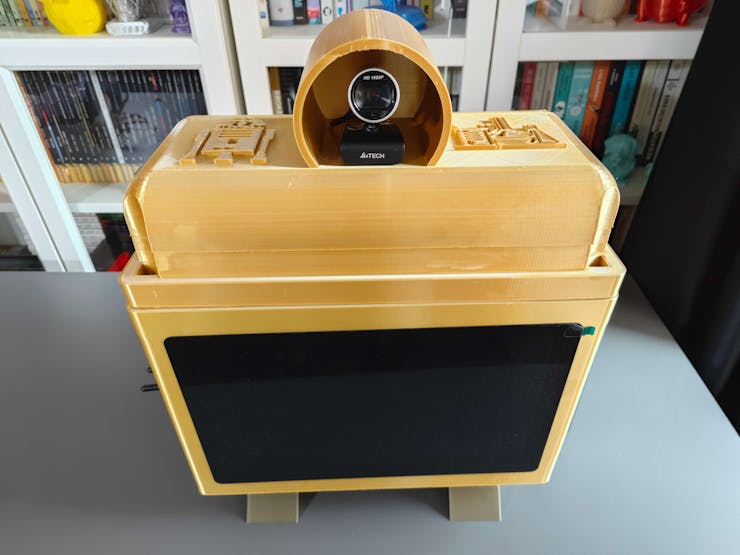
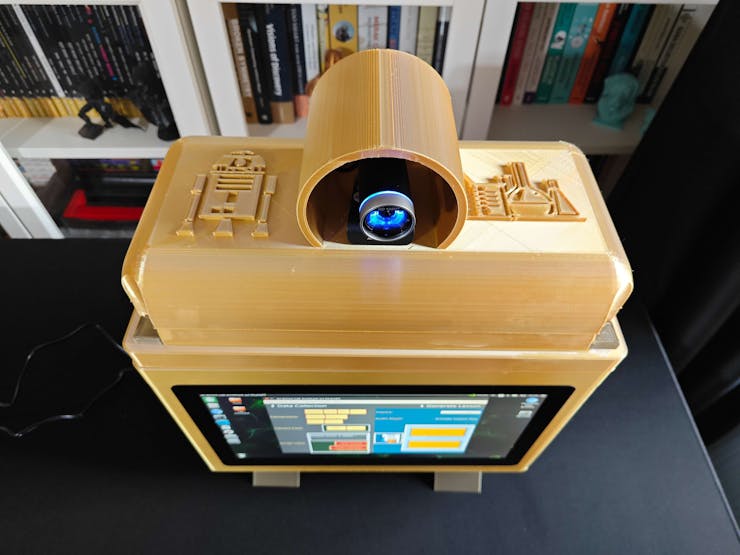
Since I focused on building a feature-rich and accessible AI-driven lab assistant that enhances the distance learning experience with auto-generated lessons, I decided to design a user-friendly and compact case that allows the user to connect the high-quality screen (control panel), USB webcam, and the speakers effortlessly. Since I got inspired by BMO (Adventure Time) while designing my lab assistant's appearance, I decided to place the high-quality touchscreen as the centerpiece. To avoid overexposure to dust and prevent loose wire connections, I added a removable top cover sealed with specially designed triangular screws. Then, I added a slot on the main case in order to attach the CrowVision 11.6'' touchscreen. On the removable top cover, I added a cylindrical camera mount that lets the user position the USB webcam freely while detecting lab equipment and apply proper cable management. Also, I decided to emblazon the NVIDIA logo, the R2-D2 logo, and the lab equipment indicators on both the top cover and the detachable legs to highlight the capabilities of this AI-based lab assistant.
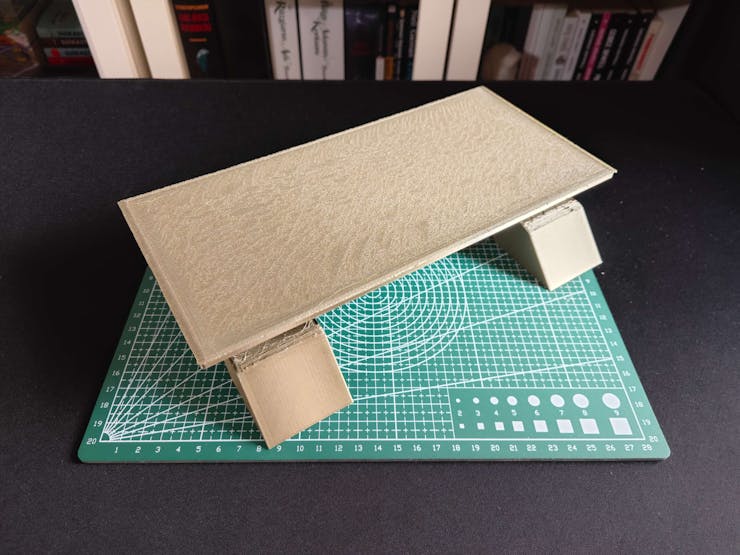
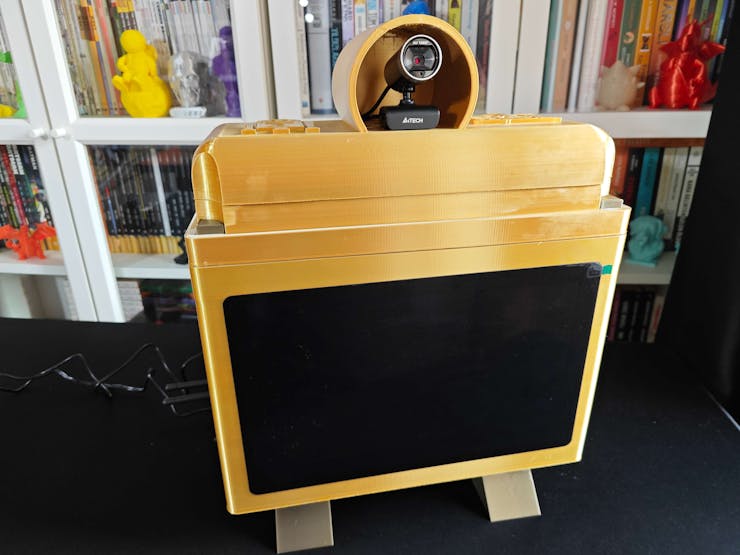
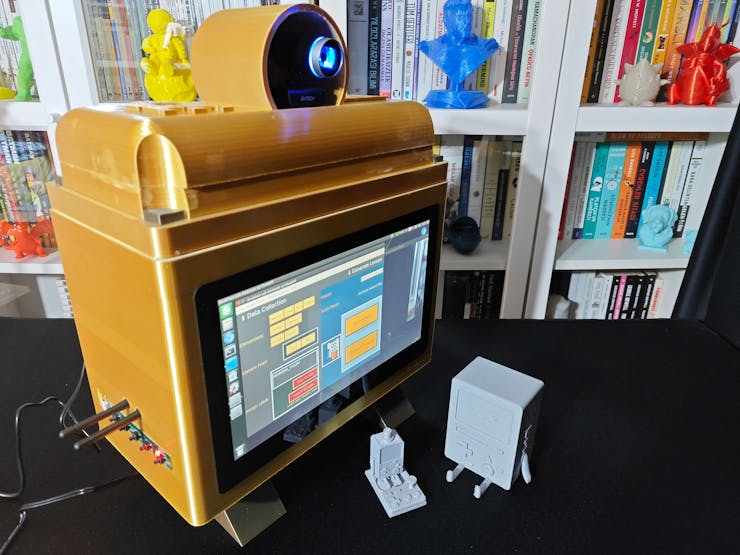
Since I loosely follow the design structure of BMO, I decided to print different BMO figures to accompany my lab assistant as a reminder of the original design. Even though BMO has operating legs, I decided to design rigid and detachable legs so as to simplify my iteration's assembly process since it is intended to be a compact lab assistant.
I designed the main case, the removable top cover, the detachable legs, and triangular screws in Autodesk Fusion 360. You can download their STL files below.


For the BMO figures accompanying the lab assistant, I utilized these models from Thingiverse:
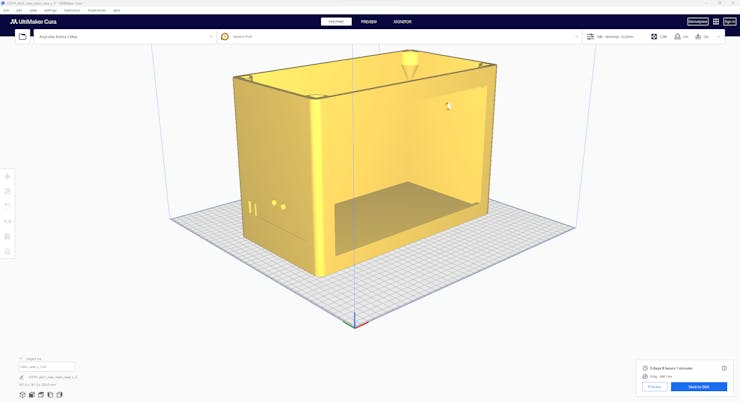
Then, I sliced all 3D models (STL files) in Ultimaker Cura.


Since I wanted to create a metallic structure for my BMO case iteration and apply a stylish gold coating theme contrasting the original color palette, I utilized these PLA filaments:
- ePLA-Silk Magic Gold-Silver (main case and top cover)
- ePLA-Silk Bronze (legs and screws)
To represent the original BMO color palette, I utilized this PLA filament:
- Anycubic High-Speed Grey
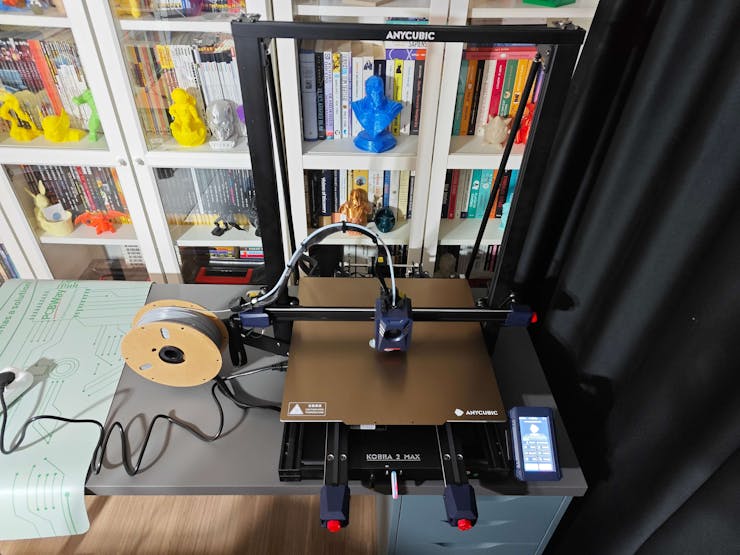
Finally, I printed all parts (models) with my brand-new Anycubic Kobra 2 Max 3D Printer.
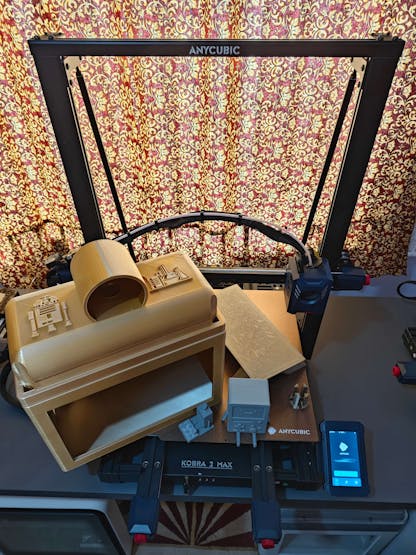
Since Anycubic Kobra 2 Max is budget-friendly and specifically designed for high-speed printing with a gigantic build volume, I highly recommend Anycubic Kobra 2 Max if you are a maker or hobbyist needing to print large prints without compartmentalizing your design and losing structural integrity while working on multiple prototypes before finalizing a complex project.
Thanks to its upgraded direct extruder and vibration compensation features, Anycubic Kobra 2 Max provides 300mm/s recommended print speed (up to 500mm/s) and enhanced layer quality. Also, it provides a high-speed optimized cooling system, reducing visible layer lines and complementing the fast printing experience. Since the Z-axis has dual-motors and dual-support rods, it prevents vibration from affecting layer smoothness and integrity, even at higher print speeds.
Furthermore, Anycubic Kobra 2 Max provides a magnetic suction platform on the heated bed for the scratch-resistant PEI spring steel build plate, allowing the user to remove prints without any struggle, even for larger prints up to 420x420x500 mm. Most importantly, you can level the bed automatically via its user-friendly LeviQ 2.0 automatic leveling system and custom Z-axis compensation. Also, it has a smart filament runout sensor and supports Anycubic APP for remote control and management.
#️⃣ First of all, remove all fixing plates. Then, install the gantry frame and support rods.


#️⃣ Install the print head and adjust the X-axis belt tensioner. Then, install the touchscreen and the filament runout sensor.


#️⃣ Connect the stepper, switch, screen, and print head cables. Then, attach the filament tube and use cable ties to secure the cables properly.


#️⃣ If the print head or bed is shaking, adjust the hexagonal isolation columns underneath them.

#️⃣ To avoid software-related print failures, update the device firmware manually via USB or directly over Wi-Fi.
I encountered some errors due to Cura configurations before the official 2.3.6 firmware.

#️⃣ After the firmware upgrade, go to Settings ➡ More Settings ➡ Guide so as to initiate the LeviQ 2.0 automatic bed leveling system and configure vibration calibration.

#️⃣ Finally, fix the filament tube with the cable clips, install the filament holder, and insert the filament into the extruder.
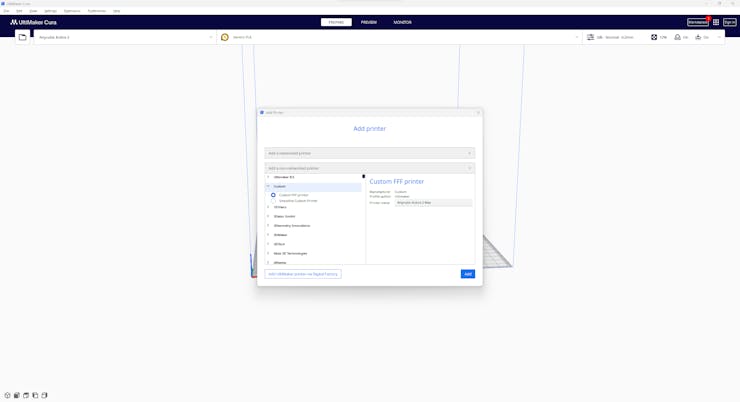
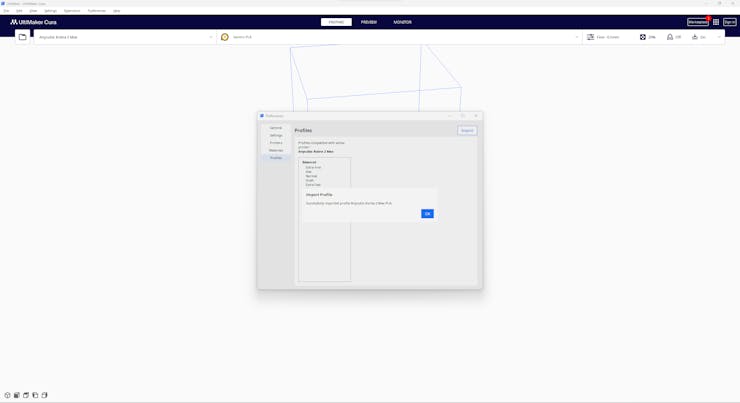
#️⃣ Since Anycubic Kobra 2 Max is not officially supported by Cura yet, we need to set it manually. Fortunately, Anycubic provides detailed configuration steps for Anycubic Kobra 2 Max on Cura.
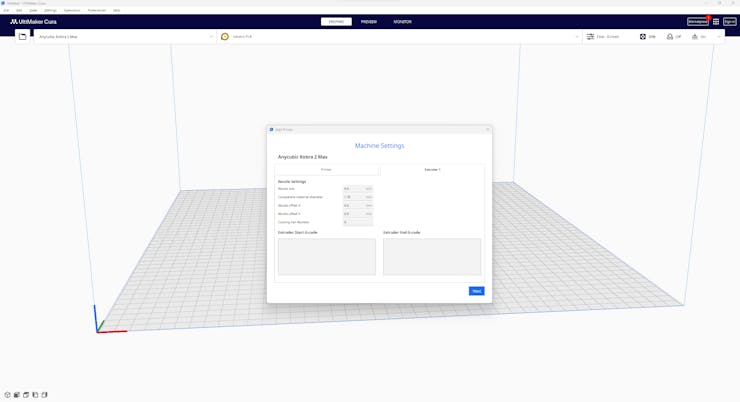
#️⃣ First of all, create a custom printer profile on Cura for Anycubic Kobra 2 Max with given printer settings.

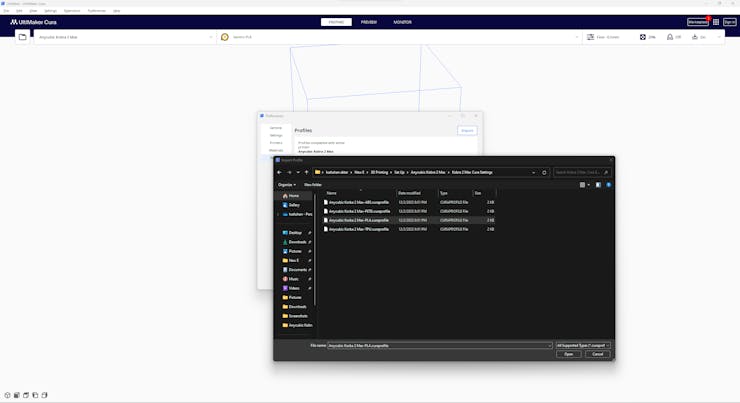
#️⃣ Then, import the printer profile (configuration) file provided by Anycubic, depending on the filament type.
Step 1.1: Assembling the case and making connections & adjustments
// Connections
// NVIDIA® Jetson Nano :
//                                ELECROW CrowVision 11.6'' TouchScreen Module (1366x768)
//                                USB Webcam (PK-910H)
// CrowVision 11.6'' TouchScreen Module :
//                                WaveShare 8Ω 5W Speakers
// https://developer.nvidia.com/embedded/learn/get-started-jetson-nano-devkit
Since I mounted Jetson Nano to CrowVision 11.6'' touchscreen module via its slidable rear-side spacers, I did not need to use a breadboard to test my prototype's wire connections. Fortunately, the CrowVision 11.6'' touchscreen module supports a 4-pin speaker connection out of the box, while Jetson Nano lacks built-in speakers or a 3.5 mm audio jack. Hence, I was able to connect 8Ω 5W speakers directly to the control board of the touchscreen. After that, I just made some adjustments before proceeding with the following steps.
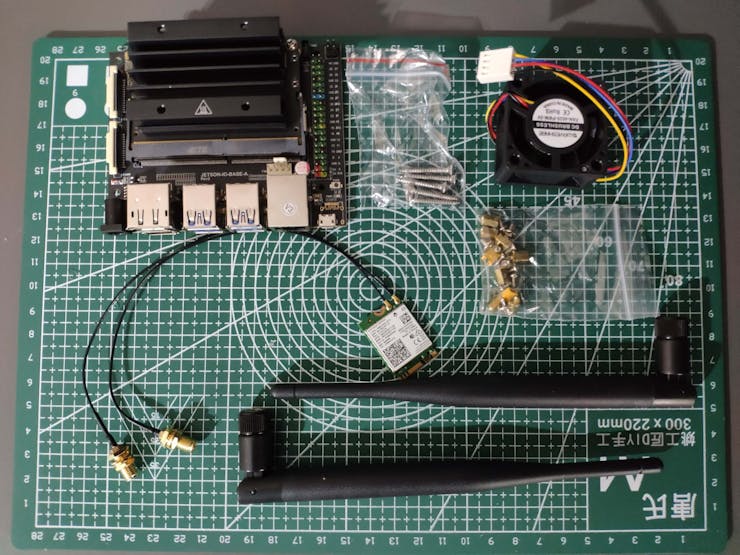
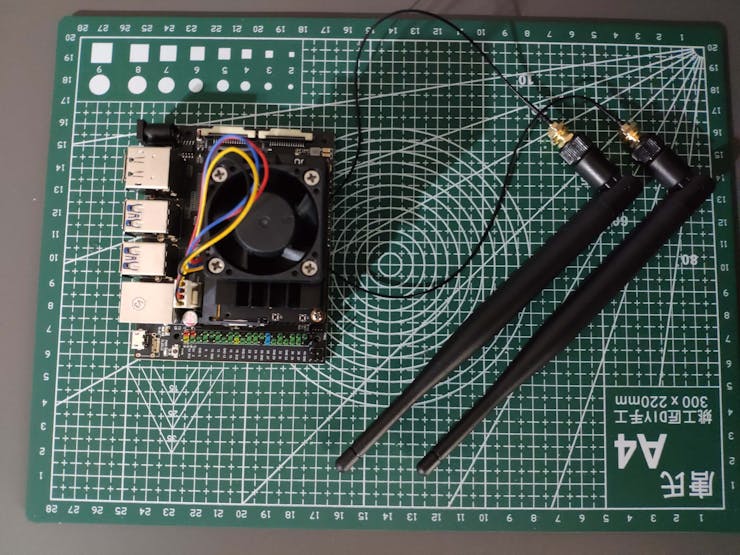
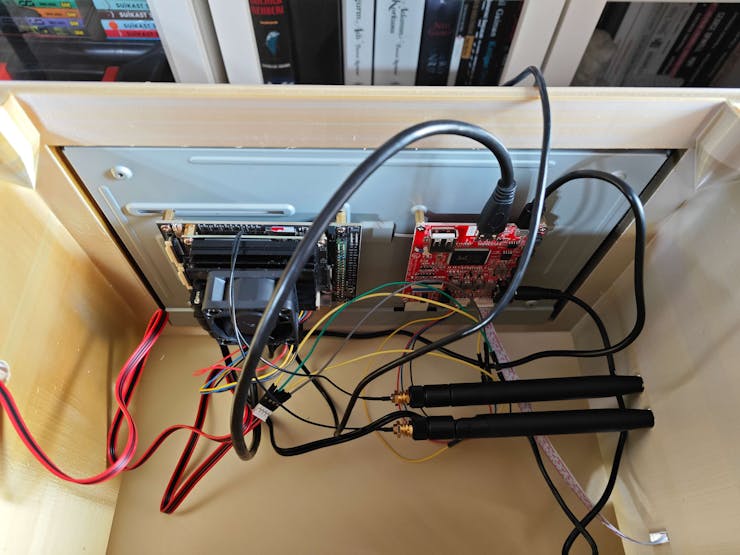
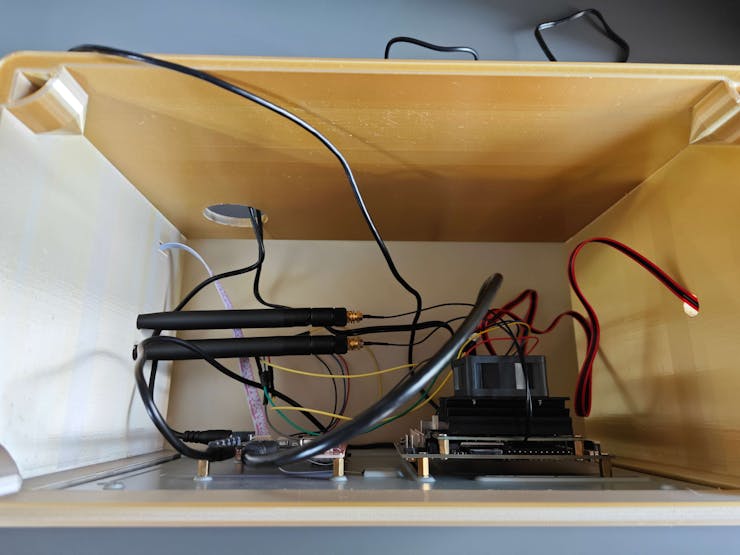
#️⃣ First of all, I connected an AC8265 dual-mode NIC to Jetson Nano via its built-in M.2 Key E connector.
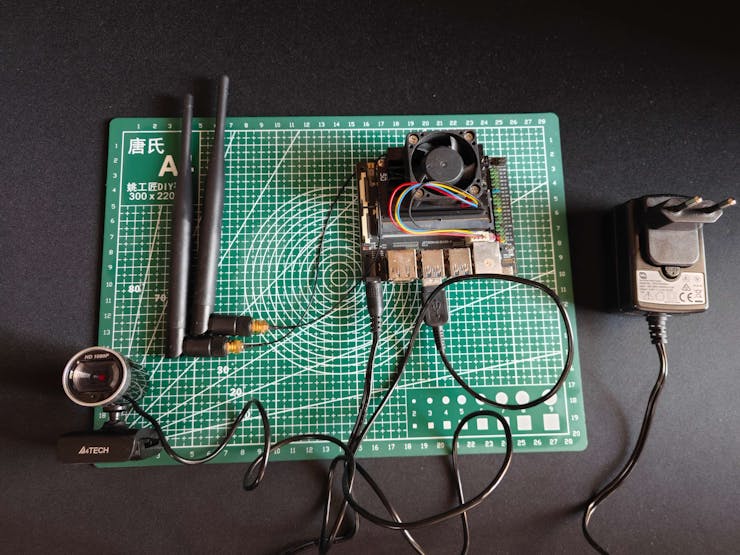
#️⃣ Then, I connected the USB webcam (PK-910H) to Jetson Nano.
#️⃣ After connecting the USB webcam, I connected the CrowVision 11.6'' touchscreen module to Jetson Nano via an HDMI to Mini-HDMI cable and a USB Type-A to Micro-B cable: USB connection is required to enable the touchscreen feature.
#️⃣ I mounted Jetson Nano directly to the back of the touchscreen module via its slidable rear-side spacers compatible with nearly every SBC structure.
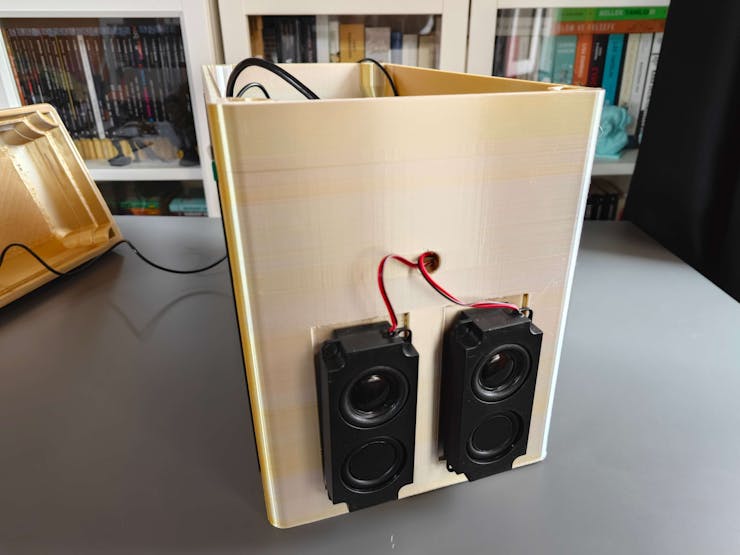
#️⃣ Then, I connected WaveShare 8Ω 5W speakers to the control board of the touchscreen via its built-in 4-pin speaker interface. Unfortunately, the speaker's 4-pin JST connector is not compatible with that of the control board. Therefore, I utilized a secondary JST (2 mm) and jumper wires to complete the speaker connection.
#️⃣ Finally, I connected the on-screen-display (OSD) adjustment board to the touchscreen control board.
If you are planning to replicate this lab assistant but with a smaller case, you can utilize the CrowVision 7" touchscreen module.

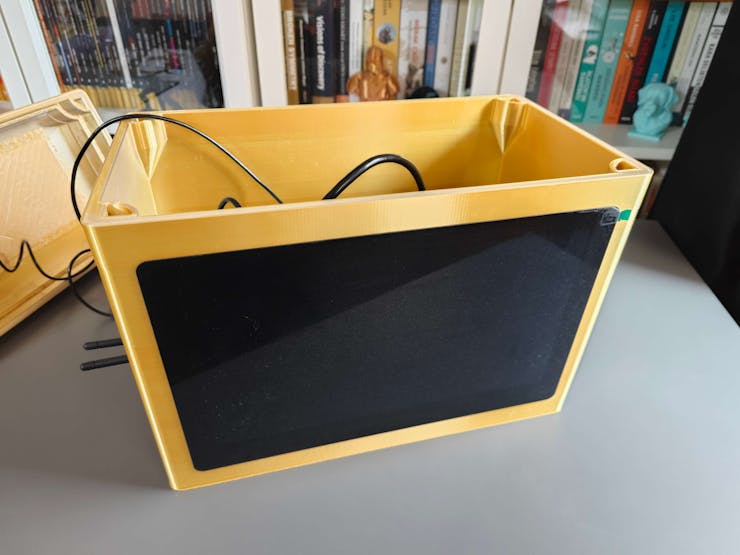
After printing all parts (models), I fastened the touchscreen module into its slot on the main case via the module's integrated 3M adhesive frame.
Then, I attached the USB webcam to the cylindrical camera mount on the removable top cover. I fastened the speakers and the OSD adjustment board to their corresponding slots on the main case via a hot glue gun. I placed the AC8265 NIC WiFi/BT antennas on the main case via their assigned slots.
Finally, I placed the triangular screws and affixed the detachable legs through the dents underneath the main case.
Note: Due to a firmware issue with Anycubic Kobra 2 Max (below 2.5.6) regarding Cura settings, I needed to print the top cover in separate pieces and glue them together.


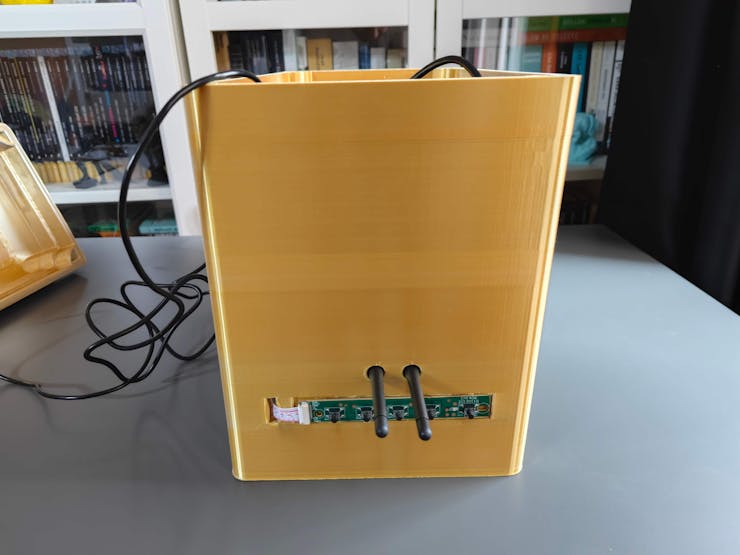


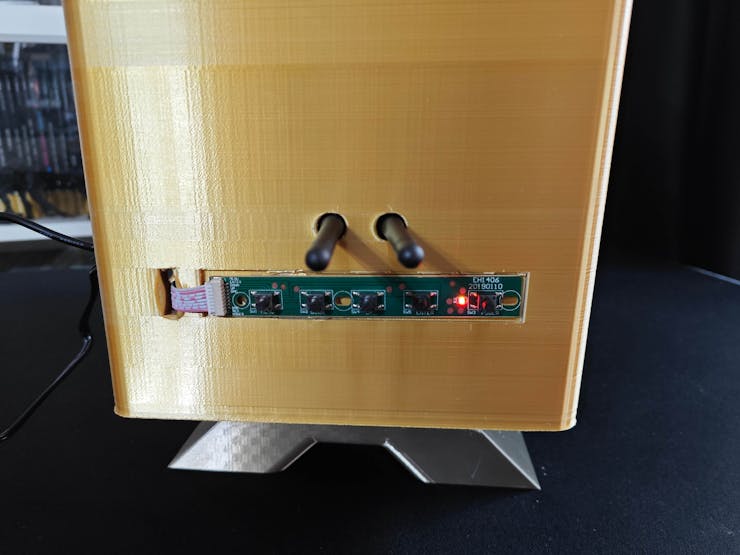
Thanks to the OSD adjustment board, the user can change screen settings effortlessly while running the AI-driven lab assistant.

Since the centerpiece of this lab assistant is a CrowVision high-quality 11.6” touchscreen module, the user can employ all device features without a keyboard and mouse, maximizing device accessibility.

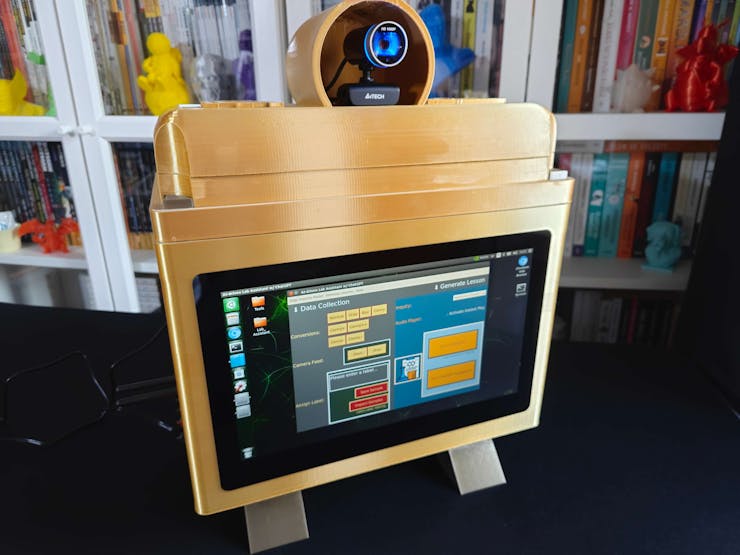


After completing the case assembly, I showcased my lab assistant case iteration with BMO figures to emphasize the original design.
Videos and Conclusion
Further Discussions
By applying object detection models trained on detecting diverse lab equipment to generate ChatGPT-powered lessons, we can achieve to:
🔬⚗️🧬🤖 assist undergraduate students or interns while acquiring new skills,
🔬⚗️🧬🤖 provide directions or suggestions without a live Q&A session,
🔬⚗️🧬🤖 give students auto-generated insightful and engaging feedback while conducting experiments,
🔬⚗️🧬🤖 reduce teacher (or researcher) workload.
References
https://docs.opencv.org/4.x/dd/d1a/group__imgproc__feature.html#ga2a671611e104c093843d7b7fc46d24af
https://docs.opencv.org/3.4/d4/d86/group__imgproc__filter.html#gaeb1e0c1033e3f6b891a25d0511362aeb
https://docs.opencv.org/3.4/d3/dbe/tutorial_opening_closing_hats.html