Step One: Print the Enclosure
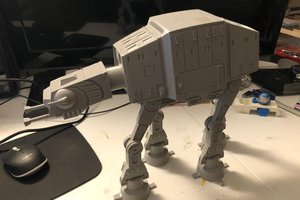
I did 4 outer shells and 20% infill to help ensure the enclosure would not be prone to bending over time.

Step Two: Set Your Servo to Neutral
Plug in your servo to the Arduino Uno and upload the Servo Neutral sketch. This sets your servo to 90 degree neutral position.
Step Three: Hot Glue the Springs
Hot glue the springs into the holes on the inner piece then into the holes on the outer rib piece. repeat on the other side.

Step Four: Install Servo Horn with Screws and Attach Wire
First screw in the M1.2 to the third hole on the inside of your long symmetrical horn that came with your servo, then attach it to your servo. Cut a length of 24 gauge wire that's long enough to be folded in half and have the ends reach the outside of the very outer edge of your assembly.
Twist wire around the tiny screws you installed on the server horn making sure they they can't slip off the screw head but they should still be loose enough to rate freely around the screw.

Step Five: Mount Servo and Attach Wires to Rib Plate
Mount the servo to the inner assembly using M2 x 6mm screws. Thread the wires through the two holes on the inner assembly and the through the rib plate holes. Making sure not to compress the springs, twist the wires tightly and then tuck the excess inside the rib plate hole.

Step Six: Screw on the Face Plate
Using M2 x 10mm screws, attach the top faceplate.

Step Seven: Upload the Servo Breathing Easing Sketch
Plug your servo into your Arduino Uno and upload the Servo Breathing Easing sketch. You can adjust the speed of the breathing with increasing or decreasing the second number in this part of the sketch:
breathe.easeTo(145, 55); //angle moved to and blocking aka time for arrival to the angle, lower the blocking number the slower the servo moves
breathe.easeTo(90, 55); //sets servo back to neutral position
 Smalls
 Skuzee

 fullyanalog-programmer
 Luke J. Barker