OV-Watch

)

📒 Overview
This is A powerful Smart Watch.
If you find the hardware of this watch difficult to solder or replicate, if hard to make, but you just want to focus on learning coding or LVGL UI instead, you can try a new STM32F411 development board:
FriPi STM32F411 dev-kit:https://github.com/No-Chicken/FryPi


🔗Links:
V2.2 video intro | V2.3 NEW function video intro | Easy EDA open source hardware
🚀 Additional Features ( in V2.3 )
The modified features include:
Heart rate section: added LED matrix hardware to enhance PPG signal strength.
Changed to a double-layer board to accommodate fitting, avoiding 4-layer board due to the inability of JLCPCB to make blind buried vias.
Bluetooth changed to KT6328A.
MPU6050 circuit modification: In V2.2, the AUX pin was grounded, which led to higher power consumption in previous versions. Now standby power consumption is in the range of several hundred microamperes.
Removed NFC section due to previous design issues where NFC would be shielded by PCB copper and screen iron sheet.
Power supply section redesigned for low power consumption: pulled down the PS/SYNC pin of TPS63020 and set to Power Save mode. According to the reference manual, under low current conditions, the previous efficiency was only 60%, whereas Power Save mode can achieve 90%.
Added games (2048, memory blocks, MPU6050-related games).
Fixed some bugs.
📑Function List:
| V1.0 | V1.1 | V2.0 | V2.1 | V2.2 | V2.3 | |
|---|---|---|---|---|---|---|
| MCU | STM32 | STM32 | STM32 | STM32 | STM32 | STM32 |
| Screen size(inches) | 1.14 | 1.14 | 1.69 | 1.69 | 1.69 | 1.69 |
| Touch | ❌ | ❌ | ✔ | ✔ | ✔ | ✔ |
| NFC | ❌ | ❌ | ❌ | ❌ | ✔ | ❌ |
| BlueTooth | ❌ | ❌ | ❌ | ❌ | ✔ | ✔ |
| Charg way | Micro-USB | Micro-USB | Wireless | Magnetic | Magnetic | Magnetic |
| Temperature Measure | ✔ | ✔ | ✔ | ✔ | ✔ | ✔ |
| Humidity Measure | ❌ | ❌ | ✔ | ✔ | ✔ | ✔ |
| Heart Rate | ❌ | ❌ | ❌ | ❌ | ✔ | ✔ |
| Altitude Measurement | ✔ | ✔ | ✔ | ✔ | ✔ | ✔ |
| Calculator | ❌ | ❌ | ✔ | ✔ | ✔ | ✔ |
| Wrist Wake Screen | ❌ | ✔ | ✔ | ✔ | ✔ | ✔ |
| Compass | ❌ | ❌ | ✔ | ✔ | ✔ | ✔ |
| Stopwatch | ❌ | ❌ | ✔ | ✔ | ✔ | ✔ |
| Game | ❌ | ❌ | ❌ | ❌ | ❌ | ✔ |
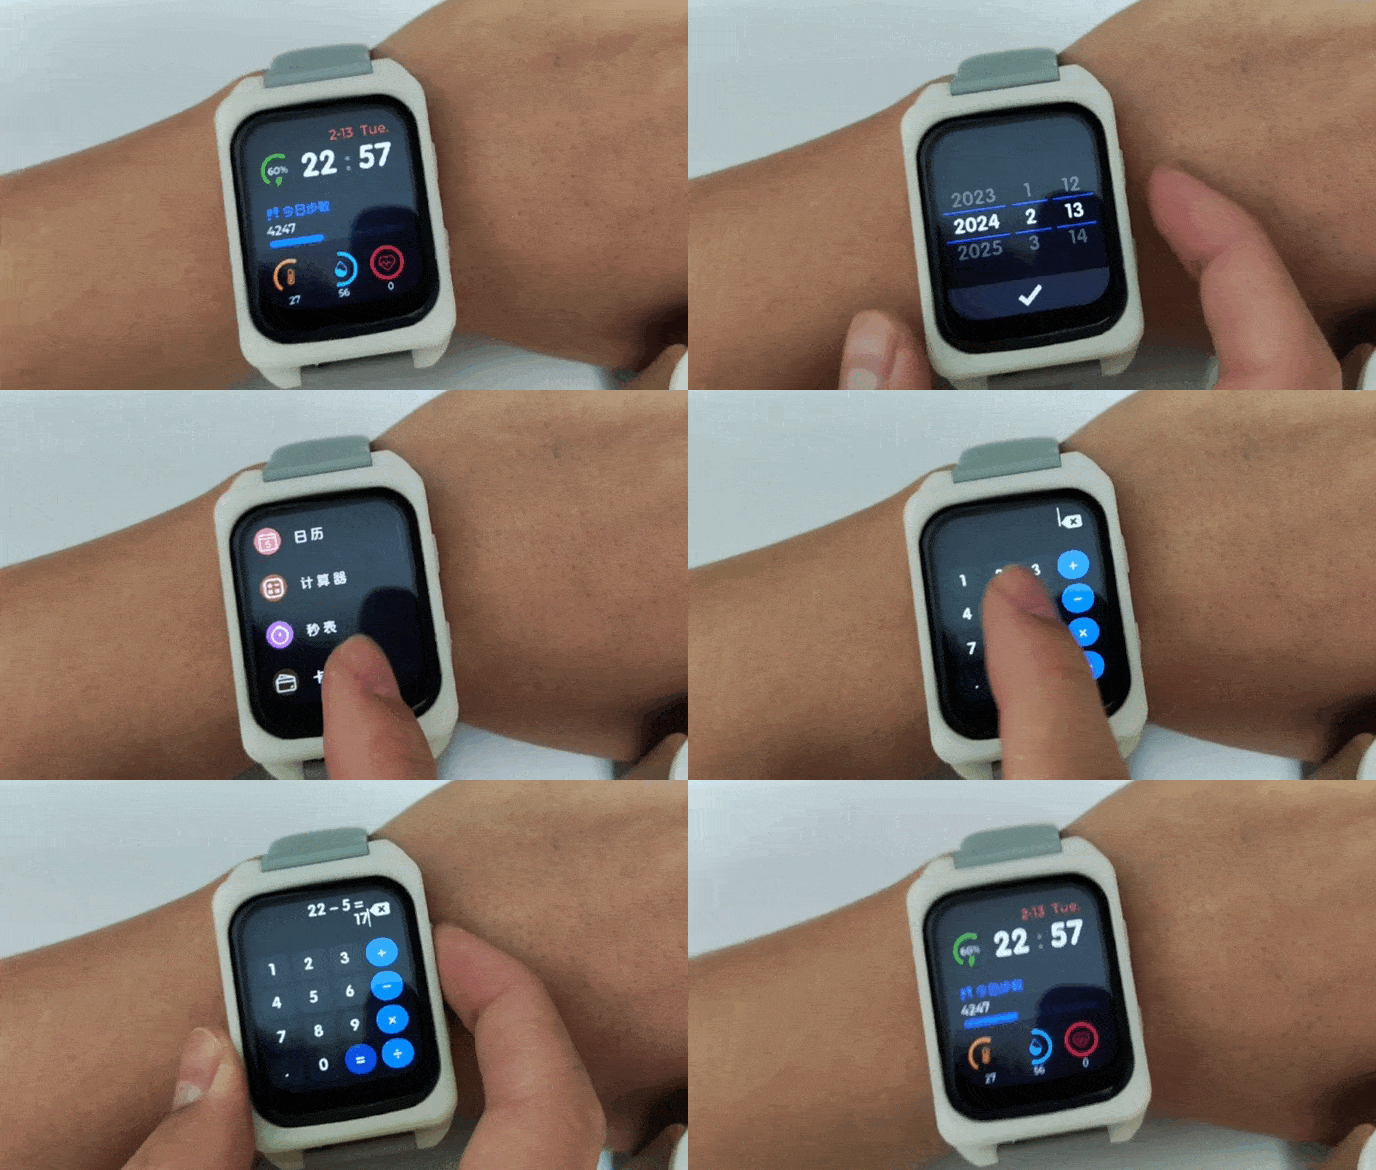
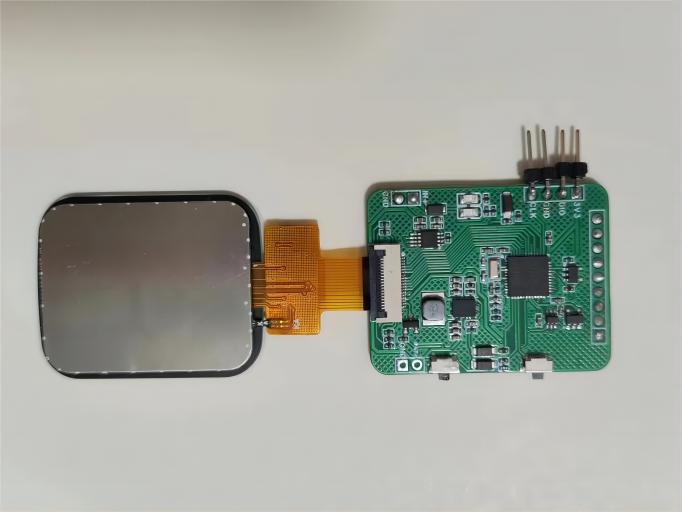
🌟V2.3 Pictures


💻Design Details of the Software Section:
1.Low Power Design
The watch has three modes. The first one is the normal operating mode, where the watch functions normally. The second is the sleep mode, where the MCU enters STOP mode while the MPU6050 still counts steps. The third is the shutdown mode, where the TPS63020 directly disables, resulting in no 3V3 power supply, only Vbat is powered.
At first, the watch used the motion function of the MPU6050 from sleep to wake up, opening interrupts to wake up. However, it was found that a large shaking motion was required to trigger the interrupt. Therefore, RTC timed interrupts were eventually used to wake up, followed by periodic checks of the current gesture status. If there is a wrist lifting action, it wakes up.
note: MPU6050 cannot directly use the DMP library. After initialization, the power consumption is high and some modifications are needed to reduce power consumption. Refer to the project code for specifics.
If using the KT6328A for Bluetooth, it is not recommended to disable Bluetooth because its standby power consumption is very low.
As For Test, when I testing with 3V3 as power supply, the power consumption is approximately 70-80mA in operating mode, around 1mA in standby mode, and almost no power consumption in shutdown mode, with only the RTC working. However, there was no testing of the power supply connected to the Vbat terminal powered by DCDC, and this power consumption depends entirely on the efficiency of the DCDC.
2.Heart Rate Blood Oxygen
The blood oxygen part has not been done yet.
Originally, the heart rate calculation used the official library, but the calculation was too slow. Later, it was changed to a simple peak detection algorithm written by ourselves. The PPG signal of the EM7028 is as shown in the figure below:

3.Data Storage
Currently, an external EEPROM is used for data storage, mainly for storing settings, etc. For details, refer to the Datasave.c file.
4.Page Switching Logic
To implement page switching and return to the previous page, a stack is used to store the corresponding pages. For example, using user_Stack_Pop(&ScrRenewStack); pops the previous page, then enter a new page and use user_Stack_Push(&ScrRenewStack, (long long int)&ui_HomePage); to push the pointer address of the new page onto the stack. Note that you cannot directly push something like ui_HomePage onto the stack during the push operation. It dynamically changes, BIG NOTE!
//key1 pressed
if(keystr == 1)
{
    user_Stack_Pop(&ScrRenewStack);
    if(user_Stack_isEmpty(&ScrRenewStack))
    {
        ui_MenuPage_screen_init();
        lv_scr_load_anim(ui_MenuPage,LV_SCR_LOAD_ANIM_MOVE_RIGHT,0,0,true);
        user_Stack_Push(&ScrRenewStack,(long long int)&ui_HomePage);
        user_Stack_Push(&ScrRenewStack,(long long int)&ui_MenuPage);
    }
    else if(ScrRenewStack.Data[ScrRenewStack.Top_Point-1] == (long long int)&ui_HomePage)
    {
        ui_HomePage_screen_init();
        lv_scr_load_anim(ui_HomePage,LV_SCR_LOAD_ANIM_MOVE_RIGHT,0,0,true);
    }
}
5.Calculator Logic
The logic of the calculator is a classic problem in computer science. The classic approach is to use two stacks, one for operators and one for numbers, and then perform operations such as popping from stacks and calculations. Taking 1+ as an example, the specific process is shown in the animated image below. However, there is a problem with decimal points. The animated image only demonstrates the logic of integer calculations. For details on calculations involving decimal points, refer to the code.
The specific process is as follows:
Traverse the expression. When encountering an operand, push it onto the operand stack.
When encountering an operator, if the operator stack is empty, push it onto the operator stack directly.
If the operator stack is not empty, compare it with the top element of the operator stack: if the current operator has higher precedence than the top operator, continue to push it onto the operator stack. If the current operator has lower or equal precedence compared to the top operator, pop two operands from the operand stack, pop the top operator from the operator stack, perform the operation, and push the result onto the operand stack.
Continue to compare the current operator with the top element of the operator stack.
Continue to traverse according to the above steps. After traversal is completed, pop the elements from both stacks and perform the final calculation to obtain the final result.

6. LVGL Simulation Configuration for Windows in VSCode
Reference link: https://blog.csdn.net/weixin_49337111/article/details/136536375
The code that has been modified and can run is placed in the folder named lv_sim_vscode_win. You may be able to directly open it using VSCode.

 kingham xu