 Giulio
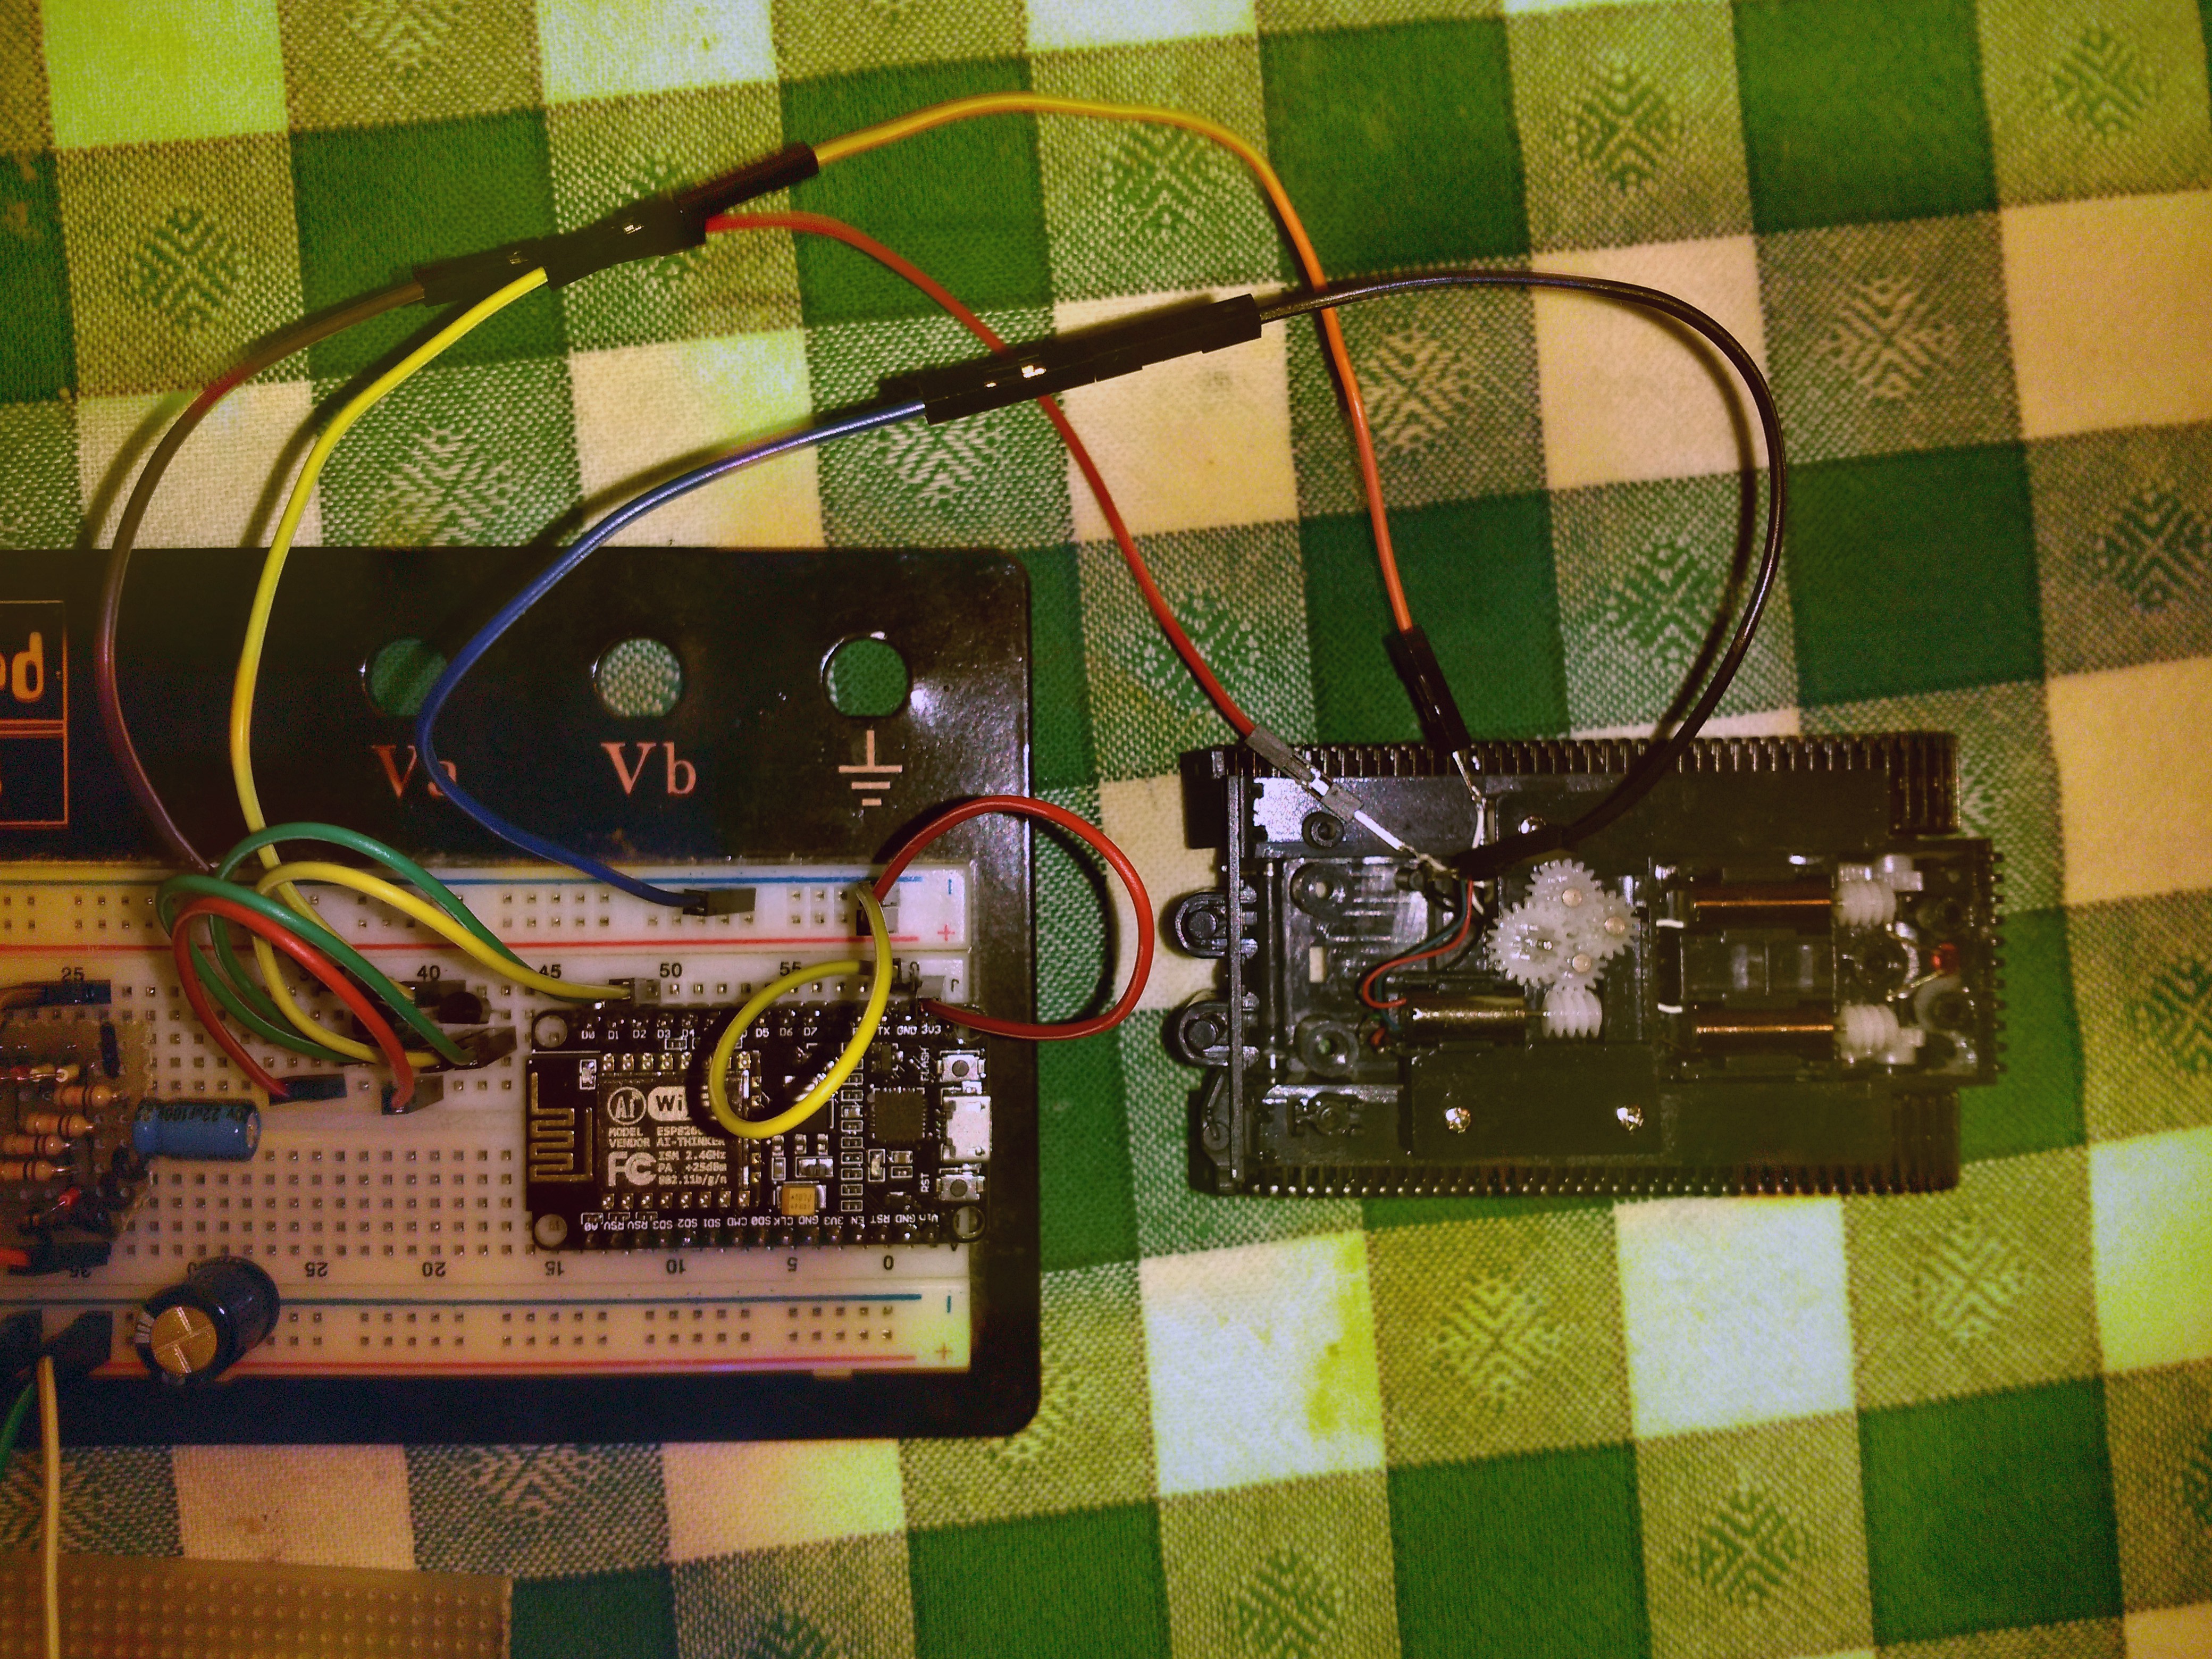
I did chose to prototype on the NodeMCU, since it is much easier to flash than on a minimum ESP-12.
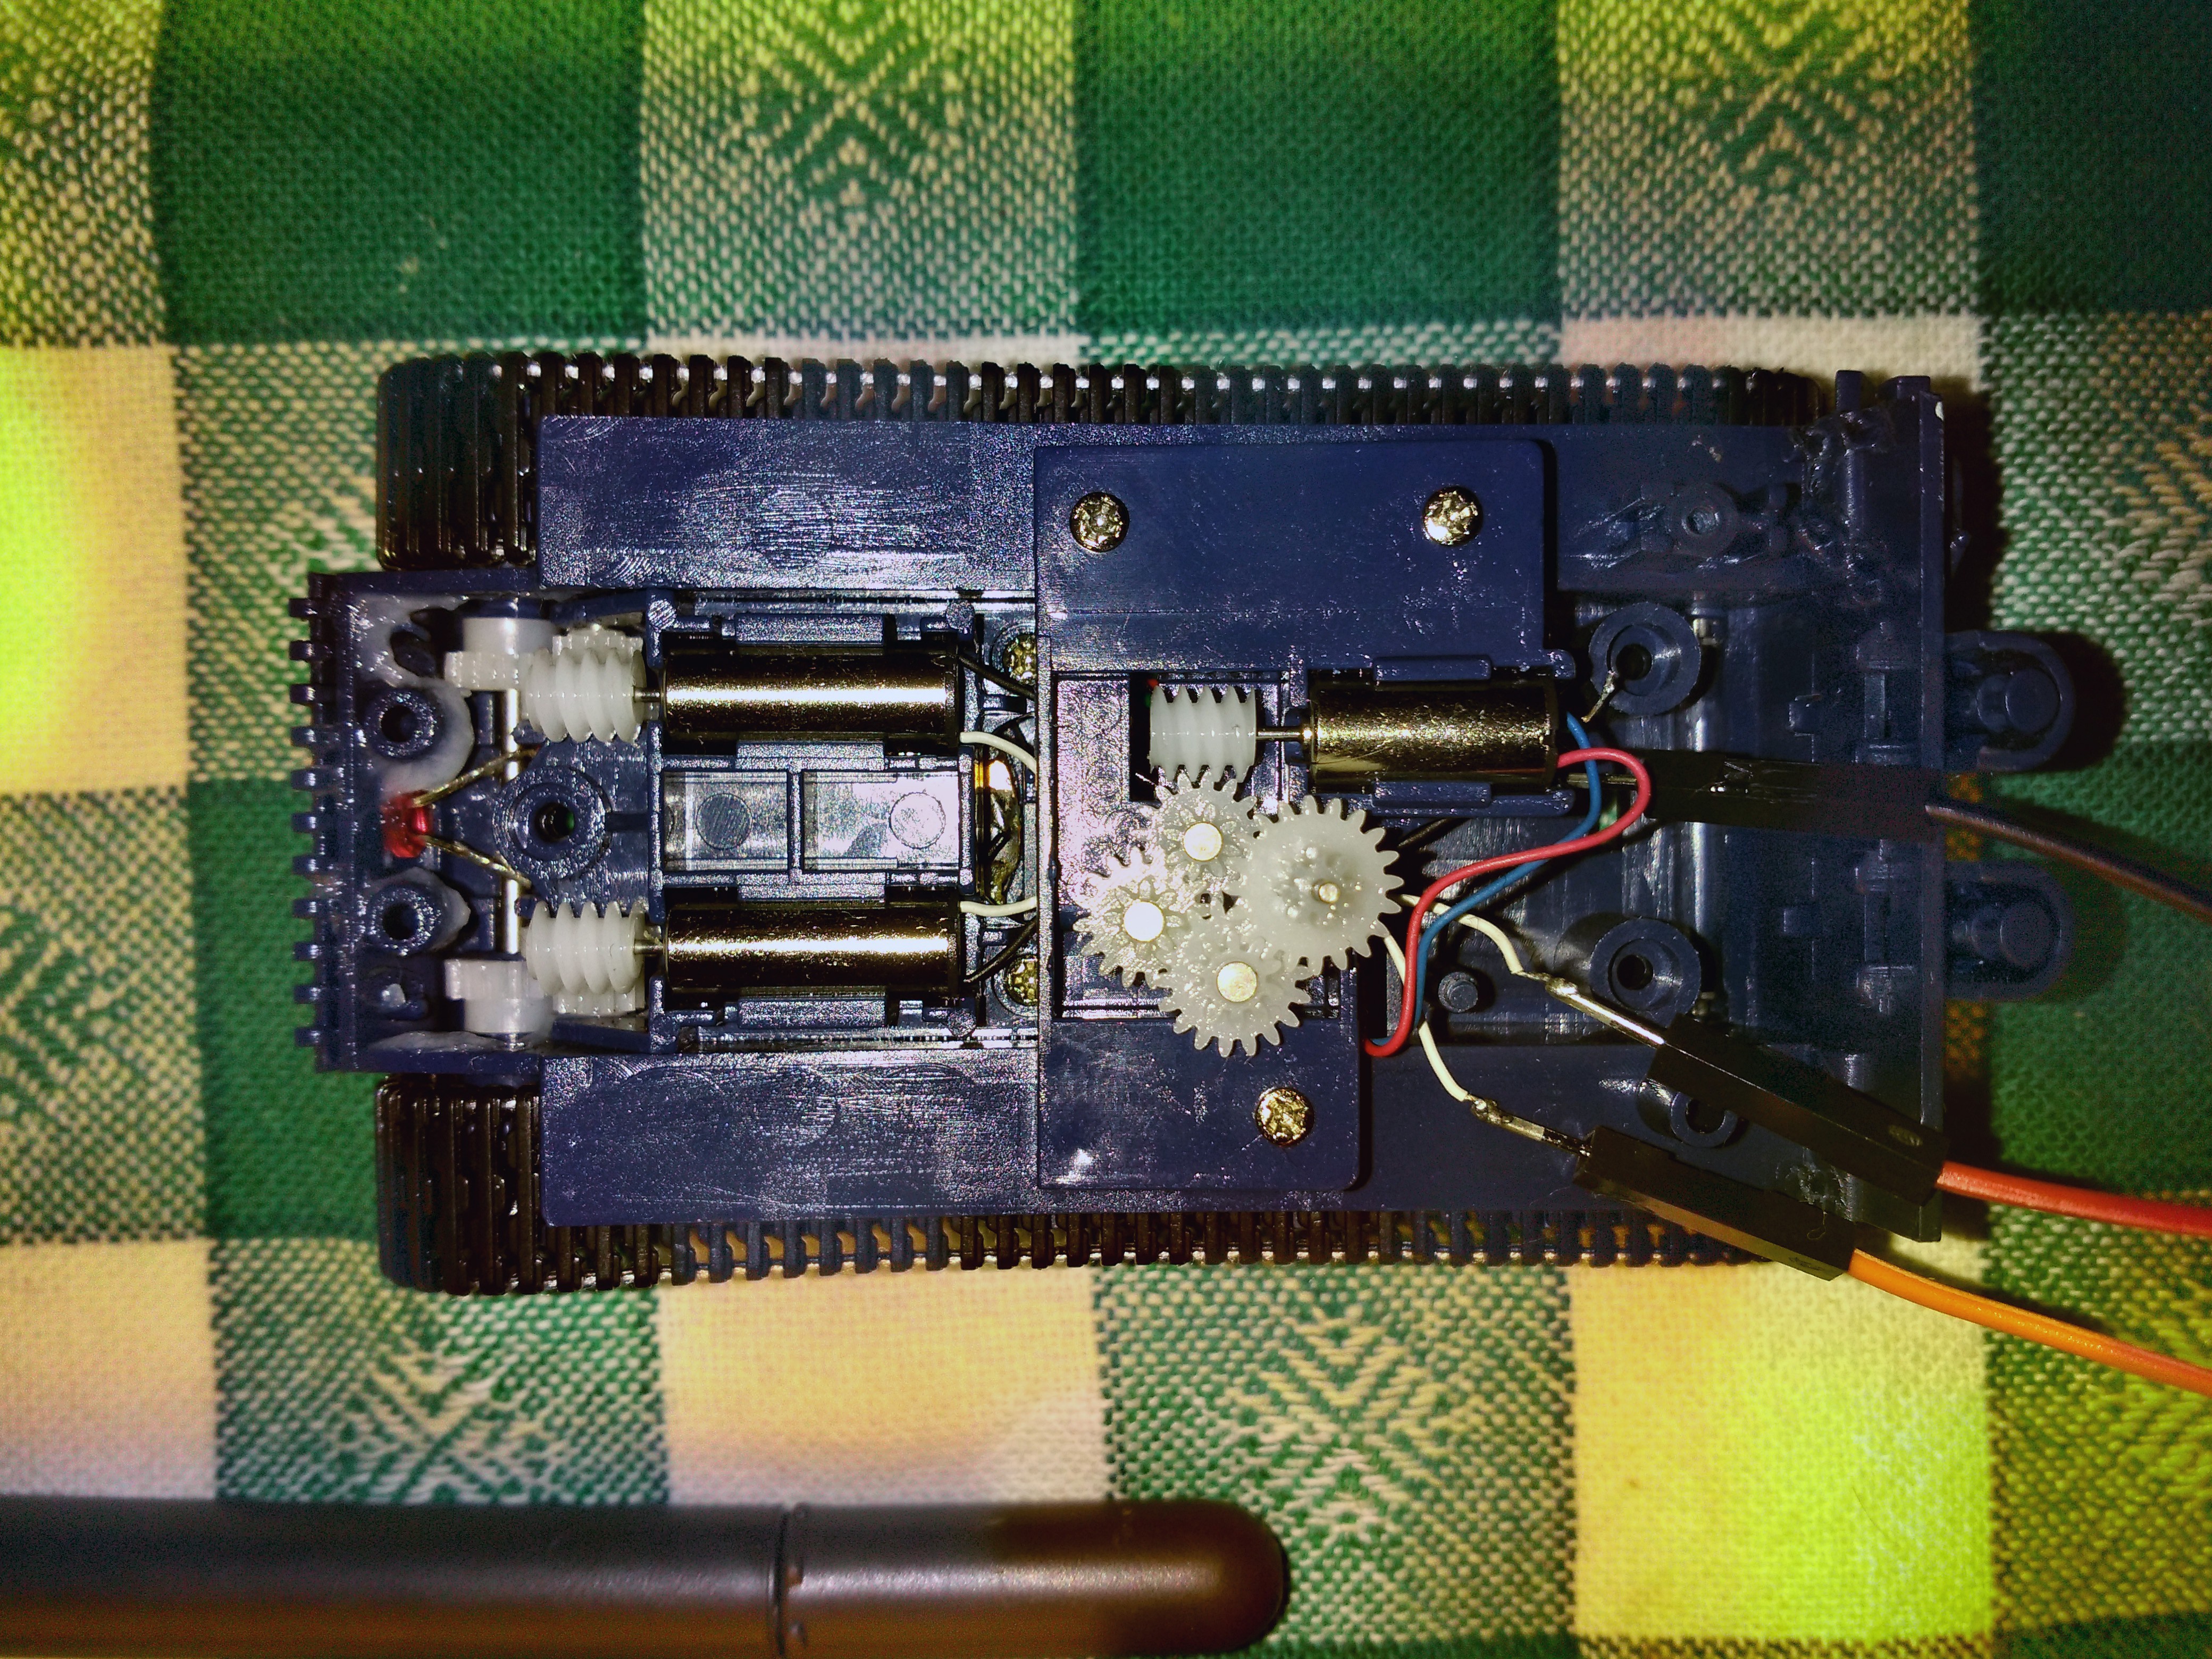
I did opened the tank and revealed the main motor leads, to those I did attached some
breadboard wires, in order to drive the motors from 2 transistors. Remember that the ESP-12 maximum pin power is 12mA and it will not drive the tank, you can also risk to burn your ESP by doing so.
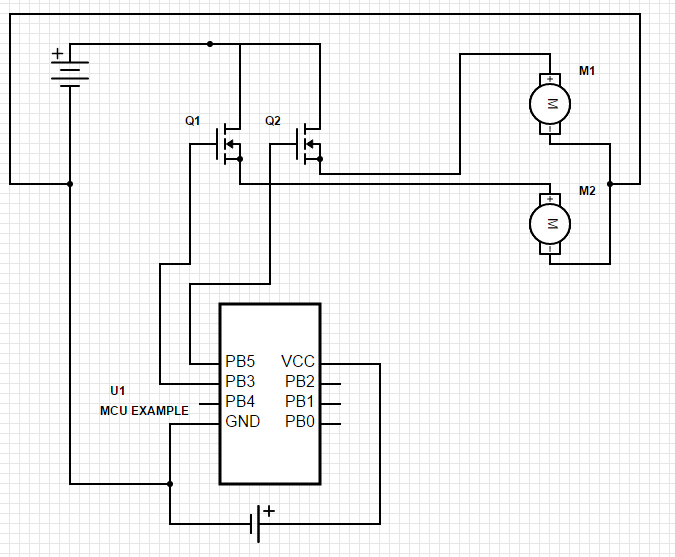
For the prototyping purpose I am not going to order an H-Bridge yet, I will use some general purpose transistors to relay the battery current to the motors. By doing so I will only be able to go forward because inverting the motor polarity is impossible.
It would be better to pull the negative with an NPN transistor, but it is working very well also in this case.
The soft PWM frequency that worked the best and had the most torque for low motor speeds in my case is 50hz, much less than the default 1000hz from the Arduino compiler.
The code below here shows the main functions that i did used to obtain the desired effect. Be careful not to analog Write a negative value, this will result in strange behaviors given by overflows.
pinMode(D1, OUTPUT);
pinMode(D2, OUTPUT);
analogWriteRange(100);
analogWriteFreq(50);

analogWrite(D1,RightPower*(RightPower>0));
analogWrite(D2,LeftPower*(LeftPower>0));
Next up: application code.
Discussions
Become a Hackaday.io Member
Create an account to leave a comment. Already have an account? Log In.