Edward Li
-
Is this thing on? -Eric
05/28/2017 at 18:38 • 0 commentsHey everyone,
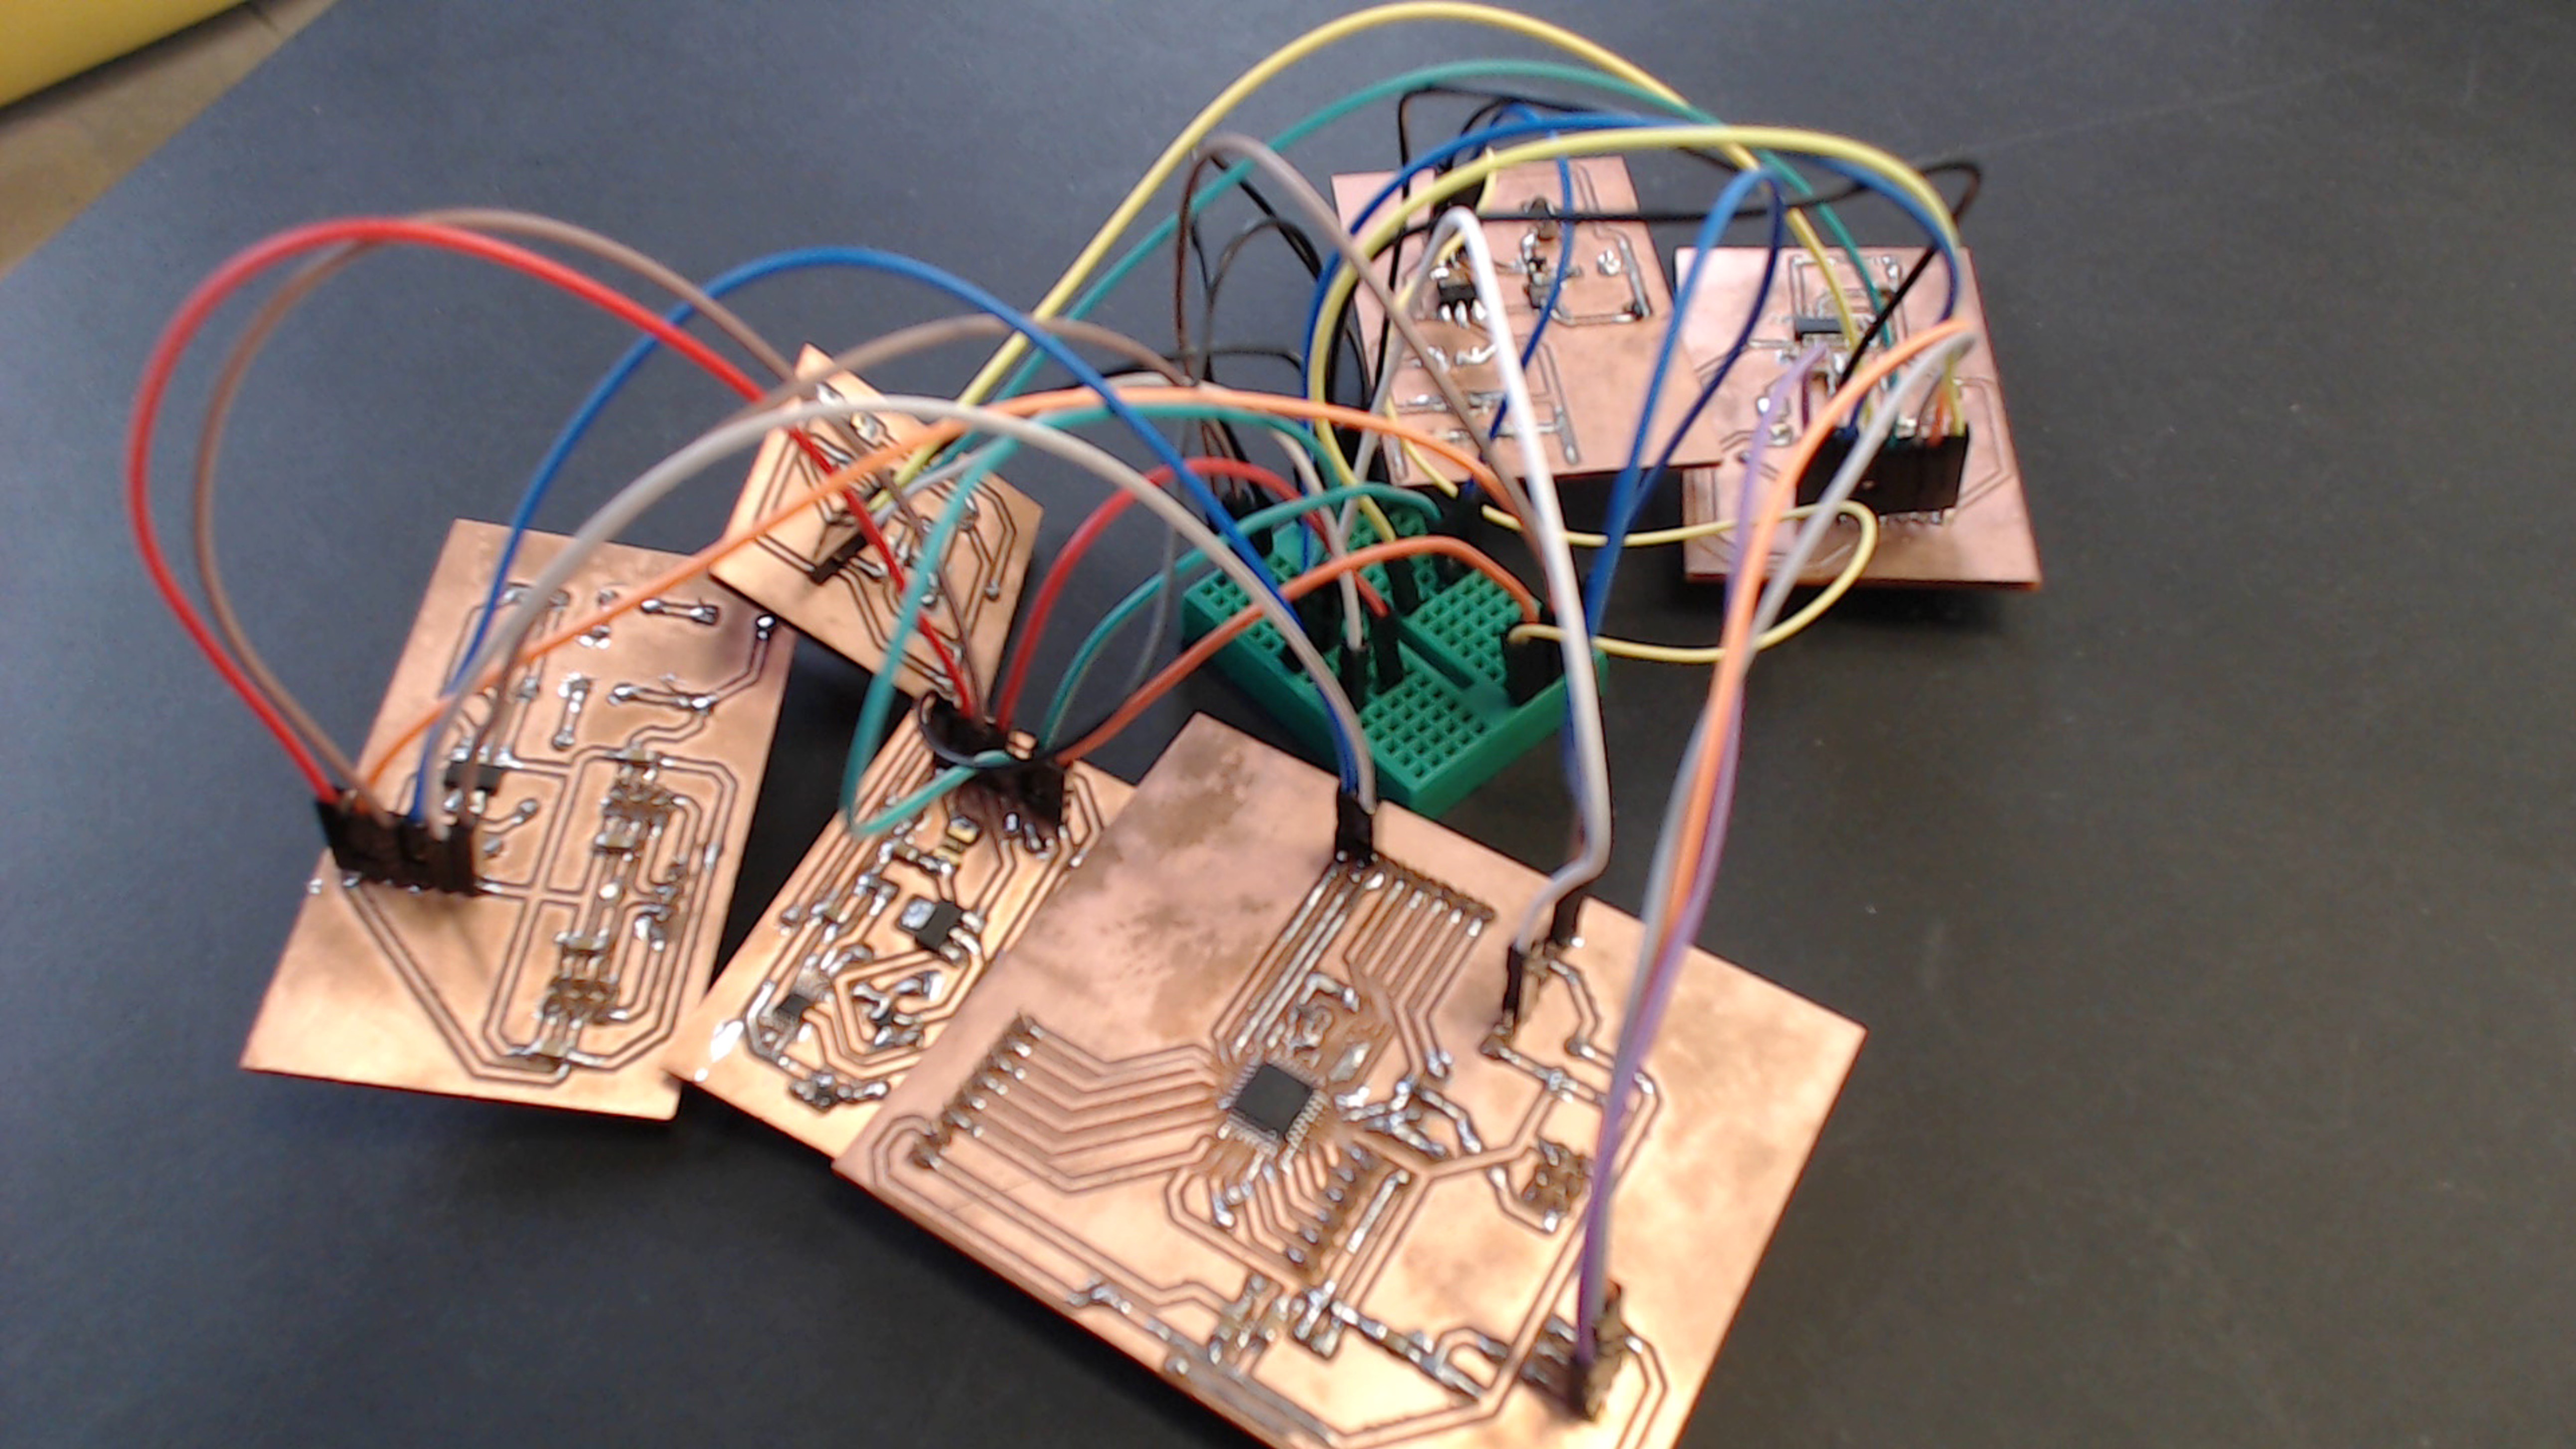
As promised, here is the attempt to Voltron all the subsystems together;
![]()
It is without a doubt, a big ugly mess.
Luckily though, it works.... sort of. The entire board receives power as intended, however I was unable to burn a bootloader onto the ATmega328P that acts as the core processor of the board. My best guess is that some of the traces on that subsystem board are non-functional. Not surprising to me but inconvenient. I will be making a breakout board to see if I can successfully burn the bootloader when I am only focused on the chip. Hopefully it works. If not then I'll spend more time in the tank figuring out what the real problem is.
Till next time,
-Eric
-
I know what I'm doing 2: The return of Jafar -Eric
05/23/2017 at 04:29 • 0 commentsHey guys,
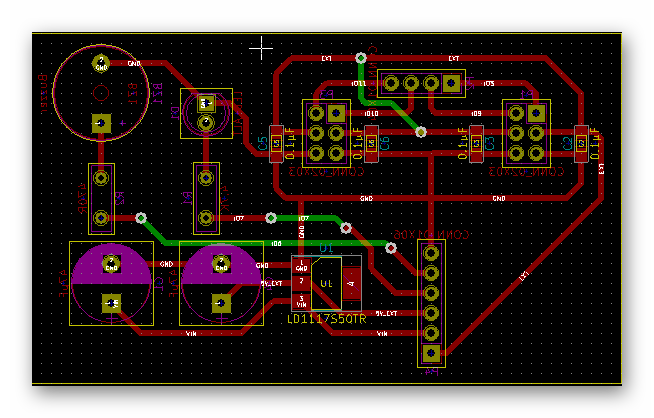
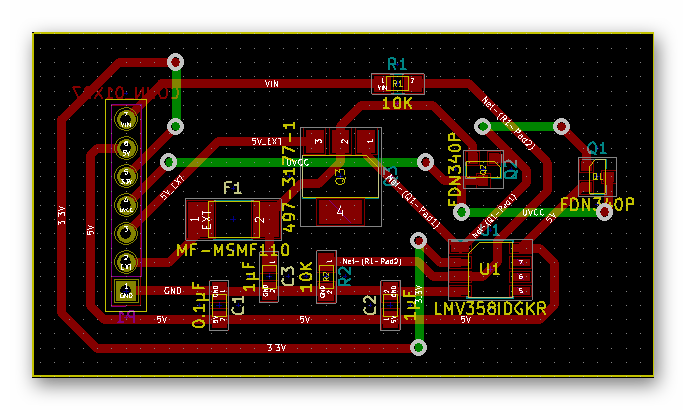
So I'm finally wrapping up the process of creating and testing all the subsystems in preparation for creating the integrated layout. The last one that I needed to route was the 'Special sauce' so to speak, that makes our board different from a stock Arduino Uno.
![]()
BOOM
So, in addition to routing and milling this board I have tested the power reg., USB, and power management subsystems separately and together. .....They worked! Wouldn't it be nice if when I test all the subsystems together, they all just work the first time. A man can dream.
Till next time,
-Eric
-
New bottom?!
05/20/2017 at 14:58 • 0 commentsHello internet and ..
![]()
Last week you all saw my wonderful failures of my new bottom. But despite all that, there has been some modifications that i started working on. One major thing that i found out is there are still issues with the back of the Rev C board that i did not take into account for. The pins on the bottom is still and issue that i needed to resolve. But after i edited the bottom, i found that the new one is perfect.
![]()
Now with the new board, im good to go for changing the sides and so forth! How exciting, Next step is to finish the drafting and shrinkage.
Until next time!
- Ryan
-
Oh the mistakes
05/13/2017 at 23:01 • 0 commentsWelcome back to the blog people and ....
![]()
Last week we were talking about injection molding, and there were a lot of issues that i had to cover. One of the biggest problem that im trying to solve is to make our rev c boards work with the new ejection molded pieces. And let me tell you, it's not going to be easy. Especially with things like this happening...
![]()
Ah yes, tis broken....
Ill have to try this again with a different design.
Welp, ill see you guys next time!
-
I think I finally know what I'm doing -Eric
05/13/2017 at 21:25 • 0 commentsHey everyone,
Since I checked in with you last time I've just been doing more of the same. That is, routing the subsystems for the Barnabas bot noggin. I am almost done with this process and will soon begin the integrated layout of the board.
So, not super exciting, BUT, I feel like I've leveled up as far as routing goes.
Below is an image of me routing on KiCad earlier this week;
![]()
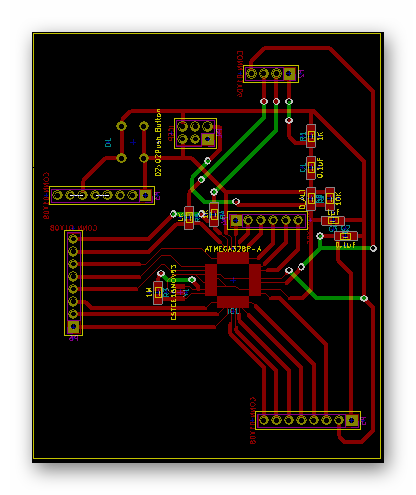
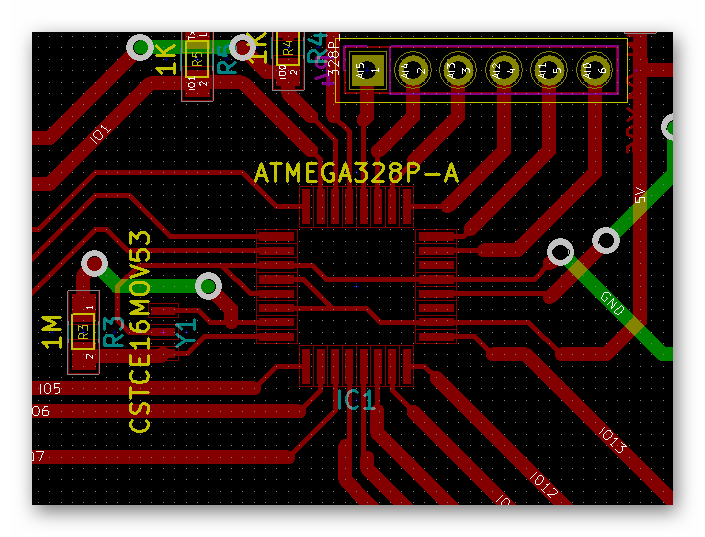
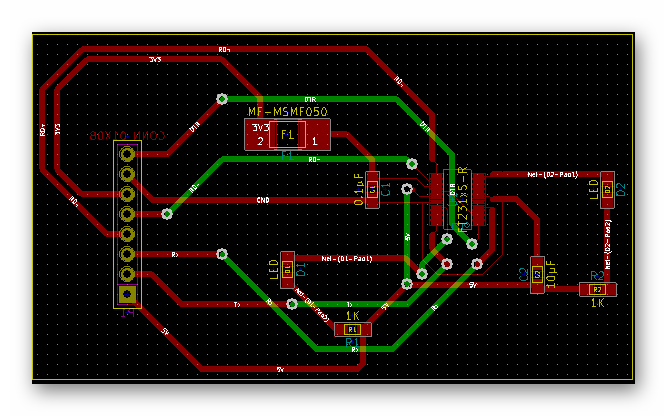
Maybe I'm giving myself to much credit but I am very proud of the PCB I made for the core processor board, take a look;
![]()
![]()
I did actually have a plan when routing this board. The first thing I did was make specific GND and 5V paths so that I could easily navigate additional tracks to power. The second was to intentionally branch the tracks of the ATmega328P outward before actually trying to navigate it into its proper place. Keeping those two things in mind really seemed to help me route the board. Anyway that's all I've got for today.
Till next time,
-Eric
-
WoodBot rev2!
05/10/2017 at 22:49 • 4 commentsHey guys,
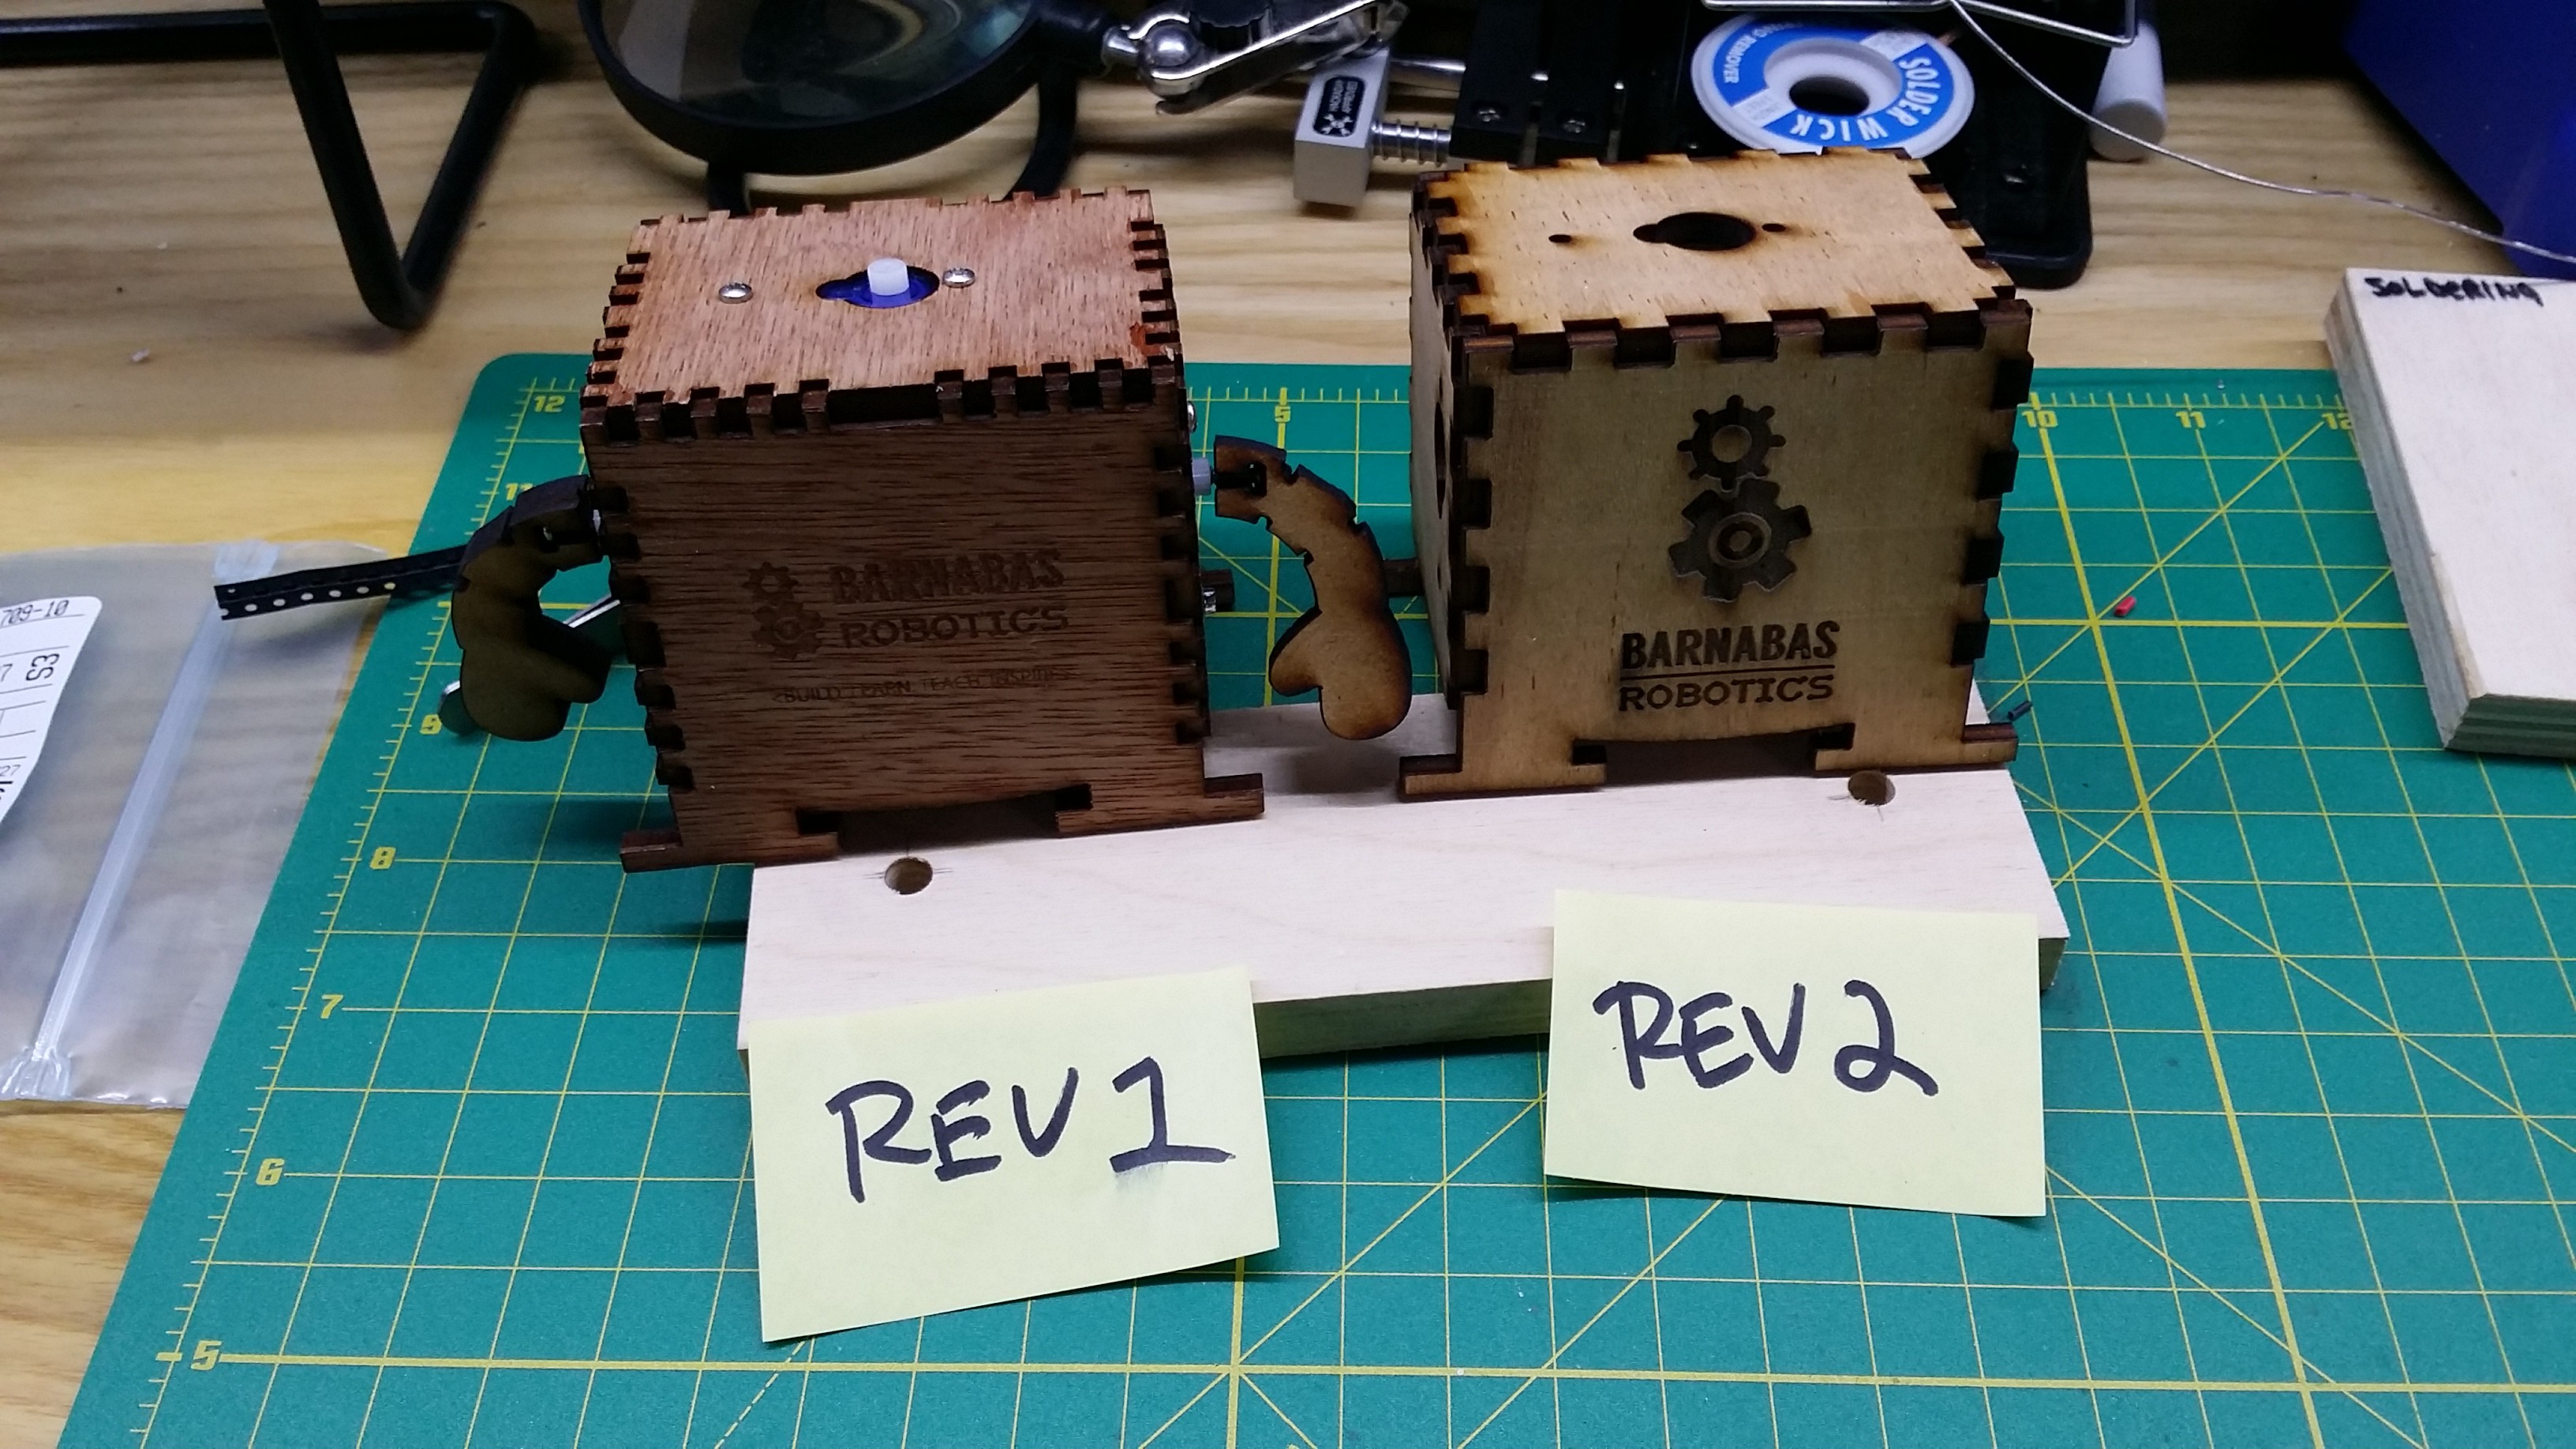
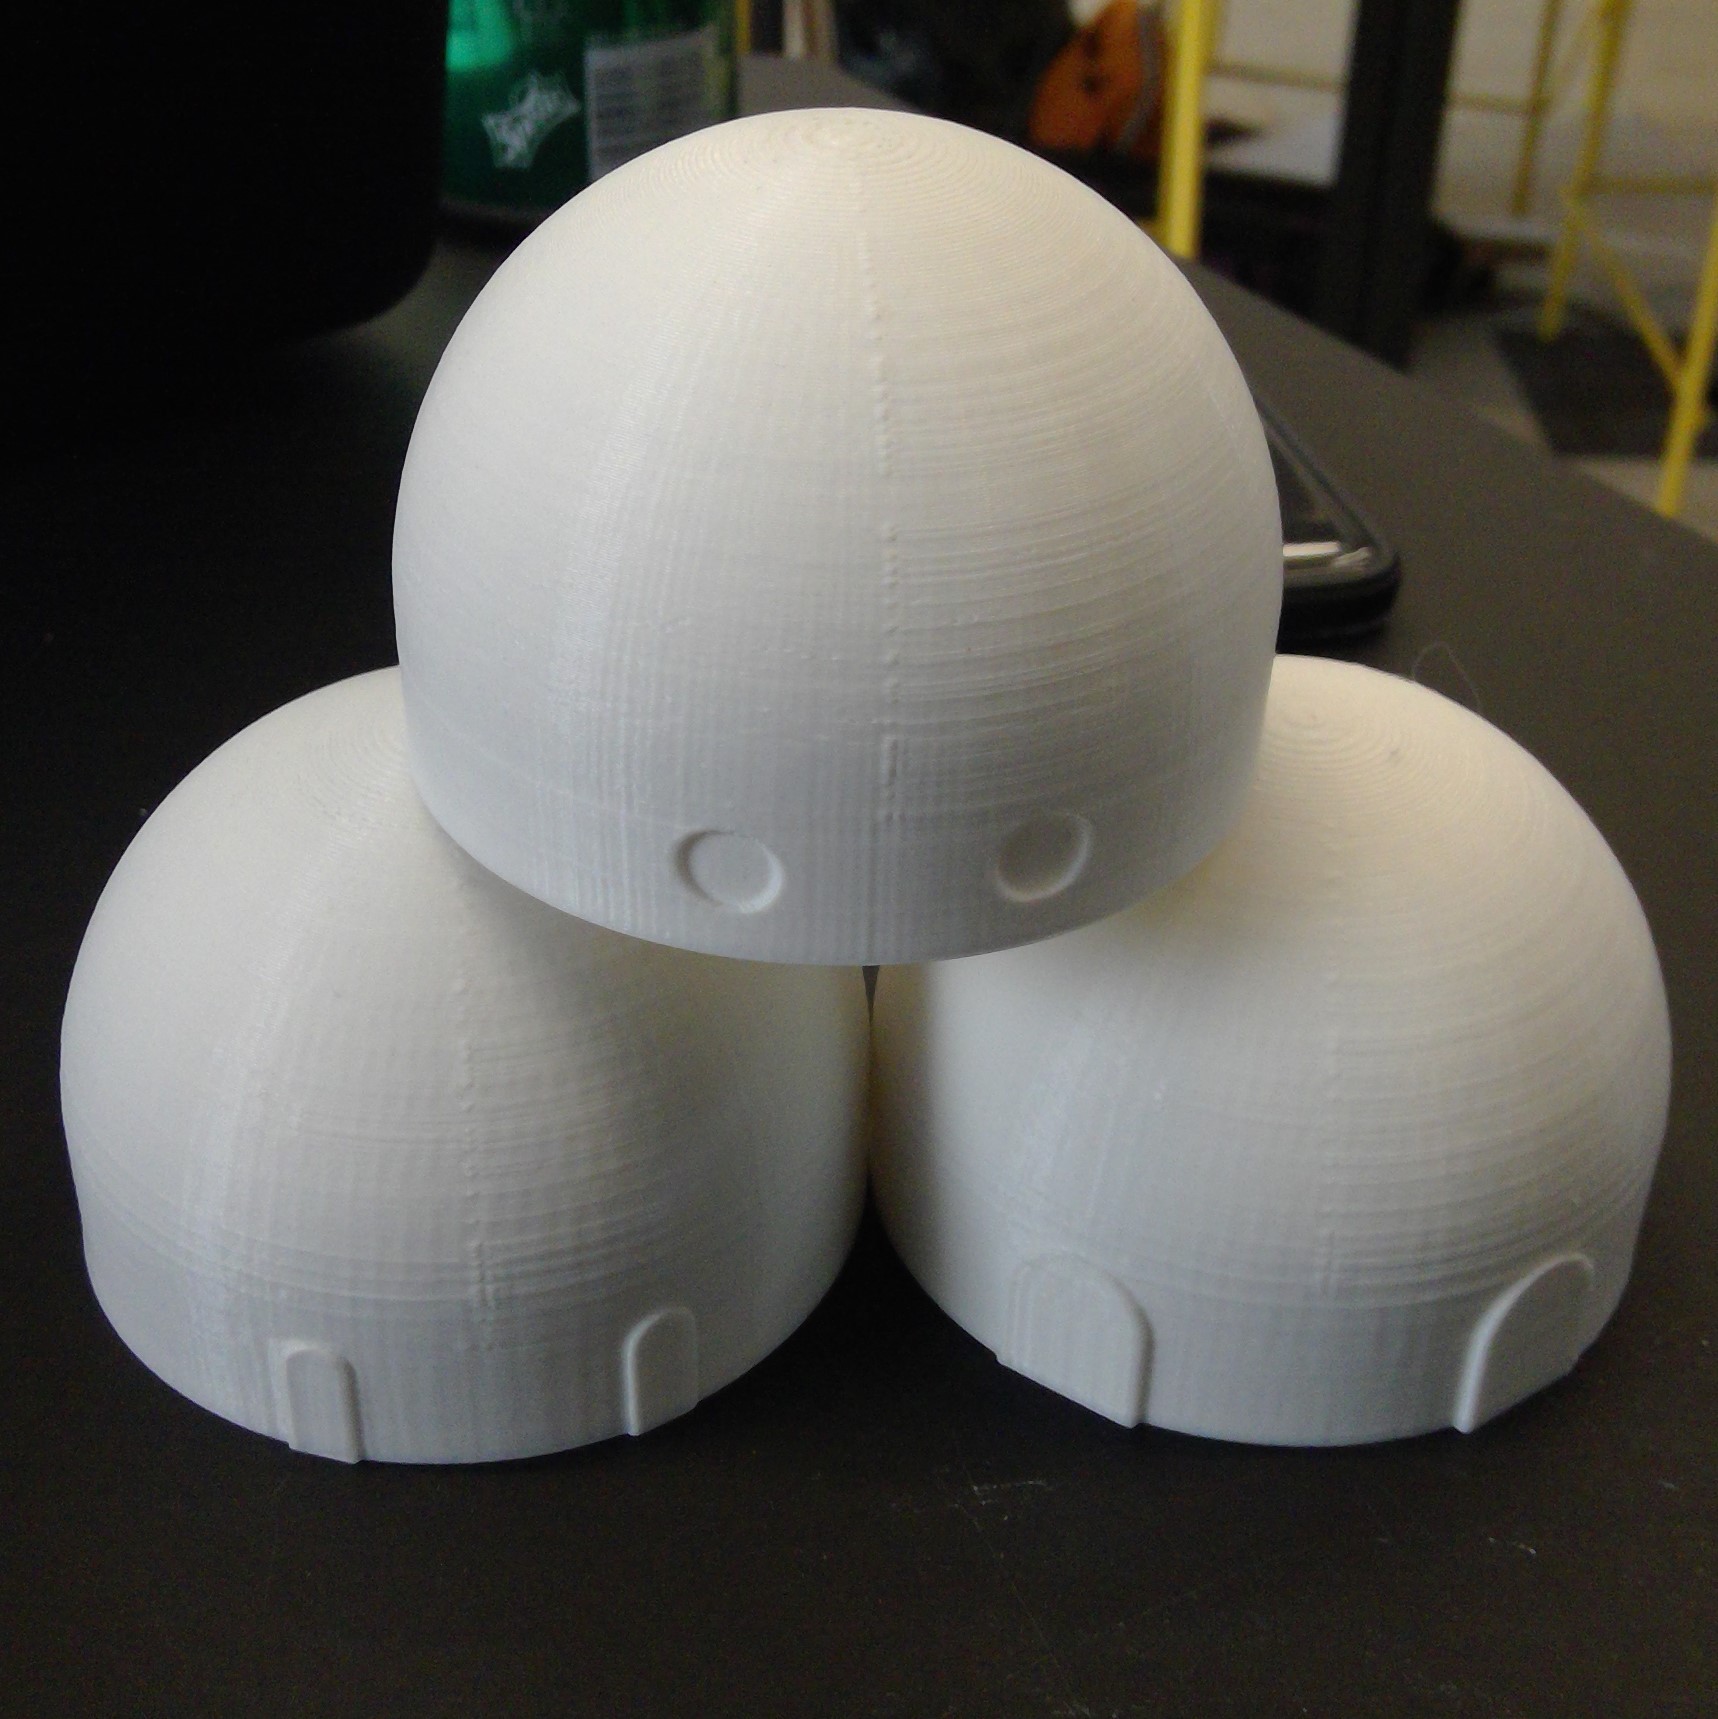
Quick update on our wood-bot. Still working on a solution for our head or arms. For now, we did an iteration on the design of the interlocking faces.
Which one do you like better?
More later!
Ed
![]()
-
More subsystems, first BOM
05/06/2017 at 20:20 • 0 commentsHey everyone,
I know it's been awhile since I checked in with you guys so I thought it was time for an update. Since last time I have completed two more subsystems, although they're a bit ugly. Let me show you;
![]()
![]()
My main issue with how these look is the number of vias I had to drop to connect everything. That's going to make them more annoying to prototype on the FR1 boards. I took Dan's advice as far as routing, don't bother making it look pretty, just make it work. As you can see that's exactly what I've done.
In addition I have created a BOM, bill of materials, to get an idea of the board's cost. It's very rough in it's current state and it is likely that many of the components currently listed on it will change. However it's an important step for us because it gives us a current dollar amount for the board. We're now aware of how far away from the cost goal we are and can adapt as needed.
Well, that's all I have for you this week.
till next time,
-Eric
-
And the drafting begins
05/05/2017 at 20:06 • 0 commentsHello people of the internet and...
![]()
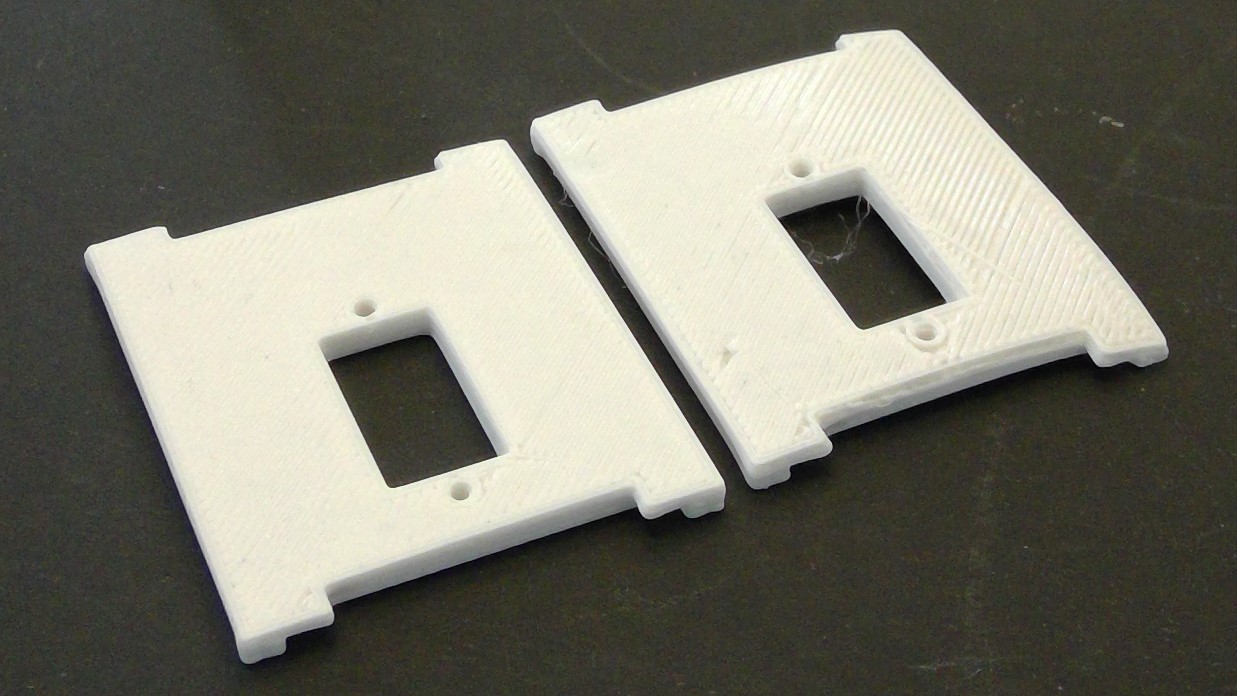
Unfortunately, not much has happened but i can say for sure that i've gotten 2/3 pieces of the robot that needs to be drafted with the 3 degrees . The hardest part of this was figuring out what sides are vertical and if so, how will i draft it. Since a majority of what im doing is altering the positive of the mold, it isn't the easiest to guess how it will come apart especially since i practically have no idea what im doing. But that aside, i also have to keep in mind that there is the issue of how my draft angles will interact with the other pieces. Will they go together? Or will they no longer secure itself as rigidly as before? These are all questions that can be answered after printing some of them out. But, there was an issue.....
![]()
As you probably could not tell from this image, the prints that i waited for are not flush. Flush in a sense that they are not solid flat pieces but curved. This is an issue with the adherence of the printer base and the plastic during the printing process. Therefore i need to print another one.... again...
Well, that's all i have for this week, until next time!
![]()
-Ryan
-
Injection Time
04/28/2017 at 17:07 • 0 commentsHello people of the internet...
![]()
Now this week is a shorter one because i don't have that much content to provide. This week i added another version of the head but despite that, i need to start making everything injection mold ready.
![]()
This week we talked to the resident engineer, Dan, and he bestowed me knowledge about how to prep my parts for making the molds.
![]()
Ah yes, it's a lot more than i understand but despite all that, no one in the makerspace knows how to do it either. All i really know what to do is make sure no vertical line is 90 degrees. I hope everything will work well.
Well, until next time...
![]()
-Ryan
-
Finally! subsystems -Eric
04/22/2017 at 20:41 • 0 commentsHey everybody,
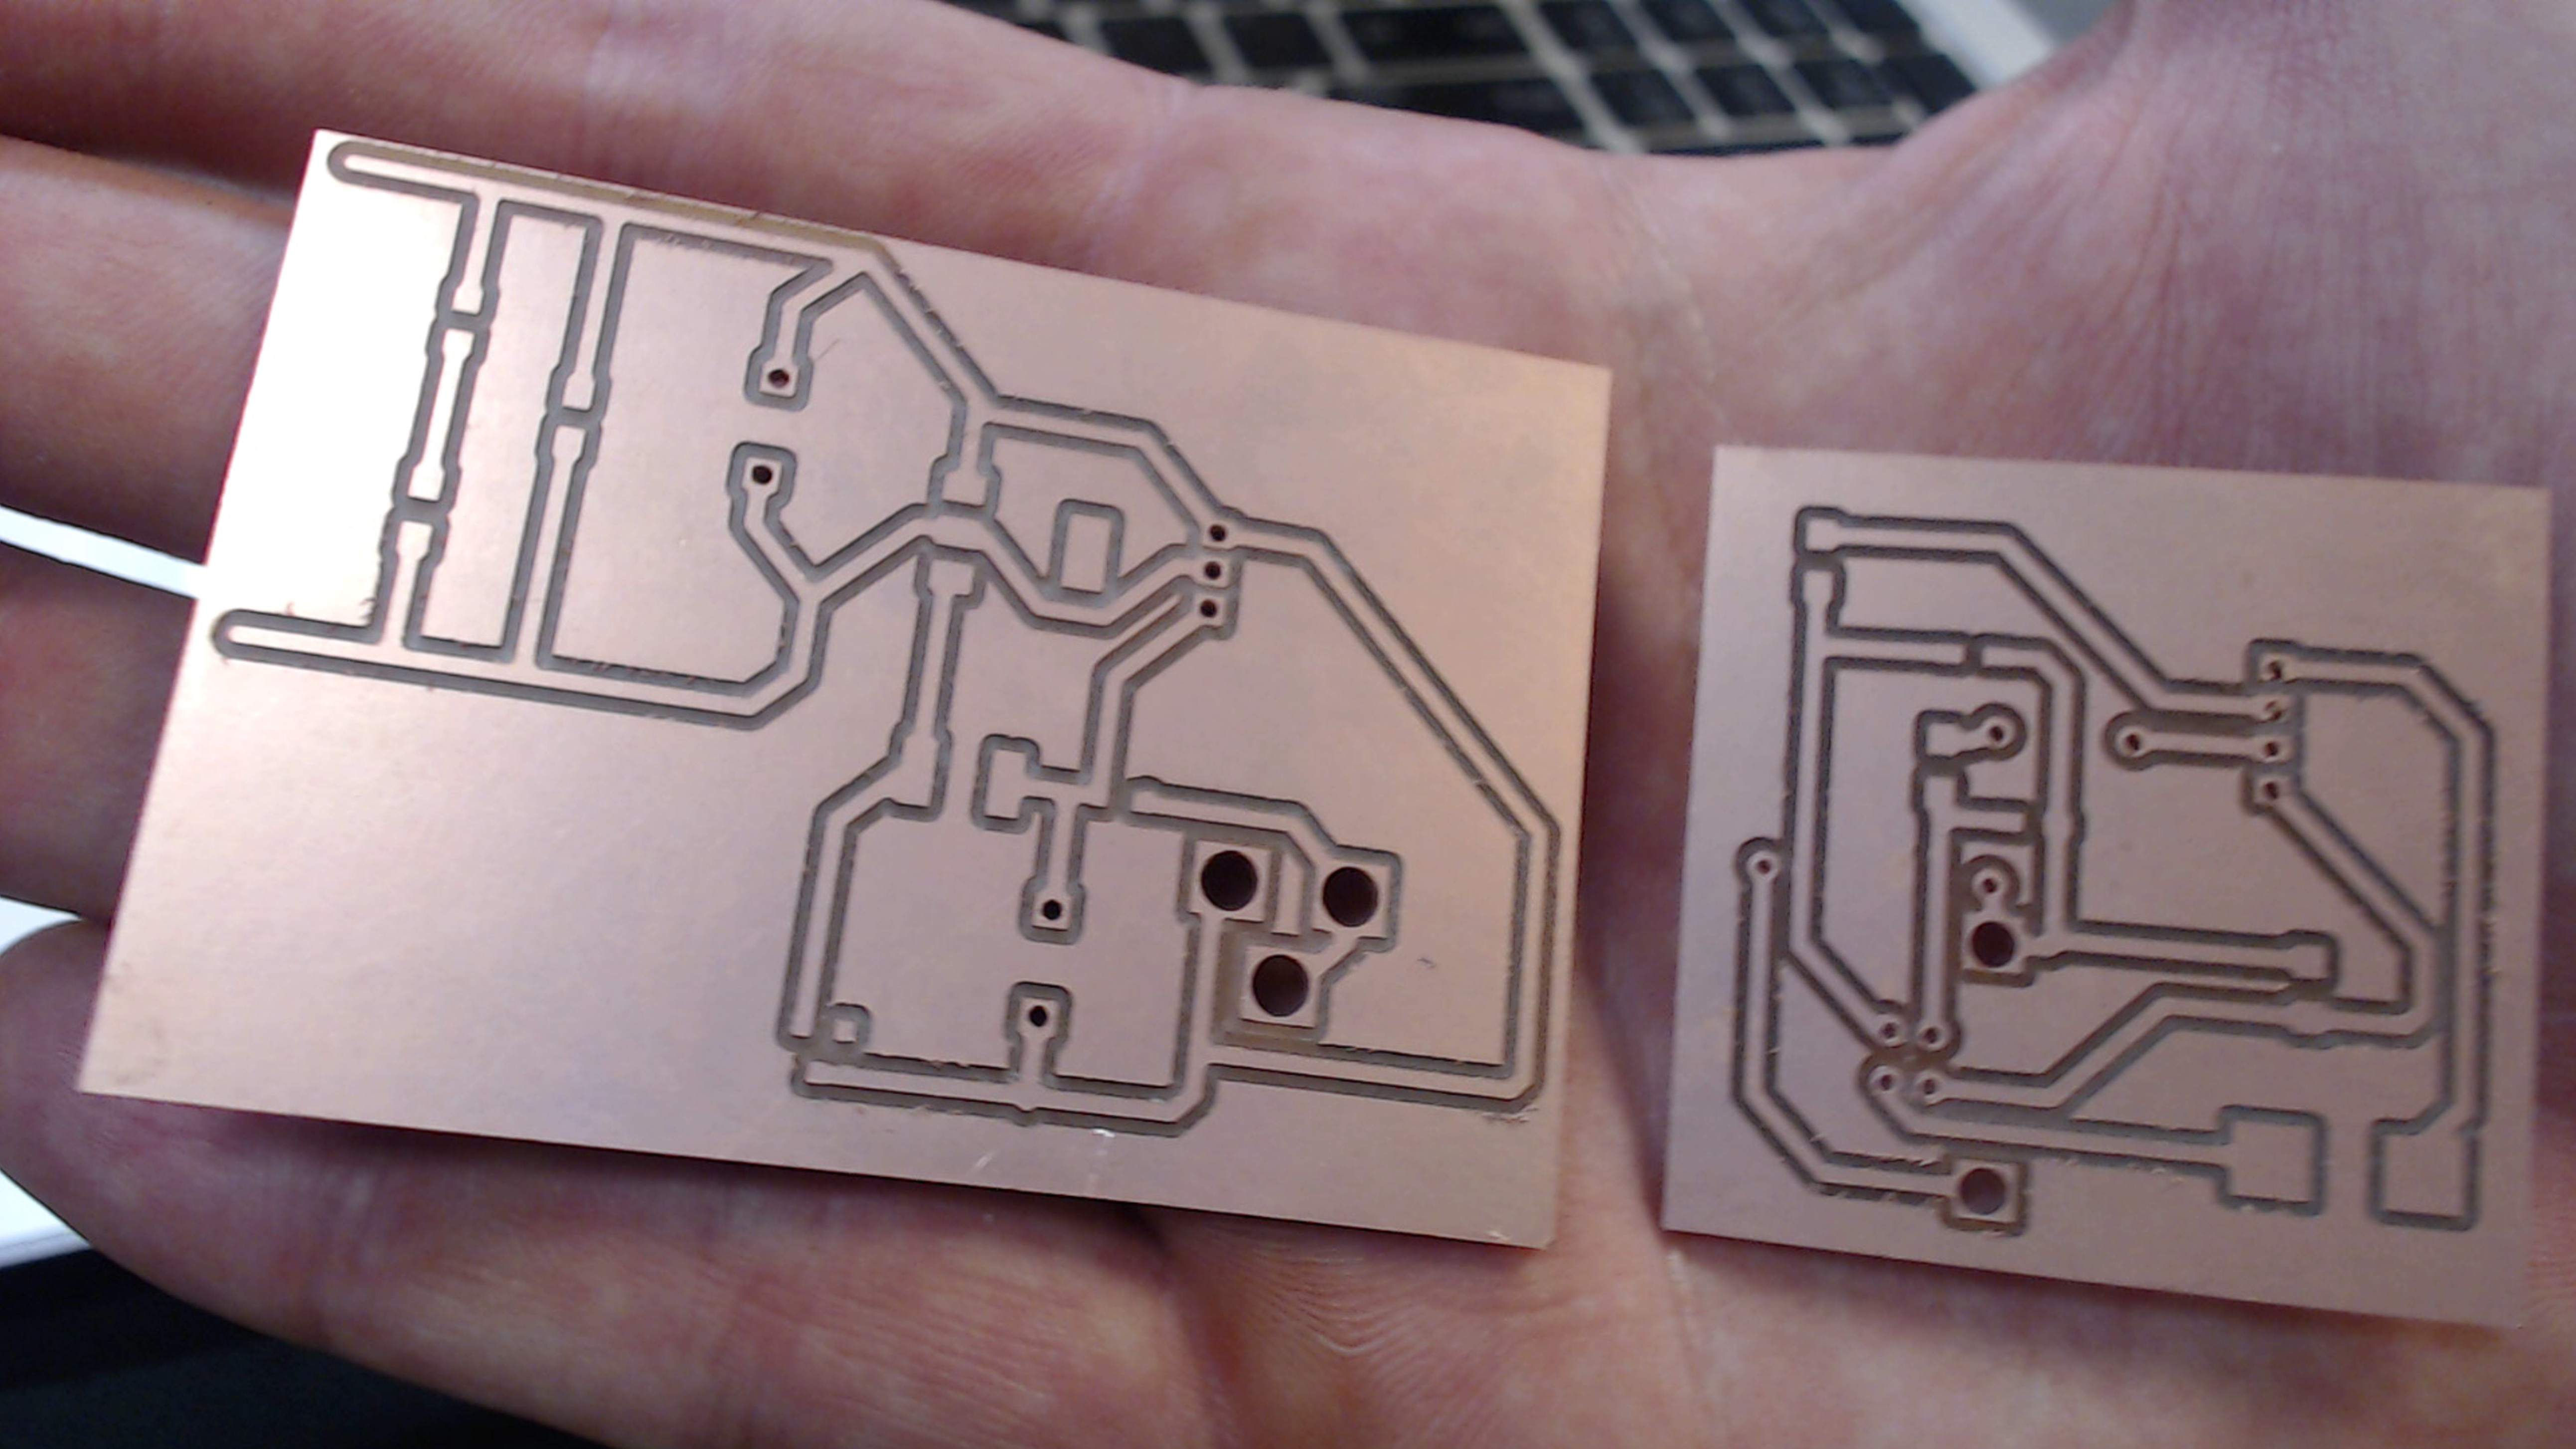
I'm excited for this update because I finally have some useful boards to show you, Check them out;
![]()
On the left is the power regulation subsystem and on the right is the USB interface subsystem. Now all I need to do is solder the appropriate parts on to each board and I will be ready to test them and see if my alterations have the desired effect. In addition to soldering and testing these boards I have several subsystems that I have yet to layout or mill, as well as several parts that need to be ordered. I'm finding that the aspect that I am least comfortable with is putting together a BOM for the parts needed. Luckily I will get plenty more practice before this is all over.
Till next time,
-Eric
Barnabas-Bot
An open-source educational robotics project that inspires elementary and middle school kids to invent through building their own robot