Edward Li
-
Finally Something Works -Eric
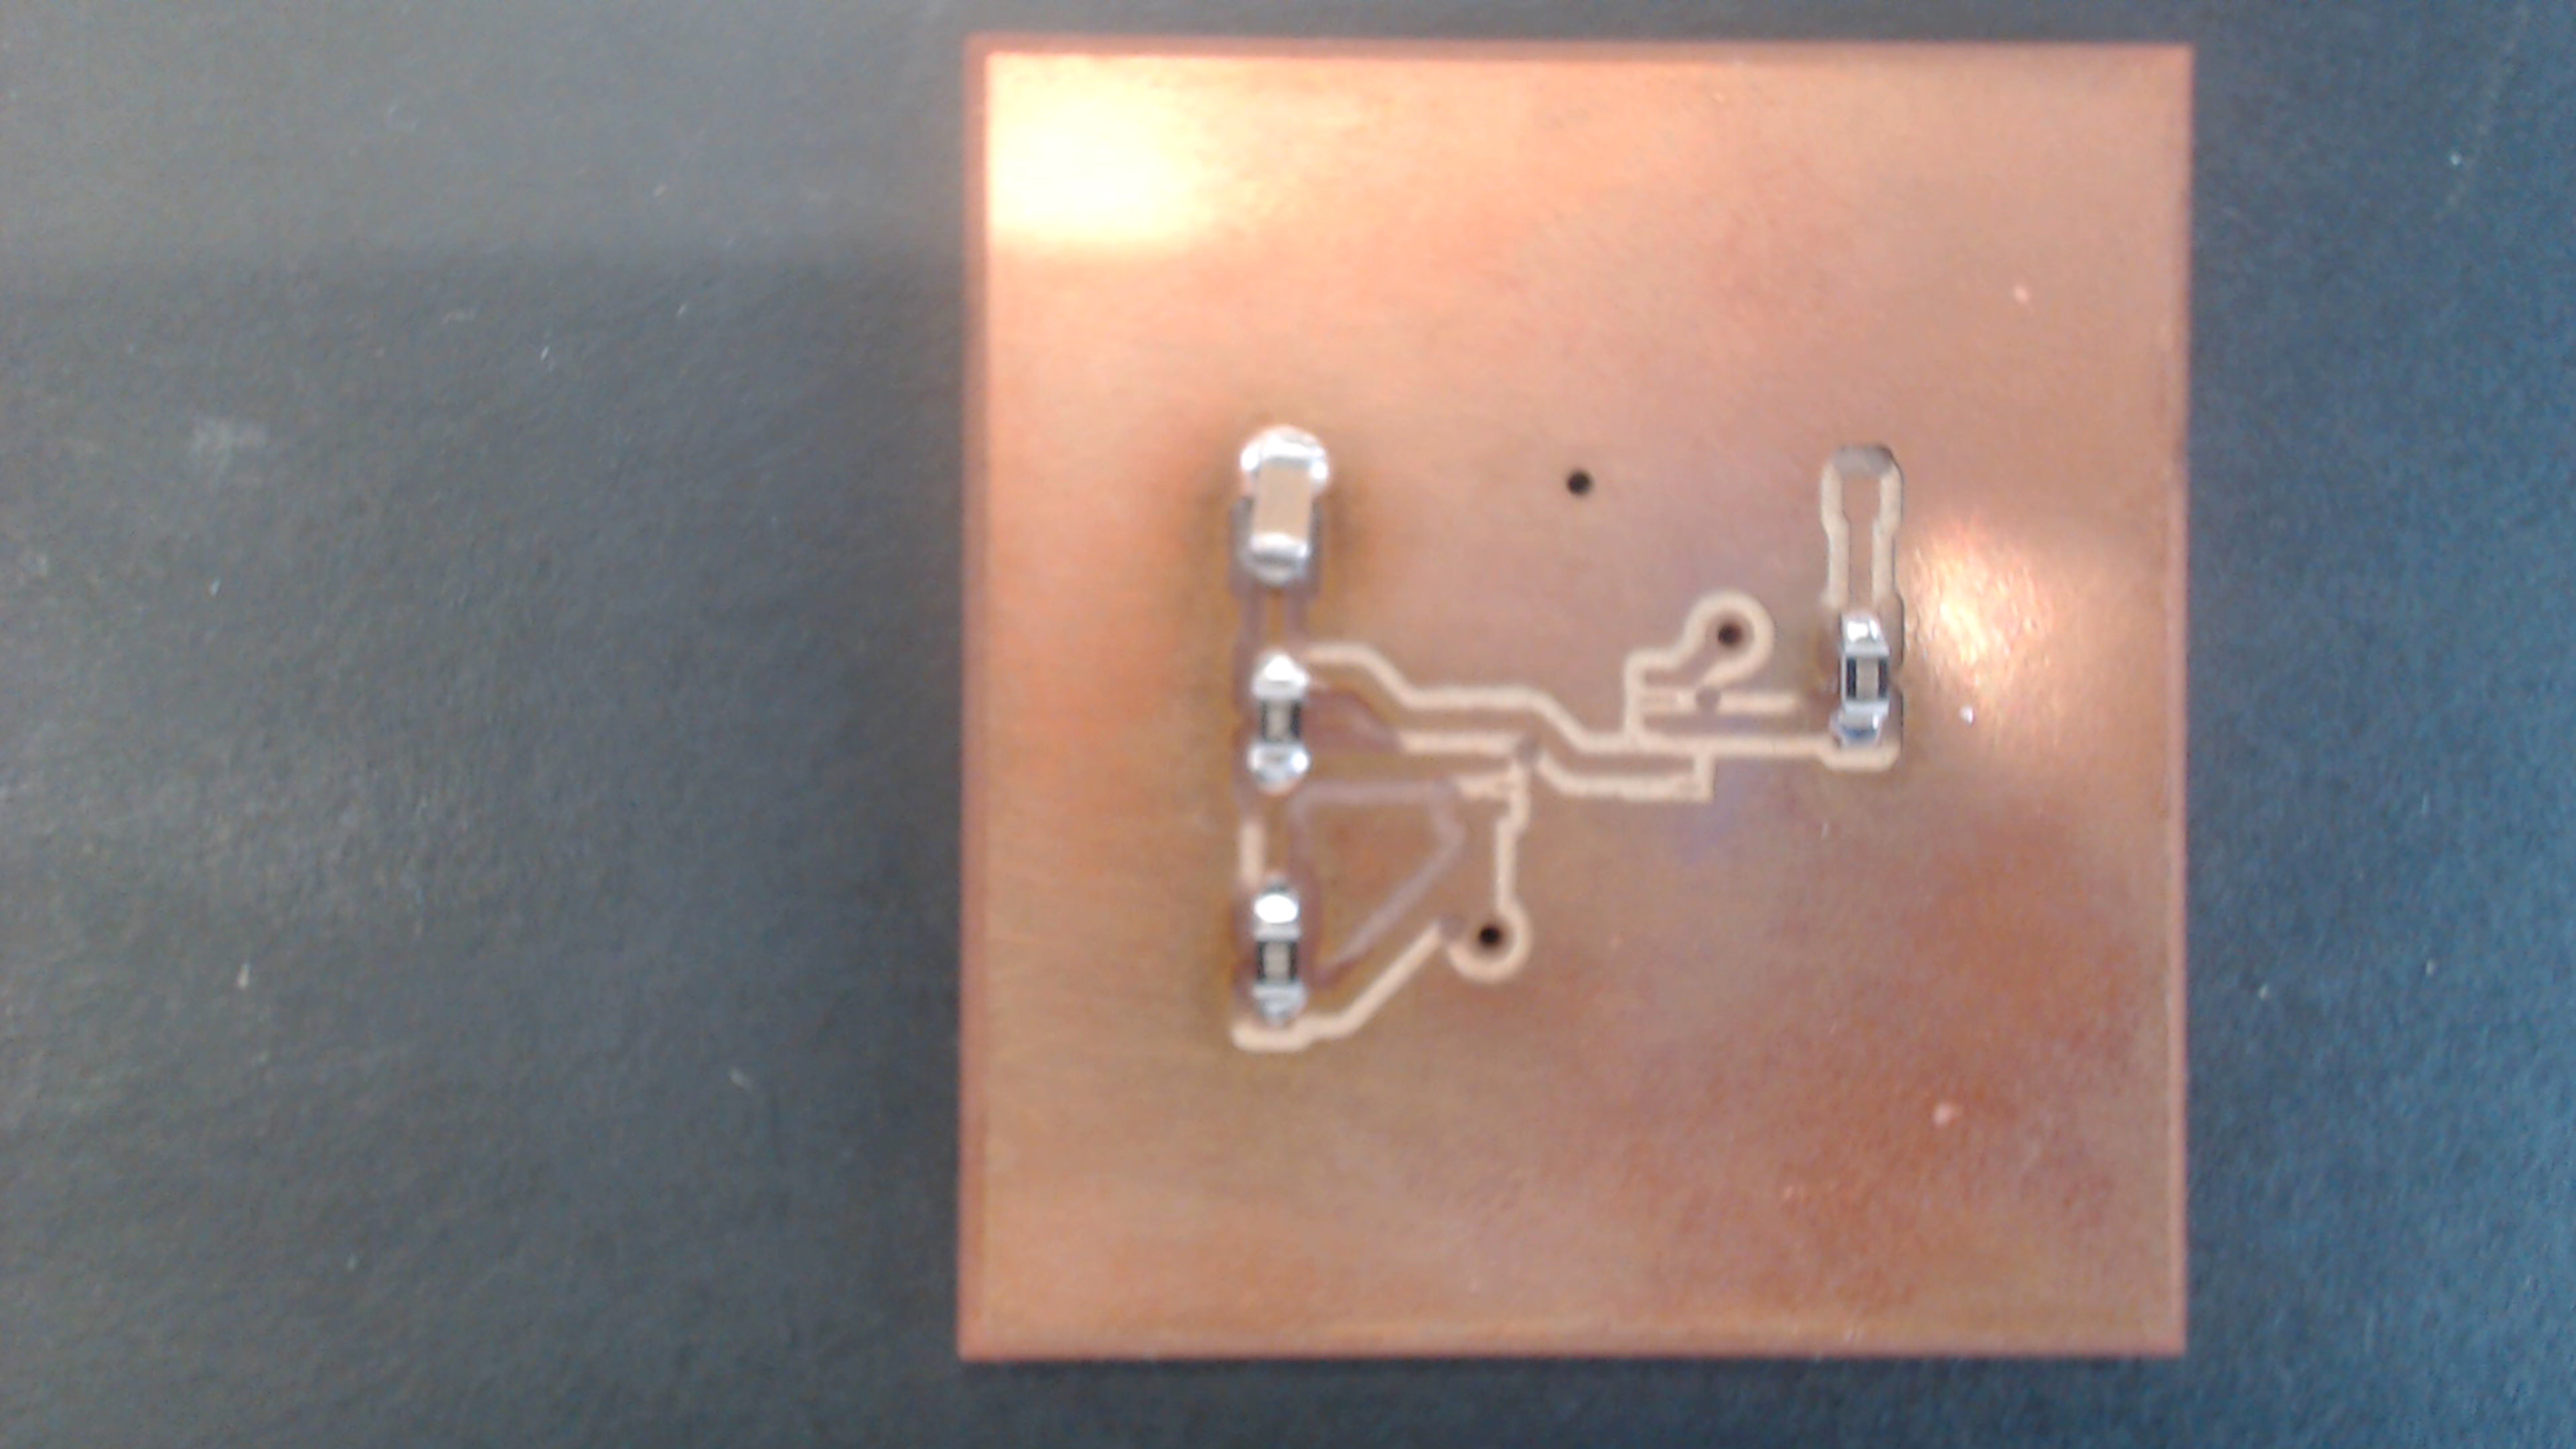
03/25/2017 at 00:10 • 0 commentsI finally got the getting to blinky circuit to work! I had to make another board after my horrible failure earlier this week. I had to make revision today after milling and soldering another board. As it turns out my schematic was wrong from the beginning. The 7555 timer should not have it's control pin grounded. I suppose that's what I get for blindly following the tutorial.
Aside from that I have finished the schematic for the Uno clone and have a plan of attack for the immediate future;
- Add the desired Barnabas Bot functionality to my current schematic.
- Get Dan to run my through all of the Uno functionality I don't understand.
- Make a prototype board for each sub-schematic to test the board (divide and conquer).
Till next time
-Eric
-
>.< .......... -Eric
03/21/2017 at 03:31 • 2 comments![]()
![]()
I'm not going to reflow solder for awhile. That is all.
-
My First PCB -Eric
03/17/2017 at 22:23 • 0 commentsHey guys,
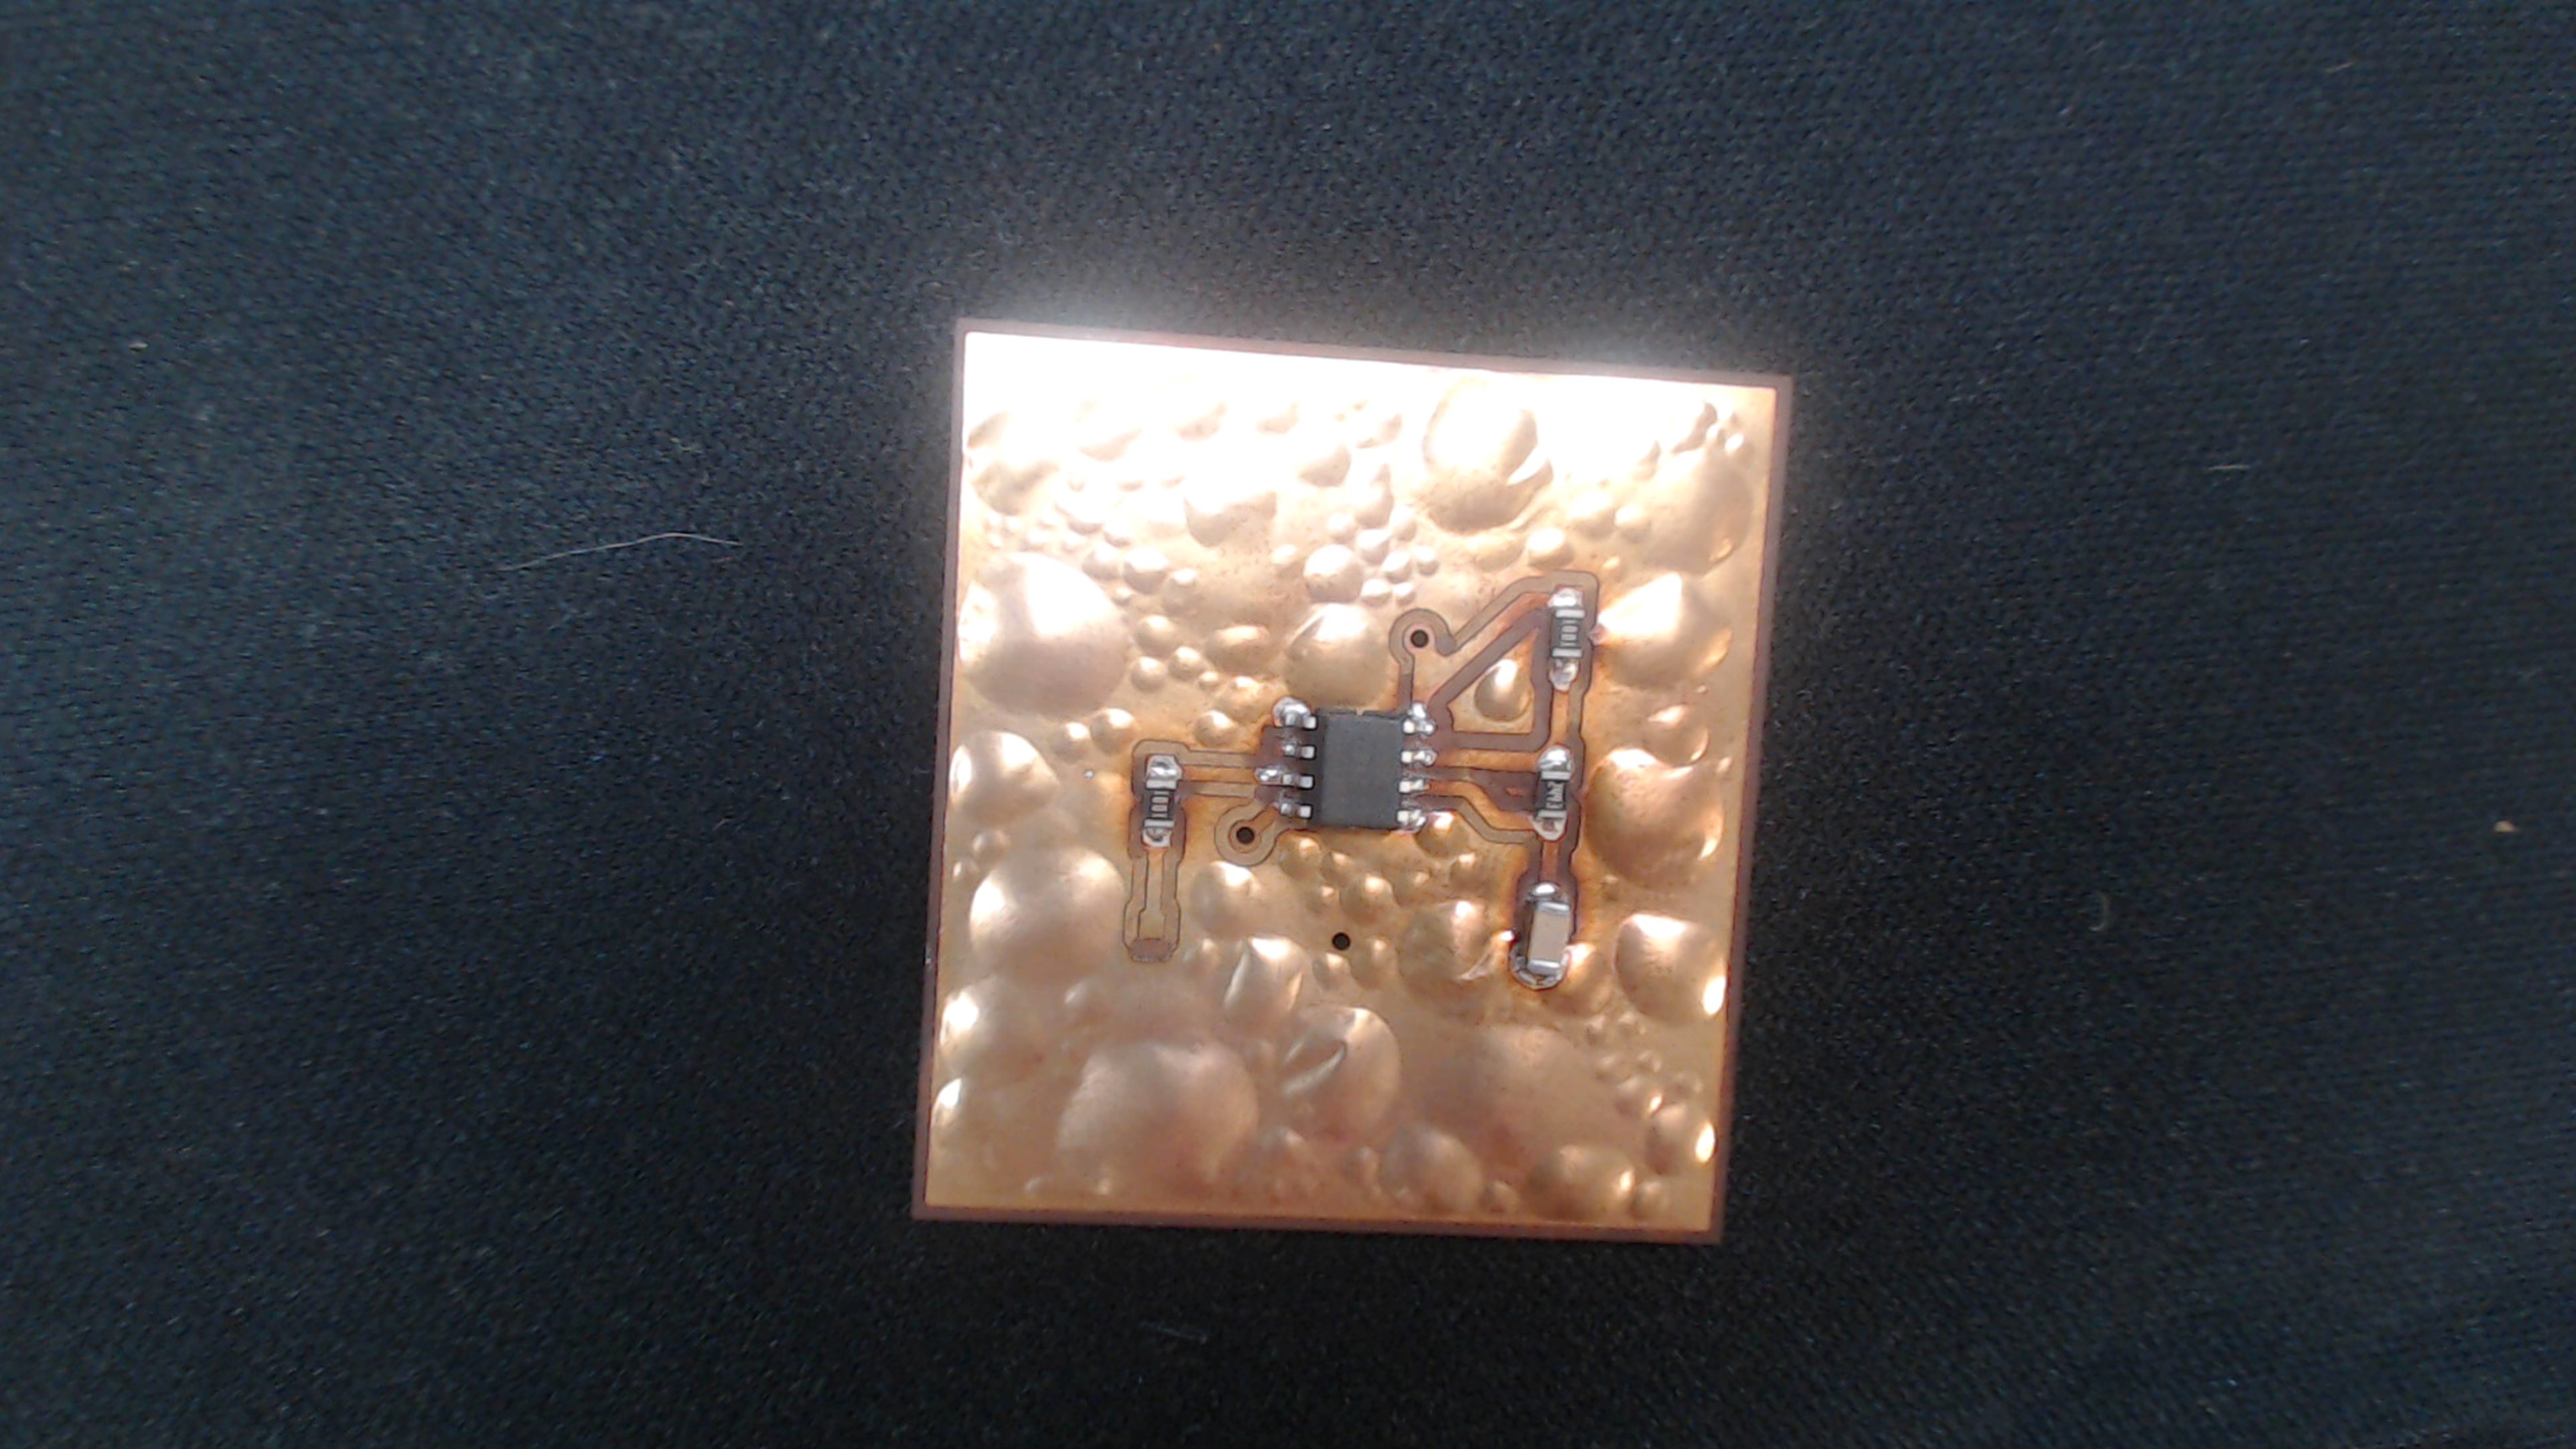
Last time I checked in I was just getting my feet wet with KiCad. Since then I have finished creating the PCB layout to match the schematic and milled the PCB out using one of the othermills here at the design lab. That took a couple of tries as the conceptual electronics tutorial that I was using obviously does not take into account the limitations of the tools we have. Because of this the tutorial suggested trace and via sizes that were far too small. After this problem was taken care of I did manage to successfully mill my first PCB, so feast your eyes;
![]()
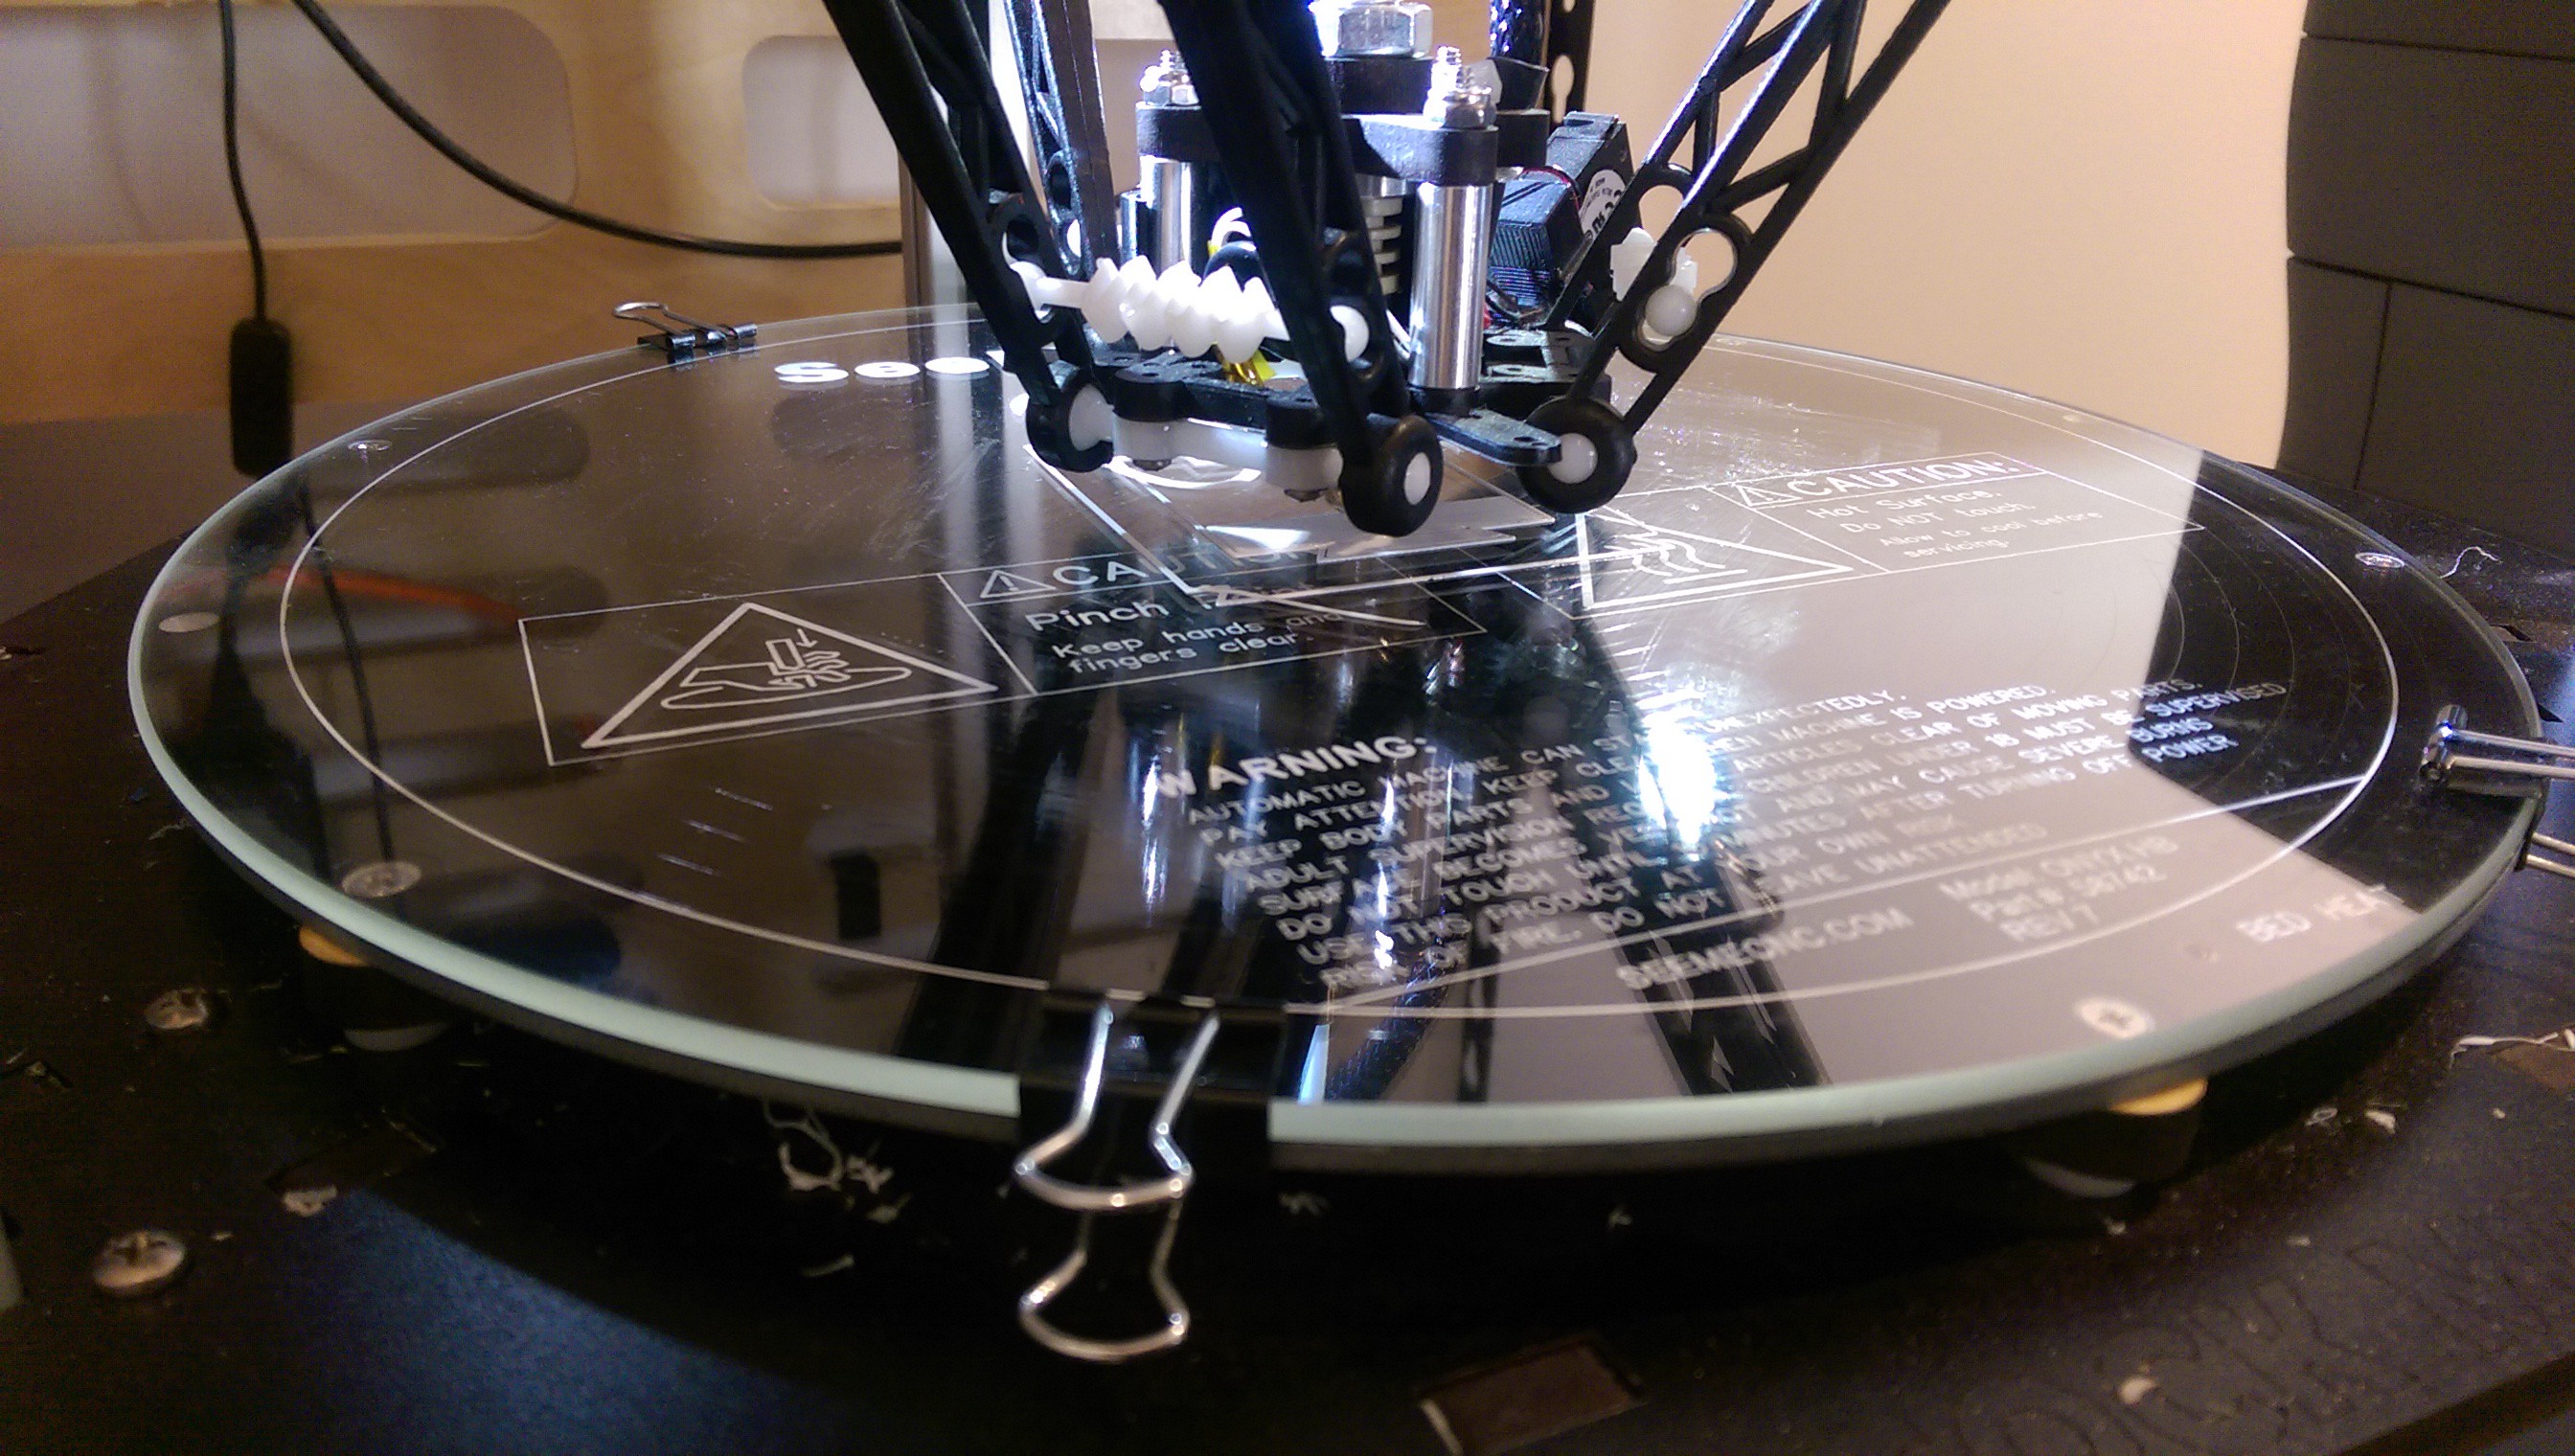
I'm aware that it's not much to look at, considering that it's not even functional at the moment. I am still waiting for the remaining parts to arrive before I can even test it.
I did manage to get a few pieces on the board already, as you can see. I chose not to hand solder them, instead I chose to reflow solder those pieces do to their size. At Barnabas Robotics we have a somewhat hap-hazard way of reflow soldering. We simply have a toaster oven and a thermocouple and we use to monitor the temperature and change it manually as needed. In the future we may get an actual temperature controller, but for now this works just fine.
While I'm waiting for those parts I've decided to dive right into my project at large, creating the next version of the Barnabas Noggin. To do this I must essentially create an Arduino Uno on a PCB of appropriate dimensions with some added functionality. This task is much more complicated than this little board I've made and it's clear that my limited knowledge of KiCad is going to make this difficult. Luckily, once again Dan has given me some direction by pointing me towards his website where he has a much prettier KiCad schematic than the official Arduino Uno datasheet provides; https://rheingoldheavy.com/arduino-from-scratch-part-13-full-arduino-uno-r3-schematic-and-bom/. I've figured out that to emulate Dan's schematics I must learn how to make hierarchical schematics which Conceptual electronics is also helping me with.
Well that's where I'm at right now. You guys will be hearing from me again in about a week, hopefully with more to show for it.
Until next time,
-Eric
-
Hello world!
03/15/2017 at 23:22 • 0 commentsGreetings, everyone!
My name is Ed Li, and I'm the team lead for the Barnabas-Bot project. I'll be chiming in here and there with overall progress updates on our process here at Supplyframe. I'll also be sharing stories about how our little robot has been used to empower students, teachers, engineers and artists all over the world. For now, check out one of my favorite projects from our 3rd-5th grade robotics class last semester. More later!
![]()
-
A New Body - Ryan
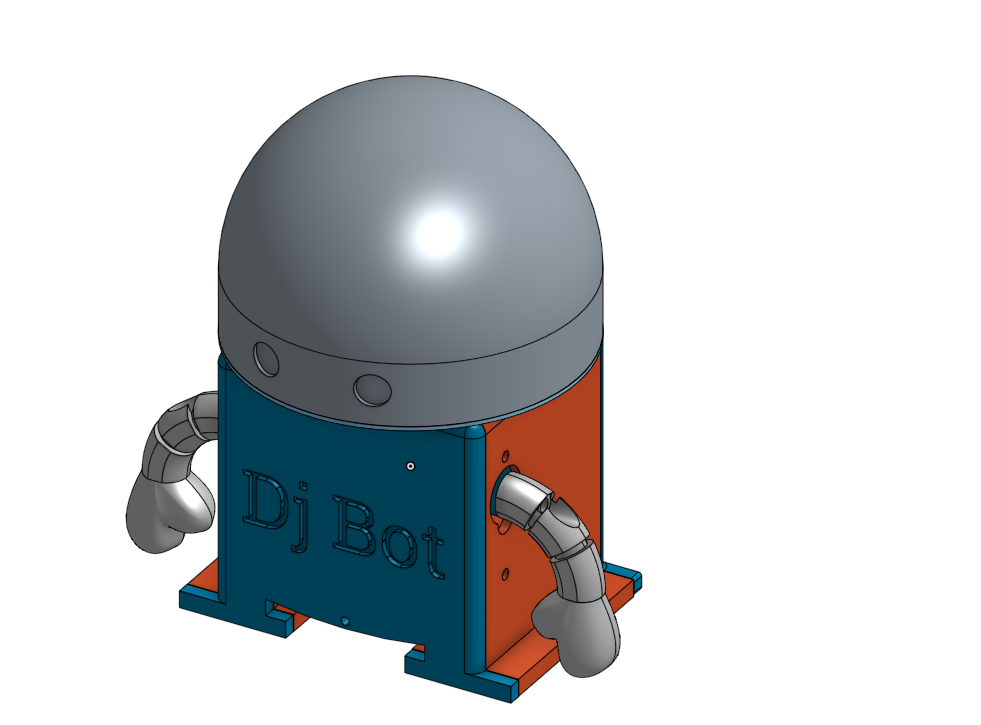
03/10/2017 at 23:28 • 0 commentsHello everyone, my name is Ryan and i am an intern for the Barnabas Robotics project. In the next coming months i will be informing you readers with all my achievements and mistakes for my part of the project. Now at this time you must (but don't have to) be curious on what is my purpose in all of this. I am working on improving the previous Barnabas Bot:
![]() so that we can effectively and efficiently produce these in mass quantities than via only 3D printing.
so that we can effectively and efficiently produce these in mass quantities than via only 3D printing. Now, i'm sure that a majority of you readers will say something like this is "simple" or "easy"; however, please keep in mind that this will be my very first time touching programs like Fusion 360 and the entire process of 3D printing. Now before i continue, i would like to give a very big thank you to the people at SupplyFrame DesignLab, for giving us the opportunity to use their facility and their wide variety of tools to help us in this journey.
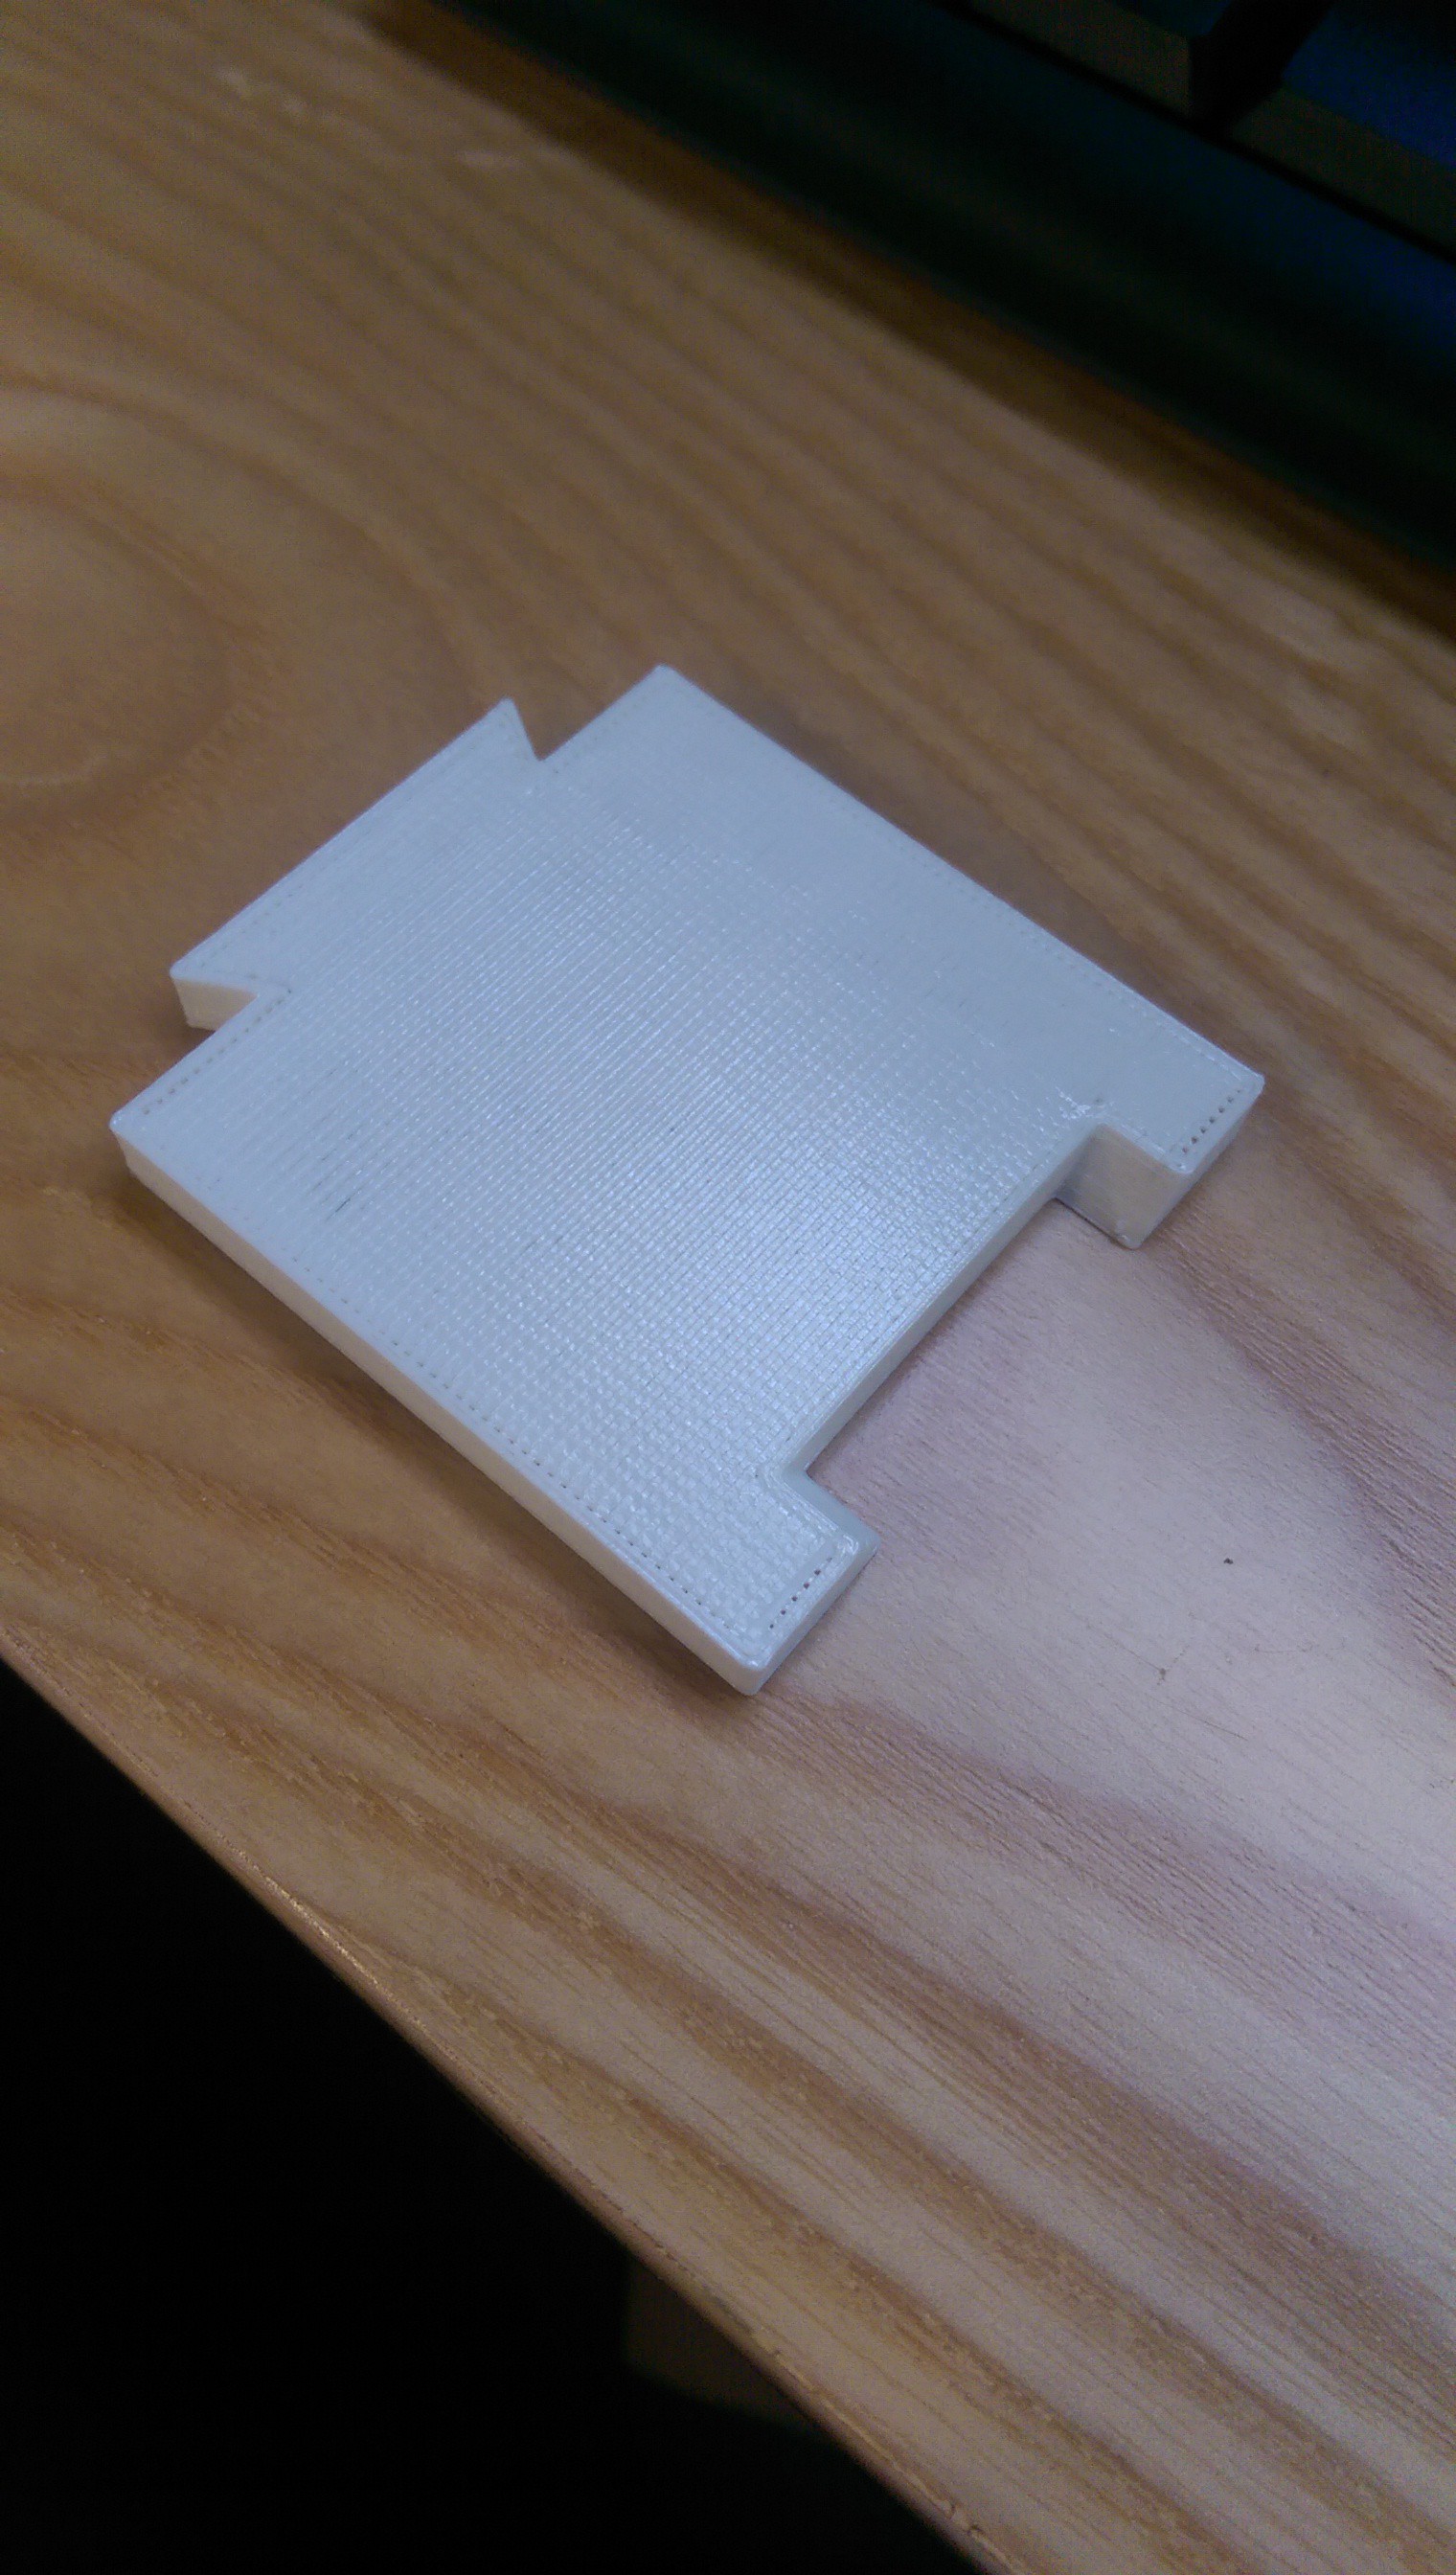
So let's start from the top, my goal is to create a new version of the Barnabas Bot, that can be manufactured in mass quantities. The method that we are playing around with is injection molding. Therefore our current design will not suffice since converting a negative of our current design will require too much work. To solve this, i need to fabricate a new design that will make it easier to injection mold. The way i thought to solve this is by separating the body into 4 parts that will join together in an interlocking mechanism. My first design is a proof of concept in how to create a tab-like system that joins together in 90 degree angles.
![]()
![]() Now whether or not this will work, that's for next time. - Ryan
Now whether or not this will work, that's for next time. - Ryan -
Getting Started -Eric
03/04/2017 at 05:30 • 0 commentsHello everyone, my name is Eric. You guys are gonna be hearing from me a lot in the coming weeks and months. Let me explain who I am before we jump into things, not that there's much to talk about... yet. I am an employee for Barnabas robotics and am currently one of the Barnabas robotics employees working on residency at the magnificent Supply Frame Design Lab. I know I sound like a kiss ass, but seriously for a nerd like myself this place is basically a bounce palace. Anyway, we are working to refine our robot kit, the Barnabas bot, and ready it for production. You can see a few Barnabas bot creations here if your interested. I am personally tasked with creating a PCB specifically constructed to fit on the Barnabas bot and be completely integrated with an appropriate Arduino micro controller, and I'm in over my head. I've got electronics experience but somehow this project makes me feel like I've gone from little league to the big leagues in the blink of an eye. The good news is I have a great support staff over at Supply Frame as well as Ryan and Edward at Barnabas, and that will go a long way.
So what's the game plan? Well this is day one for me so the game plan is pretty simple;
- Learn KiCAD (because eagle is bad) -the software
- Learn how to use an othermill -the hardware
- Use that knowledge to make a simple PCB so I can pat myself on the back
- Find an appropriate Arduino schematic (probably the uno) and add the appropriate pieces to give the Barnabas bot the functionality it currently has, or perhaps more.
- More pats on the back
- Produce a few and test them
- Iterate as necessary
So, being this is day one all I have done is start to learn KiCAD, which I can already tell is way better than eagle. That being said, learning any new software is a bit of a climb, and I was about as lost as I always am;
![]()
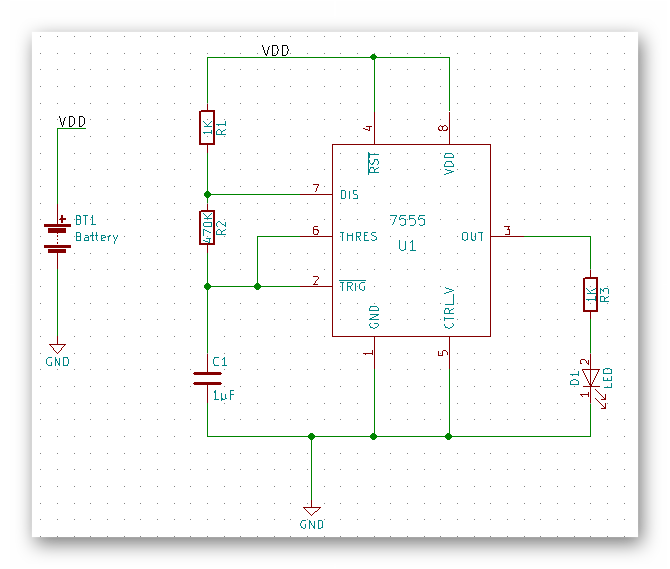
Luckily Dan has already shown how valuable he is by pointing me towards contextual electronics, who I suggest you check out if you want to learn KiCAD. In particular I am using this tutorial to get started. Incredibly simple, but you gotta start somewhere. I've gotten to this point so far;
![]()
So this is essentially the full schematic of my 'practice' PCB. This was fairly easy for me, but I imagine creating and routing the .brd file is where I'll hit some roadblocks and potentially throw some chairs. I'll let you guys know how that goes next week.
Before I take off I want to thank Dan and Edward in particular for this fantastic opportunity. I also want to talk about Barnabas robotics, our mission, our goals, our values, etc. But I won't do that. Instead I'll link you to our website: https://www.barnabasrobotics.com/, and tell you to keep an eye out for Ed, I'm sure he'll be posting on this project a ton, and he is far more charismatic than I am. The company is his vision and I think it's far better if you hear about it from his point of view than mine.
Till next time
-Eric
Barnabas-Bot
An open-source educational robotics project that inspires elementary and middle school kids to invent through building their own robot


 Now whether or not this will work, that's for next time. - Ryan