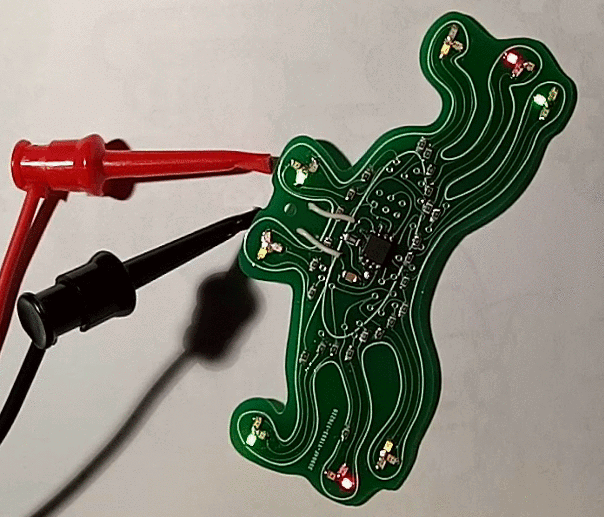
After an evening of hand soldering, and careful checking with the multimeter to make sure the light emitting diodes were the right way round, the first FSM PCB was finished.
I could not get the arduino IDE to behave with an attinty85 as the output target. After some hours trying different versions of the IDE, installing updated configuration files for avrdude, and support for additional models of attiny in the IDE, I concluded that baud rates over 9600 were doomed to fail.
Testing with avrdude on the command line showed that the target was alive and indeed an attiny85, when probed with 9600baud.
In the end I knocked up some c code, built is with avr-gcc, and then used avrdude to upload it at 9600 baud.
I will put the code up when the dev machine is nearby. In the meantime, the design file needs a few tweaks to make assembly and testing easier. So... don;t run off to order those pcb's just yet.
The main things to improve on the layout are
1) make the ISP header holes a bit bigger, although they worked fine as a "hold in place" set of contacts for programming.
2) add jumpers or solderable links so that the MCU can be programmed by the programmer without interference from the LED networks
3) maybe make provision for a reverse polarity protection diode
4) add a track that was missing between reset on the MCU and the ISP header
5) add a track missing between pin 6 and its LED network, perhaps with a solderable jumper.
6) make the MCU footprint pads a touch bigger, to make hand soldering easier
Overall, I'm pretty happy with the pcb-rnd -> fidoCadJ -> pcb-rnd workflow...
Discussions
Become a Hackaday.io Member
Create an account to leave a comment. Already have an account? Log In.