I received my SPI digital pots and hooked one up to my Arduino Due. I was able to sweep the resistor values up and down. So I know my SPI communication is working. And I think I might start calling them memristors even if they aren't that just yet. I mean, if it looks like a duck and sounds like a duck, then I'm calling it a duck.
So I also connected either side of the memristor back to the analog inputs on the Arduino so I can measure the current. I used two digital outputs to set digital high and low to check that portion of the circuit. I measured those two outputs and wrote a simple code to determine which way current is flowing through the memristor. That all seems to be working.
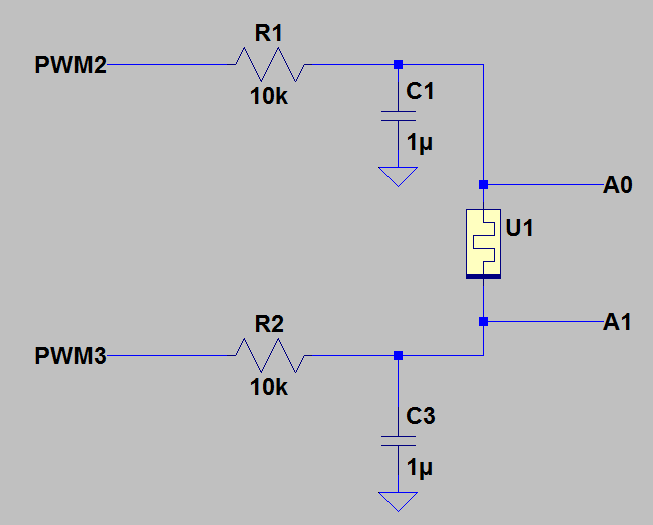
Next step is to change the resistance based on that current flow. And then change my digital outputs to PWM outputs and filter then with RC low pass networks. Then I can control the current flow easily. After that I may connect an external pattern generator or something. Eventually I want to hook up a sine wave and plot it on the oscilloscope in XY mode so I can show how I can simulate different types of memristors.
Discussions
Become a Hackaday.io Member
Create an account to leave a comment. Already have an account? Log In.