 Neil K. Sheridan
Here we use Tensorflow and Keras for elephant detection by importing an off-shelf model for image classification. We can import one of the following models with keras.applications:
Xception
VGG16
VGG19
ResNet50
InceptionV3
InceptionResNetV2
Keras documentation for keras.applications: https://keras.io/applications/
1.
First let's get this working without using a Raspberry Pi. In this case we are using a machine running ubuntu with a NVIDIA Tesla® K80 GPU. So TensorFlow is installed alongside with CUDA® Toolkit 8.0, cuDNN v6, and NVIDIA CUDA Profile Tools Interface, giving GPU-support.
Anyway, so go ahead and install TensorFlow and Keras with or without GPU-support, depending which machine you are using.
You can install TensorFlow using instructions here: https://www.tensorflow.org/install/install_linux
You can install Keras using instructions here: https://keras.io/#installation
* I won't go through installation, since it depends which machine you are using
2.
Right, so everything should be ready now! You can test TensorFlow with the hello world code in python! That doesn't mean everything will work fine tho! I've messed up several installations in some way!
import tensorflow as tf
hello = tf.constant('Hello, TensorFlow!')
sess = tf.Session()
print(sess.run(hello))
3.
Now, let's run python. In this case Python 2.7. And we'll enter the code required to classify and image using an off-shelf model. In this case it was Inception V3.
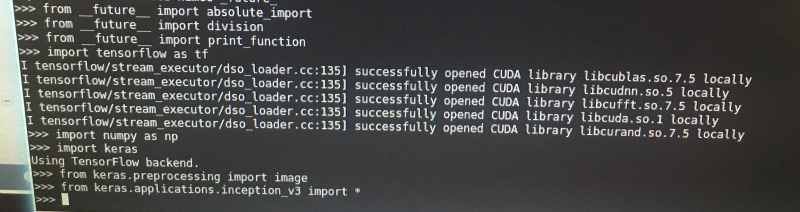
First we imported our libraries:
from __future__ import absolute_import
from __future__ import division
from __future__ import print_function
import numpy as np
import keras
import tensorflow as tf
from keras.preprocessing import image
from keras.applications.inception_v3 import *
4.
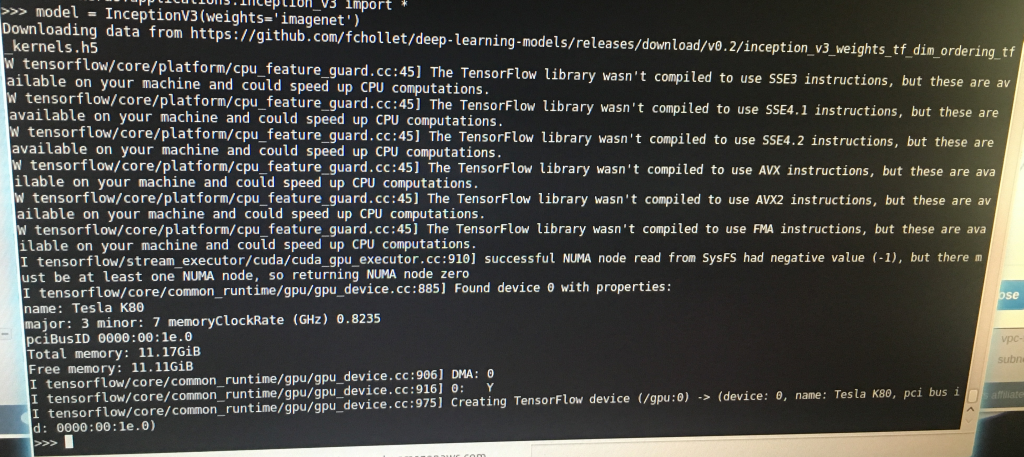
Next we set model to InceptionV3 with the imagenet weights:
model = InceptionV3(weights='imagenet')
Now you can see in the above image what happens when we do that! It downloads the weights h5 file " WEIGHTS_PATH = 'https://github.com/fchollet/deep-learning-models/releases/download/v0.5/inception_v3_weights_tf_dim_ordering_tf_kernels.h5'", and then it throws up some information that we don't have various CPU instruction sets installed. Then it reports our GPU "Found device 0 with properties name: Tesla K80" Then it reports memory available, and sets the Tesla K80 as our TensorFlow device.
5.
Now we go ahead and work on the image we want to classify with InceptionV3:
img = image.load_img('cat.10171.jpg', target_size=(299, 299))
x = image.img_to_array(img)
x = np.expand_dims(x, axis=0)
x = preprocess_input(x)
So in the first line we load the image using 'image.load_img'. That's from the image part of the keras.preprocessing library we imported earlier.
It's important to note the target_size! Different off-shelf models require images to be of certain fixed sizes. So we resized to 299x299. ResNet50 would require 224x224.
In the second line we change img to an array with 'image.img_to_array' from the keras.preprocessing library.
In the third line we use numpy to expand the shape of the array e.g.
>>> y = np.expand_dims(x, axis=0)
>>> y
array([[1, 2]])
>>> y.shape
(1, 2)
In the fourth line we use 'preprocess_input' from the keras.preprocessing library. This will return a preprocessed tensor. You can see the code in
https://github.com/fchollet/keras/blob/master/keras/applications/imagenet_utils.py
6.
Ok, so next we want to get the predictions for that image from the InceptionV3 model! What is the image? So we enter:
preds = model.predict(x)
model.predict is from keras.models. It is passed the following arguments: predict(self, x, batch_size=None, verbose=0, steps=None). x being the input data, as a numpy array which we made. See documentation: https://keras.io/models/model/ . We just gave it x.
model.predict will return a list of tuples: class, description, probability -> to preds in this case.
So we've got the preds being a numpy tensor right now. We go ahead and decode it with 'decode_predictions' from the https://github.com/fchollet/keras/blob/master/keras/applications/imagenet_utils.py . We passed it preds, and we passed it top. Top is integer as to how many guesses we want back. In this case top=5.

Then print it with print from: __future__ import printfunction:
print('Predicted:', decode_predictions(preds, top=5))
So we got back:
class_name = n02123045
class_description = tabby
probability = 0.44442537
Quite exciting! You could plot the predictions using matplotlib.pyplot too. And use
argparse if you don't want to hard-code the image name.
7.
Install TensorFlow and Keras on Raspberry Pi
-- Use pip same as for ubuntu machine
8.
[under construction]
Discussions
Become a Hackaday.io Member
Create an account to leave a comment. Already have an account? Log In.