 Quinn
QuinnOne of my goals was to make the result usable. Part of this was to not have cables hanging all of the place, but instead wired nicely internally. My main use cases would be with the video microscope, which required just a USB cable to the camera, and for a still camera, which required just a remote shutter release. Easy enough, I would install a USB extension cable into the arm and terminating at the back, and I would install a shutter release cable and wire it to two of the unused buttons on the front panel.
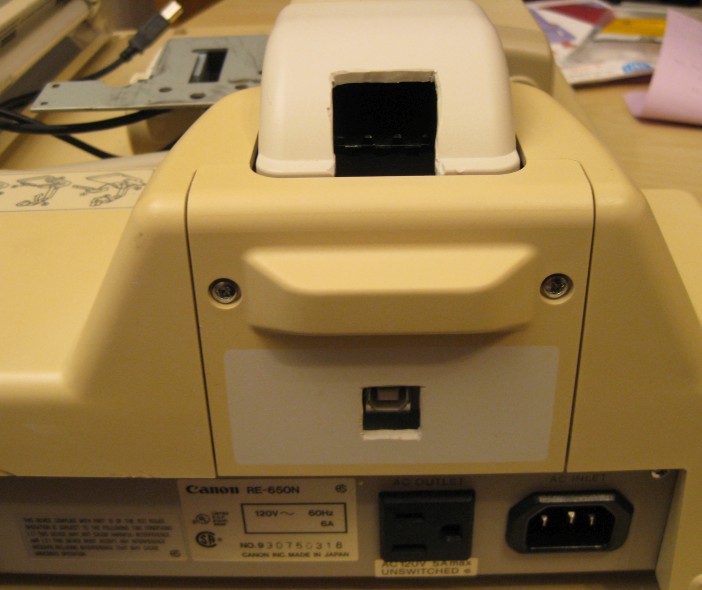
For the USB extension, the camera has a USB-B socket, so I just neededa cable with male USB-B on one end, and a panel mount female USB-B on the other. I had one that was only 1ft long. I ordered a 3ft one, thinking it was long enough:

For the shutter release, I am most likely to use my Canon EOS 10D, which uses the N3 connector. The easiest way to get this on a cable was to purchase a generic shutter release, and chop the cable off of it:
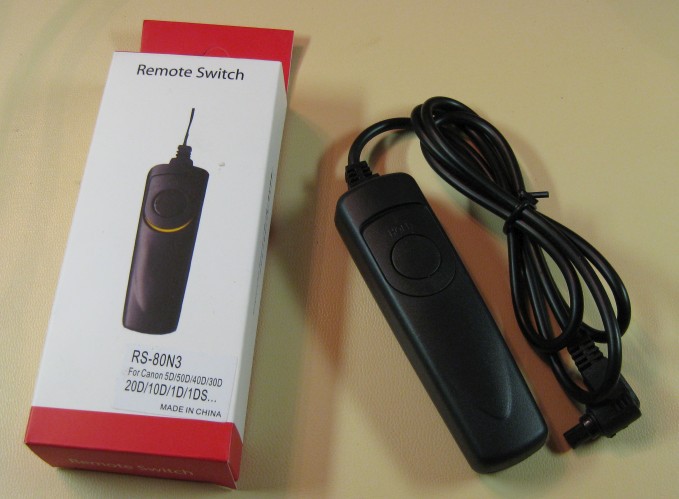
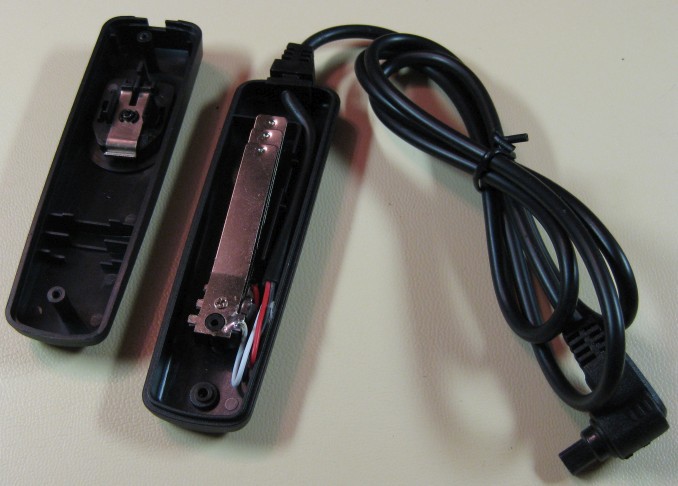
The inside of the shutter release was amazingly basic, but not a surprise for $8:
To add these, I found it easiest to remove the arm mechanism.


I decided the easiest place to mount the USB socket was on the back side, where the arm comes into the base. This was mostly because it didn't require moving any of the other circuits, or difficult cutting in surprisingly thick metal. This turned out not to be ideal because I later found that the plastic shell for the arm would run into it, and had to cut out a piece to make it fit. I also found that 3ft was insufficient, but adding the extra 1ft piece I already had was perfect. If I had to do it again, I would have ordered a 5ft cable, and mounted it even lower. Mounting it lower would have been much harder to make the cuts, and required more disassembly, but would have looked better in the end.
With the arm plastic in place, cut out, and arm up:

With all the plastic shell in place, this is how it looks with the arm folded down. I don't like the hole I had to cut out in the arm and would do it differently if I did this project again. When the arm is up, that hole is not visible.
The shutter release was much easier, as I simply cut the cable off, cut some switch traces on the front panel board, and wired it into them. One button is the focus(half press), and the other the shutter(full press).
Both of those cables, along with one of the original cables were wired up the arm, and the plastic shell re-installed.
Discussions
Become a Hackaday.io Member
Create an account to leave a comment. Already have an account? Log In.